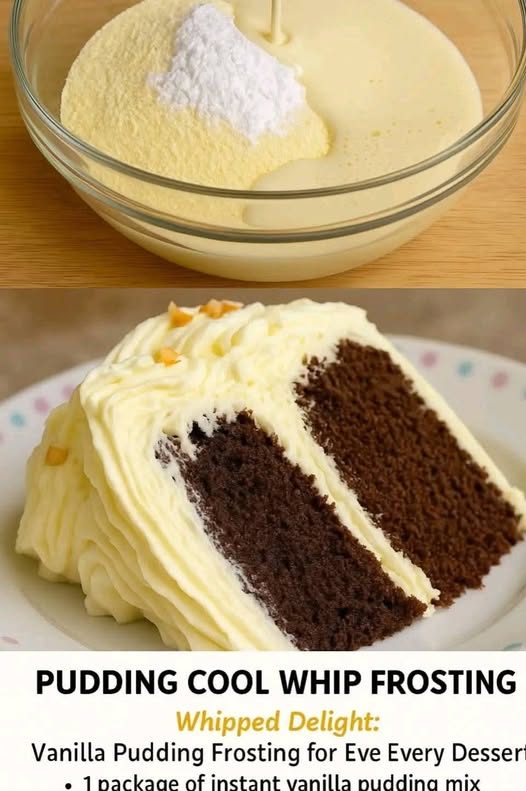
Pudding Cool Whip Frosting

If you love frosting that’s fluffy like a cloud, stable like buttercream, and sweet without being heavy, this Pudding Cool Whip Frosting will become your new go-to. It’s a magical blend of instant pudding, cream, and Cool Whip that turns into a thick, silky frosting perfect for cakes, cupcakes, trifles, fruit dips, and even layered desserts. The best part? No butter, no cooking, no complicated steps — just mix, whip, chill, spread, done.

This frosting holds its shape for hours, never melts quickly, and tastes like a cross between mousse and whipped cream. Here’s the unique version made just for you.

Ingredients (Unique Blend for Extra Fluff)

🔹 Dry Ingredients

  • 1 box instant pudding (3.4 oz – any flavor: vanilla, chocolate, cheesecake, lemon, banana, pistachio, etc.)

  • 2 tbsp powdered sugar (keeps the frosting smooth + enhances stability)

🔹 Wet Ingredients

  • 1 cup cold heavy cream

  • 1 cup cold milk (whole milk preferred)

  • 1 tsp vanilla extract (or match flavor to pudding)

🔹 Final Magic

  • 1 tub (8 oz) Cool Whip, thawed but still cold

Step-by-Step Instructions

1. Chill everything first

Place your bowl, whisk attachments, milk, cream, and Cool Whip in the fridge for 15 minutes.
Cold ingredients = fluffier frosting.

2. Make a thick pudding base

In your chilled bowl, whisk together:

  • instant pudding mix

  • cold milk

  • vanilla

Whisk until it thickens (about 1 minute).
Let it sit 2 minutes to fully set.

3. Add the heavy cream

Pour in the cold heavy cream and whip on high speed for 3–4 minutes until:
✔ creamy
✔ voluminous
✔ mousse-like

You should see soft peaks forming.

4. Fold in the Cool Whip

Add the Cool Whip and gently fold using a spatula.
Don’t stir aggressively — folding keeps the frosting airy and thick.

5. Chill to set

Refrigerate for 20–30 minutes.
It becomes ultra-stable and perfect for piping.

Texture & Taste (Unique Description)

This frosting is:
Cloud-soft
Pillow-fluffy
Satin-smooth
Light but rich
Sweet but not overly sugary

It spreads like whipped cream but holds up like buttercream — the best of both worlds.

Tips for a Perfect, Stable Frosting

  • Use instant pudding only, never cook-and-serve.

  • For stiffer frosting, reduce milk to ¾ cup.

  • For super silky frosting, sift the powdered sugar.

  • Keep the frosting cold for clean piping.

  • Works amazing between cake layers — stays put and doesn’t ooze.

Flavor Variations (Unique Twist)

🍫 Chocolate Dream

Use chocolate pudding + 1 tbsp cocoa + chocolate Cool Whip if available.

🍋 Lemon Cloud

Use lemon pudding + ½ tsp lemon zest.

🍓 Strawberry Cheesecake

Use cheesecake pudding + fold in ¼ cup chopped strawberries.

🍌 Banana Cream Bliss

Use banana pudding + ½ tsp banana extract for stronger flavor.

🥥 Coconut Paradise

Use vanilla pudding + ¼ tsp coconut extract + sprinkle toasted coconut on top.

How to Use It

✔ Frosting for cakes, cupcakes, brownies
✔ Filling for layered cakes
✔ Fruit dip
✔ Parfait or trifle layers
✔ Cookie sandwich filling
✔ Mini dessert shooter topping

This is truly a no-fail frosting you’ll come back to again and again.

Homemade Dessert in 5 Minutes

A unique homemade dessert that comes together faster than you can set the table.

Sometimes the best desserts aren’t the ones that take hours—they’re the ones you throw together in a quiet moment when a craving hits. This 5-Minute Creamy Caramel Biscuit Delight is exactly that: a silky, rich, layered treat made from everyday pantry staples. It has the softness of a mousse, the sweetness of caramel, and the comforting crunch of cookies that instantly soak up flavor. No baking, no chilling, no fuss—just assemble, stir, and enjoy.

This recipe is also incredibly flexible. Swap flavors, layer it like a parfait, or make a whole tray in minutes. But even in its simplest form, it tastes like a dessert someone spent much longer preparing. The warm caramel melts into the cream, the cookies soften into a cake-like texture, and every bite feels indulgent without any of the effort.

Below is the full unique recipe, ready to become one of your fastest and most reliable sweet fixes.

Ingredients (Serves 1–2)

  • 6–8 tea biscuits (Marie, graham crackers, or digestives)

  • 3 tbsp sweetened condensed milk

  • 3 tbsp heavy cream or milk

  • 1 tbsp butter

  • 1 tsp vanilla

  • Pinch of salt

  • Optional toppings: crushed nuts, chocolate chips, banana slices, cinnamon, or shredded coconut

Instructions (Ready in 5 Minutes!)

Step 1 — Make Instant Caramel Cream

In a microwave-safe bowl, combine:

  • sweetened condensed milk

  • heavy cream

  • butter

  • vanilla

  • salt

Microwave 30–40 seconds until warm, then whisk until thick, glossy, and smooth.
This becomes your velvety caramel sauce.

Step 2 — Crush the Biscuits

Crush the biscuits with your hands into a small bowl or dessert glass.
Leave a few bigger pieces for texture.

Step 3 — Pour and Stir

Drizzle half of the warm caramel cream over the crushed biscuits.
Stir lightly to coat everything.

Step 4 — Layer for Extra Indulgence

Add more crushed biscuits, then spoon the remaining caramel cream on top.
Spread it like a soft frosting.

Step 5 — Add Toppings (Optional but Amazing)

Sprinkle with:

  • a handful of nuts

  • a dusting of cinnamon

  • a drizzle of extra condensed milk

  • or a few chocolate chips

Whatever you choose, it elevates the dessert instantly.

Why This Dessert Works

  • Instant caramel gives gourmet flavor in seconds.

  • Biscuits soften just enough to become cake-like.

  • Warm vs. crunchy textures make every bite feel layered and special.

  • You only need one bowl, no cooking, and no waiting.

Variations (All 5 Minutes!)

  • Chocolate Dream: Add 1 tsp cocoa powder to the caramel cream.

  • Banoffee Cup: Layer with banana slices and whipped cream.

  • Coffee Shot: Add 1 tsp instant coffee to the warm mixture.

  • Strawberry Shortcake: Add fresh chopped strawberries.

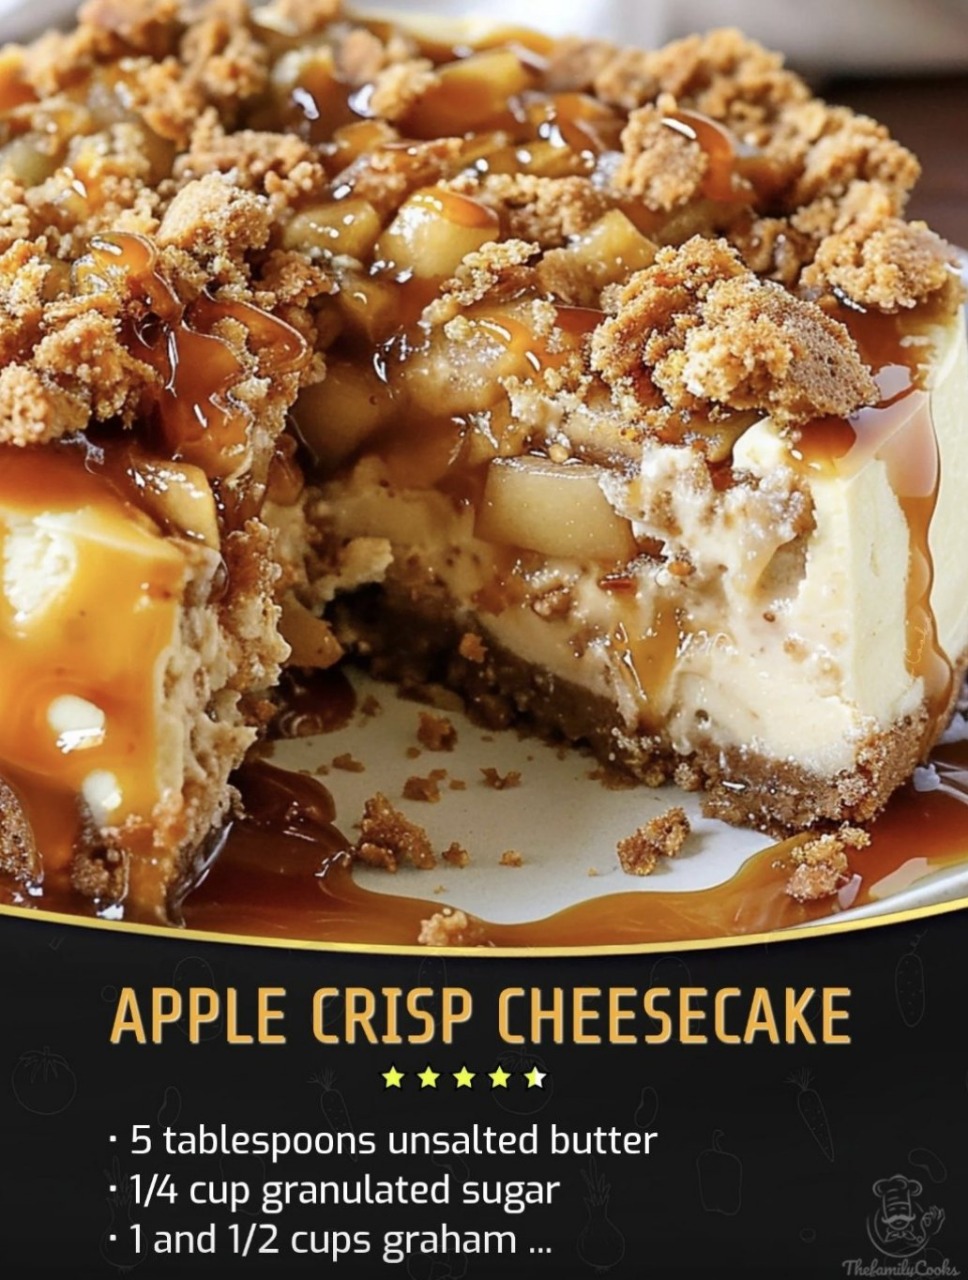
Apple Crisp Cheesecake

Apple crisp and cheesecake are two desserts that rarely share the same plate—but when they do, something magical happens. This Apple Crisp Cheesecake blends the creamy decadence of a New York-style cheesecake with the warm, cinnamon-kissed comfort of a rustic apple crisp. It’s a dessert that feels like autumn in every bite, but it’s so irresistible you’ll want it year-round. Smooth, silky filling meets a buttery crumble, while fresh spiced apples add brightness and texture. The result is a perfectly layered masterpiece—familiar, nostalgic, and wonderfully new.

Below is a fully unique, richly detailed recipe crafted to be foolproof and unforgettable.

Ingredients

For the Crust

  • 2 cups graham cracker crumbs

  • 6 tablespoons melted butter

  • 3 tablespoons brown sugar

  • ½ teaspoon cinnamon

  • Pinch of salt

For the Cheesecake Filling

  • 24 oz (3 packages) cream cheese, softened

  • 1 cup granulated sugar

  • ½ cup sour cream

  • 2 teaspoons vanilla extract

  • 3 large eggs (room temperature)

  • 1 tablespoon lemon juice

  • 2 tablespoons all-purpose flour

For the Cinnamon Apple Layer

  • 4 medium apples, peeled & diced (Granny Smith or Honeycrisp work best)

  • 3 tablespoons butter

  • ¼ cup brown sugar

  • 1 teaspoon cinnamon

  • ¼ teaspoon nutmeg

  • 1 teaspoon lemon zest

  • 1 teaspoon cornstarch (optional, for thickening)

For the Crisp Topping

  • ¾ cup rolled oats

  • ½ cup all-purpose flour

  • ½ cup brown sugar

  • ½ teaspoon cinnamon

  • 6 tablespoons cold butter, cubed

  • Pinch of salt

Optional Drizzle

  • Caramel sauce, for serving

Instructions

1. Prepare the Crust

Preheat your oven to 325°F (163°C). Grease a 9-inch springform pan and line the bottom with parchment for easier release.

In a bowl, mix the graham cracker crumbs, melted butter, brown sugar, cinnamon, and salt. Stir until the mixture resembles wet sand. Press the mixture firmly into the bottom of the springform pan, creating an even, compact crust. Bake for 10 minutes, then set aside to cool slightly.

This brief bake ensures the crust holds together beneath the creamy filling and prevents sogginess once the apple layer is added.

2. Make the Cinnamon Apple Layer

In a skillet over medium heat, melt 3 tablespoons of butter. Add the diced apples, brown sugar, cinnamon, nutmeg, and lemon zest. Cook the mixture for 5–7 minutes, stirring occasionally, until the apples soften and release their natural juices.

If the mixture seems too liquidy, sprinkle in the cornstarch to help it thicken. The goal is to achieve tender apples coated in a glossy cinnamon syrup—sweet, fragrant, and not overly wet.

Remove from heat and let the mixture cool while preparing the cheesecake filling.

3. Prepare the Cheesecake Filling

In a large mixing bowl, beat the softened cream cheese until smooth, about 2 minutes. Add the sugar and mix again until fully combined.

Next, blend in the sour cream, vanilla, lemon juice, and flour. Mix until smooth but avoid overbeating to prevent air bubbles from forming.

Add the eggs one at a time, mixing gently after each addition. The batter should be creamy, silky, and pourable.

4. Assemble the Cheesecake

Pour half of the cheesecake filling over the baked crust. Spoon half of the cinnamon apple mixture over the filling, spreading it lightly.

Add the remaining cheesecake batter on top, smoothing the surface. Finally, spoon the rest of the apple mixture across the top—these apples will blend beautifully into the crisp topping.

5. Make the Crisp Topping

In a medium bowl, combine oats, flour, brown sugar, cinnamon, and salt. Add the cold cubed butter and use your fingertips or a pastry cutter to work it in until the mixture forms coarse, buttery crumbs.

Sprinkle this topping evenly over the apple layer.

6. Bake the Cheesecake

Place the springform pan on a baking sheet. Bake at 325°F (163°C) for 60–70 minutes, or until the edges are set but the center jiggles slightly like soft custard.

Once baked, turn off the oven, crack the door open, and let the cheesecake rest inside for 1 hour. This slow cooling prevents cracks and helps the cheesecake firm evenly.

7. Chill & Serve

Remove the cheesecake from the oven and allow it to cool completely at room temperature. Cover and refrigerate for at least 6 hours, preferably overnight.

Before serving, run a warm knife around the edges and release the springform.

Drizzle generously with caramel sauce for a glossy bakery-style finish.

Why This Recipe Works

This Apple Crisp Cheesecake is special because it combines three textures—a buttery crust, velvety cheesecake, and crispy sweet topping—into a single, harmonious bite. The spiced apples offer brightness and warmth, cutting through the richness of the cheesecake. Meanwhile, the oat topping delivers the perfect crunch. Layering each component carefully allows the flavors to stand on their own while still blending together beautifully.

It’s a dessert that feels nostalgic and comforting yet elevated and sophisticated. Whether you’re making it for a holiday dinner, a weekend treat, or a cozy night in, it offers indulgence without complication.

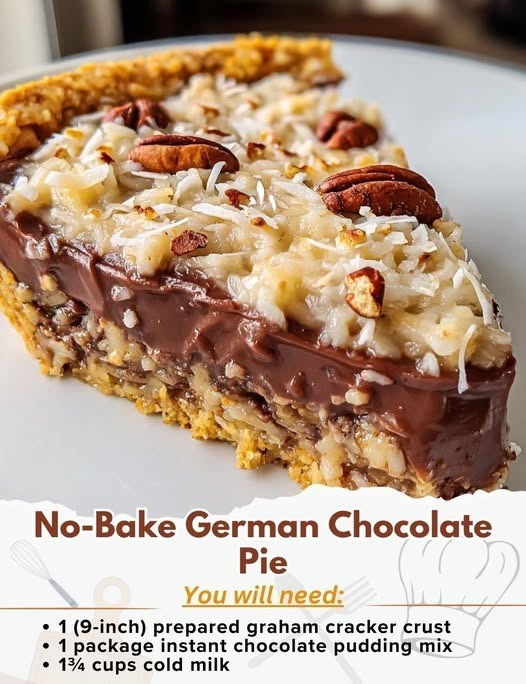
No-Bake German Chocolate Pie

There is something almost magical about German chocolate desserts—the deep cocoa flavor, the buttery caramel undertones of the coconut-pecan topping, and the melt-in-your-mouth richness that makes every bite taste nostalgic and indulgent. This No-Bake German Chocolate Pie captures all the classic flavors you love but delivers them in an easier, cooler, and foolproof format. No oven needed, no stress, and no complicated steps—yet you end up with a show-stopping pie that tastes like you spent hours on it. With layers of silky chocolate filling, a crunchy cookie crust, and a glossy coconut-pecan topping that tastes like it came straight from a bakery, this pie is destined to become a signature dessert at holidays, family dinners, potlucks, or any night you’re craving a slice of comfort.

Why This Recipe is Special

What sets this no-bake version apart is the layered texture experience and the balanced sweetness. Many German chocolate pies can be overwhelmingly sugary. This recipe uses a blend of bittersweet chocolate, a touch of creamy milk chocolate, and a whisper of espresso to deepen the cocoa notes without making the pie bitter or heavy. The filling is stabilized with cream cheese and whipped cream to create a lush, mousse-like texture. The crust is buttery and crisp, and the topping is cooked low and slow to develop that signature caramel flavor without becoming grainy. The final result? A pie that tastes gourmet, feels luxurious, and requires zero baking.

Ingredients

For the Crust

  • 2 cups chocolate graham cracker crumbs (or crushed chocolate digestives)

  • 6 tbsp unsalted butter, melted

  • 2 tbsp granulated sugar

  • Pinch of salt

For the Chocolate Filling

  • 1 cup bittersweet chocolate (60–70%), chopped

  • ½ cup milk chocolate, chopped

  • 2 tbsp cocoa powder

  • ¼ cup granulated sugar

  • ¼ tsp instant espresso powder (optional but recommended)

  • 8 oz cream cheese, softened

  • 1 tsp vanilla extract

  • 1 ½ cups cold heavy whipping cream

For the Coconut-Pecan Topping

  • 1 cup evaporated milk

  • 3 large egg yolks

  • ½ cup granulated sugar

  • ½ cup unsalted butter

  • 1 cup sweetened shredded coconut

  • ¾ cup chopped pecans (toasted for best flavor)

  • 1 tsp vanilla extract

  • Pinch of sea salt

Instructions

1. Prepare the Crust

In a medium bowl, stir together the chocolate crumbs, sugar, and salt. Pour in the melted butter and mix until everything resembles damp sand. Press the mixture firmly into the bottom and sides of a 9-inch pie dish. Use the flat bottom of a measuring cup to compact the crust well—this helps it hold together later. Place the crust in the refrigerator for at least 30 minutes, or freeze for 10 minutes if you’re in a hurry.

2. Make the Chocolate Layer

Place the chopped bittersweet and milk chocolate in a microwave-safe bowl. Heat in 20-second intervals, stirring each time, until fully melted and smooth. Stir in the cocoa powder and espresso powder. Let the mixture cool slightly.

In a large bowl, beat the cream cheese until creamy. Add the sugar and vanilla extract, mixing until smooth. Slowly pour in the warm melted chocolate and blend until fully combined.

In a separate bowl, whip the cold heavy cream until stiff peaks form. Gently fold the whipped cream into the chocolate mixture using a spatula. The mixture should be airy, silky, and mousse-like.

Spread the chocolate filling evenly into the chilled crust. Cover with plastic wrap and refrigerate while you prepare the topping.

3. Cook the Coconut-Pecan Topping

In a medium saucepan, whisk together the evaporated milk, sugar, and egg yolks. Add the butter and cook over medium heat. Stir continuously—slow, patient stirring is the secret to keeping it smooth and thick. After about 8–10 minutes, the mixture will become glossy, thickened, and pudding-like.

Remove from heat and stir in the shredded coconut, toasted pecans, vanilla, and a pinch of sea salt. Let the topping cool to room temperature. Spread the thick, fragrant mixture over the chocolate pie layer.

Final Touches & Serving

Refrigerate the finished pie for at least 4 hours, though overnight is even better. Slice with a warm knife for the cleanest cuts. Serve chilled, with optional whipped cream or chocolate shavings around the edges.

What Makes This Pie Unforgettable

Every bite gives you:

  • Creamy chocolate mousse

  • Crunchy pecans

  • Toasty, caramelized coconut

  • Silky crust with deep chocolate notes

It’s rich but not overwhelming, sweet but balanced, classic but modern—you could easily serve this at a holiday dinner or simply enjoy it on a quiet night with a cup of coffee.

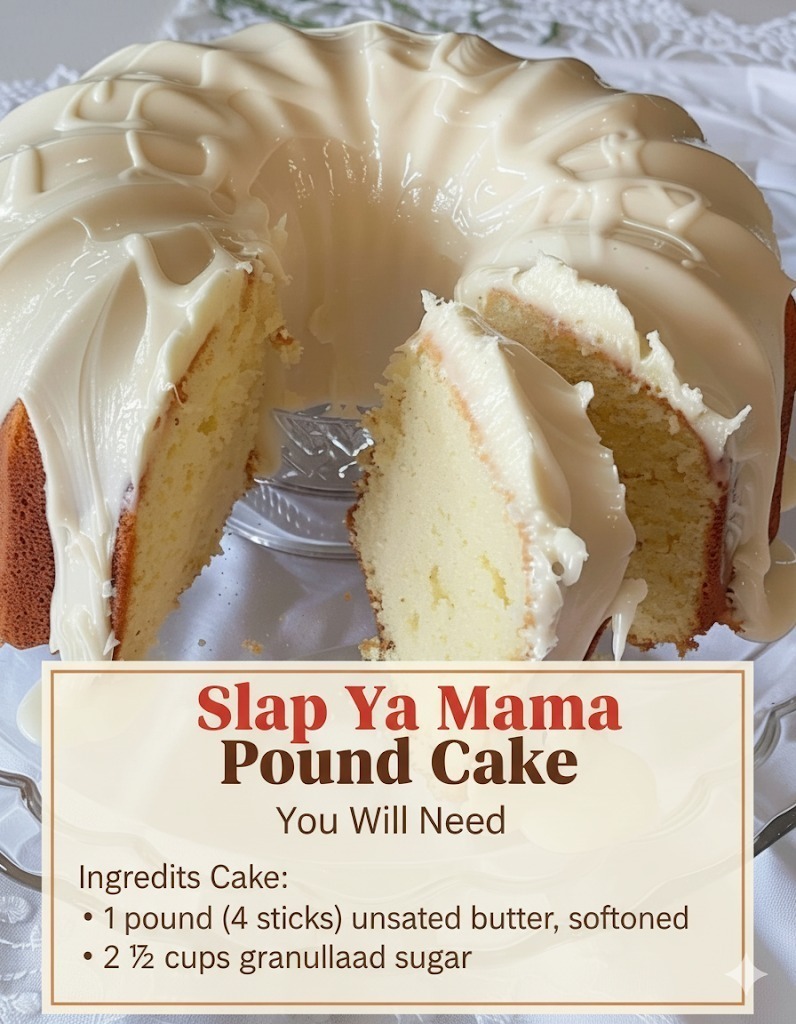
Slap Ya Mama Pound Cake

There’s something special about a cake that stops you in your tracks, makes your taste buds dance, and leaves everyone at the table speechless. That’s exactly what the Slap Ya Mama Pound Cake does—it’s that good. This uniquely rich, buttery, and perfectly moist Southern-style pound cake earns its cheeky name because one bite will have you saying, “It’s so good, it’ll make you wanna slap ya mama!” Of course, no mamas are harmed in the making of this cake—but the flavor is undeniably unforgettable. This recipe combines old-fashioned Southern charm with a twist of modern indulgence, giving you a dessert that’s sweet, comforting, and absolutely irresistible.

A Little Southern Soul in Every Bite

The essence of a pound cake lies in its simplicity—traditionally made with a pound each of butter, sugar, eggs, and flour. But this recipe elevates the classic to new heights. What makes this version so unique is the addition of a touch of heavy cream, a hint of vanilla bean paste, and a splash of bourbon or lemon extract (your choice). The result? A dense yet tender crumb with an aroma that fills the house with warmth and nostalgia. The outside develops a golden, crisp crust that crackles slightly when sliced, revealing a soft, velvety interior that practically melts in your mouth.

This isn’t just a cake—it’s an experience. Whether you serve it for Sunday supper, a family gathering, or just because you need a little sweetness in your life, this cake always delivers.

Ingredients

For the Pound Cake:

  • 3 cups all-purpose flour (sifted)

  • 1 teaspoon baking powder

  • ½ teaspoon salt

  • 1 cup unsalted butter (softened to room temperature)

  • ½ cup shortening (for extra richness and moisture)

  • 3 cups granulated sugar

  • 6 large eggs (room temperature)

  • 1 cup heavy cream

  • 1 tablespoon vanilla bean paste (or pure vanilla extract)

  • 1 teaspoon lemon extract or bourbon (optional, but highly recommended)

For the Glaze:

  • 1 cup powdered sugar

  • 2–3 tablespoons milk or heavy cream

  • ½ teaspoon vanilla extract

  • A pinch of salt

Directions

  1. Preheat and Prepare:
    Preheat your oven to 325°F (160°C). Grease and flour a large Bundt or tube pan generously, making sure every crevice is coated to ensure a smooth release after baking.

  2. Mix the Dry Ingredients:
    In a medium bowl, sift together the flour, baking powder, and salt. Sifting is key—it aerates the flour and ensures your cake stays light, not dense.

  3. Cream the Butter and Sugar:
    In a large mixing bowl, beat the butter and shortening together on medium speed until creamy and pale—about 3 minutes. Gradually add the sugar, one cup at a time, and continue to beat for another 4–5 minutes until the mixture is fluffy and light. This step creates the foundation for the cake’s signature texture.

  4. Add the Eggs:
    Beat in the eggs one at a time, ensuring each is fully incorporated before adding the next. Scrape down the sides of the bowl often to make sure everything mixes evenly.

  5. Blend in the Flavor:
    Add the vanilla bean paste and your choice of lemon extract or bourbon. These flavors build the cake’s signature Southern kick—sweet, aromatic, and a little bold.

  6. Incorporate the Dry Ingredients and Cream:
    Reduce your mixer speed to low. Alternate adding the flour mixture and heavy cream, beginning and ending with flour. Mix only until just combined—overmixing can toughen your cake.

  7. Bake to Perfection:
    Pour the batter into the prepared pan, smoothing the top with a spatula. Bake for 75–85 minutes, or until a toothpick inserted into the center comes out clean. The top should be golden brown and slightly cracked—an irresistible sign that the inside is buttery perfection.

  8. Cool and Glaze:
    Allow the cake to cool in the pan for 15 minutes before turning it onto a wire rack. While it cools, whisk together the glaze ingredients until smooth. Drizzle over the warm cake so it seeps slightly into the crust.

Serving Suggestions

The Slap Ya Mama Pound Cake stands beautifully on its own, but you can take it to the next level by serving it with:

  • A dollop of homemade whipped cream and fresh berries.

  • A scoop of vanilla ice cream with a drizzle of caramel.

  • Lightly toasted and buttered for breakfast with coffee.

  • Or, Southern-style—with a side of sweet tea on a sunny afternoon.

This cake keeps beautifully for up to five days at room temperature (covered tightly) or can be frozen for up to three months.

Chef’s Tips for the Perfect Pound Cake

  1. Room Temperature Ingredients: Make sure butter, eggs, and cream are at room temp. This ensures a smooth, even batter.

  2. Don’t Overmix: Mix only until ingredients are incorporated—overmixing creates a dense cake.

  3. Cool Slowly: Letting the cake cool gradually prevents it from collapsing or becoming gummy.

  4. Use Quality Extracts: Real vanilla bean paste or pure extracts make a world of difference in flavor.

  5. Experiment with Add-ins: Try folding in a handful of toasted pecans or swirling in a ribbon of cream cheese filling for a twist.

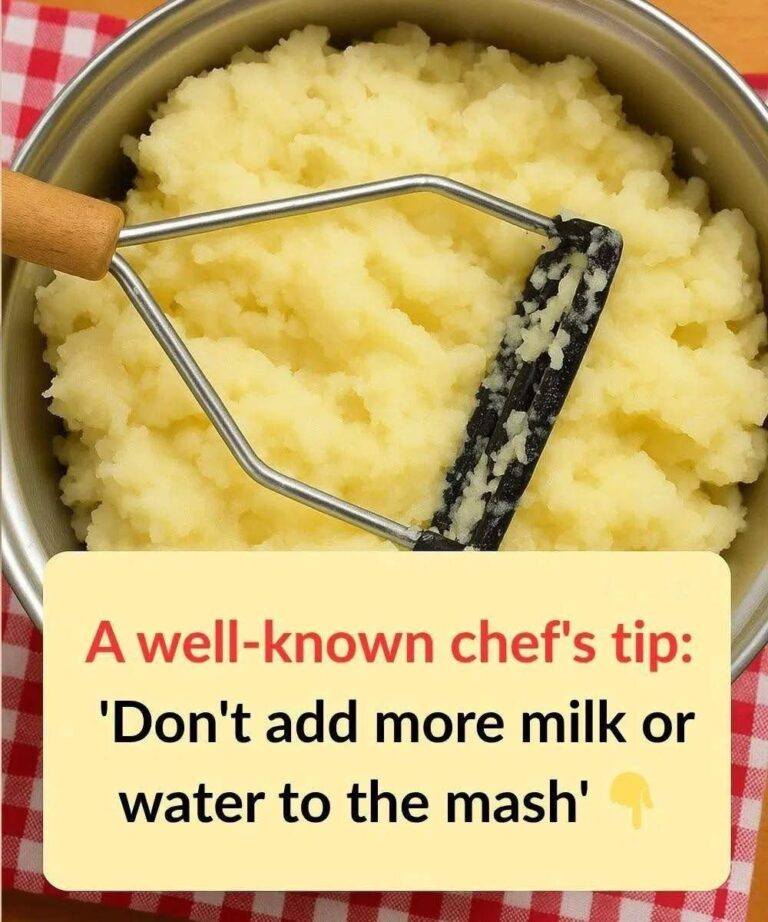
Truffle Garlic Butter Mashed Potatoes

Here’s a unique recipe and cooking tip for making the creamiest, most flavorful mashed potatoes you’ve ever had — with a little gourmet twist that elevates this humble side dish into something unforgettable.

Truffle Garlic Butter Mashed Potatoes

Serves: 4–6
Prep Time: 15 minutes
Cook Time: 25 minutes

Ingredients

  • 2 lbs Yukon Gold potatoes (for a creamy, buttery texture)

  • 4 cloves roasted garlic (see tip below)

  • ½ cup unsalted butter (cut into cubes)

  • ½ cup warm heavy cream (or warm whole milk for lighter texture)

  • 2 tbsp sour cream (adds tang and silkiness)

  • 1 tbsp truffle oil (white or black, depending on your taste)

  • Salt and freshly cracked black pepper to taste

  • 1 tbsp chopped fresh chives (optional garnish)

Cooking Instructions

  1. Start with Cold Water:
    Peel and cut potatoes into even chunks. Place them in a large pot, cover with cold salted water, and bring to a boil.
    Cooking Tip: Starting with cold water ensures even cooking and prevents a gummy texture.

  2. Simmer Until Tender:
    Boil for 15–20 minutes until potatoes are fork-tender but not falling apart. Drain well and return to the hot pot for 1–2 minutes to steam dry.
    Unique Tip: Letting them dry slightly removes excess moisture — key to a fluffy mash!

  3. Roast the Garlic:
    While the potatoes cook, roast 4 unpeeled garlic cloves in a small pan or oven (375°F for 10–15 minutes) until soft and golden. Squeeze out the roasted garlic into a bowl.

  4. Mash the Potatoes:
    Mash the hot potatoes using a ricer or masher until smooth. Stir in roasted garlic and butter cubes so they melt into the potatoes.
    Chef’s Secret: Melt butter directly into the hot potatoes before adding any cream or milk — the fat coats the starch, giving you silkier mashed potatoes.

  5. Add Cream & Flavor:
    Slowly pour in the warm heavy cream, mixing gently. Stir in sour cream and drizzle truffle oil. Season with salt and pepper to taste.

  6. Fluff & Serve:
    Don’t overmix! Serve warm, topped with chopped chives and a small drizzle of truffle oil for a restaurant-style finish.

Unique Cooking Tip: “Butter Blooming” Method

To give your mashed potatoes a gourmet depth of flavor:

  • Melt your butter gently with a few sprigs of thyme and a crushed garlic clove before adding it to the potatoes.

  • This infuses the butter with aromatic notes, giving every bite a buttery, herb-kissed richness that regular mashed potatoes can’t match.

Serving Idea

Pair these truffle garlic mashed potatoes with:

  • Grilled steak or lamb chops

  • Crispy fried chicken

  • Or simply a drizzle of olive oil and parmesan for a luxurious vegetarian side

Bonus Tip:

If you want to make ahead, refrigerate your mashed potatoes in a baking dish. Reheat in the oven with a few dollops of butter and a splash of cream covered in foil at 325°F for 15–20 minutes — it’ll taste freshly made!

Can’t Stop Baking These” Brown Butter Toffee Chocolate Chip Cookies

There’s something about the smell of freshly baked cookies that feels like home. But these aren’t your average cookies — they’re a small piece of indulgent alchemy. Made with nutty brown butter, rich dark chocolate chunks, and bits of crunchy toffee, they melt in your mouth with every bite. The combination of flavors creates a perfect balance: caramelized, chocolatey, and slightly salty. Once you bake them once, you’ll understand the name — “Can’t Stop Baking These.”

Every time you pull a batch from the oven, the scent alone guarantees you’ll be mixing the next batch before these even cool.

Ingredients

For about 20 large cookies:

  • 1 cup (2 sticks) unsalted butter

  • 1 cup packed brown sugar

  • ½ cup granulated sugar

  • 2 large eggs (room temperature)

  • 2 tsp pure vanilla extract

  • 2 ¼ cups all-purpose flour

  • 1 tsp baking soda

  • ½ tsp baking powder

  • ½ tsp salt (plus extra for topping)

  • 1 cup toffee bits (such as Heath or homemade)

  • 1 ½ cups dark chocolate chunks or chips

  • Optional: ½ cup chopped pecans or walnuts for crunch

Instructions

Step 1: Brown the Butter

In a medium saucepan over medium heat, melt the butter. Continue cooking until it turns golden brown and gives off a nutty aroma — about 5–7 minutes. Stir occasionally and watch carefully to prevent burning.
Pour into a mixing bowl and let cool for 10 minutes.

Step 2: Cream and Combine

Once the butter cools slightly, add both sugars and whisk until smooth and glossy. Add the eggs one at a time, followed by the vanilla extract. Mix until fully combined and slightly thickened.

Step 3: Whisk Dry Ingredients

In a separate bowl, whisk together flour, baking soda, baking powder, and salt. Gradually add the dry mixture to the wet ingredients, stirring until just combined. Do not overmix — the dough should be soft and thick.

Step 4: Add the Good Stuff

Fold in the dark chocolate chunks, toffee bits, and nuts (if using). Cover the dough and refrigerate for at least 30 minutes to let the flavors develop and prevent spreading.

Step 5: Shape & Bake

Preheat oven to 350°F (175°C). Line two baking sheets with parchment paper. Scoop the dough into 2-tablespoon-sized balls and place them 2 inches apart. Sprinkle a tiny pinch of sea salt on top of each for that perfect sweet-salty bite.

Bake for 10–12 minutes, until edges are golden but centers are still soft. Don’t overbake — they’ll continue cooking on the sheet.

Step 6: Cool & Devour

Let cookies cool on the baking sheet for 5 minutes before transferring to a wire rack. This step creates that dreamy chewy texture with crisp edges.

Tips for Perfection

  • Brown butter makes all the difference — its nutty aroma deepens the flavor.

  • Chill the dough — even 30 minutes helps control spreading.

  • Add a sprinkle of flaky sea salt just before baking for an irresistible finish.

  • Store in an airtight container — or better yet, freeze some dough balls and bake on demand!

Flavor Variations

  • Swap toffee for white chocolate and macadamia.

  • Mix in espresso powder for mocha-style cookies.

  • Add a dash of cinnamon and cayenne for a spicy-sweet twist.

  • Use salted caramel chips for extra decadence.

Why You’ll Keep Baking Them

Every batch delivers that gooey-meets-crisp perfection — like the first warm cookie bite that melts your worries away. The browned butter adds depth, while toffee adds crunch and nostalgia. It’s comfort in cookie form, a simple pleasure that turns an ordinary afternoon into something extraordinary.

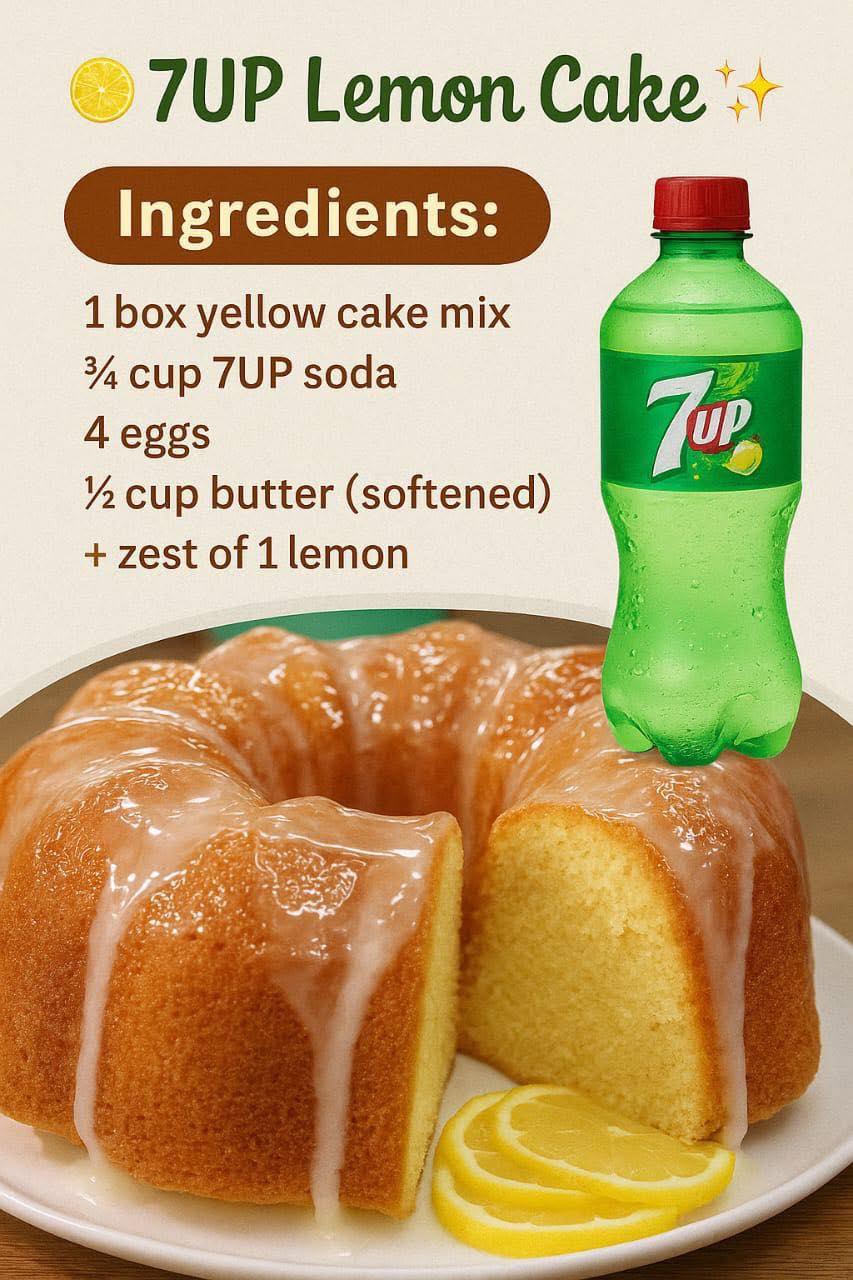
7UP Lemon Cake

If sunshine had a flavor, it would taste just like a slice of 7UP Lemon Cake. This bright, citrusy dessert combines the nostalgic charm of a classic pound cake with a bubbly twist from the famous lemon-lime soda. The 7UP not only adds a unique lightness and subtle zest but also enhances the cake’s moisture and texture, making each bite tender and perfectly balanced. Topped with a luscious lemon glaze, this cake bursts with flavor—sweet, tart, and wonderfully refreshing. Whether served at a picnic, tea party, or after-dinner treat, this dessert is sure to steal the spotlight.

Why You’ll Love This Recipe

What makes this 7UP Lemon Cake truly unique is its clever use of soda as both a flavor enhancer and leavening agent. Instead of milk or water, 7UP adds a delicate tang, a hint of fizz, and moisture that keeps the crumb soft for days. Combined with lemon zest, fresh juice, and rich butter, this cake is the perfect blend of classic comfort and modern creativity. It’s an old-fashioned recipe reborn with a twist, delightfully simple yet undeniably luxurious.

Ingredients You’ll Need

For the Cake:

  • 1 cup (2 sticks) unsalted butter, softened

  • 2 cups granulated sugar

  • 4 large eggs, room temperature

  • 3 cups all-purpose flour, sifted

  • 1 teaspoon baking powder

  • ½ teaspoon salt

  • ¾ cup 7UP (not diet)

  • 2 tablespoons lemon zest (about 2 large lemons)

  • 3 tablespoons fresh lemon juice

  • 1 teaspoon pure vanilla extract

For the Lemon Glaze:

  • 1½ cups powdered sugar

  • 2 tablespoons melted butter

  • 2–3 tablespoons 7UP

  • 1 tablespoon fresh lemon juice

  • Zest of 1 lemon (optional, for garnish)

Step-by-Step Instructions

Step 1: Preheat and Prepare

Preheat your oven to 325°F (160°C). Grease and flour a bundt pan (or a loaf pan, if preferred). A bundt pan works beautifully because its ridges catch the lemon glaze perfectly.

Step 2: Cream the Butter and Sugar

In a large mixing bowl, use an electric mixer to beat the butter and sugar together for 4–5 minutes, until light and fluffy. This creaming process is crucial—it builds the foundation for a tender, airy crumb.

Step 3: Add the Eggs

Add the eggs one at a time, beating well after each addition. Scrape down the sides of the bowl to ensure everything blends smoothly. The batter should now be creamy and pale yellow.

Step 4: Mix the Dry Ingredients

In a separate bowl, whisk together the flour, baking powder, and salt. This helps distribute the leavening evenly throughout the batter.

Step 5: Combine the Wet and Dry

Alternate adding the dry mixture and 7UP to the creamed butter mixture, beginning and ending with the flour. Mix on low speed to prevent overbeating. Gently stir in the lemon zest, lemon juice, and vanilla extract.

The result? A smooth, velvety batter with a hint of sparkle from the soda and a citrusy perfume that fills the kitchen.

Step 6: Bake to Golden Perfection

Pour the batter evenly into the prepared pan. Smooth the top with a spatula and tap the pan lightly on the counter to remove air bubbles.
Bake for 55–65 minutes, or until a toothpick inserted in the center comes out clean.

As the cake bakes, your kitchen will fill with the aroma of lemon, butter, and sugar—a scent that evokes summer mornings and cozy family gatherings.

Step 7: Cool and Glaze

Allow the cake to cool in the pan for 15 minutes before transferring it to a wire rack. Once completely cool, drizzle the lemon glaze generously over the top, letting it cascade down the sides.

To make the glaze, whisk together powdered sugar, melted butter, lemon juice, and enough 7UP to reach a pourable consistency. The glaze should be glossy and smooth, with just enough tartness to balance the cake’s sweetness.

Serving Suggestions

Slice thick, buttery wedges and serve them with a dollop of whipped cream or a scoop of vanilla ice cream. For an elegant presentation, garnish with thin lemon slices, mint leaves, or candied zest. This cake pairs wonderfully with a cup of Earl Grey tea, iced coffee, or sparkling lemonade.

If you’re hosting a brunch or potluck, serve the cake chilled—it becomes even more refreshing as it rests. For a festive touch, sprinkle with powdered sugar before serving.

Tips for the Perfect 7UP Lemon Cake

  1. Use room temperature ingredients – This ensures everything blends evenly for a smooth, rich batter.

  2. Don’t overmix – Overbeating can make the cake dense instead of tender.

  3. Use real 7UP – Avoid diet versions; the sugar in regular 7UP helps with both flavor and texture.

  4. Test for doneness early – Every oven is different; check at 50 minutes to prevent overbaking.

  5. Add extra lemon zest for a stronger tang if you love bold citrus flavor.


Why 7UP Makes a Difference

The secret to this recipe’s magic lies in the carbonation and acidity of 7UP. The bubbles help create lift, resulting in a lighter crumb, while the soda’s subtle sweetness enhances the lemon flavor without overpowering it. It’s a brilliant example of how simple ingredients—when combined thoughtfully—can transform a traditional recipe into something extraordinary.

Storage and Make-Ahead Tips

This cake stays moist and flavorful for up to 4 days when stored in an airtight container at room temperature. For longer storage, wrap slices individually and freeze for up to 2 months. To serve, thaw at room temperature and re-glaze lightly for that fresh-from-the-oven shine.

Final Thoughts

The 7UP Lemon Cake is a timeless dessert with a playful twist. It bridges the gap between old-fashioned baking and modern flair, combining simplicity with sophistication. Each bite offers a refreshing burst of citrus balanced by the buttery richness of a classic pound cake. Whether you’re reviving a family recipe or discovering it for the first time, this cake promises to bring warmth, joy, and a touch of sparkle to every occasion.

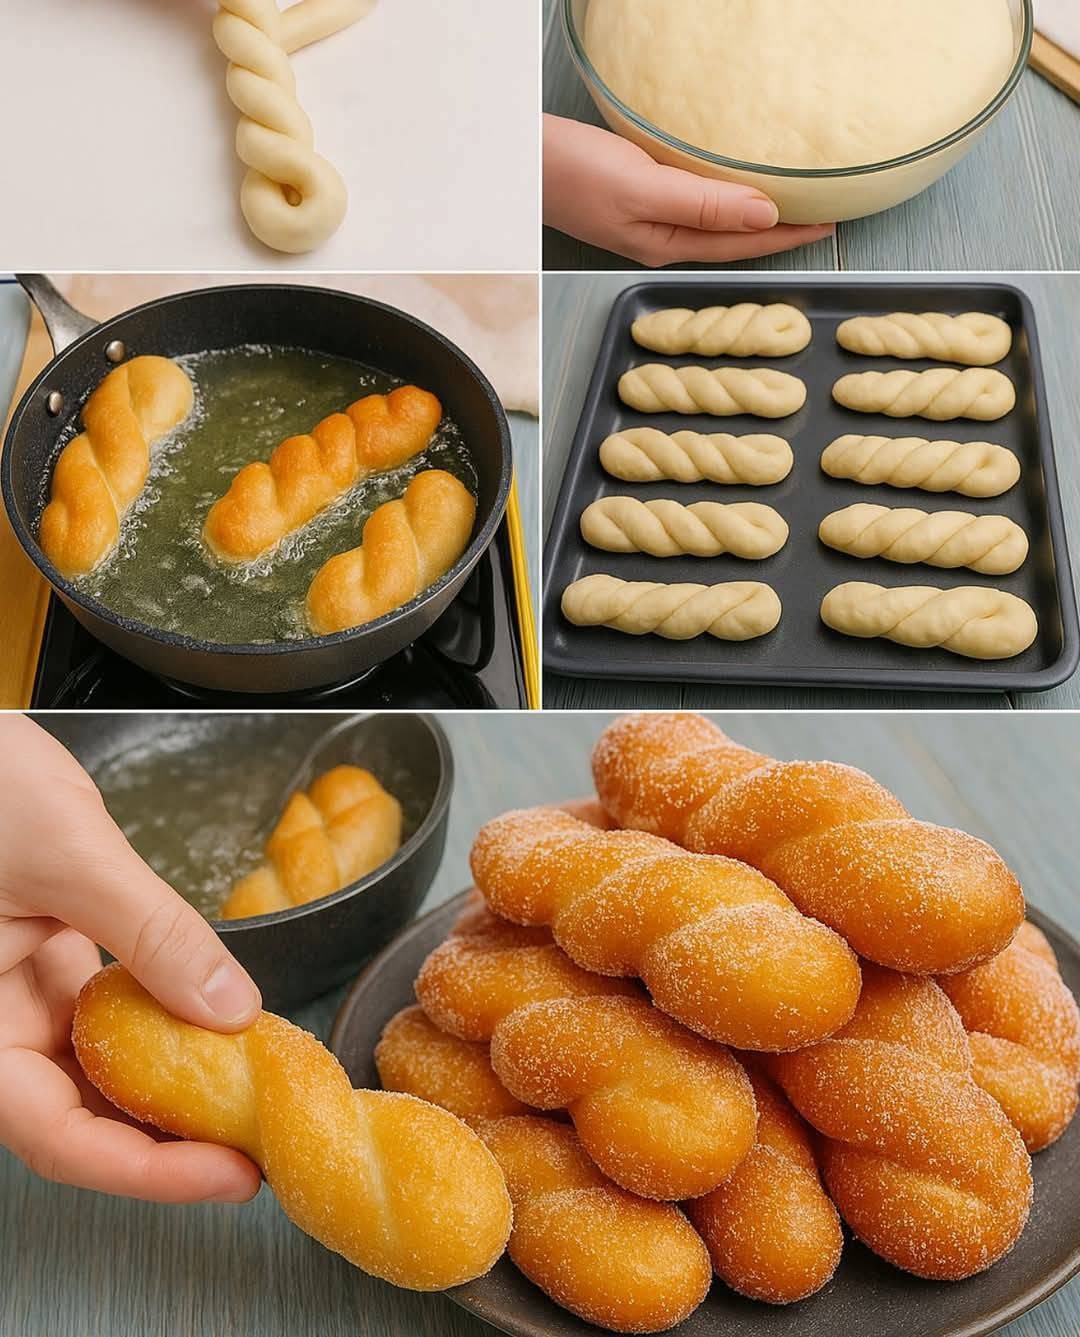
Quick & Simple Donut Recipe

There’s something wonderfully comforting about a warm, freshly made donut. That soft, pillowy texture paired with a golden crisp exterior and a dusting of sugar or drizzle of glaze—few things rival that bliss. If you’ve ever craved donuts but didn’t want to deal with the hassle of yeast, long proofing times, or complex techniques, this Quick & Simple Donut Recipe is your new best friend. These donuts are tender, light, and ready in under 30 minutes, perfect for breakfast, dessert, or a cozy afternoon treat.

Why This Donut Recipe is So Special

This recipe is designed for simplicity and speed without compromising flavor or texture. Traditional yeast donuts require proofing, kneading, and time for the dough to rise, but this version uses baking powder as the leavening agent. That means no waiting around for the dough to double—just mix, roll, fry, and enjoy. The result? A deliciously soft inside with a golden, crisp outside, ready to devour almost immediately.

You can glaze, sugar coat, or even fill them with jam or custard. It’s a blank canvas for your favorite flavors, but the base donut itself is irresistibly good on its own.

Ingredients You’ll Need

(Makes about 12 medium donuts)

  • 2 cups all-purpose flour

  • 1/4 cup granulated sugar

  • 1 tablespoon baking powder

  • 1/2 teaspoon salt

  • 1/4 teaspoon ground nutmeg (optional, adds that classic donut flavor)

  • 3/4 cup whole milk

  • 2 tablespoons melted butter

  • 1 large egg

  • 1 teaspoon pure vanilla extract

  • Oil for frying (vegetable or canola oil works best)

For coating or glazing:

  • Cinnamon sugar mixture: 1/2 cup sugar + 1 teaspoon cinnamon

  • Classic glaze: 1 cup powdered sugar + 2 tablespoons milk + 1/2 teaspoon vanilla

  • Chocolate glaze: 1/2 cup chocolate chips + 2 tablespoons heavy cream

Step-by-Step Instructions

Step 1: Prepare the Dough

In a large mixing bowl, whisk together the flour, sugar, baking powder, salt, and nutmeg. The nutmeg gives the donuts that nostalgic bakery-style aroma, but you can leave it out if you prefer.

In a separate bowl, whisk the milk, melted butter, egg, and vanilla extract until smooth. Slowly pour the wet mixture into the dry ingredients and stir until a soft dough forms. The dough should be smooth, slightly sticky but firm enough to roll out. If it’s too sticky, add a tablespoon of flour at a time until manageable.

Step 2: Shape the Donuts

Lightly flour a clean surface and roll the dough out to about ½ inch thickness. Use a round cookie cutter (about 3 inches wide) or a glass to cut circles. For the donut holes, use a small cap or the end of a piping tip. Gather the scraps, re-roll, and cut again until all dough is used.

If you don’t have cutters, simply shape small balls for “donut holes”—they’re easier and fry beautifully.

Step 3: Heat the Oil

Pour about 2 inches of oil into a deep pan or pot. Heat over medium heat until the oil reaches 350°F (175°C). If you don’t have a thermometer, drop a small piece of dough into the oil—if it sizzles and floats to the surface within a few seconds, it’s ready.

Make sure the temperature doesn’t drop too low or the donuts will absorb oil and become greasy; too hot, and they’ll brown too quickly without cooking inside.

Step 4: Fry the Donuts

Carefully add 2–3 donuts at a time into the hot oil. Fry for about 1–2 minutes per side until golden brown. Use a slotted spoon or tongs to turn them gently. Once evenly browned, remove and place them on a paper towel-lined plate to drain excess oil.

Repeat with the remaining donuts and donut holes. The holes will cook faster—usually under a minute.

Step 5: Coat or Glaze

Now comes the fun part—topping your donuts! While they’re still warm:

  • For a sugar coating: Roll the donuts in the cinnamon sugar mixture.

  • For a classic glaze: Whisk powdered sugar, milk, and vanilla until smooth, then dip the tops of the donuts in the glaze and let them set on a wire rack.

  • For chocolate lovers: Melt chocolate chips with heavy cream, stir until glossy, and dip each donut for a rich chocolate finish.

You can even add sprinkles, crushed nuts, or shredded coconut before the glaze sets.

Tips for Perfect Donuts

  1. Do not overmix the dough. Mixing too much makes the donuts dense. Stop as soon as the ingredients combine.

  2. Keep the oil temperature steady. Fluctuating heat can lead to uneven cooking.

  3. Use fresh oil. Old oil can affect both flavor and texture.

  4. Work in small batches. Overcrowding the pan lowers the oil temperature.

  5. Experiment! Try flavoring the dough with lemon zest, almond extract, or a pinch of cocoa powder for variety.

Serving Suggestions

Serve your donuts fresh and warm with a cup of coffee, hot chocolate, or a cold glass of milk. You can also turn them into dessert by adding a scoop of ice cream and a drizzle of caramel or chocolate sauce. If you want to go all out, stack them and dust with powdered sugar for a stunning brunch presentation.

These donuts also make fantastic party treats. You can prepare different coatings—like vanilla glaze, chocolate drizzle, or strawberry icing—and let guests decorate their own.

Storage

If you somehow have leftovers (which is rare!), store them in an airtight container at room temperature for up to 2 days. To bring them back to life, warm them in the microwave for about 10 seconds. You can also freeze unglazed donuts for up to 2 months; thaw and reheat before glazing.

A Little Story Behind the Recipe

This recipe was born out of a rainy morning craving—something sweet, warm, and nostalgic, but with no yeast on hand. After some quick mixing, rolling, and frying, the kitchen filled with that unmistakable donut-shop aroma. One bite sealed the deal—these simple donuts had all the joy of homemade comfort food without the effort.

Every time I make them, I’m reminded that sometimes the simplest recipes bring the most happiness. They’re proof that you don’t need a long list of ingredients or a complicated process to create something truly delightful.

Final Thoughts

This Quick & Simple Donut Recipe is everything homemade baking should be—easy, satisfying, and downright delicious. Whether you’re making them for breakfast, a weekend indulgence, or just to brighten your day, these donuts deliver every single time.
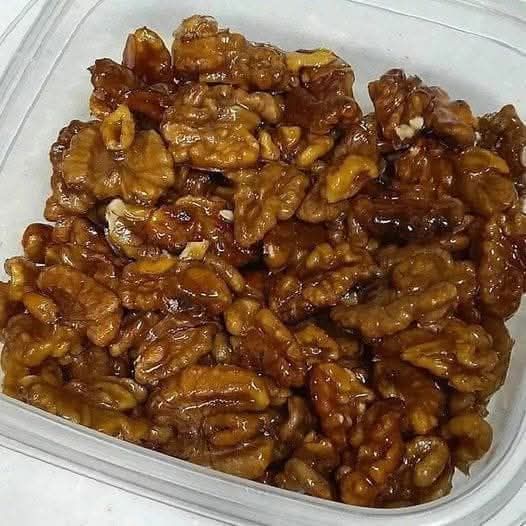
5-Minute Caramel Walnuts

If you’ve ever craved something sweet, crunchy, and deeply satisfying but didn’t have hours to spend in the kitchen, this 5-Minute Caramel Walnuts recipe is your dream come true. In just a few minutes, you can transform ordinary walnuts into glossy, golden nuggets of caramel-coated perfection. These nuts are a delightful mix of nutty warmth and sugary crunch — perfect for snacking, topping desserts, or gifting during the holidays. What makes them even better is how fast and easy they are to prepare — no oven, no candy thermometer, just one pan and five minutes of your time.

Ingredients You’ll Need

  • 1 cup walnut halves (fresh and unsalted)

  • ½ cup granulated sugar

  • 2 tablespoons butter (unsalted, for a rich flavor)

  • 1 tablespoon water

  • ¼ teaspoon salt (balances the sweetness)

  • ½ teaspoon vanilla extract (optional, for aroma and depth)

Step-by-Step Directions

Step 1: Prepare your space.
Before you start, have everything ready — caramelizing sugar moves fast. Line a baking sheet with parchment paper or a silicone mat, and set a fork or wooden spoon nearby for spreading. Measure your walnuts and keep them within reach. Once the sugar melts, you’ll need to act quickly.

Step 2: Melt the sugar and butter.
In a medium, non-stick skillet or saucepan, add sugar, butter, and water over medium heat. Stir gently as the butter melts, allowing the sugar to dissolve evenly. The water helps the sugar melt smoothly, while the butter adds a luscious richness to the caramel.

Step 3: Add the walnuts.
Once the sugar begins to dissolve and form a light syrup, toss in the walnut halves. Stir constantly to coat them evenly. The sugar mixture will bubble and thicken as it caramelizes, coating every piece with a shiny amber glaze. This is where the magic happens — the sugar transforms from white crystals into a warm, golden caramel in under two minutes.

Step 4: Watch carefully.
Keep stirring to prevent burning. As soon as the sugar turns a deep golden color and the nuts smell toasted, remove the pan from the heat immediately. Overcooking even for 10 seconds can lead to bitterness.

Step 5: Flavor and finish.
Quickly stir in the salt and vanilla extract. The salt heightens the caramel’s sweetness while cutting through the richness, and the vanilla adds a lovely aroma. Be cautious — the mixture will sizzle when the vanilla hits the hot caramel.

Step 6: Cool and crisp.
Spread the caramel-coated walnuts on your prepared parchment-lined sheet. Use a fork to separate them while they’re still warm, so they don’t clump together. Let them cool completely for about 5–10 minutes. Once cooled, the caramel hardens into a crisp shell that shatters deliciously with every bite.

Tips for Perfect Caramel Walnuts

  1. Use fresh walnuts. Stale nuts can ruin the flavor. For extra nuttiness, you can lightly toast them in a dry skillet for 2–3 minutes before adding to the caramel.

  2. Don’t walk away. Caramel can burn in seconds. Keep your eyes on the pan at all times.

  3. Avoid overcrowding. One cup of walnuts per batch is ideal — this ensures even coating.

  4. Work fast when spreading. Caramel hardens quickly once off the heat. Use two forks if needed to separate the pieces before it sets.

  5. Clean-up hack: Fill the caramel pan with hot water and let it sit. The hardened caramel will dissolve easily, saving you from scrubbing.

Creative Ways to Enjoy Caramel Walnuts

These glossy, crunchy nuts are incredibly versatile. Here are some irresistible ways to enjoy them:

  • Snack Straight: Enjoy them as they are — sweet, salty, and utterly addictive.

  • Dessert Topping: Sprinkle over ice cream, brownies, cheesecake, or yogurt parfaits for a decadent crunch.

  • Salad Star: Toss them into a spinach or arugula salad with goat cheese and dried cranberries — the caramelized sweetness balances tangy and savory flavors beautifully.

  • Breakfast Upgrade: Add them to oatmeal, pancakes, or French toast for a gourmet touch.

  • Gift Idea: Package cooled caramel walnuts in small jars tied with ribbon for an easy, homemade holiday gift.

Flavor Variations

Want to put your own twist on this quick recipe? Try these fun variations:

  • Cinnamon Sugar Walnuts: Add ½ teaspoon of ground cinnamon for a warm, cozy flavor.

  • Spicy Caramel Walnuts: Sprinkle a pinch of cayenne pepper or chili powder for a sweet-and-spicy kick.

  • Maple Caramel Walnuts: Replace half the sugar with pure maple syrup for a softer, richer caramel.

  • Chocolate Drizzle: Once cooled, drizzle melted dark or white chocolate over the walnuts for an indulgent candy-like treat.

Storage Tips

Store cooled caramel walnuts in an airtight container at room temperature. They’ll stay fresh and crunchy for up to two weeks. For longer storage, refrigerate them for up to a month — just be sure to let them come to room temperature before eating to restore their crisp texture.

Why You’ll Love This Recipe

What makes these 5-Minute Caramel Walnuts truly special is their simplicity. You get the satisfaction of homemade candy without needing a candy thermometer or complicated steps. The combination of buttery caramel and toasty walnuts is classic, yet it never loses its charm. It’s a recipe that feels fancy enough for a party but simple enough for a weekday snack.

With just a handful of pantry staples and five minutes of your time, you can create something that tastes like it took hours. Each bite delivers a satisfying crunch followed by a wave of caramel sweetness that melts into the nut’s earthy depth. Whether you use them to dress up your desserts, impress guests, or satisfy a late-night craving, these caramel walnuts are guaranteed to disappear faster than you can make them.

Final Thoughts

In a world full of elaborate desserts, this 5-Minute Caramel Walnuts recipe proves that sometimes, the simplest things are the most memorable. The process is quick, the ingredients are humble, and yet the result is pure indulgence. Once you make these, you’ll wonder how you ever lived without them. Keep a jar handy — you never know when the craving for something sweet, crunchy, and irresistible will strike!