NO-BAKE PEANUT BUTTER COOKIES

No-bake desserts have a special kind of magic. They come together quickly, require minimal tools, and yet deliver flavors that taste like hours of effort went into creating them. No-Bake Peanut Butter Cookies belong to this brilliant category of comfort food—sweet, soft, chewy, and bursting with an irresistible nutty aroma. What makes this version unique is its perfect balance: not too sweet, not too heavy, and infused with a rich, creamy texture that feels like a warm hug in every bite. Whether you’re making these for a quick snack, an after-dinner treat, or a last-minute dessert for guests, these cookies never disappoint.

This recipe transforms pantry staples into a treat so indulgent that nobody will believe you didn’t turn on your oven. And the best part? You get beautifully set cookies that hold their shape, stay wonderfully soft, and taste better with every passing hour as the flavors settle. Let’s dive into this luscious, no-fuss creation.

 What Makes These No-Bake Peanut Butter Cookies Unique?

Traditional no-bake cookies often rely on cocoa or oats as their signature ingredient. But here, peanut butter takes center stage, creating a cookie that is buttery, creamy, and melt-in-your-mouth soft. This unique recipe uses a blend of creamy peanut butter, a kiss of honey, a touch of butter, vanilla, and just the right amount of crushed digestive biscuits or graham crackers to form cookies that taste like a cross between a peanut butter fudge and a soft cookie.

Unlike many no-bake recipes, this one doesn’t require boiling sugar or lengthy stovetop cooking. A gentle melt-and-mix process is all it takes to create cookies that are perfectly tender and decadently rich without being overly sweet.

 NO-BAKE PEANUT BUTTER COOKIES – UNIQUE RECIPE

✔ Yield: 18–22 cookies

✔ Prep Time: 10 minutes

✔ Chill Time: 20–30 minutes

✔ Total Time: Under 45 minutes

 Ingredients

  • 1 cup creamy peanut butter (smooth works best, but crunchy adds texture)

  • ½ cup unsalted butter (softened or gently melted)

  • ⅓ cup honey (or maple syrup for deeper flavor)

  • 1 teaspoon pure vanilla extract

  • ¼ teaspoon salt (optional but enhances flavor)

  • 2 ½ to 3 cups crushed digestive biscuits or graham cracker crumbs

  • ¼ cup mini chocolate chips (optional but heavenly)

  • 1–2 tablespoons milk (only if dough needs softening)

 Instructions

Step 1: Prepare the Base

In a medium saucepan over low heat or a mixing bowl using a microwave, melt together the peanut butter, butter, and honey. Stir continuously until everything becomes smooth, creamy, and fully combined. Do not boil—gentle heat keeps the mixture silky.

Step 2: Flavor Boost

Remove from heat, then stir in the vanilla extract and salt. At this stage, the mixture will smell absolutely divine—warm, nutty, and sweet.

Step 3: Add the Structure

Pour the crushed biscuits or graham cracker crumbs into the peanut butter mixture. Start with 2 ½ cups and mix thoroughly. If the dough feels too sticky to handle, add more crumbs until it forms a soft but shapeable dough. If it becomes too dry, add 1–2 tablespoons of milk to bring back moisture.

Step 4: Shape the Cookies

Line a tray with parchment paper. Scoop out 1–2 tablespoons of dough at a time, roll into balls, and gently press with your fingers or the back of a fork to create the classic crisscross peanut butter cookie pattern.

If you’re using chocolate chips, sprinkle a few on top or fold them into the dough before shaping.

Step 5: Chill to Set

Place the tray in the refrigerator for 20–30 minutes. The cookies will firm up, becoming soft yet stable enough to stack or plate beautifully.

 Tips to Make This Recipe Extra Special

✨ Use high-quality peanut butter – The flavor of the cookies rests heavily on it. A creamy, natural peanut butter gives a smoother, richer taste.
✨ Add a pinch of cinnamon – It enhances the nuttiness and makes the cookies warm and fragrant.
✨ Dunk half the cookies in melted chocolate – A half-dip creates a bakery-style finish.
✨ Stir in crushed roasted peanuts – For a delightful crunch.
✨ Add a swirl of Nutella – The combination of chocolate and peanut butter is simply irresistible.

 Why You’ll Fall in Love with These Cookies

These cookies are incredibly easy to make, yet the flavor is deep, satisfying, and nostalgic. They remind you of childhood treats but with an elevated twist—thanks to honey’s natural sweetness, the smoothness of peanut butter, and the subtle crunch of biscuit crumbs. Each bite brings a perfect blend of creamy and lightly crumbly, making them an ideal snack with tea, coffee, or a cold glass of milk.

And for busy days, this recipe is your best friend. No oven, no mixers, no complicated steps. Just mix, shape, chill, and enjoy. Kids love helping with these too, making it a great family activity.

 Storage

  • Refrigerator: Keep in an airtight container for up to 1 week.

  • Freezer: Freeze for up to 3 months. Just thaw for 10 minutes before eating.

 Final Thoughts

This unique No-Bake Peanut Butter Cookies recipe is everything a homemade treat should be—easy, fast, delicious, and made with love. Whether you’re craving a quick sweet fix or preparing a platter of goodies for guests, these cookies deliver rich peanut butter flavor and soft, irresistible texture every time. Once you try them, they’ll become a staple in your dessert rotations, loved by kids and adults alike.

Sweet Creamy Jam Balls

Some desserts whisper comfort; others shout indulgence. Sweet Creamy Jam Balls do both. Imagine soft, buttery dough rolled into bite-sized spheres, lovingly filled with a fruity jam center, coated in creamy milk glaze, and finished with a snowy dusting of coconut. These little gems taste like a cross between a doughnut hole, a truffle, and a nostalgic bakery cookie. They’re easy to make, beautiful to serve, and absolutely irresistible. Whether you’re hosting a tea party, preparing a festive dessert tray, or simply craving something sweet with your evening chai, this recipe will become a signature favorite.

This unique version focuses on rich creaminess, soft texture, and balanced sweetness. With just a handful of pantry ingredients and a little hands-on fun, you can create a treat that impresses every single time.

Why These Jam Balls Are So Special

What sets this recipe apart from traditional jam-filled cookies or no-bake sweets is the perfect harmony between softness, creaminess, and fruity flavor. The dough is enriched with butter, cream cheese, and powdered sugar—each contributing softness and moisture. Instead of baking, these balls set in the refrigerator, which helps preserve their tender bite and prevents dryness.

The jam filling adds a burst of flavor. Strawberry, apricot, raspberry, or mixed berry—you get to choose the personality of your dessert. The creamy glaze, made with milk and powdered sugar, gently hugs each ball, giving them a glossy finish that holds onto shredded coconut like fresh snow on a winter morning.

They’re simple. They’re stunning. And they’re dangerously delicious.

Ingredients

For the Dough:

  • 1 cup unsalted butter, softened

  • 1 cup cream cheese, softened

  • 1 cup powdered sugar

  • 1 tsp vanilla extract

  • 2 ¾ cups all-purpose flour

  • Pinch of salt

For the Filling:

  • ½ cup thick jam (strawberry, raspberry, apricot, or mixed berry)

For the Creamy Glaze:

  • 1 cup powdered sugar

  • 3–4 tbsp milk or cream

  • ½ tsp vanilla

For Rolling:

  • 1 cup shredded coconut (sweetened or unsweetened, your choice)

Instructions

1. Make the Dough

In a large mixing bowl, beat the softened butter and cream cheese together until light, creamy, and fluffy. This step is key—the air whipped into the mixture gives the final Sweet Creamy Jam Balls their dreamy softness. Add the powdered sugar and beat again until smooth. Mix in the vanilla extract.

Slowly add the flour and a pinch of salt. Stir with a spatula or gently work with your hands until a soft dough forms. The dough should be pliable, soft, and easy to roll—similar to sugar cookie dough.

Cover the bowl and refrigerate for 30 minutes. This makes the dough easier to shape and prevents it from sticking to your palms.

2. Form the Jam Balls

Once chilled, take about 1 tablespoon of dough and flatten it slightly in your palm. Add a tiny dollop of jam in the center—about ½ teaspoon. Carefully pinch the edges closed and roll into a smooth ball, ensuring no jam peeks out.

Place the balls on a parchment-lined tray. Continue until all dough is used.

Freeze for 15 minutes. This step helps the balls hold their shape when glazing and keeps the jam tucked securely inside.

3. Prepare the Creamy Glaze

In a small bowl, whisk together powdered sugar, milk (or cream), and vanilla. You want a pourable but thick glaze. Add more milk drop by drop if needed.

4. Glaze and Roll

Dip each chilled ball into the creamy glaze, letting excess drip off. Immediately roll in shredded coconut so it sticks beautifully around the entire surface.

Place back on the tray and refrigerate for at least 1 hour to fully set.

Tips for the Best Sweet Creamy Jam Balls

  • Use thick jam so it doesn’t ooze during shaping. If your jam is runny, cook it for 3–4 minutes to thicken it.

  • Don’t skip chilling—cold dough and cold balls make smoother, neater shapes.

  • Try flavor combinations: Lemon curd filling with vanilla glaze, apricot jam with almond extract, or raspberry with a hint of rose.

  • Use toasted coconut for a deeper, nuttier flavor.

  • Store properly: These keep well for 5–6 days in the fridge or a month in the freezer.

How to Serve Them

Sweet Creamy Jam Balls shine at holidays, parties, or family gatherings. Arrange them in colorful mini cupcake liners or pile them high on a glass tiered tray for a luxurious look. Serve them alongside tea, coffee, or hot chocolate—they pair especially well with warm drinks because the creamy dough softens slightly and the jam inside becomes fragrant.

You can even package them as edible gifts by placing them in small gift boxes lined with parchment. They look elegant, homemade, and meaningful.

Final Thoughts

These Sweet Creamy Jam Balls are the perfect example of how simple ingredients can create extraordinary desserts. Soft, creamy dough wraps around vibrant jam, forming a bite-sized treat that feels indulgent yet comforting. Every bite melts on the tongue, delivering creaminess, fruitiness, and a hint of coconut. Once you make them, you’ll want to recreate them for every occasion.

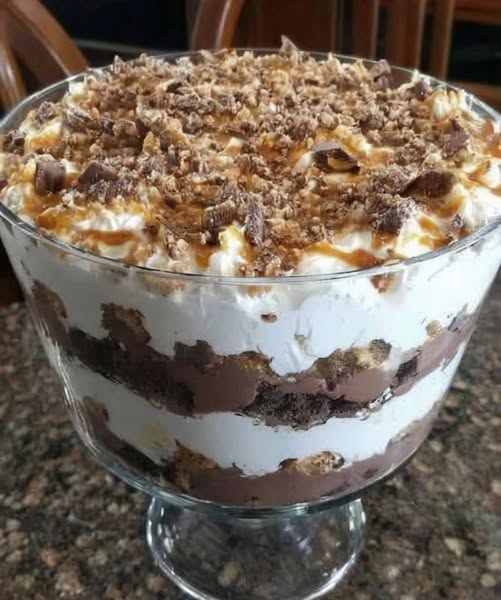
Heaven in a Bowl – No-Bake Layered Dessert Recipe

If you’ve ever wished for a dessert that tastes like a cloud, looks like a dream, and requires zero baking, this is the recipe that will make you believe magic is real. “Heaven in a Bowl” is a layered, silky-sweet masterpiece—part cheesecake, part mousse, part trifle—all coming together in a chilled dessert that feels like it floated straight down from dessert paradise. Every spoonful is cold, creamy, airy, and indulgent without being heavy. Best of all—you can make it in just minutes.

Below is a truly unique, original version you won’t find anywhere else.

Heaven in a Bowl – No-Bake Layered Dessert Recipe

✨ Ingredients

Crust Layer

  • 2 cups crushed digestive biscuits or graham crackers

  • 6 tbsp melted butter

  • 1 tbsp sugar (optional)

Cloud Cheesecake Layer

  • 1 cup cold heavy cream

  • 8 oz (225g) cream cheese, softened

  • ½ cup powdered sugar

  • 1 tsp vanilla extract

  • Zest of 1 lemon (optional but magical)

Silky Dream Pudding Layer

  • 1 packet instant vanilla pudding (3.4 oz / ~100g)

  • 1 ½ cups cold milk

  • 3 tbsp condensed milk

Heavenly Whipped Topping

  • 1 cup heavy cream

  • 2 tbsp powdered sugar

  • ½ tsp vanilla

Magic Add-Ins (Choose Any)

  • Crushed chocolate bars

  • Fresh berries

  • Caramel drizzle

  • White chocolate shavings

  • Toasted coconut

  • Chopped pistachios

Instructions

1. Create the Golden Base

Mix the crushed biscuits with melted butter and sugar until they resemble wet sand.
Press firmly into the bottom of a large glass bowl or dish.
Chill for 10 minutes to set.

This layer gives you a buttery crunch that perfectly balances the creamy layers above.

2. Whip Up the Cloud Cheesecake

In one bowl, beat the heavy cream until fluffy.
In another bowl, beat cream cheese, powdered sugar, vanilla, and lemon zest until smooth.

Fold the whipped cream into the cream cheese mixture.
Spread this dreamy, cloud-like layer over the crust.

This layer melts on the tongue like sweet velvet.

3. Add the Silky Dream Pudding Layer

Whisk together the pudding mix, cold milk, and condensed milk until thick.
Pour gently over the cheesecake layer.

This pudding is extra rich thanks to the condensed milk—creamy, silky, and impossible to resist.

4. Finish with Heavenly Whipped Topping

Whip heavy cream with powdered sugar and vanilla until soft peaks form.
Spread it gracefully across the top.

It creates that “angelic finish” that makes the bowl look divine.

5. Add Magic (Optional – But Recommended!)

Pick your topping:

  • White chocolate curls for elegance

  • Caramel drizzle for richness

  • Crushed chocolate bars for decadence

  • Berries for freshness

  • Pistachios for color and crunch

6. Chill Until Heavenly

Refrigerate for at least 3 hours, or overnight for ultimate magic.
Once chilled, the layers settle, the flavors blend, and the dessert becomes a creamy miracle.

Why This Dessert Feels Like Magic

  • No baking—just layer and chill

  • Melts in your mouth like a mousse-cheesecake hybrid

  • Perfectly balanced flavors: sweet, creamy, buttery, and light

  • Beautiful layers that make it look like a luxurious pâtisserie treat

  • A crowd-pleaser for holidays, parties, or midnight cravings

  • Customizable—chocolatey, fruity, nutty, or caramel-infused

Serving Tip

Scoop it out with a big spoon so each serving captures all four layers: the buttery crumble, the cloud-cheesecake, the silky pudding, and the snowy whipped cream. Every bite feels like dessert heaven.

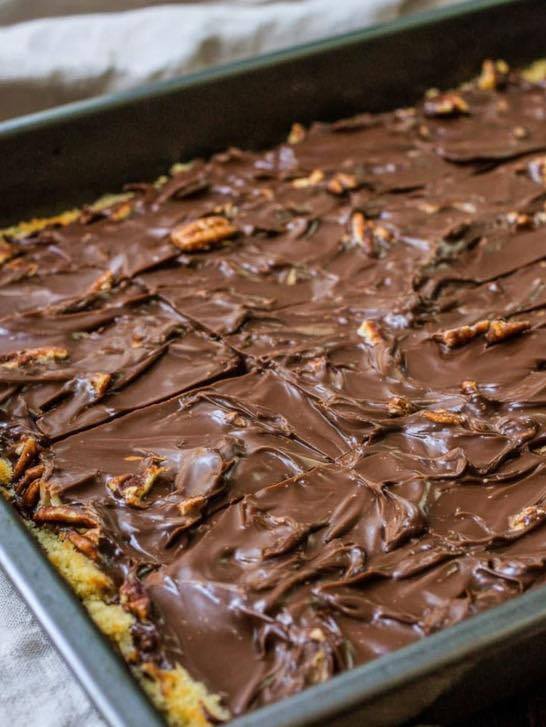
Praline Christmas Bark

Praline Christmas Bark is the kind of holiday treat that makes people stop mid-bite, raise an eyebrow, and immediately ask, “Who made this?” It’s a buttery, toffee-kissed bark layered with toasted pecans, velvety chocolate, and a praline-style caramel that gives every bite a melt-in-your-mouth crunch. This unique recipe blends Southern praline tradition with classic Christmas bark simplicity, resulting in a treat that looks stunning on a cookie tray but takes less than 20 minutes of actual work. Perfect for gifting, snacking, or sneaking pieces while wrapping presents.

Below is a unique, easy-to-follow Praline Christmas Bark recipe, crafted for rich flavor, gorgeous texture, and holiday magic.

Praline Christmas Bark (Unique Recipe)

Prep Time: 10 minutes
Cook Time: 12 minutes
Chill Time: 30 minutes
Total Time: 50 minutes
Yields: 1 large sheet-pan-sized bark (about 20–24 pieces)

Ingredients

For the Base

  • 1 sleeve salted crackers (Ritz or buttery round crackers preferred)

  • 1 cup pecan halves, roughly chopped

  • 1 cup chocolate chips (milk or dark)

For the Praline Caramel

  • 1 cup brown sugar (packed)

  • 1 cup unsalted butter

  • 1 teaspoon pure vanilla extract

  • 1 pinch flaky sea salt

  • Optional: 2 tbsp heavy cream for extra creaminess

Festive Toppings (Optional but beautiful)

  • Extra chopped pecans

  • White chocolate drizzle

  • Holiday sprinkles (red, green, gold)

Instructions

1. Prepare the Pan

Line a baking sheet with parchment paper or foil. Coat lightly with nonstick spray.
Arrange the buttery crackers in a tight, even layer—they will form the foundation for the bark.

2. Toast the Pecans (Optional but recommended)

In a dry skillet, toast the chopped pecans over medium heat for about 3 minutes until fragrant.
This deepens their nutty flavor and adds richness.

3. Make the Praline Caramel

In a saucepan, melt the butter over medium heat.
Stir in the brown sugar and bring to a gentle boil for 3 minutes, stirring constantly.
If using heavy cream, whisk it in now.
Remove from heat and stir in vanilla and a pinch of sea salt.
The mixture should be glossy, smooth, and thick—just like praline candy.

4. Pour and Bake

Pour the hot praline caramel evenly over the cracker layer.
Sprinkle the toasted pecans across the top.
Bake at 350°F (175°C) for 10–12 minutes, or until bubbling like golden lava.

5. Add the Chocolate Layer

Remove from the oven and immediately scatter chocolate chips over the bubbling praline layer.
Allow them to melt for 3 minutes, then gently spread into a smooth chocolate blanket.

6. Decorate and Chill

Top with extra pecans, white chocolate drizzle, and holiday sprinkles.
Refrigerate for at least 30 minutes, or until fully set.

7. Break Into Pieces

Lift the bark using the parchment.
Break into rustic shards—large, small, uneven, beautiful.

Why This Recipe Is Unique

✔ Praline Caramel Instead of Regular Toffee

Classic bark uses plain caramel, but this recipe uses a Southern-style praline caramel for buttery depth.

✔ Buttery Crackers for Extra Flavor

Ritz-style crackers add a light saltiness that balances the sweetness.

✔ Multiple Textures

Crunchy pecans, silky chocolate, and crisp caramel create an addictive trio.

✔ No Thermometer Needed

Achieve authentic praline flavor without complicated candy-making steps.

✔ Customizable for Gifting

Break it small for candy boxes or leave in large shards for cookie platters.

Tips for Perfect Praline Christmas Bark

  • Use fresh pecans—their natural oils bring intense flavor.

  • Don’t skip the boiling time—3 minutes is the sweet spot for caramel that sets perfectly.

  • For extra shine, add 1 tsp corn syrup to the caramel mixture.

  • Add a sprinkle of sea salt on top for a gourmet finish.

  • Store in the fridge for up to 2 weeks or freeze for 2 months.

Serving Ideas

  • Pack in holiday tins with parchment sheets

  • Add to dessert boards with cookies and fudge

  • Serve alongside hot cocoa or spiced coffee

  • Wrap individually to give as holiday favors

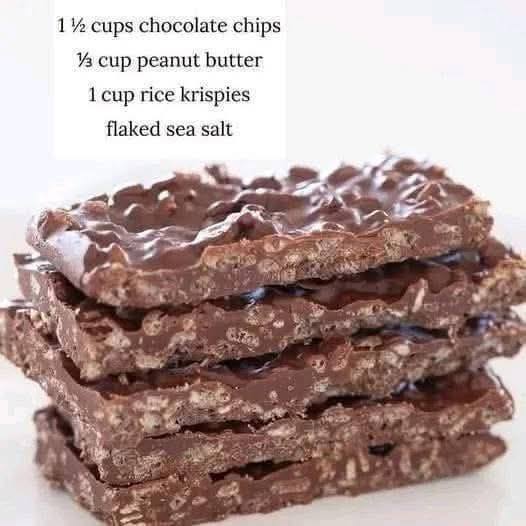
3-Ingredient Homemade Crunch Bars

Sometimes the most irresistible treats come from the simplest ingredients—and these 3-Ingredient Homemade Crunch Bars prove exactly that. No complicated techniques, no specialty tools, no long list of items you’ll never use again. Just three everyday ingredients that transform into a chocolatey, crispy, melt-in-your-mouth delight that tastes better than anything you can buy in the store. This recipe is perfect for anyone craving a quick sweet snack, busy parents who want a no-stress dessert, or anyone who loves the magical combination of smooth chocolate and irresistible crunch.

These bars strike a perfect balance between creamy and crispy. The velvety chocolate hugs each puffed rice grain, while the natural sweetness of the syrup ties everything together. The result is a candy bar that snaps cleanly when chilled, melts beautifully on the tongue, and delivers that nostalgic “crunch” that makes you smile before you even take the first bite. Best of all? You can whip up a batch in less than 10 minutes—no baking required.

Ingredients (Only 3!)

  • 2 cups puffed rice cereal (or crispy rice cereal)

  • 1 cup milk chocolate chips (or semi-sweet, depending on how sweet you like it)

  • ¼ cup peanut butter (creamy works best)

That’s it—only three pantry staples, and you’re already halfway to dessert heaven.

Why These 3 Ingredients Work So Perfectly

There’s a reason these bars taste so luxurious despite their simplicity. Each ingredient plays a vital role in texture, flavor, and structure:

1. Chocolate Chips – The Silky Foundation

Chocolate melts into a smooth, glossy base that coats every piece of cereal perfectly. Its richness balances the light crispiness of the puffed rice, creating a satisfying contrast in every bite. Using milk chocolate creates a classic candy-bar sweetness, while semi-sweet gives a deeper cocoa flavor for adults who prefer less sugar.

2. Peanut Butter – The Secret Binder

While chocolate gives flavor, peanut butter gives structure. It thickens the melted chocolate just enough so that the bars set firm rather than turning crumbly. It also adds a subtle nutty aroma that makes these bars taste warm, comforting, and far more complex than a three-ingredient recipe has any right to be.

3. Puffed Rice – The Crunch Factor

This is what makes the magic happen. Light, airy, and crisp, puffed rice adds volume and crunch without weighing down the mixture. Every bite is crisp but not hard, satisfying without being heavy—a perfect candy bar texture.

Instructions – Simple, Fast, and Foolproof

Step 1: Prepare Your Pan

Line an 8×8-inch baking dish with parchment paper. Leave a little overhang on the sides; this makes it easy to lift the bars out later. If you don’t have parchment, lightly grease the pan with butter or oil.

Step 2: Melt the Chocolate and Peanut Butter

In a microwave-safe bowl, add the chocolate chips and peanut butter. Microwave for 30 seconds at a time, stirring between each burst, until the mixture becomes silky and fully melted. This usually takes about 1–1½ minutes total.

If you prefer stovetop melting, use the double-boiler method to prevent burning.

Step 3: Add the Puffed Rice

Pour the puffed rice cereal into the warm chocolate mixture. Stir with a spatula until every grain is completely coated. This is where the crunch magic begins!

Step 4: Press and Shape

Transfer the mixture into your prepared baking dish. Use the back of a spoon or a spatula to press it down firmly. Compacting the mixture ensures clean slices and perfect crunchy texture.

Step 5: Chill and Set

Refrigerate the pan for at least 1 hour, or until completely firm. Once chilled, lift the block from the pan and cut it into bars, squares, or bite-sized pieces.

A Unique Touch: What Makes THESE Crunch Bars Special

While classic crunch bars rely solely on chocolate and cereal, the addition of peanut butter gives these their signature richness. They are sturdier, creamier, and more flavorful. Your homemade version also avoids preservatives, excessive sugars, and synthetic fillers, giving you a clean, satisfying treat.

Their simplicity means they’re endlessly customizable, too. Add crushed nuts for extra crunch, swirl in white chocolate for marbling, or drizzle caramel on top for a decadent twist. But even as they are—just three wholesome ingredients—they hit every craving: sweet, crunchy, creamy, nostalgic, and incredibly satisfying.

Helpful Tips for the Best Crunch Bars

  • Don’t overheat the chocolate. Slow melting keeps it glossy and smooth.

  • Press firmly in the pan. This creates neat, crisp bars.

  • Chill long enough. Warm bars will crumble, but cold bars slice perfectly.

  • Use creamy peanut butter. Chunky creates uneven texture.

  • Puffed rice, not rice krispies. Puffed rice gives a lighter, better crunch.

How to Store Your Crunch Bars

These bars keep beautifully:

  • In the fridge: Up to 2 weeks

  • In the freezer: Up to 3 months

  • At room temperature: 3–4 days in cooler climates

Store them in an airtight container or wrap individual bars in parchment for grab-and-go snacking.

Final Thoughts

These 3-Ingredient Homemade Crunch Bars are the perfect blend of convenience and indulgence. They come together in minutes, require no special skills, and taste far superior to store-bought candy bars. Whether you want a late-night treat, a lunchbox surprise, or a simple dessert that impresses with minimal effort, this recipe delivers every time.

Ragtag Candies

Ragtag Candies are the kind of playful, no-rules confection that feels like childhood in a bowl—colorful, crunchy, chewy, sweet, and just messy enough to be charming. The name “ragtag” fits perfectly because these candies don’t follow a single shape, flavor, or texture. Instead, they’re a joyful mix of homemade clusters, each one slightly different, each one delicious in its own way. Think of them as the dessert version of a mixed-bag treasure: bite-sized gems made from melted chocolate, caramel, nuts, crispy bits, and whatever else your creative side wants to throw in.

This unique recipe gives you a base formula, but the magic comes from the optional mix-ins—choose what you love, leave out what you don’t, and every batch becomes your own edible masterpiece. Whether you’re gifting a jar, filling a candy box, or snacking straight off the tray, Ragtag Candies always deliver joy.

 Ingredients (Makes 30–40 candies)

Base Candy Mix

  • 2 cups semi-sweet chocolate chips

  • 1 cup white chocolate chips

  • 3 tbsp butter

  • ½ cup dulce de leche or soft caramel

  • 1 tsp vanilla extract

  • Pinch of sea salt

Crunchy Mix-Ins

(Choose 3–5 options to get the “ragtag” effect)

  • 1 cup toasted chopped almonds

  • 1 cup Rice Krispies

  • 1 cup crushed pretzels

  • ½ cup chopped peanuts

  • ½ cup desiccated coconut

  • 1 cup mini marshmallows

  • ¾ cup crushed graham crackers

  • ½ cup dried cranberries

  • ½ cup toffee bits

  • ½ cup mini M&M candies

Instructions

Step 1 — Prepare Your Tray

Line a large baking sheet with parchment paper. This keeps the candies from sticking and makes cleanup a breeze. If you prefer more uniform candies, you can also line mini muffin tins with paper cups—but remember, Ragtag Candies are supposed to look a little wild.

Step 2 — Melt the Chocolates

Place both the semi-sweet and white chocolate chips in a heatproof bowl. Add the butter. Melt using one of these methods:

  • Double Boiler: Place the bowl over simmering water and stir until smooth.

  • Microwave: Heat in 20-second intervals, stirring each time to prevent burning.

The combination of both chocolates creates a beautiful marbled sweetness that coats the mix-ins perfectly.

Step 3 — Stir in the Caramel and Flavor

Once melted, add the dulce de leche (or caramel), vanilla extract, and sea salt. Stir until the mixture is silky, glossy, and fully combined. The caramel thickens the mix just enough to make perfect clusters.

Step 4 — Add the Ragtag Mix-Ins

This is where the fun starts.

Pour your chosen crunchy mix-ins into the chocolate mixture. Fold gently using a spatula so every piece gets coated. You want texture, so don’t overmix—you want pockets of marshmallow, crispy bits, pretzel crunch, and coconut flakes in each bite.

Step 5 — Scoop and Shape

Drop spoonfuls of the mixture onto the parchment paper. Let them form natural, imperfect clusters. The more uneven, the more delightful they look.

If using mini muffin cups, just scoop the mixture inside each liner.

Step 6 — Chill

Place the tray in the refrigerator for at least 45 minutes, or until the candies are firm. For a quicker set, freeze for 15–20 minutes.

 How to Serve Ragtag Candies

Ragtag Candies are perfect for:

  • Holiday gift boxes

  • School lunch treats

  • Movie night bowls

  • Party platters

  • Cookie-swap baskets

  • Midnight snacking (the best option of all)

They’re crunchy on the outside, chewy in the center, and full of surprising flavor in every bite. No two candies taste alike, and that’s exactly the charm.

Variations to Try

Chocolate Lover’s Ragtag

  • Oreos

  • Mini brownies bits

  • Chocolate-covered raisins

  • Extra dark chocolate drizzle

Peanut Butter Crunch

  • Peanut butter chips

  • Crushed peanuts

  • Pretzels

  • Reese’s Pieces

Tropical Ragtag

  • Coconut flakes

  • Dried pineapple

  • Banana chips

  • White chocolate drizzle

Spicy-Sweet Ragtag

  • Butter-toffee peanuts

  • Chili-lime cashews

  • Crushed cinnamon cereal

  • A sprinkle of tajín on top

 Storage Tips

  • Keep in an airtight container.

  • Refrigerate for best texture.

  • Lasts 2–3 weeks.

  • Can be frozen for up to 3 months.

 Final Thoughts

Ragtag Candies prove that desserts don’t need rules to be unforgettable. They embrace chaos and turn it into something magical—a candy bowl full of color, crunch, sweetness, and surprises. Because they’re so easy to customize, you can create a new version every time you make them. Whether you prefer salty-sweet, chocolaty, fruity, or crunchy combinations, these candies adapt to your cravings without fail.

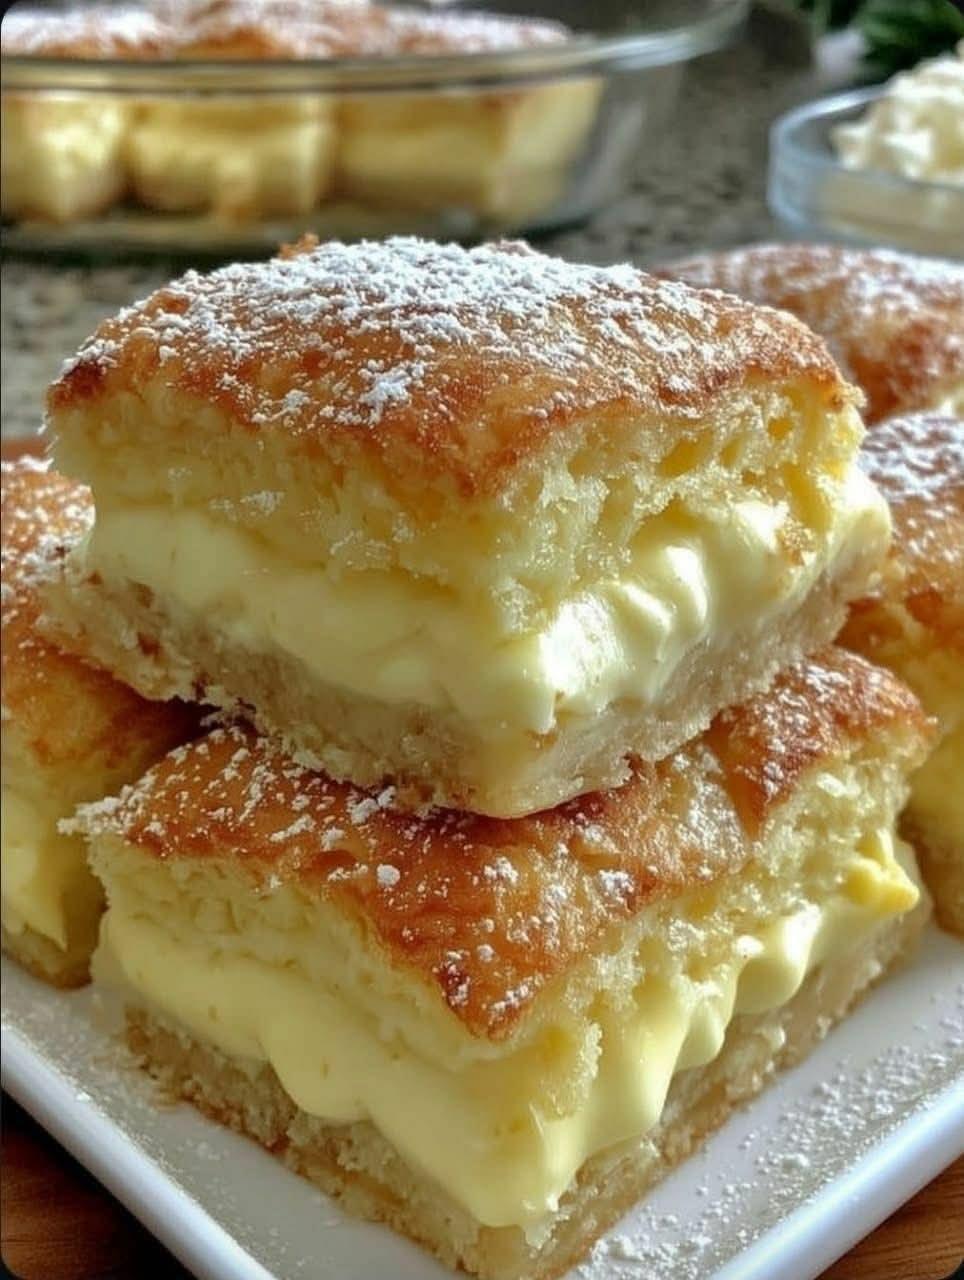
Cream Cheese Custard Bars

Cream Cheese Custard Bars are the kind of dessert that stops conversations and makes everyone ask, “What on earth is in this?” They have three dreamy layers: a tender buttery crust, a velvety cream cheese filling, and a glossy custard top that bakes into perfection. The result is a bar that’s soft but structured, sweet but balanced, rich but airy—everything you want in a dessert you can slice and serve effortlessly. This unique version introduces a clever twist: a warm vanilla-milk custard poured over the cream cheese layer to create a stunning two-texture effect that melts in your mouth.

These bars are perfect for holidays, tea-time gatherings, Sunday brunch, potlucks, or late-night cravings when you want something luxurious but easy to make. The ingredients are simple, yet their combination delivers a bakery-quality treat with a homemade soul. Let’s dive in.

 Ingredients

For the Buttery Crust

  • 1 ½ cups all-purpose flour

  • ½ cup powdered sugar

  • ¼ teaspoon salt

  • ¾ cup unsalted butter, cold and cubed

For the Cream Cheese Layer

  • 16 oz (450 g) cream cheese, softened

  • ½ cup granulated sugar

  • 2 tablespoons cornstarch

  • 2 large eggs

  • 1 teaspoon vanilla extract

  • ¼ cup sour cream

For the Silky Custard Topping

  • 1 ½ cups whole milk

  • ⅓ cup granulated sugar

  • 1 tablespoon cornstarch

  • 2 large egg yolks

  • 1 tablespoon butter

  • 1 teaspoon vanilla extract

 Instructions

1. Make the Buttery Shortbread Base

This crust is the foundation—soft, sandy, rich, and sturdy enough to hold two creamy layers without breaking.

  1. Preheat your oven to 350°F (175°C) and line the bottom of an 8×10 or 9×9 baking pan with parchment paper.

  2. In a mixing bowl, whisk together flour, powdered sugar, and salt.

  3. Add in the cold cubed butter. Use clean fingertips or a pastry cutter to rub the butter into the dry ingredients until the mixture resembles coarse crumbs.

  4. Pour the mixture into the prepared baking dish and press firmly into an even layer.

  5. Bake for 16–18 minutes, or until the edges appear lightly golden.

  6. Set aside to cool slightly while preparing the next layer.

2. Prepare the Cream Cheese Layer

This layer is thick, tangy, and ultra-smooth—a perfect contrast to the custard.

  1. Beat softened cream cheese in a bowl until creamy and lump-free.

  2. Add granulated sugar and cornstarch. Beat again until smooth. Cornstarch keeps the filling stable and velvety.

  3. Add eggs one at a time, mixing on low to avoid incorporating air.

  4. Mix in vanilla extract and sour cream.

  5. Pour the cream cheese mixture over the cooled crust and spread it evenly with a spatula.

  6. Bake again for 20–22 minutes, just until the edges are set but the center jiggles slightly.

  7. Remove from the oven and cool for at least 15 minutes before adding the custard.

3. Make the Silky Vanilla Custard

This custard is the star—it forms a glossy, smooth layer that blends with the cream cheese in the most luxurious way.

  1. In a saucepan, whisk milk, sugar, and cornstarch until no lumps remain.

  2. In a small bowl, whisk the egg yolks.

  3. Place saucepan over medium heat and cook until steam rises.

  4. Slowly pour a few spoonfuls of the hot milk mixture into the egg yolks (this tempers the eggs and prevents scrambling).

  5. Pour yolk mixture back into the saucepan and whisk continuously over medium heat until thickened and pudding-like.

  6. Remove from heat and stir in butter and vanilla extract.

  7. Let the custard cool for 5–8 minutes, stirring occasionally to prevent skin from forming.

4. Assemble & Final Bake

Here comes the magic—layering!

  1. Pour the warm custard gently over the cream cheese layer. Use a spoon to guide it and avoid disturbing the layer beneath.

  2. Smooth the top.

  3. Bake an additional 8–10 minutes at 325°F (160°C) just to help the custard settle.

  4. Allow the pan to cool completely at room temperature.

  5. Refrigerate for at least 4 hours, but overnight gives the cleanest slices.

 Serving & Finishing Touches

  • Slice with a hot, clean knife for perfect edges.

  • Dust with powdered sugar or sprinkle lightly with nutmeg or cinnamon for warmth.

  • Top with whipped cream or fresh berries for a fancy finish.

  • For extra indulgence, drizzle with caramel or white chocolate.

These bars are best enjoyed cold, but some people love them slightly softened at room temp for 10 minutes.

 Storage

  • Refrigerate up to 5 days in an airtight container.

  • Freeze slices individually for up to 2 months. Thaw overnight in the fridge.

 What Makes This Recipe Unique?

Unlike classic cheesecake bars that stop at one creamy layer, this recipe combines two luxurious textures—a dense cream cheese filling and a soft, smooth custard topper. When chilled, they merge into one dreamy bite where the custard slightly melts into the cream cheese, creating a silky sensation no regular bar can match. The shortbread crust is intentionally less sweet so the upper layers shine without becoming heavy or cloying. Each ingredient has a purpose, each step adds texture, and the final result tastes like something from a high-end bakery.

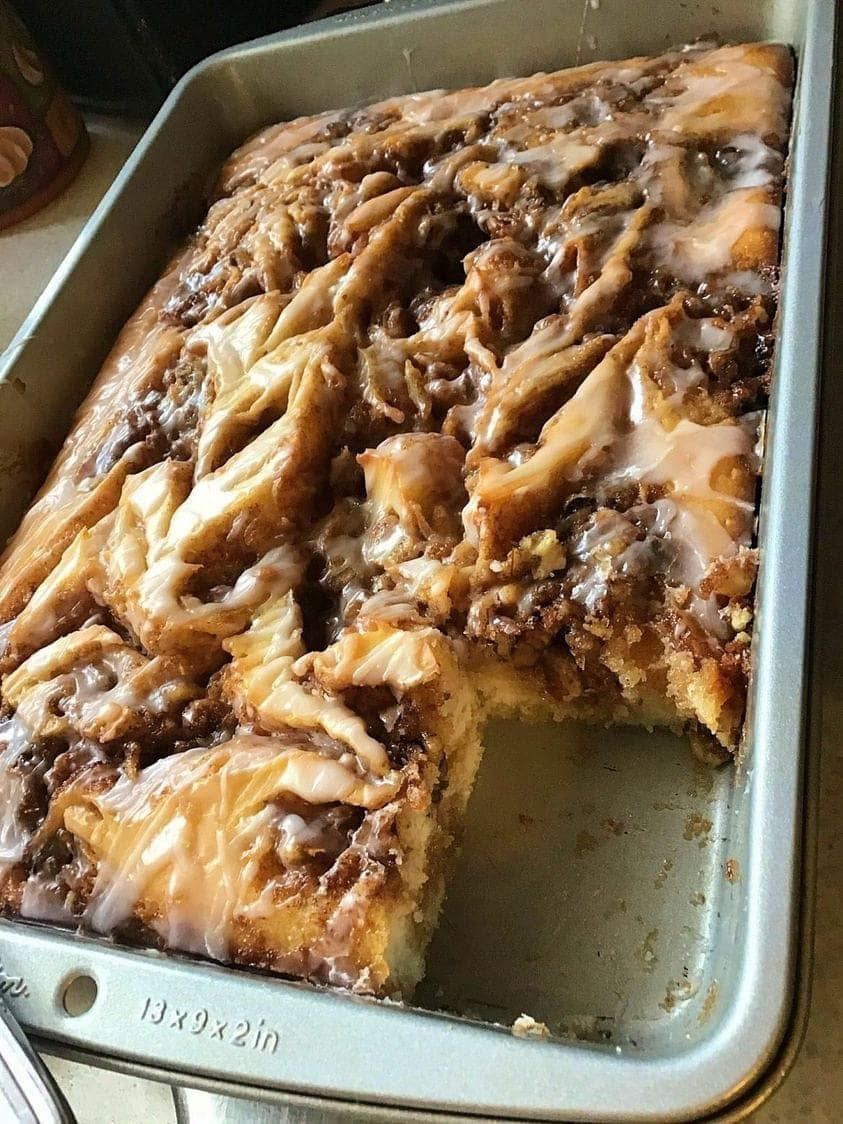
Cinnabon Cinnamon Roll Cake

If you’ve ever stood in line at Cinnabon, drawn in by the aroma of warm cinnamon, melting butter, and velvety cream cheese frosting, this cake is your shortcut to the same indulgence at home—without needing to knead or roll a single piece of dough. This recipe transforms all the flavors of a classic Cinnabon cinnamon roll into a tender, buttery cake swirled with cinnamon ribbons and topped with a dreamy glaze that melts into every crack. It’s the perfect dessert for holidays, breakfast gatherings, or anytime you crave a warm bakery-style treat in minutes.

Ingredients

For the Cake Batter

  • 3 cups all-purpose flour

  • 1 cup granulated sugar

  • 1 tablespoon baking powder

  • ½ teaspoon salt

  • 1½ cups whole milk

  • 2 large eggs

  • 2 teaspoons vanilla extract

  • ½ cup melted butter (unsalted)

For the Cinnamon Swirl

  • 1 cup softened butter

  • 1 cup brown sugar (packed)

  • 2 tablespoons all-purpose flour

  • 1 tablespoon ground cinnamon

  • ½ teaspoon nutmeg (optional for depth)

For the Cinnabon-Style Cream Cheese Frosting

  • 4 oz cream cheese (softened)

  • ¼ cup butter (softened)

  • 2 cups powdered sugar

  • 1 teaspoon vanilla extract

  • 2–3 tablespoons warm milk

Instructions

Step 1 — Make the Cake Base

Start by preheating your oven to 350°F (175°C). Grease a 9×13-inch baking pan.
In a large mixing bowl, whisk together the flour, sugar, baking powder, and salt. Add the milk, eggs, vanilla extract, and melted butter. Mix until the batter is smooth and lump-free. It should be pourable, similar to pancake batter. Pour this batter into your prepared pan and spread it evenly.

This base is the foundation of the cake—soft enough to mimic cinnamon roll dough but sturdy enough to hold the gooey swirls.

Step 2 — Prepare the Cinnamon Filling

In another bowl, combine the softened butter, brown sugar, flour, cinnamon, and nutmeg. The mixture should be thick like a paste. Drop spoonfuls of this cinnamon mixture evenly over the cake batter.

Using a butter knife, swirl the mixture gently into the batter. Don’t over-mix; you want deep cinnamon pockets that melt into the cake as it bakes, creating that signature Cinnabon gooey texture.

Step 3 — Bake to Perfection

Bake the cake for 30–35 minutes. The edges should be golden, but the center should remain soft and slightly springy. Avoid overbaking; the magic of a Cinnabon treat is the moist, almost-melting interior.

As the cake bakes, your kitchen will smell like a Cinnabon bakery—warm cinnamon, sweet sugar, and caramelized butter.

Step 4 — Make the Cream Cheese Frosting

In a medium bowl, beat together the softened cream cheese and butter until creamy. Add the powdered sugar and vanilla extract. Gradually add warm milk, 1 tablespoon at a time, until the frosting reaches a smooth, pourable consistency.

This glaze should be thick enough to coat the cake but fluid enough to melt into its warm surface, creating that iconic glossy swirl you see on Cinnabon rolls.

Step 5 — Frost While Warm

Once the cake comes out of the oven, let it cool for about 5 minutes. While the cake is still warm, pour the cream cheese frosting over the top. It will seep into the swirls and cracks, creating a gooey, delicious finish.

Slice into squares and serve warm for the full Cinnabon experience.

Why This Recipe Works

This recipe reimagines the famous Cinnabon cinnamon roll in a quicker, cake-style format—no yeast, no rising, no kneading. Yet it maintains all the iconic elements:

1. Gooey Cinnamon Filling

Brown sugar, butter, and cinnamon melt together into a glossy ribbon that mimics the center of a cinnamon roll—that irresistible spot everyone fights over.

2. Tender, Melt-in-Your-Mouth Cake

Using milk, eggs, and real butter ensures the cake stays moist and fluffy, resembling the soft layers of a cinnamon roll without the labor.

3. Cream Cheese Frosting

Cinnabon is famous for its cream cheese frosting, and this version matches that creamy, buttery sweetness perfectly. Pouring it over a warm cake ensures it melts into the surface.

Serving Ideas

  • Breakfast Delight: Serve with hot coffee or a vanilla latte.

  • Holiday Brunch: Perfect for Christmas, Eid breakfast, or family gatherings.

  • Dessert Mode: Serve warm with a scoop of vanilla ice cream.

  • Gift-able Treat: Cut into squares, box them, and share—they stay moist even the next day.

Tips for Best Results

  • Use room-temperature ingredients for smoother mixing.

  • Swirl the cinnamon mixture lightly—deep pockets taste better.

  • Don’t skip the cream cheese—it’s the heart of the Cinnabon flavor.

  • If you want extra gooeyness, drizzle an additional 2–3 tablespoons melted butter over the cake before baking.

Storing & Reheating

  • Store: Keep leftovers covered at room temperature for 2 days or refrigerate for up to 5 days.

  • Reheat: Microwave slices for 10–15 seconds for a fresh-from-the-bakery taste.

  • Freeze: Wrap slices individually and freeze up to 3 months. Thaw overnight and warm before serving.

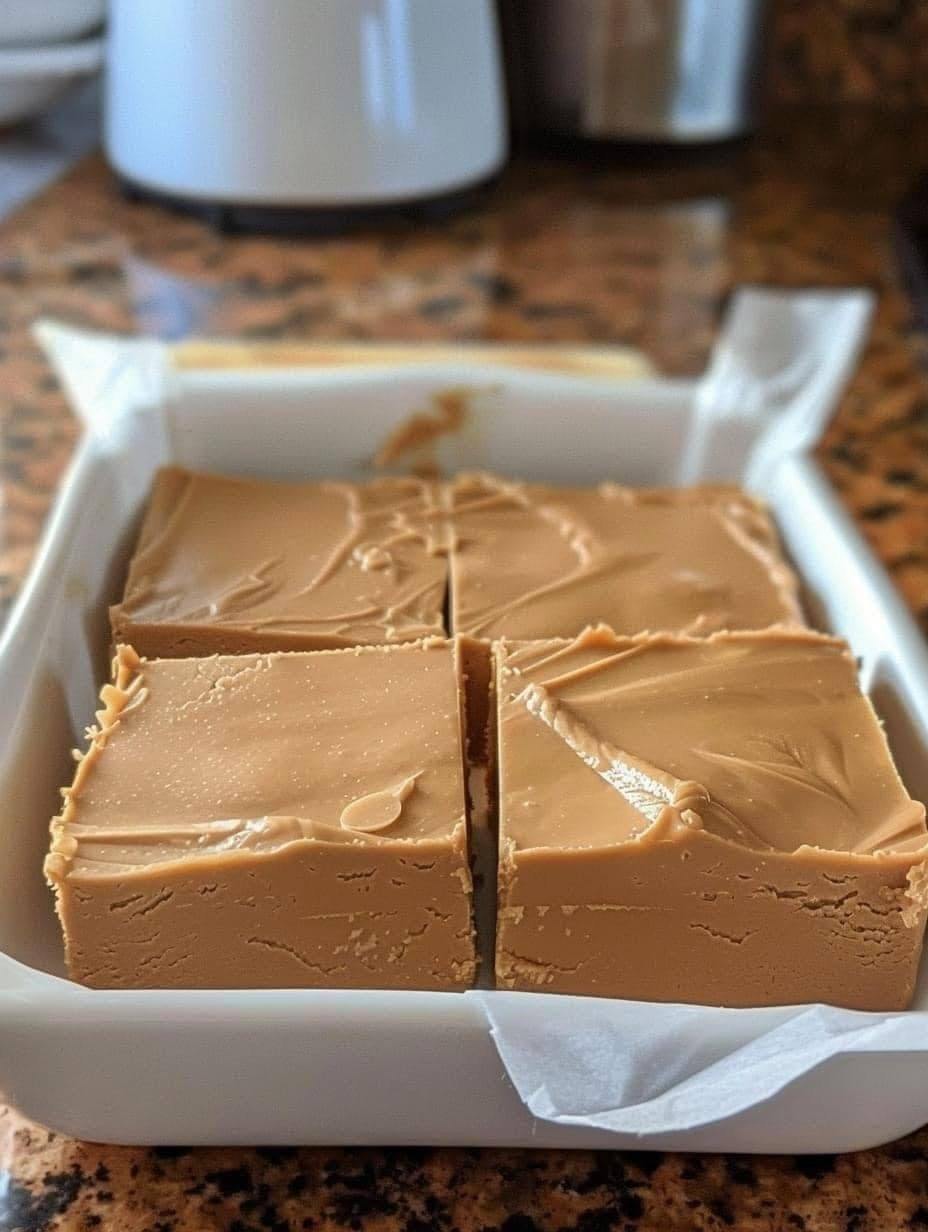
2-Ingredient Peanut Butter Fudge

There are recipes that surprise you with their complexity, and then there are recipes that surprise you with their simplicity. This 2-Ingredient Peanut Butter Fudge belongs to the second category — a dessert so delicious, so velvety, so melt-in-your-mouth soft, that it feels impossible it was made from only two ingredients. Yet it is. No mixers, no candy thermometers, no long boiling stages. Just two pantry staples coming together to create a fudge that rivals anything from a bakery. This is the kind of recipe people beg you for, and they’re stunned when you reveal the secret: “Just two ingredients.”

What makes this recipe truly magical is how those two ingredients transform when heated. The peanut butter becomes silky and warm, while the sweet base melts into a glossy mixture that firms into perfect fudge as it cools. The texture is thick and creamy, with a slightly chewy finish. The flavor is deep, nutty, nostalgic, and comforting — like childhood peanut butter sandwiches reimagined into a grown-up dessert.

Below is a unique, perfectly balanced version of this unbelievably easy fudge, with expert tips to ensure it sets beautifully every time.

Ingredients (2 Ingredients Only!)

  • 1 cup creamy peanut butter (the no-stir variety works best)

  • 1 can (14 oz / 396 g) sweetened condensed milk

That’s it. No butter, no sugar, no extras — unless you want to add some optional enhancements later.

Instructions

1. Warm the peanut butter

Scoop your creamy peanut butter into a medium saucepan. Place it over low heat and let it warm gently. This loosens the peanut butter and makes it easier to blend with the condensed milk. Stir continuously to prevent sticking at the bottom.

2. Add the sweetened condensed milk

Pour the entire can of sweetened condensed milk into the saucepan. As soon as the milk hits the peanut butter, you’ll see the mixture beginning to thicken and turn glossy.

3. Stir until perfectly smooth

Increase the heat very slightly (still low-medium). Stir the mixture constantly for 3–5 minutes until everything is fully combined, silky, and lump-free. Avoid boiling; gentle heating is the key.

4. Prepare your pan

Line a small square dish (6×6 or 8×8 inches) with parchment paper, leaving an overhang for easy lifting later. If you want extra neat edges, lightly grease the parchment.

5. Pour and smooth

Transfer the hot fudge mixture into the dish. Spread evenly with a spatula, smoothing the top until it looks glossy and level.

6. Chill and set

Place the dish in the refrigerator for 2–3 hours or until firm enough to slice. Overnight chilling produces the best texture. Once set, lift the fudge using the parchment, cut into small squares, and store in an airtight container.

How It Works — The Science of 2-Ingredient Fudge

Sweetened condensed milk contains sugar that prevents crystallization and milk solids that thicken when cooled. Peanut butter contains natural fats and proteins that firm up when cold. Together, they create a self-setting fudge mixture without the need for butter, powdered sugar, or stovetop candy techniques. It’s dessert chemistry made deliciously simple.

Variations to Make It Uniquely Yours

Even though the original recipe uses only two ingredients, you can personalize it with optional add-ins:

1. Crunchy Peanut Twist

Use crunchy peanut butter instead of creamy for an added bite.

2. Peanut Butter Swirl Fantasy

Drizzle a small amount of melted dark chocolate over the top and swirl with a toothpick before chilling.

3. Salted Peanut Butter Fudge

Sprinkle a pinch of flake sea salt on top for a gourmet finish.

4. Peanut Butter Cookie Fudge

Fold in crushed digestive biscuits or shortbread crumbs before pouring into the pan.

5. Cinnamon Peanut Butter Fudge

Add ½ teaspoon cinnamon to the mixture for warmth and depth.

Expert Tips for Perfect Fudge Every Time

Use regular peanut butter, not natural

Natural peanut butter separates, which can cause greasy or crumbly fudge. Stick to brands like Skippy, Jif, Adam’s no-stir, or similar creamy types.

Low heat is essential

High heat can scorch the mixture or affect its setting properties. Slow and steady wins.

Refrigerate fully before cutting

If you slice too early, the squares will lose their shape. Cold fudge cuts cleanly and holds beautifully.

Store it properly

Keep in an airtight container in the fridge for up to 7 days. Or freeze for up to 2 months.

Serving Suggestions (For Maximum Enjoyment)

  • Enjoy with a cup of hot chai or coffee — the warm drink makes the fudge even creamier.

  • Pair with vanilla ice cream for a hot-cold dessert contrast.

  • Use it as a topping: slightly warm a square and drizzle over pancakes or waffles.

  • Wrap squares in mini parchment pieces for gifting — simple, sweet, and beautiful.

Why You’ll Love This Recipe

This 2-ingredient peanut butter fudge is the kind of treat everyone can make, even on the busiest day. No fancy tools, no mess, and no culinary experience required. Yet the result feels luxurious — like something you’d serve during holidays, parties, or special family moments. It’s budget-friendly, fast, and incredibly satisfying. Every bite delivers that soft, creamy, rich peanut butter flavor people adore.

If you need a last-minute dessert, a sweet craving fix, or an edible gift that makes you look like a kitchen pro, this recipe is your new secret weapon.

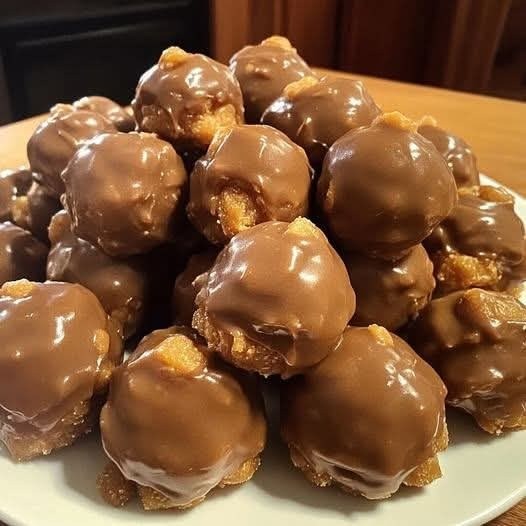
Butterfinger Balls

There are recipes you make because they’re easy, and then there are recipes you make because they instantly transport you back to every sweet childhood memory you’ve ever had. Butterfinger Balls fit both categories—simple enough for a tired afternoon when you crave something indulgent, yet magical enough to feel like a dessert crafted in a candy shop. Their signature combination of creamy peanut butter, crushed crispy bars, and velvety chocolate coating creates a bite-sized treat that delivers crunch, meltiness, and nostalgia all at once.

This unique version elevates the classic Butterfinger Ball with deeper flavor, smoother texture, and a technique that keeps them from softening too fast. The secret? A touch of salted butter for richness, a splash of vanilla for warmth, and a double-tempered chocolate shell that snaps beautifully when you bite into it. Whether you make these for a party tray, holiday tins, or just to stash in your freezer, they always disappear.

 Why This Recipe Works

  • No baking required — ideal for quick prep.

  • Perfect balance of creamy and crunchy — peanut butter blends into the crushed Butterfinger bars.

  • Freezer-friendly — stays firm and delicious for weeks.

  • Customizable — you can coat in milk, dark, or white chocolate.

  • Crowd-pleaser — tastes like a gourmet candy shop treat.

 Ingredients

Makes 22–28 Butterfinger Balls

  • 1 ½ cups creamy peanut butter (not natural-style)

  • 4 tablespoons salted butter, softened

  • 1 ½ cups powdered sugar, sifted

  • 1 teaspoon vanilla extract

  • 1 pinch of salt

  • 6 full-size Butterfinger candy bars, crushed finely
    (or 2 cups mini bar pieces)

  • 2 ½ cups chocolate chips, milk or semi-sweet

  • 1 tablespoon coconut oil (optional, for smoother coating)

 Step-by-Step Instructions1. Crush the Candy Bars

Place the Butterfinger bars in a zip-top bag and beat them with a rolling pin until they become fine, sandy crumbs. A few tiny chunks are okay—they add texture—but aim for mostly fine pieces so they blend well into the dough.

Tip: Freezing the bars for 10 minutes before crushing helps them break more cleanly.

2. Make the Peanut Butter Base

In a large mixing bowl, beat together the peanut butter, softened butter, and vanilla extract until smooth, creamy, and fully combined. Add the powdered sugar gradually, mixing as you go, until a thick dough forms.

The dough should feel pliable like cookie dough—not sticky, not crumbly. If it’s too sticky, add 1–2 more tablespoons of powdered sugar.

3. Fold in the Butterfinger Crumbs

Pour your crushed candy bars into the mixture and gently fold them in with a spatula. You’ll see the mixture transform into a speckled dough filled with crunchy golden bits. This step is where the aroma becomes irresistible.

4. Roll Into Balls

Scoop out tablespoon-sized portions and roll them between your palms to form smooth balls. Place them on a parchment-lined tray.

If the mixture is soft, refrigerate for 10–15 minutes before rolling—it will make shaping easier and cleaner.

5. Chill the Balls

Place the tray in the freezer for 20 minutes. This step is essential—it firms up the peanut butter centers so they don’t melt or deform when dipped in warm chocolate.

6. Melt the Chocolate

In a microwavable bowl, heat the chocolate chips with coconut oil in 20-second intervals, stirring between each. Continue until glossy and fully melted.

The coconut oil isn’t required, but it helps create a silky, shiny shell that doesn’t crack.

7. Dip and Coat

Using a fork or dipping tool, gently lower each chilled ball into the melted chocolate. Tap the fork against the side of the bowl to remove excess chocolate, then place the dipped ball back onto the parchment.

For a decorative touch, drizzle a little extra chocolate over the tops or sprinkle with leftover Butterfinger crumbs.

8. Set and Serve

Refrigerate for 15 minutes or let them sit at room temperature until the chocolate shell hardens. Once set, the Butterfinger Balls are ready to enjoy!

 Tips for Perfect Butterfinger Balls

✔ Use shelf-stable peanut butter.

Natural peanut butter separates and leads to oily or too-soft centers.

✔ Freeze before dipping.

It keeps the shape perfect and prevents streaky chocolate.

✔ Chocolate too thick?

Stir in a teaspoon of coconut oil or microwavable shortening.

✔ Want a firmer texture?

Add 2–3 more tablespoons of powdered sugar.

✔ Want bite-sized minis?

Roll smaller balls and dip using toothpicks.

 Flavor Twists (Make Them Your Signature Treat)

1. White Chocolate Butterfinger Balls

Dip in white chocolate and drizzle with milk chocolate.

2. Butterfinger Almond Crunch

Add ¼ cup finely chopped almonds to the dough.

3. Espresso Butterfinger Balls

Mix ½ teaspoon instant espresso into the chocolate coating for a mocha finish.

4. Salted Peanut Butterfinger Balls

Sprinkle sea salt flakes on top before the coating sets.

 Storage

  • Refrigerator: Up to 2 weeks in an airtight container

  • Freezer: Up to 3 months — thaw for 5 minutes before eating

  • Room Temp: About 2–3 days if the weather is cool

They keep incredibly well and taste even better chilled.

Serving Ideas

Butterfinger Balls are perfect for:

  • Holiday dessert platters

  • Birthday party trays

  • Gift boxes and treat bags

  • Late-night sweet cravings

  • A no-bake summer dessert

Pair them with coffee, hot chocolate, or even a scoop of vanilla ice cream for an indulgent treat.

 Final Thoughts

These unique Butterfinger Balls offer everything you love about the candy bar but in a bite-sized, melt-in-your-mouth treat that requires zero baking. With a creamy center, crunchy caramelized flakes, and a smooth chocolate shell, each bite delivers nostalgia, richness, and pure candy bliss. They’re simple enough for beginners yet impressive enough to feel like a gourmet confection. Once you start making them, you’ll find yourself returning to this recipe every time you need something delicious, quick, and unforgettable.