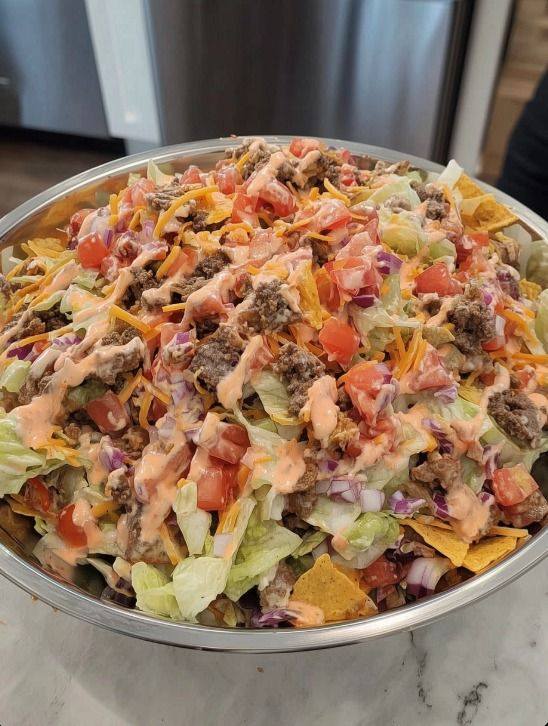
Nana’s Family-Favorite Dorito Taco Salad

There are recipes you cook because they’re trendy, and then there are recipes you cook because they taste like home. Nana’s Family-Favorite Dorito Taco Salad is firmly in the second category. This dish didn’t come from a cookbook or a celebrity chef—it came from years of potlucks, birthday parties, backyard barbecues, and holiday gatherings where Nana’s salad was always the first bowl scraped clean. Crunchy, fresh, tangy, creamy, and packed with taco-seasoned beef and bold Dorito flavor, this salad is the perfect blend of comfort and fun. It’s the kind of dish that brings families back to the table, forks clinking, plates emptying, and stories flowing.

What makes this taco salad truly special isn’t just the ingredients—it’s the balance of textures and flavors. The crisp lettuce, juicy tomatoes, sharp cheese, and crunchy Doritos combine with warm seasoned beef and a zesty dressing that Nana perfected through trial and error. This recipe captures that magic so you can bring the same joy to your own gatherings.

 Ingredients

For the Salad Base

  • 1 large head iceberg lettuce, chopped into bite-size pieces

  • 2 medium tomatoes, diced

  • 1 cup canned kidney beans, rinsed and drained

  • 1 cup canned black beans, rinsed and drained

  • 1 cup whole kernel corn (canned or thawed from frozen)

  • 1 green bell pepper, diced

  • 1 small red onion, finely chopped

  • 2 cups shredded cheddar cheese

  • 1 cup sliced black olives (optional but recommended)

  • 1–2 cups crushed Nacho Cheese Doritos (or more for topping)

For the Taco Beef

  • 1 lb (450g) ground beef

  • 2 tbsp taco seasoning (store-bought or homemade)

  • ½ cup water

  • 1 tbsp olive oil

For Nana’s Creamy Zesty Dressing

  • 1 cup Catalina dressing

  • ½ cup sour cream

  • ⅓ cup mayonnaise

  • 1 tbsp lime juice

  • 1 tsp chili powder

  • ½ tsp garlic powder

  • Salt and pepper to taste

 Step-by-Step Instructions

Step 1: Prepare the Salad Vegetables

Nana always said the secret to this salad was cold, crisp vegetables. Start by washing and chopping the lettuce into small bite-size pieces. Dice the tomatoes, bell pepper, and onion. Place all the chopped vegetables into a large, deep salad bowl—one big enough to mix everything easily. Add the corn, kidney beans, black beans, and black olives. Give it all a gentle toss, then refrigerate while you prepare the beef.

Step 2: Make the Taco Beef

Heat the olive oil in a skillet over medium-high heat. Add the ground beef and cook, breaking it up into crumbles. Once browned, drain excess fat. Sprinkle in the taco seasoning, add the water, and stir. Let it simmer until the liquid reduces, coating the beef in rich, aromatic seasoning. Allow the beef to cool slightly—Nana always reminded us not to add it piping hot, or it could wilt the lettuce.

Step 3: Mix Nana’s Signature Dressing

In a bowl, whisk together the Catalina dressing, sour cream, mayonnaise, lime juice, chili powder, and garlic powder. This dressing is the heart of the recipe: creamy, tangy, lightly sweet, and perfectly spiced. Taste and adjust seasoning as needed. Some family members prefer a bit more lime for brightness; others like an extra spoon of sour cream for richness.

Step 4: Combine the Salad

Add the slightly cooled taco beef to the chilled vegetable mixture. Sprinkle the cheddar cheese over the top. Pour about two-thirds of the dressing over the salad and gently fold everything together. You want every piece to be lightly coated without getting soggy.

Step 5: Add the Doritos

This is where Nana always insisted on timing: Doritos go in LAST, right before serving. Lightly crush the chips in the bag, then fold them into the salad for that iconic crunch. Hold back a handful to sprinkle on top for presentation.

Step 6: Taste & Adjust

Add extra dressing if you like the salad creamier, or toss in more crushed Doritos if you want it crunchier. Nana always said the best taco salad “shouldn’t need a fork to dig—it should come up to the fork with enthusiasm.”

Serving Tips

  • Serve immediately while the Doritos are still crisp.

  • For gatherings, keep Doritos on the side and let guests add them on their own.

  • Add jalapeños for spice lovers.

  • Swap ground beef for ground turkey or shredded chicken if preferred.

  • This salad pairs wonderfully with iced tea, lemonade, or a cold soda.

 Why This Recipe Works

Nana’s version of Dorito Taco Salad stands out because it manages to be both indulgent and refreshing. The vegetables provide freshness, the beef brings savory depth, and the dressing ties everything together with a nostalgic sweet-tangy kick. But the Doritos? They’re the irresistible finishing touch—the crunch that keeps you coming back for seconds. It’s the perfect potluck dish because it feels familiar yet special, comforting yet exciting.

This salad is more than a recipe—it’s a memory in a bowl. It’s the sound of kids laughing around a picnic table, the smell of seasoned beef wafting through the house, and the way everyone rushes to the serving bowl hoping the Doritos haven’t run out. Now that you have Nana’s treasured recipe, you can carry on the tradition and create new memories of your own.

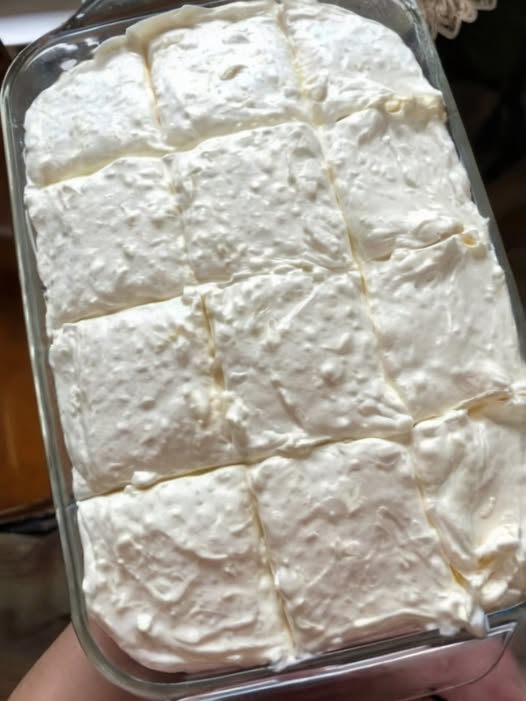
Creamsicle Orange Sugar Cookies

There are desserts that taste good… and then there are desserts that take you straight back to childhood. Creamsicle Orange Sugar Cookies do exactly that. One bite and you’re standing outside again, sun beating down, holding a cold orange creamsicle that drips onto your fingers before you can catch it. This recipe captures that memory in cookie form—soft, thick, tender, and bursting with a dreamy blend of citrus and vanilla cream. They’re nostalgic, refreshing, and different from every “plain sugar cookie” you’ve ever tasted.

What makes them truly unique is the triple-layer citrus infusion: fresh orange zest, freshly squeezed orange juice, and a touch of natural orange extract. Combine that with a velvety vanilla cream glaze and you have a cookie that is bright, fragrant, and simply unforgettable. Let’s bake the magic.

Ingredients

For the Cookies

  • 2 ¾ cups all-purpose flour

  • 1 teaspoon baking soda

  • ½ teaspoon baking powder

  • ½ teaspoon salt

  • 1 cup unsalted butter, softened

  • 1 ½ cups granulated sugar

  • 1 large egg

  • 1 egg yolk

  • 1 tablespoon orange zest (fresh!)

  • 3 tablespoons fresh orange juice

  • 1 teaspoon orange extract (or extra zest if not using extract)

  • 1 tablespoon vanilla extract

  • Optional: orange food coloring for that creamsicle hue

For the Creamsicle Glaze

  • 1 ¼ cups powdered sugar

  • 2 tablespoons melted butter

  • 1–2 tablespoons orange juice (to thin)

  • 1 teaspoon vanilla extract

  • ½ teaspoon orange zest

Instructions

1. Create the Citrus Base

In a bowl, combine the flour, baking soda, baking powder, and salt. Whisk and set aside. This is your structure—simple but important.

Now in a large mixing bowl, cream the butter and sugar until pale and fluffy. This step is essential. You’re not just mixing; you’re whipping tiny air bubbles into the butter so your cookies bake soft and tender instead of flat and dense.

Add the egg and the yolk. Why the extra yolk? Because adding one yolk without the white makes the cookies richer, softer, and more melt-in-your-mouth.

Mix in the orange zest, orange juice, orange extract, and vanilla. Take a moment and inhale—this scent alone will convince you these cookies are going to be amazing.

2. Build the Dough

Slowly add your dry mixture into the butter mixture. Mix until the dough comes together. It will be soft, slightly sticky, and fragrant. If you want that signature creamsicle color, add a drop or two of orange food coloring.

Cover the bowl and let the dough rest in the fridge for 30 minutes. This prevents spreading and intensifies the citrus flavor.

3. Roll & Bake

Preheat your oven to 350°F (175°C). Line a baking sheet with parchment paper.

Roll the dough into balls, about 1 ½ tablespoons each. You can roll them in sugar for an extra sparkle if you want a crispy edge.

Bake for 9–11 minutes, or until the centers are just barely set. The cookies should look puffy—not brown. They continue cooking as they cool, so resist the temptation to overbake.

Let them cool completely before glazing.

4. Make the Creamsicle Glaze

In a small bowl, whisk the powdered sugar, melted butter, orange juice, orange zest, and vanilla. Add more powdered sugar for thickness or more juice for a thinner drizzle.

Spoon or drizzle the glaze over each cooled cookie. The creamy vanilla-orange topping completes the classic creamsicle flavor.

Why These Cookies Are So Special 

Creamsicle Orange Sugar Cookies aren’t just another cookie on the tray—they’re the softest bite of sunshine you’ll ever bake. What makes this recipe special is how it transforms an iconic summer treat into something you can enjoy year-round. Most citrus cookies rely on extract alone or just zest, but this recipe uses all three: zest, juice, and extract. That combination brings a bold, bright, natural flavor that tastes like orange but not artificial or candy-like.

Another key detail is the texture. These cookies aren’t crispy. They’re cloud-soft in the center, slightly chewy around the edges, and perfectly puffy. The mix of whole egg and extra yolk boosts richness while the chilled dough prevents spreading, giving you that perfect bakery-style height.

But the true magic? The glaze. Instead of a plain powdered sugar drizzle, this glaze is designed to taste like the creamy center of a creamsicle pop. Melted butter gives it body, orange zest adds brightness, and the vanilla pulls everything together. When it sets, it creates a glossy, creamy shell that makes every bite taste balanced and smooth—bright citrus meets velvety vanilla, just like the classic frozen treat.

These cookies also have a nostalgic charm. They remind people of childhood summers, ice cream trucks, or sneaking into the freezer after dinner. Yet they’re sophisticated enough to serve at parties, holidays, or even as a gift. Their scent fills the kitchen with sunshine, and their color—especially with a bit of food coloring—is cheerful, warm, and inviting.

Unlike many orange cookies that become dry after a day, these stay soft for several days thanks to the yolk and citrus juice. In fact, they often taste even better the next day as the flavors settle into the dough.

You can dress them up with extra zest, use them as sandwich cookies with vanilla buttercream, or even drizzle them with white chocolate. But honestly? They’re perfect exactly as written.

Classic Pig Pickin Cake

Among the many beloved desserts in Southern kitchens, the Classic Pig Pickin’ Cake holds a special place. Originally popular at outdoor pig roasts (known as “pig pickins”), this cake became the star of the table not because it was complicated, but because it was effortlessly refreshing. With its bright mandarin oranges, fluffy pineapple cream frosting, and sunshine-yellow crumb, it’s the kind of cake that makes you smile before you even take the first bite. This unique recipe elevates the traditional version with deeper citrus notes, a softer crumb, and a frosting so airy that it feels like eating a sweet, tropical cloud.

Why This Pig Pickin’ Cake Stands Out

This recipe is crafted to stay true to Southern charm but includes subtle upgrades:

  • Fresh orange zest to enhance citrus fragrance

  • A softer, richer cake texture

  • A beautifully stable pineapple-whipped frosting

  • Balanced sweetness—light, fruity, never heavy

It’s the perfect dessert for warm weather, birthdays, potlucks, BBQs, or any time you want to bring a burst of sunshine to the table.

Ingredients

For the Cake

  • 1 box yellow cake mix

  • 4 large eggs

  • ½ cup vegetable oil

  • 1 cup mandarin oranges (with juice), lightly mashed

  • ½ cup sour cream

  • 1 tsp orange zest (optional but highly recommended)

  • 1 tsp vanilla extract

For the Pineapple Whipped Frosting

  • 1 can (20 oz) crushed pineapple with juice

  • 1 package (3.4 oz) instant vanilla pudding mix

  • 1 tub (8 oz) whipped topping (Cool Whip-style)

  • 1 tsp lemon zest (optional)

For Decoration

  • Extra mandarin orange slices

  • Pineapple tidbits

  • Toasted coconut (optional but wonderful)

Instructions

1. Prepare the Cake Batter

In a large mixing bowl, combine the yellow cake mix, eggs, oil, sour cream, vanilla, and fresh orange zest. Mix until smooth and creamy. Add the lightly mashed mandarin oranges with their juice, folding gently so the pieces stay visible in the final cake. These oranges not only add flavor, but their natural acidity keeps the cake tender and moist.

2. Bake to Golden Perfection

Grease two 9-inch round cake pans or a single 9×13-inch dish. Pour in the batter and bake at 350°F (175°C) for 22–28 minutes. The cakes should be lightly golden and spring back when touched. Allow them to cool completely before frosting—this is crucial because warm cake will melt the whipped topping.

3. Create the Signature Frosting

In a large bowl, mix the crushed pineapple (juice included) with the instant pudding mix. Let it sit for 3–5 minutes until it thickens slightly. Fold in the whipped topping gently to create a fluffy, creamy pineapple cloud. Add lemon zest if you want a brighter citrus pop.

4. Assemble the Cake

Once the cakes have cooled fully, spread a thick layer of frosting between them. Add the top layer and generously frost the entire cake. Pig Pickin’ Cake is meant to look soft and rustic—not stiff or overly decorated. Its charm lies in its natural beauty and fluffy topping.

5. Chill Before Serving

Refrigerate for at least 2 hours before slicing. This allows the flavors to come together and the frosting to thicken and cling beautifully to the cake layers.

Serving Suggestions

A Pig Pickin’ Cake is irresistible straight from the fridge. Serve chilled with:

  • Additional mandarin slices arranged like sunbursts

  • Pineapple tidbits scattered over the top

  • A sprinkle of toasted coconut for a gentle tropical finish

  • A dollop of whipped cream for extra sweetness

This cake pairs wonderfully with iced tea, lemonade, BBQ spreads, and summer picnics.

Chef’s Secrets for a Perfect Cake

1. Use the Mandarin Juice

Never drain the juice—it’s the secret to the cake’s signature moisture and citrus punch.

2. Don’t Overmix

Overmixing can make the cake dense. Fold ingredients gently for a soft, tender crumb.

3. Let the Frosting Set

Pineapple frosting firms up beautifully when chilled. This makes cutting cleaner slices easier.

4. Add Sour Cream for Depth

Sour cream adds richness and keeps the cake moist for days.

5. Flavor Boosters

  • A splash of pineapple juice in the batter

  • A teaspoon of orange extract for a fragrant punch

  • Shredded coconut folded into the frosting for texture

Why This Cake Has Stayed a Southern Icon

Classic Pig Pickin’ Cake became famous because it fit every occasion. It’s inexpensive, easy to prepare, feeds a large crowd, and tastes like sunshine. Its soothing combination of citrus and creamy pineapple feels almost nostalgic—a reminder of porch swings, summer breezes, and handwritten recipes passed from one generation to the next.

This unique version stays true to tradition while upgrading the flavor to make it even more refreshing and memorable. It’s the kind of dessert you bring once and instantly become “the one who makes that amazing orange-pineapple cake.”

Final Thoughts

If you’re looking for a dessert that is light yet memorable, refreshing yet comforting, and simple yet deeply flavorful, this Classic Pig Pickin’ Cake is the perfect choice. Every bite offers a burst of citrus, a hint of pineapple, and a soft, tender crumb that melts on the tongue. One slice never feels like enough—especially when it’s served cold on a hot afternoon.

Baked Apple Fritters

Baked apple fritters are the gentler, modern twist on the classic deep-fried version. Instead of sizzling in oil, these beauties rise slowly in the oven, where the apples release their juices into the dough, creating pockets of warm, cinnamon-soaked fruit. Every bite is like a soft apple-cinnamon cloud, kissed with a caramel-vanilla glaze that sets into a shiny, crackly top.

This unique recipe leans on fresh apples, browned butter, warm spices, and a touch of sour cream for tenderness. The result is a fritter that tastes like the love-child of a cinnamon roll, apple pie, and a bakery doughnut — but baked, not fried.


🍏 INGREDIENTS

For the Baked Fritters

  • 2 large apples (Honeycrisp, Fuji, or Gala), peeled & diced

  • 2 tbsp butter

  • 2 tbsp brown sugar

  • 1 tsp ground cinnamon

  • ¼ tsp nutmeg

  • 1 tsp lemon juice

  • 2 cups all-purpose flour

  • ⅓ cup granulated sugar

  • 2 tsp baking powder

  • ½ tsp baking soda

  • ½ tsp salt

  • 1 tsp vanilla extract

  • 2 large eggs

  • ½ cup whole milk

  • ¼ cup sour cream or Greek yogurt

  • 3 tbsp melted butter (cooled)

For the Caramel-Vanilla Glaze

  • 1 cup powdered sugar

  • 1 tbsp melted butter

  • 2 tbsp warm milk

  • ½ tsp vanilla

  • 1 tbsp caramel sauce (optional but amazing)


🍎 STEP-BY-STEP UNIQUE METHOD

1. Caramelize the Apples (The Signature Step)

This is what makes these fritters special.

  1. Melt 2 tbsp butter in a skillet until lightly golden (brown-butter stage).

  2. Add diced apples, brown sugar, cinnamon, nutmeg, and lemon juice.

  3. Cook 5–7 minutes until syrupy, glossy, and soft but not mushy.

  4. Let cool completely.

The browned butter builds a deep nutty flavor that makes these fritters unforgettable.


2. Make the Tender Fritter Dough

  1. In a mixing bowl, whisk flour, sugar, baking powder, baking soda, and salt.

  2. In a second bowl, whisk eggs, milk, sour cream, melted butter, and vanilla.

  3. Add wet ingredients to dry and mix just until combined — do not overmix.

  4. Fold in the cooled caramelized apples and all the syrup from the pan.

The batter will be thick, chunky, and apple-rich — exactly how fritter dough should be.


3. Shape the Fritters

  1. Line a baking sheet with parchment paper.

  2. Use a large spoon or ice cream scoop to drop rustic mounds of batter, leaving space between them.

  3. Gently flatten each mound with slightly wet fingertips — this gives the fritters their signature shape.

Optional: Brush the tops lightly with melted butter for extra bakery shine.


4. Bake

Bake at 400°F (200°C) for 12–16 minutes or until golden brown and set in the center.

They should have lightly crisp edges and a soft, fluffy inside.


5. Glaze While Warm

  1. Whisk powdered sugar, melted butter, milk, vanilla, and caramel until smooth.

  2. Dip warm fritters in glaze OR drizzle it generously over the tops.

  3. Let set 5 minutes — the glaze will form a crackly, glossy shell.


💡 UNIQUE TRANSFORMATIONS YOU CAN TRY

  • Apple-Cinnamon Bun Fritters: Add a swirl of cinnamon-brown-sugar paste through the batter.

  • Maple-Glazed Fritters: Swap caramel for maple syrup.

  • Crispy Edge Upgrade: After baking, broil for 1 minute for a caramelized crust.

  • Fall Spice Fritters: Add cloves + cardamom for a chai twist.

  • Salted Caramel Fritters: Sprinkle flaky sea salt on the glaze.


🍽️ SERVING SUGGESTIONS

Enjoy warm with:

  • A scoop of vanilla ice cream

  • A hot mug of chai, cinnamon tea, or coffee

  • A spoonful of whipped cream

  • A drizzle of extra caramel

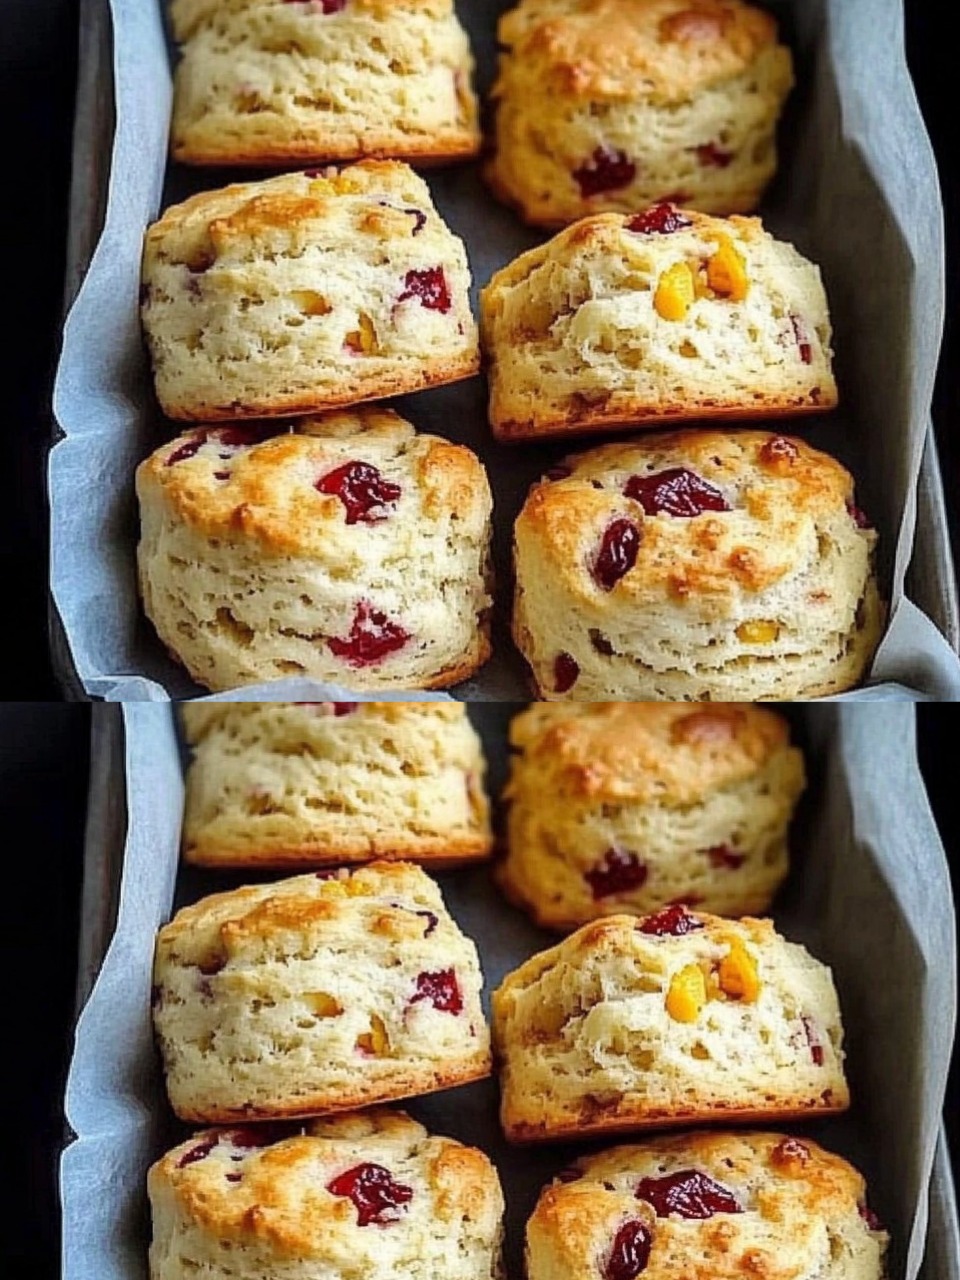
Diabetic Friendly Cranberry Orange Scones

There are moments in the kitchen when a recipe manages to balance comfort, flavor, and nourishment all at once. These Diabetic-Friendly Cranberry Orange Scones do exactly that. They bring together the sharp sparkle of fresh orange zest, the tart brightness of cranberries, and a carefully measured sweetness that respects blood sugar levels. Unlike traditional scones loaded with refined flour and sugar, this recipe uses wholesome alternatives that create a tender crumb without sacrificing flavor. It’s a breakfast treat you can enjoy with far more confidence—and far less guilt.

The inspiration for these scones came from a simple craving: something warm, citrusy, and bakery-worthy that didn’t rely on the typical sugar-heavy formula. Many people living with diabetes miss the joy of pastries, not because they can’t eat them, but because most recipes fail to consider how blood sugar actually behaves. These scones are created with slow-digesting flours, minimal sugar spikes, and heart-healthy fats. That means they support steadier energy and better glucose control while still delivering rich, satisfying flavor.

The key ingredient swap here is almond flour combined with a bit of oat flour. Almond flour provides healthy fats, protein, and a naturally tender texture, while oat flour adds gentle sweetness and structure without spiking blood sugar sharply. A touch of Greek yogurt replaces heavy cream and keeps the scones incredibly moist. For sweetness, we depend on a small amount of monk fruit sweetener—a zero-glycemic natural sweetener that gives the perfect hint of bakery-style taste without the harsh artificial aftertaste.

Cranberries, often overlooked as a “holiday-only” fruit, shine beautifully in this recipe. Their tartness balances the citrus and adds a chewy burst of color in every bite. Fresh cranberries work best, though unsweetened dried cranberries can also be used if you prefer something softer. When paired with orange zest, the aroma that fills your kitchen is divine—like a bright, comforting morning in the middle of winter.

These scones also take surprisingly little time to make. Everything comes together in one bowl, and the dough is forgiving. Even if you’ve never baked scones before, this recipe ensures success. The final texture is lightly crisp on the outside, soft and moist on the inside, and bursting with warm citrus fragrance.

Ingredients (Diabetic-Friendly)

(Makes 8 scones)

Dry Ingredients

  • 1 ½ cups almond flour

  • ½ cup oat flour (or finely ground rolled oats)

  • 2 tbsp coconut flour

  • 1 ½ tsp baking powder

  • ¼ tsp baking soda

  • ¼ tsp salt

  • ¼ cup monk fruit sweetener (granulated or classic)

Wet Ingredients

  • 1 large egg

  • 3 tbsp cold unsalted butter, diced

  • ⅓ cup plain Greek yogurt (unsweetened)

  • 2 tbsp fresh orange juice

  • 1 tbsp orange zest

  • 1 tsp vanilla extract

Add-Ins

  • ½ cup fresh cranberries, chopped
    (or ¼ cup unsweetened dried cranberries)

Optional Glaze (Diabetic-Friendly)

  • 2 tbsp powdered monk fruit sweetener

  • 1 tsp orange juice

  • ¼ tsp orange zest

Instructions

1. Prepare the Dry Mix

In a large bowl, whisk together the almond flour, oat flour, coconut flour, baking powder, baking soda, salt, and monk fruit sweetener. This blend creates a balance of structure and tenderness. Almond flour gives moisture, oat flour adds lightness, and coconut flour gently absorbs extra liquid so the scones don’t turn crumbly.

2. Cut in the Butter

Add the cold diced butter to the dry mixture. Using your fingers or a pastry blender, gently pinch and blend the butter in until you have pea-sized crumbs. The small bits of butter help create that classic scone texture—slightly crisp outside and soft inside.

3. Add the Wet Ingredients

In a separate bowl, whisk the egg, Greek yogurt, orange juice, zest, and vanilla. Pour this mixture into the dry ingredients and fold it all together with a spatula. The dough will look thick and slightly sticky—this is perfect.

4. Incorporate the Cranberries

Fold in the chopped cranberries. If using fresh ones, they may release a little juice, which is completely fine. The bright red bits add jewel-like color that makes these scones especially beautiful.

5. Shape the Dough

Place the dough onto a parchment-lined baking sheet. Lightly flour your hands with oat flour, then shape the dough into a 7-inch disc. Using a sharp knife, cut the disc into 8 equal wedges. Gently space them apart to allow them to bake evenly.

6. Bake

Bake in a preheated oven at 350°F (175°C) for about 18–22 minutes, or until the edges turn golden and the tops feel set. Gluten-free scones bake quickly, so keep an eye on them around the 18-minute mark.

7. Add the Optional Glaze

Once the scones cool slightly, whisk together the powdered monk fruit, orange juice, and zest to create a light glaze. Drizzle over the top for extra citrus brightness without spiking blood sugar.

Why This Recipe Works for Diabetes

These Cranberry Orange Scones are formulated to help avoid rapid glucose spikes by using:

  • Low-glycemic sweeteners

  • High-protein almond flour

  • Fiber-rich oat flour

  • Healthy fats from butter and yogurt

Each scone satisfies a pastry craving while supporting more stable energy. Paired with a hot cup of tea or coffee, it becomes a cozy breakfast that you can enjoy with confidence and delight.

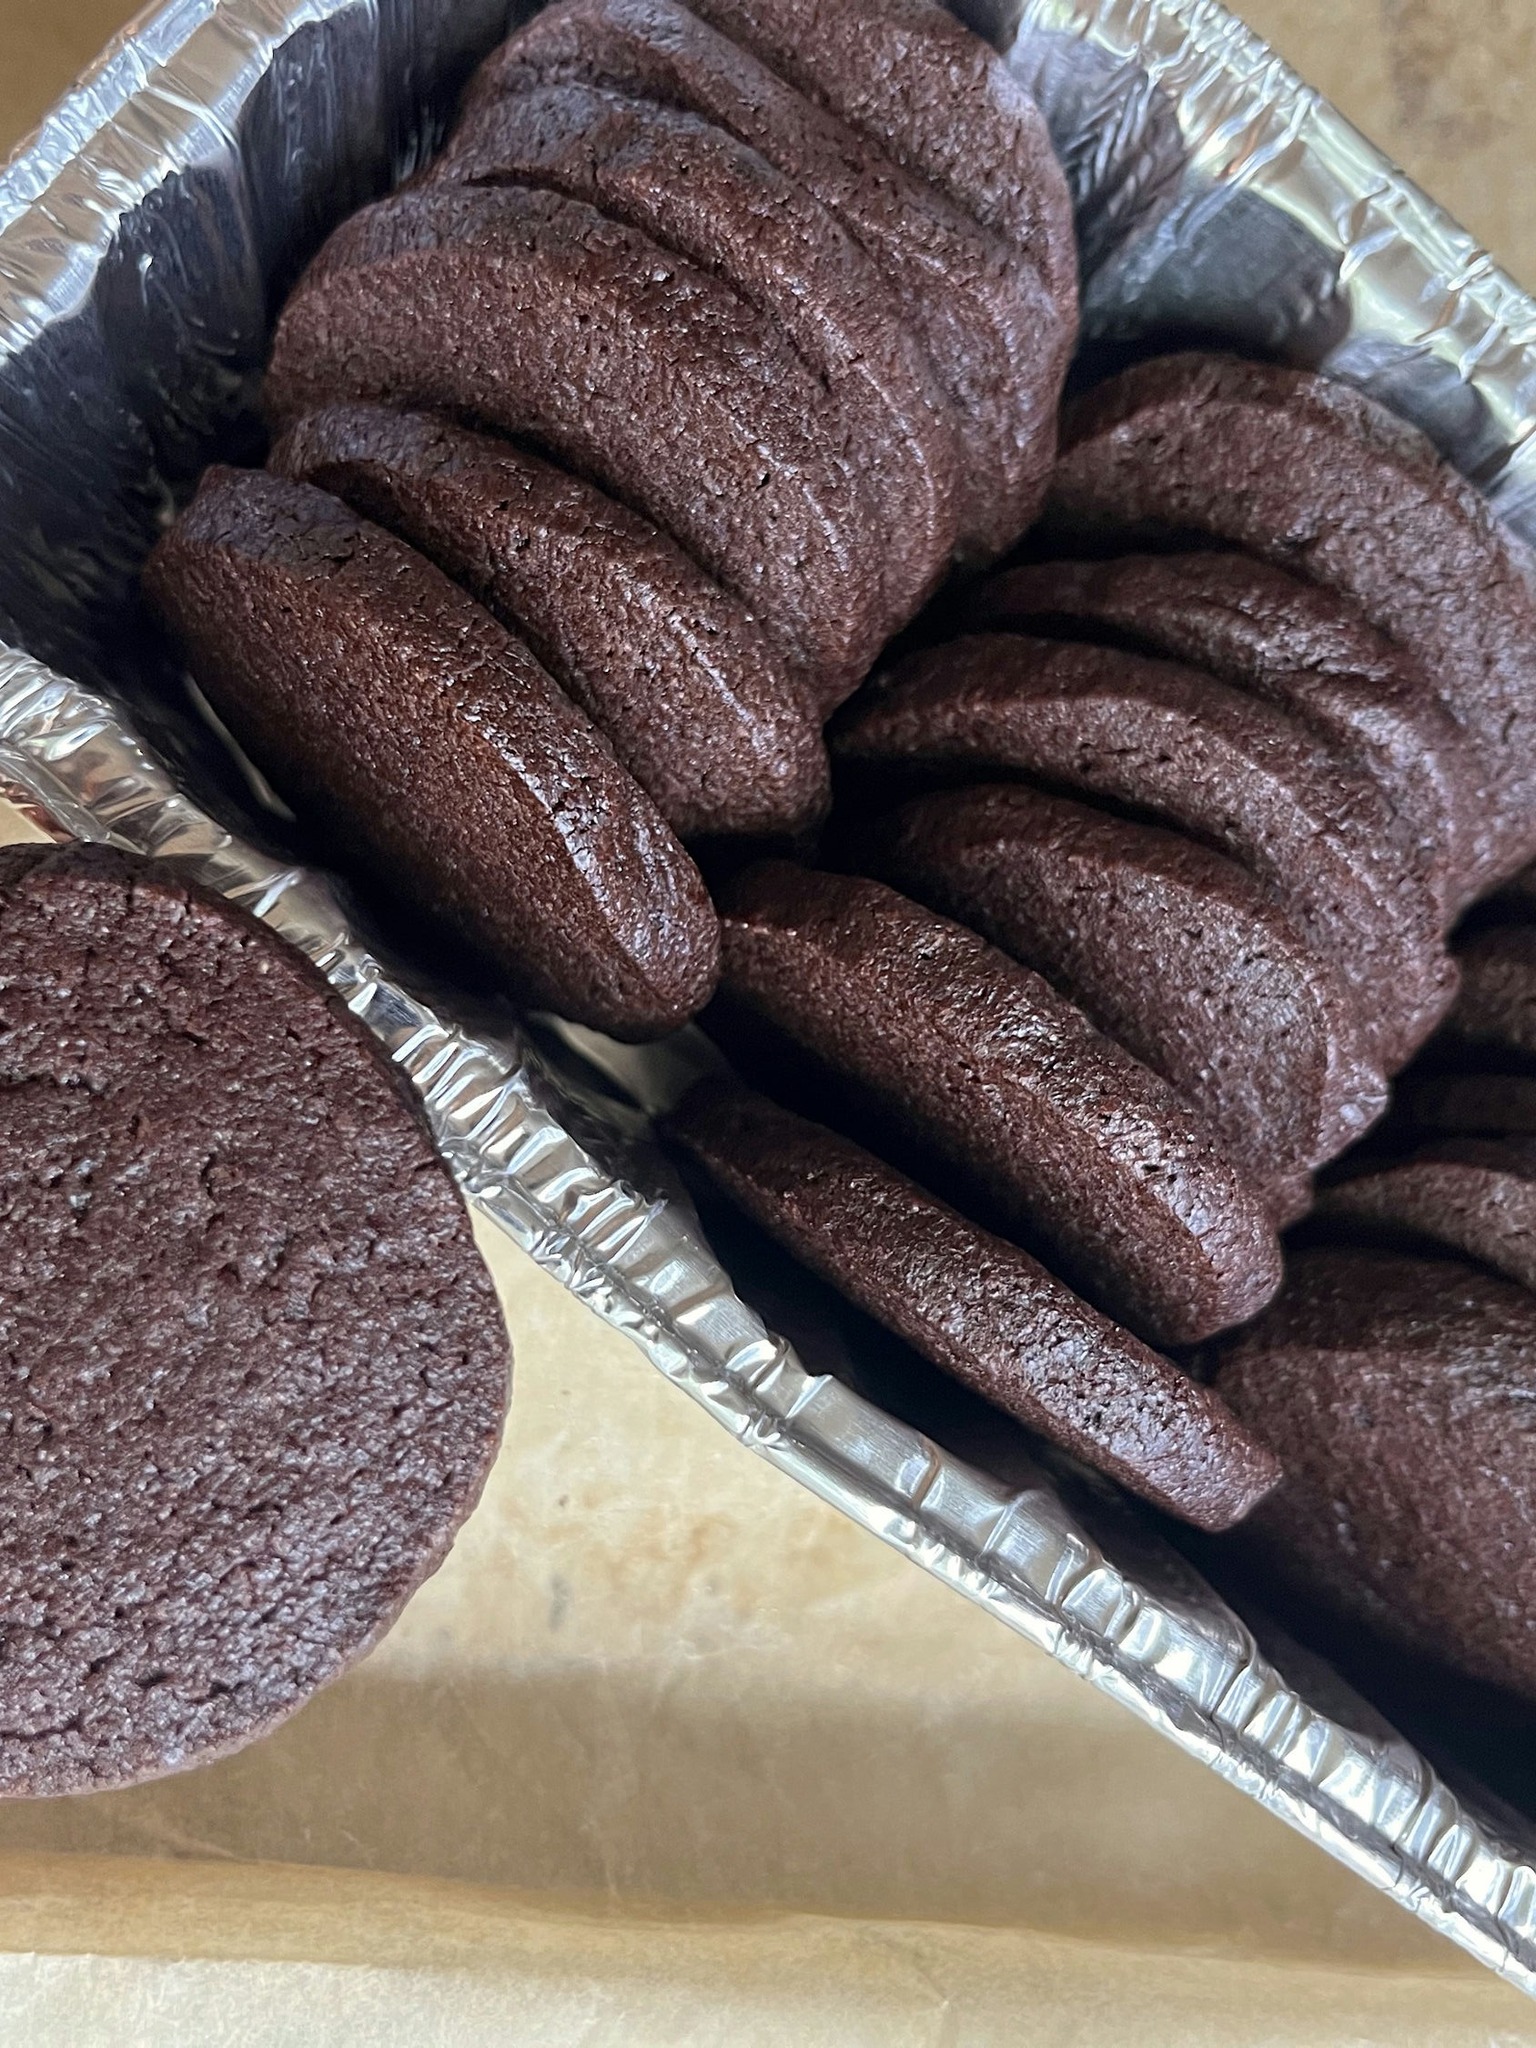
Wienerstube Cookies

There is something timeless about stepping into a traditional Viennese Wienerstube—a warm, wood-paneled pastry shop filled with the aromas of toasted almonds, sweet butter, and freshly brewed coffee. These charming cafés have existed for over a century, and each one holds a secret recipe or two passed down through generations. Today, you can bring that nostalgic warmth into your own kitchen with these Wienerstube Cookies, a soft, delicately crisp butter cookie with notes of vanilla, almond, and caramelized sugar. Unlike standard butter cookies, this version features a subtle Viennese twist: a browned-butter base, a touch of almond flour for meltability, and a golden sugar glaze that sets into a gentle crackle when cooled.

This recipe is crafted to be unique, flavorful, and comforting—perfect for holidays, afternoon coffee breaks, or gifting in elegant tins. Let’s recreate the magic of Vienna, one cookie at a time.

Ingredients

For the Cookie Dough

  • 1 cup (225g) unsalted butter

  • ¾ cup (150g) sugar

  • 1 large egg, room temperature

  • 2 tsp pure vanilla extract

  • ½ tsp almond extract

  • 2 cups (250g) all-purpose flour

  • ½ cup (55g) almond flour

  • ½ tsp fine salt

  • ½ tsp baking powder

For the Golden Glaze

  • 2 tbsp melted butter

  • 2 tbsp brown sugar

  • 1 tbsp cream or milk

  • ½ tsp vanilla

Optional Toppings

  • Crushed toasted almonds

  • Dark chocolate drizzle

  • Dusting of powdered sugar

How to Make Wienerstube Cookies

1. Begin with Browned Butter – the Vienna Secret

Traditional Viennese pastries often employ flavors made from browned butter (nussbutter). It lends a nutty, caramelized aroma that transforms simple dough into something elegant.

Melt the butter in a saucepan over medium heat, stirring often. Within a few minutes, it will foam, then turn golden. Once you see tiny brown specks and smell that irresistible nutty aroma, remove it from the heat immediately. Allow it to cool completely until slightly thickened but still pourable.

This step builds the backbone of the cookie’s flavor and ensures every bite tastes like something from a century-old café.

2. Whip the Sugars and Butter

In a mixing bowl, combine the cooled browned butter and sugar. Beat with a hand mixer or stand mixer for 2–3 minutes, until creamy and pale. The aeration ensures your cookies become soft yet lightly crisp around the edges.

Add the egg, vanilla extract, and almond extract. Beat again until the mixture is silky and smooth.

3. Mix the Dry Ingredients

In a separate bowl, whisk together:

  • All-purpose flour

  • Almond flour

  • Salt

  • Baking powder

The almond flour is essential—it gives the cookies their signature Viennese tenderness.

Add the dry mixture into the wet ingredients in two additions, mixing slowly until a soft dough forms. You should have a malleable, slightly sticky dough that firms up beautifully once chilled.

4. Chill for Perfect Texture

Viennese cookies are never rushed. Cover the dough bowl and refrigerate for 30–45 minutes. Chilling helps the flavors marry and prevents overspreading in the oven.

5. Shape with Tradition in Mind

Preheat your oven to 350°F (175°C) and line two baking trays with parchment.

Roll the dough into 1-inch balls. For a classic Wienerstube look, gently flatten each ball with the bottom of a glass, leaving a small indentation. This creates the perfect surface for the caramel glaze to cling to.

6. Brush with Golden Glaze

In a small cup, whisk together melted butter, brown sugar, cream, and vanilla. The mixture should be glossy and slightly syrupy.

Brush each cookie with a thin layer. As it bakes, the glaze caramelizes into a thin, crackled shell—delicate, sweet, and breathtakingly delicious.

7. Bake to Gold

Place cookies in the oven for 10–12 minutes, or until the edges turn lightly golden but the centers remain soft. These cookies should NOT be dark or overly crisp; their charm lies in their melt-in-the-mouth quality.

Allow them to cool on the tray for 5 minutes before transferring to a wire rack.

Finishing Touches

Traditional Viennese cafés decorate modestly but elegantly. You can finish your cookies one of several ways:

  • Sprinkle warm cookies with crushed toasted almonds.

  • Drizzle cooled cookies with thin lines of melted dark chocolate.

  • Dust with powdered sugar just before serving.

Choose one style or mix them for a beautiful cookie platter.

Flavor & Texture Profile

Wienerstube Cookies deliver a heavenly balance:

  • A light crisp exterior from the caramel glaze

  • A soft, buttery center that melts instantly

  • Subtle almond warmth and vanilla aroma

  • A hint of caramel nuttiness thanks to the browned butter

With each bite, you truly feel transported to a quiet European bakery with warm lights, polished wood counters, and the quiet hum of morning customers enjoying pastries with coffee.

Storage & Serving

Store cookies in an airtight tin for up to 6 days. Their flavor deepens after the first day as the browned butter continues to mellow into the dough.

Serve them:

  • With coffee or tea

  • In holiday cookie boxes

  • As a hostess gift

  • With hot chocolate or mulled wine

They also freeze beautifully—just place them in layers separated by parchment.

Bringing Vienna to Your Home

These Wienerstube Cookies are more than a simple recipe—they’re a taste of old-world European comfort, created with modern ingredients and timeless technique. Their nostalgic flavor, soft texture, and stunning golden glaze make them a standout addition to any dessert table.

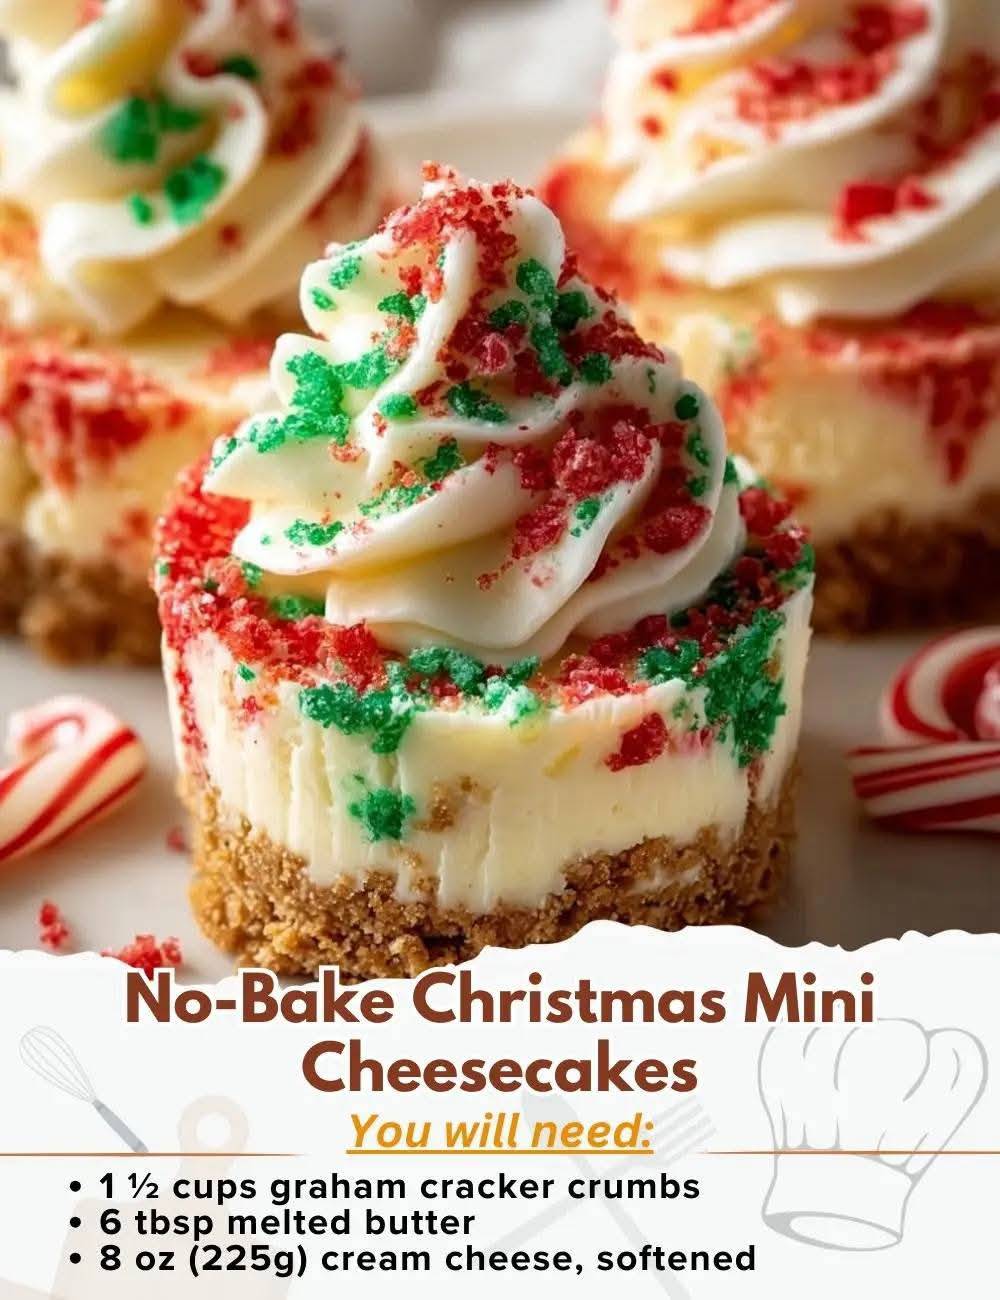
No-Bake Christmas Mini Cheesecakes

There’s something magical about Christmas treats that don’t require the stress of baking, especially when they turn out as beautiful and delicious as these No-Bake Christmas Mini Cheesecakes. They are small, adorable, velvety-smooth, and full of holiday cheer. Each bite tastes like a snowy, creamy dream stacked on top of a buttery cookie crust. What makes this recipe special is not only its simplicity, but the playful Christmas twist—peppermint sparkles, spiced cookies, ribbon-red swirls, and optional mini toppings that turn every cheesecake into its own tiny winter wonderland.

If you want a dessert that looks impressive, tastes luxurious, and requires zero baking, these mini cheesecakes will quickly become your new holiday favorite. They’re also ideal for gifting, entertaining, or adding variety to a Christmas dessert table. The recipe uses simple ingredients but combines them in a way that creates depth, warmth, and seasonal personality.

Why This Recipe Is Unique

Unlike ordinary no-bake cheesecakes, this version builds flavor in layers. The crust uses ginger snaps and vanilla cookies for a perfect balance of spice and sweetness. The filling incorporates cream cheese, mascarpone, and whipped cream for extra silkiness. A festive swirl of peppermint or cranberry sauce gives each mini cheesecake its own holiday identity. And the toppings—snowy whipped cream, crushed candy canes, chocolate curls, or sugared cranberries—turn them into edible ornaments.

These cheesecakes stay firm yet creamy, hold their shape beautifully, and taste even better chilled the next day. They’re the kind of treat that disappears faster than you can refill the plate.

No-Bake Christmas Mini Cheesecakes – Full Unique Recipe

Ingredients

For the Crust:

  • 1 cup ginger snap cookies, finely crushed

  • ½ cup vanilla wafer crumbs

  • 4 tbsp melted butter

  • 1 tbsp brown sugar

  • ½ tsp cinnamon (optional for warmth)

For the Cheesecake Filling:

  • 8 oz cream cheese, softened

  • 4 oz mascarpone cheese (adds richness)

  • ½ cup powdered sugar

  • 1 tsp vanilla extract

  • ½ tsp peppermint extract or 2 tbsp cranberry sauce (choose your flavor theme)

  • 1 cup cold heavy whipping cream

For Christmas Toppings:

Choose any combination:

  • Crushed candy canes

  • Mini chocolate curls

  • Sugared cranberries

  • Fresh mint leaves

  • White chocolate drizzle

  • Holiday sprinkles

  • Whipped cream

Instructions

1. Make the Festive Cookie Crust

In a bowl, combine crushed ginger snaps, vanilla wafer crumbs, melted butter, brown sugar, and cinnamon. Mix until the texture resembles wet sand. This blend gives each mini cheesecake a lightly spiced base—sweet, warm, and unmistakably Christmasy.

Spoon about 1 tablespoon of the crust mixture into each cupcake liner (paper or silicone). Press firmly with the back of a spoon or the bottom of a small glass. Place the tray in the freezer for 10 minutes while you make the filling.

2. Prepare the Creamy Holiday Filling

Beat the softened cream cheese and mascarpone together until smooth and lump-free—this step ensures silky perfection. Add powdered sugar and vanilla extract. Mix until fully creamy.

In a separate bowl, whip the heavy cream until stiff peaks form. This gives the cheesecakes their no-bake structure and signature airy texture. Gently fold the whipped cream into the cream cheese mixture.

Now it’s time to add your festive twist:

Option A: Peppermint Swirl

Add ½ tsp peppermint extract to the filling. Separate a small portion and tint it red. Gently fold back into the main bowl to create candy cane streaks.

Option B: Cranberry Snowdrift

Fold 2 tablespoons of cranberry sauce into the filling to create pink ribbons and tart pops of flavor.

Either way, the colors look stunning once chilled.

3. Assemble the Mini Cheesecakes

Fill each cupcake liner with the cheesecake mixture until nearly full. Use a small spatula or spoon to smooth the tops.

For extra beauty, swirl a drop of red-tinted filling or cranberry sauce on top with a toothpick. It creates a marbled, Christmas-themed effect that looks like snowy red ribbons.

Cover and refrigerate for at least 4 hours, preferably overnight. This chilling step solidifies them perfectly.

4. Decorate the Christmas Magic

Right before serving, top your mini cheesecakes like ornaments:

  • A swirl of whipped cream

  • A sprinkle of crushed candy canes

  • A few sugared cranberries

  • Chocolate curls or shavings

  • A drizzle of melted white chocolate

  • Green and red sprinkles

  • A mint leaf for a “holly” look

Each cheesecake becomes a tiny edible celebration.

Tips for the Perfect Mini No-Bake Cheesecakes

  • Use full-fat cream cheese for the richest texture.

  • Do not skip chilling, or they will be too soft.

  • Use silicone liners for the easiest removal.

  • Make ahead! They store beautifully for 3 days.

  • For a snowy effect, dust with powdered sugar before serving.

  • To freeze: wrap individually and freeze up to 2 months.

What Makes These Extra Special

These cheesecakes combine holiday flavors people adore—peppermint, cranberry, ginger snap spice, creamy vanilla—but present them in a mini, bite-sized delight. They’re elegant but playful, creamy but light, and festive without being overly complicated. They look like little Christmas gifts sitting on a plate.

Whether you’re hosting a gathering, making treats for neighbors, or wanting a dessert that feels nostalgic yet upgraded, these minis deliver pure joy. They’re everything Christmas treats should be: sweet, creamy, simple, beautiful, and cheerfully irresistible.

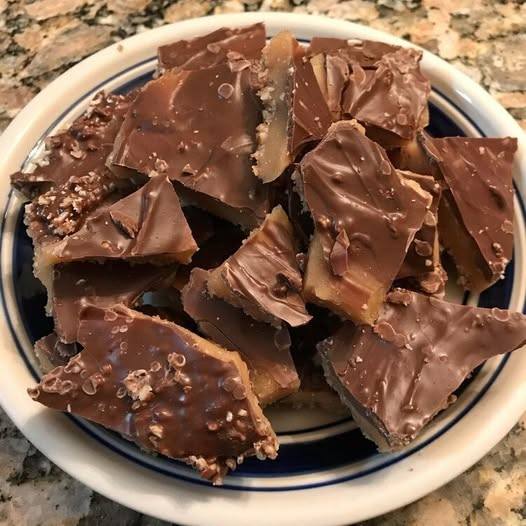
The Ultimate Toffee Recipe

There are desserts you eat, and then there are desserts you remember. Toffee belongs firmly in the second category—a buttery, golden, break-apart treat that delivers both nostalgia and indulgence in every crisp bite. Whether you crumble it over ice cream, tuck it into cookie dough, or enjoy it as a stand-alone sweet, homemade toffee always offers a level of satisfaction that store-bought versions can’t match. This ultimate toffee recipe is crafted to be unique, foolproof, and bursting with rich caramel flavor and melt-in-your-mouth texture. With just a handful of simple ingredients and a bit of patience, you’ll create a candy masterpiece worthy of any celebration.

 Why This Toffee Is Truly “Ultimate”

Unlike typical toffee recipes that risk burning, separating, or turning grainy, this method ensures smooth, reliable results. The secret lies in slow, even heating, a balanced fat-to-sugar ratio, and a surprise ingredient—a touch of vanilla and sea salt—that deepens flavor and enhances the buttery caramel notes. Even better, this toffee features a built-in chocolate layer that gently melts into the warm candy, plus a finishing sprinkle of toasted nuts for added crunch and aroma.

 Ingredients You’ll Need

For the Toffee Base:

  • 1 cup (230g) unsalted butter

  • 1 cup (200g) granulated sugar

  • ¼ tsp salt

  • 1 tbsp water

  • 1 tsp pure vanilla extract

For the Topping:

  • 1 cup semi-sweet chocolate chips (or milk chocolate for a softer sweetness)

  • ½ cup chopped toasted almonds, pecans, or cashews

  • Extra flaky sea salt (optional, but highly recommended)

 Step-by-Step Instructions

1. Prepare the Surface

Line a baking tray with parchment paper or a silicone baking mat. This ensures the toffee releases easily once it cools. If using nuts underneath your toffee layer, scatter them now.

2. Start the Toffee Magic

In a thick-bottomed saucepan, combine butter, sugar, salt, and water over medium heat. Stir continuously at the beginning so the sugar fully dissolves into the melting butter.

The mixture will look pale and bubbly at first—that’s perfect. Once everything melts and becomes smooth, stop stirring constantly and switch to gently stirring only every 20–30 seconds.

3. Slow and Steady Wins the Race

Allow the mixture to simmer gently. As it heats, it will transition through several stages—pale, golden, amber, and finally a rich caramel-brown. To get the classic toffee snap, you want it to reach 300°F (150°C), the “hard crack” stage.

If you don’t have a candy thermometer, watch the color: when it becomes a deep golden but not burnt, it’s ready.

4. Add Vanilla

Turn off the heat and immediately stir in the vanilla extract. It will bubble vigorously—this is normal—just keep stirring for 5 seconds.

5. Pour and Spread

Quickly pour the hot toffee onto your prepared tray. Tilt the tray gently to spread it into an even layer. Avoid using a spatula unless necessary, as it cools fast and can thicken before spreading.

6. Add the Chocolate

Sprinkle the chocolate chips evenly over the hot toffee. Let them sit for 2 minutes so the heat naturally melts them. Then use a spatula to spread the chocolate into a smooth, glossy layer.

7. Add the Crunch

Sprinkle toasted nuts on top and finish with a delicate dusting of flaky sea salt. The salt intensifies every flavor—from butter to chocolate to caramel.

8. Cool and Break

Let the toffee cool completely at room temperature or speed things up by placing it in the fridge for 15–20 minutes. Once firm, break it into rustic shards.

 Expert Tips for Perfect Toffee Every Time

✔ Don’t rush the process

High heat can cause the butter to separate or burn. Balanced medium heat creates smooth, glassy toffee.

✔ Use quality butter

Toffee relies heavily on butter for flavor—poor butter equals poor toffee.

✔ Stir with intention

You want to stir enough to prevent burning but not so much that sugar crystals form. Gentle, periodic stirring is ideal.

✔ Want thicker toffee?

Pour the mixture into a smaller pan. For thinner crackle-style toffee, spread it in a larger pan.

✔ Nut-free version

Skip the nuts and add a dusting of crushed pretzels or edible glitter for a fun twist.

 Why This Recipe Works

This ultimate toffee is a masterpiece because it balances simplicity with precision. The water helps dissolve sugar, the butter gives silky richness, and the vanilla adds depth. Chocolate melts into the surface for a perfect two-layer treat, while nuts give that contrast of texture that keeps each bite interesting. Everything comes together into a glossy, glass-smooth candy that shatters beautifully and stores well for weeks.

 Serving Ideas

  • Gift it in jars or treat bags during holidays.

  • Break it small and mix into brownies or cookies.

  • Sprinkle over coffee ice cream (a life-changing combo).

  • Use it as a garnish for cheesecakes.

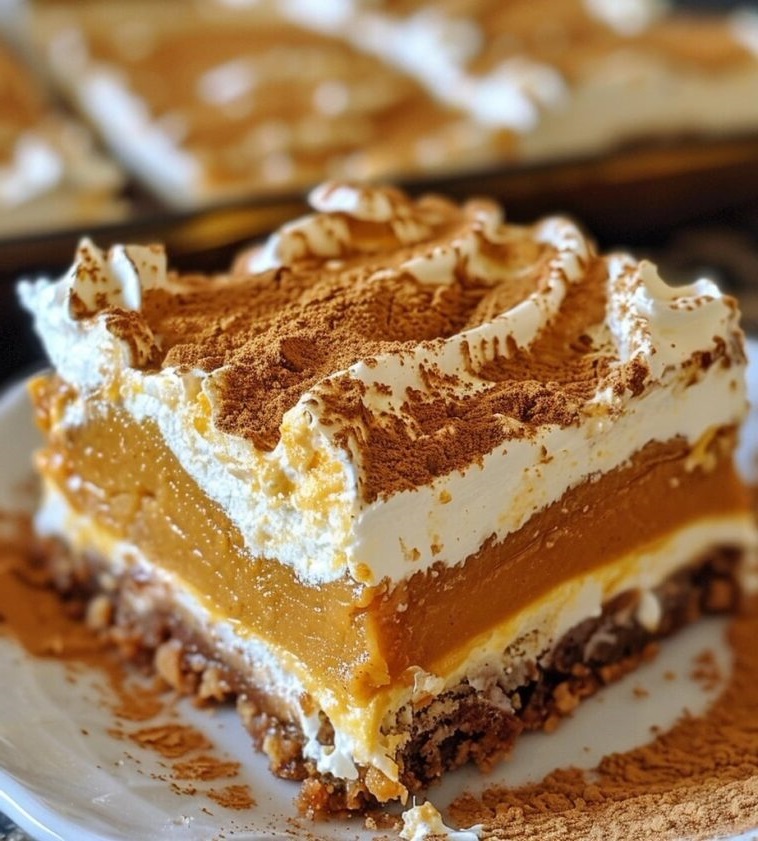
Pumpkin Cream Cheese Dream Bars

If autumn had a flavor, it would taste exactly like these Pumpkin Cream Cheese Dream Bars—a luscious layering of warm spices, velvety pumpkin, buttery cookies, and a cloud-like cream cheese topping that melts on your tongue before you even realize you’ve taken a bite. This recipe is designed to feel like a warm hug from the inside out, the kind of dessert that turns even a simple evening into something magical. Unlike basic pumpkin bars, these Dream Bars require zero baking fuss, hold their shape perfectly, and deliver a dreamy balance of sweetness, spice, and creaminess that feels luxurious but is surprisingly easy to make.

What makes this recipe “dreamy” is the combination of textures: a crunchy cookie crust, a silky pumpkin spice filling, and a fluffy cream cheese mousse topping. Each layer complements the others so well that one forkful becomes an entire experience. And because this is a unique version crafted just for you, each layer features special touches that boost flavor without adding extra work. Let’s dive into the deliciousness.

 Unique Pumpkin Cream Cheese Dream Bars

Ingredients

For the Crust

  • 2 cups crushed ginger snaps or digestive biscuits

  • 6 tablespoons melted butter

  • 2 tablespoons brown sugar

  • 1 teaspoon cinnamon

For the Pumpkin Layer

  • 1 cup canned pumpkin puree

  • 1 cup chilled heavy whipping cream

  • ½ cup cream cheese, softened

  • ⅓ cup powdered sugar

  • 2 tablespoons maple syrup

  • 1 teaspoon vanilla extract

  • 1 teaspoon pumpkin spice

  • ½ teaspoon cinnamon

  • Pinch of salt

For the Cream Cheese Dream Topping

  • ¾ cup cream cheese, softened

  • ½ cup powdered sugar

  • ½ teaspoon vanilla

  • ½ cup heavy whipping cream

  • Optional: 1 tablespoon white chocolate instant pudding mix (for stability and a hint of sweetness)

Garnish

  • Crushed cookies

  • Cinnamon dusting

  • Caramel drizzle (optional but heavenly!)

 Instructions

1. Make the Dreamy Cookie Crust

Start by crushing your ginger snaps or digestive biscuits until finely ground. Stir in brown sugar, cinnamon, and melted butter. The mixture should resemble damp sand that holds when pressed.

Pour this mixture into an 8×8 or similar dish lined with parchment. Press firmly using a spatula or the back of a glass to make an even, tight crust. Chill for 15 minutes. This allows the butter to firm up and creates a base that will slice beautifully later.

2. Prepare the Silky Pumpkin Filling

In a mixing bowl, beat the softened cream cheese until smooth. Add pumpkin puree, powdered sugar, maple syrup, vanilla, pumpkin spice, cinnamon, and salt. Beat until everything is creamy and bright orange.

In a separate chilled bowl, whisk the heavy whipping cream until stiff peaks form. Fold the whipped cream gently into the pumpkin mixture. This creates that airy mousse-like texture that makes these bars a “dream.”

Spread this pumpkin layer evenly over the chilled crust. Chill again for 20–30 minutes.

3. Whip Up the Cream Cheese Dream Topping

Beat softened cream cheese with powdered sugar and vanilla until smooth. In another bowl, whip the heavy cream to stiff peaks.

Gently fold the whipped cream into the sweetened cream cheese mixture. For extra stability and a subtle vanilla-white-chocolate flavor, fold in the optional pudding mix. This little touch keeps the topping from deflating while giving a luxurious bakery-style finish.

Spread this fluffy layer over the pumpkin layer, smoothing the top into little waves or swirls.

4. Chill Into Perfection

Cover and refrigerate the bars for at least 4 hours, but overnight is ideal for the flavors to fully “marry.” When ready to serve, lift using parchment, slice with a hot knife, and admire those gorgeous layers.

 Tips for Ultimate Dreaminess

  • For extra fall flavor: Add a drizzle of caramel or maple syrup on top before serving.

  • For a firmer slice: Freeze the bars for 20 minutes before cutting.

  • For more crunch: Top with chopped pecans or candied walnuts.

  • For a deeper pumpkin spice flavor: Add a pinch of nutmeg and clove to the pumpkin layer.

 Why These Bars Are Truly Unique

Most pumpkin bars are either too dense or too soft, but this recipe plays with contrasting textures to create a perfectly balanced dessert. The ginger snap crust adds warmth and bold spice, far more exciting than a plain graham crust. The pumpkin filling is light—not heavy like pie—thanks to the folded whipped cream. The topping, with the cream cheese and pudding mix combo, becomes a smooth, cloud-like layer that holds beautifully and tastes like cheesecake’s softer, dreamier cousin.

Every bite feels like a carefully orchestrated symphony of autumn flavors: the deep spice of the crust, the cool silkiness of the pumpkin, and the creamy, fluffy topping. And best of all, it’s a no-bake dessert, making it both foolproof and convenient for busy days, holidays, or late-night cravings.

 Serving Suggestions

Serve these bars with:

  • Hot chai

  • A vanilla latte

  • Spiced tea

  • Warm milk with cinnamon

  • Or just enjoy them on their own—they’re perfect as is.

 Final Thoughts

Pumpkin Cream Cheese Dream Bars are the perfect dessert to celebrate fall flavors without needing an oven or complicated steps. They’re impressive enough for gatherings yet easy enough for weeknight indulgence. Once you try them, you’ll want to make them every season—because they’re not just bars; they’re a dreamy escape into autumn comfort.

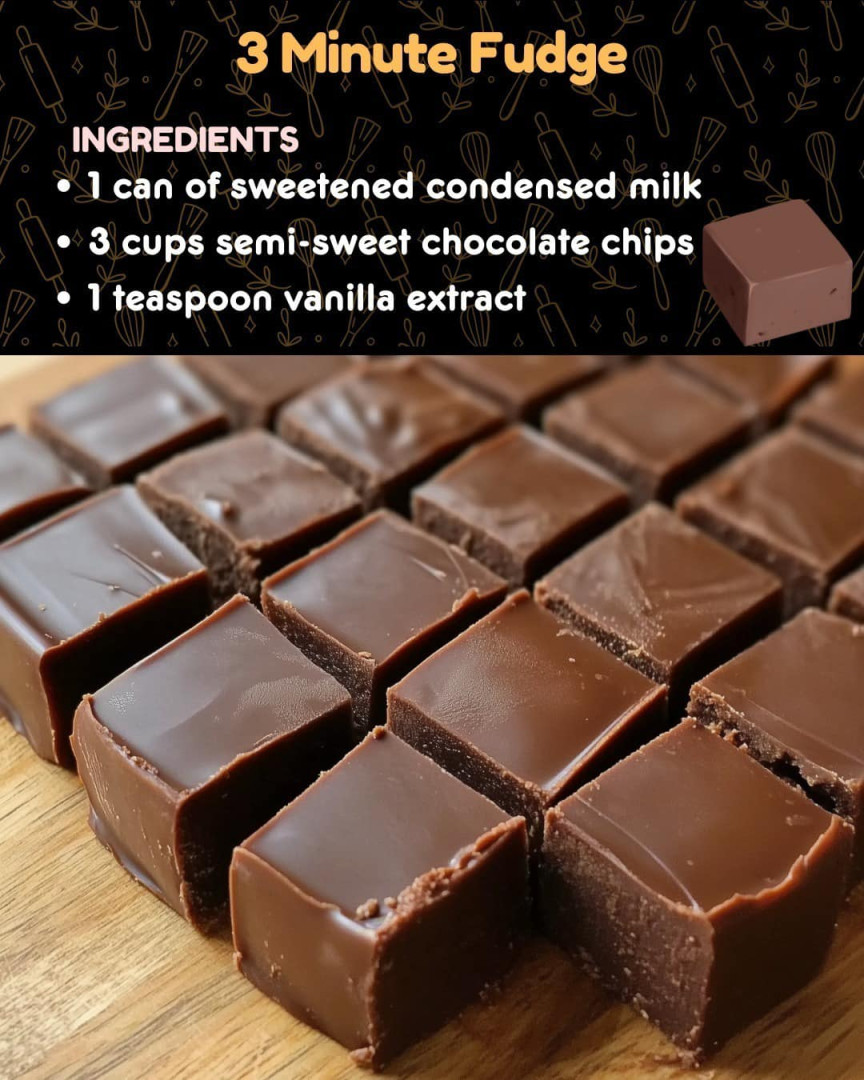
3 Minute Fudge

Fudge is often seen as a luxurious treat that takes time, patience, and a candy thermometer. But what if you could create a silky, decadent, melt-in-your-mouth fudge in only three minutes—without boiling sugar or babysitting a pot? This unique 3-Minute Fudge recipe transforms simple pantry ingredients into a rich, glossy block of chocolate bliss that tastes like it came from a premium candy shop. It’s the perfect emergency dessert for last-minute guests, late-night cravings, or whenever your sweet tooth demands something extraordinary right now.

This version stands apart because it layers deep chocolate flavor, creamy texture, and a surprising gourmet finish, all while being unbelievably fast. The secret? A clever combination of high-fat condensed milk, a dash of butter for shine, and an optional flavor infusion that makes it unforgettable.

INGREDIENTS

Base Fudge

  • 2 cups semi-sweet chocolate chips

  • 1 cup sweetened condensed milk

  • 2 tbsp unsalted butter (adds silkiness)

  • 1 tsp vanilla extract

  • Pinch of salt

Optional Gourmet Add-Ins

Choose one for a unique twist:

  • ½ cup chopped toasted almonds

  • ½ cup mini marshmallows

  • ½ tsp instant espresso powder (intensifies chocolate flavor)

  • ¼ tsp cinnamon + ¼ tsp chili powder (Mexican hot chocolate twist)

  • ½ cup crushed biscuits or cookies

  • ¼ cup dried cranberries + ¼ cup chopped pistachios

INSTRUCTIONS (ONLY 3 MINUTES!)

Step 1 — Prep the Dish (30 seconds)

Line a small square dish (6×6 or 7×7) with parchment paper. Let the edges hang over for easy lifting.

Step 2 — Melt Everything (90 seconds)

In a microwave-safe bowl, add:

  • chocolate chips

  • sweetened condensed milk

  • butter

Microwave for 45 seconds.
Stir.
Microwave again for 30–45 seconds, until everything is fully melted and glossy.

Step 3 — Flavor It (30 seconds)

Stir in:

  • vanilla

  • pinch of salt

  • AND any add-ins you love (optional)

Mix until velvety and smooth.

Step 4 — Shape + Set (30 seconds)

Dump the fudge into the prepared dish.
Smooth the top with a spoon or spatula.

You can:

  • let it set at room temperature for 1–2 hours

  • OR chill in the fridge for 20–30 minutes for faster results

Step 5 — Slice + Enjoy

Lift the slab using parchment, slice into squares, and enjoy a chocolate fantasy that took less time than brewing coffee.

WHY THIS 3-MINUTE FUDGE IS UNIQUE

  • No grainy texture — butter + condensed milk ensure a perfectly smooth finish.

  • Customizable flavor — one base recipe, endless variations.

  • No stovetop, no thermometer — anyone can make it, anywhere.

  • Gourmet taste — tastes like chocolatier-made fudge with minimal effort.

  • Foolproof — impossible to burn or overcook.

STORAGE TIPS

  • Room Temperature: Up to 5–7 days in an airtight container.

  • Refrigerator: Up to 2 weeks.

  • Freezer: Up to 3 months (wrap tightly).

SERVING IDEAS

  • Drizzle melted peanut butter over the top before setting.

  • Press sea salt flakes lightly onto the surface.

  • Layer with white chocolate fudge for a marble effect.

  • Cut into tiny cubes and add to ice cream.