The Crown Jewel of Chocolate Desserts

There are chocolate desserts, and then there are statements. The kind that silence a table, make forks pause midair, and inspire the quiet, reverent nod that says, this is the one. The Imperial Midnight Chocolate Torte is that dessert—the crown jewel of chocolate indulgence. Dense yet silky, deeply chocolate-forward without being cloying, and finished with a glossy sheen that looks like polished obsidian, this torte is designed for true chocolate lovers who believe dessert should feel luxurious, intentional, and unforgettable.

This is not a casual weeknight brownie or a quick-fix chocolate cake. This is the dessert you serve when you want to impress, celebrate, or simply remind yourself that chocolate—when treated with respect—is a masterpiece.

What Makes This Dessert Royal?

The secret lies in restraint and quality. Instead of masking chocolate with excessive sugar or flour, this recipe highlights dark chocolate in its purest form. Minimal flour, slow melting, and gentle baking create a texture that lands somewhere between a flourless cake and a truffle—rich, smooth, and hauntingly intense.

A whisper of espresso enhances the chocolate without announcing itself, while browned butter adds a subtle nutty depth that elevates the entire dessert. Finished with a satin chocolate glaze, this torte looks as elegant as it tastes.

Ingredients (Serves 10–12)

For the Torte:

  • 10 oz (280 g) high-quality dark chocolate (70% cocoa), finely chopped

  • ¾ cup unsalted butter

  • 1 tablespoon instant espresso powder

  • ¾ cup granulated sugar

  • ½ cup light brown sugar, packed

  • 4 large eggs, room temperature

  • 1 teaspoon vanilla extract

  • ¼ teaspoon fine sea salt

  • ¼ cup all-purpose flour (or almond flour for a gluten-light version)

For the Midnight Glaze:

  • 6 oz dark chocolate (60–70%), chopped

  • ½ cup heavy cream

  • 1 teaspoon honey or corn syrup (for shine)

Step-by-Step Method

1. Prepare the Pan
Preheat your oven to 325°F (165°C). Line the bottom of a 9-inch springform pan with parchment paper and lightly butter the sides. This ensures a clean release and a flawless presentation.

2. Brown the Butter
In a saucepan over medium heat, melt the butter slowly. Continue cooking until it turns golden and smells nutty, with brown flecks forming at the bottom. Remove immediately from heat and stir in the espresso powder.

3. Melt the Chocolate
Add the chopped dark chocolate to the hot butter mixture. Let it sit for one minute, then stir gently until smooth and glossy. Allow this mixture to cool slightly.

4. Build the Batter
Whisk in both sugars until fully incorporated. Add the eggs one at a time, mixing slowly to avoid incorporating too much air. Stir in vanilla and salt. Gently fold in the flour just until combined—do not overmix.

5. Bake with Precision
Pour the batter into the prepared pan and smooth the top. Bake for 35–40 minutes. The edges should be set, but the center should still have a slight wobble. This ensures a fudgy, truffle-like interior.

6. Cool Completely
Let the torte cool in the pan for one hour, then refrigerate for at least 3 hours (overnight is ideal). This resting time is essential—it allows the flavors to deepen and the texture to become luxuriously dense.

The Midnight Glaze

Heat the cream until just steaming, not boiling. Pour it over the chopped chocolate and honey. Let sit for one minute, then stir slowly until smooth. Allow the glaze to cool slightly before pouring over the chilled torte.

Pour from the center and let it naturally cascade to the edges for a flawless, mirror-like finish.

Serving Suggestions Fit for Royalty

  • Serve thin slices—this dessert is powerful.

  • Pair with lightly sweetened whipped cream or crème fraîche.

  • Fresh raspberries or black cherries add a beautiful contrast.

  • A sprinkle of flaky sea salt just before serving heightens the chocolate intensity.

For an extra-luxurious touch, serve slightly chilled with a warm espresso or a glass of red dessert wine.

Why This Truly Is the Crown Jewel

This torte doesn’t rely on gimmicks or excess. Its elegance comes from balance, technique, and respect for chocolate itself. Every bite melts slowly, coating the palate with layers of bitterness, sweetness, and depth. It’s the kind of dessert people remember—and request again and again.
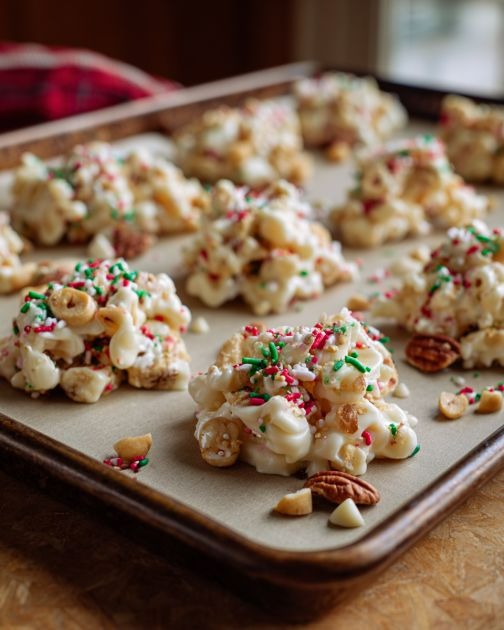
Slow Cooker 4-Ingredient White Chocolate Candy Clusters – A Sweet Treat You Can’t Resist

There’s something magical about recipes that deliver big flavor with minimal effort, and these Slow Cooker 4-Ingredient White Chocolate Candy Clusters are the perfect example. With just a handful of pantry staples and the gentle heat of a slow cooker, you can create an irresistible candy that tastes like it came straight from a specialty chocolate shop. This is the kind of treat that disappears quickly at holidays, parties, bake sales, or even just sitting in a bowl on the counter “for later.”

What makes this recipe truly special isn’t just the simplicity—it’s the texture contrast. Creamy white chocolate coats crunchy nuts and chewy add-ins, creating a cluster that hits all the right notes: sweet, rich, crisp, and satisfying. Best of all, you don’t need candy thermometers, double boilers, or fancy skills. If you can turn on a slow cooker and stir occasionally, you can make these perfectly every time.

Why You’ll Love This Recipe

This recipe is a lifesaver during busy seasons. Whether you’re preparing treats for Christmas, Eid, birthdays, or unexpected guests, these candy clusters come together effortlessly. The slow cooker does all the hard work, preventing the white chocolate from scorching while melting evenly.

Another reason these clusters are so beloved is their versatility. You can easily adapt them to your taste preferences or what you have on hand. Sweet tooth? Add dried fruit. Love crunch? Use mixed nuts. Prefer a slightly salty balance? Choose roasted peanuts or cashews. The base recipe stays the same, but the results always feel unique.

Ingredients (Just 4!)

  1. White chocolate chips or white chocolate melting wafers
    Choose good-quality white chocolate for the smoothest texture and best flavor.

  2. Roasted peanuts
    These add crunch and a savory contrast that balances the sweetness beautifully.

  3. Cashews or almonds
    A second nut adds depth and makes each cluster more interesting.

  4. Dried fruit or mini marshmallows
    Raisins, dried cranberries, chopped apricots, or mini marshmallows all work wonderfully.

That’s it—four simple ingredients that transform into something truly addictive.

Step-by-Step Instructions

Start by lightly greasing the inside of your slow cooker or lining it with parchment paper if your model allows. This helps with easy cleanup later.

Add the white chocolate chips or wafers to the slow cooker first. Set the slow cooker to low heat. White chocolate is delicate, so patience is key here. Let it melt slowly for about 30–40 minutes, stirring every 10 minutes to ensure even melting and prevent scorching.

Once the white chocolate is fully melted and silky smooth, add the roasted peanuts, cashews (or almonds), and your chosen dried fruit or marshmallows. Gently fold everything together until all the pieces are evenly coated in white chocolate. The mixture should look thick, glossy, and generously coated.

Turn off the slow cooker. Using a spoon or small cookie scoop, drop spoonfuls of the mixture onto a baking sheet lined with parchment or wax paper. Try to keep the clusters similar in size so they set evenly.

Allow the clusters to cool and firm up at room temperature for about 1–2 hours. If you’re short on time, you can place them in the refrigerator for 20–30 minutes until fully set.

Tips for Perfect Candy Clusters

One of the most important tips is to always melt white chocolate on low heat. High heat can cause it to seize or become grainy. Stirring gently and frequently keeps it smooth.

If you live in a warm climate, store the finished clusters in the refrigerator so they hold their shape. In cooler environments, an airtight container at room temperature works perfectly.

For extra flavor, you can add a pinch of salt over the clusters while they’re still wet. That tiny hint of salt enhances the sweetness and makes the flavors pop.

Creative Variations

These clusters are endlessly customizable. Swap peanuts for pistachios, add crushed pretzels for a sweet-and-salty crunch, or mix in toasted coconut for a tropical twist. You can even drizzle dark chocolate over the top once they’ve set for a beautiful contrast.

For festive occasions, sprinkle colored sugar, edible glitter, or crushed candy canes on top before the clusters harden. They instantly look bakery-worthy with almost no extra effort.

Serving and Gifting Ideas

Serve these candy clusters in decorative bowls at parties, alongside tea or coffee, or as part of a dessert platter. They also make excellent edible gifts. Simply pack them into small boxes or cellophane bags tied with ribbon for a thoughtful homemade present.

Because they keep well, you can make them days in advance—another reason they’re perfect for holidays and gatherings.

Final Thoughts

These Slow Cooker 4-Ingredient White Chocolate Candy Clusters prove that you don’t need complicated techniques or long ingredient lists to make something truly special. They’re rich, crunchy, customizable, and dangerously easy to make. One batch is never enough, and once you try them, you’ll find yourself returning to this recipe again and again.

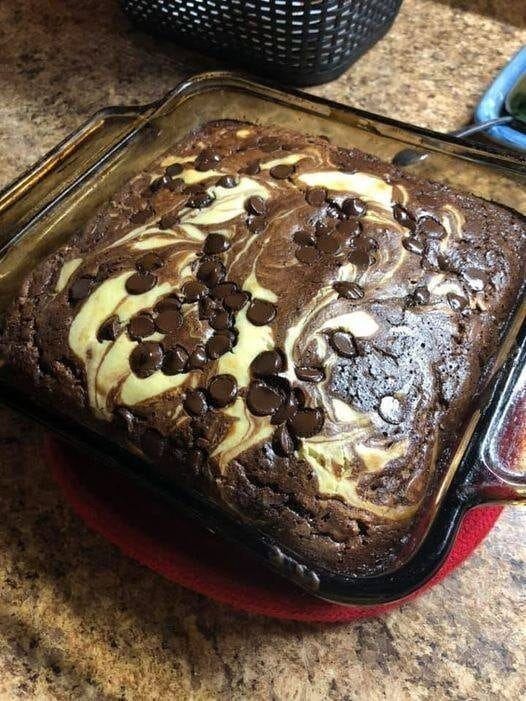
Low Carb Cheesecake Brownies

If you love brownies and cheesecake but are trying to keep your carbs low, this recipe is about to become your new obsession. These Low Carb Cheesecake Brownies combine deep, chocolatey brownie layers with a silky vanilla cheesecake swirl — all without sugar, flour, or guilt. They’re perfect for keto lifestyles, low-carb diets, or anyone who simply wants a smarter dessert that still tastes indulgent.

What makes this recipe special is the balance of textures. The brownie base is dense, moist, and intensely chocolate-forward, while the cheesecake layer adds creaminess and a subtle tang that cuts through the richness. Unlike many low-carb desserts that can feel dry or artificial, these brownies taste bakery-quality and satisfy even non-keto eaters.

Let’s dive in.

Why You’ll Love These Low Carb Cheesecake Brownies

  • Ultra fudgy texture – no crumbly or dry brownies here

  • No refined sugar or flour

  • Easy to make in one pan

  • Perfect for meal prep – they store beautifully

  • Only a few net carbs per serving

  • Freezer-friendly for cravings anytime

These brownies are ideal for holidays, potlucks, or those late-night chocolate cravings when you want something sweet without spiking your blood sugar.Ingredients You’ll Need

For the Low Carb Brownie Layer:

  • ½ cup unsalted butter

  • ¾ cup sugar-free sweetener (erythritol or monk fruit blend)

  • 2 large eggs, room temperature

  • 1 teaspoon vanilla extract

  • ¾ cup almond flour

  • ⅓ cup unsweetened cocoa powder

  • ½ teaspoon baking powder

  • ¼ teaspoon salt

  • ½ cup sugar-free dark chocolate chips (optional but recommended)

For the Cheesecake Layer:

  • 8 oz full-fat cream cheese, softened

  • ¼ cup sugar-free sweetener

  • 1 large egg

  • 1 teaspoon vanilla extract

Step-by-Step Instructions

Step 1: Prepare Your Pan

Preheat your oven to 350°F (175°C). Line an 8×8-inch baking pan with parchment paper, leaving overhang on the sides for easy removal. Lightly grease the parchment.

Step 2: Make the Brownie Batter

In a saucepan over low heat, melt the butter gently. Remove from heat and whisk in the sugar-free sweetener until smooth. Allow it to cool slightly.

Add the eggs one at a time, whisking well after each addition. Stir in the vanilla extract.

In a separate bowl, mix almond flour, cocoa powder, baking powder, and salt. Slowly fold the dry ingredients into the wet mixture until smooth. If using chocolate chips, fold them in now.

Reserve ¼ cup of brownie batter for swirling later.

Step 3: Prepare the Cheesecake Layer

In a medium bowl, beat the softened cream cheese until completely smooth. Add the sweetener and mix until fluffy. Beat in the egg and vanilla extract until creamy and lump-free.

The key here is softness — fully softened cream cheese ensures a silky cheesecake layer.

Step 4: Assemble the Layers

Spread the brownie batter evenly into the prepared pan.

Gently pour the cheesecake mixture over the brownie layer and smooth it out.

Drop spoonfuls of the reserved brownie batter on top of the cheesecake layer. Use a knife or skewer to gently swirl, creating a marbled pattern. Don’t overmix — less swirling gives prettier layers.

Step 5: Bake to Perfection

Bake for 28–35 minutes, or until the edges are set and the center is just slightly jiggly. Overbaking can dry out low-carb brownies, so err on the side of underbaking.

Remove from the oven and allow to cool completely in the pan. For best results, refrigerate for at least 2 hours before slicing.

Tips for the Best Low Carb Cheesecake Brownies

  • Use room-temperature ingredients for smooth batter and even baking

  • Don’t overbake — they firm up as they cool

  • Chill before cutting for clean slices

  • Use parchment paper for easy removal

  • Choose high-quality cocoa powder for deep chocolate flavor

Flavor Variations

Want to customize your brownies? Try these ideas:

  • Peanut Butter Swirl: Add spoonfuls of sugar-free peanut butter on top

  • Espresso Brownies: Add 1 teaspoon instant espresso powder to the brownie batter

  • Mint Chocolate: Add a few drops of sugar-free peppermint extract

  • Nutty Crunch: Fold chopped walnuts or pecans into the brownie layer

Storage & Serving

  • Refrigerator: Store in an airtight container for up to 5 days

  • Freezer: Freeze individual slices for up to 2 months

  • Serving Tip: Serve slightly chilled or at room temperature with sugar-free whipped cream

These brownies actually taste better the next day once the flavors settle.

Final Thoughts

These Low Carb Cheesecake Brownies prove that you don’t need sugar or flour to enjoy an indulgent dessert. They’re rich, creamy, chocolatey, and satisfying — everything a brownie should be, without the carb crash.

Whether you’re following a keto lifestyle, watching your carbs, or simply want a healthier dessert option, this recipe delivers comfort, flavor, and elegance in every bite. One pan, simple ingredients, and bakery-level results — you’ll find yourself making these again and again.

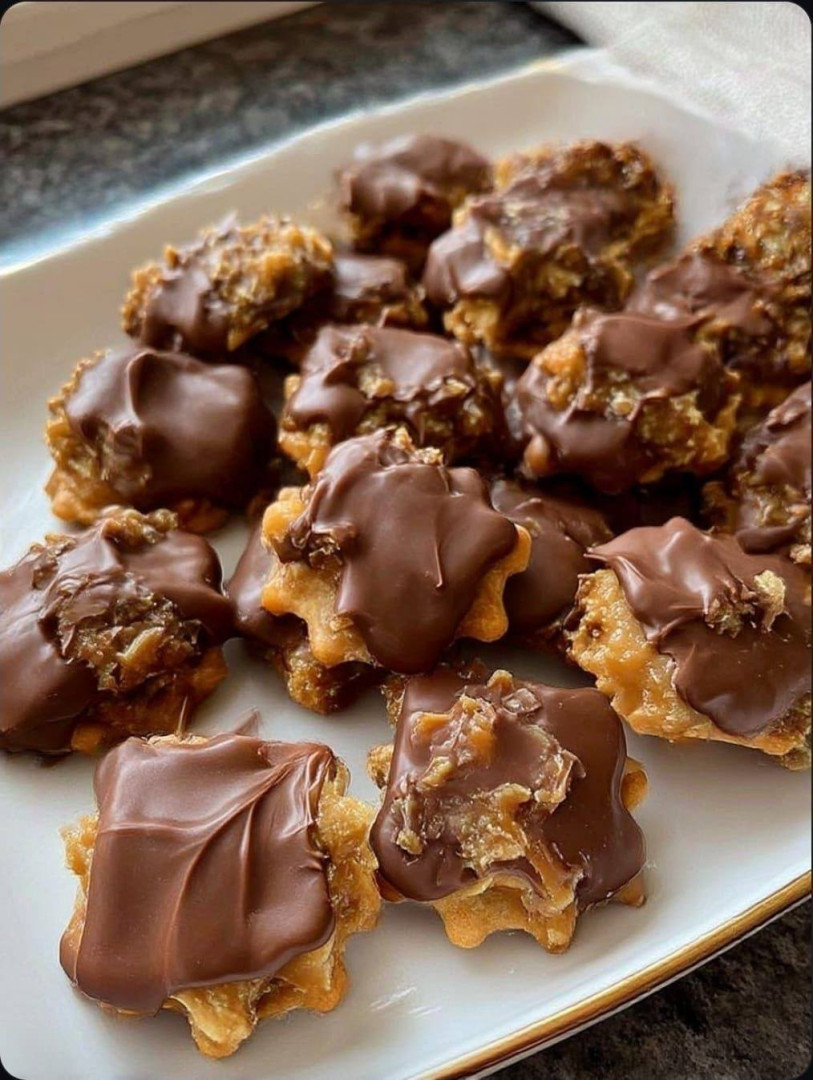
Old-School Pecan Dandy Do’s Sweetened, Sticky, and Wonderfully Retro

If you grew up around church bake sales, roadside diners, or a grandmother who kept wax paper in a drawer just for candy-making days, Pecan Dandy Do’s will feel like a warm flashback. These glossy, caramel-coated pecan clusters are unapologetically sweet, a little messy, and absolutely timeless. Before gourmet chocolates and sea salt caramels took over, candies like this were made with confidence, butter, and a sturdy wooden spoon.

This version leans fully into that old-school charm—no corn syrup shortcuts, no candy thermometers if you don’t want them, and just enough vanilla to make the whole kitchen smell like memory. The result is a chewy-crisp candy with toasted pecans wrapped in a deep, buttery caramel that sets just enough to hold together but still sticks lovingly to your fingers.

What Makes a True Pecan Dandy Do?

A proper Pecan Dandy Do isn’t brittle and it isn’t fudge. It lives somewhere in between—soft-set caramel clinging to pecans in craggy little mounds. The sugar is cooked just past the thread stage, enriched with butter and milk, then poured hot over nuts that have been toasted until fragrant. Once spooned onto wax paper, they cool into shiny, amber clusters that beg to be stolen before they fully set.

Ingredients (Simple, Honest, and Retro)

  • 2 ½ cups pecan halves

  • 1 ¾ cups granulated sugar

  • ½ cup whole milk (or evaporated milk for extra richness)

  • 6 tablespoons unsalted butter

  • 1 tablespoon light molasses (for depth and old-time color)

  • 1 teaspoon pure vanilla extract

  • ¼ teaspoon fine sea salt

  • Optional: a pinch of baking soda (for a slightly lighter, less dense caramel)

Step 1: Toast the Pecans (Do Not Skip)

Spread the pecans in a single layer on a dry skillet or baking sheet. Toast over medium heat (or in a 350°F oven) for 7–10 minutes, stirring once or twice, until fragrant and just beginning to darken. This step transforms the candy—raw pecans will taste flat and oily, while toasted ones bring warmth and complexity.

Transfer the hot pecans to a heatproof bowl and keep nearby. Candy-making waits for no one.

Step 2: Build the Old-Fashioned Caramel

In a heavy-bottomed saucepan, combine the sugar, milk, butter, molasses, and salt. Cook over medium heat, stirring constantly until the sugar dissolves and the butter melts. Once the mixture begins to bubble, reduce stirring to occasional gentle sweeps to prevent scorching.

Let the caramel cook steadily for 10–14 minutes. It should thicken, darken slightly, and smell deeply buttery. If you’re using a thermometer, aim for about 238–240°F (soft-ball stage). If you’re going by instinct, drop a small spoonful into cold water—it should form a soft ball that flattens when pressed.

If using baking soda, stir it in quickly now. The caramel will foam slightly—this is normal and very old-school.

Remove from heat and immediately stir in the vanilla.

Step 3: Marry the Pecans and Caramel

Working quickly, pour the hot caramel over the toasted pecans. Stir until every nut is thickly coated and glossy. The mixture should be sticky, not runny, and heavy on the spoon.

Line your counter with wax paper or parchment. Using two spoons, drop rustic mounds of the pecan mixture onto the paper. Don’t fuss with them—irregular shapes are part of the charm.

Step 4: Cool, Set, and Sneak One Early

Let the Pecan Dandy Do’s cool at room temperature for 30–45 minutes. They will firm up as they cool but remain pleasantly chewy. If you can’t wait and steal one warm, you’ll be rewarded with stretchy caramel and toasted pecans at their peak—just mind your fingers.

Storage & Serving (If They Last That Long)

Store in an airtight tin with wax paper between layers. They keep well for about a week at room temperature, though in most kitchens they disappear long before then. Serve with black coffee, sweet tea, or tucked into holiday cookie trays where they always stand out as the nostalgic favorite.

Retro Tips from the Candy Drawer

  • For extra chew, swap half the milk for evaporated milk.

  • For deeper flavor, use dark brown sugar in place of ½ cup of the white sugar.

  • If the caramel sets too hard, you cooked it a touch too long—next time pull it off earlier.

  • Sticky fingers are a sign of success.

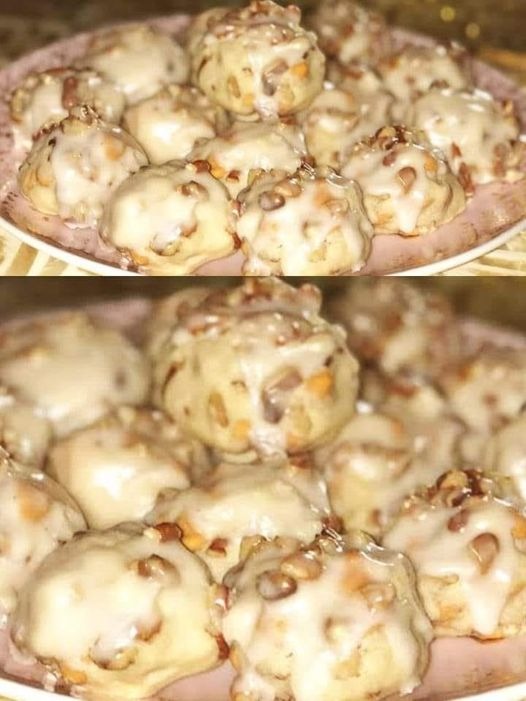
Butternut Cookies

Butternut cookies are one of those quietly magical treats that don’t shout for attention but win hearts the moment you take a bite. Tender, buttery, and filled with the deep, comforting flavor of toasted nuts, these cookies feel like something pulled from a handwritten recipe card tucked inside a grandmother’s tin. They’re not flashy, but they’re unforgettable. This version of butternut cookies balances rich butter, warm vanilla, and finely chopped nuts to create a cookie that’s soft in the center, lightly crisp on the edges, and full of cozy nostalgia.

Unlike crunchy nut cookies, butternut cookies are meant to be delicate and melt-in-your-mouth. They’re perfect with a cup of tea, coffee, or even a cold glass of milk. Whether you bake them for the holidays, a family gathering, or simply to treat yourself, these cookies deliver comfort in every bite.

What Makes Butternut Cookies Special?

The name “butternut cookies” traditionally refers to cookies made with butter and finely ground nuts, often walnuts or pecans. The nuts aren’t just mixed in for texture; they’re part of the structure, giving the cookies their signature softness and subtle nutty richness. The dough is gently sweetened, allowing the buttery flavor to shine without being overpowering.

These cookies are often rolled in powdered sugar or topped with a light glaze, which adds just enough sweetness to balance the nutty base. They’re elegant without being complicated, making them a timeless favorite.

Ingredients You’ll Need

For the cookies:

  • 1 cup unsalted butter, softened to room temperature

  • ½ cup powdered sugar

  • 1 teaspoon vanilla extract

  • 2 cups all-purpose flour

  • ¼ teaspoon salt

  • ¾ cup finely chopped walnuts or pecans

Optional coating or topping:

  • ½ cup powdered sugar (for rolling)

  • OR a simple glaze made with powdered sugar and milk

Step-by-Step Instructions

1. Cream the Butter and Sugar

In a large mixing bowl, beat the softened butter and powdered sugar together until smooth, pale, and fluffy. This step is essential for creating the light, tender texture that defines butternut cookies. Take your time here—well-creamed butter makes all the difference.

2. Add Vanilla

Mix in the vanilla extract until fully incorporated. The vanilla adds warmth and depth, enhancing the buttery and nutty flavors without overpowering them.

3. Combine Dry Ingredients

In a separate bowl, whisk together the flour and salt. Slowly add the dry mixture to the butter mixture, mixing on low speed or by hand until a soft dough forms. Avoid overmixing; the dough should come together gently.

4. Fold in the Nuts

Stir in the finely chopped nuts. Make sure they are evenly distributed throughout the dough. The nuts should be small enough to blend smoothly, creating a uniform texture rather than chunky bites.

5. Chill the Dough

Cover the dough and refrigerate for 30–45 minutes. Chilling helps the cookies hold their shape while baking and deepens the flavor.

6. Shape the Cookies

Preheat your oven to 350°F (175°C). Line a baking sheet with parchment paper. Scoop small portions of dough and roll them into 1-inch balls. Place them about 2 inches apart on the baking sheet.

7. Bake to Perfection

Bake for 12–15 minutes, or until the bottoms are just lightly golden. The tops should remain pale. Overbaking will dry them out, so keep a close eye on them.

8. Cool and Finish

Let the cookies cool on the baking sheet for 5 minutes, then transfer them to a wire rack. While still slightly warm, roll them gently in powdered sugar if desired. Alternatively, drizzle with a simple glaze once completely cooled.

Tips for the Best Butternut Cookies

  • Use real butter: Margarine or substitutes won’t give the same rich flavor or soft texture.

  • Finely chop the nuts: This ensures a smooth dough and even baking.

  • Don’t overbake: These cookies should stay soft and tender.

  • Chill the dough: Skipping this step can cause spreading and loss of structure.

Flavor Variations

  • Maple Butternut Cookies: Replace vanilla with maple extract for a warm, autumn twist.

  • Chocolate-Drizzled: Add a light drizzle of melted dark chocolate after baking.

  • Spiced Version: Add a pinch of cinnamon or nutmeg for subtle warmth.

How to Store

Store butternut cookies in an airtight container at room temperature for up to 5 days. They also freeze beautifully—simply place them in a freezer-safe container and freeze for up to 2 months. Thaw at room temperature before serving.

Final Thoughts

Butternut cookies are proof that simplicity can be extraordinary. With just a handful of ingredients and a little care, you can create a cookie that feels comforting, elegant, and deeply satisfying. Soft, buttery, and gently nutty, these cookies are perfect for sharing—or for keeping all to yourself. Once you bake them, they’re bound to become a cherished favorite in your kitchen.

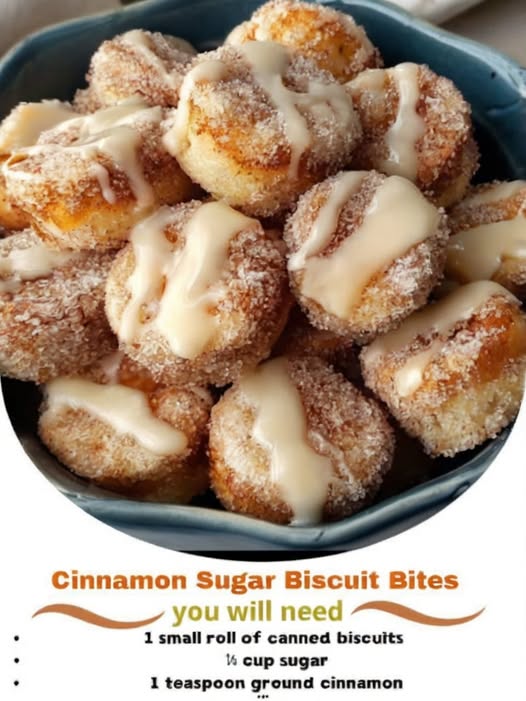
Biscuit Bites

Biscuit bites are one of those wonderfully simple snacks that manage to feel both nostalgic and endlessly customizable. They’re bite-sized, golden, soft on the inside, and slightly crisp on the outside—perfect for sharing, dipping, or serving as a quick appetizer. This recipe walks you through making tender biscuit dough from scratch, shaping it into small bites, flavoring them any way you like, and baking them so they come out perfectly every time. Whether you’re preparing something for a party, a family movie night, or an afternoon craving, these biscuit bites deliver comfort in the most delicious little packages.

Ingredients

For the Dough

  • 2 cups all-purpose flour

  • 1 tablespoon baking powder

  • ½ teaspoon baking soda

  • 1 teaspoon salt

  • 1 tablespoon sugar (optional, but adds nice browning)

  • 6 tablespoons cold unsalted butter, cubed

  • ¾ cup cold buttermilk (plus a splash more if needed)

Optional Add-ins (choose any combination)

  • ½ cup shredded cheddar

  • 1 tablespoon chopped chives or parsley

  • ½ teaspoon garlic powder

  • ¼ cup mini pepperoni pieces

  • Cinnamon and sugar for sweet bites

  • Melted butter for brushing

Instructions

1. Prepare Your Workspace

Before mixing anything, preheat your oven to 425°F (220°C). Biscuit dough bakes best in a hot oven because the sudden burst of heat creates steam that helps the bites rise. Line a baking sheet with parchment paper or lightly grease it with butter. Keeping everything cold—especially the butter—makes a big difference, so if your kitchen is warm, refrigerate your mixing bowl for a few minutes before starting.

2. Mix the Dry Ingredients

In a large bowl, whisk together the flour, baking powder, baking soda, salt, and sugar. Whisking not only blends the ingredients but also lightens the flour, helping the dough stay tender. If you plan to make savory biscuit bites, you can add garlic powder or dried herbs at this stage. For sweet ones, leave the dough plain and add flavors later.

3. Cut in the Butter

Add your cold, cubed butter to the flour mixture. Using a pastry cutter, fork, or your fingertips, gently work the butter into the dry ingredients until it resembles coarse crumbs with small pea-sized pieces of butter still visible. These tiny butter pockets melt during baking, creating flaky layers. Be careful not to overwork the mixture; warmth from your hands can melt the butter, reducing flakiness.

4. Add the Buttermilk

Pour in the cold buttermilk and stir with a wooden spoon until a shaggy dough forms. If it feels too dry or crumbly, add an extra tablespoon of buttermilk. The dough should be soft, slightly sticky, and just cohesive. Overmixing at this stage can make the bites tough, so stop as soon as it comes together.

5. Shape the Biscuit Bites

Turn the dough out onto a lightly floured surface. Instead of kneading (which develops gluten), gently pat or fold the dough a few times to bring it together. Press it into a rectangle about ¾ inch thick. Use a sharp knife or bench scraper to cut the dough into small bite-sized squares—usually about 1 inch each. If you want round bites, you can use a mini biscuit cutter or even the rim of a small medicine cup, but squares save time and prevent scraps.

If you’re adding cheese, herbs, or pepperoni, sprinkle them over the dough before giving it a final fold. For cinnamon-sugar bites, you can toss the cut pieces in a mixture of sugar and cinnamon before baking.

6. Arrange and Bake

Transfer the biscuit bites to your prepared baking sheet, placing them close together but not touching. Crowding them slightly helps them rise taller. Brush the tops with melted butter for extra flavor or leave them plain if you prefer a more rustic texture. Bake for 10–12 minutes, or until the tops are golden and the edges feel set. Smaller bites may bake faster, so keep an eye on them around the 9-minute mark.

7. Finishing Touches

As soon as they come out of the oven, you can brush them with more butter, sprinkle them with herbs, or drizzle them with honey if you’re going the sweet route. Let them cool for a few minutes—they’re best eaten warm, when the centers are fluffy and the edges slightly crisp.

Serving Suggestions

Biscuit bites are incredibly versatile. For savory options, serve them with warm marinara, garlic butter, ranch dressing, or even a cheese dip. They pair wonderfully with soups and chili, making them a cozy side dish in colder months. For sweet bites, consider dipping them in melted chocolate, cream cheese icing, or a simple honey-butter mixture. They also make delightful brunch additions alongside fruit and yogurt.

Storage and Reheating

If you have leftovers, let the bites cool completely before storing them in an airtight container. They’ll stay fresh for two days at room temperature or up to five days in the refrigerator. To reheat, warm them in a 350°F (175°C) oven for 5–7 minutes to restore their crispness—microwaving works in a pinch, but the oven delivers the best texture.

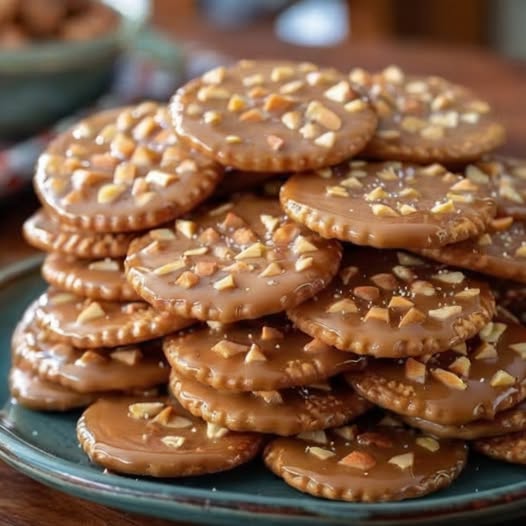
Ritz Crackers

There is something timeless, comforting, and almost magical about a Ritz cracker. Light, buttery, salty, and perfectly crisp, these little golden rounds have been part of family snacks, holiday spreads, and late-night cravings for generations. But what if you could make your very own Ritz-style crackers at home—fresh, fragrant, and even better than anything in a box? This unique recipe brings you the nostalgic flavor of classic Ritz crackers, but with a homemade twist that elevates them into a snack you’ll be proud to serve or keep all to yourself.

While most people think crackers are complicated to make, this recipe shows just how simple and satisfying it can be. The secret? A soft, buttery dough, a touch of baking powder for lift, and a slow, even bake that transforms each round into a crunchy, flaky cracker with that iconic Ritz flavor. Once you try them warm from the oven, lightly salted and impossibly crisp, you might never go back to store-bought again.

Why Homemade Ritz Crackers Taste Better

Nothing compares to the aroma that fills your kitchen when butter melts into flour and the dough transforms into delicate, golden crackers. Unlike commercially processed crackers, homemade Ritz have:

  • Real butter flavor

  • Fresh crispness

  • No preservatives

  • Customizable toppings

  • A richer, more satisfying bite

Plus, making crackers at home is shockingly affordable—and surprisingly fun. It’s the kind of recipe that kids love helping with, dinner guests rave about, and home bakers secretly enjoy because of how easy it is.

Ingredients You’ll Need

These simple ingredients come together to create the signature Ritz taste:

  • 1 ½ cups all-purpose flour

  • 1 tablespoon sugar

  • 1 teaspoon baking powder

  • ½ teaspoon salt

  • 5 tablespoons cold unsalted butter, cut into cubes

  • ⅓ cup milk (whole milk preferred)

  • 1 tablespoon melted butter (for brushing)

  • Flaky salt for sprinkling

Everything in this list is likely sitting in your pantry right now, which makes this recipe perfect for last-minute snacks or an impressive homemade addition to a cheese board.

How to Make Homemade Ritz Crackers

Step 1: Prepare the Dough

In a mixing bowl, whisk together the flour, sugar, baking powder, and salt. Add the cold butter cubes and use a pastry cutter or your fingers to crumble the butter into the flour until it resembles coarse crumbs. Cold butter is crucial—it creates the flaky, layered texture that makes these crackers irresistible.

Add the milk and gently stir until a soft dough forms. Don’t overmix; the goal is tenderness, not toughness.

Step 2: Roll and Cut

Turn the dough onto a lightly floured surface and roll it out to about ⅛ inch thickness—thin enough to crisp yet thick enough to give that buttery bite.

Use a round cookie cutter (or even a bottle cap) to cut small circles. If you want them to look exactly like Ritz crackers, poke 5–7 holes in each circle using a toothpick. These holes help them bake evenly and give them their signature pattern.

Step 3: Bake to Golden Perfection

Place the cut dough rounds on a parchment-lined baking sheet. Brush lightly with melted butter and sprinkle with a pinch of flaky salt.

Bake at 400°F (200°C) for 10–12 minutes, or until the crackers turn a beautiful golden shade. Watch them closely near the end—because of their size, they can brown quickly.

Once they’re out of the oven, brush again with a little melted butter for the ultimate Ritz flavor. Allow them to cool completely so they crisp up fully.

How to Use Homemade Ritz Crackers

These crackers are so good you can eat them plain, but they shine when paired with:

  • Cream cheese and jam

  • Sharp cheddar slices

  • Spinach dip, tuna salad, or hummus

  • Peanut butter or Nutella

  • Soup toppings or chowder sides

They’re also perfect for classic dishes like:

  • Ritz cracker chicken

  • Buttery cracker stuffing

  • Crumb toppings for casseroles or baked mac and cheese

Once you have a batch ready, you’ll find endless ways to use them.

Flavor Variations to Try

Here’s where the recipe becomes truly unique—you can customize your crackers to match your taste:

1. Garlic Herb

Add garlic powder and dried herbs like parsley or thyme to the dough.

2. Cheddar

Mix in ½ cup shredded sharp cheddar for cheesy, savory crackers.

3. Sweet Cinnamon Sugar

Brush with butter and sprinkle with cinnamon sugar before baking for a dessert-style treat.

4. Spicy Chili

Add paprika, chili powder, or crushed red pepper for kick.

Each variation tastes dramatically different, but all maintain the irresistible crunch of the classic version.

Storage Tips

Homemade Ritz crackers stay fresh for 7–10 days in an airtight container. For extra crispness, you can re-bake them at 300°F (150°C) for 3–4 minutes if they soften over time.

Final Thoughts

This unique Ritz cracker recipe isn’t just about recreating a nostalgic snack—it’s about elevating it into something handmade, flavorful, and truly special. With only a few ingredients and minimal effort, you can create a cracker that tastes richer, fresher, and more wholesome than anything in a box.

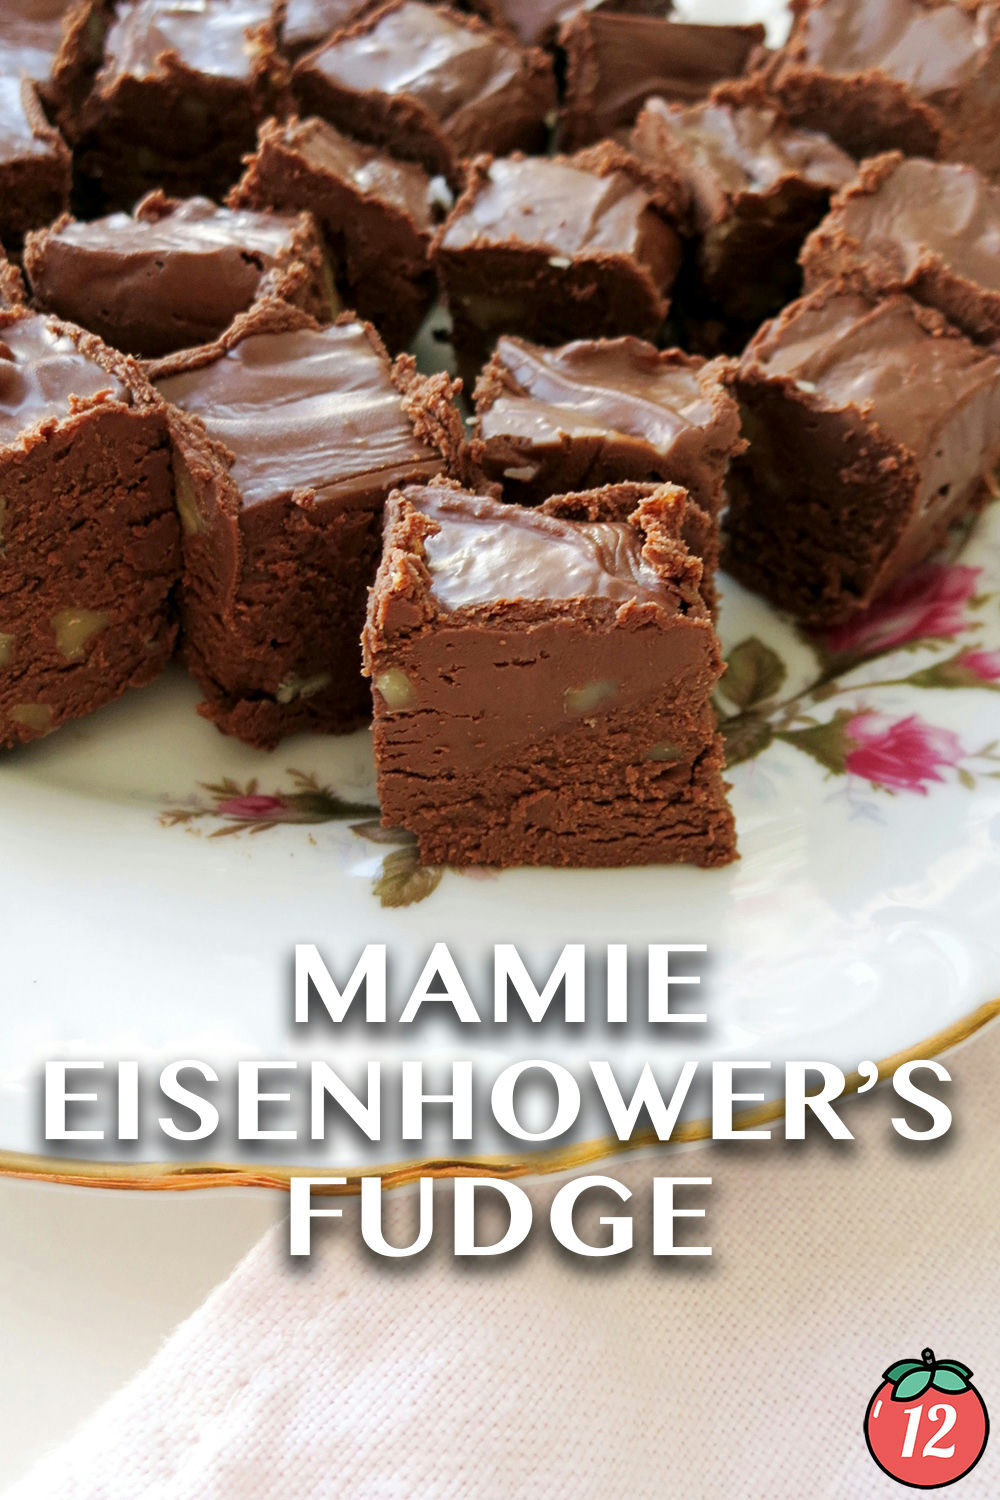
Mamie Eisenhower’s Famous Fudge

There are recipes that live in cookbooks, and then there are recipes that live in American memory. Mamie Eisenhower’s Famous Fudge firmly belongs to the second category—a decadent, crowd-pleasing confection cherished since the 1950s. Known affectionately as “Mamie’s Million-Dollar Fudge,” this recipe earned its name not because it was expensive to make, but because it tasted so luxuriously rich that people swore it was worth a fortune. The First Lady herself included it in several community cookbooks, and over time, it became both a cultural icon and a nostalgic holiday tradition. Today, you’re getting a modern, unique retelling of this legendary fudge—still true to the classic spirit but infused with fresh clarity, storytelling, and upgraded technique so every batch you make is silky, glossy, and melt-in-your-mouth perfect.

The Story Behind Mamie’s Million-Dollar Magic

Mamie Eisenhower wasn’t known for being extravagant, but she understood comfort, simplicity, and community. Her fudge became beloved because it was reliable—sweet enough to brighten a military family’s day, simple enough for busy home cooks, and special enough for holidays and White House gatherings. She famously used marshmallow cream, which ensured smooth texture without the risk of graininess that often plagues old-fashioned stovetop fudge. This clever shortcut kept the recipe foolproof, even for inexperienced candy makers.

Think of this fudge as the culinary equivalent of a warm handshake: welcoming, rich, and surprisingly accessible. And while the original recipe was fairly straightforward, this unique version adds a modern shine—technique tips, flavor balance improvements, and a few optional twists that elevate the classic without sacrificing its soul.

Mamie Eisenhower’s Famous Fudge (Unique Modern Version)

Yield: About 5 pounds of fudge
Time: 15 minutes prep + 2–3 hours chilling

Ingredients

Dry Ingredients

  • 4 ½ cups granulated sugar

  • 1 pinch fine sea salt

  • 2 cups semi-sweet chocolate chips

  • 4 ounces unsweetened baking chocolate, chopped

  • 1 tablespoon instant espresso powder (optional but enhances chocolate depth)

Wet & Creamy Ingredients

  • 1 (12-ounce) can evaporated milk

  • ½ cup unsalted butter

  • 1 (7-ounce) jar marshmallow cream

  • 1 tablespoon pure vanilla extract

Optional Add-Ins

  • 2 cups toasted chopped pecans or walnuts

  • ½ cup mini marshmallows

  • 1 teaspoon cinnamon or cayenne for a warm or spicy variant

  • 1 tablespoon bourbon for an adult holiday twist

Step-by-Step Instructions (Perfect Every Time)

1. Prepare the Pan

Line a 9×13-inch baking dish with parchment paper, leaving overhang on the sides so the fudge can be lifted out easily. Lightly butter the paper for smoother release.

2. Build the Chocolate Base

In a large heatproof bowl, add:

  • chocolate chips

  • unsweetened chocolate

  • instant espresso (if using)

  • vanilla extract

  • nuts or add-ins (unless using marshmallows—reserve those until later)

The heat from the cooked sugar mixture will melt everything, so no pre-melting needed.

3. Cook the Sugar Syrup

In a deep, heavy saucepan combine:

  • sugar

  • salt

  • butter

  • evaporated milk

Bring to a boil over medium heat, stirring constantly so the sugar doesn’t stick or crystallize. Once it reaches a steady boil, reduce the heat slightly and continue cooking for 6 minutes, stirring frequently.

The mixture will become creamy, thick, and glossy—this is your fudge foundation.

4. Off the Heat, Bring in the Marshmallow Cream

Remove the pot from the heat and quickly stir in the marshmallow cream until fully dissolved. The mixture becomes thick, pale, shiny, and smells like warm caramel.

5. Pour and Melt the Chocolate

Immediately pour the hot mixture over the bowl of chocolates. Allow it to sit untouched for 2–3 minutes—this gentle resting helps melt the chocolate evenly.

Stir until completely smooth and satiny. If adding mini marshmallows, fold them in now so they soften but don’t fully melt.

6. Transfer and Smooth

Pour the fudge into the prepared dish. Use an offset spatula or buttered spoon to level it into a smooth, even surface.

7. Chill to Perfection

Refrigerate for 2–3 hours until firm. For the cleanest cuts, dip your knife in hot water and wipe between each slice.

What Makes This Version Unique?

1. Layered Chocolate Depth

The combination of semi-sweet chocolate, unsweetened chocolate, and espresso creates a deeper, more luxurious chocolate flavor than the original one-note profile.

2. Texture Insurance

The marshmallow cream guarantees a silky finish, but using evaporated milk also delivers richness without risk of curdling—something fresh milk can’t always promise.

3. Flavor Customization

Mamie’s classic has no frills, but this version allows subtle creative twists—bourbon for warmth, cinnamon for holiday spice, mini marshmallows for nostalgia, or cayenne for a daring modern kick.

4. Foolproof Technique

With the resting melt method, your chocolate melts evenly, preventing graininess—one of the most common fudge failures.

Serving Ideas

  • Cut into 1-inch squares for holiday gifting.

  • Sprinkle flaky sea salt on top before chilling for a gourmet touch.

  • Serve chilled for firmness or room-temp for a creamier bite.

  • Pair with coffee or milk for pure comfort.


💡 Storage Tips

  • Refrigerator: Up to 3 weeks in an airtight container.

  • Freezer: Up to 3 months, well-wrapped.

  • Room Temperature: 3–4 days if kept cool and dry.

Final Thought

Mamie Eisenhower may never have imagined that her simple fudge would become a cross-generational treasure, but good recipes have a way of becoming immortal. This unique 800-word version preserves everything delightful about the original while giving home cooks a foolproof, richly flavored, modernized approach. With each bite, you’re not just tasting chocolate—you’re tasting a little piece of American history, revived and perfected for today’s kitchen.

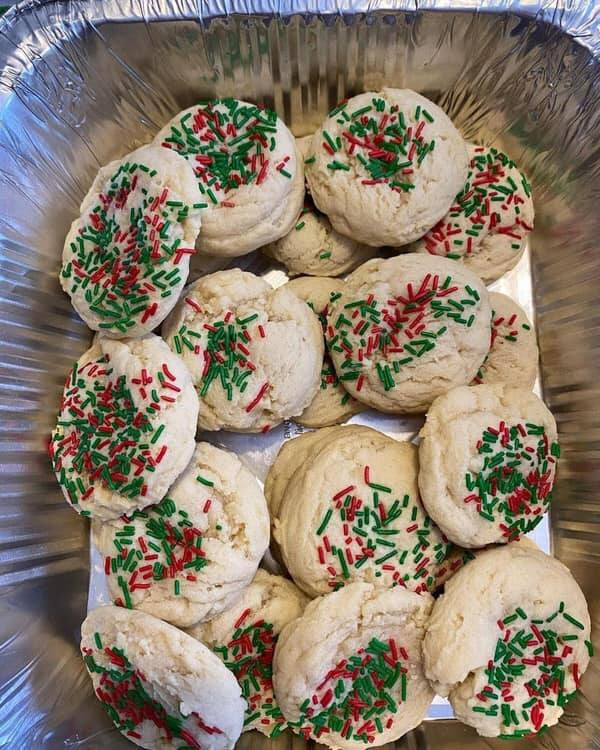
Angel Food Cake Cookies — A Heavenly, Cloud-Soft Treat

There are cookies that feel indulgent, cookies that feel nostalgic, and then there are cookies that feel absolutely weightless. Angel Food Cake Cookies, with their cloud-soft interiors and barely-there sweetness, belong to that magical third category. Imagine the lofty airiness of angel food cake condensed into a delightful handheld bite — golden at the edges, pillowy in the center, and delicately sweet with a texture that melts on your tongue like warm snow. This recipe transforms a humble box of angel food cake mix, or homemade mix if you prefer, into cookies that taste like they drifted down from the clouds themselves.

These cookies are not only beautiful, but also wonderfully simple. With only a few ingredients and a short baking time, they’re perfect for busy bakers, curious beginners, and anyone who wants a dessert that feels both luxurious and effortless. Their airy crumb makes them perfect for tea parties, bridal showers, after-school snacks, and late-night sweet cravings. Let’s dive into the process of making these heavenly treats.


Why Angel Food Cake Cookies Taste So Special

Angel food cake is famously known for its fluffy, almost sponge-like texture, thanks to whipped egg whites and the absence of fat. These cookies capture that same ethereal quality but in a denser, more compact form that still maintains that irresistible lift. When baked as cookies, the mix caramelizes at the edges, bringing a gentle crunch while keeping the inside soft and marshmallowy.

The beauty of this recipe lies in its simplicity. Just mix, scoop, bake, and enjoy. Yet the result tastes like you spent hours whipping eggs and folding batters when in reality it comes together in minutes. You can elevate them further with mix-ins like citrus zest, mini chocolate chips, sprinkles, or a dusting of powdered sugar.


Ingredients

Dry Mixture

  • 1 box (16 oz) angel food cake mix (or homemade equivalent)

  • ¼ teaspoon fine salt

  • ½ teaspoon vanilla powder (optional but wonderful)

Wet Ingredients

  • 1 large egg

  • 3 tablespoons water

  • 1 teaspoon vanilla extract

  • ½ teaspoon almond extract (optional for a signature bakery-style fragrance)

Optional Add-Ons

  • ½ cup mini white chocolate chips

  • Zest of one lemon or orange

  • Colored sprinkles for a “confetti cloud” look

  • Powdered sugar for dusting


Instructions

1. Prepare Your Workspace

Begin by preheating your oven to 350°F (175°C). Line two baking sheets with parchment paper or silicone mats. Angel Food dough tends to be sticky due to its light and airy nature, so lining is essential to achieving an even bake and easy release.

2. Mix the Dry Ingredients

In a large bowl, whisk together the angel food cake mix, salt, and vanilla powder (if using). Adding salt helps balance sweetness, and vanilla powder enhances the aromatic notes already present in the mix.

3. Combine Wet Ingredients

In a separate small bowl, whisk together the egg, water, vanilla extract, and almond extract. The water helps loosen the batter so it forms into soft mounds rather than stiff dough.

4. Create the Cookie Batter

Pour the wet mixture into the dry ingredients and fold gently using a silicone spatula. The batter will be airy, stretchy, and sticky. If you’re adding mix-ins like citrus zest, sprinkles, or chocolate chips, fold them in now. Avoid overmixing, as it can deflate the delicate structure of the batter.

5. Scoop the Cookies

Using a cookie scoop or two teaspoons, drop small mounds of dough—about 1 tablespoon each—onto the baking sheet. Leave at least 2 inches between cookies since they puff and spread slightly. A smooth dome shape gives the cookies a prettier finish.

6. Bake to Perfection

Bake for 9–12 minutes, depending on the size of your cookies. The tops should be dry, slightly cracked, and matte. The bottoms will be lightly golden. These cookies bake quickly, so keep an eye on the first batch to prevent overbrowning.

7. Cool and Dust

Remove the cookies and allow them to cool fully on the tray. They are delicate when hot and firm up as they cool. Sprinkle lightly with powdered sugar if desired for a snowy effect.


Texture, Flavor & Serving

An Angel Food Cake Cookie is unlike any other cookie. The exterior has a whisper of crispness, while the interior is like biting into a soft marshmallow with a subtle vanilla-almond perfume. These cookies pair beautifully with:

  • Hot tea

  • Fresh berries

  • Vanilla yogurt

  • Whipped cream

  • A drizzle of melted white chocolate

They also store wonderfully in airtight containers and stay pillow-soft for 3–4 days.


Variations for a Unique Twist

1. Lemon Cloud Cookies

Add 1 tablespoon lemon zest + 1 teaspoon lemon juice. Finish with a lemon glaze.

2. Birthday Cake Clouds

Fold in rainbow sprinkles and top with vanilla frosting and extra sprinkles.

3. Chocolate Chip Pillow Cookies

Use mini chocolate chips for a light, melty surprise in every bite.

4. Almond Frost Cookies

Add almond extract + sliced almonds on top before baking.

5. Coconut Cloud Cookies

Fold in ¼ cup shredded coconut for a toasty tropical twist.


Final Thoughts

Angel Food Cake Cookies are proof that simplicity can be heavenly. Soft as clouds, lightly sweet, and endlessly customizable, they offer all the charm of classic angel food cake in a bite-sized, golden-edged cookie. Whether you’re baking for a crowd or just for yourself, these cookies bring a touch of magic to the table—airy, elegant, and unforgettable.

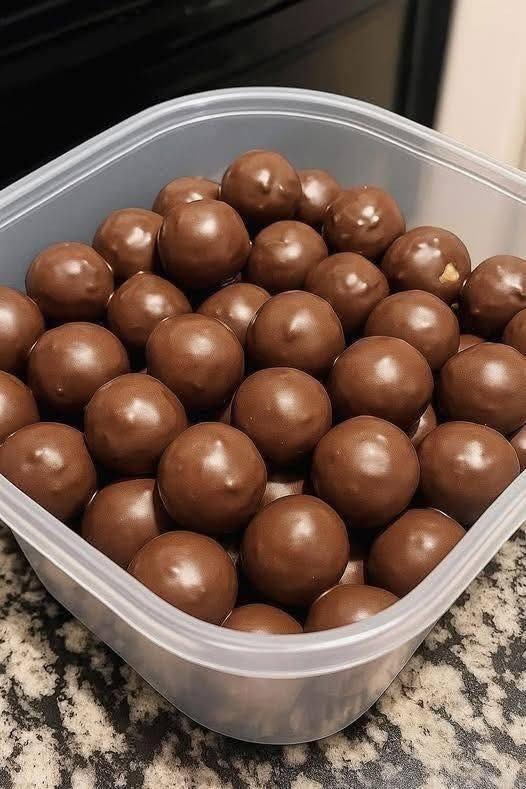
No-Bake High-Protein Chocolate Peanut Butter Balls

There’s something magical about a recipe that feels like dessert but behaves like a nutritional powerhouse. No-bake high-protein chocolate peanut butter balls are exactly that kind of food — tiny energy bombs that satisfy cravings, nourish muscles, and keep hunger under control for hours. In a world full of overly processed protein bars and sugar-loaded snacks disguised as “healthy,” these homemade protein balls stand out for being clean, simple, customizable, and unbelievably delicious. Best of all, they take less than 10 minutes to prepare and don’t require a stove, oven, mixer, or any fancy equipment.

Let’s dive into the story behind these incredibly addictive treats and then explore the step-by-step recipe that will become a staple in your fridge, lunchbox, gym bag, or late-night sweet tooth moments.

The Power of a No-Bake Snack

No-bake recipes hit differently. There’s a comfort in mixing wholesome ingredients with your hands (or a spoon) and rolling them into bite-sized spheres of goodness. There’s no worry about overbaking, underbaking, burning, or timing. What you see is what you get — raw, real, and nutrient-dense.

These chocolate peanut butter balls are high in protein thanks to peanut butter, oats, chia seeds, and your favorite protein powder. They’re also rich in healthy fats and slow-digesting carbs, keeping your blood sugar balanced and your energy levels steady. Where many snacks give you a quick rise and crash, these balls deliver smooth, lasting fuel.

Ingredients: The Perfect Balance of Flavor and Nutrition

This recipe relies on pantry staples that work harmoniously:

• Natural Peanut Butter

Creamy, unsweetened peanut butter binds the mixture while adding protein, healthy fats, and an irresistibly smooth texture.

• Protein Powder (Any Flavor)

Vanilla or chocolate protein powder enhances the sweetness naturally while boosting the protein content per serving.

• Rolled Oats

Oats bring structure, fiber, and a chewy bite. They also help slow down digestion for longer satiety.

• Honey or Maple Syrup

A touch of natural sweetness balances the chocolate and complements the nutty peanut butter flavor.

• Cocoa Powder

This deepens the chocolate flavor without piling on sugar or calories.

• Chia Seeds or Flax Seeds

These superfoods add omega-3s, fiber, and a subtle crunch while helping the mixture firm up.

• Dark Chocolate Chips (Optional but Amazing)

A sprinkle of chocolate chips adds texture and makes every bite feel indulgent.

• A Pinch of Salt

Salt amplifies all the flavors and keeps the sweetness balanced.

If you’re feeling creative, you can also roll them in shredded coconut, sesame seeds, crushed nuts, or even a dusting of cocoa.

THE RECIPE

No-Bake High-Protein Chocolate Peanut Butter Balls**

Makes: 14–18 balls

Prep Time: 10 minutes

Chill Time: 20 minutes (optional but recommended)

Ingredients

  • 1 cup creamy natural peanut butter

  • 1 cup rolled oats

  • ¼ cup honey or maple syrup

  • ½ cup chocolate or vanilla protein powder

  • 2 tablespoons cocoa powder

  • 1 tablespoon chia seeds or ground flaxseed

  • ¼ cup dark chocolate chips (optional)

  • 1 teaspoon vanilla extract

  • Pinch of salt

Instructions

1. Mix the Wet Base

In a medium bowl, add the peanut butter, honey, and vanilla. Stir until smooth and creamy. If your peanut butter is too thick, warm it in the microwave for 10–15 seconds to soften.

2. Add the Dry Ingredients

Stir in the protein powder, cocoa powder, oats, chia (or flax), and salt. The mixture will start to thicken as the oats and seeds absorb moisture.

If adding chocolate chips, fold them in now.

3. Adjust the Texture (Optional)

  • If too dry, add 1–2 teaspoons more honey or a splash of milk.

  • If too sticky, add extra oats or protein powder until it holds its shape.

4. Roll Into Balls

Scoop out tablespoon portions and roll them between your palms to form compact, smooth balls. You should get around 14–18 depending on size.

5. Chill

Place the balls on a plate and refrigerate for 20–30 minutes to firm up. They become fudgy, cohesive, and perfect for snacking.

6. Store

Store in an airtight container:

  • up to 1 week in the fridge

  • up to 2 months in the freezer

They taste incredible straight from the fridge but even better slightly softened at room temperature.

Why These Balls Are So Addictive

There is a perfect trifecta happening here:
protein + healthy fats + natural sweetness.

That combination keeps your brain happy and your body nourished. The chocolate flavor is rich without drowning in sugar, the peanut butter adds creaminess, and the oats give it that satisfying chew. Unlike heavy desserts, these feel light yet filling — a snack you can enjoy guilt-free whether you’re working out, studying, traveling, or managing a busy day.

Variations to Keep Things Interesting

1. Almond Joy Version

Swap peanut butter with almond butter, add coconut flakes, and use vanilla protein powder.

2. Mocha Energy Bites

Add ½ teaspoon instant coffee and use chocolate protein powder.

3. Banana Bread Protein Balls

Mix in 2 tablespoons mashed banana and add a dash of cinnamon.

4. Kids’ Chocolate Chip Balls

Skip cocoa, skip protein powder, and just use mini chocolate chips — soft, sweet, and perfect for lunchboxes.

5. Keto Version

Replace oats with fine almond flour and swap honey for sugar-free syrup.

Final Thoughts

No-Bake High-Protein Chocolate Peanut Butter Balls prove that healthy eating doesn’t need to be complicated, boring, or time-consuming. They’re quick, portable, customizable, and satisfy your sweet cravings while giving your body real nourishment. Once you make your first batch, they will become a weekly ritual — the snack you keep coming back to because it simply works.