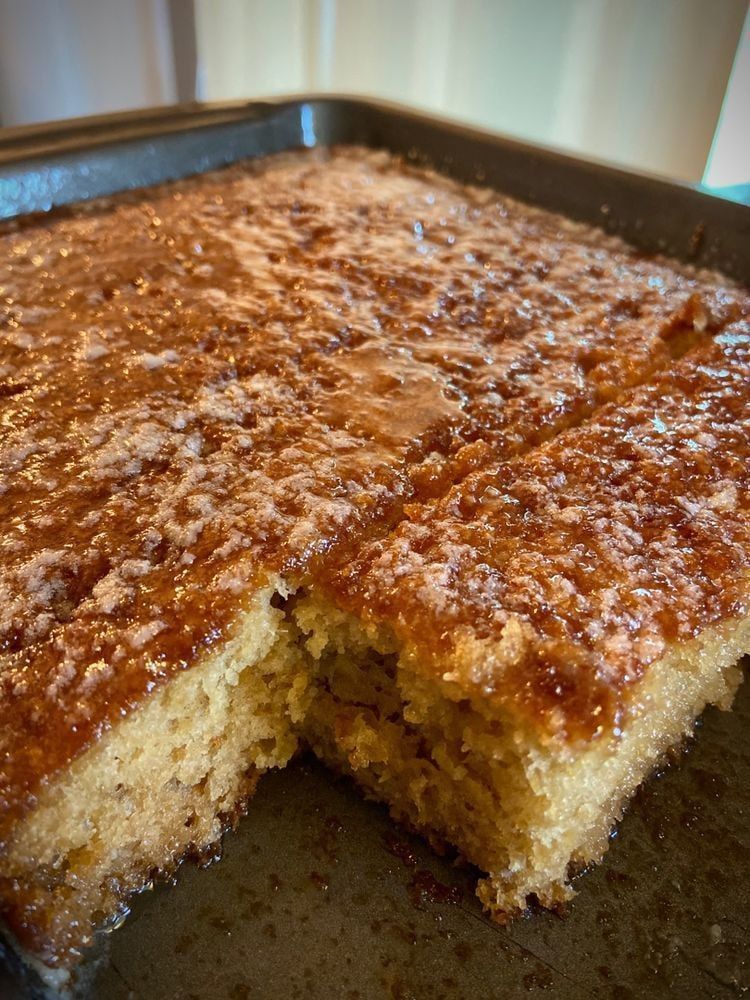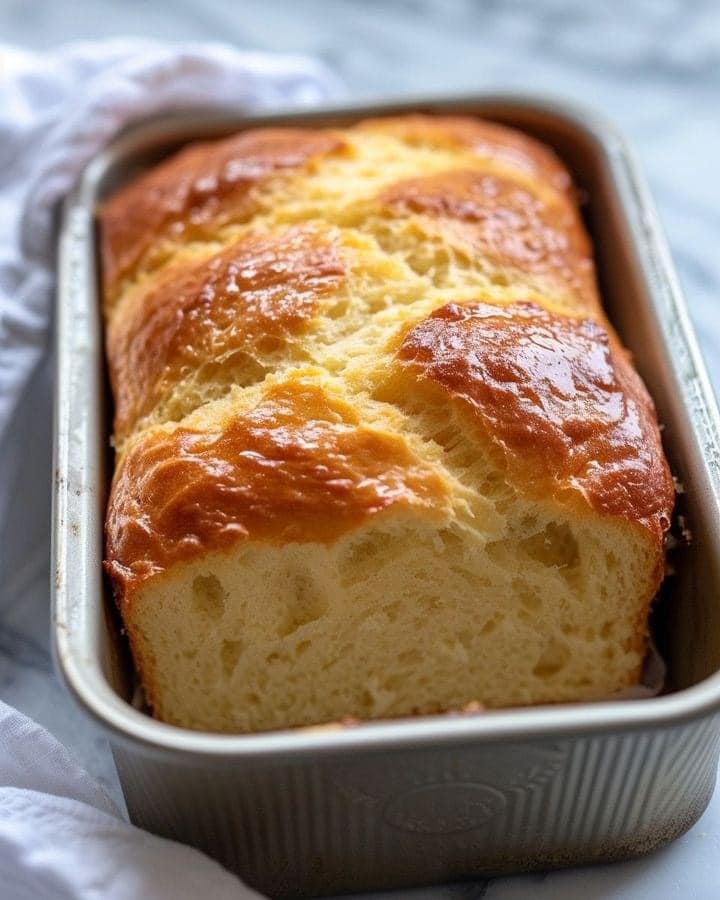
Fluffy 2-Ingredient Bread

If you’ve ever wanted to bake bread but felt intimidated by yeast, rising times, or complicated techniques, this fluffy 2-ingredient bread is about to become your new best friend. It’s soft, tender, and surprisingly satisfying for something made with just two simple ingredients you may already have in your kitchen. No kneading, no proofing, no special equipment—just mix, bake, and enjoy.

This bread is perfect for beginners, busy home cooks, or anyone craving fresh homemade bread without the stress. Whether you serve it warm with butter, use it for sandwiches, or enjoy it alongside soup, it delivers comfort in every bite.

Why This 2-Ingredient Bread Works

The magic behind this recipe lies in self-rising flour and yogurt. Self-rising flour already contains baking powder and salt, eliminating the need for yeast. Yogurt adds moisture, tenderness, and a subtle tang while helping the dough rise beautifully in the oven.

When combined, these two ingredients create a soft dough that bakes into a light, fluffy loaf with a delicate crumb. It’s proof that baking doesn’t need to be complicated to be delicious.

Ingredients (That’s It!)

  • 2 cups self-rising flour

  • 1½ cups plain yogurt (Greek yogurt works best, but regular plain yogurt is fine)

That’s all. No oil, no sugar, no eggs, no yeast.

Step-by-Step Instructions

1. Preheat Your Oven

Set your oven to 375°F (190°C). Lightly grease a loaf pan or line it with parchment paper for easy removal.

2. Mix the Dough

In a large mixing bowl, add the self-rising flour. Slowly stir in the yogurt using a spoon or spatula. At first, the mixture may look shaggy or sticky, but keep mixing until it forms a soft, slightly tacky dough.

If the dough feels too wet, sprinkle in a little more flour—one tablespoon at a time. If it’s too dry, add a spoonful of yogurt.

3. Shape the Dough

Turn the dough out onto a lightly floured surface. Gently shape it into a loaf or oval—no kneading required. Overworking the dough can make the bread dense, so handle it lightly.

Place the shaped dough into your prepared loaf pan.

4. Bake

Bake for 30–35 minutes, or until the top is lightly golden and a toothpick inserted into the center comes out clean. The bread should sound hollow when tapped gently.

5. Cool Slightly

Let the bread rest in the pan for about 10 minutes, then transfer it to a wire rack. This helps the texture set and makes slicing easier.

Texture and Flavor

Despite its simplicity, this bread is soft on the inside with a lightly crisp exterior. The yogurt gives it a tender crumb and mild tang, similar to traditional homemade bread. It’s neutral enough to go sweet or savory, making it incredibly versatile .Optional Add-Ins (Still Easy!)

While the base recipe uses just two ingredients, you can customize it without ruining its simplicity:

  • Garlic & herbs – Mix in garlic powder and dried herbs

  • Cheese – Fold in shredded cheddar or mozzarella

  • Sweet version – Add a tablespoon of honey and a sprinkle of cinnamon

  • Seeds – Top with sesame or sunflower seeds before baking

Serving Ideas

This fluffy 2-ingredient bread shines in so many ways:

  • Warm with butter or honey

  • Sliced for sandwiches or toast

  • Served with soup, stew, or chili

  • Toasted and topped with avocado or eggs

  • Used as a quick side for dinner

It’s best enjoyed fresh, but it also toasts beautifully the next day.

Storage Tips

  • Room temperature: Store in an airtight container for up to 2 days

  • Refrigerator: Keeps for up to 5 days

  • Freezer: Slice and freeze for up to 2 months. Reheat in the toaster or oven

Final Thoughts

This fluffy 2-ingredient bread proves that homemade baking doesn’t need to be complicated to be satisfying. With minimal effort and zero stress, you get fresh, warm bread that tastes like comfort and feels like a small win in the kitchen.
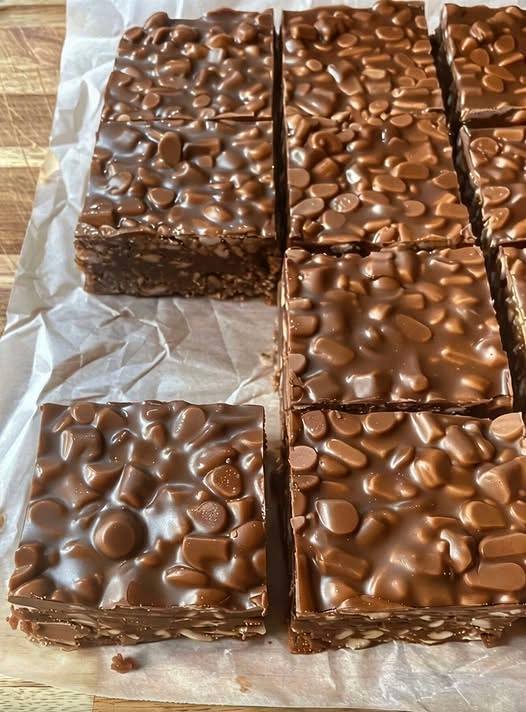
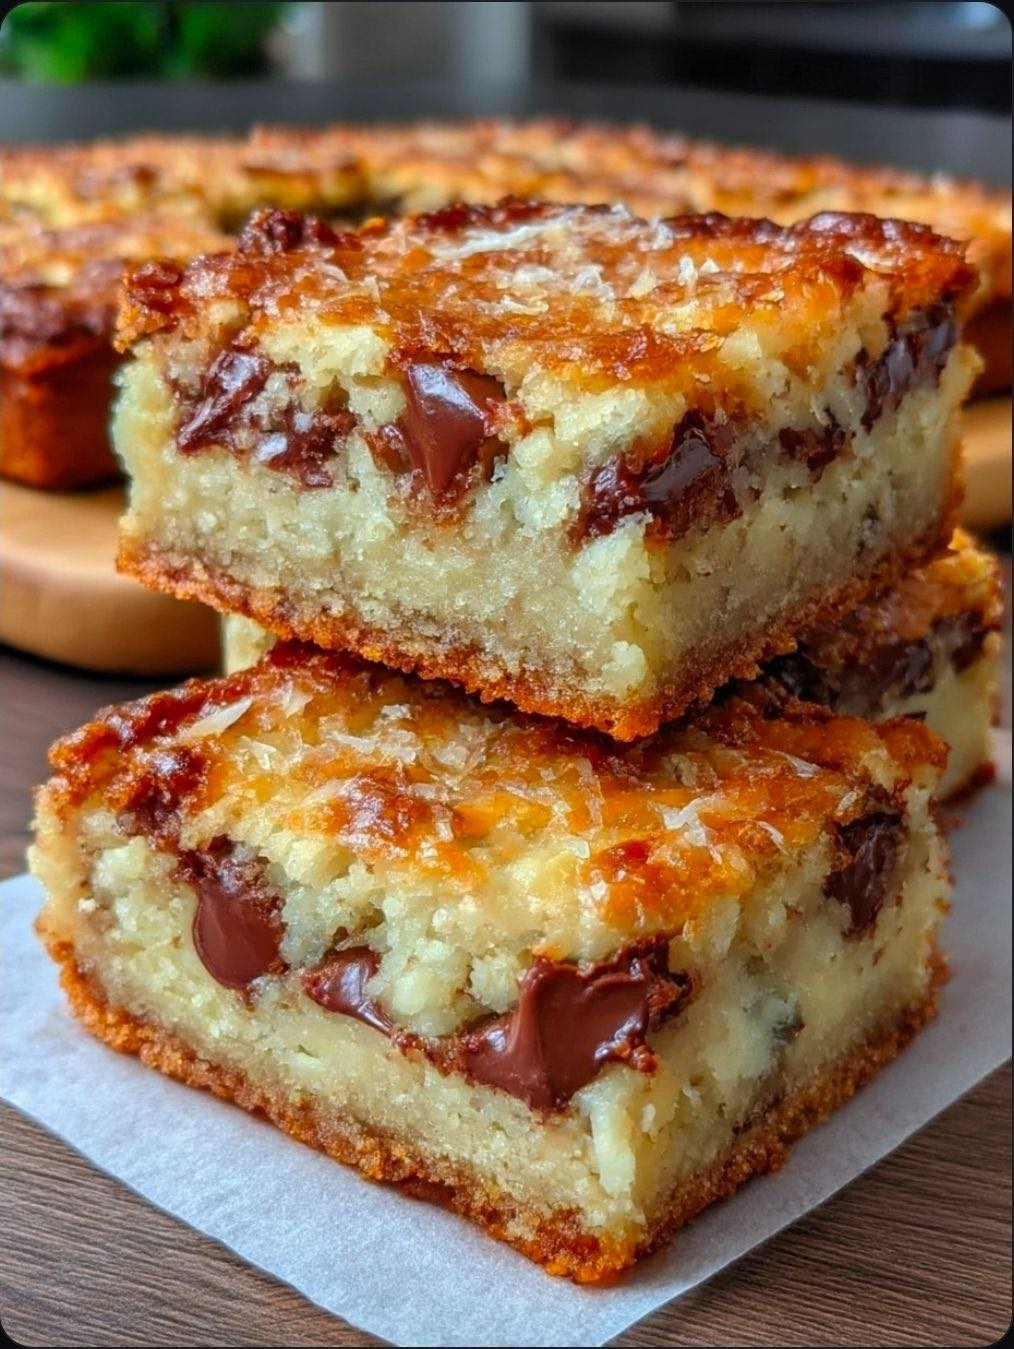
Chocolate Crunch Bars From Scratch

There’s something deeply comforting about chocolate crunch bars. They’re simple, unapologetically chocolatey, and packed with that irresistible crisp bite that makes you reach for just one more square. These bars are a throwback to childhood lunches and bake-sale classics, but when made from scratch with real ingredients, they transform into a grown-up dessert that still hits all the right nostalgic notes.

This homemade version skips artificial flavors and store-bought shortcuts, relying instead on quality chocolate, real butter, and a perfectly balanced crunch. Best of all, they’re no-bake, quick to assemble, and nearly impossible to mess up. Whether you’re making dessert for guests, a sweet snack for the family, or a last-minute treat for a celebration, these chocolate crunch bars deliver every single time.

Why Homemade Chocolate Crunch Bars Are Better

Making chocolate crunch bars from scratch gives you total control over flavor, texture, and sweetness. Store-bought versions often taste overly sweet or waxy, but homemade bars have a smoother chocolate finish and a more satisfying crunch. You can also customize them easily—add nuts, drizzle white chocolate, or sprinkle flaky sea salt for a gourmet twist.

Another huge bonus? No oven required. These bars come together on the stovetop and set in the fridge, making them perfect for warm days or when you just don’t feel like baking.

Ingredients You’ll Need

This recipe uses simple pantry staples, but the quality of your chocolate matters. Choose something you enjoy eating on its own.

  • 2 cups semi-sweet chocolate chips or chopped chocolate

  • ½ cup unsalted butter

  • ¼ cup light brown sugar, packed

  • ¼ cup honey or golden syrup

  • 1 teaspoon vanilla extract

  • 3 cups crispy rice cereal

  • ¼ teaspoon salt

Optional add-ins:
Chopped peanuts, almonds, mini marshmallows, shredded coconut, or a pinch of flaky sea salt for topping.

Step-by-Step Instructions

1. Prepare the Pan

Line an 8×8-inch square pan with parchment paper, leaving a bit of overhang on the sides. This makes removing and slicing the bars much easier later. Set aside.

2. Melt the Chocolate Base

In a medium saucepan over low heat, combine the butter, brown sugar, and honey. Stir gently until the butter melts and the mixture becomes smooth and glossy. Be patient—low heat prevents scorching and keeps the texture silky.

Once melted, add the chocolate and salt. Stir continuously until the chocolate is fully melted and the mixture looks thick and luxurious. Remove from heat and stir in the vanilla extract.

3. Add the Crunch

Pour the crispy rice cereal into a large mixing bowl. Slowly add the warm chocolate mixture over the cereal, folding gently with a spatula until every piece is evenly coated. Take your time here—this ensures a perfect crunch in every bite.

If you’re adding nuts or other mix-ins, fold them in now.

4. Press and Chill

Transfer the mixture into the prepared pan. Press it down firmly using the back of a spoon or a spatula, making sure the surface is smooth and compact. A tightly packed bar slices cleanly and holds together better.

Place the pan in the refrigerator for at least 1 hour, or until fully set.

5. Slice and Serve

Once firm, lift the bars out using the parchment overhang. Slice into squares or rectangles with a sharp knife. Serve chilled or at room temperature.

Tips for Perfect Chocolate Crunch Bars

  • Low heat is key: Chocolate scorches easily, so always melt gently.

  • Don’t overmix: Stir just until combined to keep the cereal crisp.

  • Press firmly: This prevents crumbly bars when slicing.

  • Use good chocolate: It’s the star flavor—choose wisely.

Fun Variations to Try

  • Peanut Butter Crunch Bars: Swirl in ¼ cup creamy peanut butter before pressing into the pan.

  • Dark Chocolate Sea Salt Bars: Use dark chocolate and finish with flaky salt.

  • White Chocolate Drizzle: Melt white chocolate and drizzle over the top once set.

  • Holiday Version: Add red and green sprinkles or crushed candy canes.

Storage and Make-Ahead Tips

Store chocolate crunch bars in an airtight container in the refrigerator for up to 7 days. They also freeze beautifully—just wrap individual bars and freeze for up to 2 months. Let them thaw slightly before serving.

Final Thoughts

Chocolate crunch bars from scratch prove that the simplest desserts are often the most satisfying. With their glossy chocolate coating and light, crispy texture, these bars strike the perfect balance between indulgent and comforting. They’re quick, customizable, and guaranteed to disappear fast—so you might want to make a double batch.

Congo Bars

Congo Bars are one of those nostalgic desserts that feel like a hug from the past. Long before trendy brownies, fancy blondies, or viral dessert hacks took over social media, Congo Bars were already winning hearts. Rich with brown sugar, buttery goodness, and melty chocolate chips, they sit perfectly between a cookie and a cake—chewy, soft, and deeply comforting.

What makes Congo Bars so special isn’t just their flavor, but their simplicity. No mixers, no complicated techniques, and no fussy ingredients. These bars were born in kitchens where practicality mattered, yet flavor always came first. They were the kind of dessert baked for school lunches, church gatherings, family reunions, and cozy Sunday afternoons.

What Exactly Are Congo Bars?

Congo Bars are often described as the “original blondie,” but that doesn’t quite capture their charm. Unlike brownies that rely on cocoa for depth, Congo Bars get their rich flavor from brown sugar. This gives them a caramel-like sweetness and a slightly chewy texture that’s hard to resist.

The name may sound exotic, but the bars themselves are humble and homey. They’re thick, golden, and dotted with chocolate chips—sometimes with nuts, sometimes without. Every bite delivers buttery warmth with just enough sweetness to keep you reaching for another square.

Why This Recipe Works

This version focuses on balance. Not overly sweet, not dry, and never cakey. Melted butter keeps the bars moist, brown sugar adds depth, and a touch of vanilla rounds everything out. Baking them just until set ensures that soft, chewy center that Congo Bars are known for.

Best of all, this recipe is incredibly forgiving. Even beginner bakers can make these successfully on the first try.

Classic Congo Bars Recipe

Ingredients

  • ¾ cup unsalted butter, melted and slightly cooled

  • 1 ½ cups packed brown sugar (light or dark both work)

  • 2 large eggs, at room temperature

  • 2 teaspoons vanilla extract

  • 1 ¾ cups all-purpose flour

  • 1 teaspoon baking powder

  • ½ teaspoon salt

  • 1 ½ cups chocolate chips (semi-sweet or milk chocolate)

  • ½ cup chopped walnuts or pecans (optional)

Instructions

  1. Prepare the pan
    Preheat your oven to 350°F (175°C). Grease a 9×13-inch baking pan or line it with parchment paper, leaving a little overhang for easy removal.

  2. Mix the wet ingredients
    In a large mixing bowl, combine the melted butter and brown sugar. Stir until smooth and glossy. Add the eggs one at a time, mixing well after each addition. Stir in the vanilla extract.

  3. Combine dry ingredients
    In a separate bowl, whisk together the flour, baking powder, and salt. This ensures even distribution and prevents dense spots in the batter.

  4. Bring it together
    Gradually add the dry ingredients to the wet mixture. Stir gently until just combined. Do not overmix—this is key to keeping the bars tender.

  5. Fold in the mix-ins
    Gently fold in the chocolate chips and nuts if using. The batter will be thick but spreadable.

  6. Bake to perfection
    Spread the batter evenly into the prepared pan. Bake for 25–30 minutes, or until the edges are golden and a toothpick inserted into the center comes out with a few moist crumbs.

  7. Cool and slice
    Allow the bars to cool completely in the pan before slicing. This helps them set properly and enhances their chewy texture.

Texture and Flavor Tips

  • For extra chewiness, slightly underbake by 1–2 minutes.

  • For deeper flavor, use dark brown sugar instead of light.

  • For a bakery-style finish, sprinkle a few chocolate chips on top before baking.

These small tweaks make a noticeable difference without complicating the recipe.

Serving Suggestions

Congo Bars are wonderful on their own, but they truly shine when paired with simple additions. Serve them warm with a scoop of vanilla ice cream, drizzle with caramel sauce, or enjoy them alongside a cup of coffee or tea.

They’re also perfect for packing into lunchboxes or gifting during the holidays. Wrapped individually, they stay soft for days and travel beautifully.

Storage and Make-Ahead Tips

Store Congo Bars in an airtight container at room temperature for up to 4 days. For longer storage, refrigerate them for up to a week or freeze for up to 3 months. Simply thaw at room temperature before serving.

Why Congo Bars Still Matter

In a world full of complicated desserts, Congo Bars remind us that simplicity is powerful. They don’t rely on trends or techniques—just good ingredients and time-tested methods. One bite is enough to understand why this recipe has survived generations.

Warm Pineapple Casserole

Warm pineapple casserole is one of those dishes that surprises everyone the first time they taste it. At a glance, it looks like a dessert. One bite later, you realize it lives in that magical space between sweet side dish and comforting casserole. Beloved across the South, this dish often appears at Easter tables, Thanksgiving spreads, potlucks, and family gatherings—quietly stealing attention from even the main course.

What makes pineapple casserole so special is its balance. The natural sweetness of pineapple meets sharp cheddar cheese, buttery crackers, and a warm baked texture that feels both indulgent and familiar. It’s simple, nostalgic, and incredibly versatile. This version adds subtle depth while keeping the soul of the classic intact.

Why You’ll Love This Pineapple Casserole

  • Warm and comforting with a soft, custardy center

  • Sweet and savory in perfect harmony

  • Easy to prepare with pantry-friendly ingredients

  • Crowd-pleasing—even skeptics ask for seconds

  • Perfect as a side or dessert, depending on how you serve it

This casserole pairs beautifully with baked ham, roasted chicken, or turkey, but it’s just as satisfying enjoyed on its own with a spoon.

Ingredients You’ll Need

For the Casserole Base

  • 2 cans (20 oz each) pineapple chunks, drained well

  • 1 can (20 oz) crushed pineapple, drained

  • ¾ cup granulated sugar

  • 4 tablespoons all-purpose flour

  • 2 large eggs, lightly beaten

  • 1 cup sharp cheddar cheese, freshly grated

  • 1 teaspoon vanilla extract

  • Pinch of salt

For the Topping

  • 1 sleeve buttery crackers (such as Ritz), crushed

  • ½ cup unsalted butter, melted

  • 2 tablespoons brown sugar (optional, for extra warmth)

Step-by-Step Instructions

1. Prepare the Oven and Dish

Preheat your oven to 350°F (175°C). Lightly grease a 9×13-inch baking dish with butter or nonstick spray.

2. Mix the Pineapple Base

In a large bowl, combine the drained pineapple chunks and crushed pineapple. It’s important that the pineapple is well drained to prevent a watery casserole.

Add the granulated sugar, flour, salt, vanilla extract, and beaten eggs. Stir gently until everything is evenly combined. The flour helps bind the casserole and gives it a soft, custard-like texture once baked.

3. Add the Cheese

Fold in the grated sharp cheddar cheese. Don’t worry—the cheese won’t overpower the pineapple. Instead, it melts into the mixture and adds richness and depth that balances the sweetness beautifully.

4. Transfer to Baking Dish

Pour the pineapple mixture into your prepared baking dish and spread it evenly.

5. Make the Buttery Topping

In a separate bowl, mix the crushed crackers with melted butter. If you like a deeper, caramel-like flavor, stir in the brown sugar. Sprinkle the topping evenly over the pineapple mixture.

6. Bake to Golden Perfection

Bake uncovered for 40–45 minutes, or until the casserole is bubbly around the edges and the topping is golden brown. The center should be set but still soft.

7. Rest and Serve

Let the casserole rest for about 10 minutes before serving. This allows it to firm up slightly while staying warm and spoonable.

Serving Suggestions

Warm pineapple casserole is incredibly versatile:

  • Serve it as a side dish with ham, pork chops, or roasted poultry

  • Offer it as a dessert with a scoop of vanilla ice cream

  • Pair it with buttery rolls and savory dishes for contrast

  • Enjoy leftovers warm or cold—the flavor deepens overnight

Tips for the Best Pineapple Casserole

  • Drain pineapple thoroughly to avoid excess liquid

  • Use sharp cheddar, not mild—it balances sweetness better

  • Crush crackers finely for a more even topping

  • Bake uncovered so the topping stays crisp

  • Double the recipe for holidays—it disappears fast

Make It Your Own

  • Add a pinch of cinnamon or nutmeg for warmth

  • Use pineapple tidbits for a smoother texture

  • Swap crackers for buttery breadcrumbs

  • Add chopped pecans to the topping for crunch

Final Thoughts

Warm pineapple casserole is proof that the simplest recipes often leave the strongest impression. It’s humble, nostalgic, and unexpectedly elegant in flavor. Whether you serve it alongside a holiday roast or bring it to a potluck, this dish always sparks conversation—and requests for the recipe.

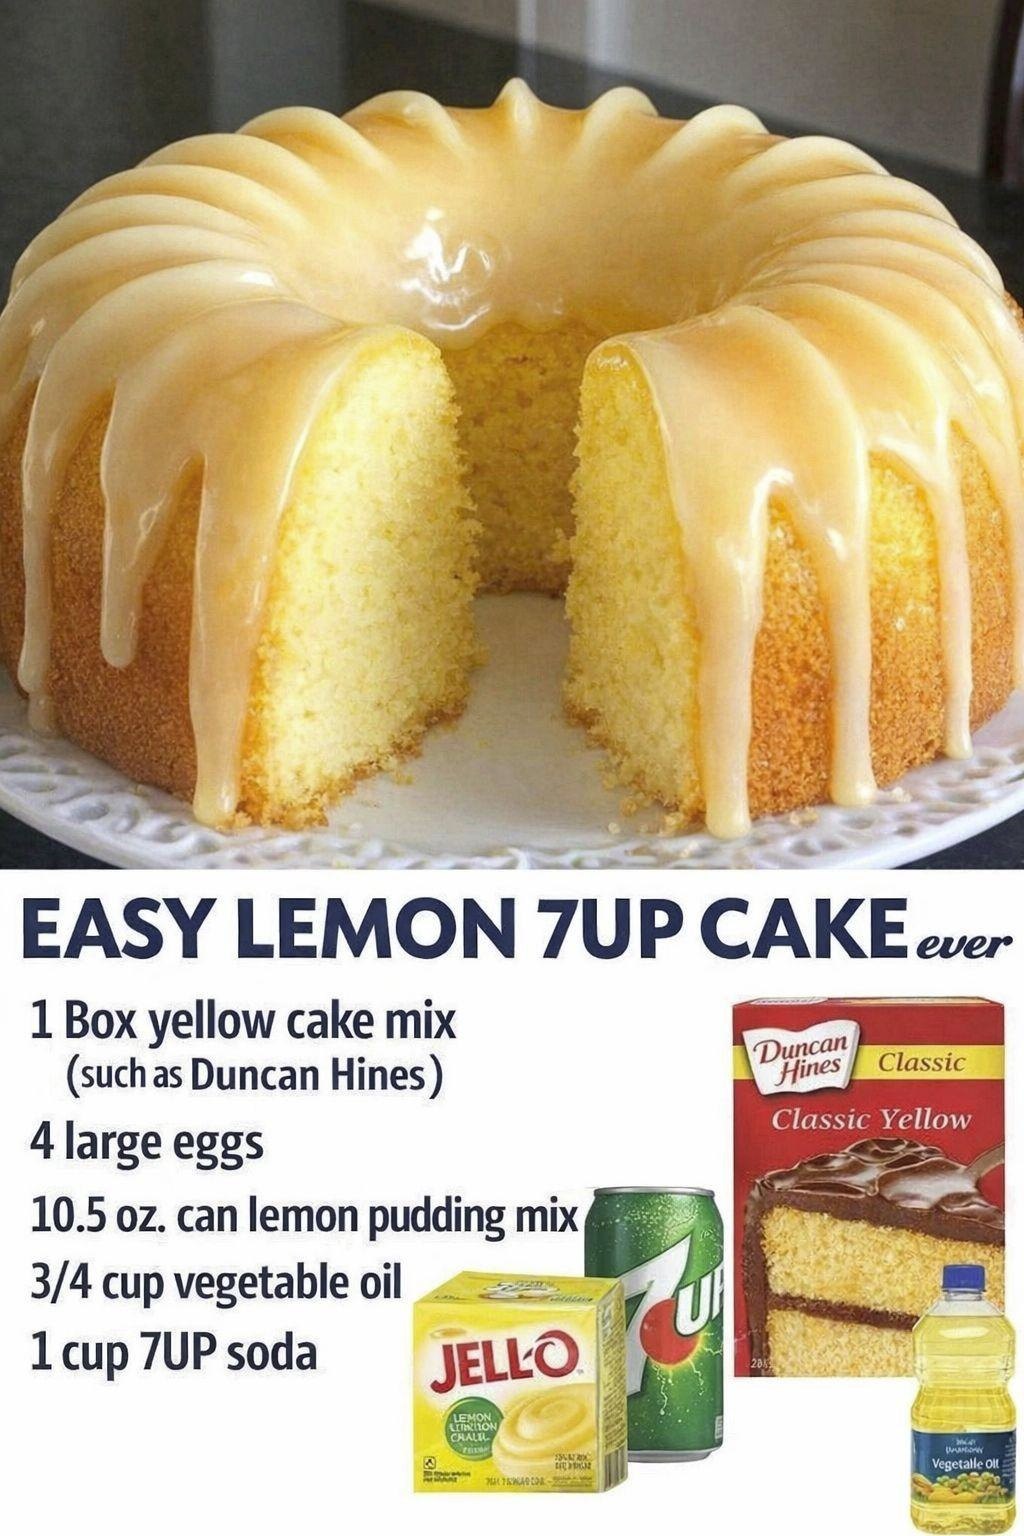
Lemon 7-Up Cake: Ultra-Moist Citrus Bundt Cake with Classic Southern Flavor

There’s something timeless about a Lemon 7-Up Cake. It’s the kind of cake that shows up at Sunday dinners, church potlucks, and family gatherings — always stealing the spotlight with its tender crumb, refreshing citrus flavor, and buttery richness. This cake gets its legendary moisture and lift from a surprising ingredient: 7-Up soda. The carbonation creates an airy texture, while the lemon-lime flavor enhances the fresh citrus notes, making every bite bright, soft, and unforgettable.

This is the perfect cake for anyone who loves old-fashioned baking with a modern twist. The combination of real butter, fresh lemon juice, and soda produces a cake that’s moist enough to melt in your mouth, yet sturdy enough to slice beautifully. Finished with a tangy lemon glaze, this cake feels both comforting and elegant — ideal for holidays, tea time, or any occasion that calls for something sweet and special.

Ingredients

For the Cake:

  • 1½ cups unsalted butter, softened

  • 3 cups granulated sugar

  • 5 large eggs, room temperature

  • 3 cups all-purpose flour

  • ½ teaspoon baking powder

  • ½ teaspoon salt

  • 1 tablespoon lemon zest

  • 2 tablespoons fresh lemon juice

  • 1 teaspoon vanilla extract

  • 1 cup 7-Up soda (room temperature)

For the Lemon Glaze:

  • 1 cup powdered sugar

  • 2 tablespoons fresh lemon juice

  • 1 tablespoon milk

  • ½ teaspoon lemon zest

Instructions

1. Prepare the Bundt Pan

Preheat your oven to 325°F (165°C). Generously grease a 10-inch bundt pan with butter or baking spray, making sure to coat every curve. Dust lightly with flour and tap out the excess. This step ensures the cake releases perfectly after baking.

2. Cream the Butter and Sugar

In a large mixing bowl, beat the softened butter until light and fluffy. Gradually add the sugar, beating for 5–7 minutes. The mixture should become pale and airy. Proper creaming creates the cake’s soft texture and rich flavor.

3. Add the Eggs

Add the eggs one at a time, mixing well after each addition. This keeps the batter smooth and prevents curdling. The eggs give structure and contribute to the cake’s delicate crumb.

4. Combine Dry Ingredients

In a separate bowl, whisk together the flour, baking powder, and salt. Slowly add this dry mixture to the butter mixture, alternating with the 7-Up soda. Start and end with the flour. Mix gently to keep the batter light and avoid overworking it.

5. Add Flavorings

Stir in the lemon zest, lemon juice, and vanilla extract. The fresh lemon gives the cake its vibrant citrus aroma and flavor.

6. Pour and Bake

Pour the batter evenly into the prepared bundt pan. Smooth the top with a spatula. Bake for 75–85 minutes, or until a toothpick inserted into the center comes out clean. The cake should have a golden crust and a soft, moist interior.

7. Cool the Cake

Let the cake cool in the pan for 15 minutes, then carefully invert it onto a wire rack. Allow it to cool completely before glazing.

Make the Lemon Glaze

In a small bowl, whisk together powdered sugar, lemon juice, milk, and lemon zest until smooth. Drizzle the glaze over the cooled cake, letting it run down the sides for a beautiful finish. The glaze adds a tangy brightness that balances the cake’s sweetness.

Serving Suggestions

Serve slices of this Lemon 7-Up Cake with:

  • Fresh berries and whipped cream

  • A scoop of vanilla ice cream

  • A warm cup of tea or coffee

Its moist, buttery texture makes it perfect as both a dessert and an afternoon treat.

Storage Tips

  • Store covered at room temperature for up to 3 days.

  • Refrigerate for up to 1 week for longer freshness.

  • Freeze slices wrapped tightly for up to 3 months.

Why This Cake is So Special

Read more

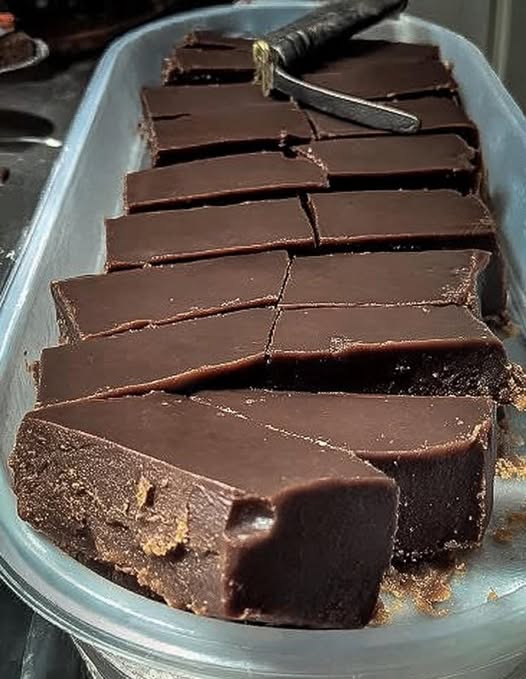
Old Fashioned Fudge

There’s something truly magical about old fashioned fudge. It’s not just candy — it’s a memory, a tradition, and a taste of pure comfort. The smooth, creamy texture, the deep chocolate flavor, and that melt-in-your-mouth sweetness make it one of the most beloved desserts of all time. Unlike modern shortcuts that rely on marshmallow fluff or condensed milk, this classic version uses simple pantry staples and the traditional boiling-and-beating method. The result is a fudge that tastes exactly like the kind your grandmother used to make for special occasions or holiday gatherings.

This recipe gives you that authentic old-world flavor and texture, with clear steps to ensure success even if you’ve never made fudge from scratch before.

Why This Recipe Is Special

Old fashioned fudge is all about technique. It’s made with real butter, sugar, cocoa, and milk — and it depends on careful cooking to the right temperature, followed by patient beating until it thickens and sets. The reward is a dense, silky fudge that feels luxurious and tastes far richer than store-bought candy. Once you master this recipe, you’ll never go back to packaged fudge again.

Ingredients

To make this classic treat, you’ll need:

• 2 cups granulated sugar
• ½ cup unsweetened cocoa powder
• 1 cup whole milk
• 4 tablespoons butter
• 1 teaspoon vanilla extract
• A pinch of salt

Optional additions:
• ½ cup chopped walnuts or pecans
• A sprinkle of sea salt for topping

Step-by-Step Instructions

1. Prepare Your Pan
Line an 8×8-inch square pan with parchment paper or lightly butter it. This will make it easy to lift out the fudge once it sets.

2. Mix the Dry Ingredients
In a medium saucepan, combine the sugar, cocoa powder, and salt. Stir well so the cocoa is evenly distributed — this prevents lumps later.

3. Add the Milk
Pour in the milk and stir gently over medium heat until the mixture is smooth and begins to warm. Keep stirring to avoid scorching the bottom.

4. Bring to a Boil
Once the mixture starts bubbling, add the butter. Let it melt, then stop stirring and allow the fudge to boil. Clip a candy thermometer to the side of the pan and cook until the temperature reaches 234°F (112°C) — this is the “soft-ball stage.”

Tip: If you don’t have a thermometer, drop a small spoonful into cold water. It should form a soft, flexible ball that flattens when pressed.

5. Let It Cool
Remove the pan from heat and allow the mixture to cool undisturbed until it reaches about 110°F (43°C). This step is essential — stirring too early can ruin the texture.

6. Add Vanilla
Stir in the vanilla extract. At this point, you can also add nuts if you like.

7. Beat the Fudge
Using a wooden spoon, beat the mixture vigorously. It will gradually thicken and lose its glossy shine. This takes about 8–10 minutes. Once it becomes creamy and starts to hold its shape, stop beating.

8. Pour and Set
Quickly pour the fudge into your prepared pan and smooth the top. Let it sit at room temperature for 2–3 hours, or refrigerate for 1 hour, until firm.

9. Cut and Enjoy
Lift the fudge out of the pan and cut into squares. Store in an airtight container for up to one week.

What Makes the Texture Perfect

The secret to old fashioned fudge is reaching the correct temperature and beating it at the right time. Cooking too little results in soft, sticky fudge, while cooking too long gives you crumbly candy. Beating transforms the sugar crystals into that iconic creamy texture — the more you beat, the smoother the fudge becomes.

Flavor Variations

You can easily personalize this fudge by adding:

• A teaspoon of espresso powder for deeper chocolate flavor
• A swirl of peanut butter for a rich twist
• A dash of cinnamon for warmth
• Crushed biscuits or toffee bits for crunch

Each variation keeps the classic base while giving it your own signature style.

Serving Ideas

Old fashioned fudge is perfect for:

• Holiday gift boxes
• Dessert trays
• Afternoon tea or coffee
• Celebrations and family gatherings

It pairs beautifully with a cup of strong coffee or warm milk, making it the ultimate comfort treat.

A Little History

Fudge has been around for over a century. The earliest known recipes date back to the late 1800s, when it was made by hand and sold at local fairs and candy shops. Its name likely comes from the word “fudged,” referring to a mistake while making caramel that turned into this deliciously creamy candy. Over time, fudge became a symbol of homemade love and craftsmanship.

Final Thoughts

Making old fashioned fudge isn’t just about creating candy — it’s about keeping a tradition alive. The process may seem detailed, but once you try it, you’ll see how rewarding it is. Each bite brings the deep, comforting taste of real chocolate and the pride of making something from scratch.

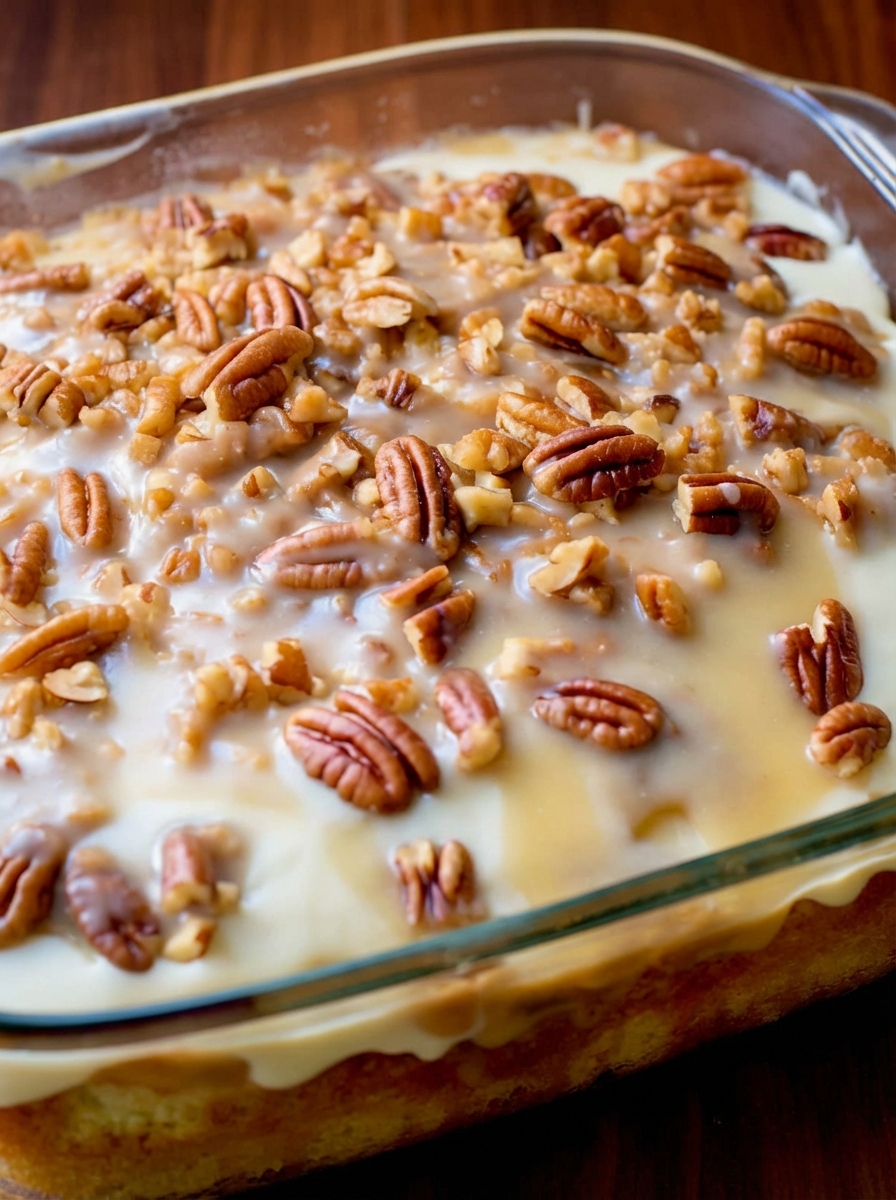
Pecan Praline Cake

Few desserts capture the soul of Southern baking quite like a Pecan Praline Cake. This cake is not just sweet—it’s deeply comforting, rich with buttery notes, and layered with toasted pecans and a luscious praline glaze that seeps into every crumb. It’s the kind of cake that fills the kitchen with warmth, draws people in before it even reaches the table, and disappears quickly once sliced.

What makes this Pecan Praline Cake truly special is its balance. The cake itself is soft, moist, and tender, acting as the perfect base for the star of the show: a homemade praline topping made from brown sugar, butter, cream, and crunchy pecans. As the warm glaze is poured over the cake, it settles into the surface, creating a caramelized, candy-like layer that hardens slightly on top while remaining gooey underneath.

This is a cake meant for celebrations, holidays, Sunday dinners, or any moment that calls for something indulgent yet timeless.

Ingredients You’ll Need

For the Cake:

  • 2½ cups all-purpose flour

  • 2 teaspoons baking powder

  • ½ teaspoon baking soda

  • ½ teaspoon salt

  • 1 cup unsalted butter, softened

  • 1¾ cups granulated sugar

  • 4 large eggs, room temperature

  • 1 cup sour cream

  • 2 teaspoons vanilla extract

  • 1½ cups chopped pecans, lightly toasted

For the Praline Topping:

  • ¾ cup unsalted butter

  • 1½ cups packed brown sugar

  • ½ cup heavy cream

  • 1 teaspoon vanilla extract

  • 1½ cups pecan halves or coarsely chopped pecans

Step 1: Prepare the Pan and Oven

Preheat your oven to 325°F (165°C). Generously grease a Bundt pan or deep tube pan, making sure to coat every crevice. Dust lightly with flour to prevent sticking. This step is crucial because the praline topping will caramelize and cling to the pan if it’s not properly prepared.

Step 2: Mix the Dry Ingredients

In a medium bowl, whisk together the flour, baking powder, baking soda, and salt. This ensures even distribution of the leavening agents and helps create a uniform crumb in the finished cake. Set aside.

Step 3: Cream the Butter and Sugar

In a large mixing bowl, beat the softened butter and granulated sugar together until light and fluffy. This process incorporates air into the batter, which is key to a tender cake texture. Take your time here—about 3 to 4 minutes of mixing makes a noticeable difference.

Add the eggs one at a time, mixing well after each addition. Scrape down the sides of the bowl as needed to keep everything well combined.

Step 4: Build the Batter

Mix in the sour cream and vanilla extract until smooth. The sour cream adds richness and moisture while giving the cake a subtle tang that balances the sweetness.

Gradually add the dry ingredients to the wet mixture, mixing just until incorporated. Avoid overmixing, as this can make the cake dense. Gently fold in the toasted chopped pecans, distributing them evenly throughout the batter.

Pour the batter into the prepared pan and smooth the top.

Step 5: Bake to Perfection

Bake the cake for 60–70 minutes, or until a toothpick inserted into the center comes out clean or with a few moist crumbs. The top should be golden and slightly springy to the touch.

Allow the cake to cool in the pan for about 15 minutes while you prepare the praline topping.

Step 6: Make the Praline Topping

In a saucepan over medium heat, melt the butter. Stir in the brown sugar and heavy cream, bringing the mixture to a gentle boil. Let it simmer for 2–3 minutes, stirring constantly, until slightly thickened.

Remove from heat and stir in the vanilla extract and pecans. The mixture should be glossy, fragrant, and pourable, with the pecans fully coated in caramel.

Step 7: Finish the Cake

While the cake is still warm, carefully spoon or pour the hot praline topping over the cake in the pan. Allow it to sit for another 10–15 minutes so the glaze can seep into the cake.

Invert the cake onto a serving plate, letting the excess praline drip beautifully over the sides. Let the cake cool completely before slicing.

Serving and Storage Tips

This Pecan Praline Cake is best served slightly warm or at room temperature. It pairs beautifully with a cup of coffee, tea, or a scoop of vanilla ice cream for an extra indulgent dessert.

Store leftovers tightly covered at room temperature for up to 2 days, or refrigerate for up to 5 days. The flavors deepen over time, making it even better the next day.

Final Thoughts

Pecan Praline Cake is more than just a dessert—it’s a celebration of texture and flavor. The tender crumb, the nutty crunch, and the rich praline glaze come together in perfect harmony. Whether you’re baking for family, friends, or yourself, this cake delivers comfort, nostalgia, and undeniable Southern charm in every bite.

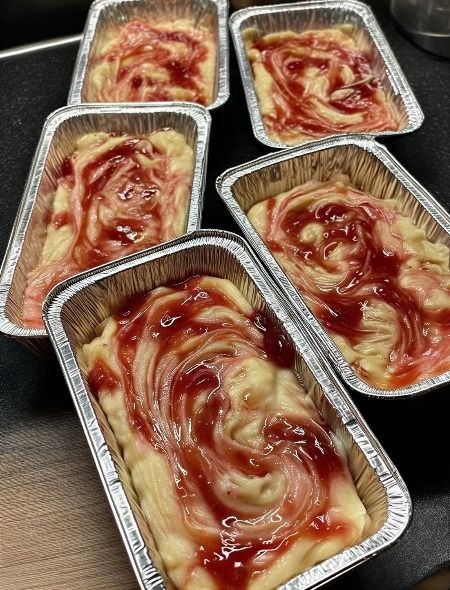
Strawberry Swirl Loaf

There is something irresistibly comforting about a homemade loaf cake. It feels humble yet special, familiar but endlessly customizable. This Strawberry Swirl Loaf takes a classic vanilla loaf and elevates it with a vivid, naturally sweet strawberry ripple that runs through every slice. The result is a moist, tender crumb with pockets of fruity brightness and a beautiful marbled interior that looks as good as it tastes.

Unlike overly sweet bakery cakes, this loaf balances gentle vanilla richness with real strawberries cooked down into a concentrated swirl. It’s perfect for breakfast with coffee, afternoon tea, or a light dessert that doesn’t feel heavy. Best of all, it’s made with simple pantry ingredients and fresh or frozen strawberries, making it accessible year-round.

Why This Strawberry Swirl Loaf Is Special

What makes this recipe unique is the from-scratch strawberry swirl. Instead of using jam straight from the jar, the strawberries are gently simmered to create a thick, glossy compote. This intensifies their flavor and prevents the swirl from sinking or disappearing into the batter. The loaf itself is made using a butter-and-oil blend, giving it both rich flavor and long-lasting moisture.

The technique is simple but thoughtful: part of the batter stays plain vanilla, while the strawberry swirl is layered and lightly dragged through with a knife to create a natural marbled effect. Every slice is different, and every bite delivers a balance of cake and fruit.

Ingredients

Strawberry Swirl

  • 1 ½ cups fresh or frozen strawberries, hulled and chopped

  • 3 tablespoons granulated sugar

  • 1 teaspoon lemon juice

  • 1 teaspoon cornstarch mixed with 1 tablespoon water

Vanilla Loaf Batter

  • 1 ¾ cups all-purpose flour

  • 1 teaspoon baking powder

  • ½ teaspoon baking soda

  • ½ teaspoon salt

  • ½ cup unsalted butter, softened

  • ¼ cup neutral oil (such as vegetable or canola)

  • ¾ cup granulated sugar

  • 2 large eggs, room temperature

  • ½ cup plain yogurt or sour cream

  • ¼ cup milk

  • 1 ½ teaspoons vanilla extract

Instructions

Step 1: Make the Strawberry Swirl

In a small saucepan over medium heat, combine the chopped strawberries, sugar, and lemon juice. Stir gently as the strawberries release their juices. Let the mixture simmer for 6–8 minutes until the fruit softens and begins to break down.

Stir in the cornstarch slurry and continue cooking for 1–2 minutes until thickened. The mixture should be spoonable and glossy, not watery. Remove from heat and allow it to cool completely. As it cools, it will thicken further.

Step 2: Prepare the Loaf Batter

Preheat your oven to 350°F (175°C). Grease and line a standard loaf pan with parchment paper, leaving an overhang for easy removal.

In a medium bowl, whisk together flour, baking powder, baking soda, and salt. Set aside.

In a large bowl, cream the butter and sugar until light and fluffy. Add the oil and mix until smooth. Beat in the eggs one at a time, mixing well after each addition.

Add the yogurt, milk, and vanilla extract, stirring until fully combined. Gradually fold in the dry ingredients just until no streaks of flour remain. Be careful not to overmix, as this can make the loaf dense.

Step 3: Assemble the Swirl

Pour about half of the batter into the prepared loaf pan and spread evenly. Spoon half of the cooled strawberry mixture over the batter. Add the remaining batter on top, followed by the rest of the strawberry swirl.

Using a butter knife or skewer, gently swirl the strawberry mixture through the batter with a few figure-eight motions. Do not over-swirl, or the layers will blend too much.

Step 4: Bake

Bake for 50–60 minutes, or until a toothpick inserted into the center comes out clean or with a few moist crumbs. If the top browns too quickly, loosely tent with foil during the last 10–15 minutes.

Let the loaf cool in the pan for 15 minutes, then lift it out and transfer to a wire rack to cool completely before slicing.

Tips for Perfect Results

  • Make sure the strawberry swirl is fully cooled before layering it into the batter.

  • Use room-temperature eggs and dairy for a smoother batter.

  • For extra flavor, add lemon zest to the batter to complement the strawberries.

  • This loaf slices best once fully cooled, as the swirl sets as it rests.

Serving and Storage

This Strawberry Swirl Loaf is delicious plain, but it also pairs beautifully with a light dusting of powdered sugar or a simple vanilla glaze. Serve it with tea, coffee, or fresh fruit for an elegant but effortless treat.

Store the loaf tightly wrapped at room temperature for up to 2 days, or refrigerate for up to 5 days. It also freezes well for up to 2 months—slice before freezing for easy portions.

This loaf proves that simple ingredients, handled with care, can create something truly special. Each slice offers a soft vanilla crumb kissed with bright strawberry flavor, making it a recipe you’ll return to again and again.

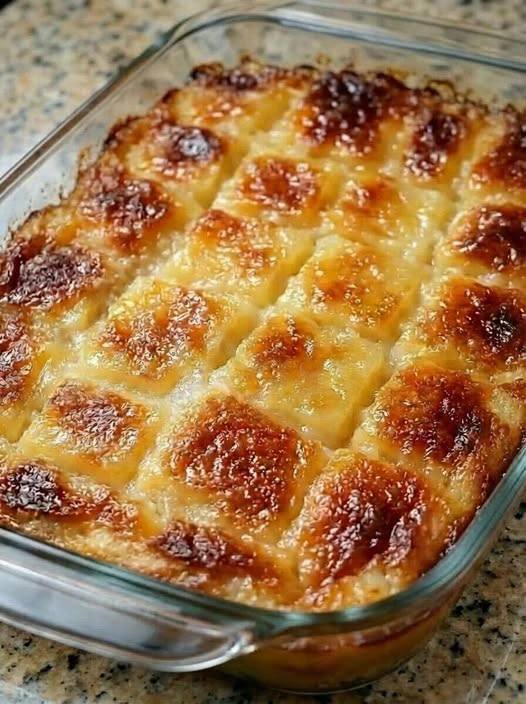
the best pineapple bake

If there’s one dessert that effortlessly balances tropical brightness with warm, home-baked comfort, it’s a pineapple bake. This dish is soft, buttery, lightly tangy, and finished with a golden top that melts in your mouth. Whether served after a family dinner, at a potluck, or as a cozy weekend treat, this pineapple bake delivers big flavor with simple ingredients. What makes this version special is its perfect texture—not too cakey, not too pudding-like—plus a rich depth that keeps people coming back for seconds.

This recipe has been carefully crafted to highlight pineapple’s natural sweetness while adding just enough richness to feel indulgent without being heavy. Let’s dive into why this truly is the best pineapple bake you’ll ever make.

Why This Pineapple Bake Works So Well

Pineapple is naturally juicy and acidic, which means it pairs beautifully with butter, eggs, and a touch of vanilla. The key is balance. Too much flour makes it dry. Too much liquid turns it soggy. This recipe strikes the sweet spot, creating a soft, custard-like center with a lightly crisp top.

Unlike overly sugary pineapple desserts, this bake lets the fruit shine. The sweetness is gentle, the texture is smooth, and the aroma while baking is irresistible—warm butter, caramelized pineapple, and vanilla filling the kitchen.

Ingredients You’ll Need

  • 2 cups crushed pineapple (with juice, not drained)

  • ¾ cup granulated sugar

  • ½ cup unsalted butter, melted

  • 2 large eggs, room temperature

  • 1 teaspoon vanilla extract

  • ½ cup all-purpose flour

  • ¼ teaspoon salt

  • ½ teaspoon baking powder

  • Optional: ¼ cup shredded coconut or chopped pecans for topping

Step-by-Step Instructions

1. Prepare the Baking Dish

Preheat your oven to 350°F (175°C). Grease an 8×8-inch baking dish with butter or non-stick spray. This ensures easy serving and a beautifully browned edge.

2. Mix the Wet Ingredients

In a large bowl, whisk together the eggs and sugar until the mixture looks pale and slightly thickened. Slowly pour in the melted butter while whisking continuously. Add the vanilla extract and crushed pineapple with all its juice. This moisture is essential for the dessert’s signature texture.

3. Add the Dry Ingredients

Sprinkle in the flour, baking powder, and salt. Gently fold everything together until just combined. Avoid overmixing—this keeps the bake tender rather than dense.

4. Pour and Level

Pour the batter into the prepared baking dish and smooth the top with a spatula. If using coconut or pecans, sprinkle them evenly over the surface for extra flavor and crunch.

5. Bake to Golden Perfection

Bake uncovered for 40–45 minutes, or until the top is lightly golden and the center is set but still soft. A toothpick inserted should come out mostly clean with a few moist crumbs.

6. Cool Slightly Before Serving

Allow the pineapple bake to cool for at least 10–15 minutes. This helps it firm up just enough for clean slices while staying wonderfully moist inside.

Serving Suggestions

This pineapple bake is incredibly versatile. Serve it warm with a scoop of vanilla ice cream for a classic dessert. For a lighter option, pair it with whipped cream or a dollop of Greek yogurt. It’s also delicious served chilled the next day, when the flavors have deepened and the texture becomes even more luscious.

It can even double as a sweet brunch dish—serve alongside coffee or tea, and watch it disappear.

Tips for the Best Results

  • Use canned crushed pineapple in juice, not syrup, for balanced sweetness.

  • Room-temperature eggs blend more smoothly into the batter.

  • Do not overbake—pineapple desserts should stay moist.

  • For a richer version, replace 2 tablespoons of butter with cream cheese.

Easy Variations to Try

  • Tropical Pineapple Bake: Add mango chunks or banana slices.

  • Spiced Version: Mix in a pinch of cinnamon or nutmeg.

  • Lemon Pineapple Bake: Add 1 teaspoon lemon zest for extra brightness.

  • Gluten-Free Option: Substitute all-purpose flour with a 1:1 gluten-free blend.

Final Thoughts

This pineapple bake is proof that simple ingredients can create something truly special. It’s comforting, bright, and endlessly adaptable—perfect for any season and any occasion. Once you try it, it’s likely to become a staple in your dessert rotation.

Amish Crowd-Pleaser Just 4 ingredients

There’s something irresistibly comforting about Amish-inspired recipes. They’re humble, practical, and built around simple pantry staples—yet they have a way of winning over every table they touch. This Amish Crowd-Pleaser is one of those quietly magical recipes. With just four ingredients, no baking, and barely any prep time, it delivers a sweet, creamy indulgence that feels far more special than its simplicity suggests.

Often served at Amish gatherings, church suppers, and family breakfasts, this classic treat is known for disappearing fast. Whether you spread it on warm bread, spoon it onto crackers, or serve it alongside fruit, it has that rare quality of pleasing kids, adults, and elders alike.

What Is the Amish Crowd-Pleaser?

This recipe is a traditional Amish peanut butter spread, sometimes lovingly called Amish “Church Spread” or Amish Peanut Butter Fluff. It’s commonly served at breakfasts and potlucks with homemade bread, biscuits, or rolls. The texture is light and creamy, the flavor is gently sweet and nutty, and the nostalgia factor is off the charts.

The brilliance lies in its restraint. No long ingredient lists. No fancy tools. Just four everyday items coming together to create something greater than the sum of its parts.

The 4 Simple Ingredients

You likely already have these in your kitchen:

Creamy peanut butter
This forms the rich, nutty base. Traditional recipes favor classic, shelf-stable peanut butter for the smoothest texture.

Marshmallow fluff (or marshmallow crème)
This adds lightness, sweetness, and that signature airy texture that makes the spread so addictive.

Light corn syrup
A small amount provides silkiness and helps everything blend smoothly, just as it has in Amish kitchens for generations.

Powdered sugar
This gently sweetens and thickens the spread without any graininess.

That’s it. Four ingredients, each with a purpose, none wasted.

How to Make It (Simple Method)

Add the peanut butter to a medium mixing bowl.

Spoon in the marshmallow fluff.

Pour in the corn syrup.

Gradually mix in the powdered sugar.

Stir until everything is fully combined and smooth. The result should be creamy, spreadable, and slightly fluffy—not stiff, not runny.

No heat. No baking. No waiting.

Why This Recipe Works So Well

1. It’s Foolproof
You don’t need cooking skills to make this successfully. If you can stir, you can master it.

2. It Scales Easily
Making it for two people or twenty is effortless. Just double or triple the ingredients.

3. It’s Budget-Friendly
Amish cooking has always been about making the most of what’s available, and this recipe reflects that beautifully.

4. It Triggers Nostalgia
The flavor instantly recalls old-fashioned kitchens, wooden tables, and fresh bread pulled from the oven.

How the Amish Traditionally Serve It

In Amish communities, this spread is rarely eaten alone. It’s almost always paired with something warm and homemade:

Fresh white or wheat bread

Soft dinner rolls

Biscuits

Toast at breakfast

Crackers at gatherings

It’s often placed in a simple bowl at the center of the table, meant to be shared—another reflection of Amish values of community and togetherness.

Modern Serving Ideas

While tradition is beautiful, this spread adapts wonderfully to modern kitchens:

Dip for apple slices or banana rounds

Filling for sandwich cookies

Spread on pancakes or waffles

Swirled into oatmeal

Layered in dessert parfaits

It even works as a quick frosting for snack cakes or brownies in a pinch.

Tips for the Best Results

Use room-temperature ingredients for easier mixing

Choose creamy peanut butter, not natural-style varieties, for authentic texture

Add powdered sugar slowly so you can control sweetness

If too thick, stir in a teaspoon of milk; if too soft, add a bit more powdered sugar

These small adjustments help you tailor the spread exactly to your taste.

Why It’s a True Crowd-Pleaser

There’s no overpowering flavor here. Nothing trendy or divisive. Just familiar, comforting sweetness that feels safe and satisfying. That’s why it works so well at gatherings—people don’t need convincing to love it.

In a world of complicated desserts and viral recipes, this Amish classic stands quietly confident. It doesn’t need attention-grabbing techniques or exotic ingredients. It simply delivers, every time.

Final Thoughts

This Amish Crowd-Pleaser proves a timeless truth: simple food, made with care, brings people together. With just four ingredients and a few minutes of effort, you get a recipe that feels generous, nostalgic, and deeply comforting.