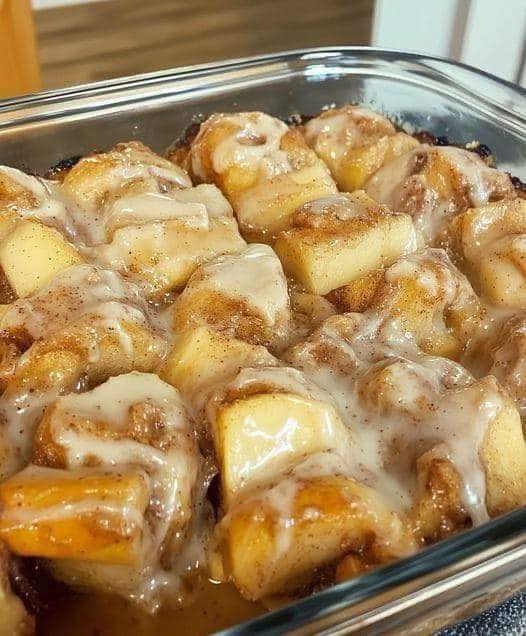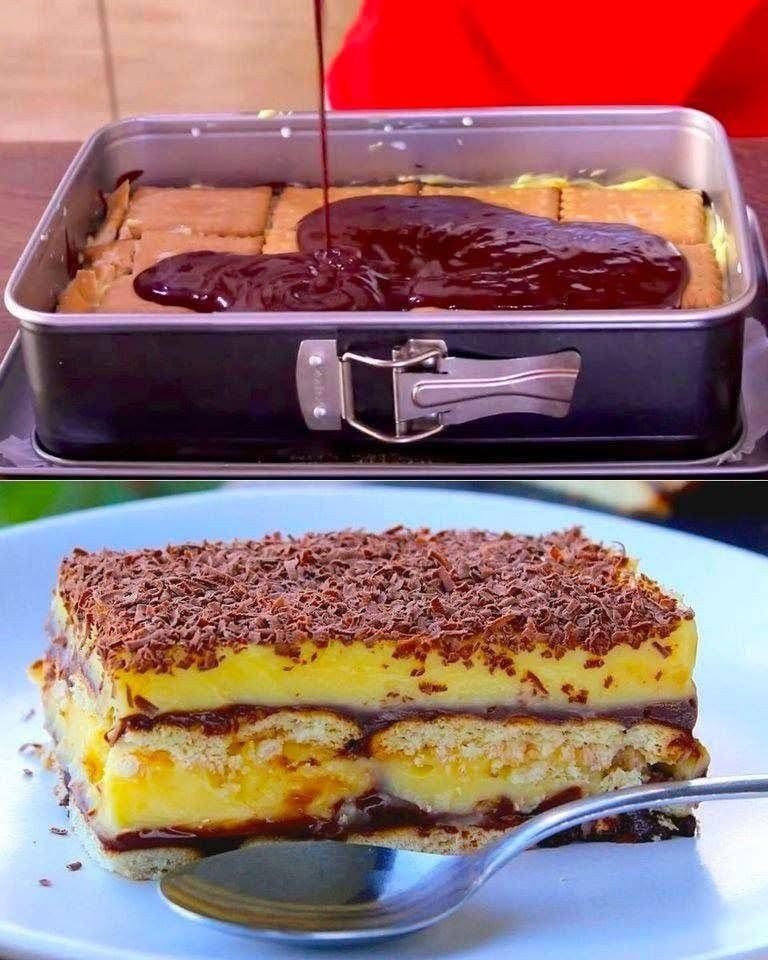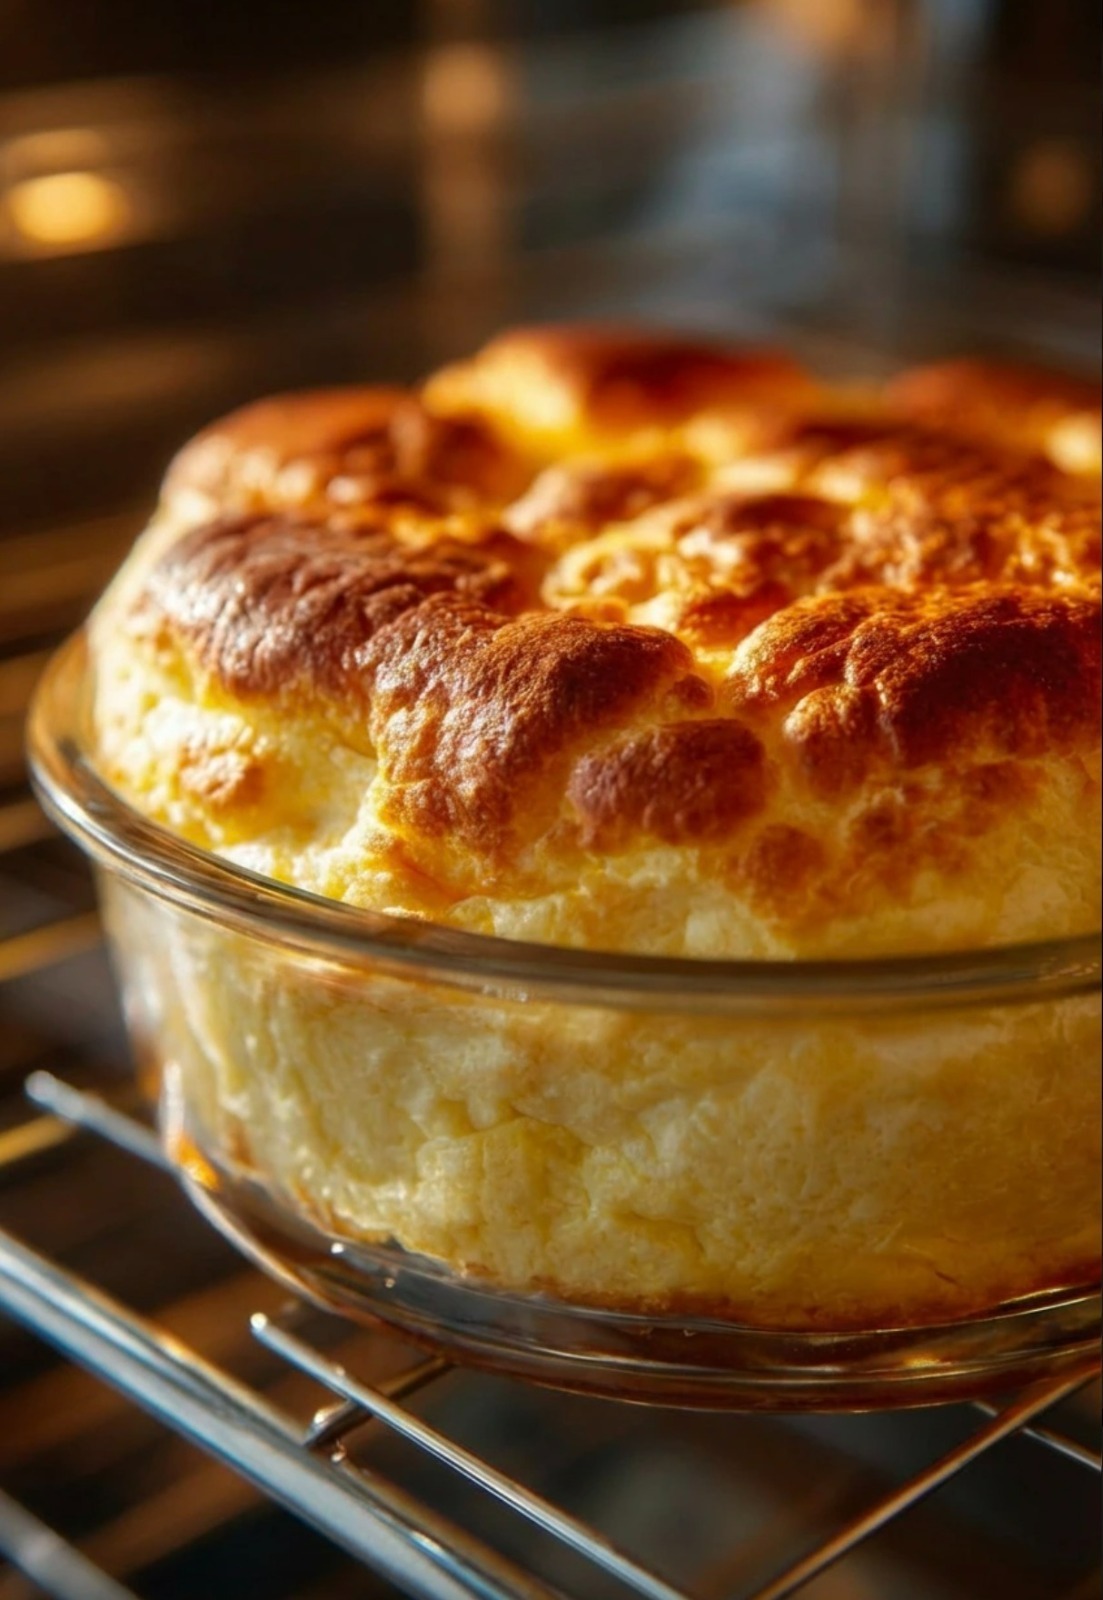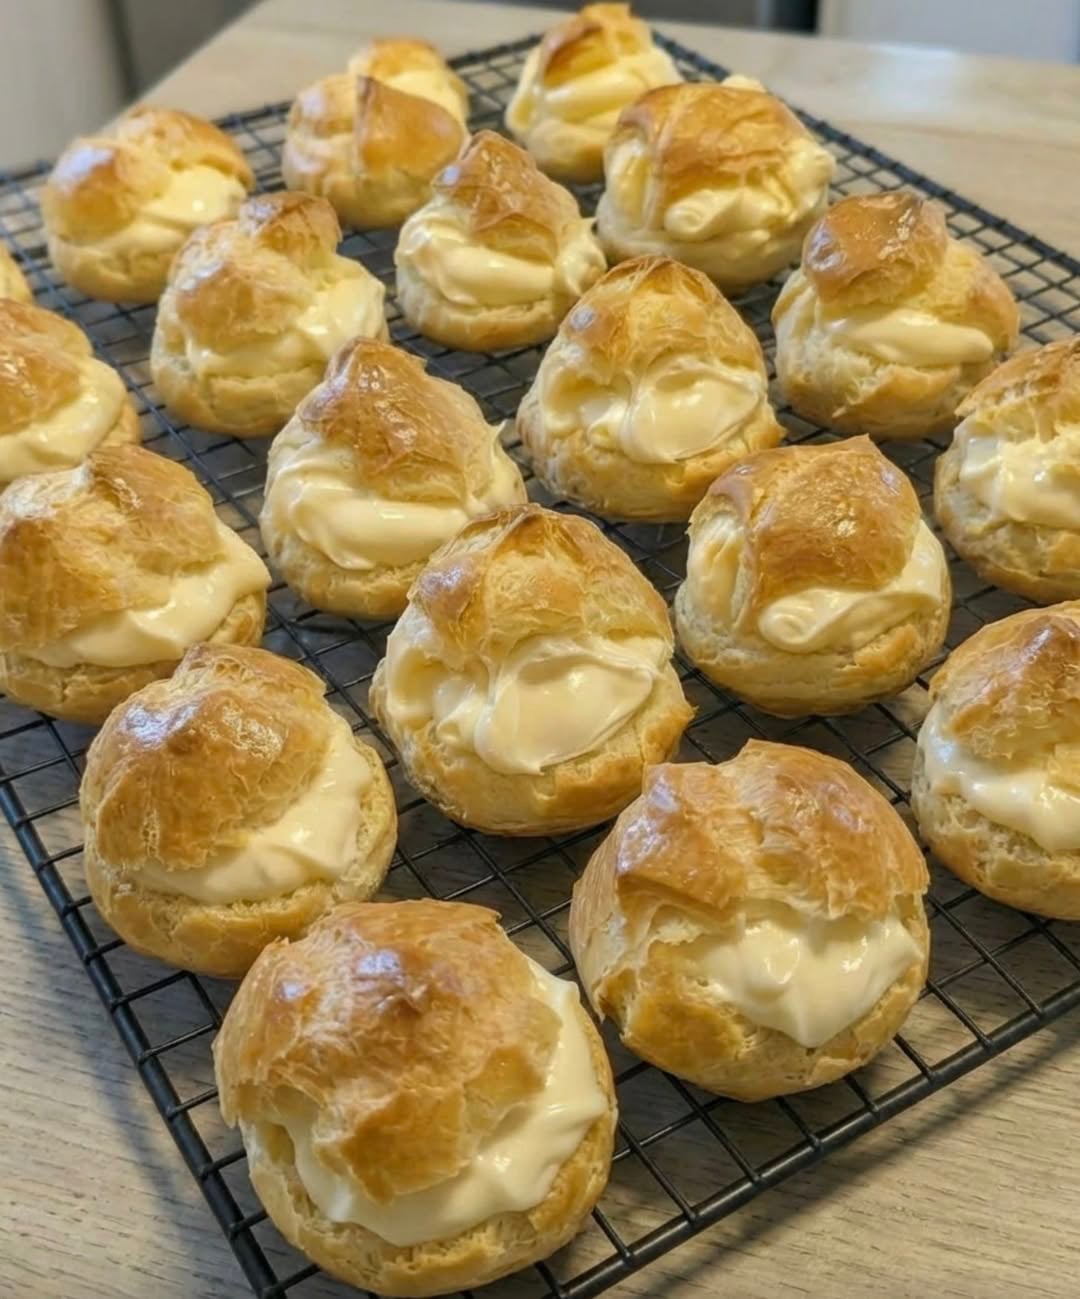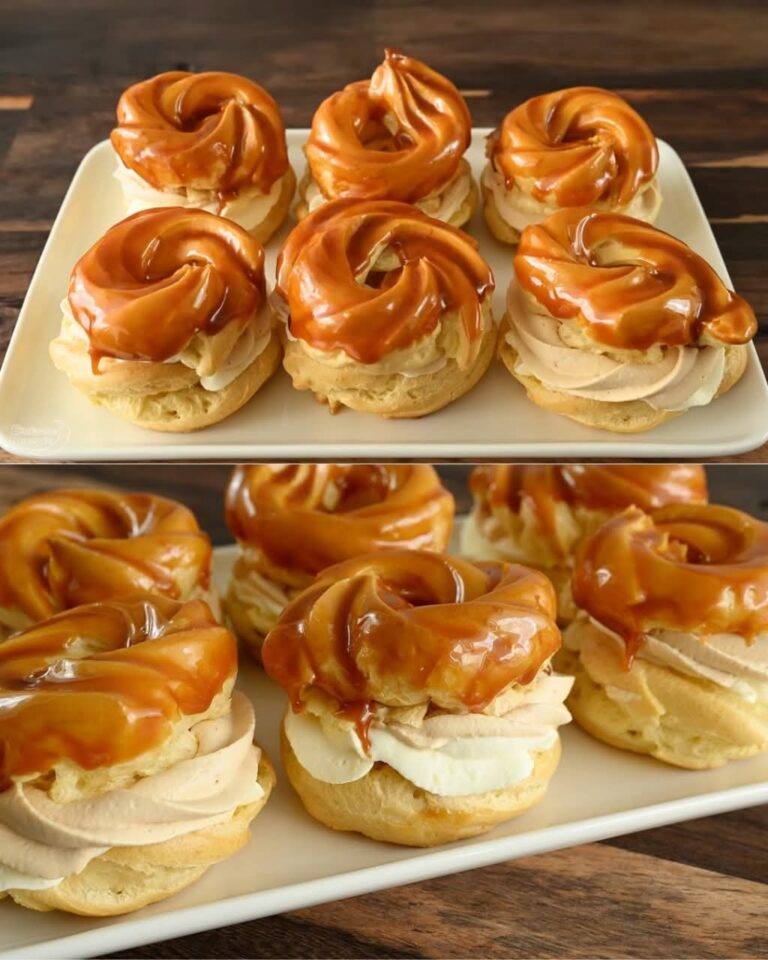
Classic Cream Puffs with Caramel & Vanilla Cream

There’s something undeniably magical about classic cream puffs. Light as air, delicately crisp on the outside, and filled with luscious vanilla cream, they feel elegant without being fussy. Add a drizzle of golden caramel, and suddenly this humble pastry becomes a show-stopping dessert worthy of holidays, birthdays, or a quiet afternoon when you want to treat yourself to something truly special.

Cream puffs—known as choux à la crème—have been beloved for centuries. Their secret lies in choux pastry, a simple dough that puffs dramatically in the oven, creating hollow centers ready to be filled with silky cream. Paired with homemade vanilla custard and rich caramel sauce, this dessert strikes the perfect balance between lightness and indulgence.

Let’s walk through this classic recipe step by step, so you can recreate bakery-quality cream puffs right in your own kitchen.

Ingredients

For the Choux Pastry (Cream Puff Shells)

  • 1 cup water

  • ½ cup unsalted butter

  • 1 cup all-purpose flour

  • 4 large eggs

  • ¼ teaspoon salt

For the Vanilla Cream Filling

  • 2 cups whole milk

  • ½ cup granulated sugar

  • 4 egg yolks

  • ¼ cup cornstarch

  • 2 tablespoons unsalted butter

  • 1 tablespoon pure vanilla extract

  • ½ cup heavy cream, whipped to soft peaks

For the Caramel Sauce

  • 1 cup granulated sugar

  • ¼ cup water

  • ½ cup heavy cream (warm)

  • 2 tablespoons butter

  • Pinch of salt

Step 1: Make the Choux Pastry

Preheat your oven to 400°F (200°C) and line a baking sheet with parchment paper.

In a medium saucepan, combine the water, butter, and salt. Heat over medium until the butter melts completely and the mixture comes to a rolling boil. Remove from heat and add the flour all at once, stirring vigorously with a wooden spoon.

Return the pan to low heat and cook for about 1–2 minutes, stirring constantly, until the dough pulls away from the sides and forms a smooth ball. Transfer the dough to a bowl and let it cool slightly for about 5 minutes.

Add the eggs one at a time, mixing well after each addition. The dough should become smooth, glossy, and thick enough to hold its shape when spooned.

Spoon or pipe small mounds of dough onto the prepared baking sheet, leaving space between each puff. Bake for 25–30 minutes, until puffed, golden, and crisp. Do not open the oven while baking.

Once baked, turn off the oven, crack the door slightly, and let the puffs dry inside for 10 minutes. Cool completely on a rack.

Step 2: Prepare the Vanilla Cream

In a saucepan, heat the milk over medium heat until just steaming (do not boil).

In a bowl, whisk together the sugar, egg yolks, and cornstarch until smooth and pale. Slowly pour the warm milk into the egg mixture while whisking constantly to prevent curdling.

Return everything to the saucepan and cook over medium heat, whisking continuously, until the mixture thickens into a smooth custard. Remove from heat and stir in the butter and vanilla extract.

Transfer the custard to a bowl, cover with plastic wrap directly on the surface, and let it cool completely. Once cooled, gently fold in the whipped cream to create a light, airy vanilla cream.

Step 3: Make the Caramel Sauce

In a heavy saucepan, combine the sugar and water. Cook over medium heat without stirring until the mixture turns a deep amber color.

Carefully add the warm heavy cream (it will bubble vigorously), then stir in the butter and salt. Cook for another minute until smooth. Remove from heat and let cool slightly.

Step 4: Assemble the Cream Puffs

Slice the cooled cream puffs in half horizontally or poke a small hole in the bottom.

Fill each puff generously with vanilla cream using a spoon or piping bag. Arrange them on a serving platter and drizzle warm caramel sauce over the top.

For an extra touch, dust lightly with powdered sugar or add a sprinkle of chopped nuts.

Tips for Perfect Cream Puffs

  • Use room-temperature eggs for smoother choux dough

  • Do not underbake—crispy shells prevent sogginess

  • Fill cream puffs just before serving for the best texture

  • Caramel can be reheated gently if it thickens

Final Thoughts

Classic Cream Puffs with Caramel & Vanilla Cream are proof that simple ingredients can create something extraordinary. Each bite delivers crisp pastry, silky vanilla filling, and rich caramel sweetness—all working together in perfect harmony. Whether you’re serving guests or treating yourself, this timeless dessert never fails to impress.
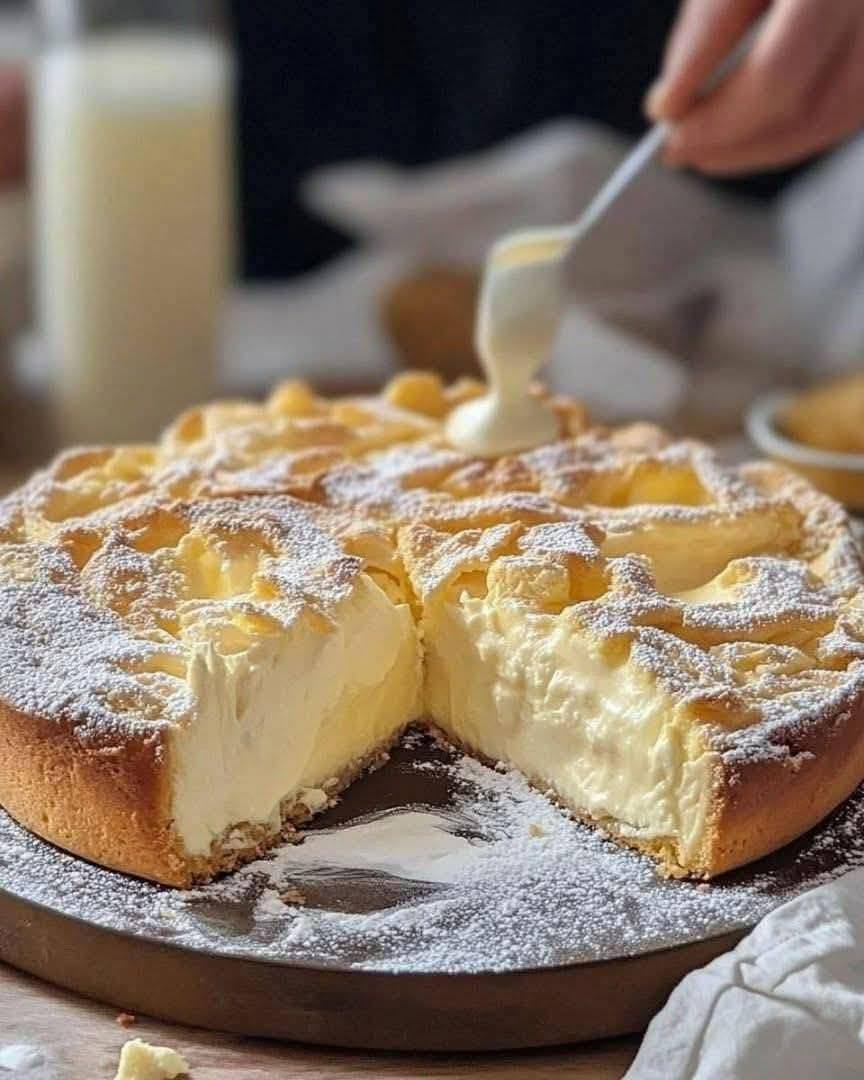
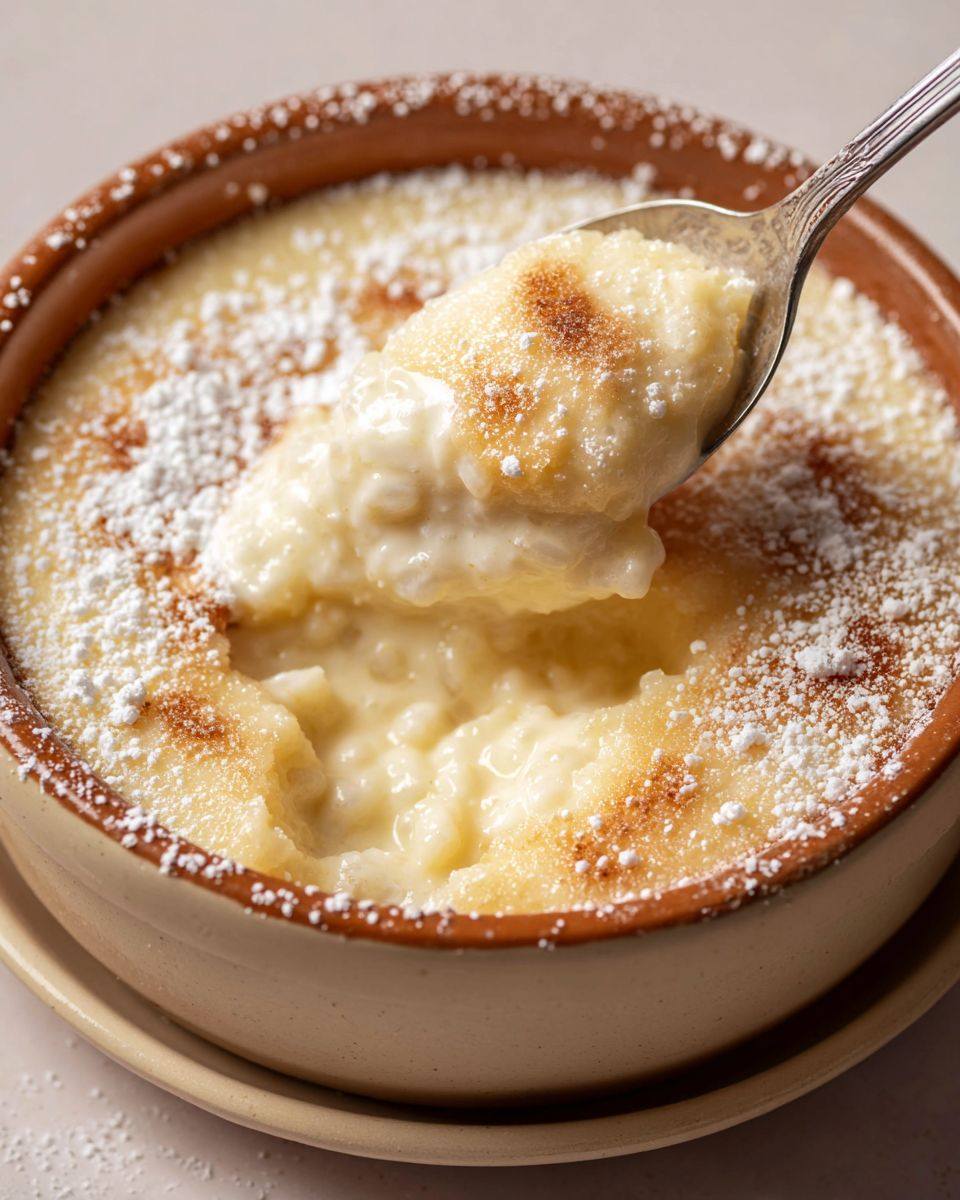
Grandma’s 15-Minute “Crazy Cake”: The Legendary Recipe That Defies Time

Some recipes don’t just feed you—they tell a story. Grandma’s 15-Minute “Crazy Cake” is one of those rare kitchen legends. No eggs. No milk. No butter. No mixer. And somehow, against all logic, it turns into a moist, tender, deeply chocolatey cake that tastes like it took hours of effort. This humble dessert earned its name during hard times, when ingenuity mattered more than fancy ingredients, and it has survived decades because it simply works.

Crazy Cake—also known as Wacky Cake or Depression Cake—was born during an era when pantry staples were scarce. But what began as necessity quickly became tradition. Grandmas passed it down not because it was cheap, but because it was reliable, fast, and shockingly good. To this day, it remains one of the easiest cakes you’ll ever make, ready from bowl to oven in just 15 minutes.

Why This Cake Is “Crazy”

The magic of Crazy Cake lies in its simplicity. There’s no creaming butter, no separating eggs, no risk of curdling. The cake uses oil for moisture and vinegar for lift, reacting with baking soda to create a light, fluffy crumb. Don’t worry—you’ll never taste the vinegar. What you will taste is a rich cocoa flavor and a soft, velvety texture that stays moist for days.

Even better, everything is mixed in one bowl (or traditionally, right in the baking pan), making cleanup almost nonexistent. Grandma loved it because it didn’t waste time—or dishes.

Ingredients You Already Have

This recipe relies on everyday pantry staples, which is exactly why it has survived generation after generation.

You’ll need:

  • 1½ cups all-purpose flour

  • 1 cup granulated sugar

  • ¼ cup unsweetened cocoa powder

  • 1 teaspoon baking soda

  • ½ teaspoon salt

  • 1 teaspoon vanilla extract

  • 1 teaspoon white vinegar

  • ⅓ cup neutral oil (vegetable or sunflower)

  • 1 cup water (or brewed coffee for deeper chocolate flavor)

That’s it. No substitutions required, no specialty items, no stress.

Grandma’s 15-Minute Method

Preheat your oven to 350°F (175°C). Lightly grease an 8×8-inch baking pan or line it with parchment.

In a large bowl, whisk together the flour, sugar, cocoa powder, baking soda, and salt until evenly combined. This step ensures the cake rises evenly and the cocoa is fully distributed.

Next, make three small wells in the dry mixture. Pour the vanilla into one, the vinegar into another, and the oil into the third. Finally, pour the water over everything.

Using a whisk or fork, gently stir until the batter is smooth. Don’t overmix—just blend until no dry spots remain. The batter will be thin, and that’s exactly how it should be.

Pour into the prepared pan and bake for 30–35 minutes, or until a toothpick inserted into the center comes out clean. Let the cake cool slightly before slicing.

From start to oven, the entire process takes about 15 minutes. Grandma timing at its finest.

Optional Old-Fashioned Chocolate Glaze

Grandma often served this cake plain, dusted with powdered sugar. But when she wanted something extra special, she poured on a simple glaze.

Quick glaze:

  • ½ cup powdered sugar

  • 2 tablespoons cocoa powder

  • 2–3 tablespoons hot water or milk alternative

Whisk until smooth and drizzle over the warm cake. It seeps into the surface, adding a glossy finish and extra richness.

Why It Still Works Today

Crazy Cake has outlived trends, diets, and complicated desserts because it fits real life. It’s accidentally vegan, budget-friendly, and endlessly adaptable. You can add chopped nuts, chocolate chips, or a pinch of cinnamon. Bake it in a loaf pan, cupcake tin, or even a cast-iron skillet.

Most importantly, it’s forgiving. Even beginner bakers get perfect results, which is why grandmas trusted it—and why they taught it to their grandchildren.

A Cake That Carries Memories

Every bite of Crazy Cake tastes like resilience. It reminds us that good food doesn’t need to be complicated, and comfort doesn’t come from extravagance. Grandma’s 15-Minute Crazy Cake is proof that the best recipes are the ones that show up when you need them most—quickly, quietly, and without fuss.

Amish Cozy Delight”: Only 3 ingredients.

Some of the best Amish recipes don’t come from cookbooks or blogs. They come from quiet kitchens, early mornings, and generations of practice. No flashy techniques. No long ingredient lists. Just food that fills the house with warmth and the table with comfort.

“Amish Cozy Delight” is exactly that kind of recipe. It uses only three humble ingredients, yet delivers a rich, soothing dish that feels like a hug in a bowl. This is the type of recipe made when the pantry is nearly bare, the weather is cold, and all you want is something familiar and nourishing.

No mixers. No special tools. No stress.

Just real food, made the old way.

Why Amish Recipes Are So Simple—and So Good

Amish cooking has always focused on practicality and nourishment. Ingredients were chosen based on what could be grown, stored, or churned at home. Recipes needed to be reliable, filling, and adaptable.

That’s why many Amish dishes rely on:

  • Natural sweetness instead of processed flavors

  • Fats like butter for richness and energy

  • Slow cooking to build depth without complexity

This recipe follows that same philosophy. Each ingredient plays a clear role, and nothing is wasted.

The 3 Ingredients You’ll Need

That’s it. No substitutions required.

  1. Apples – 6 medium apples, peeled and sliced
    Traditional Amish kitchens often used apples because they store well and add natural sweetness.

  2. Butter – ½ cup (1 stick)
    Butter brings richness, comfort, and that unmistakable homemade flavor.

  3. Brown Sugar – ¾ cup
    Adds warmth, caramel notes, and deep sweetness without overpowering the apples.

What This Dish Tastes Like

Imagine tender apples slowly baked until they melt into their own juices, coated in buttery caramel syrup that thickens naturally as it cooks. The flavor is gentle, not overly sweet, with a soft texture that feels comforting and nostalgic.

It’s not a pie.
It’s not a sauce.
It’s something beautifully in between.

Serve it warm, and it tastes like something a grandmother would place on the table without saying a word—because she knows it doesn’t need explaining.

How to Make Amish Cozy Delight

Step 1: Prepare the Apples

Peel and slice your apples into even pieces. They don’t need to be perfect—rustic is part of the charm.

Place the sliced apples into a buttered baking dish.

Step 2: Add the Butter

Cut the butter into small cubes and scatter it evenly over the apples. As it melts, it will coat the fruit and create a rich base for the syrup.

Step 3: Sprinkle the Sugar

Evenly sprinkle the brown sugar over the apples and butter. No need to stir—the magic happens in the oven.

Step 4: Bake Low and Slow

Cover the dish with foil and bake at 350°F (175°C) for 30 minutes.

After 30 minutes, remove the foil and bake for another 20–25 minutes, allowing the top to caramelize slightly and the juices to thicken.

Your kitchen will smell incredible.

Why This Recipe Works with Only Three Ingredients

  • Apples release natural juices, creating moisture and body

  • Butter emulsifies with the sugar, forming a smooth caramel sauce

  • Brown sugar enhances flavor without needing spices

No flour.
No cornstarch.
No thickeners.

Time does all the work.

How Amish Families Traditionally Served It

This dish was often served:

  • Warm for breakfast alongside bread

  • As a simple dessert after supper

  • Spooned over biscuits or pancakes

  • Eaten plain from a bowl on cold evenings

It’s filling without being heavy, sweet without being overwhelming.

Storage and Reheating

  • Store leftovers in the refrigerator for up to 4 days

  • Reheat gently on the stovetop or in the oven

  • The flavors deepen overnight, making it even better the next day

A Recipe That Reminds Us Less Is More

“Amish Cozy Delight” proves that comfort food doesn’t need complexity. With just three ingredients and a little patience, you get something deeply satisfying—food that slows you down and reminds you of simpler times.

The Cozy Cornerstone: Cinnamon Apple Cake That Smells Like Home

There are certain smells that instantly make a house feel like a home, and warm apples mingling with cinnamon is right at the top of that list. This cinnamon apple cake is the kind of recipe that doesn’t just feed people—it sets a mood. While it bakes, the air fills with a soft, spiced sweetness that feels like a hug you didn’t know you needed. It’s the cake you make on a quiet afternoon, the one you serve when guests drop by unexpectedly, or the one you cut into while it’s still slightly warm, unable to wait any longer.

This recipe is simple, reliable, and deeply comforting. No fancy techniques, no complicated ingredients—just honest baking that delivers big on flavor and nostalgia. It’s moist, tender, and generously packed with apples, with cinnamon woven through every bite.

Why This Cake Feels So Special

Apple cakes have been around forever, but this one earns its place as a cozy cornerstone because of its balance. The apples soften into jammy pockets without turning mushy, the cinnamon adds warmth without overpowering, and the cake itself stays light yet rich. It’s sweet, but not cloying. Rustic, but still elegant enough to serve to company.

Best of all, it tastes even better the next day, once the flavors have had time to settle and deepen—if it lasts that long.

Ingredients You’ll Need

For the cake:

  • 3 medium apples (Granny Smith or Honeycrisp work beautifully)

  • 2 cups all-purpose flour

  • 1 teaspoon baking soda

  • ½ teaspoon salt

  • 2 teaspoons ground cinnamon

  • ¼ teaspoon ground nutmeg (optional but lovely)

  • ¾ cup granulated sugar

  • ½ cup brown sugar, packed

  • ¾ cup vegetable oil or melted butter

  • 2 large eggs, room temperature

  • 1 teaspoon vanilla extract

  • ¼ cup milk or plain yogurt

For the cinnamon topping:

  • 2 tablespoons brown sugar

  • 1 teaspoon ground cinnamon

  • 1 tablespoon melted butter

Step-by-Step Instructions

1. Prepare the apples
Peel, core, and dice the apples into small, even cubes. You want pieces that will soften while baking but still hold their shape. Set them aside while you prepare the batter.

2. Preheat and prepare the pan
Preheat your oven to 350°F (175°C). Grease and lightly flour a 9-inch round cake pan or square baking dish. This cake releases easily, but a well-prepared pan ensures perfect slices every time.

3. Mix the dry ingredients
In a medium bowl, whisk together the flour, baking soda, salt, cinnamon, and nutmeg. This step ensures the spices are evenly distributed throughout the cake.

4. Combine the wet ingredients
In a large bowl, whisk together the granulated sugar, brown sugar, oil (or melted butter), eggs, vanilla, and milk. The mixture should look smooth and glossy, with no visible sugar lumps.

5. Bring it all together
Gradually add the dry ingredients to the wet mixture, stirring gently just until combined. Avoid overmixing—this keeps the cake tender. Fold in the diced apples, making sure they’re evenly spread through the batter.

6. Assemble and top
Pour the batter into the prepared pan and smooth the top. In a small bowl, mix the brown sugar, cinnamon, and melted butter for the topping. Sprinkle it evenly over the batter.

7. Bake to perfection
Bake for 40–50 minutes, or until a toothpick inserted into the center comes out clean or with a few moist crumbs. The top should be golden, slightly crisp, and irresistibly fragrant.

8. Cool and serve
Let the cake cool in the pan for at least 15 minutes before slicing. Serve warm, at room temperature, or chilled—it’s wonderful every way.

Serving Ideas

This cake shines on its own, but you can easily dress it up:

  • Dust with powdered sugar for a simple finish

  • Serve with whipped cream or vanilla ice cream

  • Drizzle with a light vanilla glaze for extra indulgence

  • Enjoy with a cup of tea or strong coffee for the ultimate cozy moment

Tips for the Best Cinnamon Apple Cake

  • Use firm apples to avoid a soggy texture

  • Don’t overmix once the flour is added

  • Let it rest—the flavor improves after a few hours

  • Store covered at room temperature for up to two days, or refrigerate for longer freshness

Final Thoughts

This cinnamon apple cake isn’t flashy or trendy, and that’s exactly its charm. It’s the kind of recipe that gets scribbled onto a recipe card, passed between friends, and baked again and again through the years. One slice fills the kitchen with warmth, memories, and that unmistakable feeling of home.

This Recipe Was Probably Sent Straight from Heaven

Some recipes are good. Some are great. And then there are recipes so unbelievably comforting, rich, and soul-satisfying that they feel almost divine. This is one of those. Creamy, golden, indulgent, and impossibly easy, this dish tastes like it took hours of effort when in reality, it comes together with simple ingredients and a whole lot of love.

This heavenly recipe is perfect for family dinners, holidays, potlucks, or those evenings when you just want something that feels like a warm hug on a plate. Every bite melts in your mouth, layers of flavor unfolding slowly, leaving you wondering how something so simple can taste so luxurious.

Once you make it, it will become a permanent part of your recipe collection — passed down, requested, and remembered.

Heavenly Creamy Baked Chicken & Potato Bliss

Why This Recipe Feels So Special

  • Ultra-creamy, rich texture

  • Tender chicken that stays juicy

  • Golden, buttery potatoes that soak up every drop of flavor

  • Simple pantry ingredients

  • No complicated steps — just pure comfort

Ingredients

For the Chicken & Potatoes

  • 1½ lbs chicken breast or thighs, cut into chunks

  • 4 large potatoes, peeled and thinly sliced

  • 1 medium onion, thinly sliced

  • 3 cloves garlic, minced

  • 2 tablespoons olive oil

  • Salt and black pepper to taste

For the Heavenly Cream Sauce

  • 1½ cups heavy cream

  • ½ cup milk

  • 1 cup shredded mozzarella cheese

  • ½ cup grated Parmesan cheese

  • 2 tablespoons butter

  • 1 teaspoon garlic powder

  • 1 teaspoon onion powder

  • ½ teaspoon paprika

  • ½ teaspoon dried thyme or oregano

Optional Topping (Highly Recommended)

  • ½ cup extra mozzarella or cheddar

  • Fresh parsley or chives for garnish

Instructions

Step 1: Prepare the Base

Preheat your oven to 375°F (190°C). Lightly grease a baking dish with butter or oil.

Arrange half of the sliced potatoes evenly on the bottom of the dish. Sprinkle lightly with salt and pepper. Add half of the sliced onions and a bit of minced garlic.

Layer the chicken pieces evenly over the potatoes, seasoning them generously with salt, pepper, paprika, and garlic powder.

Top with the remaining potatoes and onions, creating soft, comforting layers that will bake together into perfection.

Step 2: Make the Heavenly Cream Sauce

In a saucepan over medium heat, melt the butter. Add the garlic and cook for about 30 seconds until fragrant.

Pour in the heavy cream and milk, stirring gently. Add onion powder, thyme, and a pinch of salt and pepper. Let the sauce warm — do not boil.

Slowly stir in the mozzarella and Parmesan cheese until the sauce becomes silky, creamy, and irresistible.

Step 3: Assemble the Magic

Pour the warm cream sauce evenly over the chicken and potatoes, making sure it seeps into every layer.

Cover the dish tightly with foil and bake for 45 minutes.

Step 4: Golden Heaven

Remove the foil, sprinkle extra cheese on top, and return to the oven uncovered. Bake for another 15–20 minutes, until the top is bubbling, golden, and lightly crisp.

Let the dish rest for 10 minutes before serving — this allows the sauce to thicken into pure perfection.

Serving Suggestions

Serve this heavenly dish with:

  • A simple green salad

  • Steamed vegetables

  • Warm dinner rolls or crusty bread

It’s rich enough to stand alone, but pairs beautifully with fresh, light sides.

Why Everyone Falls in Love With This Recipe

This dish works because it balances comfort and indulgence perfectly. The potatoes become tender and flavorful, the chicken stays juicy, and the sauce wraps everything together in creamy, cheesy harmony. It’s nostalgic, luxurious, and deeply satisfying — the kind of food that brings people together around the table.

Leftovers (if there are any) taste even better the next day, making it perfect for meal prep or reheating.

Final Thoughts

Some recipes are just food. This one is an experience. It fills your kitchen with the most comforting aroma, your plate with pure joy, and your heart with that “this is why I love cooking” feeling.

Make it once, and you’ll understand why people swear this recipe didn’t come from a cookbook — it came straight from heaven.

The “No-Fuss, Feed-a-Crowd” Incredible Breakfast Bake: Your Secret Weapon for Lazy Mornings & Holiday Brunches

This is the kind of breakfast you throw together while half-awake, slide into the oven, and somehow emerge as the person who “always makes the best brunch.” The No-Fuss Breakfast Bake is cozy, hearty, endlessly adaptable, and designed to feed a hungry crowd without chaining you to the stove.

Whether you’re hosting a holiday brunch, feeding overnight guests, or just reclaiming your weekend from constant flipping and frying, this baked breakfast casserole is the quiet MVP of your recipe collection.

Why This Breakfast Bake Works Every Single Time

What makes this dish incredible isn’t just the flavor—it’s the strategy. Everything bakes together in one dish, meaning the flavors mingle, the textures balance, and you’re free to sip coffee instead of babysitting a skillet.

It’s:

  • Make-ahead friendly

  • Customizable for picky eaters

  • Comforting but impressive

  • Perfect for feeding 6–10 people

Soft bread soaks up seasoned eggs, melty cheese binds everything together, and savory add-ins turn it into a full meal that feels indulgent but familiar.

Ingredients (The Flexible Foundation)

This recipe is designed to bend, not break. Here’s a classic, crowd-pleasing version:

  • 6 cups day-old bread, cubed (French bread, brioche, or sandwich bread)

  • 8 large eggs

  • 2½ cups milk (whole milk for richness, any milk works)

  • 1½ cups shredded cheese (cheddar, mozzarella, Monterey Jack, or a blend)

  • 1 lb breakfast sausage, bacon, or diced cooked chicken

  • 1 small onion, finely diced

  • 1 bell pepper, diced (optional but great)

  • 2 cloves garlic, minced

  • 2 tablespoons butter or oil

  • 1 teaspoon salt

  • ½ teaspoon black pepper

  • ½ teaspoon paprika or smoked paprika

  • ½ teaspoon dried oregano or thyme

  • Optional: green onions, spinach, mushrooms, or chili flakes

Step-by-Step: Lazy-Morning Simple

1. Prep the Filling

In a skillet, cook your sausage or bacon until browned. Remove and set aside. In the same pan, sauté onion, bell pepper, and garlic until soft and fragrant. This quick step adds big flavor and prevents watery vegetables later.

2. Build the Base

Grease a 9×13 baking dish generously. Spread the bread cubes evenly across the bottom. Sprinkle the cooked meat and vegetables over the bread, making sure everything is well distributed.

3. Mix the Magic

In a large bowl, whisk together eggs, milk, salt, pepper, paprika, and herbs. Pour the mixture slowly over the bread, pressing gently so every piece gets soaked.

4. Cheese It Up

Scatter shredded cheese evenly over the top. This creates that golden, bubbling crust everyone fights over.

5. Rest or Bake

  • Bake immediately: 350°F (175°C) for 45–50 minutes

  • Make ahead: Cover and refrigerate overnight, then bake in the morning (add 5–10 minutes)

You’ll know it’s done when the center is set and the top is lightly golden.

What Makes It “Feed-a-Crowd” Worthy

This bake slices cleanly, reheats beautifully, and stays warm longer than individual breakfast items. It pairs effortlessly with fruit, yogurt, or a simple salad, and you don’t need multiple pans or last-minute cooking chaos.

Bonus: it smells amazing while baking—instant brunch ambiance.

Easy Variations (Same Effort, New Flavor)

  • Vegetarian: Skip meat, add sautéed mushrooms, spinach, and extra cheese

  • Spicy: Use chorizo, pepper jack cheese, and a pinch of chili flakes

  • Holiday Luxe: Swap bread for croissants, add caramelized onions

  • Kid-Friendly: Use mild cheese and plain sausage, skip veggies

This recipe loves creativity and forgives substitutions.

Storage & Reheating

  • Refrigerate leftovers up to 4 days

  • Reheat slices in the microwave or oven

  • Freezes well when wrapped tightly—perfect for busy mornings later

Final Thought

The No-Fuss, Feed-a-Crowd Incredible Breakfast Bake isn’t just a recipe—it’s a strategy for stress-free mornings. It lets you host without hovering, serve something hearty without overthinking, and enjoy your coffee while the oven does the work.

Easy cream puffs

Few desserts feel as magical as cream puffs. Crisp on the outside, airy on the inside, and filled with silky cream—these little pastries look fancy but are surprisingly easy to make at home. If you’ve ever thought cream puffs were “bakery-only” desserts, this recipe will change your mind. With simple ingredients and clear steps, you’ll have perfect cream puffs even if it’s your first time working with choux pastry.

This easy cream puffs recipe is designed for beginners, using everyday pantry staples while delivering bakery-quality results. Whether you’re making them for guests, celebrations, or just a sweet weekend treat, these cream puffs are guaranteed to impress.

What Makes Cream Puffs So Special?

Cream puffs are made from choux pastry, a unique dough cooked on the stovetop before baking. Instead of yeast or baking powder, steam does all the work—creating hollow centers that are perfect for filling with whipped cream, pastry cream, or even ice cream.

The beauty of this recipe is its simplicity. No special equipment, no complicated techniques—just follow the steps and trust the process.

Ingredients for Easy Cream Puffs

For the Choux Pastry:

  • 1 cup water

  • ½ cup unsalted butter

  • 1 cup all-purpose flour

  • ¼ teaspoon salt

  • 4 large eggs

For the Cream Filling:

  • 1½ cups heavy whipping cream (cold)

  • 3 tablespoons powdered sugar

  • 1 teaspoon vanilla extract

Optional Toppings:

  • Powdered sugar for dusting

  • Chocolate ganache or melted chocolate

  • Caramel drizzle

Step-by-Step Instructions

Step 1: Prepare the Dough

In a medium saucepan, combine the water, butter, and salt. Place over medium heat and bring to a gentle boil. Once the butter has completely melted, reduce the heat to low and add the flour all at once.

Stir vigorously with a wooden spoon. The mixture will quickly form a thick dough and pull away from the sides of the pan. Cook for about 1 minute, stirring constantly, to remove excess moisture. This step is key for light, airy cream puffs.

Remove the pan from heat and let the dough cool for 3–4 minutes.

Step 2: Add the Eggs

Add the eggs one at a time, mixing well after each addition. At first, the dough may look separated or lumpy—don’t worry, this is normal. Keep stirring, and it will become smooth and glossy.

The final dough should be thick but pipeable, falling slowly from the spoon in a ribbon.

Step 3: Shape the Cream Puffs

Preheat your oven to 400°F (200°C) and line a baking sheet with parchment paper.

Using a spoon or piping bag, drop mounds of dough onto the baking sheet, about 2 tablespoons each. Leave space between them, as they will puff up while baking. Lightly smooth the tops with a damp finger for even shapes.

Step 4: Bake Until Golden

Bake for 30–35 minutes, until the cream puffs are puffed, golden brown, and crisp. Avoid opening the oven during baking—this can cause them to collapse.

Once done, turn off the oven, crack the door slightly, and let the cream puffs sit inside for 10 minutes. This helps dry out the centers.

Transfer to a wire rack and allow them to cool completely before filling.

Making the Cream Filling

In a cold mixing bowl, beat the heavy whipping cream, powdered sugar, and vanilla extract until stiff peaks form. The cream should be thick, smooth, and hold its shape.

For extra richness, you can fold in a spoonful of cream cheese or custard, but classic whipped cream works beautifully.

Filling the Cream Puffs

Once the shells are fully cooled, use a sharp knife to cut them in half horizontally, or poke a small hole in the bottom.

Fill generously with whipped cream using a spoon or piping bag. Place the top back on gently.

Finishing Touches

Dust the filled cream puffs with powdered sugar for a classic look, or drizzle with melted chocolate for a more indulgent finish. You can also dip the tops in chocolate before filling for an elegant dessert presentation.

Tips for Perfect Cream Puffs

  • Measure ingredients accurately—choux pastry depends on balance

  • Use room-temperature eggs for smoother mixing

  • Bake until deeply golden to prevent soggy centers

  • Always fill cream puffs just before serving for best texture

Storage Tips

Unfilled cream puff shells can be stored in an airtight container for up to 2 days. Refresh them in a 300°F oven for a few minutes if needed. Filled cream puffs should be enjoyed the same day for maximum freshness.

Final Thoughts

This easy cream puffs recipe proves that elegant desserts don’t have to be complicated. With crisp shells and fluffy cream filling, these homemade cream puffs are light, satisfying, and endlessly customizable. Once you make them once, you’ll realize how fun—and addictive—they are to prepare.

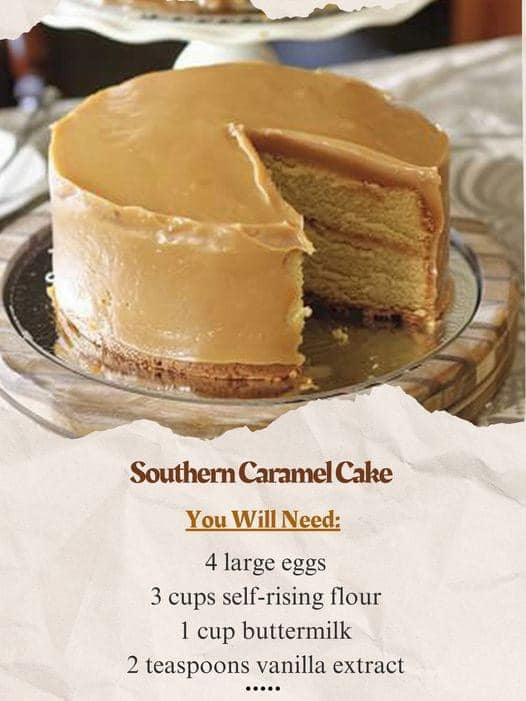
Southern Caramel Cake

Few desserts capture the soul of Southern baking quite like a classic Southern Caramel Cake. This cake isn’t about shortcuts, boxed mixes, or bottled frosting. It’s about patience, butter, sugar, and that unmistakable deep caramel flavor that only comes from carefully cooked sugar and cream. In many Southern homes, caramel cake is reserved for special occasions—Sunday dinners, holidays, reunions, and birthdays—because it takes time, love, and attention. One bite, however, makes every minute worthwhile.

What sets a true Southern caramel cake apart is the cooked caramel frosting. Unlike caramel-flavored buttercream, this frosting is made by browning sugar until it turns amber, then blending it with butter and cream to create a silky glaze that firms up beautifully as it cools. Paired with tender yellow cake layers, the result is a dessert that’s sweet, slightly smoky, and deeply nostalgic.

Ingredients

For the Cake Layers:

  • 2½ cups all-purpose flour

  • 2½ teaspoons baking powder

  • ½ teaspoon salt

  • 1 cup unsalted butter, softened

  • 2 cups granulated sugar

  • 4 large eggs, room temperature

  • 1 tablespoon vanilla extract

  • 1 cup whole milk, room temperature

For the Southern Caramel Frosting:

  • 2 cups granulated sugar

  • ½ cup unsalted butter

  • 1 cup heavy cream, warmed

  • 1 teaspoon vanilla extract

  • A pinch of salt

Step-by-Step Instructions

1. Prepare the Cake Pans

Preheat your oven to 350°F (175°C). Grease and flour three 9-inch round cake pans, or line them with parchment paper. Proper preparation ensures the delicate cake layers release cleanly after baking.

2. Mix the Dry Ingredients

In a medium bowl, whisk together the flour, baking powder, and salt. Set aside. This step helps distribute the leavening evenly for a soft, uniform crumb.

3. Cream the Butter and Sugar

In a large mixing bowl, beat the softened butter and granulated sugar until pale and fluffy—about 4 to 5 minutes. This step incorporates air into the batter, giving the cake its tender texture.

4. Add Eggs and Vanilla

Add the eggs one at a time, beating well after each addition. Stir in the vanilla extract. Scrape down the sides of the bowl to ensure everything is evenly mixed.

5. Alternate Milk and Flour

Add the dry ingredients in three additions, alternating with the milk. Begin and end with the flour mixture. Mix just until combined—overmixing can make the cake dense.

6. Bake the Cake Layers

Divide the batter evenly among the prepared pans. Bake for 22–25 minutes, or until a toothpick inserted in the center comes out clean. Allow the cakes to cool in the pans for 10 minutes before transferring them to wire racks to cool completely.

Making the Old-Fashioned Caramel Frosting

This is where the magic happens—and patience is key.

1. Caramelize the Sugar

In a heavy-bottomed saucepan over medium heat, add the granulated sugar. Stir constantly as it melts and turns from white to golden, then to a deep amber color. Be careful not to burn it—this step determines the flavor of your frosting.

2. Add Butter and Cream

Once the sugar is fully melted and amber-colored, carefully add the butter. It will bubble vigorously. Slowly pour in the warm heavy cream while stirring continuously. The mixture will foam, then settle into a smooth caramel sauce.

3. Cook to Perfection

Reduce the heat to medium-low and cook the caramel for 10–15 minutes, stirring often, until it thickens slightly. Remove from heat and stir in vanilla extract and a pinch of salt.

4. Cool and Thicken

Allow the caramel frosting to cool for 10–15 minutes, stirring occasionally. As it cools, it will thicken to a spreadable consistency. If it becomes too thick, gently rewarm it.

Assembling the Cake

Place one cake layer on a serving plate. Spread a generous amount of warm caramel frosting over the top. Add the second layer and repeat. Finish with the third layer and pour the remaining caramel frosting over the top, allowing it to drip naturally down the sides for that classic Southern look.

Let the cake sit for 30–45 minutes before slicing. This allows the frosting to set and develop its signature texture.

Tips for the Best Southern Caramel Cake

  • Use room-temperature ingredients for a smoother batter.

  • Don’t rush the caramel—low and slow creates depth of flavor.

  • Serve at room temperature for the best texture and taste.

Final Thoughts

Southern Caramel Cake is more than a dessert—it’s a tradition passed down through generations. With its tender layers and rich, cooked caramel frosting, this cake tells a story of patience, hospitality, and comfort. Whether you’re making it for a celebration or simply craving a taste of old-fashioned Southern sweetness, this cake delivers warmth in every slice.

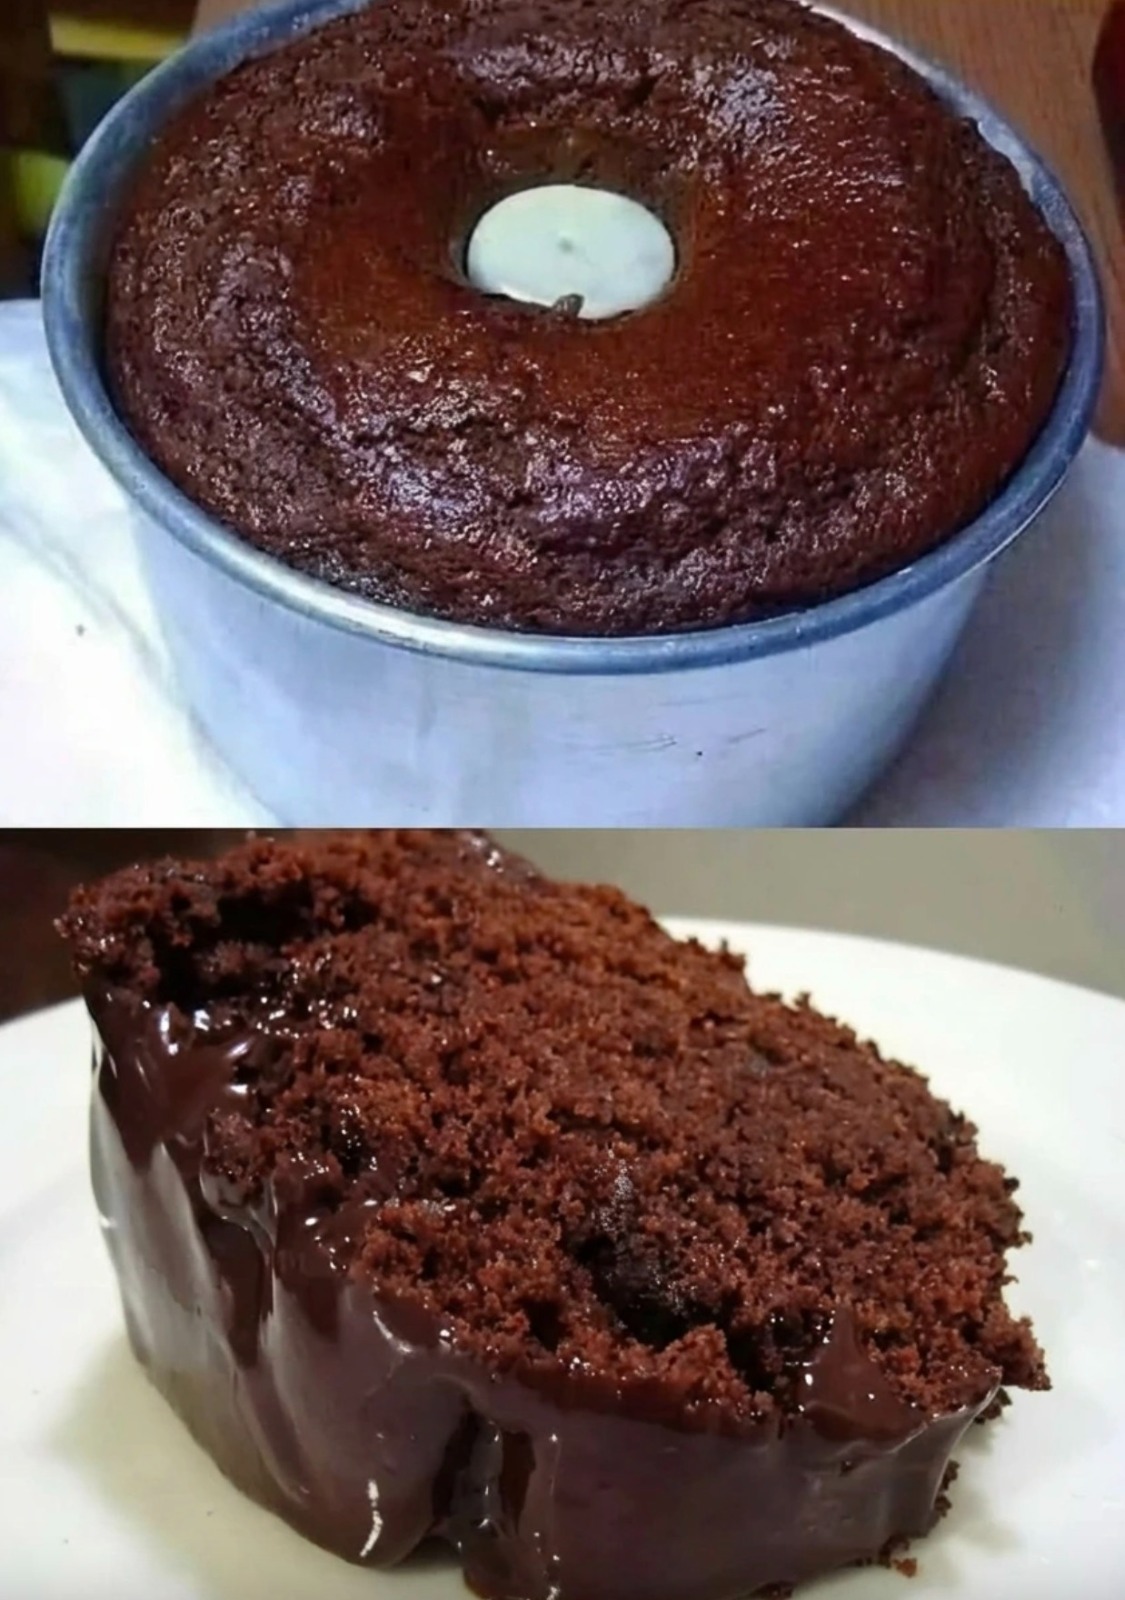
Chocolate cake

There’s chocolate cake… and then there’s that chocolate cake—the one people remember long after the plates are cleared. The kind that’s impossibly moist, deeply chocolatey, and balanced so perfectly it doesn’t even need frosting (though we’ll add one anyway, because why not?). This Decadent Chocolate Dream Cake is a unique recipe designed to deliver bakery-level results using simple pantry ingredients, with one secret technique that transforms the crumb into pure velvet.

Unlike dry or overly sweet chocolate cakes, this recipe focuses on depth of flavor, achieved through blooming cocoa powder, gentle acidity, and controlled moisture. Whether you’re baking for a celebration or a quiet evening treat, this cake promises comfort, luxury, and that unmistakable “wow” factor.

Why This Chocolate Cake Is Different

Most chocolate cakes rely heavily on melted chocolate or excess sugar. This one takes a smarter route:

  • Bloomed cocoa for intense chocolate flavor

  • Oil + butter combo for moisture and richness

  • Hot milk infusion for a soft, bakery-style crumb

  • Balanced sweetness so the chocolate shines

The result? A cake that stays moist for days and tastes even better the next morning.


Ingredients

For the Chocolate Cake

  • 1¾ cups all-purpose flour

  • ¾ cup unsweetened cocoa powder (high quality)

  • 1½ cups granulated sugar

  • ½ cup light brown sugar

  • 1½ teaspoons baking powder

  • 1 teaspoon baking soda

  • ½ teaspoon salt

  • 2 large eggs, room temperature

  • ½ cup vegetable oil

  • ¼ cup unsalted butter, melted and cooled

  • 1 cup hot milk (not boiling)

  • 2 teaspoons vanilla extract

  • 1 tablespoon apple cider vinegar or lemon juice

For the Silky Chocolate Frosting

  • ¾ cup unsalted butter, softened

  • 2½ cups powdered sugar

  • ½ cup cocoa powder

  • ¼ cup warm cream or milk

  • 1 teaspoon vanilla extract

  • Pinch of salt


Step-by-Step Instructions

Step 1: Prepare the Pan and Oven

Preheat your oven to 175°C (350°F). Grease and line a 9-inch round cake pan (or two for layers). Dust lightly with cocoa powder instead of flour to prevent white marks.

Step 2: Mix the Dry Ingredients

In a large bowl, whisk together flour, cocoa powder, granulated sugar, brown sugar, baking powder, baking soda, and salt. This even distribution ensures a smooth, lump-free batter later.

Step 3: Add the Wet Ingredients

Add the eggs, oil, melted butter, vanilla, and vinegar to the dry mixture. Stir gently until just combined. Don’t overmix—this keeps the cake tender.

Step 4: The Secret Blooming Step

Slowly pour the hot milk into the batter while stirring. The heat activates the cocoa powder, intensifying the chocolate flavor and giving the cake its signature dark color and aroma. The batter will be thin—this is exactly what you want.

Step 5: Bake to Perfection

Pour the batter into the prepared pan and tap gently to release air bubbles. Bake for 35–40 minutes, or until a toothpick inserted in the center comes out with a few moist crumbs (not wet batter).

Let the cake cool in the pan for 10 minutes, then transfer to a wire rack to cool completely.

Making the Silky Chocolate Frosting

Beat the softened butter until pale and creamy. Add powdered sugar and cocoa powder gradually, mixing on low speed. Pour in warm cream, vanilla, and salt, then beat on high for 2–3 minutes until light, smooth, and glossy.

If the frosting feels too thick, add a tablespoon of cream. Too thin? Add a bit more powdered sugar.

Assemble and Decorate

Spread the frosting generously over the cooled cake using a spatula. For an elegant finish, create soft swirls or sprinkle with:

  • Dark chocolate shavings

  • Cocoa powder dusting

  • Crushed nuts or chocolate chips


Pro Tips for the Best Chocolate Cake

  • Use room-temperature eggs for better texture

  • Don’t skip the vinegar—you won’t taste it, but it makes the cake softer

  • Rest overnight if possible—the flavor deepens beautifully

  • Store covered at room temperature for up to 2 days, or refrigerate for 5

Final Thoughts

This Decadent Chocolate Dream Cake isn’t just dessert—it’s an experience. Moist, rich, and perfectly balanced, it proves that a truly great chocolate cake doesn’t need complicated techniques or rare ingredients—just the right ones used thoughtfully.

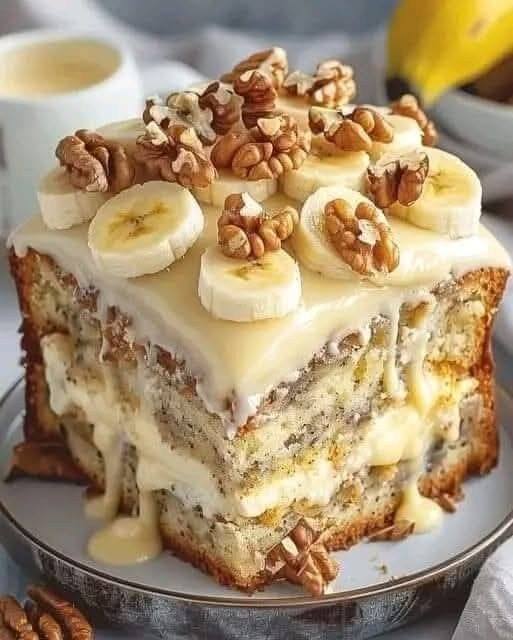
Banana Walnut Cream Cake

If banana bread and classic cream cake ever fell in love, this Banana Walnut Cream Cake would be the irresistible result. It’s soft and tender with deep banana flavor, studded with toasted walnuts, and finished with a silky cream frosting that melts into every bite. This cake feels nostalgic yet elevated—perfect for birthdays, tea time, potlucks, or when you simply have ripe bananas begging to be used.

What makes this recipe special is balance: not too sweet, not too dense, and not overloaded with frosting. The walnuts add crunch and warmth, while the cream frosting brings everything together with gentle richness. One slice is never enough.

Why You’ll Love This Cake

  • Uses overripe bananas for maximum flavor

  • Incredibly moist crumb that stays fresh for days

  • Toasted walnuts for texture and nutty depth

  • Creamy frosting that’s light, not heavy

  • Simple ingredients, bakery-style results

Ingredients

For the Banana Walnut Cake

  • 2 ½ cups all-purpose flour

  • 1 teaspoon baking powder

  • 1 teaspoon baking soda

  • ½ teaspoon salt

  • 1 teaspoon ground cinnamon

  • ¾ cup unsalted butter, softened

  • 1 cup granulated sugar

  • ½ cup light brown sugar

  • 3 large eggs, room temperature

  • 1 cup mashed ripe bananas (about 3 medium bananas)

  • ¾ cup sour cream or plain yogurt

  • 2 teaspoons vanilla extract

  • 1 cup chopped walnuts, lightly toasted

For the Cream Frosting

  • 8 oz cream cheese, softened

  • ½ cup unsalted butter, softened

  • 2 ½ cups powdered sugar, sifted

  • 1 teaspoon vanilla extract 

1. Prep the Oven and Pans

Preheat your oven to 350°F (175°C). Grease and flour two 9-inch round cake pans or line them with parchment paper for easy removal.

2. Toast the Walnuts

Spread chopped walnuts on a dry skillet or baking tray and toast for 5–7 minutes, stirring once. This step intensifies flavor and keeps them crunchy inside the cake. Let cool.

3. Mix the Dry Ingredients

In a medium bowl, whisk together flour, baking powder, baking soda, salt, and cinnamon. Set aside.

4. Cream Butter and Sugars

In a large mixing bowl, beat butter with granulated and brown sugar until light and fluffy—about 3 minutes. This step is key to a tender cake.

5. Add Eggs and Bananas

Beat in eggs one at a time, mixing well after each addition. Stir in mashed bananas and vanilla extract until smooth and fragrant.

6. Add Sour Cream and Dry Ingredients

Mix in the sour cream. Gradually add the dry ingredients, mixing just until combined. Do not overmix. Fold in toasted walnuts gently.

7. Bake

Divide batter evenly between prepared pans. Bake for 28–32 minutes, or until a toothpick inserted in the center comes out clean.

Let cakes cool in pans for 10 minutes, then transfer to a wire rack to cool completely before frosting.

Cream Frosting Instructions

In a large bowl, beat cream cheese and butter until smooth and creamy. Gradually add powdered sugar, beating on low speed. Add vanilla extract and heavy cream one tablespoon at a time until the frosting is fluffy and spreadable.

The texture should be silky—not stiff, not runny.

Assembling the Cake

Place one cake layer on a serving plate. Spread a generous layer of cream frosting over the top. Add the second cake layer and frost the top and sides. For a rustic look, keep the sides lightly frosted. Garnish with extra chopped walnuts or banana slices if desired.

Pro Tips for Best Results

  • Use very ripe bananas with brown spots—they’re sweeter and more flavorful

  • Measure flour correctly to avoid a dry cake

  • Cool the cake completely before frosting

  • Toasting nuts is optional, but highly recommended

  • Chill the cake for 30 minutes before slicing for clean cuts

Storage & Make-Ahead Tips

  • Store covered in the refrigerator for up to 4 days

  • Bring to room temperature before serving for best flavor

  • Cake layers can be baked and frozen (unfrosted) for up to 2 months

Final Thoughts

This Banana Walnut Cream Cake is the kind of dessert that quietly steals the show. It’s comforting, elegant, and deeply satisfying without being overly sweet. Every forkful delivers moist banana cake, buttery walnuts, and cloud-like cream frosting—a trio that never fails.