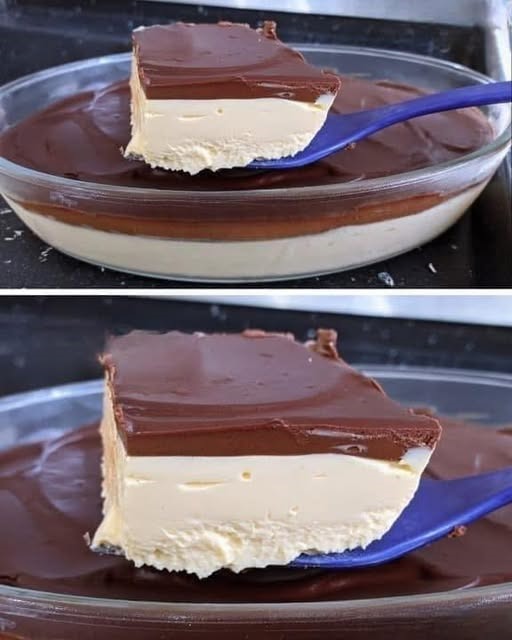
Chocolate Lava Cake

If there’s one dessert that never fails to impress, it’s the Molten Chocolate Lava Cake. With its crisp outer layer and gooey, molten chocolate center that oozes out like warm silk, this dessert is the definition of indulgence. The beauty of lava cake lies in its contrast—firm yet delicate, rich yet light, simple yet sophisticated. Whether you’re planning a romantic dinner, celebrating a special occasion, or just craving something intensely chocolatey, this unique lava cake recipe will transform your kitchen into a five-star dessert haven.

Let’s dive deep into the world of molten magic, where every bite feels like a warm chocolate hug.

Why This Lava Cake is Unique

Unlike traditional lava cakes that rely solely on melted chocolate and butter, this recipe introduces a touch of espresso and brown butter for depth and aroma. The espresso enhances the chocolate’s richness without overpowering it, while the brown butter adds a nutty undertone that elevates every spoonful. Additionally, we use a mix of dark and semi-sweet chocolate for perfect balance—bitterness meeting sweetness in harmony.

This lava cake also features a hidden layer of chocolate truffle ganache in the center. As it bakes, the ganache melts into a molten core, ensuring consistent gooeyness every time. The texture is flawlessly silky, not runny or overbaked. Finally, a sprinkle of flaky sea salt on top brings a gourmet twist that balances the sweetness beautifully.

Ingredients

For the Cake Batter:

  • 1/2 cup (115g) unsalted butter

  • 4 oz (115g) dark chocolate (70% cocoa), chopped

  • 2 oz (60g) semi-sweet chocolate chips

  • 2 large eggs

  • 2 large egg yolks

  • 1/4 cup (50g) granulated sugar

  • 2 tablespoons brown sugar

  • 1 teaspoon espresso powder

  • 1/2 teaspoon pure vanilla extract

  • 1/4 cup (30g) all-purpose flour

  • Pinch of salt

For the Ganache Core:

  • 3 oz (85g) dark chocolate, finely chopped

  • 1/4 cup (60ml) heavy cream

For Serving:

  • Powdered sugar (for dusting)

  • Vanilla bean ice cream or whipped cream

  • Fresh raspberries or strawberries

  • Flaky sea salt (optional but highly recommended)

Step-by-Step Instructions

Step 1: Prepare the Chocolate Ganache Core

In a small saucepan, heat the heavy cream until it just begins to simmer—don’t let it boil. Pour the hot cream over the chopped dark chocolate in a heatproof bowl. Let it sit for 1 minute, then stir until smooth and glossy.
Refrigerate for 20 minutes until the ganache firms up slightly. Using a small spoon or melon baller, scoop 4 small balls (about 1 inch each) and place them on a parchment-lined plate. Freeze while preparing the cake batter.

This frozen ganache will later melt inside the cake, ensuring that irresistible molten center.

Step 2: Make the Brown Butter Chocolate Base

In a small saucepan, melt the butter over medium heat. Continue cooking until it starts to foam and gives off a nutty aroma, with golden-brown specks forming at the bottom. This is brown butter—deeply aromatic and perfect for adding warmth to the dessert.
Remove from heat, add the chopped dark and semi-sweet chocolates, and stir until fully melted and smooth. Let it cool slightly.

Step 3: Whip the Eggs and Sugar

In a medium mixing bowl, combine eggs, egg yolks, granulated sugar, and brown sugar. Using a hand mixer or whisk, beat for 3–4 minutes until the mixture becomes thick, pale, and slightly foamy. This step incorporates air, giving the cake its signature light yet rich texture.
Add espresso powder and vanilla extract, mixing just until combined.

Step 4: Combine the Batter

Pour the slightly cooled chocolate-butter mixture into the whipped eggs, stirring gently until smooth.
Sift in flour and salt, folding gently with a spatula. The batter should be thick and glossy—don’t overmix, or you’ll lose the airiness.

Step 5: Prepare the Ramekins

Preheat your oven to 425°F (220°C).
Grease four 6-ounce ramekins generously with butter, then dust lightly with cocoa powder to prevent sticking. Place them on a baking sheet.

Spoon a little batter into each ramekin (about halfway full), place one frozen ganache ball in the center, then cover with remaining batter until three-quarters full. Tap gently to release any air bubbles.

Step 6: Bake to Perfection

Bake for 12 to 14 minutes, depending on your oven. The edges should be firm and set, but the center should still jiggle slightly when touched.
Do not overbake—the key to lava cake lies in perfect timing. Every extra minute in the oven turns the molten center solid, so watch carefully.

Step 7: The Moment of Truth

Remove from the oven and let the cakes rest for 1 minute. Run a thin knife around the edges, then carefully invert each cake onto a dessert plate. The warm aroma of chocolate and butter will fill the room instantly.

Dust with powdered sugar, sprinkle a pinch of flaky sea salt on top, and serve immediately with a scoop of vanilla bean ice cream or a dollop of whipped cream. When you cut into it, the rich chocolate lava will flow beautifully—a sight as heavenly as the taste.

Tips for the Perfect Lava Cake

  1. Chocolate Quality Matters: Use high-quality dark chocolate with at least 60–70% cocoa. Cheap chocolate may not melt smoothly and can affect both flavor and texture.

  2. Timing is Everything: Each oven is different. Start checking at the 12-minute mark—edges firm, center slightly soft is ideal.

  3. Freezing the Ganache Core: This step guarantees a molten center. Skipping it can result in uneven gooeyness.

  4. Use Cocoa Instead of Flour for Dusting: It enhances the flavor and prevents a white flour residue on the edges.

  5. Serve Immediately: Lava cake is best eaten warm. Once cooled, the molten center will solidify.

Flavor Variations

  • Salted Caramel Lava Cake: Replace the ganache core with a spoonful of thick caramel sauce.

  • Peanut Butter Lava Cake: Add a swirl of creamy peanut butter in the center for a nutty surprise.

  • Matcha White Chocolate Lava Cake: Use white chocolate and a teaspoon of matcha powder in the batter for a unique twist.

  • Raspberry Lava Cake: Add a layer of raspberry jam beneath the batter for a fruity tang that complements the dark chocolate.

Why You’ll Love This Recipe

This lava cake isn’t just about chocolate—it’s about the experience. The soft exterior cracks open to reveal a river of molten chocolate that pools on the plate, blending with the ice cream in a dance of warmth and coolness. The balance of flavors—from nutty brown butter to aromatic espresso—creates an elegant dessert that feels both homey and luxurious.

Each bite tells a story of contrasts: crispy yet creamy, hot yet soothing, indulgent yet comforting. It’s the kind of dessert that ends dinner with a “wow” moment and leaves everyone asking for the recipe.

Conclusion

The Molten Chocolate Lava Cake is a timeless dessert that blends art and simplicity. It’s more than a recipe—it’s an experience of textures, aromas, and pure bliss. With this unique twist of espresso, brown butter, and a hidden ganache heart, you’ll create a dessert that not only melts in your mouth but also melts hearts around the table.
Dessert is foolproof perfect for the weekend

If you’ve been craving a dessert that’s indulgent yet unbelievably simple, this Creamy Chocolate Mousse Trifle is your weekend masterpiece. It’s rich but light, elegant but easy, and the kind of dessert that feels fancy enough for guests yet foolproof enough for beginners. Imagine layers of silky chocolate mousse, fluffy whipped cream, and crushed cookies or cake crumbs all coming together in one spoonful of creamy perfection. It’s a dessert that whispers luxury while requiring minimal effort.

The Story Behind the Dessert

Trifles have always been a comfort dessert — originating from English kitchens, where leftover cake and cream became the base for something extraordinary. My version transforms this classic into a no-bake, foolproof dessert perfect for the weekend. It combines a deeply chocolatey mousse with layers of texture and flavor that can be made ahead of time and assembled in minutes.

It’s not only visually stunning but customizable. Whether you love dark, milk, or white chocolate — or prefer to switch the base with brownies or cookies — this trifle adjusts to your weekend mood. It’s the kind of dessert that doesn’t judge you for taking shortcuts but rewards you with pure indulgence.

Ingredients

For the Chocolate Mousse:

  • 1 ½ cups heavy whipping cream (cold)

  • 1 cup semi-sweet chocolate chips (or chopped chocolate bar)

  • 2 tablespoons unsalted butter

  • 2 large egg yolks

  • 3 tablespoons granulated sugar

  • ½ teaspoon pure vanilla extract

  • Pinch of salt

For the Whipped Cream Layer:

  • 1 cup heavy whipping cream (cold)

  • 2 tablespoons powdered sugar

  • ½ teaspoon vanilla extract

For the Cookie or Cake Layer:

  • 10–12 chocolate sandwich cookies (like Oreos), crushed or

  • 2 cups chocolate or vanilla sponge cake cubes

Optional Garnishes:

  • Chocolate curls or shavings

  • Fresh berries (raspberries or strawberries)

  • Caramel drizzle or chocolate syrup

  • Mint leaves for freshness

Step-by-Step Directions

1. Prepare the Chocolate Mousse

This is where the magic begins. Place your chopped chocolate and butter in a heatproof bowl. Set it over a saucepan of simmering water (double boiler method), stirring until the chocolate and butter melt into a glossy, silky mixture. Remove from heat and let it cool slightly.

In a separate small bowl, whisk the egg yolks, sugar, and salt together until pale and creamy. Slowly pour this mixture into the slightly cooled chocolate, whisking continuously so the eggs don’t scramble.

Now, whip the heavy cream in a clean, cold bowl until soft peaks form. Gently fold the whipped cream into the chocolate mixture using a spatula. Work carefully here — you want to keep the mousse light and airy. Once combined, cover and refrigerate for at least 1 hour to let it firm up.

2. Make the Whipped Cream Layer

While the mousse chills, whip the remaining heavy cream with powdered sugar and vanilla until medium peaks form. This lightly sweetened cream will perfectly complement the rich chocolate mousse. Set aside in the fridge until assembly time.

3. Prepare the Crunch Layer

This part adds texture and contrast. You can go two ways:

  • Cookie base: Crush the cookies in a food processor or with a rolling pin until you get fine crumbs. For extra flavor, mix in a tablespoon of melted butter.

  • Cake base: Cube leftover sponge or pound cake into bite-sized pieces. You can lightly drizzle them with coffee or milk to make them extra moist.

4. Assemble the Trifle

This is the fun and creative part! Take a large glass trifle bowl or individual dessert cups. Start with a layer of cookie crumbs or cake cubes at the bottom. Spoon a generous layer of chocolate mousse over it. Add a layer of whipped cream, then repeat the process until you reach the top.

For a show-stopping finish, top with chocolate shavings, fresh berries, or a drizzle of caramel or chocolate syrup. The contrast of glossy mousse, airy cream, and crunchy base makes every bite irresistible.

Tips for Foolproof Success

  1. Chill Everything: Cold cream whips better and faster. Place your mixing bowl and beaters in the fridge for 15 minutes before whipping.

  2. Don’t Overmix: When folding mousse, use gentle strokes to maintain the fluffy texture.

  3. Customize Layers: Add nuts, a splash of liqueur (like Kahlúa or Baileys), or fruit preserves for your signature touch.

  4. Make Ahead: You can prepare this dessert up to 24 hours in advance. Store it covered in the fridge — the flavors only get richer with time.

  5. Texture Variety: For an extra indulgent bite, sprinkle crushed toffee or caramelized nuts between the layers.

Why This Dessert Works Every Time

  • No Baking Required: It’s ideal for busy weekends or hot days when you don’t want to turn on the oven.

  • Flexible Ingredients: Substitute with what’s in your pantry — any chocolate, cookies, or cream will work beautifully.

  • Crowd-Pleaser: The layered presentation makes it perfect for dinner parties, birthdays, or cozy nights in.

  • Perfect Balance: The richness of chocolate mousse meets the airiness of whipped cream and the crunch of cookies — every texture is represented.

Flavor Variations

Once you’ve mastered the base recipe, the possibilities are endless:

  • Mocha Dream: Add a teaspoon of instant espresso powder to the melted chocolate for a subtle coffee kick.

  • Salted Caramel Twist: Drizzle caramel sauce between layers and top with flaky sea salt.

  • Berry Bliss: Add layers of macerated strawberries or raspberries for a fruity balance to the chocolate.

  • White Chocolate Fantasy: Replace the semi-sweet chocolate with white chocolate and fold in lemon zest for a bright, creamy version.

Serving Suggestions

Serve the trifle chilled. If you’ve made it in a large bowl, use a deep spoon to scoop generous portions into dessert glasses. For an extra elegant touch, serve with chocolate-dipped strawberries or a sprig of mint on top. Pair it with espresso, hot chocolate, or a chilled glass of dessert wine for an unforgettable ending to your meal.

Storage

Cover any leftovers tightly with plastic wrap or transfer to airtight containers. Store in the refrigerator for up to 3 days. The mousse and cream will stay fluffy, while the cookie or cake layers soften into a pudding-like texture — making it even more delicious the next day.

Final Thoughts

This Creamy Chocolate Mousse Trifle proves that the best desserts don’t have to be complicated. With a few simple ingredients and a bit of layering magic, you get a dessert that’s rich, velvety, and visually stunning. It’s the perfect blend of elegance and ease — a true foolproof weekend dessert that never disappoints.

Whether you’re treating yourself after a long week or impressing friends at a dinner party, this trifle guarantees smiles and second servings. It’s comfort and sophistication in every spoonful — a dessert you’ll return to again and again.

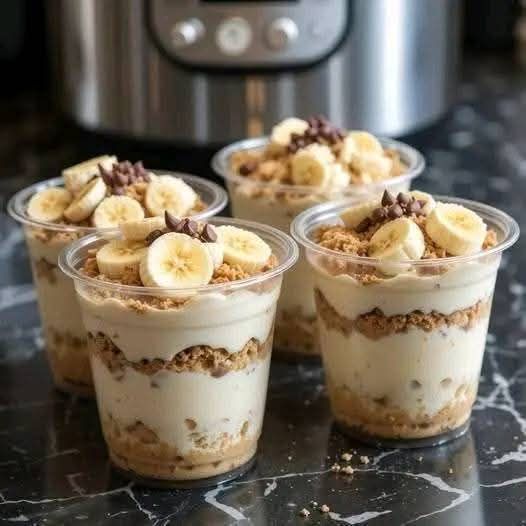
High Protein Banana Pudding

Banana pudding is one of those desserts that feels like home — creamy, nostalgic, and soul-satisfying. But what if you could enjoy all that comforting sweetness while fueling your body with protein for muscle recovery, energy, and satiety? Enter the High-Protein Banana Pudding — a luscious, layered treat that’s both indulgent and nutritious. This unique recipe transforms a Southern classic into a fitness-friendly dessert, perfect for meal prep, post-workout recovery, or guilt-free snacking.

Unlike traditional banana pudding made with heavy cream, sugar, and processed pudding mixes, this version uses natural ingredients like Greek yogurt, protein powder, and ripe bananas to deliver creaminess without compromise. The best part? It’s quick to prepare, requires no baking, and tastes like a dream after chilling overnight.

🌟 Why You’ll Love This High-Protein Banana Pudding

This isn’t your average pudding — it’s an elevated, nutritious masterpiece. Here’s why this recipe stands out:

  • Protein-Packed: Each serving contains around 20–25 grams of protein, depending on your protein powder and yogurt choice.

  • No Refined Sugar: Naturally sweetened with ripe bananas and a touch of honey or maple syrup.

  • Creamy and Dreamy: You won’t believe how rich the texture is — thick, smooth, and decadent.

  • Meal-Prep Friendly: It keeps beautifully in the fridge for up to 4 days, making it a perfect make-ahead dessert.

  • Customizable: Gluten-free, can be made dairy-free or vegan with simple swaps.

🍌 Ingredients

This recipe yields 4–6 servings, depending on portion size.

Base Pudding Mixture:

  • 3 large ripe bananas (the riper, the better for sweetness and flavor)

  • 1 ½ cups plain Greek yogurt (2% or full-fat for creaminess)

  • 1 scoop (about 30g) vanilla or banana-flavored protein powder

  • 1 cup unsweetened almond milk (or milk of your choice)

  • 2 tablespoons honey or maple syrup (adjust to taste)

  • 1 teaspoon pure vanilla extract

  • 1 tablespoon chia seeds (optional, for extra thickness and fiber)

  • Pinch of sea salt

Layering and Toppings:

  • 8–10 vanilla protein cookies or high-protein graham crackers, crushed

  • 1–2 extra bananas, sliced

  • Whipped Greek yogurt topping or light whipped cream (optional but delicious)

  • Sprinkle of cinnamon or crushed nuts (for garnish)

🥣 Instructions

Step 1: Prepare the Creamy Protein Base

Start by adding your ripe bananas to a blender or food processor. Blend until smooth and creamy — this forms the natural sweet base. Next, add Greek yogurt, protein powder, almond milk, honey (or maple syrup), vanilla extract, chia seeds, and a pinch of salt. Blend again for about 30 seconds until fully smooth.

You’ll end up with a luscious, thick, pale golden mixture that smells like banana heaven. If it’s too thick, add an extra splash of milk; if too thin, let it rest for 10 minutes so the chia seeds can absorb excess liquid.

Pro Tip: Taste the pudding mixture now — this is your chance to adjust sweetness or add a pinch more protein powder if desired.

Step 2: Chill for the Perfect Texture

Transfer the blended mixture into a large bowl or container, cover, and refrigerate for at least 2 hours. This step is crucial — chilling helps the pudding set and the flavors to meld beautifully. If you added chia seeds, they’ll thicken the pudding further during this time, creating a rich and spoonable texture.

Step 3: Layer Like a Pro

When your pudding base is chilled and thickened, it’s time to assemble your layers — the hallmark of a true banana pudding.

  • Layer 1: Spoon a layer of the protein pudding into the bottom of a serving dish or individual jars.

  • Layer 2: Add a handful of crushed protein cookies or graham crackers.

  • Layer 3: Arrange a few banana slices evenly over the cookie layer.

  • Layer 4: Add another generous layer of pudding to cover.

Repeat the layers until you reach the top of the dish, ending with pudding on top. This creates a beautiful, dessert-like parfait effect that’s visually inviting and texturally satisfying.

Step 4: Optional Whipped Greek Yogurt Topping

For an elegant finish, whip ½ cup of Greek yogurt with 1 tablespoon of honey and a dash of vanilla until light and fluffy. Spread or pipe this over the top pudding layer. It mimics whipped cream but adds even more protein!

Dust with cinnamon or sprinkle with crushed nuts for a sophisticated touch.

Step 5: Chill Again and Serve Cold

Cover your layered pudding dish with plastic wrap or an airtight lid and refrigerate for another 2–3 hours (or overnight for best results). During this time, the banana flavors intensify, and the cookie layers soften slightly, creating that classic banana pudding texture everyone loves.

When ready to serve, dig in with a spoon and enjoy the layers of creamy, crunchy, and fruity goodness.

🍽️ Serving Ideas

  • Post-Workout Treat: Scoop a chilled portion into a small bowl for a perfect balance of protein and carbs after exercise.

  • Breakfast Parfait: Add a sprinkle of granola and a drizzle of almond butter for a morning energy boost.

  • Dessert Jar: Serve in mason jars with alternating layers for a fancy presentation at gatherings or parties.

  • Frozen Delight: Freeze portions in popsicle molds for protein-packed banana pudding pops.

🧠 Nutrition Benefits Breakdown

This recipe doesn’t just taste good — it feels good, too. Each element plays a nutritional role:

  • Greek Yogurt: The creamy base is rich in casein protein, which supports muscle repair and helps you feel full longer.

  • Protein Powder: Boosts overall protein intake, enhancing recovery and metabolism.

  • Bananas: Provide natural sweetness, potassium for muscle function, and dietary fiber for digestion.

  • Chia Seeds: Add omega-3s, antioxidants, and a pleasant thickening effect without added calories.

  • Almond Milk: A light, dairy-free alternative that keeps the texture silky smooth.

Together, these ingredients make a wholesome dessert that nourishes your body while satisfying your sweet tooth.

🧁 Variations & Flavor Twists

  • Peanut Butter Banana Protein Pudding: Add 2 tablespoons of natural peanut butter to the base before blending for a nutty, indulgent twist.

  • Chocolate Banana Protein Pudding: Use chocolate protein powder and top with dark chocolate shavings.

  • Vegan Option: Replace Greek yogurt with coconut yogurt and use a plant-based protein powder.

  • Mocha Banana Pudding: Add 1 teaspoon of instant espresso powder for a banana-coffee fusion.

💡 Tips for the Best Results

  1. Use Overripe Bananas: They add natural sweetness and enhance the flavor depth.

  2. Don’t Skip the Chill: Cooling is key for the pudding to thicken and set properly.

  3. Choose Quality Protein Powder: Opt for a whey isolate or a smooth plant-based blend that mixes well without a chalky texture.

  4. Layer Just Before Serving (Optional): If you prefer crunchy cookies, assemble layers closer to serving time.

  5. Store Properly: Keep covered in the fridge for up to 4 days; stir gently before eating if separation occurs.

🍯 Final Thoughts

This High-Protein Banana Pudding is proof that dessert can be both indulgent and functional. Each spoonful offers creamy banana bliss with a boost of wholesome protein — perfect for athletes, fitness enthusiasts, or anyone craving a nutritious twist on a timeless favorite. It’s easy to prepare, endlessly adaptable, and always satisfying.

In a world where most desserts weigh you down, this one lifts you up — fueling your body, pleasing your palate, and proving that healthy eating can be downright delicious.

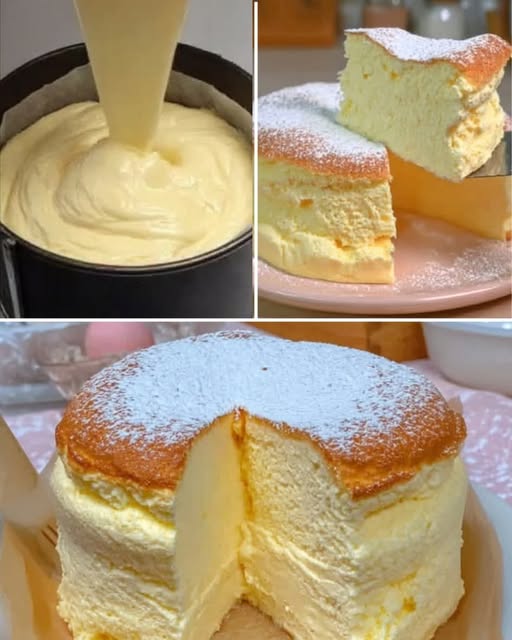
Cloud Cake Recipe

There’s something magical about a cake that feels as if it’s barely there — tender, airy, and melting on your tongue like a sweet whisper of vanilla. That’s exactly what the Cloud Cake offers. With a texture so soft it could be mistaken for a dream, this delicate confection is the perfect blend of sponge-like lightness and creamy richness. Whether served as a show-stopping dessert or enjoyed with a cup of tea, this cake embodies everything we imagine when we think of “heavenly.”

This unique recipe takes inspiration from Japanese chiffon cakes, French genoise, and a touch of modern pastry flair. The result? A cake that floats between these styles — moist, fluffy, and subtly flavored with vanilla and cream. Every bite truly feels like tasting a cloud.

🌤 Why It’s Called Cloud Cake

Unlike dense butter cakes or sugary frostings, the Cloud Cake is all about lightness. The batter is aerated with whipped egg whites, giving it structure and lift without heaviness. The cake rises beautifully, then cools to a soft, cloud-like consistency. Instead of being overly sweet, it balances gentle vanilla notes with a hint of cream.

It’s also incredibly versatile — you can serve it plain with powdered sugar, layer it with whipped cream and fruit, or even drizzle it with a silky glaze. But the base remains the same: airy perfection.

☁️ Ingredients for Cloud Cake

For the Cake Batter:

  • 1 cup (120g) cake flour (or all-purpose flour sifted 3 times)

  • 1 ½ teaspoons baking powder

  • ¼ teaspoon salt

  • 4 large eggs, separated

  • ¾ cup (150g) granulated sugar, divided

  • ¼ cup (60ml) neutral oil (like canola or sunflower)

  • ¼ cup (60ml) milk (room temperature)

  • 1 teaspoon pure vanilla extract

  • ¼ teaspoon cream of tartar (for stabilizing the egg whites)

For the Whipped Cream Filling:

  • 1 cup (240ml) heavy whipping cream, chilled

  • 2 tablespoons powdered sugar

  • ½ teaspoon vanilla extract

For Decoration (Optional but Lovely):

  • Powdered sugar, for dusting

  • Fresh berries (strawberries, raspberries, or blueberries)

  • White chocolate curls or edible flowers for an elegant touch

🌥 Step-by-Step Instructions

1. Prepare the Pan and Preheat

Preheat your oven to 325°F (160°C). Grease an 8-inch round cake pan lightly with oil and line the bottom with parchment paper. This ensures the cake lifts easily without sticking. Avoid nonstick sprays that could weigh down the batter — light greasing is key for proper rise.

2. Mix the Dry Ingredients

In a medium bowl, sift together flour, baking powder, and salt. Sifting isn’t just about removing lumps — it aerates the flour, making your cake even lighter. Set this aside.

3. Prepare the Egg Yolk Mixture

In a large bowl, whisk together the egg yolks and half the sugar (about ⅜ cup) until pale and creamy. Gradually add in oil, milk, and vanilla extract, whisking until smooth and glossy.
This mixture forms the rich base of the cake, but it will soon be lifted by the airy whites.

4. Beat the Egg Whites to Perfection

In a separate clean, dry bowl, use a hand or stand mixer to beat the egg whites on medium speed until frothy. Add the cream of tartar and continue beating. Gradually add the remaining sugar, one tablespoon at a time, until stiff, glossy peaks form.
You’ll know it’s perfect when you lift the beaters and the peaks stand tall without drooping — this air is what gives the Cloud Cake its floaty texture.

5. Combine Gently

Add one-third of the whipped whites to the yolk mixture and fold gently using a spatula — don’t stir vigorously or you’ll lose the precious air. Continue folding in the rest of the whites in two additions until no white streaks remain.
The batter should be pale, airy, and smooth like silk. Treat it like a cloud — gently but confidently.

6. Bake the Cake

Pour the batter into the prepared pan and smooth the top lightly. Tap the pan once on the counter to release any large air bubbles.
Bake for 35–40 minutes, or until the top is golden and springs back when lightly touched. A toothpick inserted in the center should come out clean.

Do not open the oven door in the first 25 minutes — the temperature drop can cause the cake to collapse.

7. Cool the Cake Properly

Once baked, remove the pan and immediately invert it onto a wire rack. Cooling it upside down (if using a chiffon-style pan) or resting it slightly elevated prevents it from shrinking.
Let it cool completely before removing from the pan. This step ensures your cake stays airy and tall.

8. Make the Whipped Cream Filling

In a chilled bowl, beat the heavy cream, powdered sugar, and vanilla until soft peaks form. Don’t overwhip — you want it smooth and cloudlike, not grainy.

If you want extra flavor, you can add a spoonful of mascarpone cheese for a creamy twist or a hint of lemon zest for brightness.

9. Assemble the Cloud Cake

Slice the cooled cake horizontally into two layers. Spread a generous amount of whipped cream over the bottom layer, add a few fresh berries if desired, and gently place the top layer back on.
Dust with powdered sugar or drizzle with a delicate glaze (a mix of powdered sugar and milk works perfectly).

For a pure look, keep the decoration minimal — think white-on-white elegance, like a soft snowcap.

☁️ Baker’s Secrets for the Perfect Cloud Cake

  1. Room Temperature Ingredients:
    Ensure your eggs and milk are at room temperature. Cold ingredients can deflate the batter and prevent even mixing.

  2. Don’t Rush the Folding:
    Overmixing the meringue into the yolk base will destroy the air bubbles. Gentle folding ensures a fluffy crumb.

  3. Avoid Moisture Traps:
    If serving the same day, refrigerate the cake only after fully cooling it. A warm cake can cause condensation, making it soggy.

  4. Flour Type Matters:
    Cake flour has lower protein than all-purpose flour, giving a finer texture. If you can’t find it, make your own: for every cup of all-purpose flour, remove 2 tablespoons and replace with cornstarch.

🌈 Flavor Variations

  • Lemon Cloud Cake: Add 1 tablespoon lemon zest and a touch of lemon extract to the batter. Pair with lemon whipped cream.

  • Chocolate Cloud Cake: Replace 2 tablespoons of flour with cocoa powder for a light chocolate version.

  • Coconut Cloud Cake: Substitute milk with coconut milk and sprinkle toasted coconut on top.

  • Berry Cloud Cake: Add a layer of strawberry or raspberry puree between the cake layers for a fruity lift.

☁️ Serving Suggestions

This cake is perfect for afternoon tea, birthday parties, or elegant dinners. Serve chilled for a melt-in-the-mouth experience. Pair with:

  • A drizzle of honey or condensed milk for sweetness.

  • A few edible rose petals for a dreamy presentation.

  • A cup of jasmine or chamomile tea for balance.

🌤 Storage Tips

Cloud Cake is best enjoyed fresh, but it can be stored:

  • In the refrigerator for up to 3 days (covered to prevent drying).

  • In the freezer (unfrosted) for up to 2 weeks. Thaw in the fridge overnight before serving.

💭Final Thoughts

The Cloud Cake isn’t just a dessert — it’s an experience. With its feather-light crumb, creamy filling, and simple yet elegant presentation, it captures the essence of delicate indulgence. Each bite feels like a soft sigh of sweetness, airy yet satisfying.