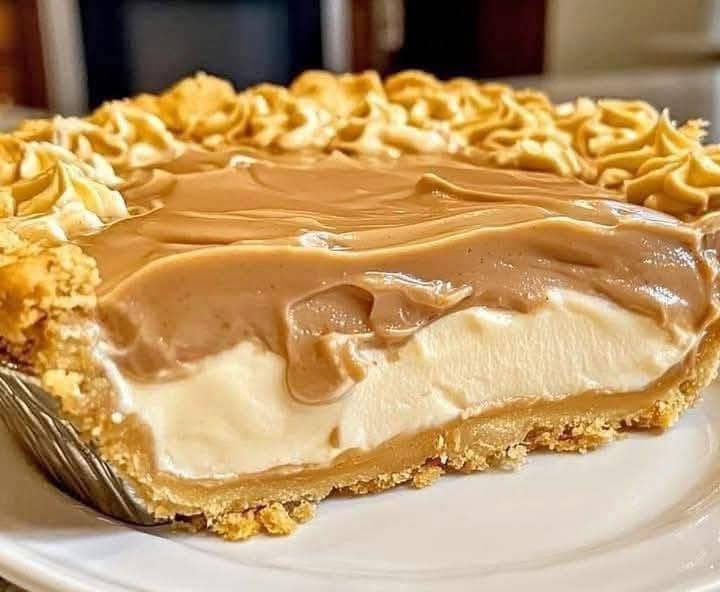
No-Bake Peanut Butter Eclair Cake

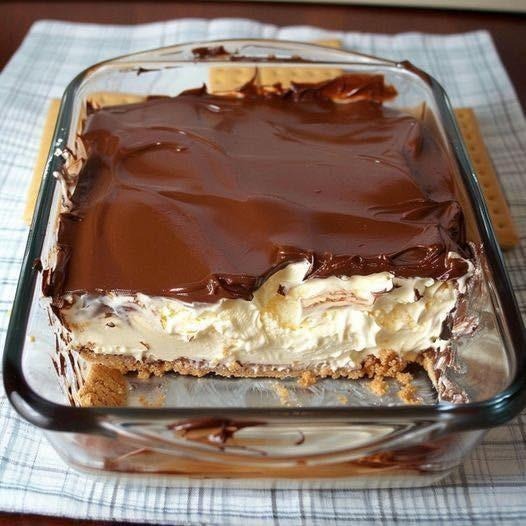
When you crave a dessert that feels luxurious, indulgent, and nostalgic all at once—but you don’t want to turn on the oven—this No-Bake Peanut Butter Éclair Cake steps onto the stage like a star. Inspired by the layered cream-filled éclairs found in French pastry shops, this version takes a playful American twist by introducing creamy peanut butter, velvety custard filling, and a silky chocolate glaze. You don’t need pastry skills, fancy tools, or hours of work. Just simple layering, chilling, and letting the magic happen.

This dessert is perfect for family gatherings, potlucks, holidays, or even late-night sweet cravings. It slices beautifully, sets firm, and melts in your mouth with each bite.

Ingredients

For the Layers

  • 2 packages graham crackers (rectangular sheets)

  • 2 cups cold heavy cream (or substitute with whipped topping, but fresh cream is best)

  • 1 cup cold milk

  • 1 box (3.4 oz / 96g) instant vanilla pudding mix

  • 1 cup creamy peanut butter

  • 8 oz cream cheese, softened

  • ½ cup powdered sugar

  • 1 teaspoon vanilla extract

  • Pinch of fine salt

For the Chocolate Ganache Topping

  • 1 cup semi-sweet chocolate chips

  • 3 tablespoons butter

  • ½ cup heavy cream

  • 1 tablespoon honey or corn syrup (gives a glossy finish)

Step-by-Step Instructions

Step 1: Create the Peanut Butter Cream Layer

Using a stand mixer or hand mixer, beat the softened cream cheese and powdered sugar until smooth and creamy. Add the peanut butter, vanilla extract, and a pinch of salt. Beat until fluffy.

Meanwhile, in a separate bowl, whisk together the cold milk and instant vanilla pudding mix until thickened. Fold in the whipped heavy cream gently until smooth and airy. Finally, fold the peanut butter mixture into the pudding mixture. The filling should be luscious, cloud-like, and silky.

This mixture is the heart of the cake—rich from peanut butter, yet light enough to create that classic éclair cream texture.

Step 2: Assemble the Layers

Prepare a 9×13-inch dish.

  • Place a layer of graham crackers across the bottom. Break pieces as needed, but keep gaps minimal.

  • Spread half of the peanut butter cream mixture over the graham cracker layer.

  • Add another layer of graham crackers.

  • Spread the remaining cream mixture evenly.

  • Finish with a final layer of graham crackers on top.

Lightly press the top layer to help settle the filling. The crackers will soften and turn into pastry-like layers as the dessert chills.

Step 3: Make the Chocolate Ganache

In a small saucepan or microwave, heat the heavy cream just until steaming—not boiling. Pour it over the chocolate chips and butter in a bowl. Let it sit for 1 minute, then whisk until smooth. Add the honey to give it that beautiful glossy shine.

Let the ganache cool for 5 minutes—just until slightly thickened—but still pourable. Pour it evenly over the top layer of graham crackers.

Use a spatula to smooth it out into a velvety chocolate blanket.

Step 4: Chill and Set

Cover the dish with plastic wrap and refrigerate for at least 6 hours, but overnight is ideal. During this time, the graham crackers transform—absorbing moisture and becoming tender like the outer layer of a traditional éclair.

When chilled properly, the cake slices beautifully and the layers look stunning.

Serving Ideas

  • Garnish with crushed peanuts or peanut butter chips.

  • Warm a knife under hot water before slicing for smooth, clean pieces.

  • Pair with cold milk, iced coffee, or hot espresso.

Why This Recipe Works

This no-bake dessert works beautifully because it relies on texture transformation. The graham crackers begin as crisp layers, but the creamy filling hydrates them slowly, turning them into something soft, tender, and close to pastry dough without any baking. Meanwhile, the peanut butter and cream cheese provide depth and richness, while the pudding and whipped cream keep things light and silky. The chocolate ganache gives that essential silky-smooth finish and ties everything together like a polished ribbon on a gift.

Unlike many no-bake éclair cakes that can feel overly sweet, this recipe balances flavors. The slight saltiness of the peanut butter prevents the dessert from leaning too sugary, while the chocolate topping provides a bittersweet contrast.

Storage

  • Refrigerate covered for up to 4 days.

  • Freeze portions for up to 2 months—thaw in the refrigerator before serving.

Tips for Perfection

  1. Use cold cream and milk to ensure the pudding sets properly.

  2. Do not rush the chilling time. The longer it sits, the better the texture becomes.

  3. To make it extra peanut-forward, drizzle warm melted peanut butter across the chocolate before chilling.
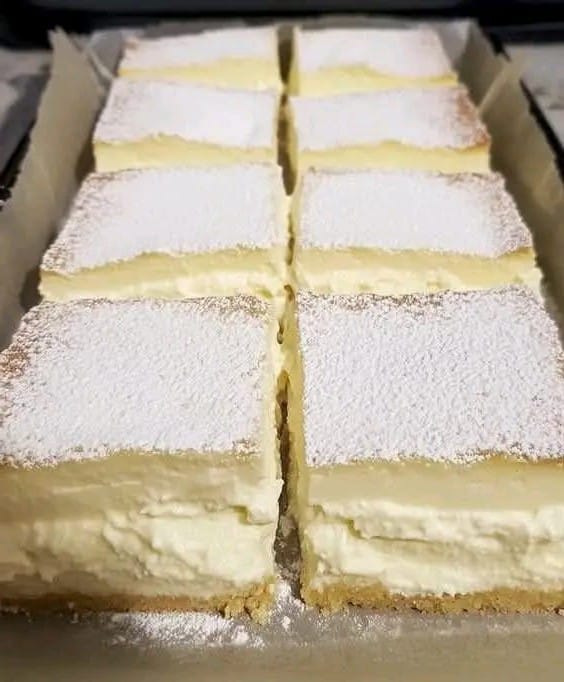
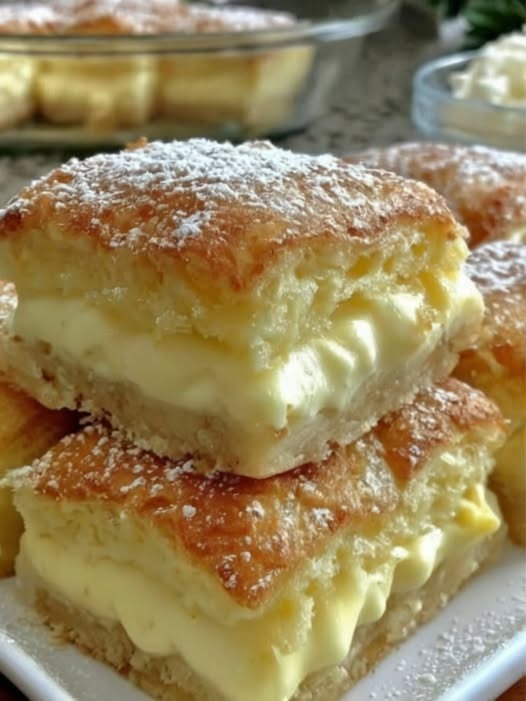
Vanilla Custard Slice

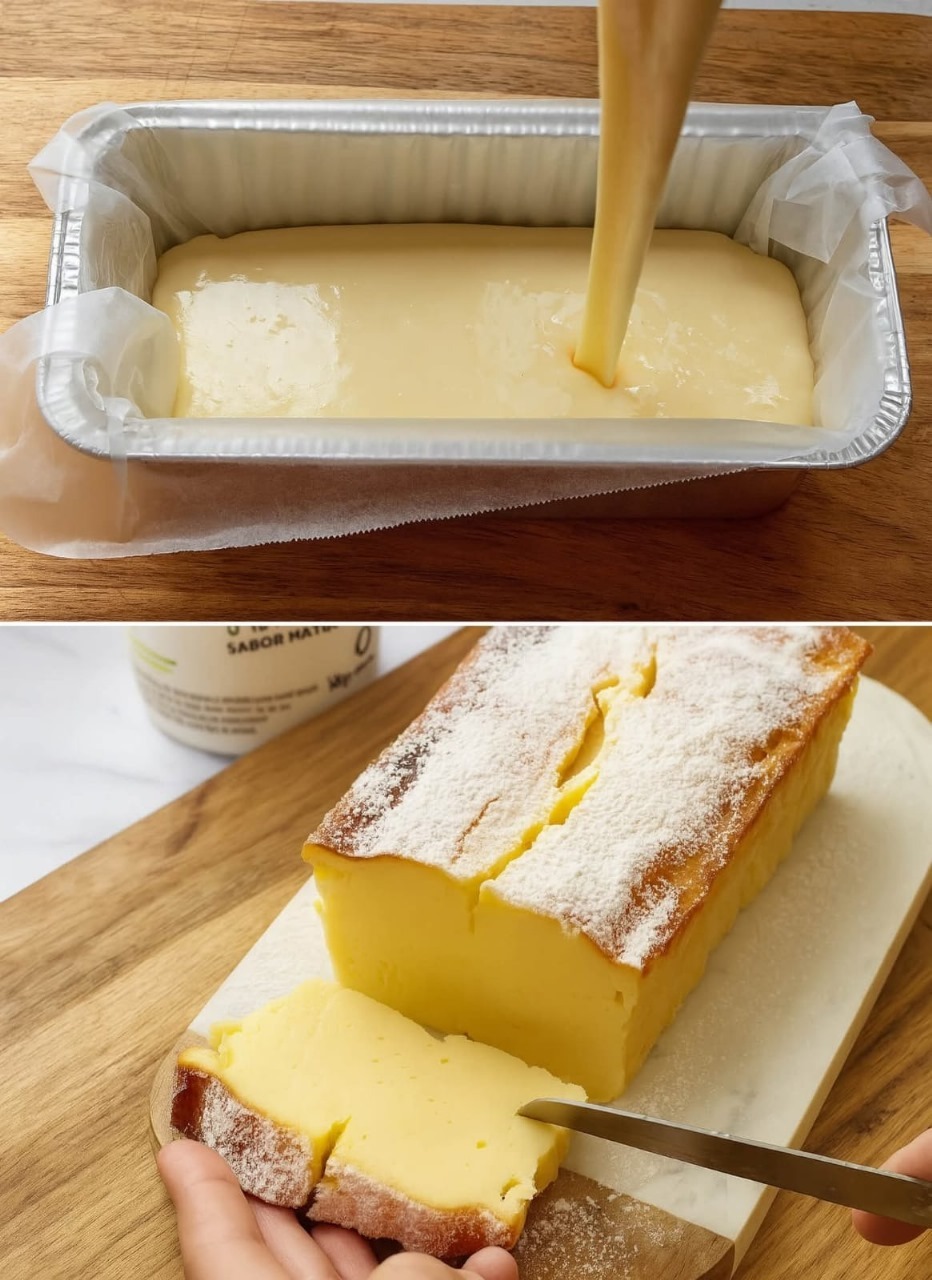
A Vanilla Custard Slice is a timeless dessert that combines layers of crisp, buttery puff pastry with a silky, fragrant vanilla custard, topped with a light dusting of icing sugar. This version elevates the classic with a subtle touch of creaminess and a delicate hint of vanilla bean, creating a slice that’s both elegant and comforting. Perfect for afternoon tea, special occasions, or a decadent weekend treat, this recipe is approachable yet impressive.

Ingredients

For the Puff Pastry:

  • 2 sheets of store-bought puff pastry (or homemade, if preferred)

  • 1 tablespoon flour, for dusting

For the Vanilla Custard:

  • 500 ml (2 cups) full-fat milk

  • 1 vanilla bean (or 1 teaspoon pure vanilla extract)

  • 4 large egg yolks

  • 100 g (½ cup) granulated sugar

  • 30 g (3 tablespoons) cornstarch

  • 30 g (2 tablespoons) unsalted butter

  • Pinch of salt

For the Topping:

  • Icing sugar, for dusting

  • Optional: melted chocolate for drizzle

Method

1. Prepare the Puff Pastry

  1. Preheat your oven to 200°C (400°F) and line a baking tray with parchment paper.

  2. Lightly dust your work surface with flour and roll out each sheet of puff pastry to approximately 3 mm thickness. Trim edges to make neat rectangles of equal size.

  3. Place the pastry sheets on the baking tray, prick the surface lightly with a fork to prevent excessive puffing.

  4. Cover loosely with parchment and bake for 12–15 minutes, until golden brown and crisp. Remove from the oven and let cool completely on a wire rack.

Tip: For an extra-crisp layer, place another sheet of parchment on top of the pastry while baking and weigh it down with another tray.

2. Make the Vanilla Custard

  1. Split the vanilla bean lengthwise and scrape the seeds into a saucepan with the milk. Heat the milk gently over medium heat until it just begins to simmer. If using vanilla extract, add it later with the butter.

  2. In a separate bowl, whisk the egg yolks with sugar, cornstarch, and a pinch of salt until pale and smooth.

  3. Gradually pour about half of the hot milk into the egg mixture, whisking constantly to temper the eggs and prevent curdling.

  4. Pour the tempered egg mixture back into the saucepan with the remaining milk. Cook over medium heat, stirring continuously with a whisk until the custard thickens and reaches a pudding-like consistency.

  5. Remove from heat and stir in butter (and vanilla extract if using). Strain the custard through a fine sieve to remove any lumps and ensure smoothness. Allow it to cool slightly.

Tip: Cover the custard with plastic wrap directly on its surface to prevent a skin from forming while it cools.3. Assemble the Vanilla Custard Slice

  1. Place one puff pastry sheet on a serving tray, flat side up.

  2. Spread the slightly cooled custard evenly over the pastry, ensuring it reaches the edges. Smooth the top with an offset spatula for an even layer.

  3. Carefully place the second puff pastry sheet on top of the custard. Press gently to ensure it adheres.

  4. Refrigerate the assembled slice for at least 2 hours (or overnight) to set, allowing the custard to firm up for clean slicing.

4. Finishing Touches

  1. Just before serving, dust the top layer with icing sugar for a classic presentation.

  2. Optional: drizzle melted chocolate over the top in a zigzag pattern for extra elegance.

  3. Use a sharp, serrated knife to slice the custard into individual rectangles or squares. For precise cuts, warm the knife slightly under hot water and wipe dry between slices.

Serving Tip: Pair with fresh berries or a dollop of whipped cream to elevate the experience.

5. Variations and Tips

  • Flavor Twist: Add a teaspoon of orange zest or almond extract to the custard for a subtle, aromatic variation.

  • Chocolate Custard Slice: Replace 50 g of milk with melted dark chocolate to create a rich chocolate version.

  • Nutty Crunch: Sprinkle finely chopped toasted almonds or pistachios between the custard and top pastry for added texture.

  • Gluten-Free Option: Use a pre-made gluten-free puff pastry, ensuring the baking time is adjusted slightly to avoid over-browning.

Vanilla Custard Cream Squares

Vanilla Custard Cream Squares are the kind of dessert that feels like a warm hug on a cool day — silky, creamy custard sandwiched between flaky pastry layers and dusted with a whisper of powdered sugar. Every bite is a perfect balance of delicate textures and nostalgic sweetness. This dessert, often inspired by the famous “Mille-feuille” or “Napoleon,” brings together the magic of homemade vanilla custard and buttery puff pastry in a simple yet luxurious way. Whether you’re hosting a dinner party or just craving something comforting and elegant, these Vanilla Custard Cream Squares will always impress.

The Story Behind the Creamy Layers

Vanilla custard desserts have been cherished for centuries across Europe, particularly in France and England, where pastry and cream are celebrated culinary arts. This version simplifies the process while retaining all the elegance — rich egg-based custard infused with real vanilla and layered between sheets of crisp, golden puff pastry. When chilled and sliced into neat squares, the layers reveal a bakery-perfect dessert that’s both beautiful and irresistibly smooth.

Ingredients You’ll Need

For the pastry layers:

2 sheets puff pastry, thawed

1 egg, lightly beaten (for brushing)

For the vanilla custard filling:

3 cups whole milk

4 large egg yolks

½ cup granulated sugar

¼ cup cornstarch

2 tbsp unsalted butter

2 tsp pure vanilla extract (or 1 vanilla bean pod for richer flavor)

Pinch of salt

For topping:

Powdered sugar, for dusting

Optional: white chocolate drizzle or whipped cream

Step-by-Step Preparation
1. Prepare the puff pastry layers

Preheat your oven to 400°F (200°C). Line two baking trays with parchment paper. Lay each puff pastry sheet flat on a tray and prick the surface all over with a fork to prevent it from puffing too high. Brush lightly with beaten egg for a golden sheen.
Place another sheet of parchment on top and set a baking tray over it — this will weigh the pastry down slightly for even layers.
Bake for 15–18 minutes, or until golden brown and crisp.
Remove from oven, let cool completely, and trim the edges so both sheets are equal in size. Set aside.

2. Create the luscious vanilla custard

In a medium saucepan, heat 2½ cups of milk over medium heat until steaming but not boiling. If using a vanilla bean, split it, scrape the seeds, and add both seeds and pod to the milk.

Meanwhile, in a separate bowl, whisk together egg yolks, sugar, cornstarch, and remaining ½ cup of milk until smooth and pale. Slowly pour the hot milk into the egg mixture, whisking continuously to temper the eggs (this prevents curdling).

Return the mixture to the saucepan and cook over medium heat, stirring constantly until it thickens — about 5–7 minutes. The custard should coat the back of a spoon and hold soft peaks. Remove from heat, discard the vanilla pod (if used), and stir in butter and vanilla extract for a glossy finish.

Transfer the custard to a clean bowl, cover the surface with plastic wrap (to prevent a skin from forming), and chill for 30–40 minutes until cool and thick.

3. Assemble the dessert

Place one pastry sheet on a serving platter or in a square baking dish. Spread the cooled vanilla custard evenly over the top, using a spatula to smooth it into a thick, even layer.

Carefully place the second pastry sheet on top, pressing gently so it adheres to the custard. Cover and refrigerate for at least 2 hours (or overnight) to allow the custard to firm up and the flavors to meld beautifully.

4. Slice and serve

Once fully chilled, use a sharp knife dipped in hot water to cut into neat squares or rectangles. Wipe the knife clean between each slice for smooth edges. Dust the tops generously with powdered sugar, or drizzle with melted white chocolate for a touch of indulgence.

Serve chilled — each piece will reveal golden pastry, smooth custard, and an aroma of pure vanilla bliss.

Baker’s Tips for Perfection

Use real vanilla: The difference between extract and artificial flavoring is huge. Real vanilla adds depth and warmth to the custard.

Keep the custard smooth: Constant stirring is key — if it thickens too fast, remove it from heat for a moment and whisk vigorously.

Chill thoroughly: Patience is worth it. The dessert cuts cleanly and holds its shape beautifully when cold.

Add flair: For a café-style finish, alternate layers of puff pastry and custard twice for a triple-layer version, or top with a light caramel glaze.

Serving Ideas

Vanilla Custard Cream Squares pair beautifully with a hot espresso, black tea, or a chilled glass of dessert wine. You can elevate the presentation by garnishing with:

Fresh berries (strawberries, raspberries, or blueberries)

A drizzle of raspberry coulis

Shaved white or dark chocolate

A sprig of mint for contrast

These subtle additions turn a humble custard square into a show-stopping dessert for any occasion.

Storage and Make-Ahead Tips

These squares can be made a day ahead and stored in the refrigerator for up to 3 days. Keep them covered to prevent the pastry from softening too much. If you prefer the pastry extra crisp, assemble them just before serving by adding the chilled custard between freshly baked sheets.

A Taste of Nostalgia and Elegance

There’s something timeless about Vanilla Custard Cream Squares. They capture the spirit of homemade desserts — simple ingredients, classic technique, and results that taste like pure comfort. The creamy custard, infused with real vanilla, melts in your mouth, while the crisp pastry offers a satisfying crunch. It’s the kind of dessert that makes you slow down and savor every bite.

Creamy Caramel Custard Pie

There are few desserts as indulgent, elegant, and comforting as a Creamy Caramel Custard Pie. Imagine a buttery, flaky crust cradling a velvety custard filling infused with the deep, rich flavor of homemade caramel — each bite melting on your tongue with perfect sweetness and smooth texture. This recipe takes the classic idea of custard pie and elevates it with layers of flavor: caramelized sugar, luscious cream, and a hint of vanilla warmth. Whether served chilled or slightly warm, this pie is a showstopper that blends simplicity with sophistication.

Below is a unique, foolproof recipe for creating the ultimate caramel custard pie from scratch. Every step has been refined to ensure you get a silky, glossy finish and an unforgettable flavor that tastes like something straight from a patisserie.

🥧 Ingredients

For the Crust:

  • 1 ½ cups all-purpose flour

  • ½ cup cold unsalted butter, cubed

  • 2 tablespoons granulated sugar

  • ¼ teaspoon salt

  • 3–4 tablespoons ice-cold water

For the Caramel Custard Filling:

  • 1 cup granulated sugar (for caramel)

  • 3 tablespoons water

  • 2 cups whole milk

  • 1 cup heavy cream

  • 4 large egg yolks

  • 2 large whole eggs

  • ½ cup brown sugar

  • 1 tablespoon cornstarch

  • 1 ½ teaspoons pure vanilla extract

  • Pinch of salt

For Topping (optional but heavenly):

  • Fresh whipped cream

  • Caramel drizzle

  • Sea salt flakes or crushed toffee pieces

🌟 Step 1: Prepare the Buttery Pie Crust

  1. Combine dry ingredients:
    In a large bowl, whisk together the flour, sugar, and salt.

  2. Add butter:
    Add cold, cubed butter and cut it into the flour using a pastry cutter or your fingertips until the mixture resembles coarse crumbs — small pea-sized bits of butter are perfect.

  3. Add cold water:
    Sprinkle the ice water one tablespoon at a time, gently mixing until the dough begins to come together. Avoid overmixing; you want a tender crust, not a tough one.

  4. Chill the dough:
    Shape it into a disk, wrap it in plastic, and refrigerate for at least 30 minutes. This rest allows the gluten to relax and the butter to firm up, giving you a flaky crust.

  5. Roll and bake:
    Roll the dough on a floured surface into a 12-inch circle. Transfer it into a 9-inch pie dish, trim excess edges, and crimp if desired.
    Prick the bottom with a fork, line with parchment paper, and fill with pie weights or beans.
    Bake at 375°F (190°C) for 15 minutes, remove weights, and bake another 8–10 minutes until golden. Cool completely before adding the filling.

🍯 Step 2: Make the Silky Caramel Base

  1. Melt sugar:
    In a heavy-bottomed saucepan, combine 1 cup sugar and 3 tablespoons of water. Heat on medium without stirring until the sugar dissolves and begins to turn golden amber. You can gently swirl the pan to even out the color.

  2. Watch carefully:
    Once the caramel reaches a rich amber color, immediately remove it from heat. Overcooked caramel becomes bitter, so timing is key here.

  3. Add milk and cream:
    Slowly (and carefully!) pour in the milk and cream while whisking. The caramel will bubble vigorously — keep whisking until smooth.
    Return to low heat and stir for 1–2 minutes until fully combined. Set aside to cool slightly.

🍮 Step 3: Prepare the Custard

  1. Whisk eggs and sugars:
    In a large bowl, whisk together egg yolks, whole eggs, brown sugar, cornstarch, vanilla, and a pinch of salt until smooth and creamy.

  2. Temper the eggs:
    Slowly pour about ½ cup of the warm caramel mixture into the egg mixture while whisking constantly. This gentle step prevents the eggs from scrambling.
    Gradually add the remaining caramel milk, whisking until the custard is silky and well-blended.

  3. Strain for smoothness:
    Pour the mixture through a fine sieve to remove any lumps or cooked bits of egg. This ensures the final custard is luxuriously smooth.

🔥 Step 4: Bake the Pie

  1. Pour the filling:
    Pour the custard into the cooled pie crust. Tap gently to remove air bubbles.

  2. Bake gently:
    Place the pie dish on the middle rack of your oven preheated to 325°F (160°C). Bake for 40–45 minutes, or until the center is just set and slightly wobbly when shaken.

  3. Cool down:
    Remove from the oven and let it cool at room temperature for 1 hour, then refrigerate for at least 3–4 hours (overnight gives the best flavor and texture).

🍨 Step 5: Serve with Elegance

Before serving, whip up some fresh cream and pipe or spread it over the chilled pie. Drizzle homemade caramel sauce over the top and sprinkle with sea salt flakes or toffee crumbs for a gourmet touch. Slice into the creamy custard — the fork should glide through effortlessly, revealing a golden, glossy interior.

💡 Tips for Perfect Caramel Custard Pie

  • Use fresh eggs: They ensure a stable, rich custard that sets beautifully.

  • Don’t rush the caramel: Slow, steady heat gives it a deep amber flavor without bitterness.

  • Avoid overbaking: The custard will continue to set as it cools; overbaking causes cracks or a rubbery texture.

  • Chill time matters: The longer it chills, the creamier and silkier the texture becomes.

🕯️ Why This Recipe Is Unique

This recipe stands out because it balances three layers of texture and flavor — the flaky butter crust, the silky caramel-infused custard, and the creamy whipped topping. Most caramel custard pies either lean too sweet or lack depth, but this version uses brown sugar for complexity, a touch of salt for balance, and a precise baking technique that locks in moisture.

The homemade caramel adds that irresistible toffee note, turning a simple custard pie into something magical — like crème brûlée meets a butterscotch tart. And unlike traditional custard pies that can feel plain, this one bursts with caramelized aroma from the very first bite.

🍴 Serving Suggestions

  • Pair with a cup of espresso or black coffee for contrast.

  • Serve warm with vanilla ice cream for a comforting dessert.

  • Garnish with toasted nuts, banana slices, or a sprinkle of cinnamon for variation.

❤️ Final Thoughts

A Creamy Caramel Custard Pie is more than dessert — it’s a celebration of balance: buttery crust, silky custard, and that haunting caramel sweetness. Whether for a family dinner, festive occasion, or just a quiet indulgence, this pie always impresses. Every spoonful feels nostalgic, yet luxurious — reminding us why homemade desserts are pure joy.

Creamy 3-Ingredient Dessert

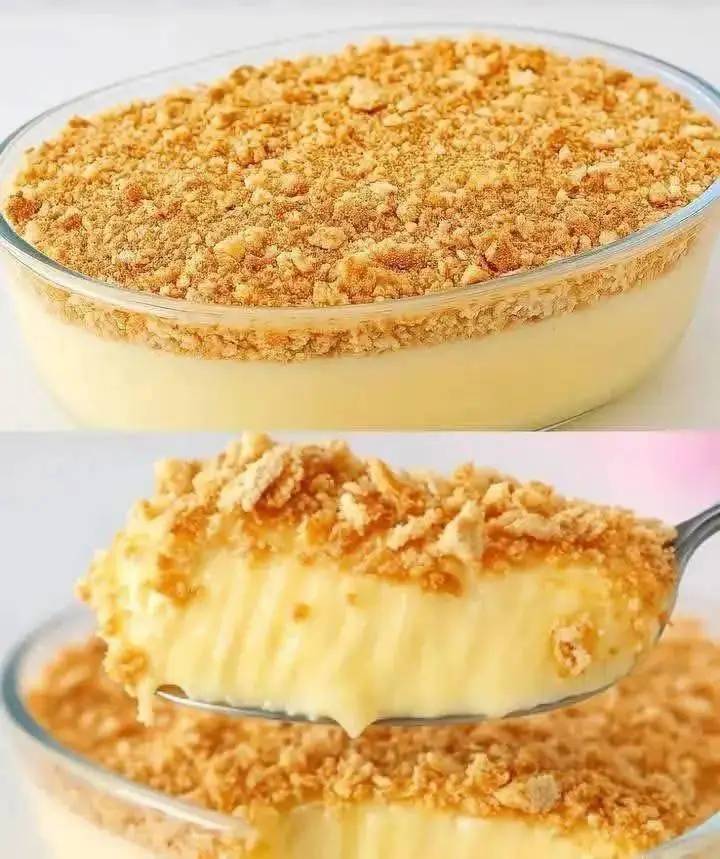
Sometimes the most irresistible desserts come from the simplest ingredients — and this Creamy 3-Ingredient Dessert proves that beautifully. With only three basic items and no complicated steps, you can create a velvety, melt-in-your-mouth treat that feels like it came straight out of a high-end patisserie. This dessert is rich, silky, and comforting — the kind that satisfies both your sweet tooth and your soul. It’s the perfect recipe for anyone who loves effortless indulgence. Whether you’re hosting a dinner, celebrating a cozy weekend, or simply craving something luxurious after a long day, this dessert delivers every time.

🌿 The Magic Trio: Only 3 Ingredients

What makes this recipe truly special is its simplicity. You only need three everyday ingredients, but when combined, they transform into something elegant and deeply satisfying. The secret lies in the technique — gentle heating, patient stirring, and the magic of setting just right.

Here’s what you’ll need:

  • 2 cups heavy cream (or full-fat cream): This forms the rich, velvety base of your dessert. It gives that luscious texture that feels like a soft mousse or a pudding.

  • ½ cup sweetened condensed milk: This adds sweetness and a creamy caramel note without the need for extra sugar.

  • 1 tablespoon cornstarch (or custard powder): This acts as a thickener, ensuring your dessert has that perfect smooth, spoonable consistency.

Optional but highly recommended for flavor depth: a splash of vanilla extract or a sprinkle of crushed biscuits, nuts, or chocolate shavings on top.

🍮 Step-by-Step Recipe

Step 1: Combine the Cream and Condensed Milk

In a medium-sized saucepan, pour in the heavy cream and sweetened condensed milk. Whisk gently to combine, making sure both blend evenly. The mixture should be silky and pale ivory in color. This combination already smells delicious — rich, creamy, and sweet.

Step 2: Dissolve the Thickener

In a small bowl, mix the cornstarch with 2 tablespoons of cold cream (from the mixture) or cold milk to make a smooth slurry. Stir until there are no lumps. This step ensures your dessert sets perfectly smooth without any gritty texture.

Step 3: Heat Gently

Place your saucepan over low to medium heat and slowly add the cornstarch mixture. Continue whisking as the cream begins to heat. The key here is patience — you don’t want the cream to boil too fast. Gentle stirring will prevent curdling and help the mixture thicken evenly.

Within 7–10 minutes, you’ll notice the texture changing — the mixture will become thicker and coat the back of your spoon beautifully. It should resemble a rich custard consistency.

Step 4: Pour and Chill

Once your creamy mixture reaches that silky, pudding-like texture, remove it from the heat. Pour it carefully into serving glasses, small bowls, or ramekins. Tap them lightly to remove air bubbles and create a smooth surface.

Allow the desserts to cool to room temperature, then cover them with plastic wrap and refrigerate for at least 2–3 hours (or overnight for a firmer set). The chilling time allows the dessert to firm up into a spoonable, creamy dream.

Step 5: Serve and Enjoy

Once chilled, your 3-ingredient creamy dessert is ready to serve! The texture should be luxuriously thick and glossy — somewhere between a panna cotta and a mousse. You can serve it plain for a minimalist beauty, or garnish it with a touch of creativity:

  • Dust with cocoa powder or cinnamon

  • Add fresh fruit slices like strawberries, raspberries, or mango

  • Top with crushed cookies, caramel drizzle, or chopped nuts

Each variation adds a unique touch while keeping the simplicity intact.

✨ The Secret Behind the Creaminess

What makes this dessert so indulgent is the balance between the fat content of the cream and the sweet condensed milk’s smooth texture. When gently heated, the proteins in the cream stabilize with the starch, forming a naturally thick custard-like base without the need for eggs or gelatin. The result is a soft, velvety mouthfeel that’s not overly sweet — just perfectly rich.

If you prefer a lighter version, you can substitute heavy cream with evaporated milk or half-and-half, but keep in mind that the consistency will be slightly softer. For a dairy-free twist, use coconut cream and coconut condensed milk — it will yield a tropical flavor reminiscent of Thai coconut pudding.

🍧 Serving Ideas & Variations

This 3-ingredient dessert is a blank canvas for your creativity. Here are a few variations to inspire you:

  1. Chocolate Lover’s Dream:
    Add 2 tablespoons of melted dark chocolate or cocoa powder into the warm mixture before chilling. The result? A silky, decadent chocolate pudding.

  2. Coffee Cream Bliss:
    Stir in 1 teaspoon of instant coffee or espresso powder for a mocha twist that pairs beautifully with whipped cream or grated chocolate.

  3. Coconut Paradise:
    Replace heavy cream with coconut cream and top with toasted coconut flakes. It’s refreshing and exotic — perfect for warm days.

  4. Citrus Kiss:
    Add a teaspoon of lemon or orange zest to the mixture before heating. The zesty aroma brightens the richness and adds a sophisticated touch.

  5. Layered Dessert Cups:
    Pour the creamy mixture over crushed biscuits or cake crumbs in a glass, chill, and top with fruit or chocolate for a parfait-style treat.

💡 Tips for Perfect Texture

  • Low heat is key: Too much heat can cause the mixture to curdle or separate. Gentle cooking gives it a perfectly creamy finish.

  • Stir constantly: Don’t walk away — continuous whisking prevents lumps and ensures even thickening.

  • Cool before chilling: Always allow the dessert to cool slightly before refrigerating. This avoids condensation and keeps the top layer smooth.

  • Serve chilled: This dessert tastes best cold; the texture becomes firmer and more luxurious after a few hours in the fridge.

🍴 Why You’ll Love This Recipe

What makes this Creamy 3-Ingredient Dessert truly unique is its combination of simplicity, versatility, and indulgence. It’s foolproof — no mixer, no baking, and no fancy tools. Every spoonful is silky, rich, and comforting, making it the kind of dessert that feels both nostalgic and modern.

It’s also perfect for last-minute entertaining or late-night cravings. You can prepare it in advance, store it in the fridge, and bring it out when you need a quick dessert that impresses without the fuss.

❤️ Final Thoughts

In a world full of complex recipes, this 3-Ingredient Creamy Dessert is a gentle reminder that beauty often lies in simplicity. With just cream, condensed milk, and a touch of cornstarch, you create something that feels utterly luxurious — smooth, velvety, and deeply satisfying. It’s the kind of dessert that doesn’t shout for attention but quietly wins your heart, one spoonful at a time.

Whether enjoyed alone with a quiet cup of coffee or served to guests as a fancy chilled pudding, it never disappoints. Simple, elegant, and endlessly customizable — this creamy creation is proof that minimal ingredients can still deliver maximum pleasure.

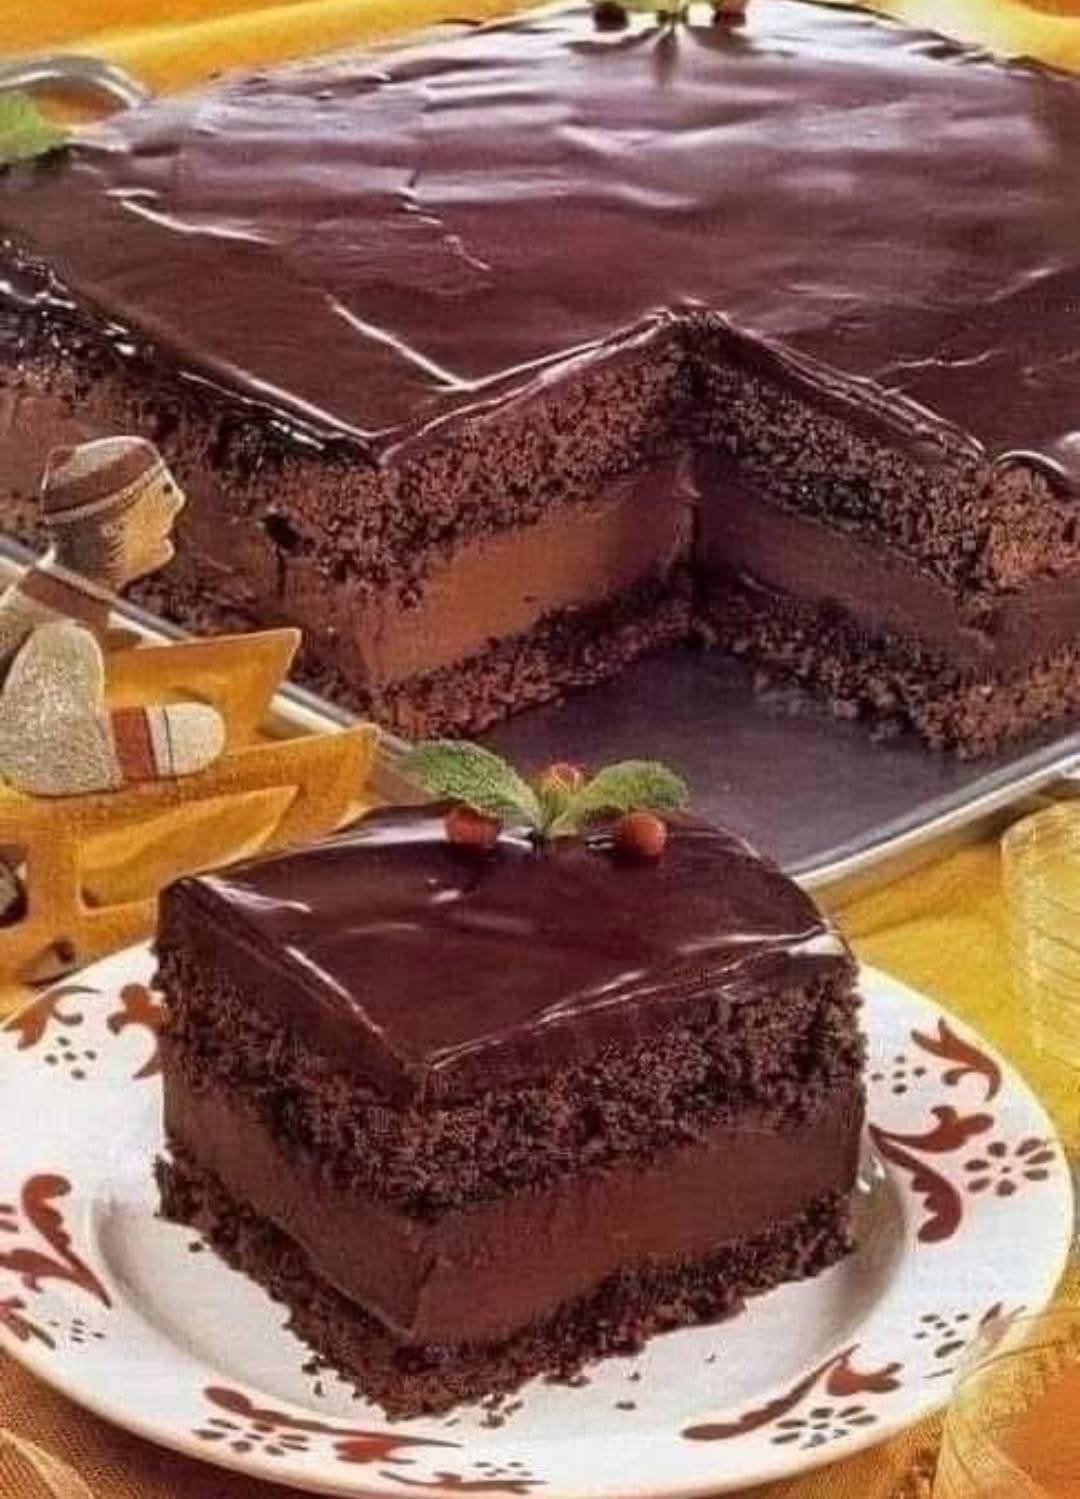
Mocha Layer Cake with Chocolate-Rum Cream Filling

If you’re searching for a dessert that combines the bold allure of coffee, the decadence of chocolate, and the warm sophistication of rum, this Mocha Layer Cake with Chocolate-Rum Cream Filling is the masterpiece you’ve been waiting for. This cake isn’t just a dessert—it’s an experience. Each bite blends silky coffee-infused sponge with a luscious chocolate-rum filling that melts like velvet on your tongue. Perfect for celebrations or cozy weekend indulgence, this cake promises a perfect balance of richness, aroma, and texture.

The Inspiration

Mocha and rum have always been a timeless pairing. The depth of coffee enhances chocolate’s natural bitterness, while rum adds a subtle warmth and aromatic sweetness that lingers beautifully. This cake was designed to feel luxurious but approachable—a dessert that feels like a patisserie delight yet can be baked right in your kitchen. Whether served as the centerpiece at a dinner party or as a special self-care treat, it’s a recipe worth savoring slowly.

Ingredients

For the Mocha Cake Layers:

  • 2 cups all-purpose flour

  • ¾ cup unsweetened cocoa powder (preferably Dutch-processed)

  • 2 tsp baking powder

  • 1 tsp baking soda

  • ½ tsp fine salt

  • 1 ¾ cups granulated sugar

  • ¾ cup vegetable oil (or melted butter for richer texture)

  • 3 large eggs, room temperature

  • 1 cup brewed strong coffee, cooled

  • ½ cup buttermilk, room temperature

  • 1 tsp pure vanilla extract

  • 1 tbsp instant espresso powder (optional, for deeper flavor)

For the Chocolate-Rum Cream Filling:

  • 1 ½ cups heavy cream

  • 8 oz dark chocolate (60–70%), chopped

  • 2 tbsp unsalted butter

  • 2 tbsp dark rum (or 1 tsp rum extract for non-alcoholic version)

  • ¼ cup powdered sugar (adjust to taste)

  • Pinch of salt

For the Mocha Buttercream Frosting:

  • 1 cup unsalted butter, softened

  • 3 cups powdered sugar, sifted

  • 3 tbsp cocoa powder

  • 2 tbsp brewed espresso or strong coffee

  • 1 tsp vanilla extract

  • 1–2 tbsp heavy cream (as needed for consistency)

Optional Garnishes:

  • Chocolate curls or shavings

  • Espresso beans (chocolate-covered, for flair)

  • A drizzle of rum-chocolate syrup or melted ganache

Step-by-Step Preparation

1. Prepare the Cake Batter

Begin by preheating your oven to 350°F (175°C). Grease and line three 8-inch round cake pans with parchment paper. This step ensures your layers release beautifully after baking.

In a large mixing bowl, sift together flour, cocoa powder, baking powder, baking soda, and salt. Set aside.

In another bowl, whisk together sugar, oil, and eggs until smooth and creamy. Pour in the cooled coffee, buttermilk, and vanilla extract, whisking until well combined. Slowly incorporate the dry ingredients into the wet mixture in two stages, mixing just until the batter is smooth and free of lumps.

If you want a bolder mocha kick, stir in a tablespoon of instant espresso powder—it will deepen both the flavor and aroma.

2. Bake the Cake Layers

Divide the batter evenly among your prepared pans. Tap the pans gently on the counter to remove air bubbles. Bake for 22–25 minutes, or until a toothpick inserted in the center comes out clean.

Once baked, let the cakes cool in their pans for 10 minutes, then transfer them to wire racks to cool completely. Patience is key here—cool layers make for easier assembly later.

3. Make the Chocolate-Rum Cream Filling

In a heatproof bowl, add the chopped dark chocolate and butter. In a small saucepan, heat the heavy cream just until it begins to simmer—do not boil. Pour the hot cream over the chocolate and let it sit for one minute. Stir slowly until smooth and glossy.

Once the ganache base is silky, whisk in rum and a pinch of salt. Chill the mixture in the refrigerator for 30–40 minutes, or until it thickens slightly but remains spreadable. Then, beat it with an electric mixer until fluffy and mousse-like. This is your Chocolate-Rum Cream Filling—a heavenly spread that tastes like truffles in cream form.

4. Prepare the Mocha Buttercream

In a large bowl, beat butter until creamy and pale. Add cocoa powder and powdered sugar, one cup at a time, mixing on low speed to prevent clouds of sugar. Gradually add the espresso and vanilla extract, then whip on high for 3–4 minutes until fluffy. If it’s too thick, add a tablespoon of heavy cream until it reaches your preferred consistency—smooth, spreadable, and velvety.

5. Assemble the Cake

Place one layer of cake on a serving stand or plate. Spread a generous amount of the Chocolate-Rum Cream Filling evenly across the surface. Add the second layer and repeat. Once the third layer is placed on top, use any remaining filling to lightly coat the sides for a rustic crumb layer. Chill the cake for 20 minutes to set.

Next, frost the cake with the Mocha Buttercream, spreading it evenly over the top and sides. Smooth with a spatula or give it textured swirls for a more artistic touch.

If desired, drizzle with a little warm chocolate ganache or sprinkle chocolate curls for that bakery-style finish.

6. Chill and Serve

Refrigerate the cake for at least one hour before slicing. This allows the flavors to meld beautifully and the filling to set perfectly. When ready to serve, let it sit at room temperature for about 15 minutes—this enhances the creaminess of both the frosting and filling.

Tips for Perfection

  • Coffee Strength Matters: The stronger your coffee, the bolder your mocha flavor. Use espresso for a deep, rich profile.

  • Rum Choice: Dark rum gives the best warmth and aroma. For a non-alcoholic option, use rum extract or omit entirely.

  • Texture Trick: Brush each cake layer lightly with brewed coffee or rum syrup for extra moistness and sophistication.

  • Decor Idea: Add chocolate shards or cocoa dust for a refined, café-style presentation.

Serving Suggestions

Serve this Mocha Layer Cake with a dollop of whipped cream or a scoop of vanilla gelato. It pairs beautifully with espresso, cappuccino, or a small glass of sweet dessert wine. The contrast of creamy, bitter, and boozy notes makes every bite unforgettable.

Storage

Keep leftovers covered in the refrigerator for up to five days. The flavors intensify over time, making it even more delicious on day two or three. You can also freeze individual slices—just wrap them tightly in plastic and foil for up to two months.

Final Thoughts

This Mocha Layer Cake with Chocolate-Rum Cream Filling is not just a dessert—it’s a celebration of flavor harmony. The mocha sponge, airy yet deeply flavored, provides the perfect base for the luscious, rum-kissed filling. Every forkful offers a balance of coffee, chocolate, and cream that feels indulgent yet comforting. Whether for a festive gathering or an elegant dinner finale, this cake is guaranteed to impress both the eyes and the taste buds.

Low-Calorie Greek Yogurt Cake

If you’re searching for a dessert that’s delicious, moist, and satisfying but won’t sabotage your healthy eating goals, this Low-Calorie Greek Yogurt Cake is the perfect treat. This cake blends creamy Greek yogurt, light flour, and a touch of natural sweetness to create a dessert that tastes decadent yet feels wholesome. It’s soft, tender, slightly tangy, and full of flavor—proving that “low-calorie” doesn’t have to mean “low pleasure.”

This unique recipe highlights the versatility of Greek yogurt, which gives the cake its luscious texture while keeping the fat content in check. Each bite melts in your mouth, offering a refreshing lightness that pairs beautifully with a cup of coffee or fresh fruit.

🍰 Why This Cake Is Special

Unlike traditional cakes loaded with butter and sugar, this recipe replaces heavy ingredients with Greek yogurt and a small amount of olive oil. The yogurt adds moisture and protein while cutting down on calories. Olive oil brings a subtle richness that balances the tanginess of the yogurt. With the addition of lemon zest and vanilla, the cake gains a bright, aromatic flavor that feels indulgent without being heavy.

This cake can be enjoyed plain, dusted with powdered sugar, or topped with fresh berries and a drizzle of honey for a naturally sweet finish. It’s versatile enough for breakfast, afternoon tea, or dessert.

🧁 Ingredients

(Makes one 8-inch cake, serves 8–10 slices)

Dry Ingredients:

  • 1 ½ cups (180 g) all-purpose flour (or half whole-wheat for extra fiber)

  • 2 tsp baking powder

  • ¼ tsp baking soda

  • ¼ tsp salt

Wet Ingredients:

  • ¾ cup (180 g) plain non-fat Greek yogurt

  • ⅓ cup (80 ml) olive oil or melted coconut oil

  • ⅔ cup (130 g) granulated erythritol or coconut sugar (low-calorie option)

  • 2 large eggs

  • 2 tsp pure vanilla extract

  • Zest of 1 lemon (optional but highly recommended)

  • 2 tbsp fresh lemon juice

  • 2 tbsp unsweetened almond milk (or any milk of choice)

Optional Toppings:

  • 1 tbsp powdered sugar substitute for dusting

  • Fresh berries (blueberries, raspberries, or sliced strawberries)

  • A drizzle of honey or light glaze made with Greek yogurt and lemon juice

🥣 Instructions

Step 1: Prepare the Pan and Oven

Preheat your oven to 350°F (175°C). Grease an 8-inch round cake pan lightly with olive oil or non-stick spray, and line the bottom with parchment paper. This step ensures the cake releases easily and stays moist all around.

Step 2: Mix the Dry Ingredients

In a medium bowl, whisk together the flour, baking powder, baking soda, and salt. This step aerates the flour, ensuring your cake turns out soft and fluffy. If you’re using whole wheat flour for added nutrition, sift it twice to keep the texture light.

Step 3: Whip the Wet Ingredients

In a large mixing bowl, combine Greek yogurt, olive oil, and erythritol. Beat them together with a hand mixer or whisk until the mixture turns smooth and creamy. Add the eggs, vanilla extract, lemon zest, and lemon juice, and continue whisking until fully incorporated. The lemon adds a brightness that complements the creamy tang of yogurt beautifully.

Step 4: Combine Wet and Dry

Gradually add the dry ingredients to the wet mixture in three batches, gently folding with a spatula after each addition. Pour in almond milk to loosen the batter. The batter should be thick yet pourable—smooth enough to spread evenly in the pan.

Step 5: Bake the Cake

Pour the batter into your prepared pan and smooth the top with a spatula. Bake for 30–35 minutes, or until the top is golden and a toothpick inserted in the center comes out clean.

The scent of vanilla and lemon filling your kitchen will be irresistible—fresh, tangy, and cozy all at once.

Step 6: Cool and Serve

Allow the cake to cool in the pan for about 10 minutes, then transfer it to a wire rack to cool completely. Dust with powdered sugar or top with your favorite fruit before serving. For a fancier presentation, you can spread a thin layer of Greek yogurt “frosting” (Greek yogurt mixed with a little honey and vanilla) over the cooled cake.

🌿 Low-Calorie Tips and Variations

  • Sugar Swap: Use stevia, erythritol, or monk fruit sweetener instead of regular sugar to cut down on calories.

  • Flour Options: Replace part of the flour with almond flour or oat flour for extra nutrients and fiber.

  • Flavor Twists: Add ½ teaspoon of cinnamon or a handful of blueberries into the batter before baking for a fun variation.

  • Protein Boost: Stir in one scoop of unflavored or vanilla protein powder and reduce flour slightly for a high-protein dessert.

💡 Why Greek Yogurt Works So Well

Greek yogurt is the hero of this recipe. Its high protein content keeps the cake tender while making it more filling and nutritious. It replaces much of the butter or oil in typical cakes, cutting calories by nearly half. Additionally, its slight tang balances the sweetness, creating a sophisticated flavor that feels like a cross between a sponge cake and a cheesecake.

Yogurt also activates the baking soda, which gives this cake its gentle rise without needing heavy cream or excessive fat. The end result? A soft, light crumb with a moist interior that stays fresh even the next day.

🍋 Serving Suggestions

This cake is delightfully simple but elegant enough to serve to guests. Here are a few serving ideas:

  1. Breakfast Treat: Serve a slice with a dollop of Greek yogurt and fresh fruit for a wholesome morning boost.

  2. Tea-Time Delight: Pair it with green tea or black coffee—it’s not overly sweet, so it complements both hot and cold beverages perfectly.

  3. Light Dessert: Add a drizzle of warm honey and a few mint leaves for a naturally beautiful presentation.

If you’re entertaining, you can also serve small squares of this cake alongside a yogurt-based fruit dip—creating a low-calorie dessert platter that looks fancy but is easy to prepare.

🧡 Storage Tips

  • Store the cake in an airtight container at room temperature for up to 2 days, or in the refrigerator for up to 5 days.

  • For longer storage, wrap slices individually and freeze for up to a month. Thaw in the fridge overnight before enjoying.

The texture stays remarkably moist even after freezing, thanks to the Greek yogurt’s natural creaminess.

Nutritional Benefits (Per Slice, Approximate)

  • Calories: 145 kcal

  • Protein: 6 g

  • Fat: 6 g

  • Carbohydrates: 15 g

  • Sugar: 4 g

These numbers make this cake a balanced, guilt-free option for anyone watching their calorie intake but still craving something sweet and satisfying.

🌸 Final Thoughts

The Low-Calorie Greek Yogurt Cake proves that dessert doesn’t need to be off-limits when you’re eating mindfully. It’s light, luscious, and perfectly balanced—a harmony of tangy yogurt, subtle sweetness, and soft crumb. Each bite feels indulgent yet nourishing, offering comfort without compromise.

Whether you’re baking it for a weekend treat, a healthy snack, or a special brunch, this cake brings together everything you love about homemade baking: simplicity, flavor, and heart. With its elegant aroma and melt-in-your-mouth texture, this low-calorie wonder is sure to become one of your go-to recipes whenever you crave a slice of pure, healthy happiness.

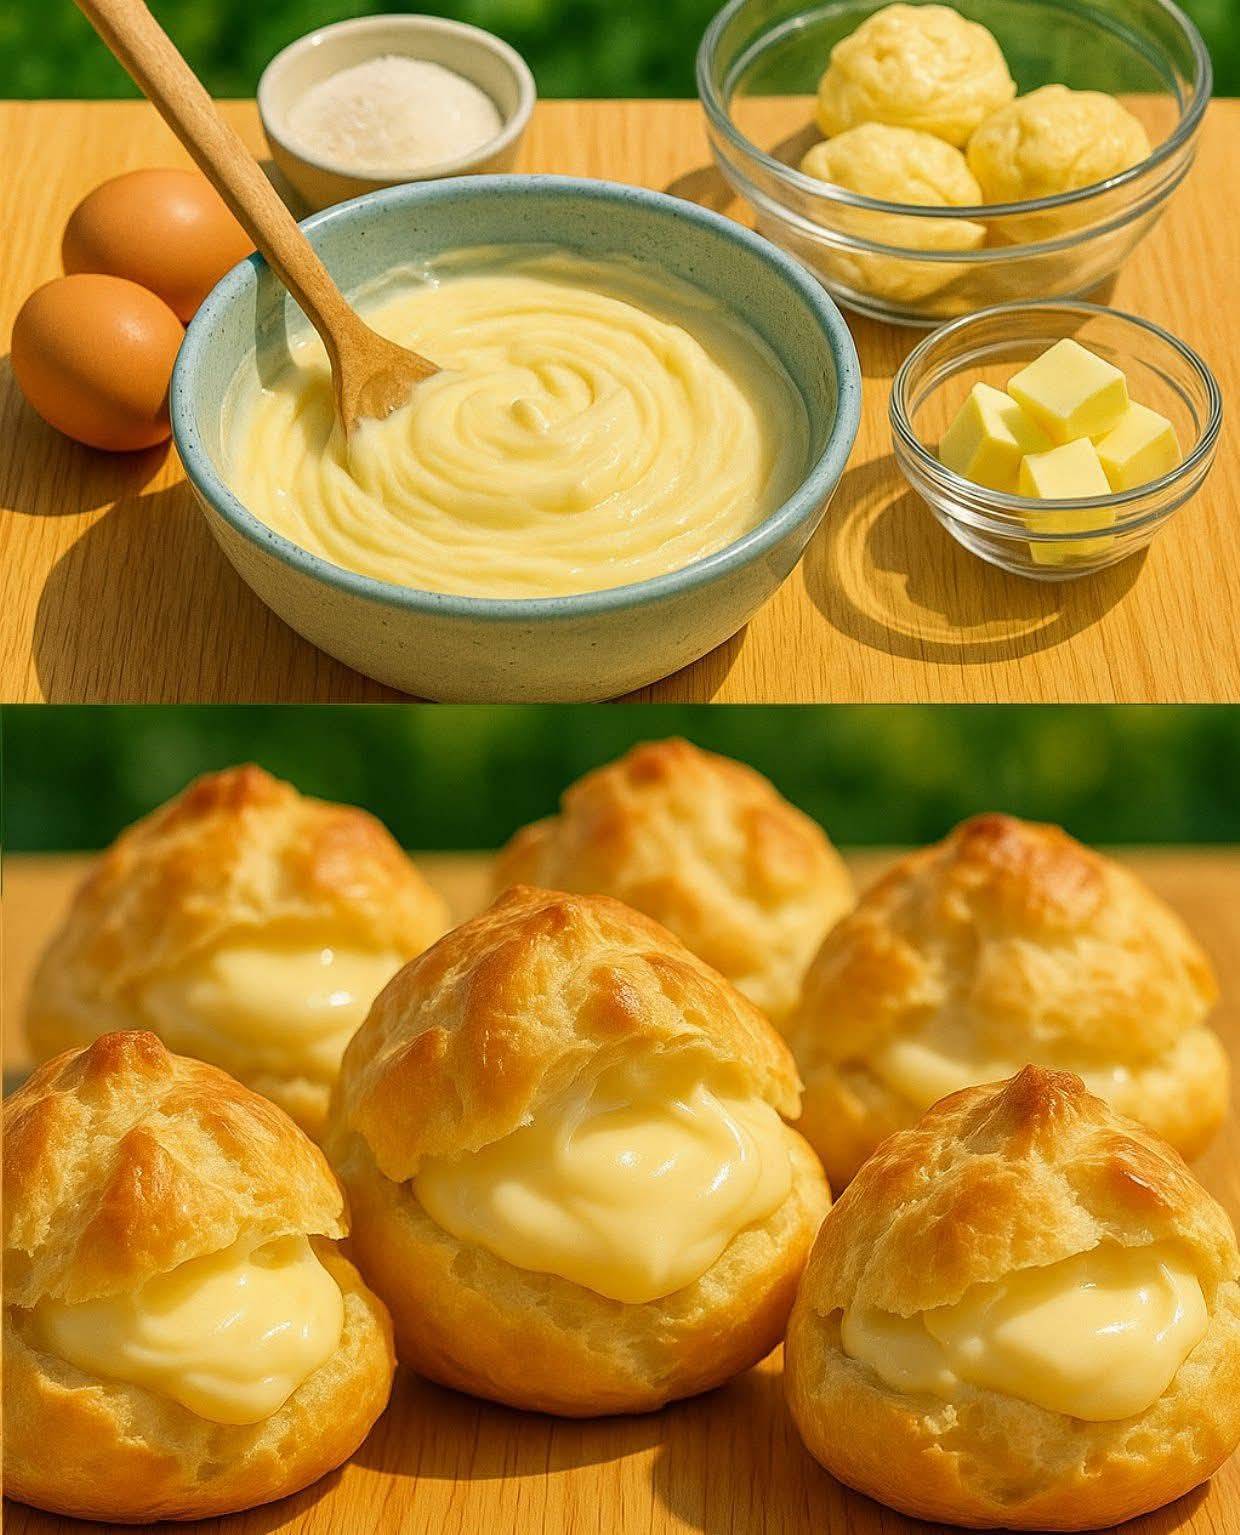
FAMOUS CREAM PUFFS

There are few pastries in the world as timeless and irresistible as cream puffs — those golden, airy shells filled with a cloud of smooth, sweet cream. This famous cream puff recipe combines the elegance of French choux pastry with a touch of homemade comfort, creating a dessert that feels both classic and unique. Light as air on the outside and creamy on the inside, each bite is pure bliss. Whether you’re serving them for a celebration, afternoon tea, or a simple weekend treat, these cream puffs will become your new signature dessert.

The Charm of Cream Puffs

Cream puffs (or choux à la crème in French) are made using pâte à choux — a special dough that puffs up beautifully without any yeast or baking powder. The magic lies in the steam created inside the dough while baking, forming a hollow center perfect for luscious filling. This recipe elevates the traditional puff by using a silky vanilla custard filling with a hint of whipped cream for added lightness, and a glossy dusting of powdered sugar or drizzle of chocolate for the perfect finishing touch.

Ingredients

For the Choux Pastry (Pâte à Choux):

  • 1 cup (240 ml) water

  • ½ cup (115 g) unsalted butter

  • 1 tbsp sugar

  • ¼ tsp salt

  • 1 cup (125 g) all-purpose flour

  • 4 large eggs (room temperature)

For the Cream Filling:

  • 2 cups (480 ml) whole milk

  • ½ cup (100 g) granulated sugar

  • 4 large egg yolks

  • ¼ cup (30 g) cornstarch

  • 2 tbsp unsalted butter

  • 1 ½ tsp pure vanilla extract

  • ½ cup (120 ml) heavy whipping cream (cold)

Optional Toppings:

  • Powdered sugar, for dusting

  • Melted chocolate, for drizzling

  • Caramel sauce, for a gourmet touch

Step 1: Making the Perfect Choux Pastry

Start by preheating your oven to 400°F (200°C). Line a large baking sheet with parchment paper.

In a medium saucepan, combine water, butter, sugar, and salt. Place over medium heat until the butter melts completely and the mixture just begins to boil. Immediately add the flour all at once, stirring vigorously with a wooden spoon until the dough forms a smooth ball and pulls away from the sides of the pan. This process cooks the flour slightly, ensuring your pastry puffs properly later.

Remove from heat and allow the dough to cool for 5–7 minutes — you don’t want it hot enough to cook the eggs. Then, add the eggs one at a time, beating well after each addition until the dough is smooth, glossy, and slightly sticky. The perfect consistency is when it forms soft peaks and slowly drops off the spoon.

Transfer the dough into a piping bag fitted with a large round or star tip. Pipe small mounds (about 1½ inches wide) onto your prepared baking sheet, leaving space between each one to allow for expansion.

Lightly wet your finger and smooth any pointed tops to ensure even puffing. Bake at 400°F (200°C) for 10 minutes, then reduce the temperature to 350°F (175°C) and bake for another 20–25 minutes, or until golden brown and crisp.

Do not open the oven door early — the steam must stay inside for them to puff up properly. Once baked, pierce each puff with a toothpick to release steam and prevent sogginess. Let them cool completely on a wire rack.

Step 2: Preparing the Dreamy Cream Filling

In a saucepan, warm the milk over medium heat until it’s just about to simmer. In a separate bowl, whisk together egg yolks, sugar, and cornstarch until pale and thick.

Slowly pour the hot milk into the egg mixture while whisking continuously to temper the eggs (this prevents curdling). Pour the entire mixture back into the saucepan and cook over medium heat, stirring constantly, until it thickens into a silky custard. You’ll know it’s ready when it coats the back of a spoon.

Remove from heat and stir in butter and vanilla. Transfer the custard to a bowl, press plastic wrap directly onto its surface (to avoid a skin forming), and refrigerate until chilled.

Once the custard has cooled, whip the heavy cream to soft peaks and gently fold it into the custard. This combination creates a luxuriously smooth and light pastry cream — not too dense, not too airy, but absolutely perfect.

Step 3: Filling the Puffs

When the pastry shells have cooled, slice them in half horizontally or create a small hole at the bottom using a knife or piping tip. Spoon or pipe the prepared cream filling inside until generously filled.

If you want a café-style presentation, pipe a little cream above the top shell for that extra flourish. Dust lightly with powdered sugar or drizzle with melted chocolate for a bakery-worthy look.

Step 4: Presentation and Serving

These famous cream puffs are best served chilled or at room temperature. Arrange them on a platter and watch as they disappear in moments! The crisp outer shell paired with the creamy vanilla filling creates a texture contrast that’s impossible to resist.

For a special twist, try these flavor variations:

  • Chocolate Cream Puffs: Add cocoa powder to the pastry cream or drizzle with dark chocolate ganache.

  • Coffee Infusion: Add 1 tsp espresso powder to the cream filling for a sophisticated mocha flavor.

  • Berry Delight: Add fresh raspberries or strawberries inside before filling for a burst of fruity freshness.

  • Caramel Kiss: Drizzle caramel sauce over the top and sprinkle with sea salt for a gourmet touch.

Tips for Perfect Cream Puffs

  1. Don’t rush the dough cooling: Adding eggs to hot dough will scramble them — patience pays off.

  2. Use room-temperature eggs: They incorporate more smoothly and help achieve a better puff.

  3. No peeking while baking: Opening the oven door releases steam, which can deflate your puffs.

  4. Pierce after baking: This step ensures the interior stays crisp and hollow.

  5. Chill before serving: The flavors develop beautifully after 30 minutes in the fridge.

The Story Behind Their Fame

Cream puffs originated in France during the 16th century, later gaining popularity worldwide for their delicate yet indulgent nature. What makes this recipe unique is its balance — a sturdy yet light pastry with a cream filling that’s rich but not heavy. It’s the kind of dessert that feels nostalgic, refined, and comforting all at once.

You don’t need fancy bakery equipment or special ingredients — just simple kitchen basics and a little patience. The result is a dessert so impressive it looks like it came straight out of a Parisian patisserie, yet it’s easy enough for anyone to master at home.

Conclusion

These Famous Cream Puffs are not just a dessert — they’re an experience. Each puff embodies craftsmanship and elegance, combining the crunch of golden pastry with the dreaminess of vanilla cream. With their delicate look and unforgettable flavor, they never fail to steal the show at any table.

Whether you’re baking them for a loved one, a party, or simply to indulge your sweet tooth, this recipe guarantees perfection every single time. One bite and you’ll understand why cream puffs have remained a beloved classic for centuries — and why this version is destined to be your most famous creation yet.

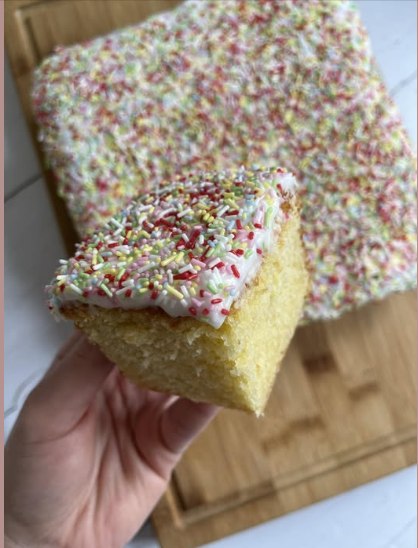
Pudding Sponge Cake

If you’ve ever dreamed of a dessert that melts in your mouth with the silky smoothness of pudding and the airy texture of sponge cake, this Pudding Sponge Cake will make your wish come true. It’s not just a cake—it’s a luscious fusion of two beloved classics. This recipe combines the light, cloud-like crumb of a sponge cake with the creamy decadence of pudding baked right into it, creating a dessert that’s moist from within and delightfully tender on the outside. Perfect for any celebration or just to spoil yourself, this unique recipe will become one of your favorites the moment you taste it.

What Makes This Pudding Sponge Cake Unique

Unlike traditional sponge cakes that rely on butter or oil for moisture, this one gets its soft, custard-like texture from an infused pudding layer baked directly in the batter. As the cake bakes, the pudding layer seeps through the sponge, creating natural pockets of creaminess without any frosting required. It’s a dessert that balances simplicity and indulgence beautifully—no fancy fillings or frostings, just pure comfort in every bite.

Ingredients

For the Sponge Cake Layer:

  • 1 cup (120g) all-purpose flour, sifted

  • 4 large eggs, separated

  • ¾ cup (150g) granulated sugar

  • 2 tablespoons warm water

  • 1 teaspoon pure vanilla extract

  • ½ teaspoon baking powder

  • ¼ teaspoon salt

For the Pudding Layer:

  • 2 cups (480ml) whole milk

  • 3 tablespoons cornstarch

  • ½ cup (100g) sugar

  • 2 egg yolks

  • 2 tablespoons unsalted butter

  • 1 teaspoon vanilla extract

  • A pinch of salt

Optional Toppings:

  • Whipped cream

  • Fresh berries or fruit compote

  • Powdered sugar for dusting

Step-by-Step Preparation

1. Prepare the Pudding Base

Start by making the pudding so it has time to cool before mixing into the cake.
In a medium saucepan, whisk together sugar, cornstarch, and salt. Add the milk slowly, whisking constantly to avoid lumps. Place the saucepan over medium heat and cook until the mixture thickens, stirring continuously—this will take about 5–7 minutes. Once it begins to bubble gently, remove from the heat and quickly whisk in the egg yolks (temper them first by adding a small spoonful of hot mixture to the yolks before combining). Stir in butter and vanilla until smooth and glossy. Set aside to cool slightly while you prepare the sponge.

The pudding should be silky, not too thick—similar to pastry cream. This ensures it blends seamlessly with the cake layer later on.

2. Whip the Egg Whites

For the sponge cake, separate the eggs carefully. Place the egg whites in a clean bowl and whip with an electric mixer until foamy. Gradually add half of the sugar and beat until stiff, glossy peaks form. This is what gives the cake its airy rise without baking powder doing all the work.

3. Mix the Egg Yolks and Sugar

In another bowl, whisk together the egg yolks, remaining sugar, vanilla extract, and warm water until the mixture becomes pale and thick. The warm water helps dissolve the sugar and gives the yolks more volume.

4. Combine Dry Ingredients

In a separate bowl, sift the flour, baking powder, and salt together. Gradually fold the dry ingredients into the yolk mixture until just combined. Be gentle—you don’t want to lose the airy structure.

5. Fold in the Egg Whites

Now, carefully fold the beaten egg whites into the yolk-flour mixture using a spatula. Add them in three portions, mixing gently after each addition. This step ensures the cake remains fluffy and light. The batter should look smooth and airy—almost like a mousse.

6. Layer the Cake and Pudding

Preheat your oven to 325°F (160°C) and lightly grease a deep 8-inch square or round cake pan. Pour two-thirds of the sponge cake batter into the prepared pan, then spoon over the pudding layer gently, letting it settle naturally over the batter. Pour the remaining batter on top and use a knife or skewer to swirl the layers just once or twice—this creates a marbled pudding effect inside the cake.

7. Bake to Perfection

Bake the cake in the preheated oven for about 40–45 minutes, or until the top is golden brown and a toothpick inserted into the center comes out mostly clean (a little pudding residue is fine). The magic happens during baking—the pudding sinks slightly, creating a soft, creamy center while the sponge sets around it.

Once baked, remove the cake from the oven and let it cool in the pan for 10 minutes before transferring it to a wire rack. The cake will settle slightly as it cools, revealing its signature custardy texture.

8. Chill and Serve

You can serve the cake warm for a comforting pudding-like experience, or chill it for a few hours to enjoy it as a cool, creamy dessert. Dust the top with powdered sugar, or serve slices with a dollop of whipped cream and fresh berries.

Texture and Taste

Each bite of this pudding sponge cake is a delightful contrast—soft and spongy on top, velvety and custard-like in the middle, and tender underneath. The flavor is delicate, sweet without being overwhelming, with a hint of vanilla and butter that enhances the pudding’s creaminess. It’s the kind of dessert that doesn’t need any elaborate presentation; its texture and aroma speak for themselves.

Tips for the Perfect Pudding Sponge Cake

  1. Room Temperature Eggs: Always use room-temperature eggs—they whip up to a greater volume, creating a fluffier sponge.

  2. Don’t Overmix: Once the egg whites are added, fold gently to retain air bubbles.

  3. Temperature Control: Bake at a lower temperature for even cooking—too hot, and the sponge will set before the pudding layer integrates.

  4. Cooling Time: Let the cake rest before cutting to allow the pudding to firm slightly.

  5. Flavor Variations: Try chocolate pudding for a decadent version, or butterscotch for a caramel twist. You can even infuse the milk with coffee or lemon zest for added aroma.

Creative Variations

  • Chocolate Lovers’ Dream: Replace 2 tablespoons of flour with cocoa powder and use chocolate pudding instead of vanilla. Top with a light chocolate ganache for pure indulgence.

  • Tropical Bliss: Add shredded coconut and use coconut milk in the pudding layer. Top with mango slices for a sunny, tropical finish.

  • Caramel Surprise: Swirl caramel sauce through the batter before baking for ribbons of sweet, golden goodness.

  • Lemon Pudding Sponge Cake: Infuse the pudding with lemon zest and juice, and serve with a dusting of powdered sugar for a refreshing, citrusy twist.

Storage

This cake keeps beautifully for 3–4 days when refrigerated in an airtight container. The pudding keeps it moist, so it never dries out. In fact, the flavor deepens after a day as the pudding fully settles into the sponge. You can also freeze slices individually for up to one month—just thaw in the fridge overnight before serving.

Final Thoughts

This Pudding Sponge Cake is a testament to how two simple desserts can unite to create something extraordinary. It’s elegant enough for guests yet simple enough for a cozy family treat. The balance of airy sponge and creamy pudding makes it stand out from ordinary cakes—it’s comforting, refined, and impossible to resist.

Once you make it, don’t be surprised if it becomes a family favorite. Whether served warm with a drizzle of cream or cold from the fridge on a summer afternoon, every slice delivers a tender reminder of why baking is truly a joy.

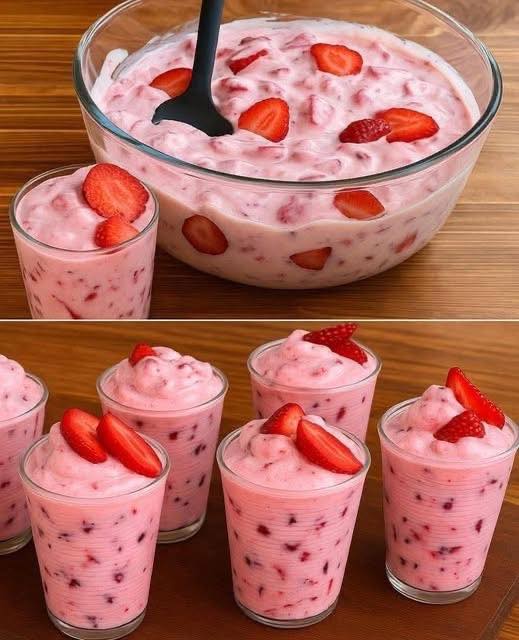
Easy Strawberry Cloud Delight

When strawberries are at their sweetest and most fragrant, there’s nothing better than turning them into a dessert that captures their natural charm. This Easy Strawberry Cloud Delight is the kind of treat that feels like you’re eating a strawberry-infused dream — light, airy, and gently sweet with a velvety texture that melts on your tongue. It’s the perfect balance between freshness and indulgence.

This dessert is incredibly easy to make — no baking, no complicated steps, and only a few everyday ingredients. Think of it as a mix between a mousse, a cheesecake, and a trifle — layered with whipped cream, creamy strawberry filling, and buttery cookie crumbs. Whether you’re preparing it for a lazy weekend treat, a surprise for guests, or a refreshing summer dessert, this strawberry cloud is destined to be a hit.

 Ingredients

For the Base:

  • 1 ½ cups crushed digestive biscuits or graham crackers

  • 5 tablespoons melted butter

  • 1 tablespoon sugar (optional, for extra sweetness)

For the Strawberry Cloud Layer:

  • 2 cups fresh strawberries, hulled and sliced

  • ½ cup sugar

  • 1 tablespoon lemon juice

  • 1 tablespoon cornstarch

  • 1 cup heavy whipping cream, chilled

  • 1 cup cream cheese, softened

  • ½ cup powdered sugar

  • 1 teaspoon vanilla extract

For the Topping:

  • ½ cup whipped cream (for garnish)

  • A few sliced strawberries

  • Crushed biscuits or white chocolate shavings (optional)

 Step-by-Step Directions

Step 1: Make the Base

Start by preparing the base that gives the dessert its subtle crunch. In a mixing bowl, combine crushed biscuits with melted butter and sugar (if using). Mix until the crumbs are evenly coated and resemble wet sand.

Press this mixture into the bottom of serving glasses, jars, or a shallow dish. You can refrigerate it for about 10–15 minutes to set while you prepare the filling. This buttery foundation adds a beautiful contrast to the soft strawberry cream.

Step 2: Cook the Strawberry Compote

Now it’s time to create that vibrant strawberry layer bursting with flavor. In a small saucepan, add the sliced strawberries, sugar, lemon juice, and cornstarch. Cook over medium heat, stirring often, until the strawberries break down and the sauce thickens — about 6–8 minutes.

Once it’s thick and glossy, remove from the heat and let it cool completely. This homemade compote adds a natural fruitiness that balances perfectly with the creamy layers to come. If you prefer a smoother texture, you can blend it once cooled.

Step 3: Prepare the Strawberry Cream

In a large bowl, beat cream cheese with powdered sugar and vanilla extract until smooth and creamy. It’s important to use softened cream cheese so you don’t end up with lumps. Once that’s silky, gently fold in the cooled strawberry compote until you get a lovely pink color and fruity aroma.

In a separate chilled bowl, whip the heavy cream until it forms soft peaks. Carefully fold this whipped cream into the strawberry-cream cheese mixture. The result should be fluffy and airy — like a cloud. This is the heart of your dessert, combining the tang of strawberries with the richness of cream cheese and the lightness of whipped cream.

Step 4: Assemble the Layers

Take your chilled biscuit bases out of the fridge. Spoon or pipe the strawberry cloud mixture evenly over the crumb layer. Smooth the tops gently with a spatula or the back of a spoon. For an elegant look, alternate layers of the cream and a drizzle of extra strawberry compote if you like.

Once all your glasses or bowls are filled, refrigerate for at least 2–3 hours (or overnight if possible). Chilling helps the dessert set and enhances the flavor, making it cool and refreshing with every bite.

Step 5: Add the Finishing Touches

Before serving, top each glass with a dollop of whipped cream and garnish with fresh strawberry slices. For extra flair, sprinkle some crushed biscuits or white chocolate shavings on top. The combination of textures — creamy, crunchy, and fruity — is simply irresistible.


Tips for Perfect Results

  1. Use ripe strawberries: The sweeter your strawberries, the better your dessert will taste. If your berries are slightly tart, add an extra teaspoon of sugar to the compote.

  2. Don’t skip the chill time: This step ensures the dessert sets properly and gives it that light, mousse-like consistency.

  3. For a dairy-free version: Use coconut cream instead of heavy cream and vegan cream cheese — it’ll add a tropical note that complements the strawberries beautifully.

  4. Add a surprise layer: Try adding a thin layer of crushed meringue, vanilla sponge cake, or even strawberry jelly between layers for an interesting twist.

  5. Make it ahead: This dessert stores well in the fridge for up to 3 days, making it a wonderful make-ahead option for parties or busy weekends.


The Secret Behind the “Cloud” Texture

The name Strawberry Cloud Delight comes from the heavenly texture — not too dense like cheesecake and not too light like whipped cream. The secret lies in gently folding the whipped cream into the cream cheese and strawberry base. This technique traps air, creating a mousse-like consistency that’s both fluffy and rich.

When you take the first spoonful, you’ll notice how it melts in your mouth, leaving behind the gentle sweetness of strawberries and the creamy smoothness of cheese and cream — a combination that’s both indulgent and refreshing.

 Variations to Try

This recipe is endlessly customizable. Once you’ve mastered the basic version, try experimenting with these ideas:

  • Strawberry Lemon Dream: Add a teaspoon of lemon zest to the cream layer for a zesty twist.

  • Chocolate Strawberry Cloud: Add a drizzle of melted chocolate or a layer of chocolate cookie crumbs for a decadent flavor contrast.

  • Berry Medley: Mix in blueberries or raspberries with the strawberries for a colorful and tangy variation.

  • Mini Strawberry Parfaits: Layer the mixture in small shot glasses for a party-perfect dessert that guests can grab and go.

Why You’ll Love This Dessert

This dessert isn’t just about taste — it’s about experience. Every layer serves a purpose:

  • The crumbly biscuit base provides texture and buttery flavor.

  • The strawberry cream adds lightness and fruity aroma.

  • The whipped topping finishes it all with elegance and smoothness.

It’s the perfect dessert for any season, but especially wonderful during warmer months when you crave something chilled and fruity. It’s simple enough for everyday indulgence but special enough to serve at gatherings.

 Final Thoughts

The beauty of Easy Strawberry Cloud Delight lies in its simplicity and charm. It takes humble ingredients — strawberries, cream, biscuits — and transforms them into a visually stunning, melt-in-your-mouth creation. Every bite feels like a burst of strawberry sweetness balanced by silky creaminess and buttery crunch.

So, whether you’re craving something quick to satisfy your sweet tooth or want to impress guests without spending hours in the kitchen, this dessert is the perfect solution. It’s light, beautiful, and undeniably delicious — a strawberry lover’s dream in every spoonful.