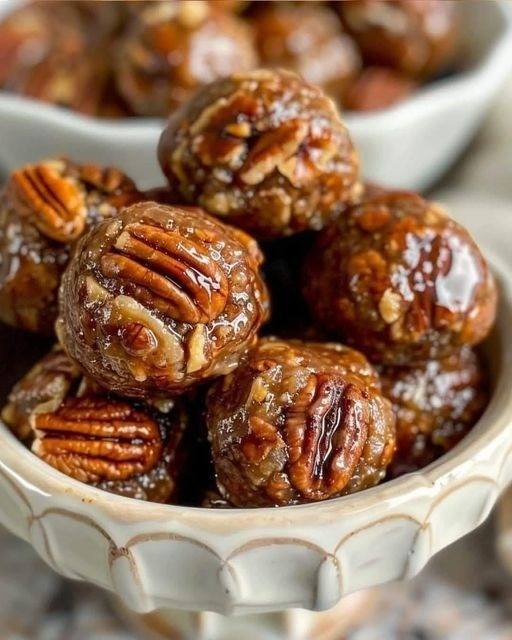
Pecan Pie Balls

If you love the rich, buttery flavor of classic pecan pie but want a treat that’s portable, no-bake, and irresistibly snackable, these Pecan Pie Balls are the perfect indulgence. They capture everything you adore about pecan pie — the toasted nuts, caramel-like sweetness, and melt-in-your-mouth richness — all rolled into bite-sized perfection. Whether for holiday gatherings, dessert tables, or a cozy snack with coffee, these little orbs of southern sweetness deliver pure comfort in every bite.

The Inspiration Behind the Recipe

The magic of pecan pie lies in its simplicity — butter, sugar, and pecans coming together to create something extraordinary. But sometimes, you want the same decadence without the oven. That’s where this recipe shines. Instead of baking, we blend roasted pecans with graham cracker crumbs, brown sugar, maple syrup, and a touch of vanilla to create a dough that’s rolled into balls and dipped in luscious chocolate. The result is a truffle-like confection that’s chewy, nutty, and blissfully sweet.

Think of them as pecan pie meets chocolate truffle — smooth on the outside, crunchy and caramel-rich inside.

Ingredients

For the Pecan Pie Ball Mixture:

  • 2 cups finely chopped pecans (lightly toasted)

  • 1 ½ cups graham cracker crumbs

  • 1 cup brown sugar (packed)

  • ¼ cup pure maple syrup or light corn syrup

  • ½ teaspoon ground cinnamon

  • ½ teaspoon salt

  • 1 teaspoon pure vanilla extract

  • 2 tablespoons melted butter

For the Chocolate Coating:

  • 2 cups semi-sweet or dark chocolate chips

  • 1 tablespoon coconut oil or shortening (for a smoother coating)

  • Extra chopped pecans or sea salt for garnish (optional)

Step-by-Step Instructions

1. Toast the Pecans

Preheat your oven to 350°F (175°C) and spread the chopped pecans on a baking sheet. Toast them for 6–8 minutes, stirring halfway through. This brings out their natural oils and intensifies the nutty aroma — the foundation of your pecan pie flavor. Once done, let them cool completely before adding to the mixture.

2. Create the Base Mixture

In a large mixing bowl, combine the toasted pecans, graham cracker crumbs, brown sugar, cinnamon, and salt. Stir until evenly blended. The graham crumbs act as the “crust,” binding the sweetness with the earthy crunch of pecans.

In a smaller bowl, whisk together the melted butter, maple syrup, and vanilla extract until smooth. Pour this liquid mixture into the dry ingredients and stir until it all comes together into a sticky dough.

If it feels too dry, add an extra teaspoon of syrup at a time until the texture resembles cookie dough — soft but moldable.

3. Roll into Balls

Using your hands or a small cookie scoop, portion out the dough and roll it into 1-inch balls. Place them on a parchment-lined baking tray. You should get around 24–30 pecan pie balls, depending on size.

Place the tray in the refrigerator for 30 minutes to help the balls firm up before coating. This step is crucial for keeping their shape when dipped in chocolate.

4. Melt the Chocolate

In a microwave-safe bowl, combine chocolate chips and coconut oil. Heat in 20-second intervals, stirring between each until the mixture is smooth and glossy. Alternatively, you can melt it over a double boiler for more control.

5. Dip and Decorate

Using a fork or dipping tool, coat each chilled pecan ball in the melted chocolate, letting excess drip off before placing it back on the parchment paper. For an extra touch of beauty and texture, sprinkle a few crushed pecans or a pinch of sea salt on top before the chocolate sets.

6. Chill to Perfection

Refrigerate the tray for another 30–45 minutes or until the chocolate hardens. Once set, transfer your pecan pie balls to an airtight container. They’ll keep fresh for up to two weeks in the fridge or three months in the freezer.

Flavor Variations & Add-Ins

  • Bourbon Twist: Add a tablespoon of bourbon to the mixture for a Southern flair that enhances the pecan and caramel notes.

  • White Chocolate Coating: Swap the dark chocolate for white chocolate for a creamier, sweeter bite.

  • Espresso Kick: Mix in a teaspoon of espresso powder to deepen the flavor and balance the sweetness.

  • Coconut Crunch: Add ¼ cup of shredded coconut to the mixture for a tropical texture contrast.

These variations let you reinvent the recipe each time, making it a signature dessert for any occasion.

Serving Ideas

Serve these pecan pie balls on a decorative platter lined with mini cupcake liners for a professional touch. They pair beautifully with hot coffee, chai latte, or even a small glass of bourbon or rum for adults. During holidays, they make delightful additions to cookie exchanges, gift boxes, or dessert charcuterie boards.

You can even crumble them slightly and sprinkle over vanilla ice cream or pancakes for a quick pecan pie sundae moment.

Why You’ll Love This Recipe

  1. No baking required: Perfect for busy days or warm weather when you want dessert without turning on the oven.

  2. Authentic flavor: Tastes just like classic pecan pie, but easier to make and eat.

  3. Customizable: From bourbon to white chocolate, you can tailor it to your taste.

  4. Portable treats: Great for parties, picnics, or snacking on the go.

  5. Crowd-pleaser: Every bite has that buttery, nutty, caramel flavor that makes pecan pie a timeless favorite.

Tips for Success

  • Don’t skip toasting the pecans. It’s the secret to that rich, roasted flavor.

  • Use high-quality chocolate. Since it’s the outer layer, it defines the final taste.

  • Keep hands slightly damp when rolling to prevent sticking.

  • Let them chill fully before dipping, so they don’t fall apart in the chocolate.

  • For extra shine, lightly drizzle melted chocolate on top after chilling.

Conclusion

These Pecan Pie Balls are a modern twist on a classic dessert that embodies southern warmth and homemade comfort. Every bite bursts with caramel sweetness, buttery richness, and toasted nut flavor — the essence of pecan pie, reimagined in the most irresistible way.

Whether you serve them during holidays or keep a stash in your fridge for sweet cravings, they’re guaranteed to bring smiles, comfort, and a little taste of nostalgia with every bite.

White Chocolate Strawberry Cheesecake

If you’re searching for a dessert that perfectly blends elegance, indulgence, and the freshness of ripe strawberries, this White Chocolate Strawberry Cheesecake is pure perfection. It combines the creamy decadence of white chocolate, the luscious tang of cream cheese, and the bright sweetness of strawberries—all layered on a buttery graham cracker crust. This cheesecake is not only visually stunning but also irresistibly smooth and flavorful. Whether for a dinner party, a birthday celebration, or simply to treat yourself, this recipe promises to impress every sweet tooth at the table.

Ingredients

For the crust:

  • 1 ½ cups graham cracker crumbs

  • ¼ cup granulated sugar

  • ½ cup unsalted butter, melted

For the filling:

  • 12 ounces (340g) white chocolate, chopped

  • 24 ounces (680g) cream cheese, softened

  • ¾ cup granulated sugar

  • 3 large eggs, room temperature

  • 1 cup sour cream

  • 1 teaspoon vanilla extract

  • 1 tablespoon lemon juice (optional, for balance)

For the strawberry topping:

  • 2 cups fresh strawberries, sliced

  • ¼ cup granulated sugar

  • 1 tablespoon cornstarch

  • ¼ cup water

  • 1 teaspoon lemon juice

  • ½ teaspoon vanilla extract

Optional garnish:

  • White chocolate curls or shavings

  • Fresh whole strawberries

  • Whipped cream for serving

Step 1: Make the Crust

Begin by preheating your oven to 325°F (160°C). In a mixing bowl, combine graham cracker crumbs, sugar, and melted butter. Stir until the mixture resembles wet sand. Press the mixture firmly into the bottom of a 9-inch springform pan, using the back of a spoon to create an even layer. Bake the crust for 10 minutes, then set it aside to cool while you prepare the filling.

This simple crust adds a delicate crunch that perfectly balances the creamy texture of the cheesecake. If you prefer a slightly nutty flavor, you can mix in a few crushed almonds or pecans.

Step 2: Melt the White Chocolate

Place the chopped white chocolate in a heatproof bowl set over a pot of gently simmering water (double boiler method). Stir until smooth and fully melted. Remove from heat and let it cool slightly.

White chocolate can be temperamental—it burns easily, so take care to melt it slowly. This silky component adds a luxurious sweetness to the cheesecake without overpowering the tang of the cream cheese.

Step 3: Prepare the Cheesecake Filling

In a large mixing bowl, beat the softened cream cheese with an electric mixer on medium speed until smooth and creamy, about 2–3 minutes. Gradually add the sugar and continue beating until fully incorporated.

Add the eggs, one at a time, mixing on low speed after each addition. Next, beat in the sour cream, vanilla extract, and lemon juice. Finally, gently fold in the melted white chocolate until fully combined.

The key here is not to overmix—too much air in the batter can cause cracks during baking. The mixture should be silky and thick, with the white chocolate giving it a beautiful glossy sheen.

Step 4: Bake the Cheesecake

Pour the filling over the cooled crust and smooth the top with a spatula. Wrap the outside of the springform pan with aluminum foil to prevent water from seeping in. Place the pan into a larger roasting pan and fill the roasting pan with about an inch of hot water—this creates a gentle water bath that ensures an even bake and prevents cracks.

Bake for 60–70 minutes, or until the edges are set but the center still has a slight wobble. Turn off the oven and crack the door open slightly, allowing the cheesecake to cool inside for about an hour.

Afterward, remove it from the oven, take off the foil, and let it cool completely at room temperature. Then cover and refrigerate for at least 6 hours, or overnight for best results.

Step 5: Make the Strawberry Topping

While the cheesecake chills, prepare the strawberry topping. In a small saucepan, combine sliced strawberries, sugar, cornstarch, water, lemon juice, and vanilla extract. Stir over medium heat until the strawberries release their juices and the mixture thickens into a glossy sauce, about 5–7 minutes.

Remove from heat and let it cool completely before spooning over the chilled cheesecake. This vibrant strawberry layer adds a burst of freshness and color that beautifully complements the richness of the white chocolate base.

Step 6: Assemble and Garnish

Once the cheesecake is fully chilled and set, carefully remove it from the springform pan. Spoon the cooled strawberry topping evenly over the surface, letting a few drips cascade down the sides for a rustic, irresistible look.

For an elegant finish, top with white chocolate curls, a swirl of whipped cream, and fresh whole strawberries. The red-and-white contrast makes this dessert visually stunning—a showpiece worthy of any occasion.

Tips for Success

  1. Use full-fat cream cheese and sour cream for the best creamy texture.

  2. Avoid overbaking—a slightly jiggly center means the cheesecake will be perfectly smooth once chilled.

  3. Chill overnight to allow the flavors to meld and the texture to firm up beautifully.

  4. Slice cleanly by dipping a knife in hot water and wiping it dry between each cut.

Serving Suggestions

Serve chilled slices with a dollop of whipped cream or a drizzle of melted white chocolate for extra decadence. Pair with a cup of coffee, hot tea, or even a glass of sparkling rosé for a delightful dessert experience.

This White Chocolate Strawberry Cheesecake makes a perfect centerpiece for celebrations like Valentine’s Day, Mother’s Day, or anniversaries. Its luxurious flavor profile—creamy, fruity, and slightly tangy—ensures it appeals to every palate.

Final Thoughts

This White Chocolate Strawberry Cheesecake is more than just a dessert—it’s an experience. Each bite offers a beautiful contrast: the velvety smoothness of the cheesecake filling, the rich sweetness of white chocolate, and the refreshing tang of strawberries. The buttery crust ties everything together, giving structure and balance.

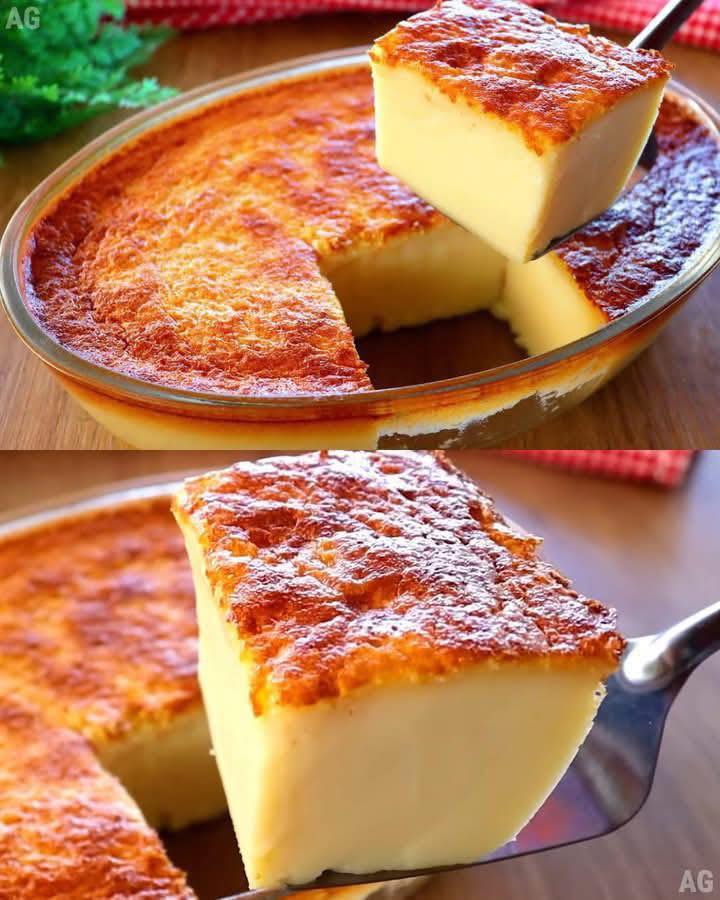
Creamy Milk Cake

If you’re looking for a dessert that feels like pure indulgence, Creamy Milk Cake is your answer. This luscious, milky treat—often inspired by classic tres leches and South Asian milk cakes—combines the richness of cream, the sweetness of condensed milk, and the softness of a perfectly baked sponge cake. Every bite delivers a velvety, melt-in-the-mouth experience, making it an irresistible dessert for any occasion, from family gatherings to festive dinners.

Ingredients

For the Cake:

  • 1 cup all-purpose flour

  • 1 ½ teaspoons baking powder

  • ¼ teaspoon salt

  • 5 large eggs, separated

  • ¾ cup granulated sugar (divided)

  • 1 teaspoon pure vanilla extract

  • ¼ cup whole milk

For the Milk Soak (Cream Mixture):

  • 1 cup evaporated milk

  • 1 cup sweetened condensed milk

  • 1 cup heavy cream or whole milk

For the Cream Topping:

  • 1 ½ cups heavy whipping cream

  • 3 tablespoons powdered sugar

  • 1 teaspoon vanilla extract

Optional Garnish:

  • Toasted almond flakes or crushed pistachios

  • Drizzle of caramel or dulce de leche

  • Fresh fruit like strawberries or mango slices

Step 1: Preparing the Sponge Cake

Start by preheating your oven to 350°F (175°C). Grease a 9×13-inch baking dish with butter or line it with parchment paper.

In a small bowl, sift together the flour, baking powder, and salt. This ensures an even, airy texture in the cake. In a separate large bowl, beat the egg yolks with ½ cup sugar until the mixture becomes pale and creamy. Add the vanilla extract and milk, and continue beating until fully combined.

In another clean bowl, whisk the egg whites until soft peaks form. Gradually add the remaining ¼ cup of sugar while continuing to whisk, until stiff peaks develop. This step gives the cake its signature light and fluffy texture.

Gently fold the whipped egg whites into the yolk mixture using a spatula, alternating with the dry ingredients. Take care not to overmix—the goal is to keep the batter airy. Pour the batter into your prepared baking dish and bake for 25 to 30 minutes, or until a toothpick inserted into the center comes out clean.

Once baked, remove from the oven and allow the cake to cool for 10 minutes. Using a fork or skewer, poke small holes all over the surface—this will help the milk mixture seep deep into the sponge later.

Step 2: Making the Creamy Milk Soak

In a mixing bowl, combine the evaporated milk, sweetened condensed milk, and heavy cream. Whisk until smooth and fully blended. This tri-milk combination is what gives the cake its creamy, dreamy character.

When the cake is still slightly warm, pour the milk mixture slowly and evenly over the entire surface. Watch as it soaks in—this is the magical step that transforms a simple sponge into a luxurious milk cake. Let it rest for about 30 minutes at room temperature, then refrigerate it for at least 4 hours, or preferably overnight. The longer it chills, the creamier and richer it becomes.

Step 3: Whipping the Topping

Just before serving, prepare the whipped cream topping. In a chilled mixing bowl, beat the heavy cream with powdered sugar and vanilla extract until soft peaks form. Spread this whipped cream evenly over the chilled cake, creating a thick, luscious layer.

You can leave it simple and elegant, or elevate it with a sprinkle of crushed nuts, a drizzle of caramel, or slices of fresh fruit. Each topping adds its own charm and texture to this silky dessert.

Step 4: Serving and Storing

Cut the cake into squares or rectangles using a sharp knife, wiping between slices for neat edges. Each piece should be creamy and slightly moist, with the milk mixture glistening through the sponge.

Serve chilled for the best experience—every bite should feel cold, creamy, and decadently smooth. If you want an extra luxurious twist, drizzle a bit of cold milk or condensed milk on top before serving.

This cake stores beautifully in the refrigerator for up to three days. The flavors deepen as it sits, making it even more delightful the next day.

Tips for a Perfect Creamy Milk Cake

  1. Use room temperature eggs – This helps achieve maximum volume when whipping.

  2. Don’t overbake the cake – A slightly moist sponge absorbs milk better.

  3. Let it chill overnight – The flavor and texture improve with time.

  4. Balance the sweetness – If you prefer a lighter sweetness, reduce condensed milk slightly and replace with extra evaporated milk.

  5. Add a flavor twist – Infuse the milk mixture with cardamom, saffron, or rosewater for a South Asian flair.

Why This Cake Is So Special

What sets this Creamy Milk Cake apart from traditional milk-based desserts is the harmony of textures. The base is airy yet rich, the soaked layer is smooth and velvety, and the whipped cream adds a cloud-like finish. It’s not just a dessert—it’s an experience that melts on your tongue and leaves a lasting impression.

This cake embodies comfort and elegance in every slice. The simplicity of the ingredients hides the sophistication of its flavor. Whether served at a family dinner, birthday celebration, or festive holiday, it’s sure to steal the spotlight.

Final Thoughts

Creamy Milk Cake is proof that magic can happen when milk meets sponge. It’s a dessert that blends the best of home-style baking with the sophistication of patisserie elegance. With every forkful, you’ll taste the rich creaminess, the soft sweetness, and the light airiness that make this cake so memorable.


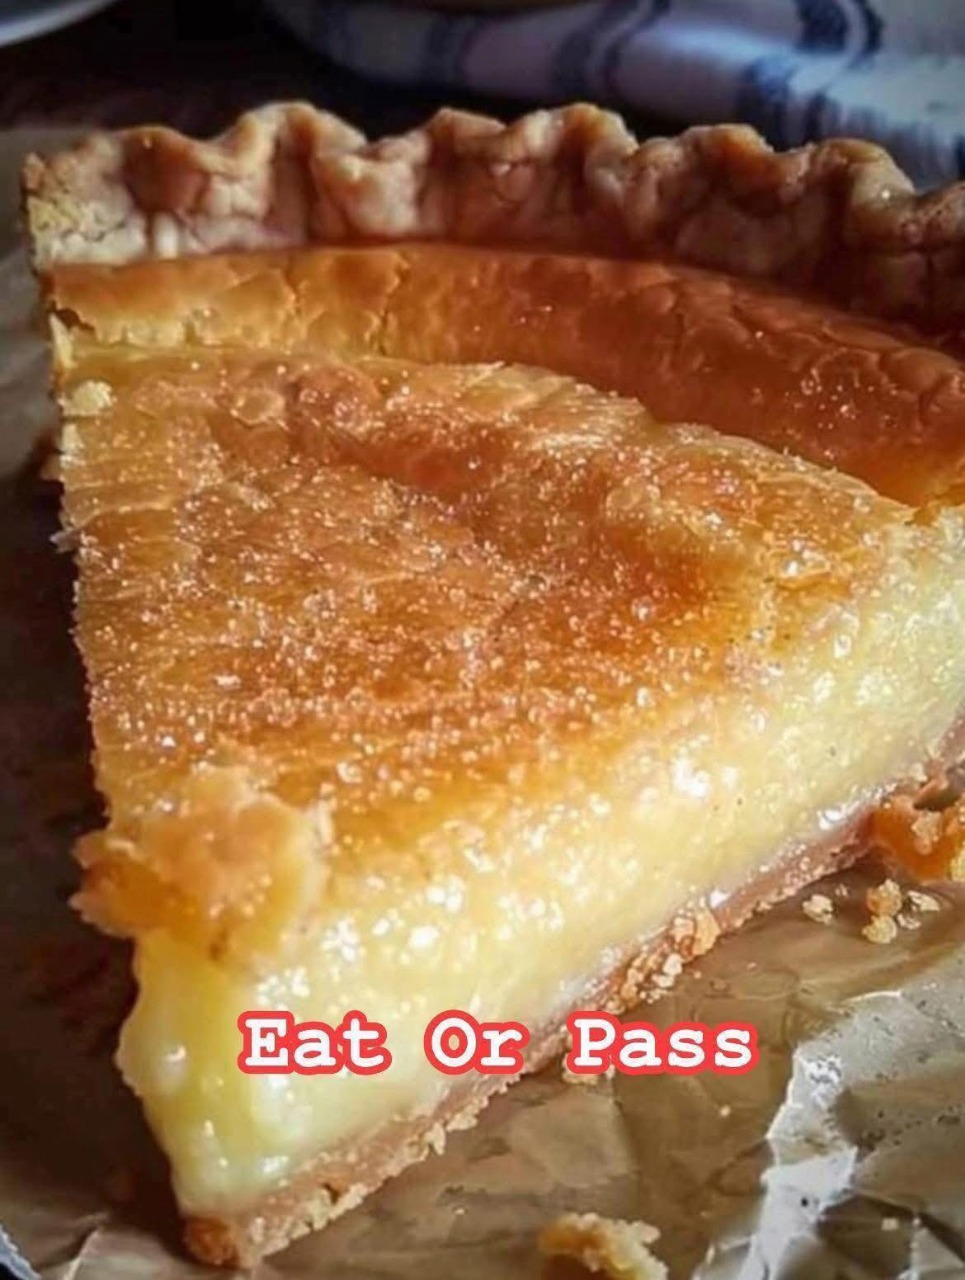
Nannie’s Old-Fashioned Buttermilk Pie

There are recipes that taste good, and then there are recipes that feel like home. Nannie’s Buttermilk Pie belongs to the second kind—the kind passed down through hands that measured by memory and baked with love instead of timers. It’s the pie your grandmother cooled on the windowsill, the one that smelled like butter, sugar, and warm vanilla gently drifting through a summer kitchen. The crust flakes just enough, and the filling is delicate, custard-smooth, lightly tangy from the buttermilk, and sweet without ever being heavy. It’s humble. It’s simple. It’s unforgettable.

This old-fashioned pie comes from the rural tradition of making dessert with what you already had in the pantry: eggs, sugar, butter, and cultured milk. While some pies wear frosting, crumble, or cream on their sleeves, Nannie’s Buttermilk Pie sits proudly in its simplicity. Its beauty is its plainness. The magic happens in the oven, where a silky custard sets into a golden top that cracks just slightly as it cools. Serve it warm or chilled—either way, it melts into comfort.

Ingredients

For the Crust (homemade is best, but store-bought works too):

  • 1 ¼ cups all-purpose flour

  • ½ teaspoon salt

  • 1 tablespoon sugar

  • ½ cup cold unsalted butter, cut into small cubes

  • 3–4 tablespoons ice water

For the Buttermilk Filling:

  • 1 cup buttermilk (shake before using)

  • 1 ½ cups granulated sugar

  • 3 large eggs, room temperature

  • ½ cup unsalted butter, melted and slightly cooled

  • 1 tablespoon all-purpose flour

  • 1 teaspoon pure vanilla extract

  • 1 tablespoon lemon juice

  • ½ teaspoon ground nutmeg (plus a pinch more for the top)

  • A tiny pinch of salt

How to Make the Pie

Step 1: Prepare the Crust

  1. In a medium mixing bowl, stir together the flour, salt, and sugar.

  2. Add the cold butter cubes. Using your fingertips or a pastry cutter, blend until the mixture resembles coarse breadcrumbs with a few pea-sized butter bits remaining.

  3. Add ice water one tablespoon at a time, mixing gently until the dough just holds together. Do not overwork.

  4. Shape into a disk, wrap in plastic wrap, and chill at least 30 minutes.

Once chilled, roll the dough into a circle and place it into a 9-inch pie pan. Trim excess and crimp the edges. Place into the freezer while you make the filling. A cold crust is key to avoiding soggy bottoms.

Step 2: Make the Filling

  1. In a large bowl, whisk the eggs until smooth.

  2. Add the sugar and whisk until the mixture becomes pale and slightly thickened.

  3. Whisk in the flour and salt.

  4. Stir in the melted butter, vanilla, and lemon juice.

  5. Finally, whisk in the buttermilk until the filling is silky and uniform.

This batter should be pourable but creamy, not thin.

Step 3: Bake

  1. Preheat your oven to 350°F (175°C).

  2. Remove the pie crust from the freezer.

  3. Pour the filling into the unbaked crust.

  4. Sprinkle a light dusting of nutmeg across the top.

  5. Bake for 45–55 minutes, or until the center is just set—it should have a slight jiggle like soft-set custard, not sloshy.

If the crust begins to brown too deeply, tent lightly with foil.

Step 4: Cool and Serve

Let the pie cool on the counter for at least 1 hour. The flavors deepen and the custard finishes setting as it cools. Serve warm, room temperature, or cold—each version offers its own comfort.

Flavor Notes & Tips

  • Don’t skip the lemon juice. The acidity brightens the custard and keeps the sweetness balanced.

  • Real buttermilk—not milk with vinegar—is key. It provides flavor and a velvety texture that can’t be duplicated.

  • Nutmeg is essential. It gives that old-fashioned bakery aroma that makes this pie nostalgic.

Serving Ideas

  • A light dusting of powdered sugar across the top makes it picture-perfect.

  • Serve with a dollop of softly whipped cream—not too sweet.

  • Fresh berries add a burst of brightness, especially in summer.

How to Store

This pie stores beautifully—another sign of a true heirloom recipe.

  • Refrigerator: Cover loosely and store for up to 4 days.

  • Freezer: Wrap slices and freeze up to 2 months. Thaw overnight in the fridge.

The Story in Every Slice

Buttermilk Pie is more than a dessert—it’s a memory. It’s the pie you make when someone comes home, when someone needs cheering, when neighbors stop by unexpectedly, or when you just need the kitchen to smell like love again. When you cut into this golden, trembling custard and take that first delicate bite, you taste time: flour-dusted aprons, wooden rolling pins, conversations spoken in soft voices over coffee.

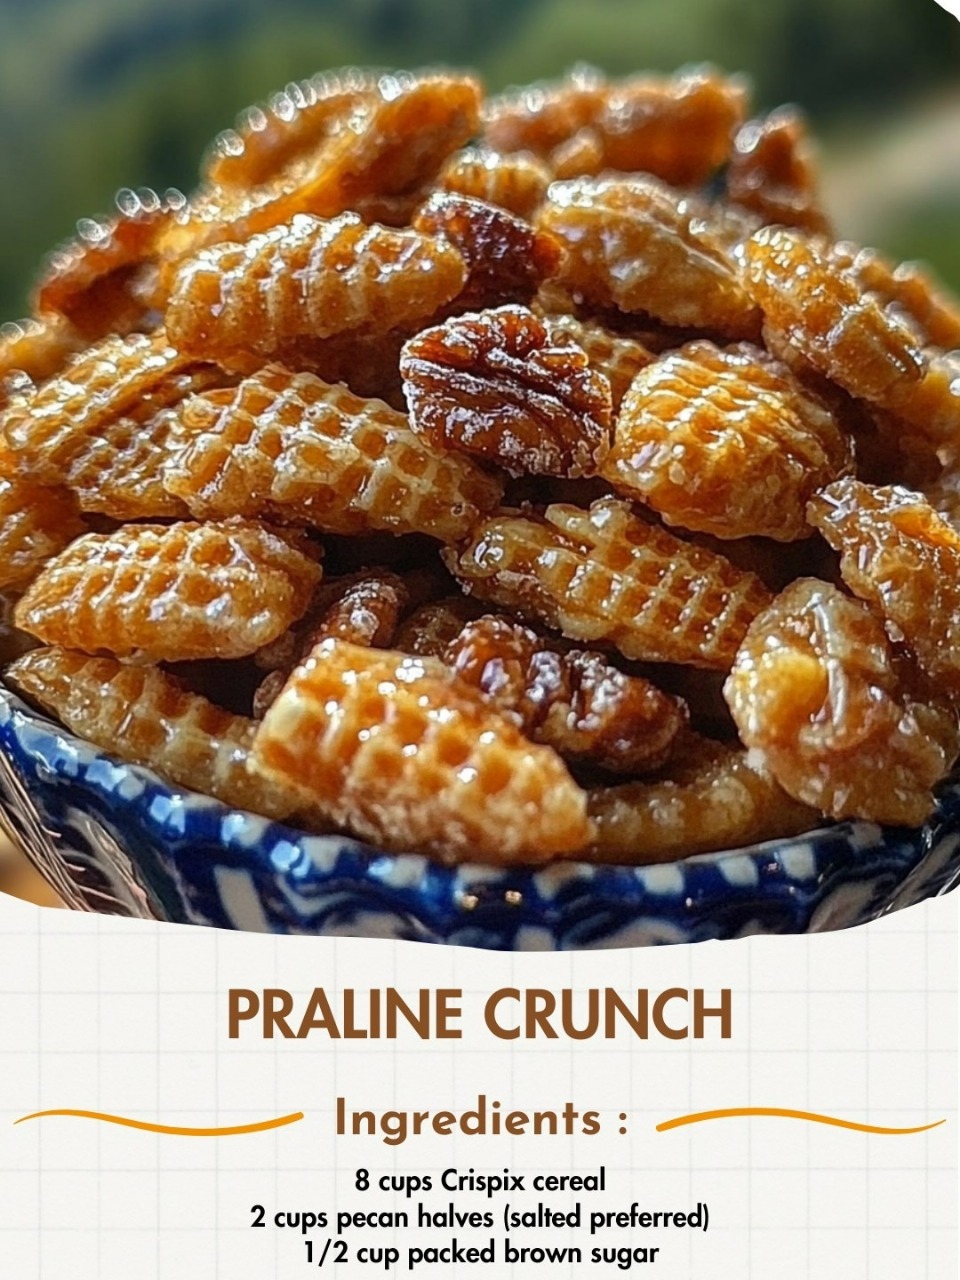
Praline Crunch

Praline Crunch is the kind of snack that feels like it came straight from a Southern grandma’s candy tin—warm, buttery, sweet, toasty, and absolutely irresistible. It’s a mix of crispy cereal clusters coated in a glossy praline caramel glaze made from butter, brown sugar, vanilla, and pecans. The result is a snack that crunches gently at first and then melts into a caramel-pecan finish that makes it almost impossible to stop eating. If you love the flavor of pecan pralines, this is basically that flavor in snackable handfuls.

This recipe is easy enough to make on a weekday, but special enough to bag up as gifts, holiday treats, or party snacks. And because it’s baked low and slow, every piece gets coated evenly and crisps up beautifully without burning. Once it cools, the praline glaze sets into a shiny, sweet shell that tastes like the best candy shop crunch.

Praline Crunch (Unique Homemade Recipe)

Servings: About 10 cups
Prep Time: 10 minutes
Cook Time: 1 hour
Cooling Time: 20–30 minutes

Ingredients:

  • 8 cups crisp corn cereal (Chex or similar)

  • 2 cups pecan halves or pieces (lightly toasted preferred)

  • 1 cup packed light brown sugar

  • ½ cup (1 stick) unsalted butter

  • ¼ cup light corn syrup or honey

  • 1 teaspoon pure vanilla extract

  • ½ teaspoon salt

  • Optional: ¼ teaspoon cinnamon or a pinch of nutmeg for a warm spice note

Directions

  1. Prepare the Baking Setup:
    Preheat your oven to 250°F (120°C). Line a large baking sheet with parchment paper or lightly grease it. This makes cleanup simple and prevents sticking.

  2. Mix the Base:
    In a large bowl, combine your corn cereal and pecans. If your pecans are raw, consider toasting them lightly in a dry skillet or oven for about 5–7 minutes beforehand—this deepens their nutty flavor and gives the praline crunch a richer taste.

  3. Make the Praline Glaze:
    In a medium saucepan over medium heat, melt the butter. Add in the brown sugar and corn syrup (or honey) and stir until everything blends into a smooth caramel-like mixture. Continue heating and stirring until it begins to bubble gently. Let it simmer for 3 minutes—this helps the glaze thicken and cling better to the cereal.
    Remove from heat and stir in the vanilla extract, salt, and cinnamon (if using). The fragrance at this point is heavenly.

  4. Coat the Cereal Mixture:
    Pour the warm praline glaze evenly over the cereal and pecans. Use a spatula to gently fold the mixture until everything is coated in that golden, glossy goodness. Work carefully so you don’t crush the cereal.

  5. Bake Low & Slow:
    Spread the coated cereal on your prepared baking sheet in as even a layer as possible. Bake for 1 hour, but stir every 15 minutes. This keeps the coating evenly distributed and allows it to dry and set without pooling.

  6. Cool and Crunch:
    When the hour is up, remove from the oven and let the mix cool completely. As it cools, the praline glaze sets into a crisp, sweet shell. Break into clusters and transfer into an airtight container.

What Makes This Recipe Unique

Most versions of praline crunch rely heavily on sweetness alone—but this version emphasizes balance. The use of real vanilla, salted butter, lightly toasted pecans, and that little pinch of salt ensure the sweetness never becomes overwhelming. The touch of cinnamon is optional, but it adds warmth that makes the snack taste like autumn fairs, fireside gatherings, and holiday mornings.

The low oven bake is also key. Instead of rushing the process, the hour-long slow bake allows the coating to firm up and the cereal to stay crisp—no soggy bits, no sticky, wet patches, just clean, crunchy praline perfection.

Serving Ideas

  • Holiday gift bags: Package in cellophane bags tied with ribbon.

  • Ice cream topper: Sprinkle over vanilla ice cream or butter pecan gelato.

  • Sweet & salty snack mix: Add pretzels, popcorn, or chocolate candies once cooled.

  • Breakfast treat: Mix into Greek yogurt or sprinkle on pancakes (trust me).

Storage

Store in an airtight container at room temperature for up to 2 weeks. If you’re in a humid climate, place a small food-safe silica gel packet in with the container to keep the crunch intact. It also freezes very well for up to 3 months—just thaw at room temperature before serving.

Final Thought

Praline Crunch is more than a snack—it’s a memory-maker. The combination of toasted pecans and buttery brown sugar evokes old-fashioned kitchens, warm hands around coffee mugs, and family gatherings where the best treats are never store-bought. Once you know how easy and stunningly delicious this is, you’ll find endless occasions to make it—from cozy weekends to celebrations.

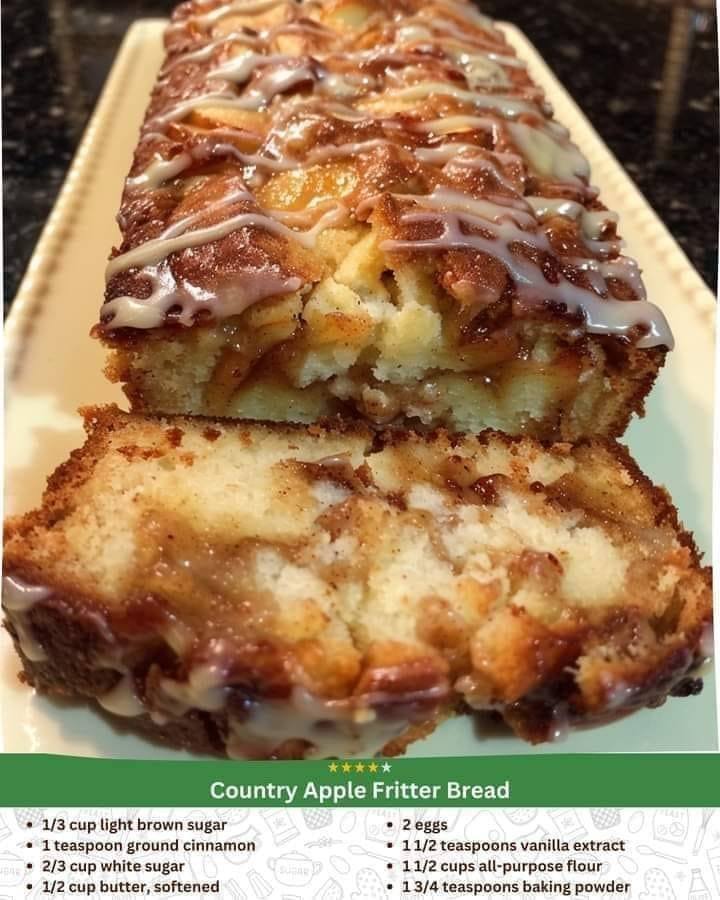
Apple Cinnamon Streusel Loaf

There are certain scents that instantly make a home feel warm, safe, and welcoming—and freshly baked apples with cinnamon is one of those magical fragrances. This Apple Cinnamon Streusel Loaf combines soft, tender cake, juicy apple pieces, and a buttery cinnamon-sugar crumble that melts right into the top as it bakes. It’s the kind of loaf you bake on a relaxing weekend morning, or when you want something homemade but comforting, familiar, and nostalgic. What makes this recipe unique is the way we prepare the apples and the secret touch of sour cream that gives the loaf a soft, plush crumb that stays moist for days.

Ingredients

For the Loaf:

  • 1 ¾ cups all-purpose flour

  • 1 teaspoon baking powder

  • ½ teaspoon baking soda

  • ½ teaspoon fine salt

  • 1 teaspoon ground cinnamon

  • ¼ teaspoon ground nutmeg

  • ½ cup (1 stick) unsalted butter, softened

  • ¾ cup granulated sugar

  • 2 large eggs, room temperature

  • 1 teaspoon vanilla extract

  • ½ cup sour cream (or plain yogurt)

  • 2 tablespoons milk

  • 2 cups peeled and finely diced apples (use Honeycrisp, Fuji, or Gala)

For the Cinnamon Sugar Layer:

  • ⅓ cup brown sugar

  • 1 teaspoon cinnamon

For the Streusel Topping:

  • ½ cup all-purpose flour

  • ¼ cup brown sugar

  • ½ teaspoon cinnamon

  • 4 tablespoons cold butter, cubed

Instructions

1. Prepare the Apple Filling

Peel and finely dice your apples. The key is small pieces—large chunks don’t soften as nicely and interrupt the tender crumb. Toss the diced apples with just a pinch of cinnamon and set aside. This allows the apples to release their natural aroma and develop flavor before going into the batter.

2. Make the Streusel

In a small bowl, mix flour, brown sugar, and cinnamon. Add the cold, cubed butter and use your fingertips to pinch and crumble until the mixture resembles coarse, buttery sand. Place into the refrigerator to keep it cold—chilled streusel bakes more beautifully and crisps instead of melting flat.

3. Mix the Dry Ingredients

In a medium bowl, whisk together flour, baking powder, baking soda, salt, cinnamon, and nutmeg. This ensures even distribution of spices before combining with the wet ingredients.

4. Cream the Butter and Sugar

In a separate large bowl, use a hand mixer or whisk to beat the softened butter with granulated sugar until pale and fluffy, about 3 minutes. This step aerates the batter and contributes to a lighter texture.

5. Add Eggs and Flavor

Beat in the eggs, one at a time, followed by vanilla extract. Then mix in the sour cream—this is the secret to a moist and tender loaf that doesn’t dry out.

6. Combine Wet and Dry

Add the dry ingredients to the wet bowl in two additions, alternating with the milk. Mix only until smooth—overmixing can toughen the batter. Fold in the diced apples.

7. Layer the Batter

Pour half the batter into a greased and lined loaf pan. Sprinkle the cinnamon sugar layer evenly over the batter—this creates a sweet ribbon inside the loaf. Then spread the remaining batter on top.

8. Finish With Streusel

Scatter the chilled streusel topping generously over the surface. Don’t press; just let it sit loosely so it bakes into a beautiful, crumbly crust.

9. Bake

Bake at 350°F (175°C) for 55–70 minutes, depending on your oven. A toothpick inserted in the center should come out clean or with moist crumbs—just not wet batter.

10. Cool and Serve

Allow the loaf to cool in the pan for 10 minutes before transferring to a cooling rack. Serve warm or at room temperature.

Serving Suggestions

This loaf is delightful on its own, but here are a few simple enhancements:

  • Drizzle with vanilla glaze for extra sweetness.

  • Serve warm with butter or cream cheese spread.

  • Pair with hot tea, apple cider, or a cinnamon latte.

  • Toast slices lightly the next morning—it becomes even more fragrant.

Storage Tips

  • Room Temperature: Store tightly wrapped for 3 days.

  • Refrigerator: Lasts up to 6 days.

  • Freezer: Wrap slices individually and freeze up to 2 months.

What Makes This Recipe Special

Most apple loaves rely solely on moisture from apples, but apples alone can sometimes make a loaf gummy. The combination of sour cream, milk, and butter in this recipe ensures a soft, fluffy texture while maintaining richness. The cinnamon sugar layer inside gives a surprise sweetness with each bite, and the streusel topping brings a satisfying contrast of texture—soft crumb meets crunchy top.

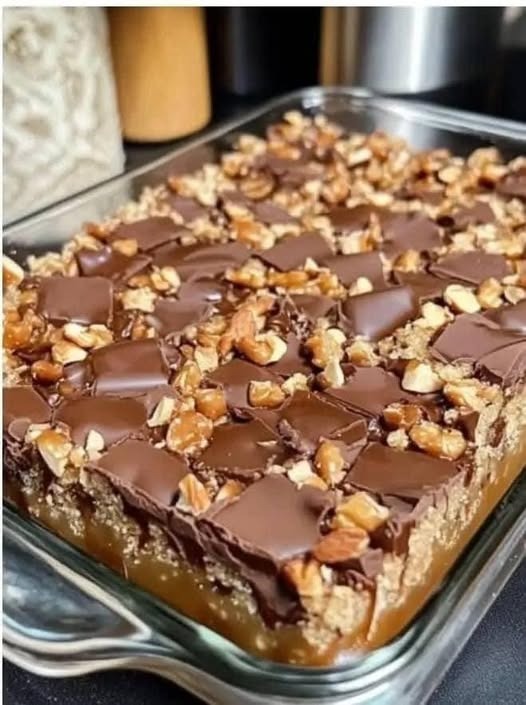
Caramel Chocolate Crunch Bars

A decadent, no-bake treat with layers of creamy caramel, buttery crunch, and smooth chocolate.

If you love desserts that combine silky sweetness with a satisfying crunch, these Caramel Chocolate Crunch Bars are going to become your new go-to indulgence. They require no baking, come together with minimal ingredients, and deliver a gourmet flavor that tastes like something from a boutique chocolate shop. Imagine a crisp golden cookie layer, followed by a ribbon of chewy caramel, all capped with velvety chocolate that melts on your tongue. These bars are perfect for parties, holidays, or whenever you need a luxurious dessert without a lot of effort.

Ingredients

Crunch Base

  • 3 cups crispy rice cereal (Rice Krispies or similar)

  • 1 cup crushed digestive biscuits or graham crackers

  • ½ cup melted butter (unsalted)

  • ⅓ cup light brown sugar

  • ½ cup creamy peanut butter (optional but recommended)

  • 1 teaspoon vanilla extract

Caramel Layer

  • 1 can (14 oz) sweetened condensed milk

  • ½ cup unsalted butter

  • ½ cup brown sugar

  • ¼ teaspoon sea salt

  • 1 teaspoon vanilla

Chocolate Topping

  • 2 cups semi-sweet chocolate chips or chopped chocolate

  • 1 tablespoon butter or coconut oil (for smooth finish)

Instructions

1. Make the Crunch Layer

Begin by preparing the foundation of your bars. Place the crispy rice cereal in a large mixing bowl. Crush your biscuits until they resemble coarse crumbs—this gives the bars structure and deepens the flavor. In a small saucepan, melt the butter and whisk in the brown sugar until dissolved and lightly bubbly. Remove from heat and stir in the peanut butter and vanilla. Pour this warm mixture over the cereal and biscuit crumbs, stirring until every piece is coated. Press this mixture firmly into the bottom of a lined 9×13-inch pan. The tighter you press, the better your bars will hold. Chill for 15 minutes.

2. Prepare the Caramel Filling

The caramel is where magic happens. In a medium saucepan over medium-low heat, melt the butter. Add the brown sugar and sweetened condensed milk, stirring continuously to prevent scorching. Allow the mixture to gently simmer, stirring until it thickens into a glossy golden caramel (about 8–10 minutes). Add the vanilla and salt, then pour the caramel evenly over your chilled base. Use a spatula to smooth it out. Place the pan back in the refrigerator for at least 20 minutes to set.

3. Top with Chocolate

Place the chocolate and butter (or coconut oil) in a heat-safe bowl and melt using either a microwave in 20–30 second intervals or a double boiler. Stir until silky and smooth. Pour this chocolate layer over the caramel, tilting the pan slightly to ensure full coverage. Chill again until the chocolate is set, about 30 minutes.

Cutting & Serving

When ready to cut, remove the bars from the fridge and let them sit at room temperature for 5–8 minutes. This helps the chocolate soften just enough to slice cleanly. Use a sharp knife and cut into squares or bars.

These bars are wonderfully rich, so small pieces go a long way. Store in an airtight container in the refrigerator for up to 1 week, or freeze for up to 3 months.

Tips for the Best Results

  • Add texture: For an extra layer of crunch, sprinkle chopped toasted almonds or pecans over the caramel before adding the chocolate.

  • Salt is key: A tiny pinch of sea salt on top of the chocolate creates a perfect sweet-salty balance.

  • Don’t rush chilling: Each layer needs time to firm up so your bars slice beautifully.

  • Customize chocolate: Dark chocolate gives elegance, while milk chocolate makes them extra sweet and dessert-like.

Why These Bars Are Special

There’s something irresistibly comforting about desserts that have multiple textures working in harmony. The crisp cereal layer offers lightness, preventing the bars from feeling heavy. The caramel brings depth and indulgence, rich and buttery with just the right chew. The chocolate sealing the top ties everything together with a luxurious finish. Every bite is balanced—sweet but not overwhelming, soft yet crunchy, simple yet undeniably impressive.

Carrot Salad with Pineapple and Raisins

There is something beautifully nostalgic about a bowl of carrot salad—a dish that feels like sunshine. It’s sweet, lightly tangy, creamy, and full of texture. It brings to mind family picnics, church luncheons, and summertime cookouts where every dish was made with care and meant to be shared. Carrot Salad with Pineapple and Raisins is especially timeless; it’s refreshing but comforting, and it comes together with only a few humble ingredients that somehow create something wonderful.

This unique take on the classic stays true to its roots but incorporates a few thoughtful touches that elevate flavor and texture. We’ll build creaminess without heaviness, balance sweetness with a touch of acid, and add optional crunchy elements for depth. The result is a salad that is not only simple to make, but also lively and satisfying.

Why This Recipe Works

Carrots are naturally sweet, crisp, and refreshing. When shredded, they release juices that help blend into the dressing. Pineapple adds bright tropical sweetness and moisture, while raisins introduce the chewy contrast. The creamy dressing ties everything together with just enough tang to keep it from tasting overly sweet. A pinch of salt—not optional—makes all the difference, waking up every flavor in the bowl.

This salad tastes best after chilling, allowing the flavors to meld and the raisins to plump slightly in the creamy dressing. It can be served as a side dish, a light snack, or even part of a brunch spread.

Ingredients

For 4–6 servings:

  • 4 cups freshly grated carrots (about 5–6 medium carrots)

  • 1 cup crushed pineapple, well-drained (reserve 1–2 tablespoons of juice)

  • ½ cup raisins (golden raisins recommended for brighter flavor)

  • ½ cup mayonnaise (or Greek yogurt for a lighter version, or half of each)

  • 2 tablespoons honey or sugar (adjust to taste)

  • 1 teaspoon apple cider vinegar or lemon juice

  • Pinch of salt (essential)

  • ¼ teaspoon cinnamon (optional but delightful)

  • ¼ cup toasted chopped pecans or walnuts (optional for crunch)

Step-by-Step Instructions

  1. Prepare the Carrots:
    Peel and grate the carrots using the coarse side of a box grater or a food processor. Freshly grated carrots are important—pre-shredded packaged carrots are too dry and lack natural moisture and flavor. Place the shredded carrots in a large mixing bowl.

  2. Drain the Pineapple:
    Drain the crushed pineapple thoroughly, pressing it lightly to remove excess liquid. Too much juice can make the salad watery. However, reserve just a tablespoon or two of the juice to add flavor to the dressing.

  3. Soften the Raisins (optional but recommended):
    If your raisins are firm or dry, soak them in warm water for 5 minutes, then drain well. This gives them a plump, soft bite in the finished salad.

  4. Make the Dressing:
    In a separate small bowl, whisk together the mayonnaise (or yogurt), honey (or sugar), reserved pineapple juice, apple cider vinegar or lemon juice, salt, and cinnamon (if using). Taste and adjust until the flavor is balanced—creamy, lightly sweet, and a little tangy.

  5. Combine Everything:
    Add the pineapple and raisins to the bowl with the carrots. Pour the dressing over them and toss gently until everything is evenly coated.

  6. Add Crunch (Optional, but Recommended):
    If you enjoy a contrast in texture, fold in toasted pecans or walnuts. Toasting them enhances their flavor and helps them stay crisp in the salad.

  7. Chill Before Serving:
    Cover and refrigerate for at least 30 minutes. This helps the flavors blend and the dressing settle perfectly.

Serving Suggestions

  • Serve chilled as a refreshing side dish.

  • Pair with roasted chicken, grilled kebabs, sandwiches, or summer BBQ dishes.

  • Add it to a brunch table alongside fruit salad and fresh bread.

  • Make it into a light lunch by adding a scoop on top of a bed of leafy greens.

Storage Notes

This salad keeps well in the fridge for up to 48 hours. Stir it before serving, as some natural juices may settle. If making ahead for a gathering, add the nuts right before serving so they stay crunchy.

Customization Variations

Variation What to Add Flavor Result
Zingy Extra lemon juice + zest Bright + lively
Spiced Pinch of nutmeg + cinnamon Cozy + aromatic
Tropical Add coconut flakes Sweeter & island-inspired
Health Boost Use Greek yogurt only + add chia seeds Higher protein + more texture

Final Thoughts

This Carrot Salad with Pineapple and Raisins is a beautiful expression of simplicity—proof that fresh, everyday ingredients can become something comforting, nostalgic, and even elegant when thoughtfully combined. It tastes like sunshine in a bowl: sweet, soft, crisp, creamy, and refreshing. It’s a dish that fits any season, any table, and any gathering.

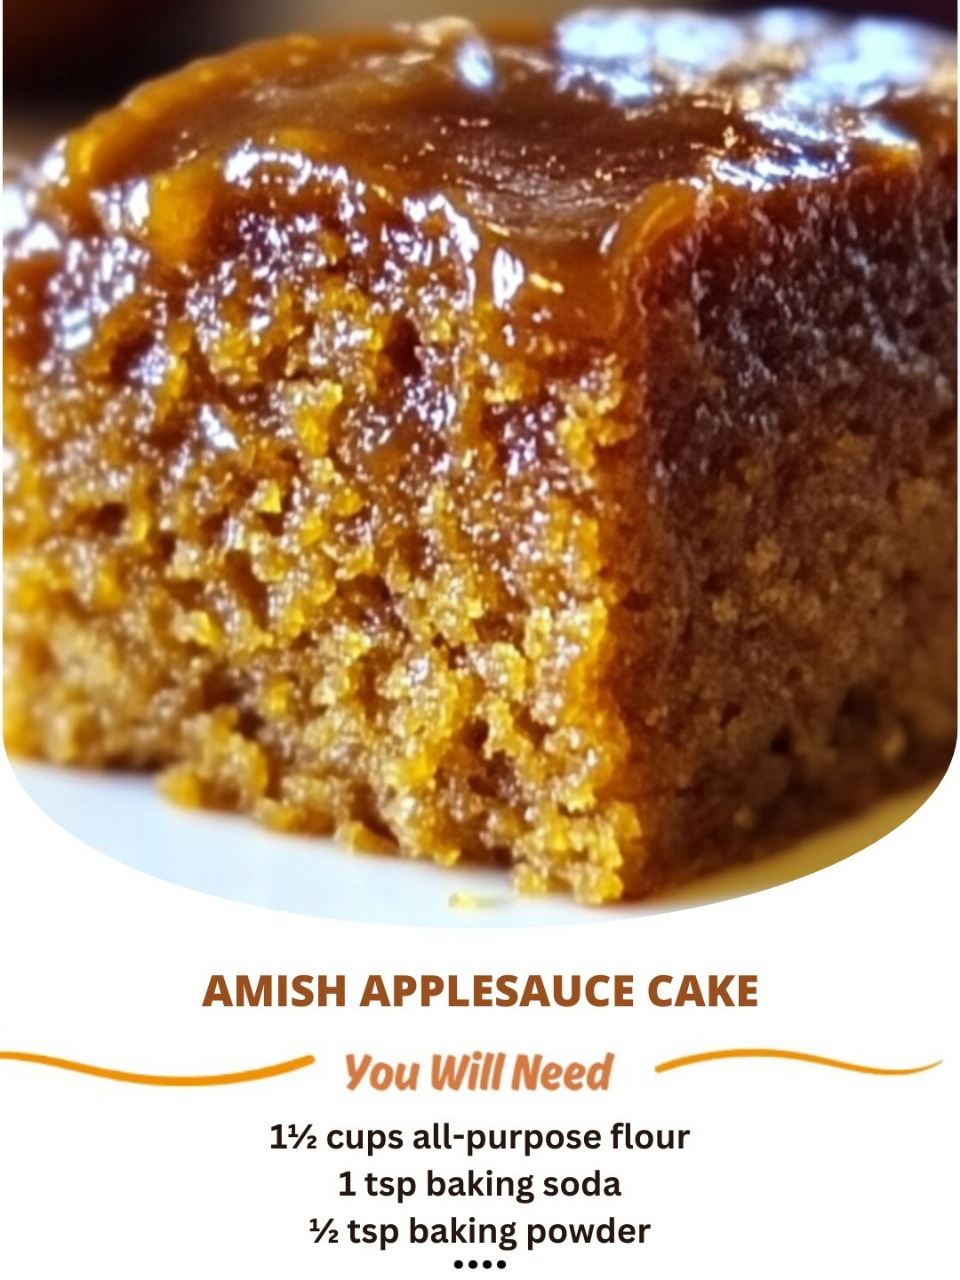
Amish Applesauce Cake

There’s something timeless about Amish baking—simple ingredients, humble techniques, and flavors that wrap around the soul like a warm quilt on a chilly autumn evening. One of the most cherished treats from Amish kitchens is Applesauce Cake. This cake is not flashy or overly sweet. Instead, it boasts deep spice, moist crumb, and the kind of fragrant warmth that makes a home feel lived in. This recipe takes the heart of the traditional version and enhances it just enough to make it unforgettable—while still keeping true to the authenticity of a down-home Amish bake.

Why Amish Applesauce Cake Works

Many old-fashioned cakes relied on pantry staples rather than expensive butter or milk. Applesauce replaces much of the fat and moisture, creating a cake that is surprisingly tender and richly flavored. Cinnamon, nutmeg, and clove transform ordinary ingredients into something that smells like fall, comfort, and family gatherings. The texture is dense yet tender, almost like a cross between a tea cake and a spice loaf.

And the best part? This cake gets better the next day as the flavors deepen.

Ingredients

Dry Ingredients:

  • 2 cups all-purpose flour

  • 1 ¼ teaspoons baking soda

  • ½ teaspoon baking powder

  • ½ teaspoon salt

  • 1 ½ teaspoons cinnamon

  • ½ teaspoon nutmeg

  • ¼ teaspoon ground cloves

Wet Ingredients:

  • 1 ½ cups unsweetened applesauce (homemade or store-bought)

  • 1 cup brown sugar, packed

  • ½ cup vegetable oil (or melted butter for richer flavor)

  • 2 large eggs

  • 1 teaspoon vanilla extract

Mix-ins (optional but authentic):

  • ¾ cup raisins OR chopped dates

  • ½ cup chopped walnuts or pecans

For the Old-Fashioned Brown Sugar Glaze (Optional but heavenly):

  • ¼ cup butter

  • ½ cup brown sugar

  • 2 tablespoons milk

  • ½ teaspoon vanilla

  • ½ to ¾ cup powdered sugar, to thicken

Instructions

  1. Preheat the Oven:
    Set your oven to 350°F (175°C). Butter and flour a loaf pan or an 8×8 baking dish. Amish kitchens often use metal pans because they bake more evenly.

  2. Mix the Dry Ingredients:
    In a medium bowl, whisk together flour, baking soda, baking powder, salt, cinnamon, nutmeg, and cloves. This evenly distributes spices and ensures no clumps.

  3. Combine the Wet Ingredients:
    In a separate large bowl, beat together applesauce, sugar, oil (or butter), eggs, and vanilla. The mixture should be smooth and slightly glossy.

  4. Bring It Together:
    Add the dry mixture into the wet mixture, stirring gently. Do not overmix. Fold in raisins and nuts if using.

  5. Bake:
    Pour the batter into your prepared pan and bake for 40–50 minutes, or until a toothpick comes out clean. The top will be deep golden and slightly domed.

  6. Make the Glaze (optional but transformative):
    In a small saucepan, melt butter and brown sugar over medium heat. Stir in milk and let it bubble for about 1 minute. Remove from heat, add vanilla, then whisk in powdered sugar until smooth.
    Pour the warm glaze over the warm cake.

  7. Cool Slightly Before Serving:
    The glaze will soak in just enough to form a soft, glossy finish.

What Makes This Recipe Unique

Instead of being overly dense, this version balances moisture and spice perfectly. The glaze adds a caramelly richness reminiscent of butterscotch, enhancing the cake without overwhelming it. The raisins and nuts are optional, but historically, Amish communities added what the pantry allowed, making each cake a bit personal. The applesauce is the hero—it gives the cake a homey sweetness and helps it stay moist days longer than other cakes.

Serving Suggestions

  • Serve warm with a scoop of vanilla ice cream.

  • Pair with black tea or hot chai for a cozy snack.

  • Serve at breakfast with a pat of butter for a farmhouse-style treat.

This cake also travels well and makes a wonderful gift—wrap slices in waxed paper just like the old days.

Storage

This cake tastes even better the next day. Store covered at room temperature up to 4 days. You can also refrigerate it for a week and gently warm slices before eating.

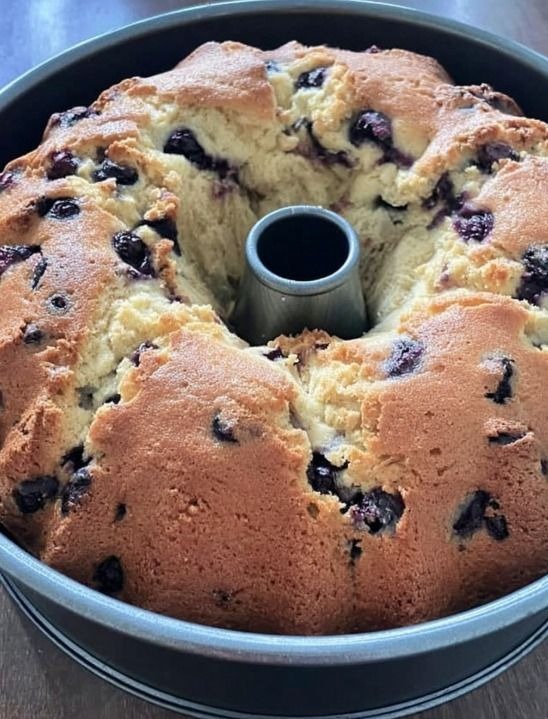
Sour Cream Blueberry Coffee Cake

There are few things more comforting than the scent of a coffee cake wafting through the kitchen—warm, buttery, slightly sweet, and full of nostalgia. This Sour Cream Blueberry Coffee Cake takes that magic to another level. Imagine a cake so tender it nearly melts when you cut into it, swirled generously with fresh or frozen blueberries, and finished with a golden, cinnamon-brown sugar crumble that adds just the right amount of texture. It’s the kind of cake meant for slow mornings, shared with a steaming cup of coffee, tea, or even a tall glass of cold milk. It is soft, moist, and stays fresh for days—thanks to the secret hero ingredient: sour cream.

Why Sour Cream Makes This Cake Special

Sour cream is the ingredient that gives the cake its unique character. It brings the ideal balance of richness and tenderness without making the cake heavy. It adds moisture while allowing the crumb to remain fluffy, creating that bakery-style texture that can be difficult to achieve at home. When paired with blueberries, the slightly tangy profile of the sour cream enhances the fruit’s natural sweetness and brightness. Together, they form the perfect pairing—sweet, tangy, buttery, and absolutely irresistible.

Ingredient List

For the Cake:

  • 1 ½ cups all-purpose flour

  • 1 teaspoon baking powder

  • ½ teaspoon baking soda

  • ½ teaspoon fine salt

  • ½ cup unsalted butter, softened

  • 1 cup granulated sugar

  • 2 large eggs, room temperature

  • 1 ½ teaspoons vanilla extract

  • 1 cup sour cream (full fat is best)

  • 1 ½ cups blueberries (fresh or frozen; if frozen do not thaw)

For the Crumble Topping:

  • ½ cup all-purpose flour

  • ½ cup light brown sugar

  • 1 teaspoon ground cinnamon

  • 4 tablespoons unsalted butter, cold and cubed

Optional Glaze (for a bakery finish):

  • ½ cup powdered sugar

  • 1–2 teaspoons milk or lemon juice

  • Splash of vanilla

Instructions

Step 1: Prepare Your Pan and Ingredients

Preheat your oven to 350°F (175°C). Grease and line an 8×8-inch baking pan or a deep round cake pan. If using fresh blueberries, rinse and dry them. If using frozen, keep them frozen to avoid excess moisture. Lightly toss the berries in a spoonful of flour to prevent them from sinking during baking.

Step 2: Make the Crumble Topping

In a small bowl, mix together the flour, brown sugar, and cinnamon. Add the cold cubed butter and use your fingertips or a pastry cutter to break it down until the mixture resembles coarse, sandy crumbs. Place in the refrigerator to keep cold while you make the batter.

Step 3: Mix the Cake Batter

In a large mixing bowl, beat the softened butter and granulated sugar together until pale and creamy—about 3 minutes. Add the eggs one at a time, beating well after each addition. Stir in the vanilla.

In a separate bowl, whisk the flour, baking powder, baking soda, and salt. Add this dry mixture to the butter mixture in two additions, alternating with the sour cream. Mix gently—do not overmix. The batter should be thick, smooth, and creamy.

Fold in the blueberries using a gentle hand to avoid crushing them.

Step 4: Assemble and Bake

Spread the batter evenly into your prepared pan. Sprinkle the chilled crumble topping generously over the surface, allowing some larger clusters to remain for texture.

Bake 45–55 minutes, or until a toothpick inserted in the center comes out clean (a few moist crumbs are okay). The top should be golden and fragrant.

Allow the cake to cool for at least 20 minutes before slicing. If glazing, whisk the ingredients together and drizzle lightly over the top.

Flavor Enhancements & Variations

  • Add Lemon: A teaspoon of lemon zest brightens the entire cake.

  • Try Almond: Replace vanilla with almond extract for a bakery-style twist.

  • Make It Spiced: Add nutmeg or cardamom to the topping for warmth.

  • Use Other Berries: Raspberries, blackberries, or even chopped cherries work beautifully.

How To Serve

This cake is best served warm or at room temperature. Pair it with:

  • Black coffee for contrast

  • Earl Grey tea for elegance

  • Latte or cappuccino for cozy café vibes

It stores extremely well—cover tightly and keep at room temperature for 2 days or refrigerate for up to 1 week. It also freezes beautifully for up to 3 months.

Final Thoughts

This Sour Cream Blueberry Coffee Cake is simple enough to bake on a quiet morning, yet special enough to impress guests without effort. It’s the kind of recipe that becomes part of your kitchen tradition—one that you’ll reach for year after year, season after season. Moist, buttery, bright with blueberry flavor, and crowned with a cinnamon-sweet crumble—this cake is pure comfort in every bite.