If you’re searching for the perfect gluten-free donut recipe that delivers bakery-style results without complicated techniques, these homemade vanilla baked donuts are exactly what you need. Soft, fluffy, lightly sweet, and finished with a smooth vanilla glaze, these donuts are a delicious treat for breakfast, brunch, dessert, or special occasions. Best of all, they can be prepared in about 30 minutes using simple pantry ingredients and just one mixing bowl.
Many people assume that gluten-free baking is difficult or that gluten-free desserts lack the texture of traditional baked goods. However, these vanilla donuts prove otherwise. They have a light and tender crumb, a delicate vanilla aroma, and a moist texture that rivals classic bakery donuts. Because they are baked rather than fried, they are also easier to prepare at home and require less cleanup.
The secret to achieving soft and fluffy gluten-free donuts starts with choosing a high-quality gluten-free all-purpose baking flour blend. A blend that contains xanthan gum helps provide structure and elasticity, creating a texture that closely resembles traditional wheat-based baked goods. When combined with baking powder, eggs, and milk, the result is a perfectly risen donut with a tender interior.
Vanilla is the star flavor in this recipe. Pure vanilla extract adds warmth and depth to the batter while also enhancing the sweetness of the glaze. The subtle flavor pairs beautifully with the gentle sweetness of the donut, creating a timeless dessert that appeals to both children and adults.
Another important ingredient is nutmeg. While only a small amount is used, it contributes a classic bakery-style flavor often found in traditional donuts. The spice adds warmth and complexity without overpowering the vanilla profile.
One of the reasons home bakers love this recipe is its simplicity. There is no need for a stand mixer or complicated equipment. Everything can be mixed quickly by hand, making it an excellent recipe for beginners. The batter comes together smoothly and can be transferred easily into donut pans using a piping bag or a resealable plastic bag.
The baking method is equally important. A hot oven helps the donuts rise rapidly, creating an airy texture and attractive shape. Unlike fried donuts, baked donuts require no hot oil, making them a convenient choice for busy families and home cooks.
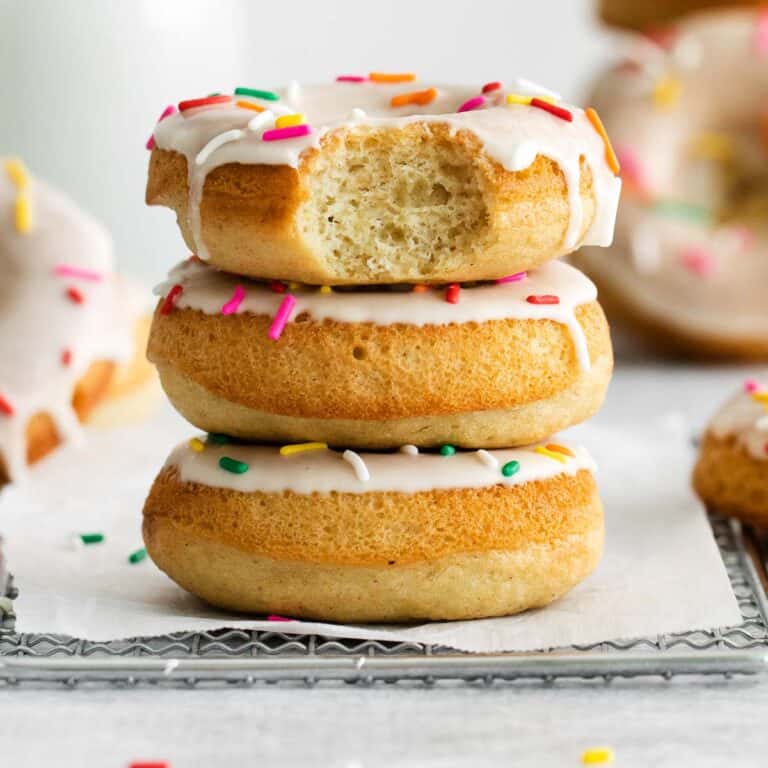
The glaze transforms these donuts into a bakery-worthy treat. Made with powdered sugar, milk, and vanilla extract, it creates a smooth coating that hardens slightly as it sets. This sweet finish enhances the overall flavor while giving the donuts a beautiful appearance. Decorative sprinkles can be added for birthdays, celebrations, holidays, or simply for fun.
These donuts are versatile enough to serve at many occasions. They make a wonderful breakfast pastry alongside coffee or tea. They are also ideal for brunch gatherings, family celebrations, school events, holiday mornings, or weekend baking projects. Because they are gluten-free, they allow individuals with gluten sensitivities to enjoy a classic donut experience.
When preparing gluten-free baked goods, measuring ingredients accurately is especially important. Too much flour can create dense donuts, while too little flour may affect structure. Using a kitchen scale can help ensure consistent results every time.
The eggs in this recipe contribute moisture, richness, and structure. They help support the rise created by the baking powder and work together with the flour blend to produce a soft texture. The combination of eggs and oil also keeps the donuts moist for several days.
Apple cider vinegar may seem like a surprising ingredient, but it plays an important role in baking. The mild acidity helps activate the leavening agents and contributes to a lighter crumb. You won’t taste the vinegar in the finished donuts, but it helps improve texture and overall baking performance.
The choice of milk can be customized according to personal preference. Unsweetened almond milk works beautifully and keeps the flavor light, but dairy milk, oat milk, soy milk, or other plant-based alternatives can also be used successfully. This flexibility makes the recipe adaptable to various dietary needs.
Oil is another ingredient that contributes significantly to texture. Vegetable oil, canola oil, avocado oil, or melted coconut oil all provide moisture while maintaining softness. Because oil remains liquid at room temperature, it helps the donuts stay tender even after cooling.
For the glaze, consistency is key. A glaze that is too thin may slide off the donuts, while one that is too thick can be difficult to spread. Adjusting with small amounts of powdered sugar or milk allows you to achieve the perfect coating consistency.
Storage is simple. Once completely cooled and glazed, the donuts can be kept in an airtight container at room temperature for up to two days. For longer freshness, refrigeration may be used. Before serving, allow refrigerated donuts to come to room temperature for the best texture and flavor.
These baked vanilla donuts also freeze well. Place cooled, unglazed donuts in a freezer-safe container and freeze for up to two months. Thaw at room temperature and glaze before serving. This makes them an excellent make-ahead option for parties and special occasions.
Another advantage of this recipe is its customization potential. While the classic vanilla glaze is delicious, you can experiment with different toppings and decorations. Colored sprinkles, chocolate drizzle, cinnamon sugar, crushed nuts, or naturally colored glazes can create unique variations while maintaining the original donut base.
Families often enjoy making these donuts together because the process is simple and fun. Children can help mix ingredients, decorate with sprinkles, and watch the donuts rise in the oven. This creates memorable baking experiences while introducing homemade treats that are fresher and often more affordable than bakery purchases.
Because these donuts are baked instead of fried, they have a lighter texture and less oil content than many traditional donuts. This makes them an appealing option for those seeking a homemade baked dessert without deep-frying equipment.
The aroma that fills the kitchen while these donuts bake is one of their greatest pleasures. The combination of vanilla, nutmeg, and sweet batter creates a comforting scent that signals a fresh batch of homemade treats is on the way.
Whether you’re new to gluten-free baking or an experienced home baker, these vanilla baked donuts are a dependable recipe worth adding to your collection. Their soft texture, delicate sweetness, and beautiful glaze create a classic dessert experience that everyone can enjoy.
From weekday breakfasts to holiday celebrations, these donuts consistently deliver delicious results. Their ease of preparation, versatile ingredients, and crowd-pleasing flavor make them a favorite choice for home kitchens everywhere. Once you try them, they may become one of your most requested homemade baked treats.
Easy Gluten-Free Vanilla Donuts Recipe
Preparation Time
- Prep Time: 10 minutes
- Bake Time: 10–12 minutes
- Cooling Time: 15 minutes
- Total Time: Approximately 35 minutes
- Yield: 12 baked donuts
Ingredients
Dry Mixture
- 1½ cups gluten-free 1:1 baking flour (about 240g)
- ⅔ cup granulated sugar
- 2 teaspoons baking powder
- ¾ teaspoon salt
- ¼ teaspoon ground nutmeg
Wet Mixture
- 2 large eggs
- 2 teaspoons pure vanilla extract
- 1 teaspoon apple cider vinegar
- ¾ cup unsweetened almond milk (or preferred milk)
- ½ cup vegetable oil or melted coconut oil
Vanilla Glaze
- 1½ cups powdered sugar
- 1–2 tablespoons milk
- ½ teaspoon vanilla extract
- Colorful sprinkles (optional)
Method
- Preheat oven to 425°F (220°C).
- Lightly grease two 6-cavity donut pans.
- In a large bowl, combine flour, sugar, baking powder, salt, and nutmeg.
- In another bowl, whisk together eggs, vanilla extract, apple cider vinegar, milk, and oil.
- Pour wet ingredients into dry ingredients and mix until a smooth batter forms.
- Transfer batter into a piping bag or zip-top bag.
- Cut a small corner from the bag and pipe batter into prepared donut pans.
- Fill each cavity about three-quarters full.
- Bake for 10–12 minutes until lightly golden and springy.
- Remove from oven and cool in pans briefly.
- Transfer donuts to a wire rack and cool for 15 minutes.
Glaze Instructions
- Whisk powdered sugar, milk, and vanilla extract together until smooth.
- Adjust consistency with additional milk or powdered sugar if needed.
- Dip cooled donuts into the glaze.
- Decorate with sprinkles.
- Allow glaze to set before serving.
Helpful Baking Tips
- Use a premium gluten-free flour blend containing xanthan gum.
- Do not overmix the batter.
- Bake in a fully preheated oven for the fluffiest texture.
- Let donuts cool before glazing to prevent the glaze from melting.
- Store in an airtight container for maximum freshness.
Nutrition Information (Per Donut)
- Calories: 261 kcal
- Carbohydrates: 37g
- Protein: 3g
- Fat: 12g
- Saturated Fat: 1g
- Cholesterol: 27mg
- Sodium: 181mg
- Potassium: 137mg
- Fiber: 1g
- Sugar: 26g
- Calcium: 62mg
- Iron: 1mg