Brittle or weak nails may signal

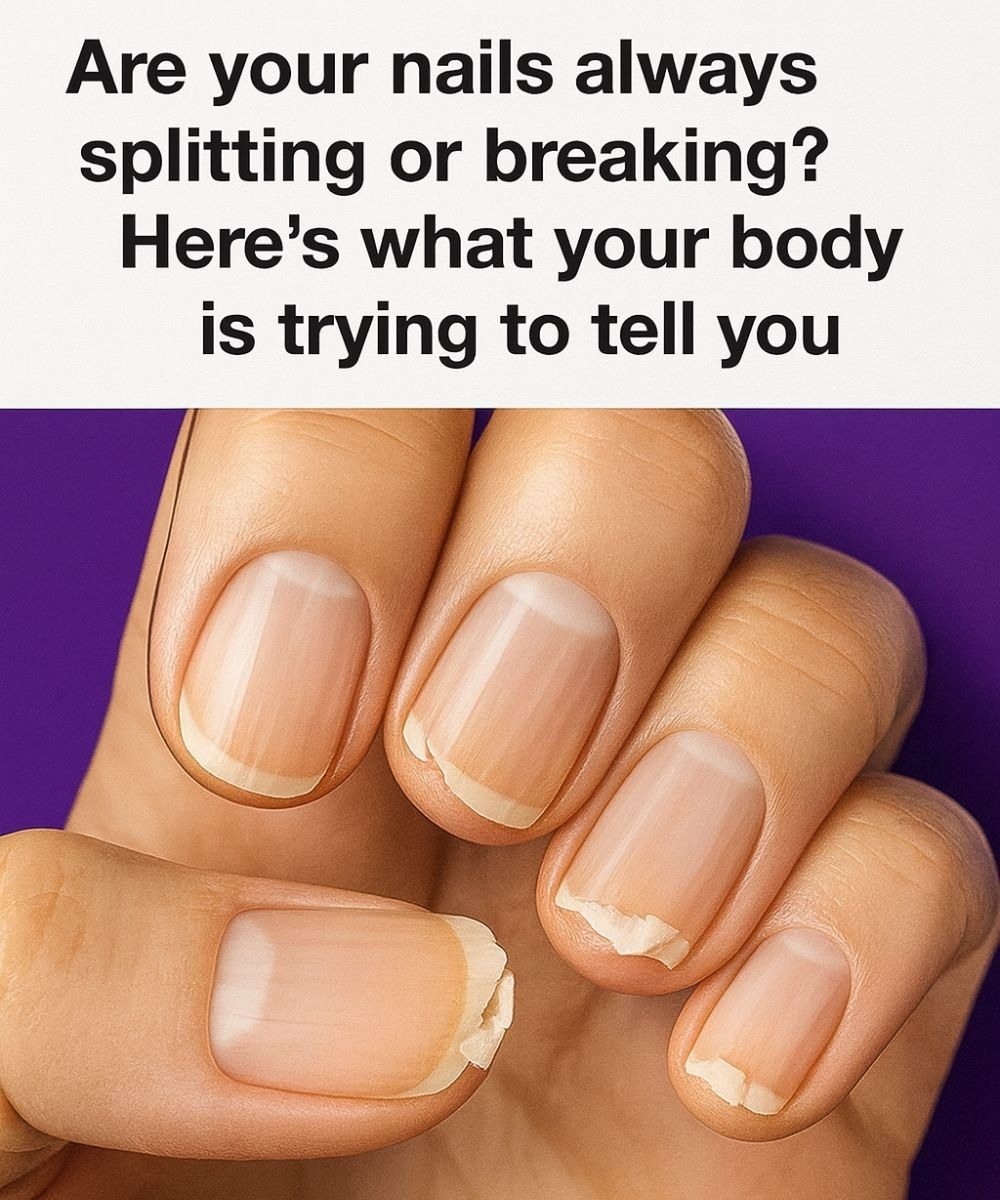
Brittle, peeling, or weak nails are often dismissed as a simple cosmetic concern. However, your nails can quietly reflect what is happening inside your body. When nails split easily, crack, or refuse to grow, it may signal nutritional gaps, dehydration, frequent chemical exposure, or even underlying health imbalances. While severe or persistent nail problems should always be evaluated by a healthcare professional, mild weakness is often connected to daily habits and nutrient intake.

Healthy nails are made primarily of keratin, a protein that requires adequate vitamins and minerals to grow strong. Deficiencies in biotin (vitamin B7), iron, zinc, protein, and certain B vitamins are commonly associated with brittle nails. Constant exposure to water, harsh detergents, nail polish removers, and cleaning chemicals can also strip the nail of its natural oils, leaving it dry and fragile. Additionally, dehydration and poor circulation may contribute to slow growth and weakness.

Instead of relying solely on nail hardeners—which can sometimes make nails even more brittle—supporting nail health from both the inside and outside is a balanced approach. Below is a gentle, nourishing drink and oil treatment combination designed to support stronger nails naturally.

Inner Strength Nail Support Drink

This mineral-rich blend focuses on nutrients often associated with nail strength and hydration.

Ingredients:

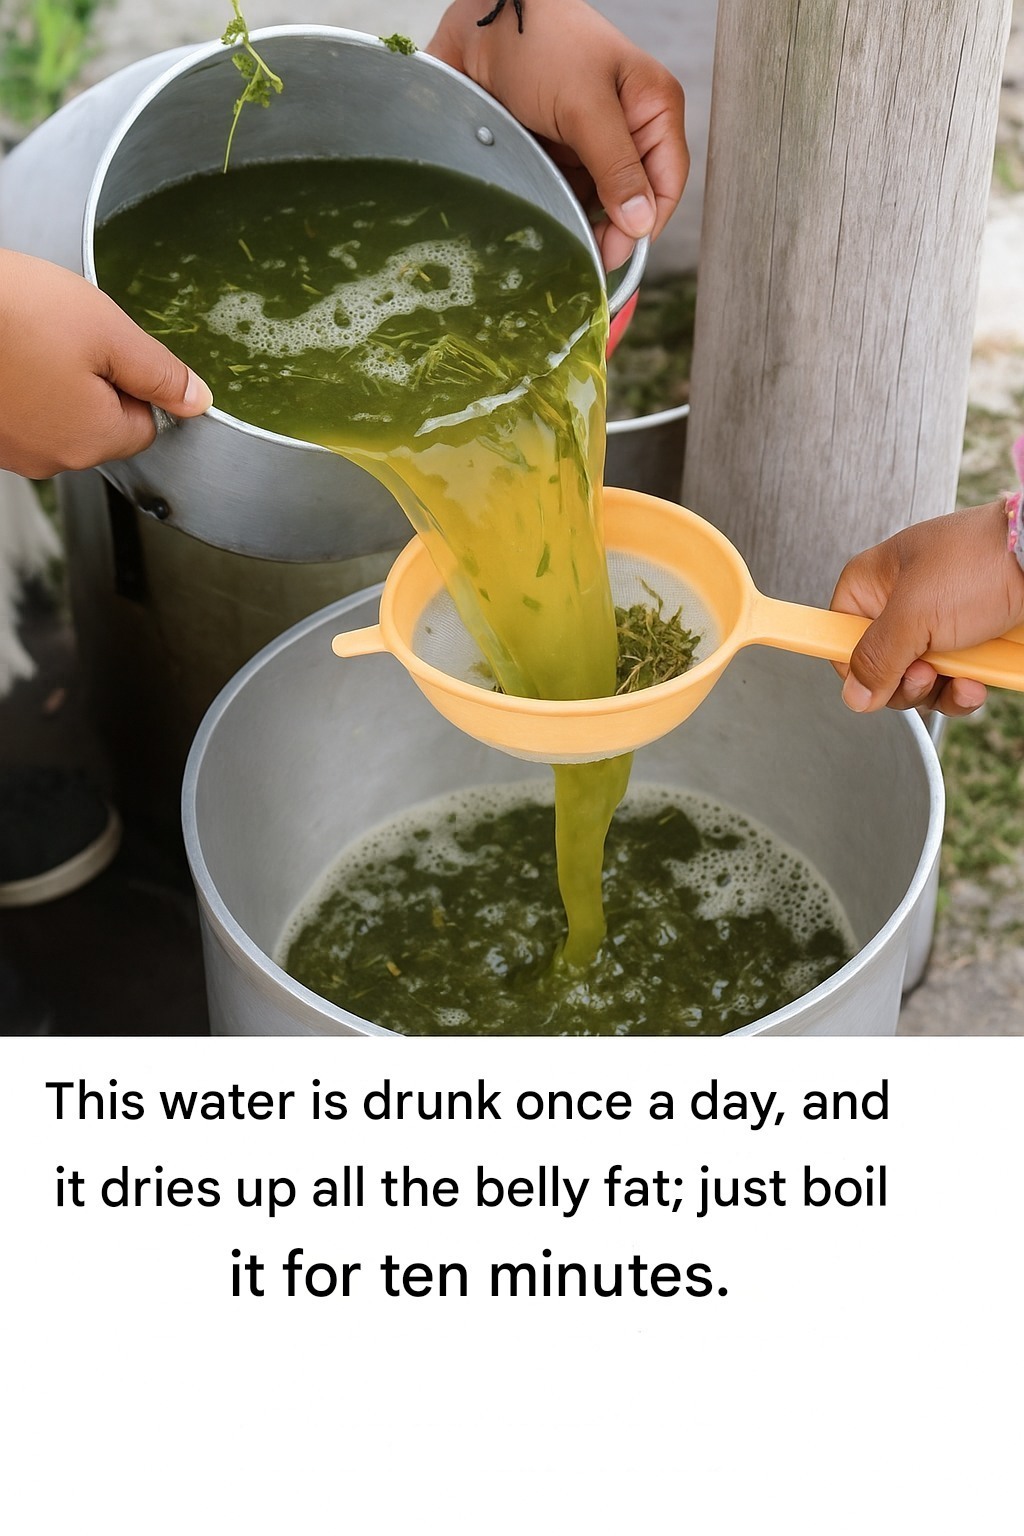
  • 1 cup fresh spinach (rich in iron and folate)

  • 1 tablespoon soaked almonds (skin removed)

  • 1 tablespoon pumpkin seeds

  • 1 teaspoon chia seeds

  • 1 small carrot

  • Juice of ½ lemon

  • 1 cup coconut water or plain water

  • 1 teaspoon raw honey (optional)

Instructions:

  1. Soak almonds overnight and peel the skin in the morning.

  2. Add spinach, almonds, pumpkin seeds, chia seeds, carrot, lemon juice, and coconut water into a blender.

  3. Blend until smooth.

  4. Add honey if desired and blend briefly again.

  5. Drink fresh, preferably in the morning, 3–4 times per week.

Why It May Help:

  • Spinach provides iron and folate, nutrients linked with healthy nail growth.

  • Pumpkin seeds are rich in zinc, which plays a role in tissue repair.

  • Chia seeds offer omega-3 fatty acids that support moisture retention.

  • Almonds contain biotin and vitamin E, often associated with nail strength.

  • Carrot and lemon add antioxidants that help protect cells from damage.

Consistency matters. Nail growth is slow, so visible changes may take several weeks.

External Strengthening Nail Oil

Supporting nails from the outside can help reduce dryness and breakage.

Ingredients:

  • 1 tablespoon warm coconut oil

  • 1 teaspoon olive oil

  • 3 drops vitamin E oil

  • 2 drops lavender essential oil (optional)

Instructions:

  1. Mix all ingredients in a small bowl.

  2. Massage gently into nails and cuticles for 5 minutes.

  3. Leave overnight or at least 30 minutes before washing.

  4. Use 4–5 times per week.

Benefits:

Coconut oil penetrates the nail plate, helping reduce protein loss. Olive oil supports moisture balance. Vitamin E adds antioxidant support, while lavender provides a calming effect and mild antimicrobial properties.

Additional Nail Care Tips

Stay Hydrated – Drink enough water daily to prevent dryness.
Eat Enough Protein – Nails are made of keratin, a protein. Include eggs, beans, yogurt, fish, or lean meats in your diet.
Limit Harsh Chemicals – Wear gloves while washing dishes or cleaning.
Avoid Over-Buffing – Excess filing weakens the nail plate.
Take Breaks from Gel or Acrylic Nails – These can thin natural nails over time.
Trim Regularly – Keeping nails at a manageable length prevents splitting.

When to Seek Medical Advice

Sometimes brittle nails may signal more significant issues such as thyroid imbalance, anemia, or chronic nutritional deficiencies. If you notice severe ridges, discoloration, spoon-shaped nails, sudden nail changes, or fatigue along with nail weakness, consult a healthcare professional for proper evaluation and testing.

A Gentle Reminder

Natural remedies support overall wellness but are not instant cures. Avoid exaggerated claims that promise “overnight nail transformation.” Healthy nails reflect long-term habits. With proper nutrition, hydration, and gentle care, many people notice gradual improvement within 6–8 weeks—the typical nail growth cycle.

Your nails are small but powerful messengers. Listening to them can help you adjust your diet, self-care routine, and overall wellness approach. By nourishing your body inside and protecting your nails outside, you create the foundation for stronger, smoother, and healthier nails naturally.

Natural Juice That’s Packed With Benefits

Natural juices have long been valued for their refreshing taste and nourishing qualities. When made from fresh fruits, vegetables, and herbs, these juices can provide vitamins, minerals, antioxidants, and hydration that help support overall wellness. One particularly powerful combination blends carrots, oranges, ginger, lemon, and turmeric to create a vibrant and nutrient-rich drink. This natural juice is simple to prepare, deliciously balanced between sweet and tangy flavors, and filled with ingredients commonly associated with supporting energy, digestion, and immune health. Below is a complete recipe along with preparation tips and helpful insights to help you enjoy this wholesome drink as part of a balanced lifestyle.

Why This Juice Stands Out

Each ingredient in this natural juice contributes its own unique nutritional profile. Carrots are rich in beta-carotene, which the body converts into vitamin A, an essential nutrient that supports vision and skin health. Oranges provide vitamin C, which helps support the immune system and contributes to healthy collagen formation. Ginger and turmeric have been traditionally used in many cultures for their warming properties and their potential to support digestion. Lemon adds brightness and provides additional vitamin C and refreshing flavor. When combined, these ingredients create a juice that is not only flavorful but also nutritionally diverse.

Ingredients

  • 3 medium fresh carrots (peeled and chopped)

  • 2 fresh oranges (peeled and seeds removed)

  • 1 small piece of fresh ginger (about 1 inch, peeled)

  • 1 small piece of fresh turmeric root (about ½ inch, peeled) or ¼ teaspoon turmeric powder

  • Juice of ½ fresh lemon

  • ½ cup cold water (optional, for adjusting consistency)

  • 1 teaspoon raw honey (optional, for mild sweetness)

  • Ice cubes (optional, for serving)

Preparation Method

Start by washing all produce thoroughly under running water to remove any dirt or residue. Even if you plan to peel some ingredients, washing helps prevent transferring impurities to the edible portion.

Next, peel the carrots and chop them into small pieces. This helps them blend or juice more easily and evenly. Peel the oranges and remove any visible seeds to ensure a smooth texture and balanced taste.

Peel the ginger and turmeric carefully. Fresh turmeric can stain surfaces and hands, so you may want to wear gloves or wash your hands quickly afterward.

If using a blender, place the chopped carrots, orange segments, ginger, turmeric, lemon juice, and water into the blender jar. Blend on high speed until the mixture becomes smooth and well combined. Once blended, strain the mixture using a fine mesh strainer or cheesecloth if you prefer a smoother juice. If you enjoy a thicker, fiber-rich drink, you can skip straining.

If using a juicer, simply feed the carrots, oranges, ginger, and turmeric through the juicer according to the manufacturer’s instructions. Stir in the lemon juice afterward for the freshest flavor.

Taste the juice and add raw honey if you prefer a slightly sweeter profile. Stir well to combine.

Serve the juice immediately over ice if desired. Fresh juice is best enjoyed right after preparation to preserve flavor and nutritional quality.

Nutritional Highlights

This natural juice is rich in antioxidants, which help protect the body from oxidative stress. Carrots provide plant compounds that support eye health, while citrus fruits supply hydration and vitamin C. Ginger and turmeric are often appreciated for their natural warming and soothing properties, especially when included in balanced dietary habits. Lemon enhances freshness while contributing additional micronutrients.

Because this juice contains natural fruit sugars, it provides gentle, quick energy, making it a refreshing choice in the morning or as an afternoon pick-me-up. Including vegetables such as carrots also helps balance sweetness while adding extra nutrients.

Tips for Best Results

Using fresh, high-quality produce significantly improves both flavor and nutritional value. Organic ingredients can be used when available, but thoroughly washing conventional produce is also effective.

Adjust the ingredient ratios to match your taste preferences. If you prefer a sweeter juice, add an extra orange or a small apple. For a stronger, spicier flavor, increase the ginger slightly. If the juice tastes too strong, dilute it with a little cold water or coconut water for a lighter consistency.

Fresh turmeric root provides the brightest flavor, but powdered turmeric works well when fresh root is unavailable. If using turmeric powder, mix thoroughly to prevent settling.

Serving Suggestions

This juice can be enjoyed as part of a balanced breakfast, served alongside whole-grain toast, eggs, or yogurt. It also pairs well with light lunches or can be consumed after physical activity as a refreshing hydration boost.

For presentation, garnish with a thin lemon slice or a small sprig of fresh mint. Serving in a clear glass highlights the vibrant golden-orange color, making the drink visually appealing as well.

Storage Advice

Fresh juice is most beneficial when consumed immediately after preparation. However, if needed, it can be stored in an airtight glass container in the refrigerator for up to 24 hours. Shake or stir well before drinking, as natural separation may occur. Avoid prolonged storage because exposure to air and light can gradually reduce freshness and nutrient content.

A Balanced Wellness Addition

While no single drink can replace a varied and nutritious diet, natural juices like this one can be a flavorful and enjoyable addition to healthy daily routines. When combined with proper hydration, balanced meals, regular physical activity, and sufficient rest, fresh juices may help support overall vitality and well-being.

This natural juice recipe offers a simple yet nourishing way to enjoy a blend of fruits, vegetables, and natural herbs in one refreshing glass. Its bright flavor, beautiful color, and wholesome ingredients make it a wonderful option for anyone looking to incorporate more fresh produce into their daily lifestyle.

Elegant Ricotta and Spinach Quiche

There’s something timeless and refined about a beautifully baked quiche. With its golden crust, creamy filling, and delicate balance of flavors, this Elegant Ricotta and Spinach Quiche is perfect for brunch gatherings, light dinners, or even a sophisticated afternoon tea. The combination of fresh spinach and rich ricotta creates a smooth, velvety texture that feels indulgent yet light. Every bite offers a harmony of creamy cheese, tender greens, and a flaky crust that melts in your mouth.

Unlike heavy quiches loaded with cream alone, this version uses ricotta as the star ingredient. Ricotta gives the filling a slightly sweet, airy texture while keeping it rich and satisfying. Paired with sautéed spinach, a touch of garlic, and nutty Parmesan, the result is a balanced dish that feels both comforting and elegant. Serve it warm from the oven or at room temperature—either way, it’s a guaranteed crowd-pleaser.

Ingredients

For the crust:

  • 1 ¼ cups all-purpose flour

  • ½ teaspoon salt

  • ½ cup cold unsalted butter, cubed

  • 3–4 tablespoons ice water

(You may substitute with a store-bought 9-inch pie crust for convenience.)

For the filling:

  • 1 tablespoon olive oil

  • 3 cloves garlic, minced

  • 5 ounces fresh spinach (about 4 cups packed)

  • 1 cup whole milk ricotta cheese

  • 3 large eggs

  • ½ cup heavy cream

  • ½ cup grated Parmesan cheese

  • ½ teaspoon salt

  • ¼ teaspoon black pepper

  • ¼ teaspoon ground nutmeg (optional, but recommended)

  • ½ cup shredded mozzarella (optional for extra richness)

Instructions

Step 1: Prepare the Crust

In a large bowl, combine flour and salt. Add cold cubed butter and use a pastry cutter or your fingertips to blend until the mixture resembles coarse crumbs. Gradually add ice water, one tablespoon at a time, mixing gently until the dough comes together. Form into a disk, wrap in plastic, and refrigerate for at least 30 minutes.

Preheat your oven to 375°F (190°C). Roll out the chilled dough on a lightly floured surface and fit it into a 9-inch pie dish. Trim the edges and prick the bottom with a fork. Line with parchment paper and fill with pie weights or dried beans. Blind bake for 12–15 minutes, then remove weights and bake for another 5 minutes until lightly golden. Set aside.

Step 2: Prepare the Spinach

Heat olive oil in a skillet over medium heat. Add minced garlic and sauté for about 30 seconds until fragrant. Add spinach and cook until wilted, about 2–3 minutes. Remove from heat and let cool slightly. Once cooled, gently squeeze out excess moisture to prevent a watery quiche.

Step 3: Make the Filling

In a large mixing bowl, whisk together eggs, ricotta, and heavy cream until smooth. Stir in Parmesan, salt, pepper, and nutmeg. Fold in the cooked spinach and mozzarella if using. Mix gently to combine without overworking the batter.

Step 4: Assemble and Bake

Pour the filling into the pre-baked crust, spreading evenly. Bake at 375°F (190°C) for 35–40 minutes, or until the center is set but slightly jiggly. The top should be lightly golden.

Allow the quiche to cool for at least 10–15 minutes before slicing. This resting time helps the filling firm up for clean, beautiful slices.

Serving Suggestions

This Elegant Ricotta and Spinach Quiche pairs beautifully with a crisp green salad dressed in lemon vinaigrette. For brunch, serve alongside fresh fruit, roasted potatoes, or smoked salmon. If serving for dinner, a bowl of tomato soup or a light vegetable medley complements it perfectly.

It can also be made ahead of time and refrigerated for up to three days. Simply reheat gently in the oven at 325°F (160°C) for about 15 minutes, or enjoy cold for a picnic-style meal.

Tips for Success

  • Drain spinach well: Excess moisture can make the quiche soggy.

  • Use whole milk ricotta: It provides the creamiest texture.

  • Don’t overbake: The center should still have a slight wobble when removed from the oven.

  • Add herbs: Fresh basil, thyme, or chives elevate the flavor profile.

  • Customize it: Add sautéed mushrooms, caramelized onions, or sun-dried tomatoes for variation.

Why You’ll Love This Recipe

This quiche strikes the perfect balance between light and luxurious. It’s sophisticated enough for entertaining guests yet simple enough for a cozy family meal. The ricotta gives it a delicate creaminess that feels less heavy than traditional custard-based quiches, while spinach adds freshness and color.

Every slice showcases a beautiful contrast between the golden crust and the creamy green-speckled filling. Whether served warm, at room temperature, or chilled, this Elegant Ricotta and Spinach Quiche brings a touch of charm and refinement to your table.

Drink this EVERY DAY and you will live to be 100 years old | Your Body Will Cure Its Own Diseases

For centuries, the longest-living cultures in the world have shared one powerful belief: the body already knows how to heal itself—when we stop getting in its way. From the mountain villages of the Mediterranean to rural Asian communities where people live well past 90, daily rituals—not pills—form the foundation of longevity.

One of the most common rituals is a simple daily drink, prepared with natural ingredients that gently support digestion, circulation, detoxification, and cellular renewal. This is not a “magic cure,” and it does not replace medical care. Instead, it works quietly, day after day, by helping the body return to balance.

When practiced consistently, this drink becomes a signal to your body: it’s safe to repair, cleanse, and restore.

Why Daily Drinks Matter More Than You Think

Your body is constantly healing itself—every second. Cells regenerate, toxins are filtered, inflammation is managed, and energy systems are recalibrated. But stress, poor digestion, sugar overload, dehydration, and inflammation can slow these natural processes.

A daily wellness drink works by:

  • Supporting the liver and kidneys (your main detox organs)

  • Encouraging gentle digestion and elimination

  • Improving hydration at a cellular level

  • Reducing low-grade inflammation

  • Supporting circulation and oxygen delivery

Longevity isn’t about one dramatic change. It’s about small habits done every day for decades.

The Longevity Support Drink (Traditional Wellness Recipe)

This recipe is inspired by folk remedies used across many cultures, with ingredients that have stood the test of time.

Ingredients

  • 1 cup warm (not hot) filtered water

  • Juice of ½ fresh lemon

  • 1 teaspoon raw honey (optional, but traditional)

  • ¼ teaspoon ground turmeric

  • Pinch of black pepper

  • ½ teaspoon grated fresh ginger or a pinch of dried ginger

How to Prepare It

  1. Warm the water gently—lukewarm is ideal.

  2. Add lemon juice and stir well.

  3. Mix in turmeric and black pepper (pepper helps turmeric absorb better).

  4. Add ginger and honey if using.

  5. Stir slowly and drink mindfully.

Best time: Morning, on an empty stomach
Frequency: Once daily

What Each Ingredient Traditionally Supports

Lemon

Lemon has long been used to stimulate digestion and support liver function. It encourages bile flow, helps wake up the digestive system, and provides vitamin C for immune support.

Turmeric

Used for thousands of years in traditional systems, turmeric is known for supporting the body’s natural inflammatory response and cellular health.

Black Pepper

More than a spice, black pepper enhances nutrient absorption and gently stimulates digestion.

Ginger

Ginger supports circulation, digestion, and gut comfort. Many cultures use it daily to maintain internal warmth and balance.

Raw Honey (Optional)

Traditionally used to support energy and soothe the digestive tract. Skip it if you prefer a sugar-free version.

What Happens When You Drink This Consistently

People who adopt this ritual often report:

  • Better digestion and less bloating

  • More regular bowel movements

  • Improved morning energy

  • Reduced cravings for heavy or sugary foods

  • A general feeling of lightness and clarity

These effects don’t usually happen overnight. The real magic is consistency—the same way brushing your teeth works over years, not days.

Can Your Body “Cure Itself”?

Your body has extraordinary self-repair mechanisms:

  • The liver regenerates

  • The gut lining renews every few days

  • Immune cells adapt and learn

  • Inflammation rises and falls naturally

This drink does not cure diseases—but it creates an internal environment where healing is easier. When digestion works well, inflammation is lower, and hydration improves, the body can focus on repair instead of survival.

Longevity Is More Than a Drink

People who live to 100 don’t rely on one recipe. They share habits like:

  • Eating simply

  • Walking daily

  • Managing stress

  • Maintaining social connection

  • Having a sense of purpose

This drink fits into that lifestyle as a daily anchor ritual—a quiet moment of care that reminds your body to slow down and reset.

Important Notes

  • This is a wellness recipe, not a medical treatment

  • If you have gallbladder issues, ulcers, or are on medication, consult a healthcare professional

  • Start with small amounts if you have a sensitive stomach

Final Thought

You don’t live longer by chasing miracles.
You live longer by honoring your body every single day.

One warm cup.
Five simple ingredients.
A few quiet minutes each morning.

Over time, those minutes add up—to vitality, resilience, and a life well lived

Cleanses the Liver 150 Times More Powerful Than Garlic and Lemon

For generations, garlic and lemon have been celebrated as powerful allies for liver wellness. They’re simple, accessible, and time-tested. But in many traditional healing systems around the world, there’s a deeper, more potent blend that elders quietly relied on—one believed to work far beyond garlic and lemon alone.

This herbal tonic combines bitter, warming, and cleansing ingredients that have long been associated with liver support, digestion, and internal balance. While modern science reminds us that the liver naturally detoxifies the body on its own, traditional cultures believed that certain plants could support this process by stimulating bile flow, easing digestive burden, and reducing stagnation.

Let’s explore this powerful blend, why it earned such a legendary reputation, and how to prepare it at home.

Why the Liver Loves Bitter and Warming Herbs

In traditional herbalism, the liver is associated with movement, filtering, and balance. When digestion feels heavy, energy feels low, or the body feels sluggish, bitter herbs were often the first remedy reached for.

Bitter flavors are believed to:

  • Stimulate bile production

  • Support fat digestion

  • Reduce feelings of heaviness after meals

  • Encourage natural cleansing pathways

Warming spices, on the other hand, were used to:

  • Improve circulation

  • Wake up sluggish digestion

  • Help the body process nutrients more efficiently

When combined, these elements create a tonic that feels both cleansing and strengthening—gentle, yet deeply supportive.

The Legendary Liver-Support Tonic Ingredients

This blend goes far beyond garlic and lemon by incorporating herbs traditionally considered liver-centered:

🌿 Turmeric Root

Known as the “golden root,” turmeric has been used for centuries in Ayurvedic and Eastern traditions. It was prized for supporting bile flow and overall digestive harmony.

🌿 Dandelion Root

Often overlooked as a weed, dandelion root was historically valued as one of the most important bitter roots for liver and gallbladder support.

🌿 Ginger

A warming spice that helps stimulate digestion and circulation, ginger also balances the bitterness of other ingredients.

🌿 Black Pepper

Used traditionally to “activate” herbal blends, black pepper was believed to enhance absorption and potency.

🌿 Lemon Peel (not juice)

Unlike lemon juice, the peel contains aromatic oils traditionally associated with cleansing and digestive stimulation.

🌿 Raw Honey

Added not only for taste, but because traditional healers believed honey helped carry herbs deeper into the body while soothing digestion.

The UNIE Liver Cleansing Tonic Recipe

Ingredients:

  • 1 tablespoon freshly grated turmeric root (or 1 teaspoon dried)

  • 1 tablespoon chopped dandelion root (dried or fresh)

  • 1 teaspoon freshly grated ginger

  • ½ teaspoon freshly ground black pepper

  • Peel of 1 organic lemon (no white pith)

  • 2 cups filtered water

  • 1 teaspoon raw honey (optional, added after cooling)

Instructions:

  1. Add turmeric, dandelion root, ginger, black pepper, and lemon peel to a small pot.

  2. Pour in the water and bring to a gentle simmer.

  3. Cover and simmer on low heat for 15–20 minutes.

  4. Remove from heat and allow to cool slightly.

  5. Strain into a mug and stir in raw honey if desired.

  6. Drink warm.

How to Use This Tonic Traditionally

In traditional wellness practices, this tonic was not consumed excessively. Instead, it was used intentionally.

  • Drink once daily, preferably in the morning or early evening

  • Use for 5–7 days, then take a break

  • Best consumed on an empty or light stomach

The philosophy was simple: support the liver, don’t overwhelm it.

Why It’s Said to Be “More Powerful Than Garlic and Lemon”

Garlic and lemon are excellent—but they work mostly on the surface level of digestion and circulation. This tonic goes deeper by:

  • Using bitter roots that specifically target liver pathways

  • Combining warming spices that improve movement and absorption

  • Supporting bile flow, which is central to liver function

  • Working gently over time instead of aggressively

The phrase “150 times more powerful” isn’t about numbers—it reflects the depth and complexity of the blend compared to single-ingredient remedies.

A Gentle Reminder

This recipe comes from traditional wellness wisdom, not modern medical treatment. It’s meant to support the body, not replace professional care. If you’re pregnant, managing a medical condition, or taking medication, it’s always wise to consult a healthcare professional before using herbal tonics.

Final Thoughts

Sometimes the most powerful remedies aren’t loud or extreme. They’re quiet, bitter, warming, and deeply rooted in tradition. This liver-support tonic is a reminder that healing rituals were once slow, intentional, and respectful of the body’s natural intelligence.

How to make a homemade and natural dye shampoo with cinnamon

Natural hair care has made a big comeback, and for good reason. Many people want to avoid harsh dyes, ammonia, and peroxide while still keeping their hair rich, shiny, and lively. Cinnamon has been used for centuries not just as a spice, but also in traditional beauty rituals. When combined with a mild shampoo base, it can subtly tint hair while nourishing the scalp.

This recipe is ideal if you want a gradual, natural-looking warmth, not an overnight transformation.

Why Cinnamon Works for Hair

Cinnamon contains natural pigments that can enhance reddish, golden, and warm brown undertones, especially in light brown, dark blonde, or naturally warm hair. Over time, it can slightly deepen color and add dimension.

Additional benefits include:

  • Helps hair look shinier

  • Adds warmth and depth to dull tones

  • Naturally fragrant

  • Can support scalp freshness when used gently

⚠️ Important note: Cinnamon is powerful. Used incorrectly, it may irritate sensitive skin. Always dilute it properly and do a patch test.

Ingredients (Simple & Natural)

  • 1 cup unscented natural shampoo (castile-based or sulfate-free)

  • 1½ tablespoons ground cinnamon (organic preferred)

  • 1 tablespoon raw honey (optional, for shine and softness)

  • 1 tablespoon aloe vera gel (soothing and moisturizing)

  • ½ cup distilled water

  • 1 teaspoon olive oil or coconut oil (optional, for dry hair)

Step-by-Step Preparation

  1. Create the cinnamon infusion
    In a small saucepan, add the cinnamon and distilled water.
    Simmer gently on low heat for 10–15 minutes. Do not boil aggressively.
    Remove from heat and let it cool completely.

  2. Strain thoroughly
    Use a fine mesh strainer or cheesecloth to remove all cinnamon particles.
    This step is crucial to prevent scalp irritation and residue.

  3. Mix the shampoo base
    In a clean bowl, combine the natural shampoo, honey, aloe vera gel, and oil (if using).

  4. Add the cinnamon liquid
    Slowly pour the cooled cinnamon infusion into the shampoo mixture, stirring gently until fully blended.

  5. Bottle and store
    Transfer to a clean bottle with a tight lid.
    Store in the refrigerator and use within 7–10 days.

How to Use the Cinnamon Dye Shampoo

  1. Wet your hair thoroughly.

  2. Apply the shampoo evenly from roots to ends.

  3. Massage gently into the scalp.

  4. Leave on for 3–5 minutes for mild warmth, or up to 10 minutes for stronger tone.

  5. Rinse thoroughly with lukewarm water.

  6. Follow with a conditioner (preferably natural and lightweight).

Frequency

Use 2–3 times per week. Color builds gradually, so patience is key.

What Results to Expect

  • Subtle warmth and glow after 3–5 washes

  • Richer cinnamon or golden tones after 2–3 weeks

  • Added shine and softness

  • No harsh line of regrowth or sudden color change

This works best on:

  • Light brown hair

  • Dark blonde hair

  • Naturally warm-toned hair

It may not visibly color very dark or black hair, but it can still improve shine.

Safety Tips (Very Important)

  • Always do a patch test behind the ear or on the inner arm.

  • Avoid if you have a sensitive scalp, eczema, or open sores.

  • Never use undiluted cinnamon directly on the scalp.

  • If you feel burning or itching, rinse immediately.

  • Avoid eye contact.

Custom Variations

  • For darker warmth: Add 1 tablespoon brewed coffee to the infusion

  • For reddish tones: Add 1 teaspoon paprika (optional and mild)

  • For dry hair: Increase aloe vera and oil slightly

Final Thoughts

This homemade cinnamon dye shampoo is a gentle, natural way to enhance your hair’s warmth and vitality without harsh chemicals. It’s not about instant results—it’s about gradual beauty, healthy hair, and consistency. With regular use, you’ll notice richer tones, more shine, and a soft, natural glow that looks effortless.

7 Gentle Nighttime Habits to Support a Lighter, Happier Colon

Our bodies love rhythm. Just like the sun sets and the world slows down, your digestive system also prefers a gentle wind-down in the evening. When nights are rushed, heavy, or stressful, the colon often takes the hit—showing up the next day as bloating, heaviness, or sluggish digestion. The good news? You don’t need harsh cleanses or extreme routines. Small, consistent nighttime habits can make a surprisingly big difference over time.

Here are seven gentle nighttime habits that support a lighter, happier colon—naturally and sustainably.

1. Stop Eating Earlier Than You Think

Late-night meals force your digestive system to work when it’s meant to rest. Ideally, aim to finish your last substantial meal 2–3 hours before bedtime. This gives your stomach and intestines time to process food before your body shifts into repair mode during sleep.

If hunger sneaks in later, keep it light—think warm herbal tea or a small piece of fruit. A calmer digestive system overnight often leads to smoother bowel movements in the morning.

2. Choose Warm Over Cold in the Evening

Cold foods and drinks can slow digestion, especially at night. Swapping ice-cold beverages for warm or room-temperature options helps relax the digestive tract.

A simple cup of warm water, chamomile tea, or fennel tea before bed can gently encourage intestinal movement without overstimulation. Warmth signals safety to the body—and digestion responds best when the body feels safe.

3. Create a “Digestive Pause” Ritual

Stress is one of the biggest enemies of a happy colon. When the nervous system is tense, digestion slows. A short nightly ritual—just 5 to 10 minutes—can shift your body from stress mode into rest mode.

Try this:

  • Sit or lie down comfortably

  • Take slow, deep breaths (inhale 4 seconds, exhale 6 seconds)

  • Place one hand on your belly and consciously soften it

This activates the parasympathetic nervous system, which directly supports healthy bowel function.

4. Gentle Abdominal Movement Before Bed

You don’t need intense exercise at night. In fact, vigorous workouts late in the evening can disrupt digestion and sleep. Instead, opt for gentle movement that encourages intestinal flow.

Good options include:

  • Light stretching

  • Knees-to-chest pose

  • Slow walking for 5–10 minutes

  • Gentle clockwise belly massage

These movements support natural peristalsis—the wave-like motion that helps move waste through the colon.

5. Hydrate—But Wisely

Hydration matters, but timing matters too. Drinking large amounts of water right before bed can disrupt sleep, while not drinking enough can lead to harder stools.

Aim to hydrate consistently throughout the day, then sip lightly in the evening if needed. A small glass of warm water an hour before bed can help keep the colon hydrated without overloading the bladder.

6. Keep Evenings Predictable

Your colon loves routine. Going to bed at wildly different times each night confuses your internal clock, including the signals that regulate bowel movements.

Try to:

  • Go to bed around the same time each night

  • Dim lights an hour before sleep

  • Reduce screen exposure

A consistent sleep schedule supports the body’s natural “gastrocolic reflex,” which often triggers a morning bowel movement.

7. Trust the Morning—Don’t Force the Night

One of the gentlest habits is knowing what not to do. Nighttime is not meant for forcing bowel movements or using aggressive remedies. The colon naturally becomes more active in the morning, especially after waking and eating.

By supporting your body overnight—through calm, warmth, hydration, and routine—you allow the colon to do its work when it’s ready. This reduces strain and supports long-term digestive comfort.

Why Gentle Works Better Than Extreme

Extreme cleanses, harsh laxatives, and aggressive detox routines often irritate the colon and weaken its natural rhythm. Gentle nightly habits, on the other hand, build trust with your body. Over time, this leads to more regularity, less bloating, and a lighter overall feeling—without stress or dependency.

Think of your colon like a shy guest. When the environment is calm, warm, and predictable, it shows up willingly. When pressured or shocked, it shuts down.

Final Thought

A happier colon isn’t about doing more—it’s about doing less, more consistently. By softening your evenings and honoring your body’s natural rhythm, you create the conditions for digestive ease to happen on its own.

One spoonful every night for three days helped flatten my belly. Don’t overdo it—less is more.

If you’ve ever gone to bed feeling uncomfortably bloated, tight around the waist, or heavy despite eating “normally,” you’re not alone. Belly puffiness is one of the most common frustrations people talk about quietly but feel loudly. And while there’s no miracle cure, sometimes a simple nightly ritual can make a noticeable difference — especially when it supports digestion, hydration, and calm rather than extremes.

That’s exactly what happened when I tried a modest, one-spoon routine for just three nights. No fasting. No detox madness. No drinking liters of strange liquids. Just one spoon before bed — and a reminder that less really is more.

Why Belly Bloating Happens (and Why Nights Matter)

A flatter belly isn’t always about fat. In fact, for many people, it’s about:

  • Slow digestion in the evening

  • Gas buildup from late meals

  • Mild constipation

  • Inflammation triggered by salty or processed foods

  • Stress that tightens the gut overnight

Nighttime is when your digestive system slows down and shifts into repair mode. Giving it gentle support — not overload — can help reduce that “morning belly” feeling that sneaks up even when your diet hasn’t changed.

The One-Spoon Nighttime Blend

This simple mixture has been used in different cultures as a calming, digestion-friendly night habit. It’s not aggressive, and that’s the point.

You’ll need:

  • 1 teaspoon raw honey

  • ½ teaspoon fresh lemon juice

  • A pinch of ground ginger (or cinnamon if ginger is too strong)

Mix everything well and take just one spoonful about 30 minutes before bedtime.

That’s it. No second helping. No “extra for better results.” Overdoing it can actually irritate digestion — which is why restraint is key here.

Why This Combination Works Gently

Each ingredient plays a small but meaningful role:

Raw honey
Supports the gut environment, helps soothe the stomach lining, and may reduce late-night sugar cravings that lead to bloating.

Lemon juice
Encourages mild digestive stimulation without heaviness. In small amounts, it helps the body process food more efficiently rather than sitting stagnant overnight.

Ginger or cinnamon
Both are known for easing gas, supporting digestion, and reducing that tight, swollen feeling in the abdomen. A pinch is enough — more can be too warming for nighttime.

Together, they work not as a “fat burner,” but as a digestive calm-down signal.

What Changed After Three Nights

By the second night, the most noticeable shift wasn’t the mirror — it was comfort. Less pressure. Less heaviness. Better bathroom regularity in the morning. By the third day, the belly felt flatter not because weight vanished, but because bloating backed off.

That’s an important distinction. A flatter belly often comes from reduced water retention, smoother digestion, and less trapped gas — all things this routine quietly supports.

Why You Shouldn’t Overdo It

It’s tempting to think:
“If one spoon helps, three must be better.”

That’s where many people go wrong.

Too much honey at night can spike blood sugar. Too much lemon can irritate the stomach. Too much ginger can cause warmth or reflux. The body responds best to signals, not shocks.

This is a nudge, not a push.

Tips to Maximize the Effect

To support this nightly spoon, try these small habits:

  • Stop eating heavy meals at least 2–3 hours before bed

  • Drink water earlier in the evening, not right before sleep

  • Avoid very salty foods at night

  • Sleep slightly on your left side to aid digestion

These tiny adjustments amplify the effect without adding effort.

Who Should Skip or Adjust

This routine is gentle, but it’s not for everyone. If you have:

  • Acid reflux that worsens with citrus

  • Blood sugar concerns

  • Allergies to honey

You should skip or adjust ingredients (for example, warm water with a pinch of cinnamon instead).

The Real Takeaway

This isn’t about shrinking yourself overnight. It’s about supporting your body instead of fighting it. When digestion improves, inflammation eases, and stress lowers, the belly often follows naturally.

Classic Cream Puffs with Caramel & Vanilla Cream

There’s something undeniably magical about classic cream puffs. Light as air, delicately crisp on the outside, and filled with luscious vanilla cream, they feel elegant without being fussy. Add a drizzle of golden caramel, and suddenly this humble pastry becomes a show-stopping dessert worthy of holidays, birthdays, or a quiet afternoon when you want to treat yourself to something truly special.

Cream puffs—known as choux à la crème—have been beloved for centuries. Their secret lies in choux pastry, a simple dough that puffs dramatically in the oven, creating hollow centers ready to be filled with silky cream. Paired with homemade vanilla custard and rich caramel sauce, this dessert strikes the perfect balance between lightness and indulgence.

Let’s walk through this classic recipe step by step, so you can recreate bakery-quality cream puffs right in your own kitchen.

Ingredients

For the Choux Pastry (Cream Puff Shells)

  • 1 cup water

  • ½ cup unsalted butter

  • 1 cup all-purpose flour

  • 4 large eggs

  • ¼ teaspoon salt

For the Vanilla Cream Filling

  • 2 cups whole milk

  • ½ cup granulated sugar

  • 4 egg yolks

  • ¼ cup cornstarch

  • 2 tablespoons unsalted butter

  • 1 tablespoon pure vanilla extract

  • ½ cup heavy cream, whipped to soft peaks

For the Caramel Sauce

  • 1 cup granulated sugar

  • ¼ cup water

  • ½ cup heavy cream (warm)

  • 2 tablespoons butter

  • Pinch of salt

Step 1: Make the Choux Pastry

Preheat your oven to 400°F (200°C) and line a baking sheet with parchment paper.

In a medium saucepan, combine the water, butter, and salt. Heat over medium until the butter melts completely and the mixture comes to a rolling boil. Remove from heat and add the flour all at once, stirring vigorously with a wooden spoon.

Return the pan to low heat and cook for about 1–2 minutes, stirring constantly, until the dough pulls away from the sides and forms a smooth ball. Transfer the dough to a bowl and let it cool slightly for about 5 minutes.

Add the eggs one at a time, mixing well after each addition. The dough should become smooth, glossy, and thick enough to hold its shape when spooned.

Spoon or pipe small mounds of dough onto the prepared baking sheet, leaving space between each puff. Bake for 25–30 minutes, until puffed, golden, and crisp. Do not open the oven while baking.

Once baked, turn off the oven, crack the door slightly, and let the puffs dry inside for 10 minutes. Cool completely on a rack.

Step 2: Prepare the Vanilla Cream

In a saucepan, heat the milk over medium heat until just steaming (do not boil).

In a bowl, whisk together the sugar, egg yolks, and cornstarch until smooth and pale. Slowly pour the warm milk into the egg mixture while whisking constantly to prevent curdling.

Return everything to the saucepan and cook over medium heat, whisking continuously, until the mixture thickens into a smooth custard. Remove from heat and stir in the butter and vanilla extract.

Transfer the custard to a bowl, cover with plastic wrap directly on the surface, and let it cool completely. Once cooled, gently fold in the whipped cream to create a light, airy vanilla cream.

Step 3: Make the Caramel Sauce

In a heavy saucepan, combine the sugar and water. Cook over medium heat without stirring until the mixture turns a deep amber color.

Carefully add the warm heavy cream (it will bubble vigorously), then stir in the butter and salt. Cook for another minute until smooth. Remove from heat and let cool slightly.

Step 4: Assemble the Cream Puffs

Slice the cooled cream puffs in half horizontally or poke a small hole in the bottom.

Fill each puff generously with vanilla cream using a spoon or piping bag. Arrange them on a serving platter and drizzle warm caramel sauce over the top.

For an extra touch, dust lightly with powdered sugar or add a sprinkle of chopped nuts.

Tips for Perfect Cream Puffs

  • Use room-temperature eggs for smoother choux dough

  • Do not underbake—crispy shells prevent sogginess

  • Fill cream puffs just before serving for the best texture

  • Caramel can be reheated gently if it thickens

Final Thoughts

Classic Cream Puffs with Caramel & Vanilla Cream are proof that simple ingredients can create something extraordinary. Each bite delivers crisp pastry, silky vanilla filling, and rich caramel sweetness—all working together in perfect harmony. Whether you’re serving guests or treating yourself, this timeless dessert never fails to impress.

Doctors reveal that eating beetroot causes surprising changes in the body

Beetroot has long been a quiet staple on dinner plates, often grated into salads or roasted as a humble side dish. But in recent years, doctors and nutrition experts have been paying much closer attention to this deep-red root—and what they’re discovering is surprising. From circulation to digestion, energy levels to brain health, eating beetroot regularly can trigger noticeable changes in the body, some of which people feel within hours.

So what exactly happens when you start eating beetroot? And why are so many doctors recommending it more often?

Let’s break it down.

1. Improved Blood Flow and Circulation

One of the most well-documented effects of beetroot is its impact on blood circulation. Beetroot is rich in natural nitrates, which the body converts into nitric oxide. This compound helps relax and widen blood vessels, allowing blood to flow more freely.

Doctors note that improved circulation can lead to:

  • Better oxygen delivery to muscles and organs

  • Reduced strain on the heart

  • A gentle lowering of blood pressure in some people

This is why beetroot juice is popular among athletes—and why some cardiologists recommend beetroot as part of a heart-friendly diet.

2. A Natural Energy Boost (Without Caffeine)

Many people report feeling more energetic after consuming beetroot, and doctors say there’s a good reason for this. Enhanced blood flow means cells receive oxygen more efficiently, which supports stamina and endurance.

Unlike caffeine, beetroot doesn’t stimulate the nervous system. Instead, it supports energy production at the cellular level, making the boost feel smoother and longer-lasting. This is especially noticeable during walking, exercise, or physically demanding work.

3. Digestive Support and Gut Health

Beetroot is high in dietary fiber, which plays a key role in digestion. Doctors often recommend fiber-rich foods like beetroot to support:

  • Regular bowel movements

  • A healthier gut microbiome

  • Reduced bloating over time

The natural pigments in beetroot, known as betalains, may also help soothe the digestive tract and support liver function, which indirectly improves digestion and nutrient absorption.

4. Anti-Inflammatory Effects Inside the Body

Chronic inflammation is linked to many modern health issues, from joint discomfort to metabolic problems. Beetroot contains powerful antioxidants—especially betalains—that help neutralize oxidative stress.

Doctors explain that when inflammation is reduced:

  • Joints may feel less stiff

  • Recovery after exercise can improve

  • Overall cellular health is supported

This doesn’t mean beetroot is a cure, but it can be a helpful part of an anti-inflammatory eating pattern.

5. Brain and Cognitive Support

Another surprising effect of beetroot is its connection to brain health. Because nitric oxide improves blood flow, it also enhances circulation to the brain. Some doctors believe this may help support:

  • Focus and mental clarity

  • Memory function, especially with aging

  • Slower cognitive decline when combined with a healthy lifestyle

While beetroot isn’t a “brain drug,” its ability to support vascular health plays a key role in keeping the brain well nourished.

6. A Change in Urine or Stool Color (Totally Normal)

One effect that often shocks people is a reddish or pink tint in urine or stool after eating beetroot—a harmless condition known as beeturia. Doctors stress that this is completely normal and not a sign of bleeding or illness.

It simply means beet pigments passed through the body without being fully broken down. No need to panic.

7. Support for Natural Detox Pathways

Beetroot supports the liver, one of the body’s main detox organs. Compounds in beetroot help liver enzymes function efficiently, which may assist the body in processing waste products.

Doctors emphasize that the body already detoxes itself—but foods like beetroot support these natural processes, rather than replacing them.

Who Should Be Careful With Beetroot?

Despite its benefits, beetroot isn’t for everyone in large amounts. Doctors advise moderation if you:

  • Are prone to kidney stones (beetroot is high in oxalates)

  • Have very low blood pressure

  • Are sensitive to digestive changes

As with any food, balance is key.

Simple Doctor-Approved Beetroot Recipe

Gentle Roasted Beetroot Bowl

Ingredients:

  • 2 medium beetroots, peeled and cubed

  • 1 tablespoon olive oil

  • Pinch of salt

  • Optional: lemon juice or yogurt for topping

Instructions:

  1. Preheat oven to 200°C (400°F).

  2. Toss beetroot with olive oil and salt.

  3. Roast for 35–40 minutes until tender.

  4. Serve warm with a squeeze of lemon or a spoon of yogurt.

This preparation preserves nutrients while making beetroot easy to digest and delicious.

Final Thoughts

Doctors agree that beetroot is far more than a colorful vegetable. Its effects on circulation, digestion, energy, and overall wellness make it a powerful addition to everyday meals. While it’s not a miracle food, eating beetroot regularly can lead to subtle yet meaningful changes in how the body feels and functions.