Proven Health Benefits of Dates (Dried, Fresh, Medjool) – Science-Based Guide

Dates have been cherished for thousands of years, not only for their rich caramel-like sweetness but also for their remarkable nutritional value. Whether enjoyed fresh, dried, or as plump Medjool dates, this ancient fruit continues to earn modern scientific respect. Research now confirms what traditional cultures long believed: dates are far more than a natural sweet treat—they are a functional food with powerful health benefits.

Let’s explore the proven, science-based benefits of dates and understand how different varieties contribute to overall wellness.

1. Nutrient Density in a Small Fruit

Dates are one of the most nutrient-dense fruits available. Despite their sweetness, they are packed with essential vitamins and minerals. A serving of dates provides potassium, magnesium, copper, manganese, iron, and vitamin B6—nutrients essential for nerve function, muscle health, red blood cell production, and metabolism.

Medjool dates, in particular, are larger and contain higher levels of potassium compared to many other fruits. Potassium is vital for maintaining healthy blood pressure and heart rhythm, making dates an excellent choice for cardiovascular support.

2. Natural Energy Without the Crash

Dates are rich in natural sugars—glucose, fructose, and sucrose—making them an excellent source of quick and sustained energy. Unlike refined sugar, dates contain fiber and micronutrients that slow sugar absorption, reducing energy spikes and crashes.

Studies suggest that consuming dates before physical activity can improve endurance and performance. This makes them ideal for athletes, fasting periods, or anyone needing a clean energy boost without artificial stimulants.

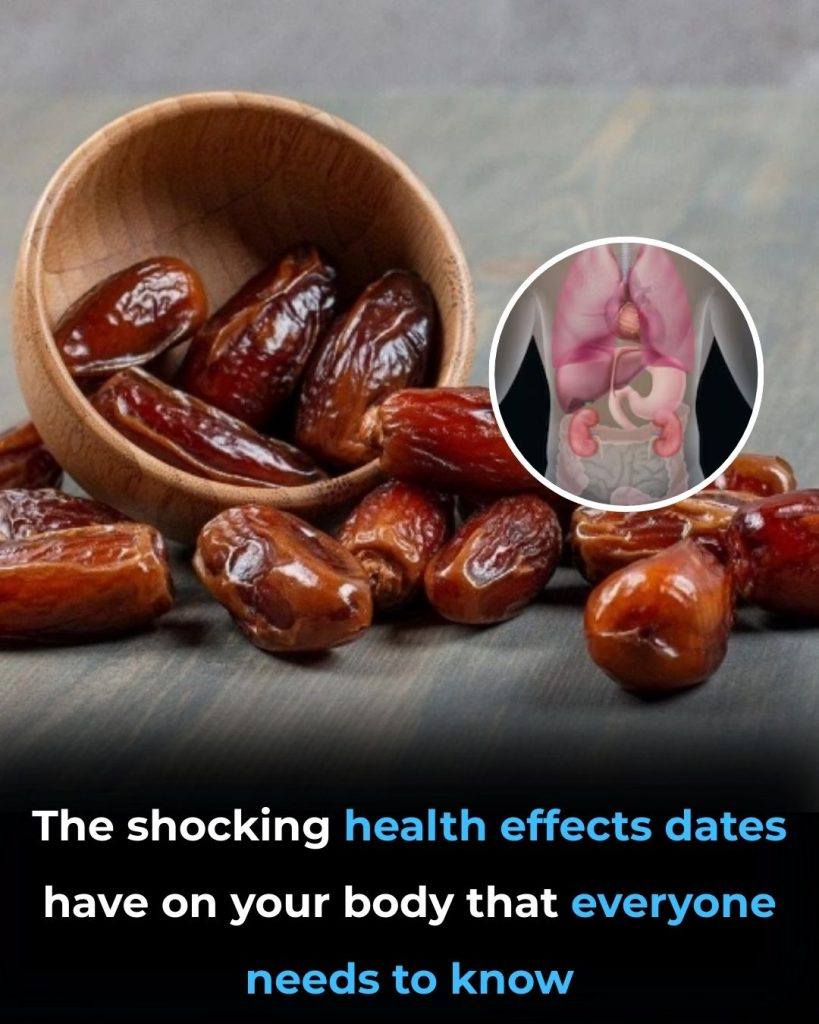
3. Powerful Digestive Health Support

One of the most scientifically supported benefits of dates is their positive effect on digestion. Dates are high in soluble and insoluble fiber, which promotes regular bowel movements and prevents constipation.

Research shows that regular date consumption increases stool frequency and improves gut transit time. Additionally, dates support beneficial gut bacteria, acting as a natural prebiotic. A healthier gut microbiome is linked to improved immunity, better nutrient absorption, and reduced inflammation.

4. Rich in Antioxidants That Fight Disease

Dates contain powerful antioxidants, including flavonoids, carotenoids, and phenolic acid. These compounds protect the body from oxidative stress caused by free radicals—one of the primary drivers of aging and chronic disease.

Scientific studies indicate that dates have higher antioxidant activity than many commonly consumed dried fruits. These antioxidants are linked to reduced risk of heart disease, neurodegenerative conditions, and certain cancers.

Fresh dates tend to have slightly lower sugar content, while dried dates often concentrate antioxidants, making both forms beneficial in different ways.

5. Brain Health and Cognitive Protection

Emerging research suggests that dates may support brain health. Animal and laboratory studies show that compounds in dates can reduce inflammation markers in the brain and inhibit beta-amyloid plaques—one of the hallmarks of Alzheimer’s disease.

The antioxidants in dates also protect neurons from oxidative damage, supporting memory and learning. Including dates regularly in a balanced diet may contribute to long-term cognitive health, especially when combined with other antioxidant-rich foods.

6. Heart Health and Cholesterol Balance

Dates are naturally free of cholesterol and contain compounds that help lower LDL (bad) cholesterol. Their high potassium and magnesium content supports healthy blood vessels and reduces strain on the cardiovascular system.

Several studies indicate that consuming dates daily can lower triglyceride levels and reduce oxidative damage to blood lipids—both critical factors in preventing heart disease. Unlike many sweet snacks, dates support heart health rather than compromise it.

7. Bone Strength and Mineral Support

Dates contain minerals essential for bone health, including calcium, phosphorus, magnesium, and potassium. These nutrients help maintain bone density and may reduce the risk of osteoporosis, especially as we age.

Medjool and dried dates are particularly mineral-rich due to their concentrated nature, making them a valuable addition to diets lacking dairy or fortified foods.

8. Blood Sugar Control When Eaten Mindfully

Despite their sweetness, dates have a relatively low to moderate glycemic index, especially when eaten with protein or healthy fats. Research shows that moderate date consumption does not cause dangerous blood sugar spikes in healthy individuals.

For people with diabetes, portion control is key, but studies suggest dates can be included safely in a balanced meal plan under professional guidance.

9. Support During Pregnancy and Labor

Scientific studies have found that consuming dates in late pregnancy may promote cervical dilation and reduce the need for medical labor induction. Dates provide energy, iron, and compounds that support uterine muscle function.

This traditional practice, now supported by modern research, highlights the unique role dates play in maternal nutrition.

Fresh vs. Dried vs. Medjool: Which Is Best?

  • Fresh dates: Lower in calories and sugar, higher moisture, refreshing taste

  • Dried dates: More concentrated nutrients and fiber

  • Medjool dates: Larger, softer, richer in potassium and antioxidants

All forms offer benefits—the best choice depends on dietary needs and portion size.

Final Thoughts

Dates are a rare combination of indulgence and nutrition. Backed by scientific research, they support digestion, heart health, brain function, energy levels, and more. Whether fresh, dried, or Medjool, dates prove that nature’s sweetness can also be medicine.

Italian Drunken Noodles (Pasta Ubriaca Style)

Italian Drunken Noodles are a bold, rustic fusion dish inspired by pasta ubriaca—literally “drunken pasta”—where noodles are cooked and sauced with wine, garlic, herbs, and hearty ingredients. Unlike traditional Italian pasta that relies heavily on tomato sauce, this recipe celebrates the deep, aromatic richness of wine reduction, olive oil, and savory add-ins. The result is a glossy, intensely flavored noodle dish that feels indulgent, comforting, and just a little rebellious.

This dish is perfect for nights when you want something dramatic but simple, elegant yet satisfying. It’s the kind of meal that fills your kitchen with irresistible aromas and makes an ordinary dinner feel like a trattoria experience.

Why It’s Called “Drunken”

The term “drunken” comes from the generous use of wine—not just as a splash, but as a major flavor base. As the wine simmers, the alcohol cooks off, leaving behind concentrated notes of fruit, acidity, and warmth that cling to the noodles. Combined with garlic, chili flakes, herbs, and olive oil, the wine becomes the soul of the dish.

Ingredients (Serves 4)

For the Noodles

  • 400 g wide noodles (pappardelle, tagliatelle, or thick spaghetti)

  • Salt for boiling water

For the Sauce

  • 4 tablespoons extra-virgin olive oil

  • 1 tablespoon butter (optional, for richness)

  • 6 cloves garlic, thinly sliced

  • 1 medium onion, finely chopped

  • 1 teaspoon red chili flakes (adjust to taste)

  • 1½ cups dry red wine (Chianti or Merlot works beautifully)

  • ½ cup pasta cooking water (reserved)

  • 1 teaspoon smoked paprika

  • 1 teaspoon dried oregano

  • 1 teaspoon dried basil

  • Freshly ground black pepper

  • Salt to taste

Add-Ins (Choose One or Combine)

  • 250 g Italian sausage, sliced

  • OR 200 g mushrooms, sliced

  • OR 150 g sun-dried tomatoes, chopped

Finishing Touches

  • Fresh parsley or basil, chopped

  • Freshly grated Parmesan or Pecorino Romano

  • A drizzle of olive oil

Step-by-Step Instructions

1. Cook the Noodles

Bring a large pot of salted water to a rolling boil. Add the noodles and cook until just al dente. Reserve at least 1 cup of pasta water before draining. The noodles will finish cooking in the sauce, absorbing all that drunken flavor.

2. Build the Flavor Base

Heat olive oil and butter in a wide skillet over medium heat. Add the onion and cook until soft and lightly golden. Stir in the garlic and chili flakes, cooking just until fragrant—about 30 seconds. Be careful not to burn the garlic.

3. Add Your Protein or Vegetables

If using sausage, add it now and cook until browned and caramelized. For mushrooms, sauté until deeply golden and slightly crispy. Sun-dried tomatoes can be added later for a punch of sweetness and acidity.

4. Let the Wine Take Over

Pour in the red wine and turn the heat up slightly. Let it bubble and reduce for 5–7 minutes. This step is crucial—the wine should thicken slightly, deepen in color, and lose its raw alcohol smell. What remains is rich, complex, and intoxicating.

5. Season Like an Italian

Add smoked paprika, oregano, basil, black pepper, and salt. Stir well. If the sauce looks too thick, add a splash of reserved pasta water. This starchy water helps bind the sauce to the noodles, creating a silky finish.

6. Toss the Noodles

Add the cooked noodles directly into the skillet. Toss vigorously, coating every strand in the wine-infused sauce. Let everything cook together for 1–2 minutes so the noodles soak up the flavor.

7. Finish with Freshness

Turn off the heat. Sprinkle in fresh herbs and a generous handful of grated cheese. Drizzle with olive oil and toss once more.

Flavor Profile

Italian Drunken Noodles are:

  • Savory and aromatic from garlic and herbs

  • Bold and slightly smoky from paprika

  • Rich yet balanced thanks to wine acidity

  • Comforting and indulgent without being heavy

Each bite delivers warmth, depth, and just a hint of spice—perfect for cozy evenings or impressive dinners.

Tips for the Best Drunken Noodles

  • Use wine you’d actually drink—cheap wine ruins the sauce.

  • Don’t rush the wine reduction; this is where the magic happens.

  • Wide noodles hold the sauce better than thin ones.

  • For extra indulgence, stir in a spoon of mascarpone or cream at the end.

Serving Suggestions

Serve Italian Drunken Noodles with:

  • Crusty garlic bread

  • A simple green salad with lemon vinaigrette

  • A glass of the same wine used in cooking

This dish is bold enough to stand alone but elegant enough for guests.

Final Thoughts

Italian Drunken Noodles are proof that simplicity, when done right, can be extraordinary. With humble ingredients and a generous pour of wine, you create a dish that feels rustic, soulful, and unforgettable. It’s not traditional, it’s not expected—and that’s exactly what makes it special.

Quick Cottage Cheese Cake with Cherries

If you love desserts that feel indulgent but are surprisingly light, this Quick Cottage Cheese Cake with Cherries will become one of your favorites. It’s creamy without being heavy, naturally rich in protein, and comes together fast—perfect for busy days when you still want something homemade and special. Unlike traditional cheesecakes that require long baking times and complicated steps, this version is simple, forgiving, and wonderfully comforting.

Cottage cheese gives this cake its signature texture: soft, moist, and slightly airy. When blended properly, it becomes smooth and creamy, creating a cake that feels like a cross between a cheesecake and a delicate sponge. The cherries add a burst of sweet-tart flavor that balances the richness beautifully, making every bite fresh and satisfying.

Why This Cottage Cheese Cake Is Different

This recipe is designed for speed and ease without sacrificing flavor. There’s no need for a water bath, no cracking worries, and no special equipment beyond a blender or food processor. It’s also versatile—you can use fresh, frozen, or even jarred cherries depending on the season.

Another advantage is that this cake tastes just as good chilled as it does warm. It works as a light dessert, a coffee-time treat, or even a sweet breakfast slice. Because cottage cheese is naturally lower in fat than cream cheese, the result feels lighter while still being creamy and rich.

Ingredients You’ll Need

For the cake batter:

  • 2 cups cottage cheese (full-fat for best flavor)

  • 3 large eggs, at room temperature

  • ½ cup sugar (adjust to taste)

  • ¼ cup vegetable oil or melted butter

  • 1 teaspoon vanilla extract

  • ¾ cup all-purpose flour

  • 1 teaspoon baking powder

  • Pinch of salt

For the cherry layer:

  • 1½ cups cherries, pitted (fresh or frozen)

  • 2 tablespoons sugar

  • 1 teaspoon lemon juice

  • 1 teaspoon cornstarch (optional, for thickening)

Optional topping:

  • Powdered sugar for dusting

  • Extra cherries for decoration

Step-by-Step Preparation

1. Prepare the Cherries

Start by placing the cherries in a small saucepan with sugar and lemon juice. Cook over medium heat for 5–7 minutes until the cherries release their juices and soften. If you prefer a thicker cherry layer, dissolve the cornstarch in a tablespoon of water and stir it in, cooking for another minute until glossy. Remove from heat and let cool slightly.

2. Blend the Cottage Cheese

This step is key to achieving a smooth texture. Place the cottage cheese in a blender or food processor and blend until completely smooth and creamy. Take your time here—no visible curds should remain.

3. Make the Batter

Add eggs, sugar, oil (or butter), and vanilla to the blended cottage cheese. Blend again until well combined. In a separate bowl, whisk together flour, baking powder, and salt. Gradually add the dry ingredients to the wet mixture, blending just until smooth. Avoid overmixing to keep the cake light.

4. Assemble the Cake

Preheat your oven to 350°F (175°C). Grease and line an 8-inch round or square baking pan. Pour the batter into the pan and smooth the top. Spoon the cherry mixture over the batter, gently swirling it with a knife for a marbled effect, or leave it layered on top for a rustic look.

5. Bake

Bake for 35–40 minutes, or until the center is just set and a toothpick inserted comes out mostly clean. The cake should be lightly golden on top and slightly jiggly in the center—it will firm up as it cools.

6. Cool and Serve

Allow the cake to cool in the pan for at least 15 minutes, then transfer to a rack. Serve warm, at room temperature, or chilled. Finish with a dusting of powdered sugar or a few fresh cherries on top.

Tips for the Best Results

  • Blend thoroughly: Smooth cottage cheese makes all the difference.

  • Don’t overbake: Slight softness ensures a creamy interior.

  • Use quality cherries: Tart cherries give the best contrast, but sweet cherries work beautifully too.

  • Chill for cheesecake vibes: Refrigerate for 2 hours for a firmer, sliceable texture.

Flavor Variations to Try

  • Lemon Cherry Cake: Add lemon zest to the batter for brightness.

  • Chocolate Cherry: Sprinkle dark chocolate chips into the batter before baking.

  • Vanilla Almond: Replace vanilla with almond extract for a bakery-style aroma.

  • Berry Swap: Use blueberries or raspberries instead of cherries.

Final Thoughts

This Quick Cottage Cheese Cake with Cherries proves that delicious desserts don’t have to be complicated. With simple ingredients, minimal prep, and a beautifully balanced flavor, it’s a recipe you’ll come back to again and again. Soft, creamy, lightly sweet, and bursting with cherry goodness—this cake is comfort food done right.

Twice a Week I Bake Cottage Cheese Pancakes Without Flour in Just 3 Minutes

Some recipes don’t just feed your body — they quietly change your routine. These flourless cottage cheese pancakes are exactly that kind of recipe for me. I make them twice a week, sometimes more, because they are fast, nourishing, and incredibly satisfying. No flour, no complicated steps, no long cooking time. Just 3 minutes from mixing to plate, and breakfast (or dinner!) is done.

If you’re someone who wants a high-protein, low-carb meal without sacrificing flavor or comfort, this recipe will quickly become a favorite.

Why Cottage Cheese Pancakes Are a Game-Changer

Cottage cheese is often overlooked, yet it’s one of the most versatile and nutritious ingredients you can keep in your fridge. Rich in protein, calcium, and beneficial amino acids, it creates pancakes that are fluffy, creamy, and filling — all without flour.

Unlike traditional pancakes that rely on refined flour and sugar, these pancakes:

  • Keep you full longer

  • Help stabilize blood sugar

  • Support muscle and bone health

  • Are naturally gluten-free

And the best part? You don’t need to be a skilled cook. If you can use a blender and a pan, you’re already qualified.

The Secret to Making Pancakes in 3 Minutes

The magic lies in simplicity and heat. By using ingredients that cook quickly and blending everything into a smooth batter, you drastically reduce cooking time. Thin pancakes cook evenly and brown beautifully in seconds, not minutes.

This recipe works perfectly for:

  • Busy mornings

  • Late-night cravings

  • Post-workout meals

  • Light dinners

Ingredients (Simple & Honest)

You only need five basic ingredients, most of which you probably already have:

  • ½ cup cottage cheese (full-fat gives the best texture)

  • 1 large egg

  • 2 tablespoons oat flakes or almond meal (optional, but adds structure)

  • A pinch of salt

  • A pinch of baking powder (optional but recommended for fluffiness)

That’s it. No flour, no sugar, no oil inside the batter.

How to Make Cottage Cheese Pancakes in 3 Minutes

Step 1: Blend
Place all ingredients into a blender or food processor. Blend for 20–30 seconds until the batter is smooth and creamy. The texture should be slightly thick but pourable.

Step 2: Heat
Heat a non-stick pan over medium heat. Lightly grease with butter or oil if needed, though a good pan usually needs nothing.

Step 3: Cook
Pour small amounts of batter into the pan, forming thin pancakes. Cook for 30–40 seconds per side. Flip when bubbles appear and edges look set.

Step 4: Serve
Remove from heat and serve immediately. Total cooking time: about 2 minutes.

Texture and Flavor: What to Expect

These pancakes are:

  • Soft on the inside

  • Lightly golden on the outside

  • Slightly creamy, almost cheesecake-like

They are mild in flavor, which makes them perfect for both sweet and savory toppings.

My Favorite Ways to Eat Them

I rotate toppings depending on mood and time of day.

Sweet options:

  • Greek yogurt with honey

  • Fresh berries

  • Cinnamon and vanilla

  • A spoon of peanut butter

Savory options:

  • Avocado and eggs

  • Smoked salmon

  • Greek yogurt with herbs

  • Sautéed mushrooms

Because the pancakes are neutral, they adapt beautifully to whatever you pair them with.

Why I Make Them Twice a Week (At Least)

These pancakes fit into real life. They don’t demand planning, special ingredients, or patience. They keep me full for hours and never leave me feeling heavy or sluggish.

I’ve noticed:

  • Less snacking between meals

  • More energy in the morning

  • Better digestion

  • No sugar crashes

They’re especially great if you’re trying to eat cleaner without feeling restricted.

Tips for Perfect Results Every Time

  • Blend well: Smooth batter makes smoother pancakes

  • Keep pancakes small and thin for faster cooking

  • Don’t overcook — they firm up as they cool

  • Full-fat cottage cheese gives the best flavor

Storage and Meal Prep

You can make a double batch and store leftovers in the fridge for up to 2 days. Reheat in a pan or microwave for 20 seconds. They stay surprisingly soft.

Final Thoughts

Sometimes the simplest recipes become the most reliable ones. These 3-minute flourless cottage cheese pancakes have earned a permanent place in my weekly routine. They’re fast, nourishing, customizable, and genuinely delicious.

Loaded Baked Potato Soup – Creamy, Comforting, and Irresistibly Delicious

Few dishes capture the essence of comfort food quite like Loaded Baked Potato Soup. Rich, creamy, and packed with flavor, this soup transforms the classic baked potato into a warm, spoonable delight that feels like a hug in a bowl. Whether you’re craving something cozy on a cold evening or looking to impress family with a hearty homemade meal, this recipe delivers indulgence without being overly complicated.

This version is extra creamy, deeply savory, and loaded with toppings that mimic your favorite fully dressed baked potato—crispy bacon, sharp cheddar cheese, tangy sour cream, and fresh green onions. The balance of textures and flavors makes every bite satisfying, while a few simple techniques ensure restaurant-quality results right from your kitchen.

Why This Loaded Baked Potato Soup Stands Out

What makes this recipe unique is the double-potato method. Half of the potatoes are blended into the broth for a smooth, velvety base, while the other half remain chunky for that unmistakable baked potato texture. Combined with real butter, milk, and cream, the result is a soup that’s thick, luscious, and never watery.

Another key element is building flavor in layers—from rendering bacon fat to sautéing aromatics and gently simmering the potatoes until perfectly tender. Every step is intentional, creating depth without requiring fancy ingredients.

Ingredients (Serves 4–6)

For the Soup Base

  • 4 large russet potatoes, scrubbed and dried

  • 6 slices thick-cut bacon

  • 3 tablespoons unsalted butter

  • 1 small yellow onion, finely diced

  • 3 cloves garlic, minced

  • ¼ cup all-purpose flour

  • 3 cups chicken broth (or vegetable broth)

  • 1½ cups whole milk

  • 1 cup heavy cream

  • 1 teaspoon salt (adjust to taste)

  • ½ teaspoon black pepper

  • ½ teaspoon smoked paprika

For the Loaded Toppings

  • 1½ cups sharp cheddar cheese, freshly shredded

  • ½ cup sour cream

  • 3 green onions, thinly sliced

  • Extra bacon bits for garnish

Step-by-Step Instructions

1. Bake the Potatoes

Preheat your oven to 400°F (200°C). Pierce the russet potatoes several times with a fork, place them directly on the oven rack, and bake for 50–60 minutes until the skins are crisp and the insides are fluffy. Remove and let cool slightly, then peel and cut into chunks.

Tip: Baking instead of boiling intensifies the potato flavor and prevents excess water.

2. Cook the Bacon

In a large, heavy-bottomed pot or Dutch oven, cook the bacon over medium heat until crispy. Remove the bacon and place it on paper towels to drain. Once cooled, crumble it into small pieces. Leave about 2 tablespoons of bacon fat in the pot for extra flavor.

3. Build the Flavor Base

Add butter to the bacon fat and melt over medium heat. Stir in the diced onion and cook for 4–5 minutes until soft and translucent. Add the garlic and cook for another 30 seconds, just until fragrant.

Sprinkle in the flour and stir continuously for 1–2 minutes to form a roux. This step thickens the soup and gives it a silky texture without tasting floury.

4. Create the Creamy Soup

Slowly pour in the chicken broth while whisking to prevent lumps. Bring to a gentle simmer, then add the milk, heavy cream, salt, pepper, and smoked paprika.

Add half of the baked potato chunks to the pot. Using an immersion blender, blend until smooth and creamy. If you don’t have one, carefully transfer part of the soup to a blender and return it to the pot.

Stir in the remaining potato chunks for texture.

5. Finish and Enrich

Reduce the heat to low and stir in 1 cup of shredded cheddar cheese, allowing it to melt completely into the soup. Add half of the bacon crumbles and mix well. Taste and adjust seasoning as needed.

Let the soup simmer gently for 10–15 minutes, stirring occasionally, until thick and luxurious.

Serving Suggestions

Ladle the hot soup into bowls and top generously with:

  • Extra shredded cheddar cheese

  • A dollop of sour cream

  • Crispy bacon bits

  • Fresh green onions

Serve with crusty bread, garlic toast, or a simple side salad for a complete meal.

Pro Tips for the Best Potato Soup

  • Shred your own cheese – Pre-shredded cheese contains anti-caking agents that prevent smooth melting.

  • Don’t boil after adding dairy – Keep the heat low to avoid curdling.

  • Make it thicker – Mash a few extra potato chunks directly in the pot.

  • Make it lighter – Swap heavy cream for more milk, but keep at least some cream for richness.

Storage and Reheating

Store leftovers in an airtight container in the refrigerator for up to 3 days. Reheat gently on the stovetop over low heat, stirring often. Add a splash of milk or broth if the soup thickens too much.

Final Thoughts

This Loaded Baked Potato Soup is the perfect combination of creamy comfort and bold flavor. It’s filling without being heavy, indulgent yet homemade, and endlessly customizable. Once you try it, it’s sure to become a staple recipe you return to again and again—especially when you need something warm, satisfying, and deeply comforting.

cooking tiP for making mashed potatoes

Mashed potatoes may seem like one of the simplest comfort foods, yet many people struggle to get them truly perfect. Too often they turn out gluey, watery, bland, or lumpy. The secret to unforgettable mashed potatoes isn’t just butter and cream—it’s technique, timing, and temperature. This cooking tip–based recipe walks you step by step through the small details that transform basic potatoes into rich, silky, restaurant-quality mashed potatoes every single time.

Choose the Right Potatoes (This Is Non-Negotiable)

The foundation of perfect mashed potatoes starts at the grocery store. Starchy potatoes are your best friend. Russet potatoes and Yukon Gold potatoes are the top choices. Russets produce light, fluffy mash, while Yukon Golds give a naturally buttery, creamy texture. Avoid waxy potatoes like red or fingerling potatoes—they contain too much moisture and lead to gummy results.

For the best balance, many chefs swear by using a mix of Russet and Yukon Gold potatoes, combining fluffiness with creaminess.

Cut Evenly for Even Cooking

One of the most overlooked cooking tips is how you cut your potatoes. Always peel them first, then cut them into even-sized chunks, roughly 1½ to 2 inches. Uneven pieces cook at different speeds, leaving some undercooked and others waterlogged. Consistency ensures that every piece softens at the same time, making mashing easier and smoother.

Start with Cold, Salted Water

Never drop potatoes into boiling water. Instead, place them in a pot and cover with cold water, then add salt generously—your water should taste like the sea. Starting cold allows the potatoes to cook evenly from the inside out. Salt at this stage seasons the potatoes internally, which is far more effective than adding salt later.

Bring the pot to a gentle boil, then reduce to a simmer. Rapid boiling can cause the potatoes to break apart and absorb too much water.

Cook Until Just Fork-Tender

The perfect cooking time is when a fork slides easily into the potato without resistance, usually about 15–20 minutes. Overcooking is a common mistake—it causes potatoes to absorb excess water, resulting in bland, soggy mash. Once tender, drain immediately.

The Steam-Drying Secret Tip

Here’s a professional cooking tip most home cooks skip: after draining, return the potatoes to the hot pot and place it back over low heat for 30–60 seconds. Gently shake the pot. This step allows excess moisture to evaporate, giving you drier potatoes that absorb butter and cream beautifully instead of turning watery.

Warm Your Butter and Cream Separately

Cold dairy is the enemy of smooth mashed potatoes. Before mashing, gently heat your butter and cream together in a small saucepan or microwave until warm—not boiling. Warm fat blends seamlessly into the potatoes, creating a luxurious texture without shocking them into stiffness.

Mash the Right Way

Avoid food processors or blenders at all costs—they release too much starch and turn potatoes gluey. Instead, use a potato masher, ricer, or food mill. For ultra-smooth mashed potatoes, a ricer is ideal. Mash while the potatoes are still hot for best results.

Start by adding butter first and mash it in thoroughly. Butter coats the starch molecules, helping prevent gumminess. Then slowly pour in warm cream until you reach your desired consistency.

Season in Layers

Salt should be added gradually throughout the process—not all at once. Taste as you go. Freshly ground black pepper adds depth, while a pinch of white pepper keeps the mash visually pristine. For extra flavor, consider adding roasted garlic, chives, or a small spoon of cream cheese or sour cream for subtle tang.

Rest Before Serving

Once mashed, cover the pot and let the potatoes rest for about 5 minutes. This allows the flavors to meld and the texture to settle. Give them one final gentle stir before serving.

Final Pro Tip for Unforgettable Mashed Potatoes

If you want truly next-level mashed potatoes, finish with a drizzle of melted butter on top and a light sprinkle of flaky salt. Serve hot. Mashed potatoes should be creamy, rich, and comforting—not stiff or bland.

Summary Cooking Tip to Remember

Perfect mashed potatoes are less about ingredients and more about respecting the process: choose the right potatoes, control moisture, warm your dairy, and mash gently. Follow these cooking tips, and your mashed potatoes will no longer be just a side dish—they’ll be the star of the table.

Researchers Explore Potential Link Between Medication and Dementia Risk

As the global population ages and dementia diagnoses continue rising, scientists are urgently investigating all possible risk factors — including the surprising possibility that common medications may influence the likelihood of developing dementia. While dementia has long been primarily associated with age, genetics, and lifestyle, accumulating research suggests certain drugs might be connected to changes in cognitive health. Exploring these relationships could transform how clinicians prescribe medicines and how patients manage long-term treatment.

Understanding Dementia and Its Risk Factors

Dementia is not a single disease but a syndrome characterized by declining memory, thinking, and the ability to perform daily activities. Alzheimer’s disease is the most common form, followed by vascular dementia and mixed types. Traditionally, risk factors include age, cardiovascular disease, diabetes, traumatic brain injury, and lifestyle elements such as smoking and physical inactivity. Genetic predisposition also plays a significant role. Medical News Today+1

However, researchers are now scrutinizing medications people take for other conditions as potential influencers of dementia risk — both positively and negatively.

Anticholinergic Drugs: A Strong Association with Increased Risk

One of the most extensively studied drug classes in relation to dementia risk is anticholinergic medications. These drugs block acetylcholine, a neurotransmitter important for memory and learning. They are used widely to treat conditions like depression, bladder issues, Parkinson’s disease, and epilepsy.

Multiple large-scale observational studies have found that people aged 55 and older who took strong anticholinergic medications daily for at least three years had nearly a 50% higher chance of developing dementia compared to those who did not take these drugs. The risk appeared dose-dependent — meaning higher cumulative exposure correlated with greater risk. WebMD+1

Detailed analyses indicate that specific anticholinergic subgroups — such as antidepressants, antipsychotic drugs, bladder antimuscarinics, and antiepileptic drugs — were particularly implicated in increased dementia risk. While these findings do not prove causation, they raise flags about the long-term use of anticholinergics, especially in older adults or those already at cognitive risk. WebMD+1

Other Medications Under Scrutiny

Acid Reflux Drugs

Proton pump inhibitors (PPIs), a class of drugs widely used to treat heartburn and acid reflux, have also been linked to dementia risk in some observational studies. Reports suggest that extended PPI use for more than four years may be associated with up to a 33% higher risk of developing dementia. The biological mechanisms are not fully understood, though hypotheses include altered gut microbiota and nutrient absorption issues. Psychiatrist.com

Antidepressants and Benzodiazepines

Research on antidepressants and benzodiazepines (sedatives often prescribed for anxiety or sleep disorders) has produced mixed results. Some studies suggested certain antidepressants could correlate with increased dementia risk, possibly due to anticholinergic effects or underlying conditions driving both depression and cognitive decline. However, other investigations, particularly on benzodiazepines, indicate only weak evidence of a link, with methodological limitations tempering definitive conclusions. MDPI+1

Despite these uncertainties, physicians are encouraged to be cautious with long-term prescribing of sedatives and antidepressants in older populations and to consider non-pharmacological alternatives when possible.

Medications Linked to Lower Dementia Risk

Intriguingly, research also identifies several drug categories associated with reduced dementia risk, challenging the simplistic notion that all medications negatively impact cognitive health.

Antihypertensives and Cardiovascular Drugs

Long-term treatment with blood pressure-lowering medications has been linked to a significant reduction in dementia risk — as much as a 24% lower chance of developing cognitive decline compared with those with minimal antihypertensive exposure. This likely reflects the broader benefits of controlling blood pressure on brain health and vascular function. American College of Cardiology

Antibiotics, Vaccines, and Anti-Inflammatories

A recent review of large health record datasets found that antibiotics, antivirals, and vaccinations were associated with a lower risk of dementia, supporting emerging hypotheses that chronic infections and inflammation might contribute to cognitive decline. Anti-inflammatory drugs like ibuprofen also showed potential protective effects, although the evidence remains preliminary. University of Cambridge

These findings suggest that immune modulation and infection prevention might protect the brain over decades, although clinical trials are needed to confirm cause and effect.

Challenges in Interpreting the Evidence

It’s important to emphasize that most studies linking medications and dementia risk are observational, meaning they can identify associations but cannot prove that drugs cause or prevent dementia. Confounding factors — such as the reason a medication was prescribed — could also influence outcomes. For example, medications for cardiovascular disease might appear protective because cardiovascular health itself is a major determinant of cognitive outcomes.

A recent systematic review of over 130 million individuals highlighted this complexity: while certain drug classes showed consistent associations, others did not, and the evidence for antihypertensives, antidepressants, and diabetes medications was conflicting. PubMed

Furthermore, some medications might influence dementia risk indirectly through biological pathways — such as inflammation, immune responses, or brain perfusion — rather than a direct pharmacological effect.

Clinical Implications and Future Directions

Despite uncertainties, this emerging field has significant implications:

  • Polypharmacy Awareness: Clinicians should regularly review medication lists in older adults to minimize unnecessary prescriptions, especially anticholinergics, and consider deprescribing when appropriate.

  • Personalized Medicine: Understanding how genetic and health profiles interact with drug effects may allow tailored prescriptions that optimize benefits and minimize cognitive risks.

  • Drug Repurposing: Observations that certain antibiotics, vaccines, or cardiovascular drugs correlate with reduced dementia risk open opportunities to repurpose existing medications in preventive strategies — potentially accelerating solutions for a condition with limited treatment options.

  • Further Research Needed: Randomized trials and mechanistic studies are essential to establish causal links, if any, and clarify how medications influence brain aging.

Bottom Line: While many commonly prescribed medications are safe and effective for their intended uses, growing research suggests a nuanced picture where some — particularly anticholinergic drugs — may be associated with increased dementia risk, and others, like cardiovascular drugs and vaccines, might offer protection. Understanding these relationships can help guide safer prescribing and stimulate innovative dementia prevention research.

Fat-Melting Drink Recipe: Burn Belly Fat While You Sleep

If stubborn belly fat has been refusing to budge despite your best efforts, your nighttime routine might be missing one powerful element. While no drink can magically melt fat overnight, certain natural ingredients can support metabolism, reduce bloating, balance blood sugar, and help your body burn fat more efficiently while you sleep. This fat-melting bedtime drink is designed to work with your body’s natural overnight repair and detox processes—gently, safely, and naturally.

Below is a unique, soothing, and effective fat-support drink recipe, followed by a deep explanation of why it works and how to use it for best results.

The Nighttime Fat-Melting Drink Recipe

Ingredients

  • 1 cup warm water

  • 1 teaspoon raw apple cider vinegar (with the mother)

  • ½ teaspoon ground cinnamon

  • 1 teaspoon fresh lemon juice

  • ½ teaspoon grated fresh ginger (or ¼ teaspoon ginger powder)

  • 1 teaspoon raw honey (optional, for taste)

How to Prepare

  1. Warm the water until it is comfortably hot, not boiling.

  2. Add cinnamon and ginger, stirring well.

  3. Mix in apple cider vinegar and lemon juice.

  4. Add honey if desired.

  5. Drink slowly 30–45 minutes before bedtime.

Why This Drink Works While You Sleep

Sleep is when your body resets hormones, repairs cells, and regulates fat storage. This drink supports those processes instead of overstimulating your system.

1. Apple Cider Vinegar – The Fat-Storage Regulator

Apple cider vinegar helps stabilize blood sugar levels at night. When blood sugar spikes are reduced, the body is less likely to store excess glucose as belly fat. ACV also supports digestion and may reduce nighttime cravings that sabotage weight loss.

2. Cinnamon – Blood Sugar & Belly Fat Ally

Cinnamon is one of the most effective natural spices for improving insulin sensitivity. Balanced insulin levels mean your body burns stored fat instead of hoarding it—especially around the abdomen. Cinnamon also helps reduce late-night hunger.

3. Ginger – Thermogenic Fat Burner

Ginger slightly raises body temperature, encouraging thermogenesis—a process where the body burns calories to produce heat. It also helps reduce inflammation and bloating, making your stomach look flatter by morning.

4. Lemon Juice – Detox & Digestion Support

Lemon supports liver function, and your liver plays a key role in fat metabolism during sleep. A healthy liver helps break down fats more efficiently while you rest.

5. Warm Water – Relaxation & Circulation

Warm liquids relax the digestive system, reduce water retention, and improve circulation. This helps nutrients absorb properly and supports overnight fat-burning processes.

6. Honey (Optional) – Sleep & Fat Balance

A small amount of raw honey can support melatonin release, improving sleep quality. Better sleep equals better fat loss because poor sleep increases cortisol, the hormone most associated with belly fat storage.

What Happens in Your Body Overnight

After drinking this blend, several helpful things occur:

  • Blood sugar stabilizes, preventing fat storage

  • Digestion improves, reducing bloating

  • Liver detoxification increases

  • Fat metabolism gently accelerates

  • Sleep quality improves, lowering cortisol

Instead of waking up feeling heavy or bloated, many people report feeling lighter and more energized in the morning.

How to Use for Best Results

  • Drink once daily, preferably at night

  • Use consistently for 7–14 days

  • Avoid heavy meals at least 2 hours before bedtime

  • Stay hydrated throughout the day

  • Combine with light movement (like walking) for enhanced results

This drink works best as part of a simple, balanced lifestyle—not as a replacement for healthy eating.

Common Mistakes to Avoid

  • Using boiling water (destroys beneficial compounds)

  • Drinking immediately before lying down

  • Overusing apple cider vinegar

  • Adding refined sugar instead of honey

  • Expecting instant results in one night

Fat loss is a process—but this drink helps your body work smarter, not harder.

Who Should Avoid This Drink

  • People with stomach ulcers or acid reflux (reduce ACV)

  • Pregnant or breastfeeding women

  • Anyone with blood sugar conditions should consult a professional

Always listen to your body.

Final Thoughts

This fat-melting nighttime drink isn’t a miracle—but it is a powerful natural support tool. By calming your system, balancing blood sugar, and enhancing fat metabolism, it helps your body do what it’s already designed to do while you sleep: repair, reset, and burn stored fat more efficiently.

Pickled Beets

Pickled beets are one of those classic kitchen staples that quietly stand the test of time. With their deep ruby color, tender bite, and perfectly balanced sweet-and-tangy flavor, they transform simple meals into something memorable. Whether spooned beside a hearty dinner, tossed into salads, or enjoyed straight from the jar, homemade pickled beets deliver a flavor far superior to store-bought versions. This recipe honors traditional techniques while adding subtle modern touches to create a bold yet comforting result.

Why Homemade Pickled Beets Are Worth It

Making pickled beets at home gives you complete control over flavor, texture, and sweetness. Commercial versions often rely on excess sugar or preservatives, while homemade pickles allow the natural earthiness of the beets to shine. Plus, pickled beets are incredibly nutritious—packed with antioxidants, fiber, and essential minerals that support digestion and heart health.

Another advantage? They store beautifully. A single afternoon of preparation can provide jars of vibrant pickled beets that last for weeks in the refrigerator or months when properly canned.

Ingredients (Serves 4–6)

  • 2 pounds fresh beets (medium-sized, firm, deep red)

  • 1 cup white vinegar (5% acidity)

  • ½ cup apple cider vinegar (adds depth)

  • ¾ cup granulated sugar (adjust to taste)

  • 1 cup water

  • 1 teaspoon salt

  • ½ teaspoon black peppercorns

  • 3 whole cloves

  • 1 small cinnamon stick

  • 1 bay leaf

  • ½ teaspoon mustard seeds

  • 1 small onion, thinly sliced (optional but traditional)

Step-by-Step Instructions

1. Prepare the Beets

Start by trimming the beet greens, leaving about an inch of stem attached to prevent color bleeding. Scrub the beets thoroughly under running water to remove dirt. Place them in a large pot, cover with water, and bring to a boil. Reduce heat and simmer for 35–45 minutes, or until a knife slides easily into the center.

Drain and allow the beets to cool slightly. Once cool enough to handle, rub off the skins using your fingers or a paper towel. Slice the beets into rounds, wedges, or cubes—whichever shape you prefer.

2. Make the Pickling Brine

In a saucepan, combine white vinegar, apple cider vinegar, water, sugar, salt, peppercorns, cloves, cinnamon stick, bay leaf, and mustard seeds. Bring the mixture to a gentle boil, stirring until the sugar fully dissolves.

Lower the heat and let the brine simmer for 5 minutes. This step allows the spices to bloom, creating a more complex and aromatic flavor.

3. Assemble the Jars

Place sliced beets into clean glass jars, layering them with thin slices of onion if using. Carefully pour the hot brine over the beets until fully submerged. Remove air bubbles by gently tapping the jar or using a clean utensil.

Seal the jars tightly.

4. Rest and Develop Flavor

Let the jars cool to room temperature, then refrigerate for at least 24 hours before eating. The flavor continues to improve over time, reaching its peak after 3–5 days. Properly refrigerated pickled beets will stay fresh for up to one month.

Flavor Variations You’ll Love

  • Honey Pickled Beets: Replace half the sugar with raw honey for a floral sweetness.

  • Spicy Pickled Beets: Add a sliced chili pepper or ½ teaspoon crushed red pepper flakes.

  • Herb-Infused Beets: Add fresh thyme or rosemary to the jar for a savory twist.

  • Citrus Pickled Beets: Include strips of orange or lemon zest for brightness.

How to Serve Pickled Beets

Pickled beets are incredibly versatile. Serve them chilled as a side dish, slice them into green salads, or pair them with goat cheese and walnuts for an elegant appetizer. They also shine alongside roasted meats, grilled fish, or simple sandwiches. Even the pickling liquid itself can be repurposed as a salad dressing base or a colorful addition to marinades.

Storage and Safety Tips

Always use clean jars and utensils. If you plan to store pickled beets long-term outside the refrigerator, follow proper water-bath canning procedures to ensure safety. For casual home use, refrigeration is the simplest and safest option.

Final Thoughts

Homemade pickled beets are more than just a recipe—they’re a tradition passed through generations. Their sweet, tangy flavor brings warmth and nostalgia to every bite while offering impressive health benefits. Once you try making them yourself, you’ll never go back to store-bought jars again. Simple ingredients, timeless technique, and bold flavor make this pickled beets recipe a true kitchen essential.

The Hidden Danger in Your Home: The Electrical Mistake 90% of People Make

Most homes look safe on the surface. Lights turn on, appliances hum quietly, and outlets sit innocently on the walls doing their job. Yet behind this sense of normalcy lies a hidden danger that causes countless house fires, damaged electronics, and even serious injuries every year. The shocking truth is that nearly 90% of people make the same electrical mistake in their homes—often without realizing it. This mistake isn’t dramatic or obvious. It’s simple, routine, and deeply ingrained in daily life.

The most common electrical mistake is overloading outlets and power strips.

Why This Mistake Is So Common

Modern life depends on electricity more than ever before. Televisions, routers, chargers, kitchen appliances, heaters, air fryers, computers, and smart devices all compete for power. Yet most homes were designed decades ago, long before this level of electrical demand was normal. Instead of upgrading wiring or adding outlets, people adapt in the quickest way possible: plugging more devices into the same outlet.

Power strips and extension cords feel like safe solutions. They are cheap, widely available, and easy to use. Unfortunately, convenience often hides risk.

How Overloading Becomes Dangerous

Every electrical outlet is designed to handle a specific amount of current. When too many devices are connected, especially high-wattage appliances, the wiring behind the wall can overheat. This heat builds silently. You won’t hear it, smell it, or see it—until damage is already happening.

Over time, this overheating can:

  • Melt insulation around wires

  • Damage internal outlet components

  • Create sparks inside walls

  • Trigger electrical fires

Many house fires begin this way, without any dramatic warning signs. People often assume fires come from faulty appliances, but in reality, misuse of outlets is a leading cause.

The Illusion of “It’s Been Fine for Years”

One of the most dangerous assumptions is: “I’ve always done it this way and nothing has happened.” Electrical systems don’t always fail immediately. Damage builds slowly. Each time an overloaded outlet heats up and cools down, the materials weaken just a little more.

Think of it like bending a paper clip. The first few bends do nothing noticeable. But eventually, it snaps. Electrical failures work the same way.

Chargers: The Silent Contributors

Phone chargers, laptop adapters, and tablet cords are often left plugged in all day and all night. Individually, they draw little power, but collectively they add up—especially when connected to cheap power strips.

Worse, low-quality chargers can continue drawing power even when no device is attached. This creates unnecessary heat and increases fire risk, particularly when chargers are left plugged in near curtains, bedding, or furniture.

High-Risk Appliances You Should Never Combine

Certain devices should never share the same outlet or power strip:

  • Space heaters

  • Microwaves

  • Air conditioners

  • Electric kettles

  • Hair dryers

  • Toasters

These appliances draw a large amount of power. Plugging even two of them into one outlet can overload the circuit instantly.

Warning Signs Most People Ignore

Your home often gives subtle clues that something is wrong. These signs are frequently overlooked:

  • Warm outlets or power strips

  • Flickering lights when devices turn on

  • Buzzing or crackling sounds

  • Discolored outlet covers

  • Circuit breakers that trip repeatedly

These are not minor inconveniences. They are warnings.

The Power Strip Myth

Many people believe power strips “increase” outlet capacity. They do not. A power strip simply divides the same amount of electricity into multiple sockets. If the outlet can safely supply 15 amps, plugging in six devices doesn’t magically increase that limit.

Some power strips include surge protection, which helps protect electronics from voltage spikes—but surge protection does not prevent overloading.

A Safer Way to Power Your Home

Avoiding this common mistake doesn’t require fear or expensive upgrades. Simple habits make a huge difference:

  • Plug high-wattage appliances directly into wall outlets

  • Use one major appliance per outlet whenever possible

  • Unplug chargers when not in use

  • Replace damaged cords immediately

  • Use power strips with built-in circuit breakers

  • Never run extension cords under rugs or furniture

If your home frequently runs out of outlets, it may be time to have an electrician add more. This is far safer than relying on extensions and adapters.

Why This Knowledge Matters

Electricity is invisible, which makes it easy to underestimate. But unlike many household risks, electrical dangers don’t always give second chances. Fires can start when you’re asleep. Damage can occur inside walls where you’ll never see it.

The real danger isn’t electricity itself—it’s familiarity. When something becomes routine, we stop questioning it. That’s why this mistake is so widespread.

Final Thought

Your home should be a place of safety, not hidden risk. Taking a few minutes to rethink how you use outlets and power strips can protect your family, your belongings, and your peace of mind. The most dangerous electrical mistakes are rarely dramatic—they’re ordinary habits we never thought to change.