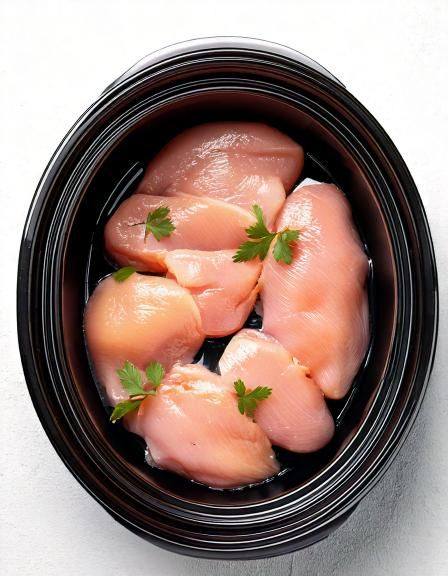
Put raw chicken breasts in a slow cooker with these 4 ingredients

Put Raw Chicken Breasts in a Slow Cooker with These 4 Ingredients

If you’re looking for a simple, foolproof dinner that tastes like you spent hours in the kitchen, this slow cooker chicken recipe is exactly what you need. With just 4 main ingredients and a few optional seasonings, you can transform plain raw chicken breasts into a creamy, flavorful meal the whole family will love.

This recipe is perfect for busy weekdays, meal prep Sundays, or anytime you want comfort food without the stress. Just place everything in your slow cooker, turn it on, and let it do the work.

Why This 4-Ingredient Slow Cooker Chicken Works

The beauty of this recipe lies in its simplicity. Chicken breasts can sometimes turn out dry when cooked quickly, but the slow cooker keeps them moist and tender. As they simmer gently for hours, they absorb all the flavors from the sauce, becoming incredibly juicy and easy to shred.

It’s also versatile. You can serve it over rice, pasta, mashed potatoes, or even in sandwiches and wraps. With just four ingredients, you get a creamy, savory dish that feels indulgent but requires minimal effort.

Ingredients

Here’s what you’ll need:

  • 4 boneless, skinless chicken breasts

  • 1 packet (1 oz) ranch seasoning mix

  • 1 can (10.5 oz) cream of chicken soup

  • 8 oz cream cheese, softened

Optional (but recommended):

  • ½ cup chicken broth (for extra moisture)

  • Fresh parsley for garnish

  • Black pepper to taste

That’s it. Four core ingredients create magic in the slow cooker.

Step-by-Step Instructions

1. Prepare the Slow Cooker

Lightly spray the inside of your slow cooker with nonstick cooking spray. This helps prevent sticking and makes cleanup much easier.

2. Add the Chicken

Place the raw chicken breasts in a single layer at the bottom of the slow cooker. There’s no need to pre-cook or brown them first. The slow cooking process will fully cook them to tender perfection.

3. Add the Seasoning

Sprinkle the ranch seasoning mix evenly over the chicken breasts. This seasoning adds garlic, onion, herbs, and a subtle tangy flavor that enhances the entire dish.

4. Add the Soup and Cream Cheese

Spread the cream of chicken soup over the seasoned chicken. Then place chunks of softened cream cheese on top. If using chicken broth, pour it around the edges of the slow cooker.

Don’t stir at this point — everything will blend together beautifully as it cooks.

5. Cook Low and Slow

Cover and cook on:

  • Low for 6–7 hours, or

  • High for 3–4 hours

The chicken is done when it reaches an internal temperature of 165°F (74°C) and easily shreds with a fork.

6. Shred and Stir

Once fully cooked, use two forks to shred the chicken directly in the slow cooker. Stir everything together until the cream cheese and soup form a smooth, creamy sauce coating the shredded chicken.

Let it sit for about 10 minutes to thicken before serving.

Serving Suggestions

This creamy slow cooker chicken is incredibly versatile. Here are a few delicious ways to enjoy it:

  • Over steamed white or brown rice

  • On top of egg noodles

  • With mashed potatoes

  • Inside toasted sandwich rolls

  • Stuffed into baked potatoes

  • Wrapped in tortillas for creamy chicken tacos

You can also add steamed broccoli or spinach directly into the slow cooker during the last 30 minutes for a complete one-pot meal.

Storage and Meal Prep Tips

This recipe is excellent for leftovers. Store any remaining chicken in an airtight container in the refrigerator for up to 4 days.

To freeze, let it cool completely and transfer to freezer-safe containers. It will keep well for up to 3 months. Thaw overnight in the refrigerator and reheat gently on the stove or in the microwave.

It reheats beautifully, making it perfect for quick lunches throughout the week.

Ways to Customize This Recipe

Even though it’s delicious as written, you can easily switch things up:

  • Add shredded cheddar cheese for extra richness.

  • Mix in cooked bacon for a smoky twist.

  • Add garlic powder or paprika for deeper flavor.

  • Use low-fat cream cheese and soup for a lighter version.

  • Substitute cream of mushroom soup for a slightly earthier taste.

If you prefer a thicker sauce, remove the lid during the last 20 minutes of cooking to allow excess moisture to evaporate.

Helpful Tips for Perfect Results

  • Avoid overcooking. Even in a slow cooker, chicken breasts can dry out if left too long.

  • If the sauce seems too thick, stir in a splash of warm chicken broth.

  • For extra flavor, sprinkle fresh herbs on top before serving.

  • Always check internal temperature to ensure safe cooking.

    Why This Recipe Is a Keeper

    In a world of complicated recipes and long ingredient lists, this 4-ingredient slow cooker chicken stands out for its simplicity and comfort. It’s creamy, flavorful, family-friendly, and nearly impossible to mess up.

    Whether you’re feeding a crowd or just want a stress-free dinner option, this recipe proves that you don’t need dozens of ingredients to create something satisfying.
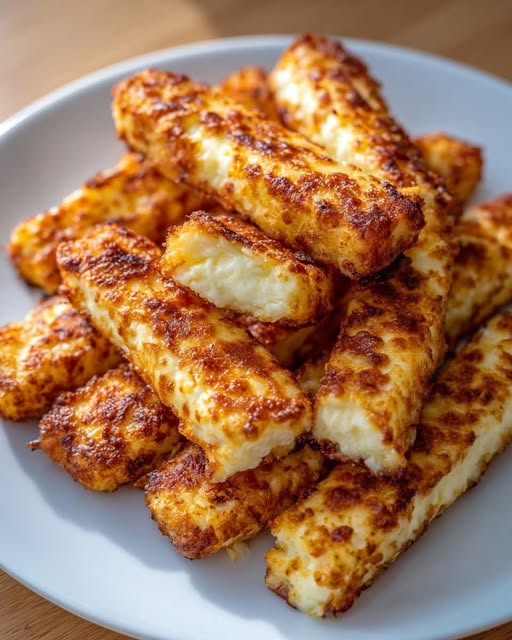
High-Protein Cottage Cheese Sticks

If you’re hunting for a snack that’s crispy on the outside, creamy on the inside, satisfying, high in protein, and surprisingly simple to throw together, these High-Protein Cottage Cheese Sticks are about to become your new obsession. Forget the usual fried mozzarella sticks—this recipe transforms humble cottage cheese into golden, crunchy sticks that deliver a nutritious punch without sacrificing indulgence. Whether you’re trying to eat cleaner, add more protein to your day, or just want a fun snack that feels like comfort food, these cottage cheese sticks fit the bill perfectly.

Cottage cheese has had a major glow-up in recent years, and for good reason. It’s packed with protein, naturally creamy, versatile, and ideal for creating healthier versions of your favorite treats. Here, we blend it until smooth, mix it with seasonings and a binding ingredient, shape it into sticks, and bake or air-fry them until crisp and golden. The result? A snack that tastes like a cross between cheese sticks and savory protein bars—but lighter, fresher, and guilt-free.

Ingredients (Makes 10–12 sticks)

  • 1 ½ cups cottage cheese (full-fat or low-fat)

  • 1 whole egg

  • ½ cup shredded mozzarella (or cheddar)

  • ⅓ cup oat flour (or almond flour for low-carb)

  • 1 tbsp cornstarch (helps them hold shape)

  • 1 tsp garlic powder

  • ½ tsp onion powder

  • ½ tsp paprika

  • ½ tsp salt (adjust to taste)

  • ¼ tsp black pepper

  • 1 tbsp chopped fresh parsley (optional)

  • ½ cup breadcrumbs (or crushed cornflakes for extra crunch)

  • 1 tbsp olive oil (for brushing)

How to Make High-Protein Cottage Cheese Sticks

Step 1: Smooth the Cottage Cheese

Add the cottage cheese to a blender or food processor and blend until completely smooth—no lumps, no curds. This step is what gives the sticks their creamy, mozzarella-like interior. Smooth cottage cheese makes a huge difference in texture, so don’t skip this part!

Step 2: Mix in the Binding Ingredients

Pour your blended cottage cheese into a mixing bowl. Add the egg, mozzarella, oat flour, cornstarch, garlic powder, onion powder, paprika, salt, pepper, and parsley.
Mix until the batter becomes thick, sticky, and scoopable. It should resemble a soft dough—wet but able to hold shape.

If it’s too runny: add 1–2 tbsp more oat flour.
If it’s too thick: splash in 1 tbsp milk or water.

Step 3: Chill the Mixture

Cover the bowl and chill for 25–30 minutes.
This helps the mixture firm up so you can easily shape it into sticks later. Cottage cheese naturally holds a lot of moisture, so chilling gives the flours time to absorb excess liquid.

Step 4: Shape Your Sticks

Line a tray with parchment paper.
Scoop out portions of the mixture, roll them gently between your palms, and shape them into long sticks—about the size of mozzarella sticks.

If your hands get sticky, lightly wet them.

Step 5: Coat for Crispiness

Roll each stick in breadcrumbs or crushed cornflakes to create a crunchy exterior.
Brush lightly with olive oil to help them crisp beautifully during cooking.

Cooking Options

Air Fryer Method (Best for Crispiness)

Place the sticks in a single layer in the air fryer basket.
Cook at 400°F (200°C) for 10–12 minutes, flipping halfway.

They should come out golden, firm, and crunchy outside with a creamy, cheesy center.

Oven Method

Bake at 425°F (218°C) for 15–18 minutes.
Broil for the last 1–2 minutes to add extra crunch.

Nutrition & Protein Boost

Each cottage cheese stick contains roughly 6–8 grams of protein, depending on the cottage cheese brand and flour used. This makes them an excellent snack for gym days, weight-loss plans, or simply staying full between meals.

They’re also:
✔ Low in calories
✔ High in calcium
✔ Perfect for low-carb or high-protein diets
✔ Kid-friendly and meal-prep friendly

Why This Recipe Works So Well

The magic is in the texture transformation. Blending the cottage cheese turns it into a silky base that behaves almost like ricotta or soft mozzarella. When combined with mozzarella and oat flour, it becomes sturdy enough to shape, while still remaining creamy inside.

The seasoning blend—garlic, onion, paprika—adds savory depth without overpowering the delicate dairy flavor. Coating the sticks in breadcrumbs creates that signature crunch you expect from fried cheese sticks but without the oil or heaviness.

You end up with a snack that hits all the right notes: crunchy, soft, cheesy, salty, and satisfying.

Flavor Variations (Customizable & Fun)

1. Spicy Jalapeño

Add:

  • 1 tbsp finely diced jalapeños

  • ¼ tsp cayenne pepper

Perfect for spice lovers.

2. Pizza-Style

Add:

  • 1 tsp Italian seasoning
    Serve with marinara dipping sauce.

3. Garlic Parmesan

Coat the sticks with:

  • 2 tbsp grated parmesan mixed into the breadcrumbs

  • ½ tsp garlic powder

4. Herb & Lemon

Add:

  • 1 tsp dried dill

  • Zest of half a lemon

Light and refreshing.

5. Low-Carb Keto Version

Swap breadcrumbs with:

  • Crushed pork rinds

  • Almond flour

Zero carbs, same crunch.

Storage & Meal Prep

These cottage cheese sticks store beautifully:

  • Fridge: 3–4 days

  • Freezer: 2 months (freeze before cooking for best texture)

Air fry straight from frozen at 400°F for 12–14 minutes—no thawing needed.

Serving Suggestions

They’re delicious alone, but even better with dips like:

  • Garlic yogurt sauce

  • Marinara

  • Ranch

  • Honey mustard

  • Spicy mayo

Perfect for movie nights, lunch boxes, gym snacks, or late-night cravings.

Final Thoughts

High-Protein Cottage Cheese Sticks take an everyday ingredient and turn it into something exciting, flavorful, and deliciously crunchy. They’re easy to make, endlessly customizable, diet-friendly, and full of protein to keep you energized throughout the day. Whether you’re trying to eat healthier or simply want a fun snack without guilt, this recipe delivers every single time.

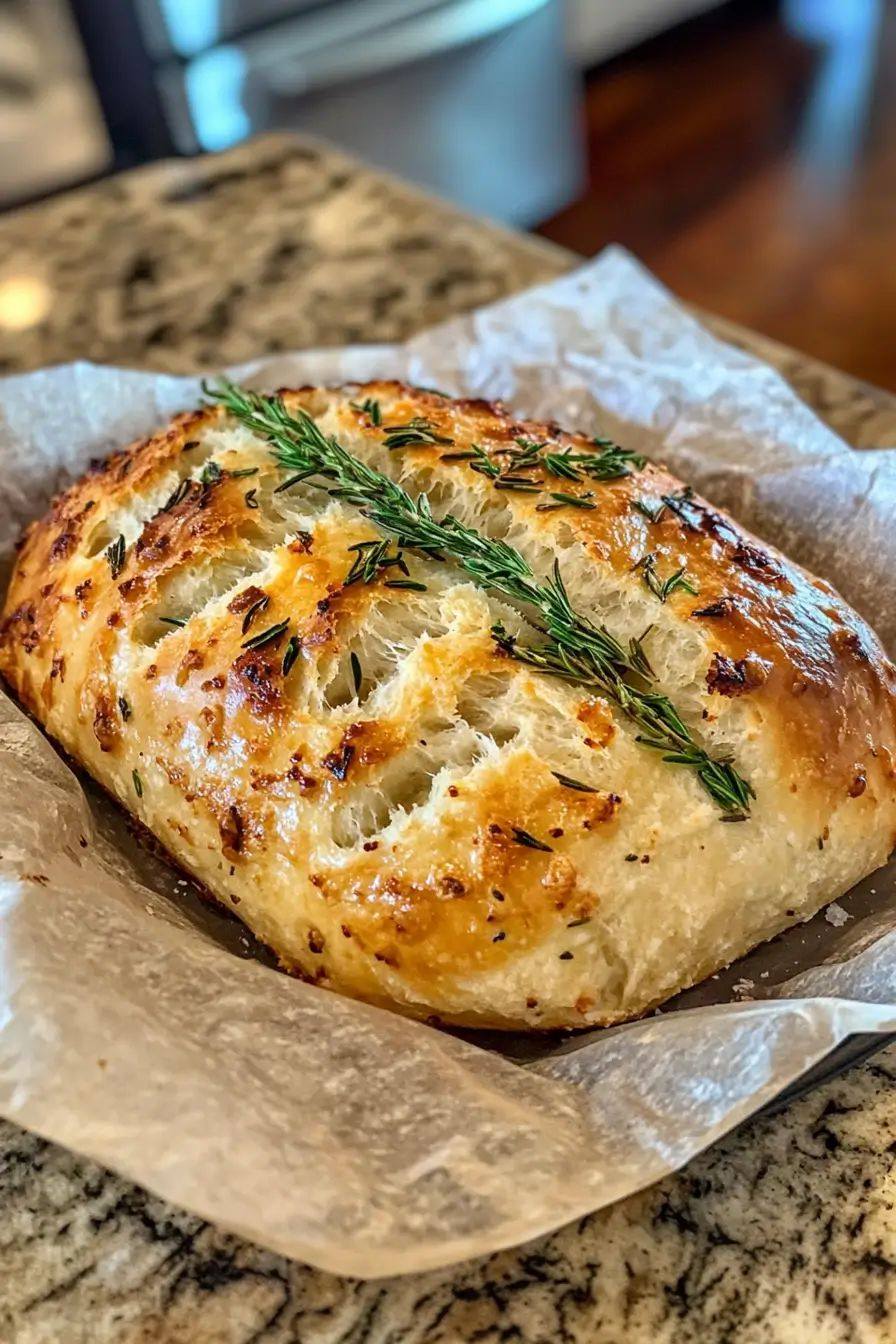
Air Fryer Bread — A Soft, Golden Loaf

Homemade bread has a special magic: the warm aroma, the soft crumb, that first buttery bite. But traditional baking often feels time-consuming and intimidating, especially if you don’t want to heat up your whole kitchen. That’s where the air fryer becomes a game-changer. This unique Air Fryer Bread recipe gives you an easy, foolproof, beautifully golden loaf with a tender, cloud-like interior — all in less time than a conventional oven. Whether you’re a beginner or a seasoned cook, this recipe simplifies bread-making without sacrificing flavor or texture. You’ll be amazed at how bakery-fresh it tastes using only basic ingredients and an everyday air fryer.

Why Make Bread in an Air Fryer?

The air fryer creates a mini-oven environment with powerful circulating heat, giving you:

  • Faster baking, often 10–15 minutes shorter than an oven

  • Even browning with a gorgeous glossy crust

  • Soft, perfectly cooked centers thanks to consistent temperature

  • Energy efficiency — no need to heat your full oven

Plus, you can bake this bread in small pans, making it ideal for individuals, small families, or anyone who loves fresh warm bread on demand.

Ingredients (Simple & Foolproof)

Dry Ingredients:

  • 2 cups all-purpose flour (you can also use bread flour for chewier texture)

  • 1 tbsp sugar

  • 1 tsp salt

  • 2 tsp instant yeast

Wet Ingredients:

  • ¾ cup warm milk (not hot, about 40°C/105°F)

  • 2 tbsp melted butter

  • 1 egg (optional but makes the bread richer and softer)

To Finish:

  • 1 tbsp melted butter for brushing

  • Sesame seeds or nigella seeds (optional)

Step-By-Step Instructions

1. Activate the Dough

In a mixing bowl, whisk together warm milk, sugar, and instant yeast. Let it sit for 5 minutes until slightly foamy. This guarantees your yeast is alive and ready to rise.

2. Add Dry Ingredients

Add flour, salt, melted butter, and the egg (if using). Mix with a spatula until a sticky dough forms.

3. Knead the Dough

Transfer the dough to a lightly floured surface. Knead for 6–8 minutes, or until it becomes smooth, elastic, and slightly springy.
Tip: If dough feels too sticky, add 1 tbsp flour at a time, but avoid adding too much—soft dough makes softer bread.

4. First Rise

Place the dough back into the bowl, cover it, and let it rise for 45–60 minutes, or until doubled in size.
A warm kitchen will make it rise faster.

5. Shape the Loaf

Punch out the air gently. Shape the dough into a smooth ball or roll it into a mini loaf.
Place it in a small greased cake tin or loaf pan that fits your air fryer basket.

6. Second Rise

Let the shaped dough rise for 20–30 minutes inside the pan. This helps create a soft, fluffy interior.

7. Air Frying

Preheat the air fryer to 160°C (320°F).
Place the pan inside and bake for 20–25 minutes, or until golden brown on top and cooked inside.

Tip: If bread browns too quickly, cover the top with foil halfway through.

8. Final Touch

Remove the bread from the air fryer and immediately brush with melted butter for a glossy, soft crust.
Let it cool for at least 10 minutes before slicing.

Texture, Flavor & Results

This air fryer bread has:

  • A light, fluffy crumb that pulls apart easily

  • A buttery, golden crust that is soft rather than crunchy

  • A warm, mildly sweet flavor that pairs beautifully with both sweet and savory spreads

It’s perfect for breakfast toast, sandwiches, garlic bread, or simply enjoying warm with melting butter.

Unique Tips to Make This Recipe Even Better

Add Yogurt for Ultra Softness

Replace 2 tbsp of milk with plain yogurt for an even more tender crumb.

Make It Sweet

Add 3 extra tablespoons of sugar and ½ tsp vanilla for a dessert-style milk bread.

For a Rustic Loaf

Use half all-purpose flour and half whole wheat flour.

Create Air Fryer Dinner Rolls

Divide dough into 6–8 small balls, place into a round baking tin, and air fry for 15–18 minutes.

Cinnamon Swirl Version

Roll out dough, spread butter, sprinkle cinnamon sugar, roll up, and air fry — irresistible.

Serving Ideas

  • Spread with honey butter or cream cheese

  • Slice and pan-toast with garlic and herbs for quick garlic bread

  • Use for mini sandwiches

  • Dip into soups, stews, or creamy pasta dishes

  • Serve warm with butter and jam for breakfast

Storage & Reheat

Store leftover bread in an airtight container for 2–3 days.
Reheat slices in the air fryer for 2–3 minutes at 150°C and they’ll taste freshly baked again.

Final Thoughts

This unique Air Fryer Bread recipe gives you all the satisfaction of homemade bread with none of the stress. It’s soft, warm, golden, incredibly easy, and absolutely foolproof — perfect for beginners and seasoned cooks alike. Once you taste this loaf, you’ll realize you don’t need a full oven to enjoy bakery-quality bread at home. The air fryer does it beautifully, every time.

7 Cup Coconut Cake No Eggs No Scale Required

7-Cup Coconut Cake – No Eggs, No Scale Required

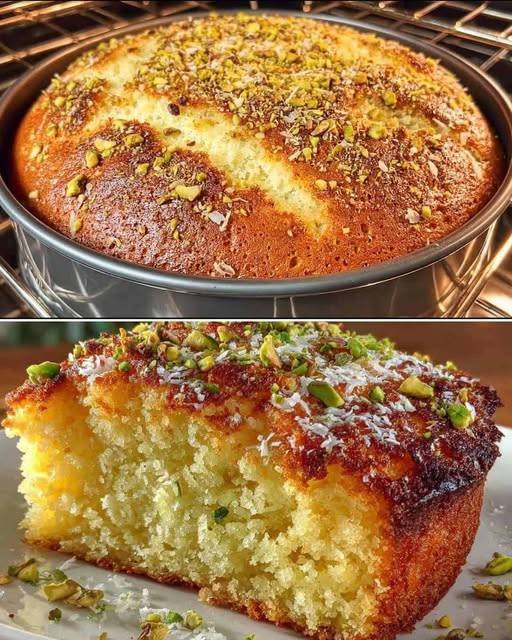
If you love soft, fragrant, and moist cakes but dislike complicated measurements or the hassle of eggs, the 7-Cup Coconut Cake is your dream come true. This delightful old-fashioned recipe is popular in many parts of the world for one simple reason—it’s foolproof. You don’t need a kitchen scale, mixer, or eggs—just one cup, a bowl, and a spoon. The result? A rich, golden coconut cake that’s slightly crisp on the outside and beautifully tender inside, with a hint of tropical sweetness in every bite.

Let’s explore this easy, comforting cake in detail—from its origins to the simple steps that make it shine.


The Beauty of the “7-Cup” Formula

The name “7-Cup Cake” comes from the equal ratio of ingredients—one cup each of seven basic items. It’s a wonderfully practical idea, especially for home bakers who don’t like dealing with scales or measuring spoons. Traditionally, this cake includes flour, sugar, grated coconut, semolina, yogurt, oil, and milk. These humble ingredients create a perfectly balanced texture: soft, dense, and aromatic, with a satisfying bite from the semolina and coconut.

This cake is a cousin of the popular Indian “7-Cup Barfi” but adapted into a moist, sliceable tea cake. Its texture lies somewhere between a pound cake and a coconut loaf—moist, aromatic, and slightly chewy at the edges.


Ingredients (Measured by Cups, Not Scale!)

You’ll only need a simple kitchen cup—any standard measuring cup will do.

Ingredients:

  • 1 cup all-purpose flour

  • 1 cup fine semolina (suji or rava)

  • 1 cup desiccated coconut (unsweetened preferred)

  • 1 cup plain yogurt (curd)

  • 1 cup sugar

  • 1 cup milk (room temperature)

  • 1 cup vegetable oil (or melted butter)

  • 1 ½ tsp baking powder

  • ½ tsp baking soda

  • 1 tsp vanilla extract or cardamom powder (optional for flavor)

  • A pinch of salt

Optional for topping:

  • 2 tbsp grated coconut or chopped nuts (almonds or pistachios)


Why No Eggs?

This cake is completely eggless yet beautifully soft. The yogurt and baking soda work together as a perfect substitute for eggs, providing moisture, lightness, and lift. The reaction between the yogurt’s acidity and the soda helps the batter rise without making it heavy. This makes the 7-Cup Coconut Cake ideal for vegetarians or anyone avoiding eggs.


Step-by-Step Method

1. Prepare the Pan

Grease a loaf tin or 8-inch round cake pan with oil or butter. Line the bottom with parchment paper for easy removal. Preheat your oven to 170°C (340°F).

2. Mix the Wet Ingredients

In a large mixing bowl, combine:

  • Yogurt

  • Sugar

  • Milk

  • Oil

  • Vanilla extract (if using)

Whisk until the sugar dissolves completely and the mixture turns smooth and creamy. This forms the moist foundation of your cake.

3. Combine the Dry Ingredients

In another bowl, mix together:

  • Flour

  • Semolina

  • Desiccated coconut

  • Baking powder

  • Baking soda

  • Salt

Stir with a spoon or whisk until well combined.

4. Bring It All Together

Pour the dry ingredients into the wet mixture in batches. Use a spatula or wooden spoon to gently mix until a thick, smooth batter forms. Don’t overmix; just fold until there are no dry streaks.

If the batter feels too thick (depending on your semolina), you can add 2–3 tablespoons of extra milk. The texture should be pourable but not runny.

5. Rest the Batter

Let the batter rest for 10 minutes. This allows the semolina and coconut to absorb moisture and helps the cake develop a rich, dense crumb.

6. Pour and Bake

Pour the rested batter into the prepared cake pan. Tap it gently on the counter to remove air bubbles. Sprinkle some grated coconut or chopped nuts on top if you like a golden crust.

Bake in the preheated oven for 40–50 minutes, or until the top is golden brown and a toothpick inserted in the center comes out clean.

7. Cool and Serve

Once baked, let the cake rest in the pan for 10 minutes, then remove it to a cooling rack. Slice only after it has completely cooled. This helps the texture set properly.


Flavor Variations

The beauty of the 7-Cup Coconut Cake is its flexibility. You can easily tweak it to your taste or what’s available in your kitchen.

  • Lemon Coconut Cake: Add 1 tablespoon of lemon zest to the batter for a fresh, citrusy note.

  • Tropical Twist: Mix in a handful of chopped pineapple or mango for extra moisture and fruity flavor.

  • Nutty Delight: Add chopped almonds, walnuts, or cashews to the batter for crunch.

  • Chocolate Swirl: Mix 2 tablespoons of cocoa powder with ¼ cup batter and swirl it into the cake before baking for a marble effect.


Serving Ideas

This cake is perfect on its own with a cup of tea or coffee. However, you can dress it up for special occasions too:

  • Drizzle with a coconut glaze: Mix powdered sugar with a little coconut milk until smooth, then drizzle it over the cooled cake.

  • Serve with whipped cream and fruits: Add a light layer of whipped cream and garnish with berries or tropical fruits for a dessert-worthy treat.

  • Warm it up: Lightly toast a slice and serve with a pat of butter—it tastes heavenly!


Storage Tips

Because it’s rich with oil, milk, and yogurt, this cake stays moist for days.

  • Room temperature: Store in an airtight container for up to 3 days.

  • Refrigerator: Keeps well for up to 6–7 days.

  • Freezer: Wrap slices individually and freeze for up to a month. Just thaw and warm slightly before serving.


Why You’ll Love This Cake

  1. No Eggs, No Fuss: Perfect for vegetarians or when you’re out of eggs.

  2. One-Cup Wonder: No scales, no fancy tools—just one cup for measuring everything.

  3. Soft and Moist: Yogurt and oil make the texture unbelievably tender.

  4. Tropical Aroma: Coconut and semolina give a subtle crunch and flavor that’s simply addictive.

  5. Versatile Recipe: Easy to flavor, glaze, or top to suit your mood or season.


A Bite of Simplicity and Comfort

The 7-Cup Coconut Cake is the kind of recipe that connects generations—it’s simple, homely, and full of nostalgic warmth. Every slice feels like a hug from the kitchen: golden, aromatic, and satisfying without being too sweet or heavy.

It’s the perfect cake to bake when you want something special but stress-free, when you’re hosting guests, or when you just crave a cozy treat with your evening tea. And the best part? You’ll never have to worry about measuring or cracking eggs—just seven cups, one bowl, and pure coconut magic.

KFC Air Fryer Chicken

If you’ve ever found yourself craving that irresistible golden crunch and juicy tenderness of KFC fried chicken, this Air Fryer KFC Chicken recipe will change the way you think about homemade fried chicken forever. It’s a healthier, quicker version that still delivers that iconic blend of herbs, spices, and crispy perfection — all without deep-frying in oil. Imagine biting into a piece of chicken so flavorful, with a crust that shatters lightly and meat that stays tender inside. This is the magic of air-frying done right, and today we’ll recreate that world-famous taste right in your kitchen.

Why This Recipe Works

This air fryer version captures the signature KFC flavor with a special 11-spice mix, while the buttermilk brine ensures each bite is juicy and seasoned throughout. Instead of soaking in oil, the air fryer circulates hot air to create a golden, crispy crust that rivals traditional frying. It’s also easier to clean up and much healthier — with about 70% less fat than deep-fried chicken. You’ll still get that finger-lickin’ good crunch, only lighter and guilt-free.

Ingredients

For the Buttermilk Marinade:

  • 2 lbs (about 1 kg) bone-in chicken (drumsticks, thighs, or breasts)

  • 1 ½ cups buttermilk

  • 1 teaspoon salt

  • 1 teaspoon black pepper

  • ½ teaspoon paprika

  • ½ teaspoon garlic powder

For the Seasoned Coating:

  • 1 ½ cups all-purpose flour

  • 1 teaspoon salt

  • 1 teaspoon ground black pepper

  • 1 teaspoon paprika

  • 1 teaspoon dried basil

  • ½ teaspoon dried thyme

  • ½ teaspoon oregano

  • ½ teaspoon celery salt

  • ½ teaspoon mustard powder

  • ½ teaspoon garlic powder

  • ½ teaspoon onion powder

  • ¼ teaspoon white pepper

  • ¼ teaspoon cayenne pepper (optional for a spicy kick)

For Cooking:

  • Olive oil spray or cooking spray

tep 1: Marinate for Maximum Juiciness

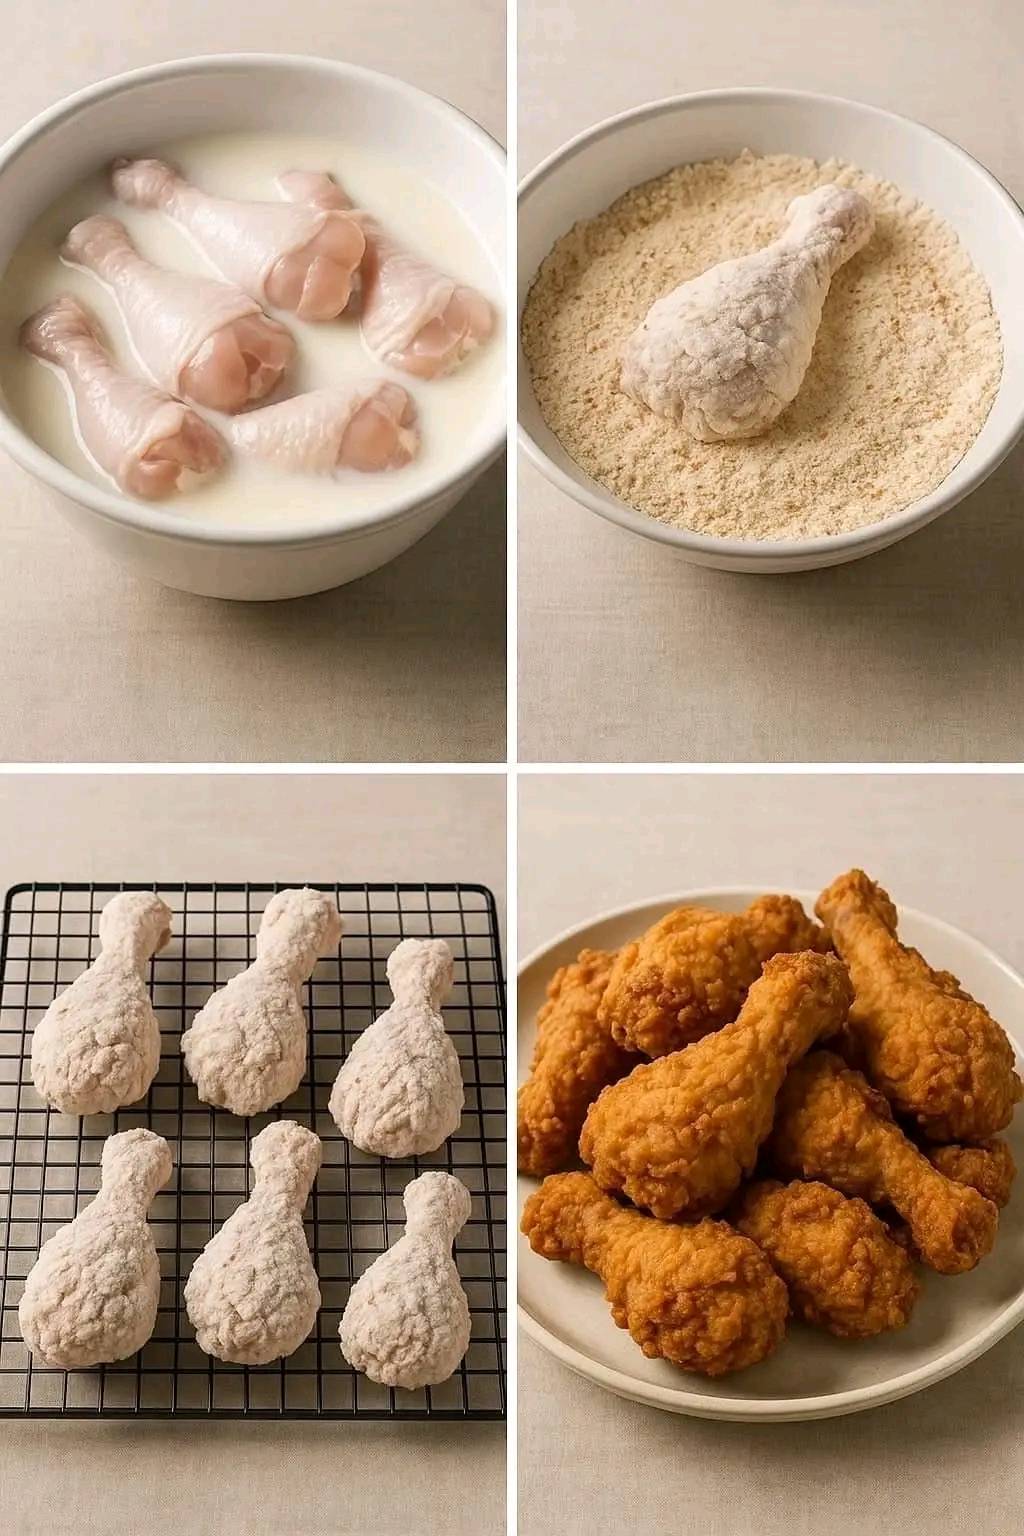
In a large mixing bowl, whisk together the buttermilk, salt, black pepper, paprika, and garlic powder. Add the chicken pieces, making sure each one is fully submerged in the mixture. Cover and refrigerate for at least 4 hours, or overnight if possible.

This buttermilk bath does more than flavor the chicken — it tenderizes it. The acidity breaks down the muscle fibers, while the spices infuse deep inside. When you bite into your cooked chicken, you’ll taste the seasoning from the surface all the way to the bone.

Step 2: Create the Legendary KFC Spice Blend

In another large bowl, mix the flour with all the seasonings. This is where the secret lies — the 11 herbs and spices inspired by the original KFC recipe. It’s a blend of warmth, spice, and savory depth that makes the coating addictive.

For an extra-crispy result, double-dip the chicken:

  1. Remove a piece of marinated chicken, letting the excess buttermilk drip off.

  2. Coat it in the seasoned flour mixture, pressing the flour onto the surface.

  3. Dip it back into the buttermilk.

  4. Coat once again in the flour mixture.

This double coating builds up that iconic flaky crust that shatters when you bite into it.

Step 3: Preheat the Air Fryer

Preheat your air fryer to 375°F (190°C) for about 5 minutes. Preheating is crucial because it mimics the instant sear you’d get in hot oil — sealing in juices and ensuring an even golden color.

Step 4: Arrange and Spray

Lightly spray the air fryer basket with oil to prevent sticking. Arrange the chicken pieces in a single layer, making sure they don’t touch. You may need to cook in batches depending on your air fryer’s size.

Once arranged, spray the chicken generously with cooking oil on all sides. This step is key to creating that beautiful fried look and crunch — it helps the flour coating crisp evenly and turn golden brown.

Step 5: Air Fry to Crispy Perfection

Air fry the chicken at 375°F (190°C) for 25–30 minutes, flipping halfway through. Spray again after flipping to maintain the crispy coating.

  • For smaller pieces (like wings or drumsticks): 22–25 minutes.

  • For larger pieces (like thighs or breasts): 28–30 minutes.

The chicken is done when the crust is golden and the internal temperature reaches 165°F (74°C). You’ll know it’s perfect when the air fryer basket smells like a KFC bucket.

Step 6: Let It Rest

When the chicken is finished, let it rest for 5 minutes on a wire rack. This allows the juices to settle and keeps the coating from getting soggy. The result? A perfectly crisp outside and tender, flavorful inside.

Step 7: Serve and Enjoy

Serve your KFC-style Air Fryer Chicken hot, with your favorite sides: mashed potatoes, coleslaw, buttery corn on the cob, or even fries. For the full experience, drizzle a little honey over the crispy chicken or pair it with your favorite dipping sauces like ranch, BBQ, or spicy mayo.

Tips for the Best Air Fryer KFC Chicken

  1. Don’t overcrowd the basket: Air circulation is key for even crisping.

  2. Use bone-in chicken: It stays juicier and more flavorful.

  3. Rest before serving: This ensures a perfectly crunchy exterior.

  4. Oil spray matters: A good mist of oil helps the crust fry up evenly.

  5. Try a spicy version: Add more cayenne or crushed chili flakes for a fiery Southern twist.

Why You’ll Love This Recipe

This recipe captures everything we adore about KFC — that secret blend of spices, crispy coating, and juicy meat — but transforms it into a healthier, mess-free version. It’s perfect for family dinners, game nights, or even meal prep. You can reheat leftovers in the air fryer for a few minutes, and they’ll crisp right back up.

Every bite feels like a trip down memory lane, with that nostalgic KFC flavor — only fresher, crunchier, and made with love in your kitchen.

Final Bite:
This KFC Air Fryer Chicken isn’t just a copycat; it’s a tribute to the legendary comfort food that defined crispy fried chicken for generations. It’s proof that with the right technique and a little spice magic, you can create restaurant-quality fried chicken at home — with a healthier, air-fried twist that keeps you coming back for more.

Air Fryer Garlic Toast Pizza

If you love the comforting aroma of garlic bread and the cheesy delight of pizza, this Air Fryer Garlic Toast Pizza is about to become your new obsession. It’s the perfect fusion of crispy garlic toast and gooey, melty pizza toppings—all cooked to perfection in the air fryer. This recipe is so quick, delicious, and customizable that you’ll wonder how you ever lived without it. Whether you’re craving a quick lunch, an easy dinner, or a late-night snack, this mouthwatering creation will satisfy every craving with minimal effort and maximum flavor.

Why This Recipe Works

Using garlic toast as the pizza base eliminates the need for pizza dough—saving you time while adding incredible buttery, garlicky flavor. The air fryer ensures a crispy, golden crust while melting the cheese evenly, creating that irresistible pizza stretch we all love. Plus, it’s endlessly versatile—you can top it with anything from classic pepperoni to vegetables, or even turn it into a breakfast pizza with eggs and bacon.

This recipe is ideal for busy weeknights, family movie nights, or anyone who loves a quick homemade meal without sacrificing taste. You’ll only need about 10 minutes from start to finish, and no oven preheating required!

Ingredients

For 4 servings (2 slices each):

  • 8 slices frozen Texas-style garlic toast (thick and buttery)

  • 1 cup pizza sauce (store-bought or homemade)

  • 2 cups shredded mozzarella cheese

  • ½ cup pepperoni slices (or any topping of choice)

  • ¼ cup sliced black olives (optional)

  • ¼ cup diced bell peppers

  • ¼ cup sliced mushrooms

  • 1 teaspoon Italian seasoning

  • ½ teaspoon crushed red pepper flakes (optional, for heat)

  • 2 tablespoons fresh basil or parsley, chopped, for garnish

Homemade Garlic Toast Option (optional)

If you prefer to make your own garlic toast base instead of using frozen toast, here’s a quick method:

  • 8 slices of thick-cut bread (French, sourdough, or brioche)

  • 3 tablespoons softened butter

  • 2 cloves garlic, minced

  • 1 teaspoon parsley flakes

  • ¼ teaspoon salt

Mix butter, garlic, parsley, and salt together, spread over one side of each slice, and toast them in the air fryer at 350°F for 3–4 minutes before adding toppings.

Instructions

Step 1: Preheat Your Air Fryer

Preheat the air fryer to 375°F (190°C). Preheating ensures the garlic toast crisps up perfectly and that the cheese melts evenly. If your air fryer doesn’t require preheating, you can skip this step—but starting hot gives you the best texture.

Step 2: Prepare the Garlic Toast Base

Place the frozen garlic toast slices in the air fryer basket in a single layer. Air fry for 3 minutes to get them slightly crisped but not fully cooked. This step prevents soggy bottoms once you add sauce and cheese.

Step 3: Add the Sauce and Toppings

Carefully spread about 1 to 2 tablespoons of pizza sauce over each partially toasted slice. Sprinkle with a generous layer of mozzarella cheese, then add your desired toppings. Try mixing and matching—some slices with pepperoni and olives, others with bell peppers and mushrooms for variety.

Step 4: Air Fry to Perfection

Return the loaded garlic toast pizzas to the air fryer basket (don’t overcrowd—cook in batches if needed). Air fry for 5 to 7 minutes until the cheese is bubbly, golden, and the edges are perfectly crisp. Keep a close eye during the last minute to prevent over-browning.

Step 5: Garnish and Serve

Remove the garlic toast pizzas carefully using tongs or a spatula. Sprinkle with Italian seasoning, red pepper flakes, and fresh basil or parsley. Let them cool for a minute—they’ll be piping hot and melty—then serve immediately.

Flavor Variations

Here’s where you can get creative! Try some of these tasty variations:

  1. Margherita Style:
    Top with fresh mozzarella slices, tomato, and basil leaves for a fresh Italian twist.

  2. BBQ Chicken Pizza:
    Use BBQ sauce instead of pizza sauce, add cooked shredded chicken, red onions, and smoked gouda cheese.

  3. Veggie Lovers:
    Add spinach, onions, olives, and bell peppers with a sprinkle of feta for a Mediterranean vibe.

  4. Meat Lovers:
    Load up with pepperoni, sausage crumbles, ham, and bacon for the ultimate carnivore feast.

  5. Breakfast Garlic Toast Pizza:
    Add scrambled eggs, bacon, and cheddar cheese, then drizzle with hot sauce for a morning treat.

Tips for Perfect Air Fryer Garlic Toast Pizza

  • Avoid soggy toast: Pre-toast the bread before adding sauce and toppings—it keeps the base firm and crisp.

  • Don’t overload toppings: Air fryers work best with even airflow. Too many toppings may result in uneven cooking.

  • Watch the cheese: Mozzarella melts fast. For a golden top, cook until just bubbly.

  • Reheat with ease: Leftovers reheat beautifully in the air fryer for 2–3 minutes at 350°F. They’ll taste just as fresh as when you made them!

Serving Suggestions

Serve these garlic toast pizzas with a side of Caesar salad, creamy tomato soup, or air fryer fries for a full meal. They’re perfect for parties, casual dinners, or even kids’ lunches. Pair them with a chilled soda or sparkling lemonade for a simple yet satisfying combo.

Storage and Reheating

  • Refrigerate: Store leftovers in an airtight container for up to 3 days.

  • Freeze: Once cooled, wrap individual slices in foil and freeze for up to 1 month.

  • Reheat: Pop in the air fryer at 350°F for 5 minutes—crispy and cheesy again!

Final Thoughts

The Air Fryer Garlic Toast Pizza proves that you don’t need a fancy crust or hours in the kitchen to enjoy the magic of homemade pizza. With crispy garlic butter bread, gooey cheese, and your favorite toppings, this quick and easy dish delivers instant satisfaction. It’s the perfect balance of convenience and flavor—a nostalgic comfort food with a modern air fryer twist.

Gluten-Free Crescent Rolls

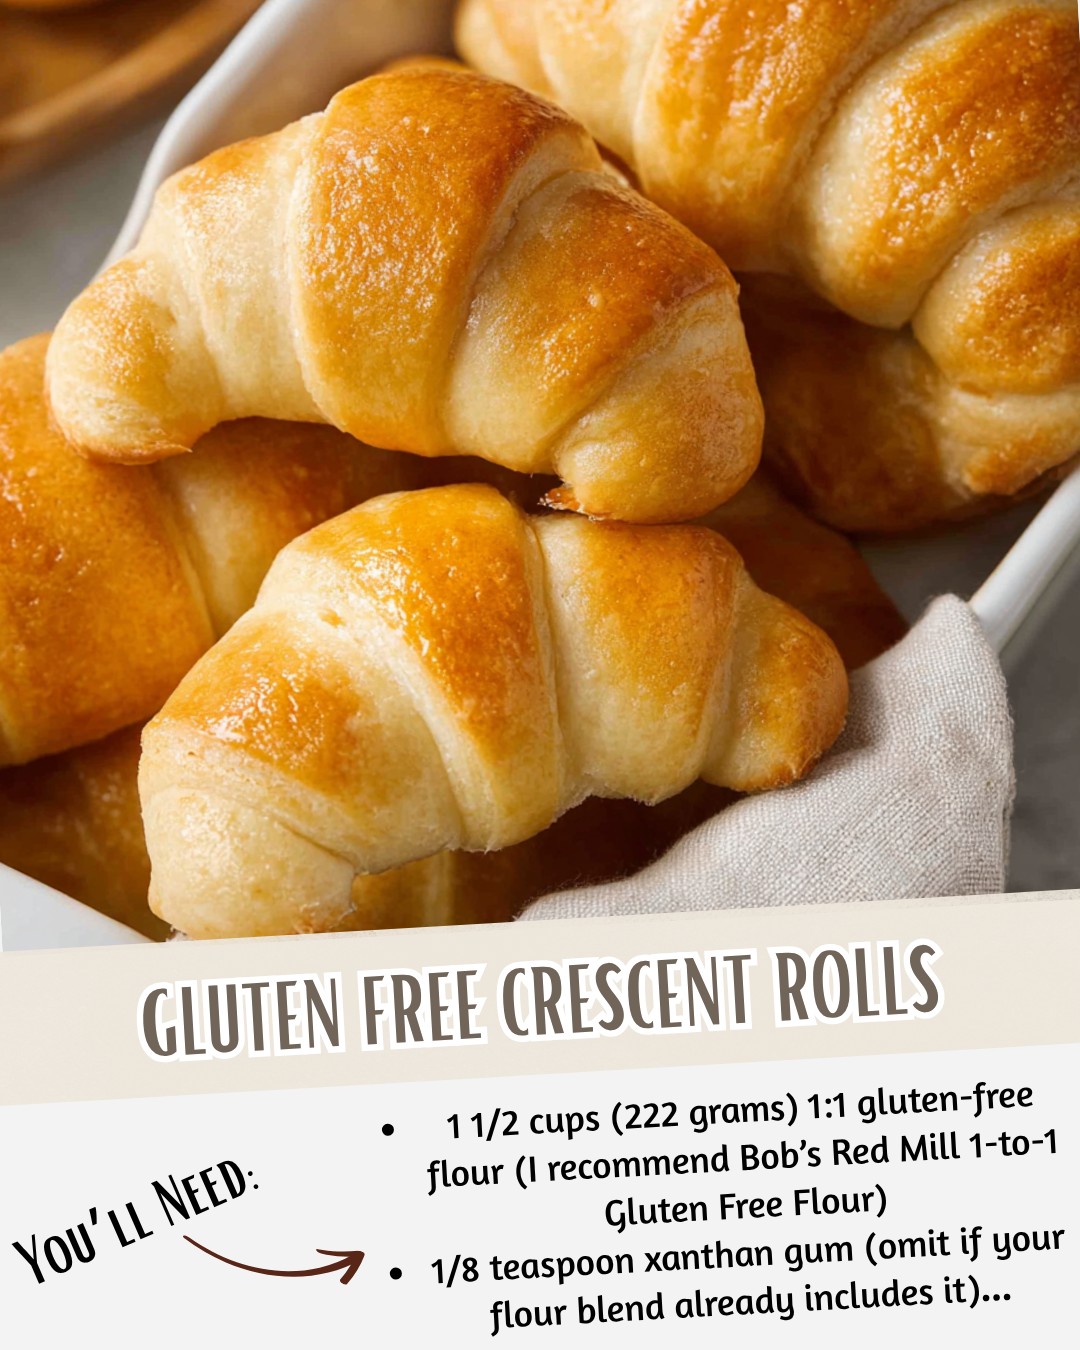
If you’ve been missing the soft, buttery goodness of crescent rolls since going gluten-free, you’re in for a treat. These Gluten-Free Crescent Rolls are tender, golden, and layered with buttery flavor—so much so that you’ll hardly believe they’re gluten-free. Whether served alongside a hearty dinner, filled with chocolate for a sweet treat, or stuffed with ham and cheese for a quick snack, these rolls rise to every occasion. This recipe delivers that nostalgic crescent roll experience with wholesome, gluten-free ingredients and a touch of homemade love.

Why You’ll Love This Recipe

Unlike many gluten-free bread recipes that turn out dry or crumbly, these crescent rolls are soft and pull apart beautifully. The secret lies in using a combination of gluten-free flours and the right technique for rolling and shaping the dough. You’ll get a melt-in-your-mouth texture that’s light, buttery, and satisfying.

These rolls are perfect for holidays, brunches, or just to have something special at the dinner table. And because they freeze beautifully, you can make them ahead of time and bake them fresh whenever the craving hits.

Ingredients

For the Dough:

  • 1 ½ cups gluten-free all-purpose flour (with xanthan gum included)

  • ½ cup tapioca starch

  • ¼ cup sorghum flour

  • 2 ½ tsp baking powder

  • 1 tsp salt

  • 3 tbsp sugar

  • 1 packet (2 ¼ tsp) active dry yeast

  • ½ cup warm milk (100°F to 110°F; can use almond or oat milk)

  • 1 tsp honey or sugar (to activate the yeast)

  • 2 large eggs (room temperature)

  • ¼ cup unsalted butter, melted and cooled slightly

  • ¼ cup plain Greek yogurt (or sour cream)

  • 1 tsp apple cider vinegar

For Brushing and Finishing:

  • 3 tbsp melted butter (for brushing before baking)

  • 1 tbsp melted butter (for brushing after baking)

  • Optional: a sprinkle of sea salt or sesame seeds on top

Step 1: Activate the Yeast

In a small bowl, combine the warm milk, honey (or sugar), and yeast. Stir gently and let it sit for about 5–10 minutes, until it becomes foamy. If it doesn’t foam, your yeast may be expired or the milk too hot or cold, so start again. This step ensures your rolls rise properly and have that delicate, fluffy texture.

Step 2: Mix the Dry Ingredients

In a large mixing bowl, whisk together the gluten-free flour, tapioca starch, sorghum flour, baking powder, salt, and sugar. Mixing the flours before adding the wet ingredients ensures even distribution, which is key to consistent texture.

Step 3: Combine the Wet Ingredients

In another bowl, whisk together the eggs, melted butter, yogurt, and apple cider vinegar. Add in the activated yeast mixture and mix until well blended. This wet mixture should be creamy and slightly frothy from the yeast.

Step 4: Form the Dough

Slowly pour the wet mixture into the dry ingredients, stirring as you go. Use a wooden spoon or a mixer with a dough hook to bring it together. The dough will be soft, slightly sticky, and more pliable than typical gluten-based dough.

If it feels too sticky, add a tablespoon of gluten-free flour at a time until it holds its shape. Cover the bowl with plastic wrap and let it rest for 30–40 minutes in a warm spot. This allows the yeast to develop flavor and the flours to hydrate.

Step 5: Roll and Shape

Once rested, lightly flour your work surface with gluten-free flour. Roll the dough into a 12-inch circle about ¼-inch thick. Using a pizza cutter or knife, slice it into 8 triangles like you would a pizza.

To shape each crescent roll, take one triangle, gently stretch the wide end a bit, then roll it tightly toward the tip. Tuck the tip underneath so it stays in place while baking. Arrange the rolls on a parchment-lined baking sheet with space between them.

Step 6: Proof the Rolls

Cover the rolls lightly with a kitchen towel and let them proof for 20–25 minutes in a warm area. They should puff up slightly but not double in size. This second rise helps develop the light, airy texture.

Step 7: Bake to Golden Perfection

Preheat your oven to 375°F (190°C). Brush the rolls with melted butter before baking. Bake for 16–20 minutes, or until the tops are beautifully golden brown.

Remove from the oven and immediately brush with another layer of melted butter for that glossy finish and irresistible buttery aroma.

Step 8: Serve and Enjoy

Allow the rolls to cool slightly before serving. They’re best enjoyed warm—soft, fragrant, and perfectly golden. You can serve them with honey butter, jam, or a simple pat of butter.

Tips for Perfect Gluten-Free Crescent Rolls

  1. Use a quality gluten-free flour blend: Not all blends behave the same way. Look for one with a mix of rice flour, potato starch, and xanthan gum.

  2. Don’t skip the resting time: Gluten-free doughs need that hydration time to avoid a grainy texture.

  3. Handle gently: Gluten-free doughs are more delicate; avoid overworking them.

  4. Try dairy-free: Substitute butter with vegan butter and milk with almond milk for a dairy-free version.

  5. Freeze for later: Freeze unbaked rolls on a tray, then store them in a zip-top bag. Bake straight from frozen—just add 5 extra minutes to baking time.

Creative Variations

  • Garlic Butter Crescent Rolls: Add ½ tsp garlic powder to the dough and brush with garlic butter after baking.

  • Cheese-Filled Crescents: Before rolling, sprinkle shredded mozzarella or cheddar on each triangle.

  • Sweet Crescents: Sprinkle cinnamon sugar over the dough and drizzle with vanilla glaze after baking.

  • Stuffed Ham & Cheese Rolls: Add a slice of ham and cheese before rolling for an irresistible savory snack.

Conclusion

These Gluten-Free Crescent Rolls prove that you don’t have to sacrifice flavor or texture when eating gluten-free. With their light, tender crumb and buttery layers, they’re sure to impress anyone at the table—gluten-free or not. Whether you enjoy them plain, filled, or topped with your favorite spread, each bite brings back that comforting warmth of homemade baking.

Gluten-Free Lemon Blueberry Bread

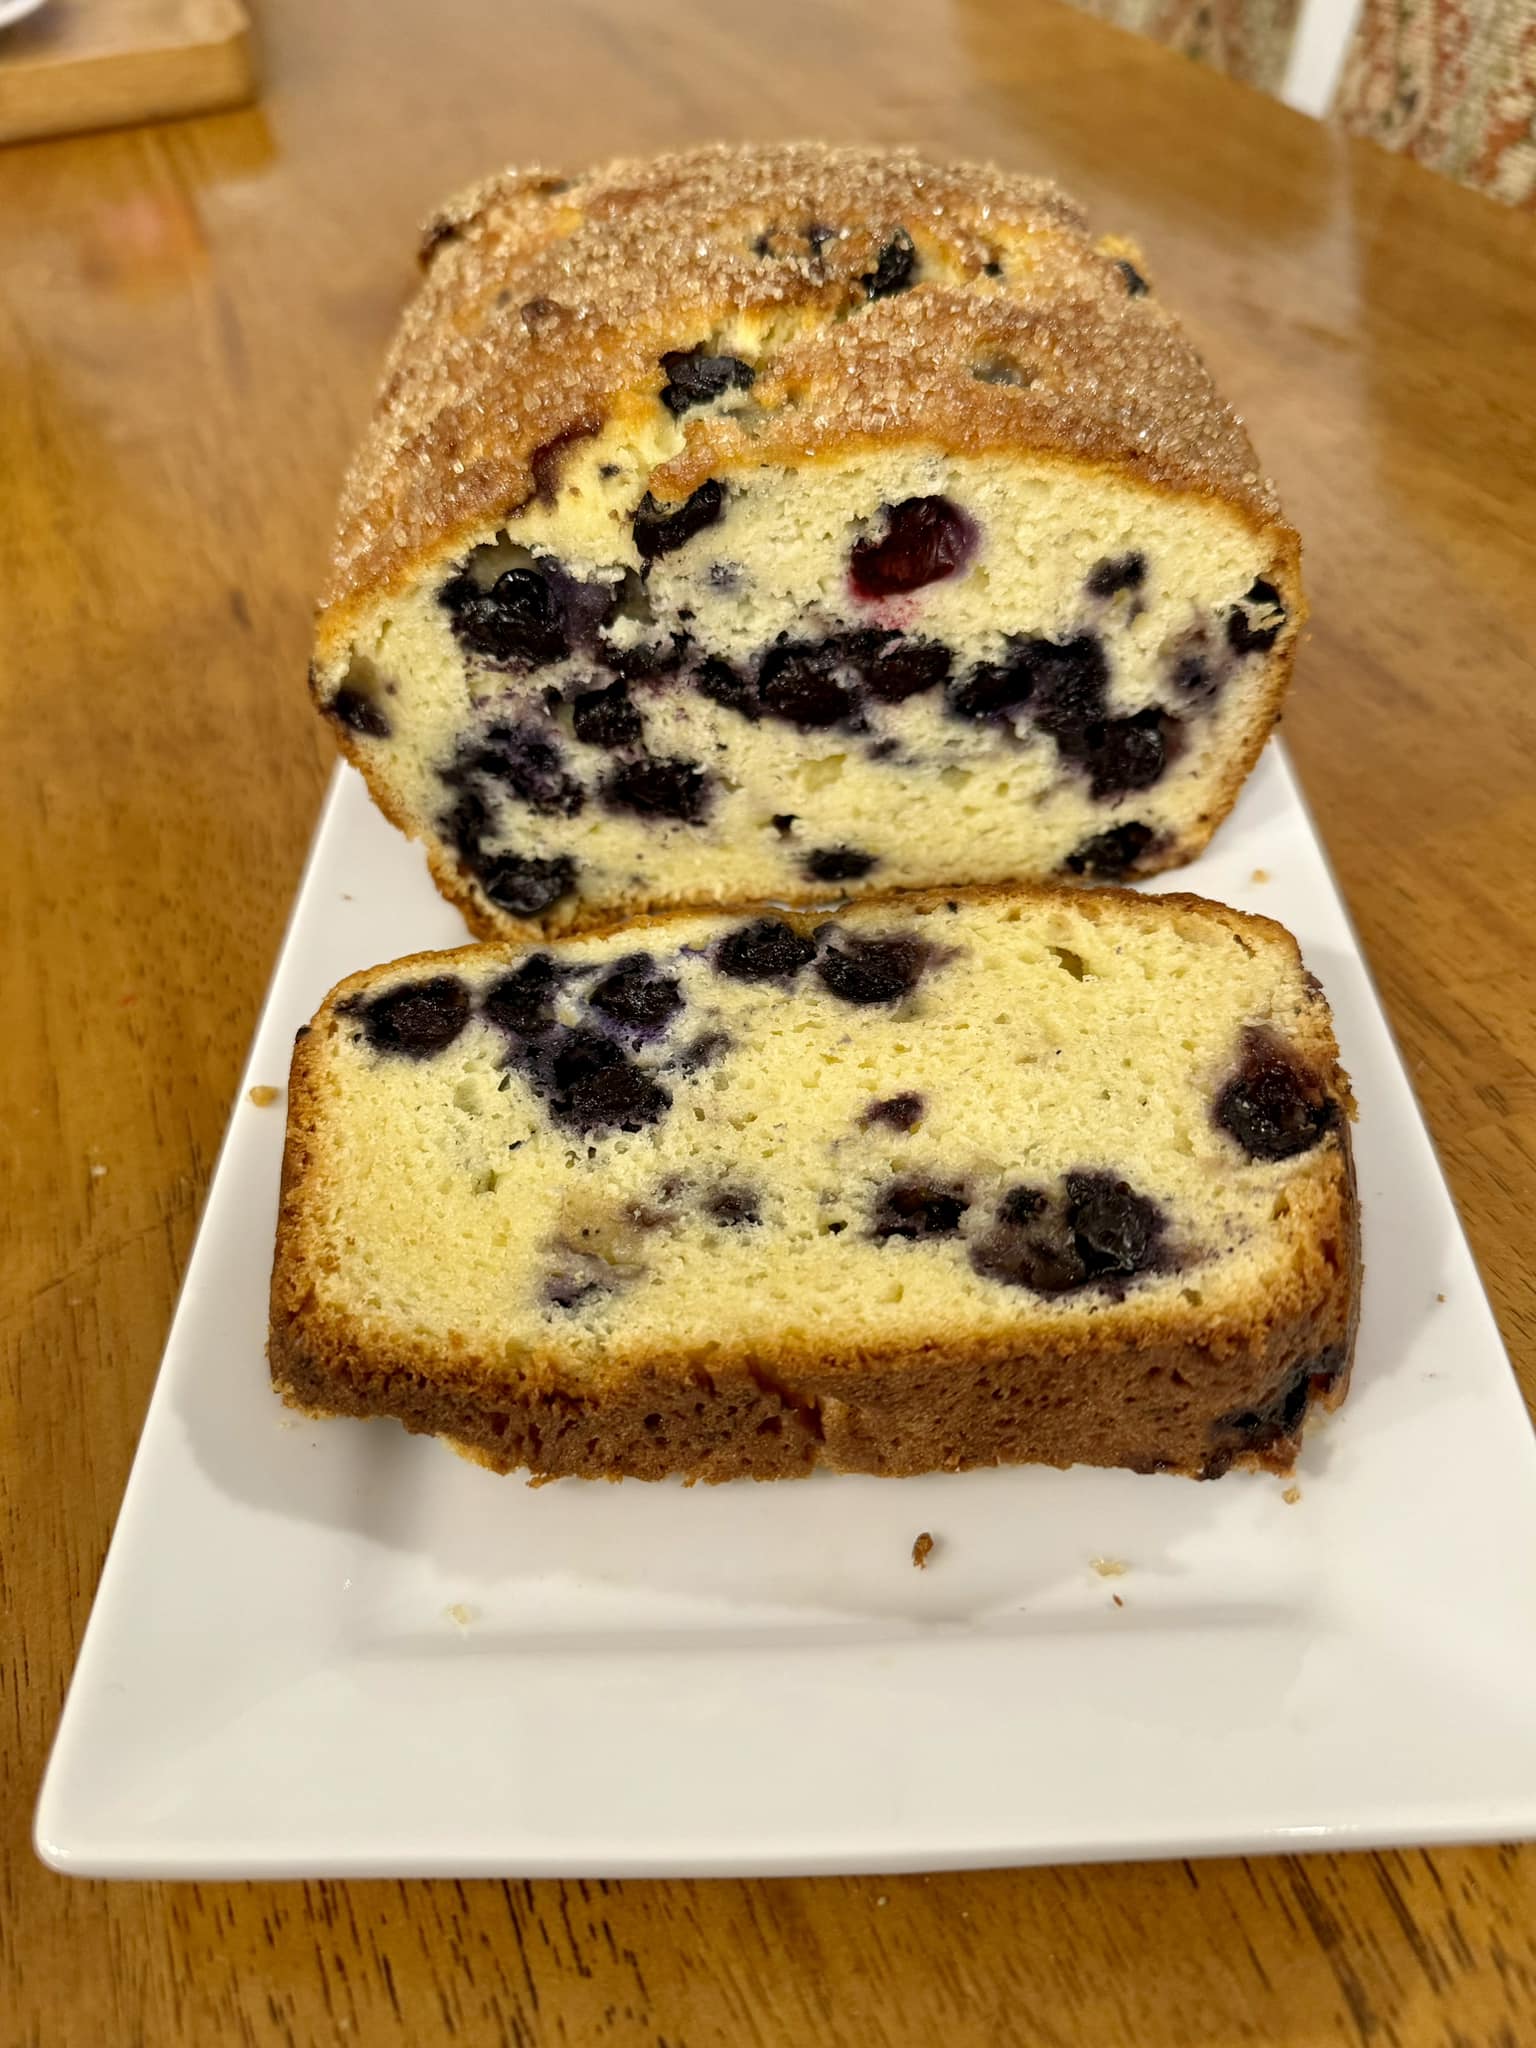
If you’ve been craving something sweet yet refreshing, this Gluten-Free Lemon Blueberry Bread is the perfect choice. It’s tender, moist, and bursting with tangy lemon zest and juicy blueberries in every bite. Whether you’re gluten-sensitive or simply want a lighter, fruit-forward dessert, this bread captures everything delightful about homemade baking without the gluten. What makes this recipe special is its balance — the zing of lemon complements the natural sweetness of blueberries beautifully, creating a loaf that’s as elegant for brunch as it is comforting for tea time.

The Inspiration Behind the Recipe

Classic lemon loafs have long been a favorite for their light, citrusy flavor. But when you add blueberries, magic happens — their subtle tartness adds depth and natural sweetness. Making it gluten-free doesn’t mean compromising texture or flavor; the combination of almond flour, rice flour, and a bit of cornstarch ensures a moist and fluffy crumb that rivals any traditional bread. This recipe is designed to be foolproof, with easy-to-find ingredients and simple steps that anyone can follow.

Ingredients You’ll Need

To create this heavenly gluten-free lemon blueberry bread, gather the following:

Dry Ingredients:

  • 1 ½ cups gluten-free all-purpose flour blend (with xanthan gum included)

  • ½ cup almond flour (for extra tenderness and flavor)

  • 2 tsp baking powder

  • ¼ tsp baking soda

  • ¼ tsp salt

Wet Ingredients:

  • ¾ cup granulated sugar (or coconut sugar for a natural twist)

  • ½ cup unsalted butter, softened (or coconut oil for dairy-free)

  • 2 large eggs, room temperature

  • ¼ cup Greek yogurt or sour cream (adds richness and moisture)

  • ¼ cup milk of choice (almond, oat, or dairy milk)

  • Zest of 2 large lemons

  • 2 tbsp fresh lemon juice

  • 1 tsp pure vanilla extract

Add-ins:

  • 1 cup fresh or frozen blueberries (if frozen, don’t thaw)

  • 1 tbsp gluten-free flour (to toss blueberries and prevent sinking)

Optional Lemon Glaze:

  • ½ cup powdered sugar

  • 1–2 tbsp fresh lemon juice

Step-by-Step Instructions

Step 1: Preheat and Prepare

Preheat your oven to 350°F (175°C). Grease and line a 9×5-inch loaf pan with parchment paper, leaving some overhang for easy removal later. This ensures your bread lifts out cleanly without breaking apart.

Step 2: Mix the Dry Ingredients

In a large mixing bowl, whisk together the gluten-free flour blend, almond flour, baking powder, baking soda, and salt. This dry mixture forms the foundation of the bread, keeping it light yet structured.

Step 3: Cream the Butter and Sugar

In a separate bowl, use an electric mixer to cream the butter and sugar together until pale and fluffy — about 2–3 minutes. This step helps incorporate air, giving the bread a tender crumb.

Step 4: Add the Wet Ingredients

Beat in the eggs one at a time, mixing well after each addition. Then add the Greek yogurt, lemon zest, lemon juice, vanilla extract, and milk. The aroma of lemon at this stage is irresistible — it’s what gives this bread its signature brightness.

Step 5: Combine Wet and Dry Mixtures

Gradually add the dry ingredients to the wet mixture, stirring gently with a spatula until combined. Avoid overmixing, as it can make the bread dense. The batter should be thick but smooth.

Step 6: Fold in Blueberries

Toss the blueberries with 1 tablespoon of gluten-free flour, then gently fold them into the batter. This trick prevents the berries from sinking to the bottom while baking and helps them stay evenly distributed.

Step 7: Bake to Perfection

Pour the batter into your prepared loaf pan and smooth the top with a spatula. Bake for 50–60 minutes, or until a toothpick inserted into the center comes out mostly clean with a few moist crumbs. If the top starts browning too quickly, cover loosely with foil during the last 10 minutes.

Step 8: Cool and Glaze

Let the bread cool in the pan for 10 minutes, then lift it out using the parchment paper and transfer to a wire rack. Once completely cooled, drizzle with the optional lemon glaze for an extra burst of citrus sweetness.

Baker’s Tips for Success

  1. Use room temperature ingredients – This ensures better mixing and helps the bread rise evenly.

  2. Don’t overmix – Gluten-free batters are delicate; stirring too much can lead to a gummy texture.

  3. Try frozen blueberries – They work beautifully and prevent the batter from becoming too wet.

  4. For dairy-free version – Swap butter for coconut oil, yogurt for coconut yogurt, and milk for almond milk.

  5. Add a crunch – Top with a sprinkle of coarse sugar or sliced almonds before baking for texture contrast.

Flavor Variations

  • Lemon Poppyseed Blueberry Bread: Add 1 tablespoon of poppy seeds for a subtle crunch.

  • Coconut Lemon Loaf: Replace half the milk with coconut milk and add shredded coconut to the batter.

  • Lavender Lemon Loaf: Add ½ teaspoon of dried culinary lavender for a delicate floral note.

Serving Suggestions

This bread is delightful as is, but you can elevate it further by serving slices warm with:

  • A dollop of whipped cream or Greek yogurt

  • A drizzle of honey or lemon curd

  • Fresh blueberries and mint leaves for presentation

It pairs perfectly with a cup of tea or iced coffee on a sunny morning.

Storage and Freezing

Wrap the cooled loaf tightly in plastic wrap or an airtight container and store at room temperature for up to 3 days, or refrigerate for up to 1 week. For longer storage, freeze slices individually for up to 2 months — simply thaw and warm before serving.

Final Thoughts

This Gluten-Free Lemon Blueberry Bread proves that gluten-free baking can be just as luscious and satisfying as traditional recipes. The soft crumb, vibrant citrus notes, and bursts of juicy berries make it a showstopper at any table. Whether enjoyed as breakfast, a snack, or dessert, each slice brings a refreshing burst of flavor that reminds you of sunshine and homemade goodness. With its perfect balance of sweet and tangy, this bread is more than just a treat — it’s a celebration of flavor, freshness, and the joy of gluten-free baking done right.

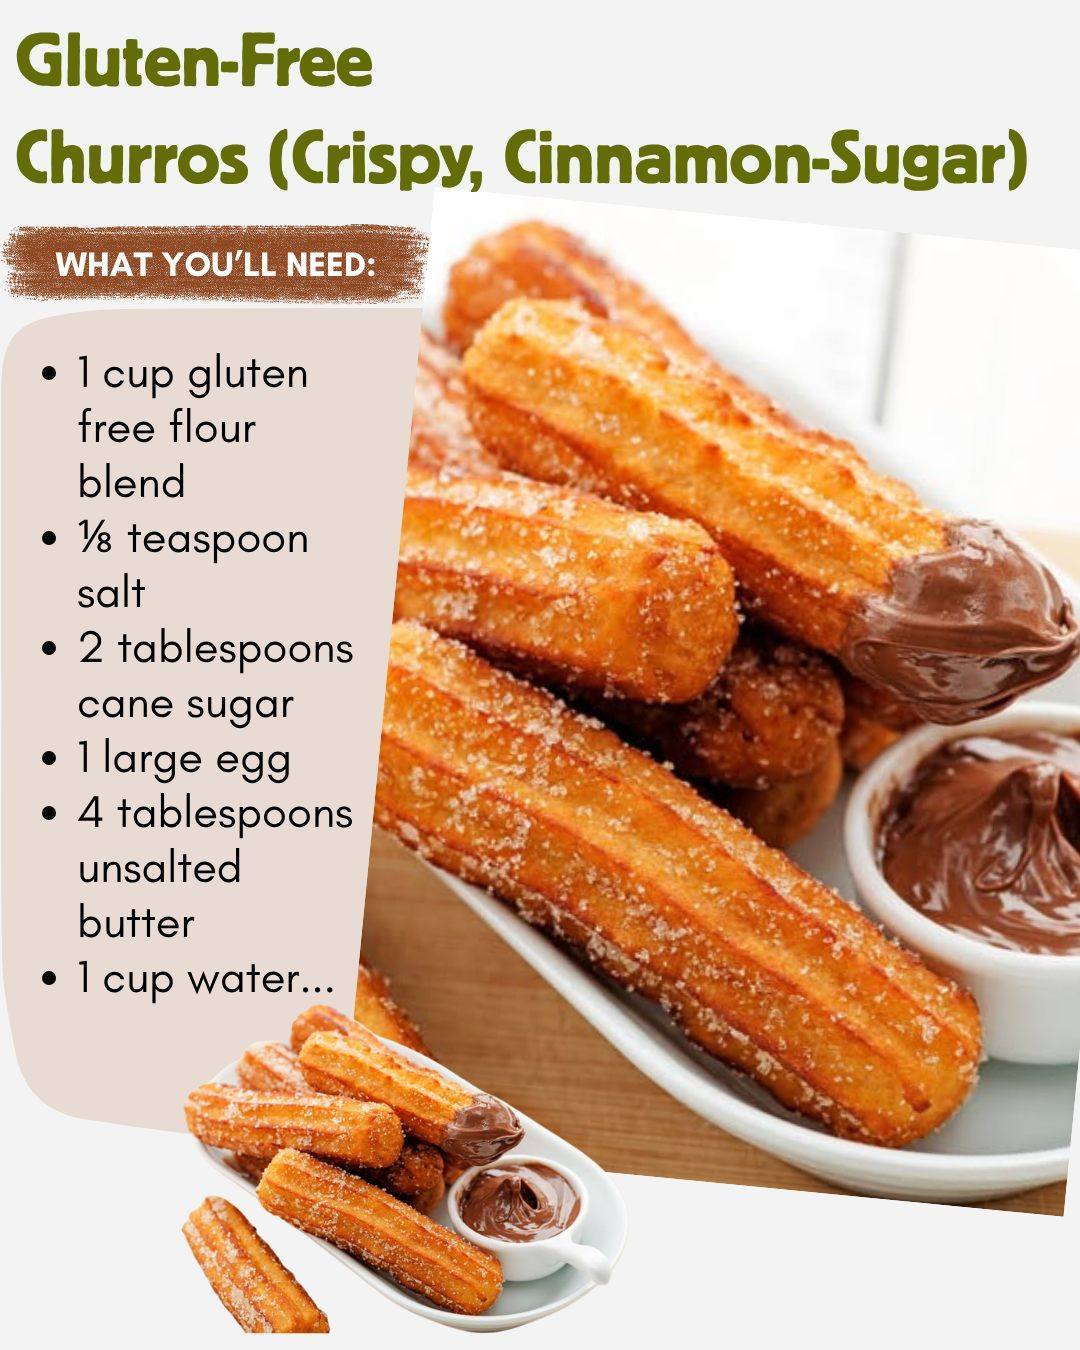
Gluten-Free Churros

There’s nothing quite like the aroma of freshly fried churros — that heavenly blend of cinnamon, sugar, and crisp dough that instantly transports you to a Spanish street fair or your favorite dessert café. For those avoiding gluten, traditional churros may seem off-limits, but with this Gluten-Free Churros recipe, you can enjoy all the magic of this classic treat without compromising flavor or texture. These churros are crispy on the outside, soft and tender inside, and rolled in a cinnamon-sugar coating that melts in your mouth. Whether served with silky chocolate sauce, caramel, or simply on their own, these churros are guaranteed to be a hit.

Why You’ll Love This Recipe

This isn’t just a gluten-free version of a classic — it’s a recipe that celebrates the balance of crunch and fluff. The secret lies in the combination of gluten-free flour and tapioca starch, which mimic the chewiness of traditional churros while keeping them light and airy. You don’t need any fancy ingredients or equipment, just a sturdy piping bag, a star-shaped tip, and a few pantry staples. Plus, this recipe works for anyone following a gluten-free diet or simply looking to try something new and delicious.

Ingredients

For the Churro Dough:

  • 1 cup (240 ml) water

  • 2 tablespoons unsalted butter

  • 2 tablespoons granulated sugar

  • ¼ teaspoon salt

  • 1 teaspoon pure vanilla extract

  • ¾ cup (90 g) gluten-free all-purpose flour blend (with xanthan gum)

  • ¼ cup (30 g) tapioca starch or cornstarch

  • 2 large eggs

  • Vegetable oil, for frying

For the Cinnamon-Sugar Coating:

  • ½ cup (100 g) granulated sugar

  • 1½ teaspoons ground cinnamon

Optional for Dipping:

  • Chocolate Sauce: Melt ½ cup dark chocolate chips with ¼ cup heavy cream.

  • Caramel Dip: Warm store-bought or homemade caramel sauce for a buttery finish.

Step-by-Step Instructions

1. Prepare the Dough

In a medium saucepan, combine water, butter, sugar, and salt. Bring the mixture to a gentle boil over medium heat, stirring occasionally until the butter melts completely. Once the mixture starts bubbling, reduce the heat to low and add in the gluten-free flour blend and tapioca starch all at once. Stir vigorously with a wooden spoon until the mixture forms a smooth dough that pulls away from the sides of the pan — this takes about 2 minutes.

Remove the pan from heat and let the dough cool for about 5 minutes. You want it to be warm but not hot before adding the eggs.

2. Incorporate the Eggs

Once the dough has cooled slightly, add the vanilla extract. Then beat in the eggs one at a time, mixing thoroughly after each addition. The dough will look separated at first, but keep stirring — it will come together into a smooth, sticky batter with a consistency similar to thick mashed potatoes.

If the dough feels too thick to pipe, you can add a tablespoon of warm water to loosen it slightly.

. Heat the Oil

Pour vegetable oil into a deep pot or heavy skillet to a depth of about 2 inches. Heat the oil over medium heat until it reaches 360°F (182°C). You can test the temperature by dropping a small piece of dough into the oil — if it sizzles and rises to the top slowly, it’s ready.

4. Pipe the Churros

Spoon the dough into a piping bag fitted with a large star tip (a Wilton 1M or Ateco 829 works perfectly). Carefully pipe 5–6-inch strips of dough directly into the hot oil, using scissors or a knife to cut the dough from the piping bag. Fry 3–4 churros at a time, making sure not to overcrowd the pan.

5. Fry to Golden Perfection

Fry each batch for about 2–3 minutes per side, turning occasionally until the churros are golden brown and crisp. Transfer the churros to a paper towel-lined plate to drain any excess oil.

6. Coat in Cinnamon Sugar

While the churros are still warm, roll them in the cinnamon-sugar mixture until evenly coated. The warmth helps the sugar stick perfectly and gives that signature sparkle.

7. Serve and Enjoy

Serve your gluten-free churros immediately with warm chocolate sauce or caramel dip. They’re best enjoyed fresh, but if you have leftovers, you can reheat them in a 350°F (175°C) oven for about 5 minutes to regain their crispness.

Tips for Perfect Gluten-Free Churros

  • Flour Blend Matters: Not all gluten-free flours behave the same way. Use a high-quality blend with xanthan gum to help bind the dough and provide elasticity.

  • Consistent Oil Temperature: Keep an eye on the oil temperature. If it’s too hot, the churros will brown quickly but remain doughy inside. Too cool, and they’ll absorb excess oil.

  • Don’t Skip the Tapioca: This starch helps give the churros that essential chewy interior — a crucial element for texture.

  • Make Ahead Tip: You can pipe the dough onto parchment paper strips and freeze them. Fry straight from frozen, adding an extra minute to the cook time.

Flavor Variations

  • Chocolate Churros: Add 2 tablespoons of cocoa powder to the flour mixture for a rich, chocolatey version.

  • Pumpkin Spice Churros: Mix ½ teaspoon pumpkin pie spice into the cinnamon-sugar coating for a fall-inspired twist.

  • Filled Churros: Use a pastry bag with a narrow tip to pipe Nutella, dulce de leche, or pastry cream into the center of each churro after frying.

Serving Ideas

Pair your churros with classic Spanish hot chocolate — thick, rich, and made for dipping. For a festive dessert board, serve alongside fresh strawberries, whipped cream, and caramel drizzle. These gluten-free churros also make an unforgettable addition to birthday parties, brunch spreads, or cozy movie nights.

Storage and Reheating

Store cooled churros in an airtight container at room temperature for up to 2 days. Reheat them in the oven or air fryer to restore their crunch. Avoid microwaving, as it can make them soggy. You can also freeze fried churros for up to a month; just reheat directly from frozen.

Final Thoughts

These Gluten-Free Churros are proof that going gluten-free doesn’t mean giving up indulgence. Every bite is light, crispy, and irresistibly sweet — just like the classic version you know and love. Whether you’re making them for a special occasion or a simple weekend treat, these churros promise the perfect balance of tradition and innovation. Dip them, share them, or savor them solo — however you enjoy them, one thing’s certain: once you make these at home, you’ll never go back to store-bought again.

Gluten Free Cheddar Bay Biscuits

If you’ve ever sat down at a seafood restaurant and been served a warm basket of buttery, cheesy biscuits, you know how irresistible they can be. Soft, golden, and full of sharp cheddar flavor with a hint of garlic and herbs — it’s a comfort food dream come true. This Gluten-Free Cheddar Bay Biscuits recipe brings that same restaurant-style experience right to your kitchen, but without the gluten. These biscuits are tender on the inside, slightly crisp on the outside, and bursting with cheesy, garlicky goodness that will make even non-gluten-free eaters swoon.

A Bit of Biscuit Bliss

Traditional Cheddar Bay Biscuits rely on wheat flour for structure, but this gluten-free version is made with a custom blend of gluten-free flours that perfectly mimic the texture of classic biscuits. The secret lies in balancing moisture, fat, and leavening — ensuring every bite is fluffy yet flavorful. Whether you’re serving them with seafood, soup, or simply as a snack, these biscuits are a showstopper. The aroma of melted butter, garlic, and cheddar wafting through your kitchen is enough to make everyone gather around before they even hit the table.

Ingredients

For the Biscuits:

  • 2 cups gluten-free all-purpose flour blend (with xanthan gum included)

  • 1 tablespoon baking powder

  • 1 teaspoon garlic powder

  • ½ teaspoon onion powder

  • ½ teaspoon salt

  • ¼ teaspoon smoked paprika (optional, for depth of flavor)

  • ½ cup cold unsalted butter, cubed

  • 1 cup shredded sharp cheddar cheese

  • ¾ cup cold buttermilk (or ¾ cup milk + 1 teaspoon lemon juice)

  • 1 large egg, lightly beaten

For the Garlic Butter Topping:

  • 3 tablespoons melted butter

  • ½ teaspoon garlic powder

  • ½ teaspoon dried parsley (or fresh parsley, finely chopped)

  • Pinch of sea salt

Instructions

Step 1: Preheat and Prepare.
Preheat your oven to 425°F (220°C) and line a baking sheet with parchment paper. A hot oven is key to achieving that crisp golden edge while keeping the inside soft and tender.

Step 2: Mix Dry Ingredients.
In a large mixing bowl, combine the gluten-free flour blend, baking powder, garlic powder, onion powder, salt, and smoked paprika. Whisk them together until evenly distributed. This dry base creates a perfect canvas for the butter and cheese to work their magic.

Step 3: Cut in the Butter.
Add the cold cubed butter to the flour mixture. Using a pastry cutter, fork, or your fingertips, work the butter into the flour until the mixture resembles coarse crumbs. The key here is to keep the butter cold — those little bits of butter will create steam pockets during baking, leading to light, flaky layers.

Step 4: Add the Cheese.
Stir in the shredded cheddar cheese, tossing it lightly to coat the shreds in the flour mixture. The cheese adds not just flavor, but also moisture and richness.

Step 5: Bring It Together.
Pour in the cold buttermilk and beaten egg. Mix gently with a wooden spoon or spatula until just combined. Do not overmix — the dough should be soft, slightly sticky, and a little lumpy. If it feels too dry, add a tablespoon of milk at a time until it holds together.

Step 6: Form the Biscuits.
Using a spoon or ice cream scoop, drop 8–10 mounds of dough onto the prepared baking sheet, spacing them about 2 inches apart. You don’t need to shape them perfectly — their rustic appearance adds charm.

Step 7: Bake.
Place the tray in the preheated oven and bake for 14–17 minutes, or until the tops are golden brown and the biscuits are puffed up beautifully.

Step 8: Make the Garlic Butter.
While the biscuits are baking, melt the butter in a small saucepan or microwave-safe bowl. Stir in garlic powder, parsley, and a pinch of salt. This fragrant butter topping is what makes these biscuits truly addictive.

Step 9: Brush and Serve.
As soon as the biscuits come out of the oven, brush them generously with the garlic butter mixture. The warmth of the biscuits will help the butter soak in, infusing every bite with flavor. Serve immediately for the best experience — warm, soft, and aromatic.

Tips for Perfect Gluten-Free Biscuits

  1. Use a Quality Gluten-Free Flour Blend: Look for a mix that contains xanthan gum or guar gum for structure. If your blend doesn’t, add 1 teaspoon of xanthan gum to the dry ingredients.

  2. Keep Ingredients Cold: Cold butter and cold buttermilk help produce light, flaky layers instead of dense, heavy biscuits.

  3. Don’t Overmix: Gluten-free dough doesn’t require kneading — too much mixing can make your biscuits tough.

  4. Add Flavor Variations: Try adding chopped chives, jalapeños, or even crumbled bacon for a twist on the classic.

  5. Storage: Store leftover biscuits in an airtight container at room temperature for up to two days or refrigerate for up to a week. Reheat in the oven for a few minutes to restore their crispness.

Serving Ideas

These gluten-free Cheddar Bay Biscuits are incredibly versatile. Serve them alongside seafood favorites like shrimp scampi, crab legs, or creamy clam chowder for a restaurant-worthy meal. They also pair wonderfully with soups, stews, or salads. For breakfast, slice one open and spread it with scrambled eggs and a slice of bacon for a cheesy biscuit sandwich. Or enjoy them simply with a pat of butter and a drizzle of honey for a sweet-savory snack.

Why You’ll Love This Recipe

What makes these biscuits truly special is how effortlessly they come together — no kneading, no rolling, just simple ingredients and big flavor. Each bite offers a balance of buttery richness, sharp cheddar tang, and that unmistakable hint of garlic that keeps you reaching for another. The gluten-free version is so fluffy and flavorful that you’d never guess it doesn’t contain wheat.

These biscuits bring comfort and indulgence to any table, reminding you that gluten-free baking doesn’t have to mean compromise. It can mean golden, cheesy perfection in every bite — the kind that disappears before you know it.