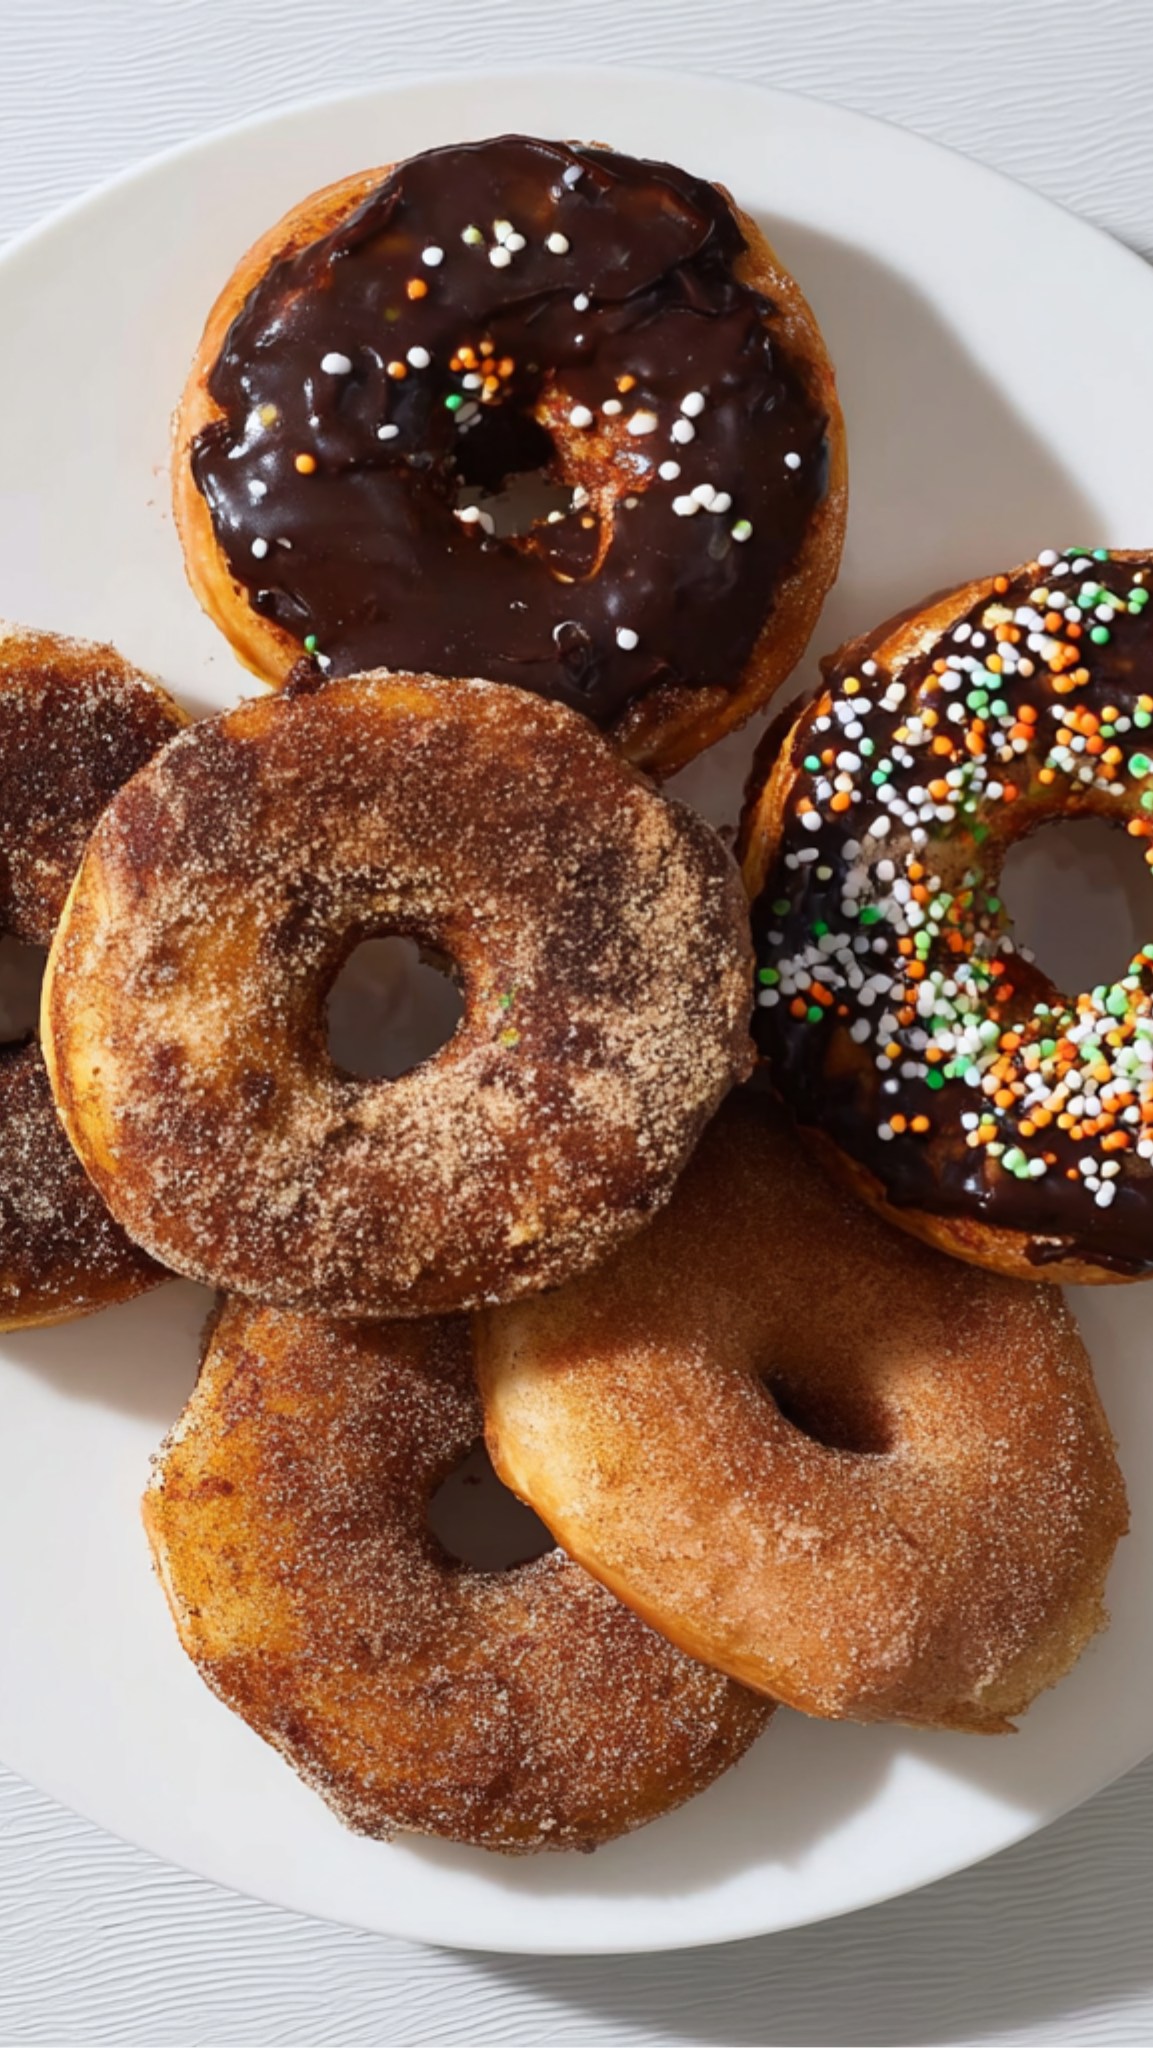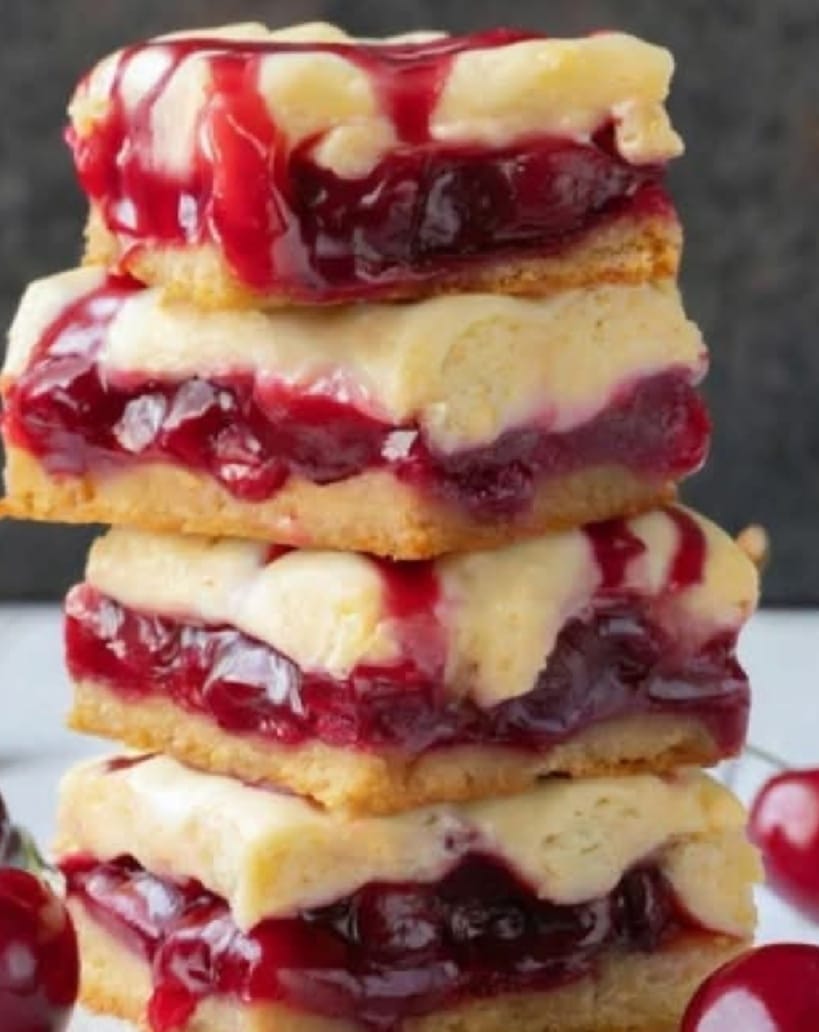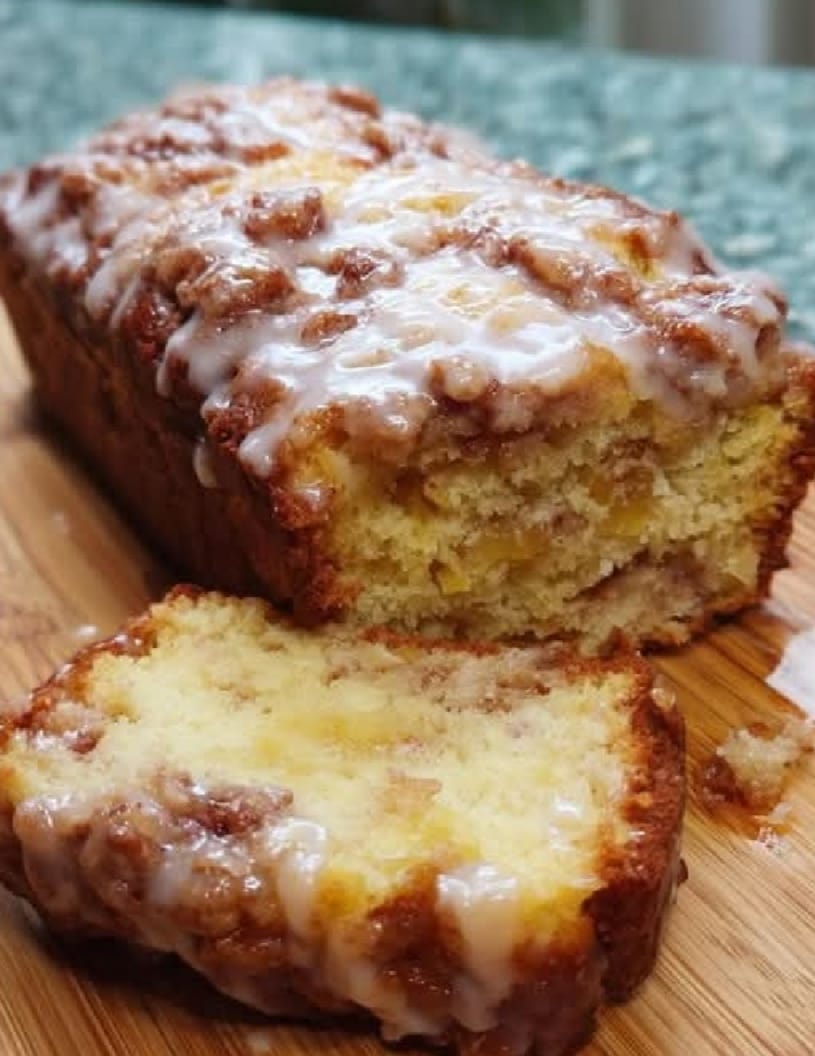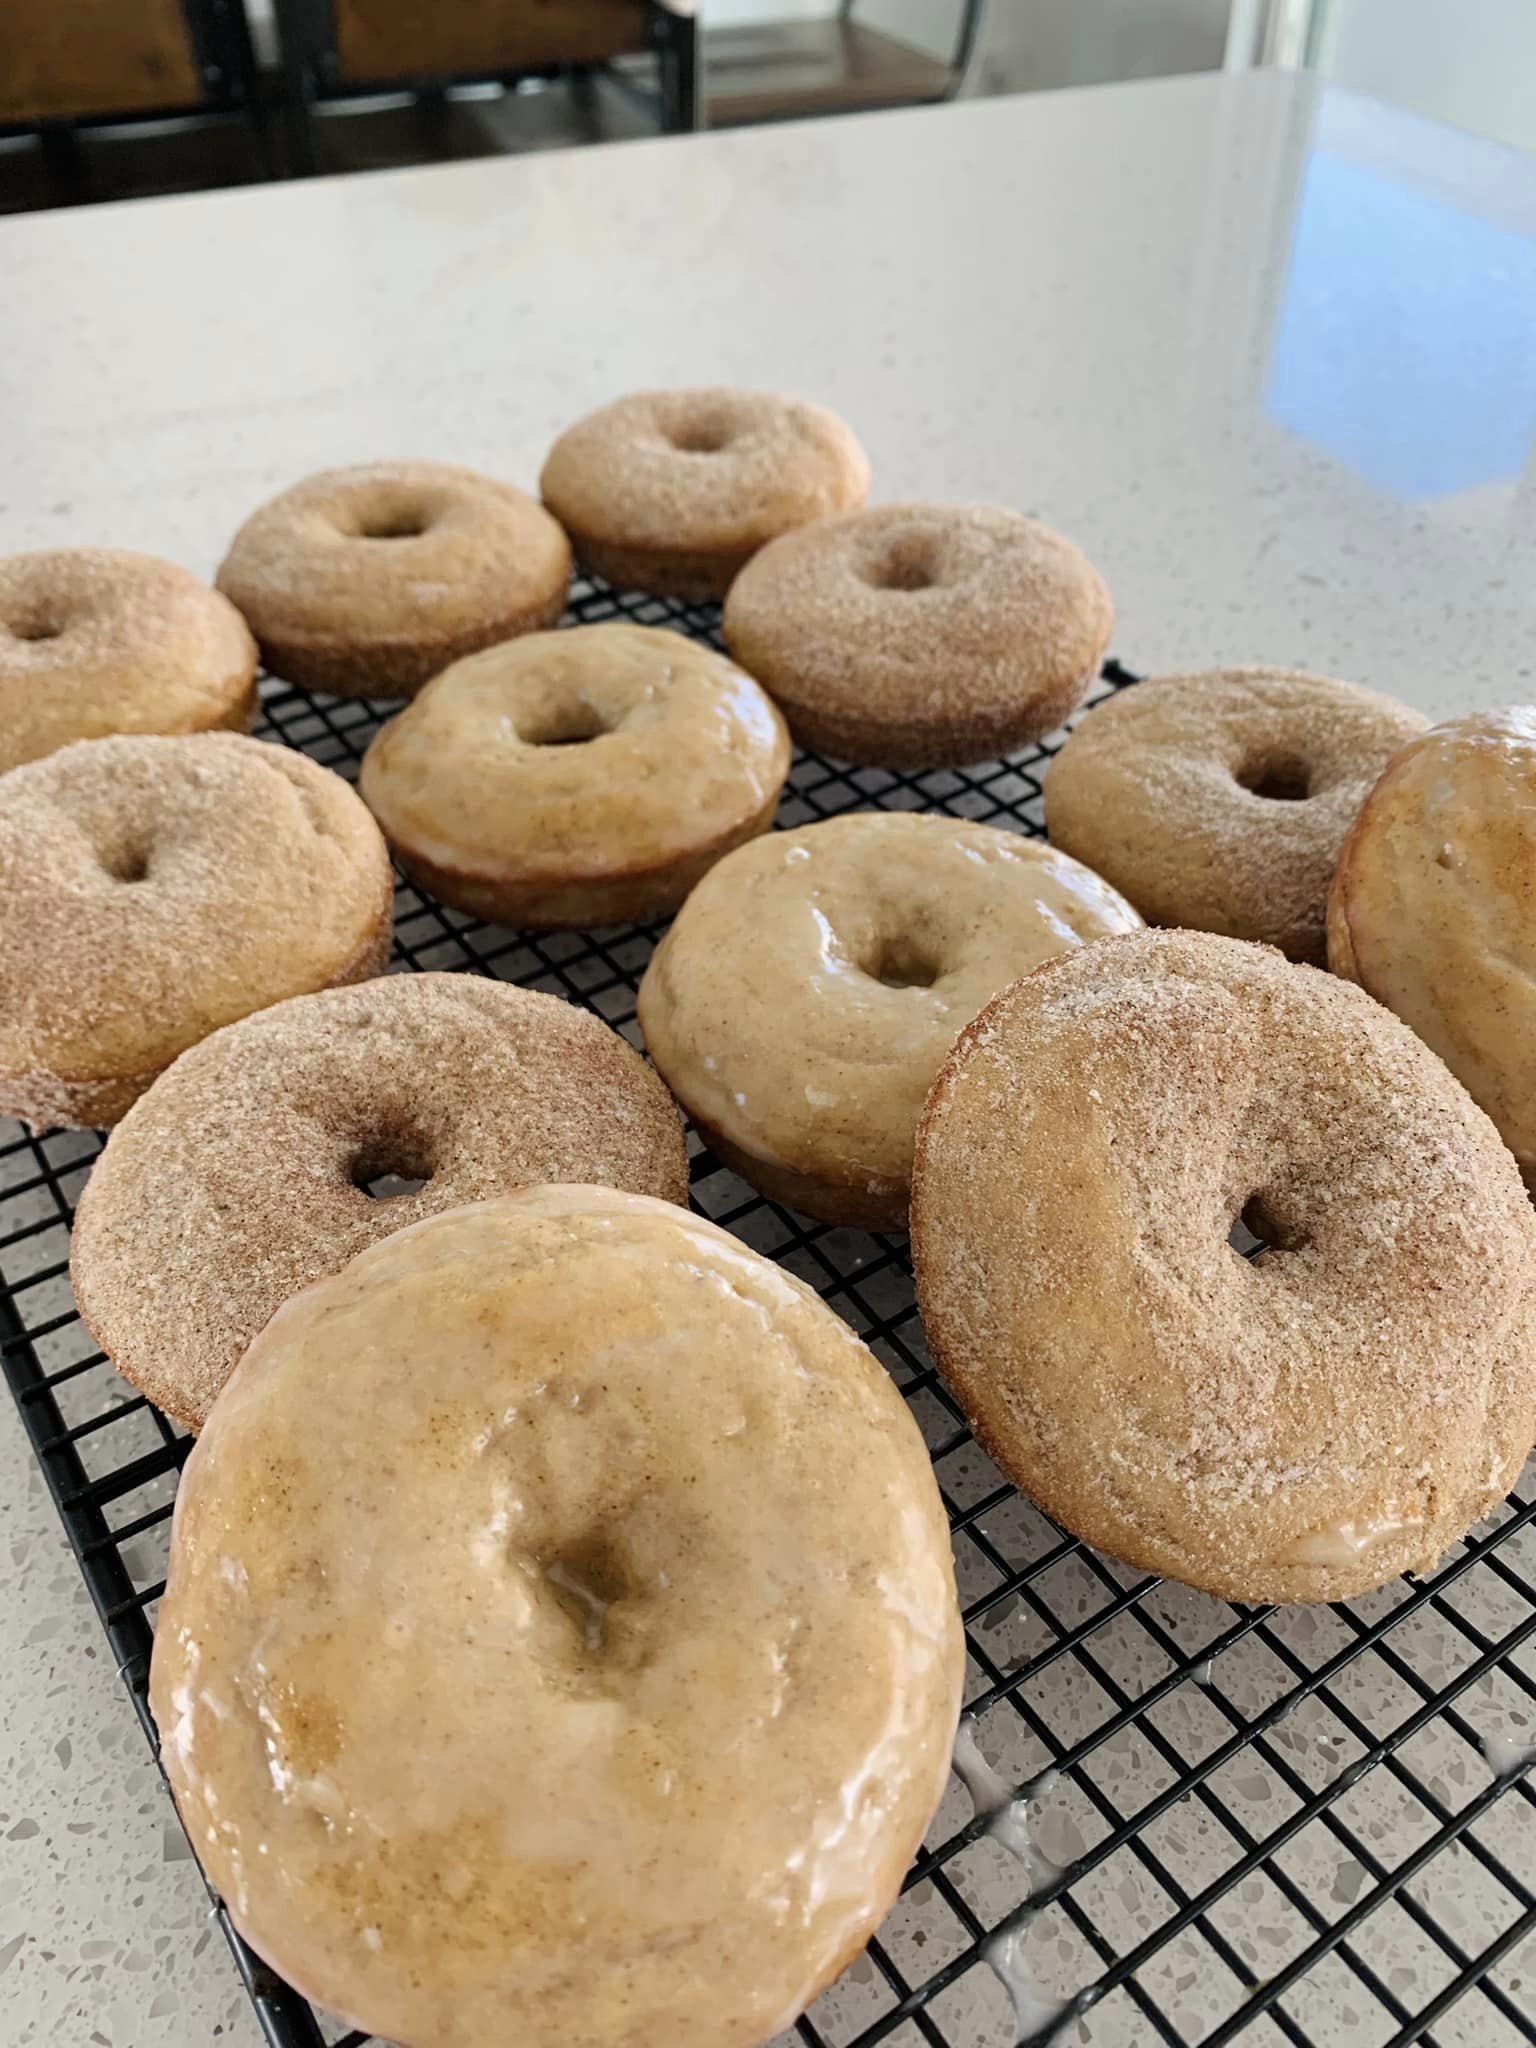
Gluten-Free Baked Pumpkin Donuts

There’s something magical about the aroma of pumpkin and spices wafting through the kitchen on a cool morning. These Gluten-Free Baked Pumpkin Donuts capture that autumn warmth in every soft, tender bite. Lightly spiced, perfectly moist, and finished with a silky glaze or cinnamon sugar coating, they’re the perfect indulgence for anyone craving seasonal sweetness—without the gluten. Best of all, they’re baked, not fried, which means you can enjoy them guilt-free with your morning coffee or as a festive dessert.

Why You’ll Love This Recipe

These pumpkin donuts are a celebration of comfort and inclusivity. Made with gluten-free flour, they’re friendly for those with gluten sensitivities while maintaining the tender crumb of classic donuts. Pumpkin purée gives them natural moisture and a lovely golden hue, while spices like cinnamon, nutmeg, and cloves bring all the nostalgic fall flavor. Whether you serve them at brunch, bake them for Halloween, or make them just because, these donuts always feel special.

Ingredients

For the Donuts:

  • 1 ¾ cups gluten-free all-purpose flour (with xanthan gum included)

  • 1 teaspoon baking powder

  • ½ teaspoon baking soda

  • ½ teaspoon salt

  • 1 teaspoon ground cinnamon

  • ½ teaspoon ground nutmeg

  • ¼ teaspoon ground ginger

  • ¼ teaspoon ground cloves

  • ½ cup brown sugar, packed

  • ¼ cup granulated sugar

  • ¾ cup canned pumpkin purée (not pumpkin pie filling)

  • 2 large eggs, room temperature

  • ¼ cup unsalted butter, melted (or coconut oil for dairy-free option)

  • ¼ cup milk of choice (almond, oat, or dairy milk)

  • 1 teaspoon pure vanilla extract

For the Glaze (optional but highly recommended):

  • 1 cup powdered sugar

  • 2 tablespoons milk (more if needed for thinning)

  • ½ teaspoon vanilla extract

  • A pinch of cinnamon

For Cinnamon Sugar Coating (alternative):

  • ½ cup granulated sugar

  • 1 tablespoon ground cinnamon

  • 3 tablespoons melted butter for brushing

Instructions

1. Preheat and Prepare

Preheat your oven to 350°F (175°C). Grease a donut pan with a little butter or nonstick spray. If you don’t have a donut pan, use a muffin pan—just adjust the bake time slightly.

2. Mix Dry Ingredients

In a large mixing bowl, whisk together the gluten-free flour, baking powder, baking soda, salt, cinnamon, nutmeg, ginger, and cloves. These aromatic spices are the heart of the recipe, infusing the donuts with that cozy fall essence.

3. Combine Wet Ingredients

In another bowl, whisk together the brown sugar, granulated sugar, pumpkin purée, eggs, melted butter, milk, and vanilla extract until smooth. The pumpkin keeps the donuts moist and tender while adding natural sweetness and color.

4. Bring It Together

Pour the wet ingredients into the dry ingredients and gently stir until just combined. Avoid overmixing; gluten-free batter can toughen if stirred too long. The batter should be thick but spoonable—similar to a dense cake batter.

5. Fill the Pan

Spoon the batter into a piping bag (or use a zip-top bag with a corner snipped off) and pipe it into the donut pan wells, filling each about ¾ full. This ensures they puff up perfectly without overflowing.

6. Bake to Perfection

Place the pan in the preheated oven and bake for 12–15 minutes, or until a toothpick inserted in the center comes out clean. The donuts should be firm to the touch and slightly springy.

7. Cool Before Glazing

Let the donuts cool in the pan for 5 minutes, then carefully transfer them to a wire rack. Allow them to cool completely before glazing, as the glaze will melt on hot donuts.

8. Add the Finishing Touch

  • For Glazed Donuts: Whisk powdered sugar, milk, vanilla, and a pinch of cinnamon together until smooth. Dip each cooled donut into the glaze and let it drip off before placing it back on the rack to set.

  • For Cinnamon Sugar Donuts: Mix sugar and cinnamon in a small bowl. Brush each warm donut lightly with melted butter, then roll in the cinnamon sugar mixture until evenly coated.

Baking Tips for the Perfect Gluten-Free Donuts

  • Don’t skip the pumpkin purée: It provides natural moisture, replacing the richness that gluten sometimes contributes.

  • Room temperature ingredients: Help the batter mix evenly for a smooth, consistent texture.

  • Avoid overbaking: Gluten-free baked goods can dry out quickly. Keep a close eye on them during the final minutes.

  • Use quality gluten-free flour: A good blend with xanthan gum mimics traditional flour and gives that classic donut chew.

Flavor Variations

  • Maple Glaze: Replace the milk in the glaze with pure maple syrup for a deeper, richer sweetness.

  • Chocolate Drizzle: Melt dark chocolate and drizzle over glazed donuts for an indulgent twist.

  • Nutty Crunch: Sprinkle chopped pecans or walnuts over the glaze before it sets for a delightful texture.

  • Vegan Option: Substitute eggs with flax eggs (2 tablespoons flaxseed meal + 6 tablespoons water), butter with coconut oil, and dairy milk with almond or oat milk.

Serving Suggestions

These gluten-free baked pumpkin donuts are best enjoyed fresh, paired with a steaming cup of coffee, spiced chai, or hot apple cider. For an elegant presentation, dust them lightly with powdered sugar and serve on a rustic wooden platter. They also make a perfect addition to a brunch spread or holiday dessert table.

If you’re making them ahead for a cozy fall gathering, store them in an airtight container at room temperature for up to 2 days, or refrigerate for up to 5. Reheat slightly before serving to bring back that fresh-from-the-oven warmth.

A Cozy Autumn Treat for Everyone

There’s a certain comfort in baking that connects us to the season, and these Gluten-Free Baked Pumpkin Donuts embody that feeling completely. The golden hue, the tender crumb, and the sweet, spiced aroma make them irresistible. Whether you’re gluten-free or not, one bite will remind you why pumpkin season is so beloved.


Gluten-Free Pizza

There’s nothing quite like the aroma of a freshly baked pizza filling your kitchen — that intoxicating mix of bubbling cheese, tangy sauce, and golden crust. But for those who avoid gluten, finding a pizza that’s both satisfying and flavorful can feel like chasing an impossible dream. This Gluten-Free Pizza recipe changes everything. It’s not just a substitute for the real thing — it is the real thing: crisp on the outside, soft and chewy on the inside, and sturdy enough to hold all your favorite toppings without crumbling apart. Whether you’re gluten-intolerant, celiac, or just exploring better-for-you options, this recipe delivers that true pizzeria magic from your own oven.

Ingredients for the Perfect Gluten-Free Pizza Dough

Dry Ingredients:

  • 2 cups gluten-free all-purpose flour (with xanthan gum included)

  • 2 teaspoons baking powder

  • 1 teaspoon salt

  • 1 teaspoon sugar (helps activate the yeast and adds slight flavor)

Wet Ingredients:

  • 1 packet (2¼ teaspoons) active dry yeast

  • ¾ cup warm water (around 105°F/40°C)

  • 1 tablespoon olive oil

  • 1 teaspoon apple cider vinegar

Optional for Flavor:

  • ½ teaspoon garlic powder

  • ½ teaspoon dried oregano

  • ¼ teaspoon crushed red pepper flakes

For the Pizza Toppings:

  • ½ cup pizza sauce (homemade or store-bought)

  • 1½ cups shredded mozzarella cheese

  • Favorite toppings: pepperoni, mushrooms, bell peppers, onions, olives, or basil

Step 1: Activate the Yeast

In a small bowl, combine the warm water, sugar, and yeast. Stir gently and let it sit for about 10 minutes, or until it becomes frothy and bubbly. This step ensures that your yeast is alive and will give the dough a beautiful rise — even though gluten-free flour doesn’t have traditional elasticity, yeast helps create a light, airy texture.

Step 2: Mix the Dry Ingredients

In a large mixing bowl, whisk together the gluten-free flour, baking powder, salt, and any optional seasonings like garlic powder or oregano. The baking powder provides extra lift, while the herbs give the dough a subtle, savory note that makes the final crust taste more artisanal than store-bought.

Step 3: Bring the Dough Together

Make a well in the center of your dry ingredients. Pour in the yeast mixture, olive oil, and apple cider vinegar. Using a wooden spoon or stand mixer fitted with a paddle attachment, mix until a sticky, slightly tacky dough forms. Unlike regular pizza dough, gluten-free dough will feel more like thick batter than stretchy dough — and that’s perfectly normal.

If it seems too dry, add an extra tablespoon or two of warm water. If it’s too sticky, sprinkle a small amount of flour on top. The goal is a soft, pliable dough that can be pressed easily without cracking.

Step 4: Rest and Rise

Cover the bowl with a clean kitchen towel and let the dough rest in a warm place for about 30–45 minutes. During this time, the yeast activates and the dough puffs up slightly, developing structure and flavor.

This resting phase is essential for gluten-free baking — it allows the starches in the flour to hydrate properly, which helps the crust bake evenly and develop that chewy interior.

Step 5: Shape the Crust

Preheat your oven to 425°F (220°C) and place a pizza stone or baking sheet inside to heat. A hot surface gives the crust a crisp bottom.

Lay a piece of parchment paper on your counter and dust it lightly with gluten-free flour. Place the dough on top, then sprinkle more flour over it to prevent sticking. Gently press and flatten it into a circle about 12 inches in diameter and about ¼ inch thick.

For a rustic look, leave the edges uneven; for a more classic pizzeria finish, use your fingers to shape a slightly raised crust rim

Step 6: Pre-Bake the Crust

Slide the parchment and dough onto your hot baking sheet or stone. Bake for 8–10 minutes, until the crust begins to firm up and turns slightly golden around the edges. This step ensures your pizza won’t become soggy once you add toppings.

Step 7: Add Sauce and Toppings

Remove the partially baked crust from the oven. Spread a thin layer of pizza sauce over the surface, leaving about an inch border around the edge. Sprinkle generously with mozzarella cheese and arrange your favorite toppings.

For a simple Margherita, use fresh mozzarella slices, cherry tomatoes, and basil. If you’re in the mood for something bold, try a BBQ chicken combo or a veggie-loaded Mediterranean style with artichokes, olives, and feta.

Step 8: Bake to Perfection

Return the pizza to the oven and bake for another 10–12 minutes, or until the cheese is melted, bubbly, and lightly golden. If you like your crust extra crisp, bake for an additional 2–3 minutes.

When done, remove from the oven and let it rest for 5 minutes before slicing. This short cooling time helps the cheese set slightly, giving you clean, beautiful slices.

Step 9: Slice and Enjoy

Cut your pizza into wedges, sprinkle with fresh basil or crushed red pepper, and drizzle with a little olive oil if desired. The crust should be golden, slightly chewy, and strong enough to pick up without falling apart — exactly what every great pizza should be.

Chef’s Tips for Success

  1. Use a quality gluten-free flour blend – A mix with rice flour, tapioca starch, and potato starch gives the best texture.

  2. Don’t skip pre-baking – It prevents sogginess and ensures a crisp base.

  3. Add flavor to the dough – Herbs, garlic powder, or parmesan in the dough make it more savory and authentic.

  4. Hot oven = perfect crust – The high heat mimics a wood-fired effect at home.

Final Thoughts

This Gluten-Free Pizza recipe proves that you don’t need wheat to create a masterpiece. Each bite offers the perfect contrast — a crispy edge, a tender crumb, and a stretchy, cheesy topping that satisfies every craving. Whether you’re serving a family dinner, game night snack, or weekend treat, this pizza will have everyone asking for seconds — gluten-free or not.

Once you try this recipe, you’ll never look back at store-bought gluten-free crusts again. It’s simple, authentic, and absolutely unforgettable — the kind of pizza that brings people together around the table, one slice at a time.

Cottage Cheese Flatbread

If you’ve ever wanted a flatbread that’s as nourishing as it is delicious, this Cottage Cheese Flatbread recipe is a game changer. It’s high in protein, low in carbs, and has a soft, pillowy texture that works beautifully for wraps, sandwiches, pizzas, or even as a side to soups and stews. What makes this flatbread so unique is the addition of cottage cheese—an ingredient that not only gives the dough moisture and tenderness but also infuses it with rich, creamy flavor. This isn’t your typical flatbread; it’s a wholesome twist that brings nutrition and flavor together in one irresistible creation.

Ingredients

  • 1 cup full-fat cottage cheese

  • 2 large eggs

  • 1 cup all-purpose flour (or almond flour for low-carb)

  • 1 tablespoon olive oil

  • 1 teaspoon baking powder

  • ½ teaspoon salt

  • ½ teaspoon garlic powder (optional)

  • ½ teaspoon dried oregano or thyme (optional for flavor)

  • Butter or olive oil for brushing

Instructions

Step 1: Prepare the Base Mixture

In a medium mixing bowl, combine the cottage cheese and eggs. Use a hand blender or food processor to blend until the mixture becomes smooth and creamy. This step is crucial because blending breaks down the cheese curds, giving your flatbread a silky texture. The cottage cheese not only adds protein but also moisture, ensuring your flatbread stays soft and flexible instead of dry or crumbly.

Step 2: Add the Dry Ingredients

In a separate bowl, whisk together the flour, baking powder, salt, and optional seasonings. Slowly incorporate the dry mixture into the wet base, stirring with a spatula until a dough forms. The texture should be soft and slightly sticky but manageable. If it feels too wet, sprinkle in a bit more flour; if too dry, add a spoonful of milk or water.

Step 3: Knead and Rest the Dough

Lightly dust a clean surface with flour and knead the dough for about 2–3 minutes until smooth. Don’t overwork it—you want it tender, not tough. Once kneaded, cover the dough with a clean towel and let it rest for about 10–15 minutes. This allows the flour to absorb the moisture fully and makes the dough easier to roll out.

Step 4: Roll Out the Flatbreads

Divide the dough into 4–6 equal portions. Roll each ball into a thin circle or oval, roughly ⅛-inch thick. If you prefer thicker flatbreads, you can roll them slightly less. You’ll notice how supple the dough feels—this is the magic of cottage cheese, creating a pliable texture that doesn’t crack or tear easily.

Step 5: Cook the Flatbreads

Heat a non-stick skillet or cast-iron pan over medium heat. Brush a little olive oil or butter onto the surface. Place one flatbread at a time into the hot pan. Cook for 1–2 minutes per side, or until golden brown spots appear and the flatbread puffs slightly. Adjust the heat as needed to avoid burning. Continue cooking all the pieces, stacking them on a plate and covering with a towel to keep warm.

Serving Ideas

The beauty of this cottage cheese flatbread lies in its versatility. You can use it in countless ways:

  • Wraps: Fill with grilled chicken, veggies, and hummus for a healthy, protein-rich lunch.

  • Mini Pizzas: Top with tomato sauce, mozzarella, and your favorite toppings, then bake until bubbly.

  • Breakfast Option: Spread with avocado, scrambled eggs, or nut butter and fruit for a balanced morning meal.

  • Side Bread: Pair it with soups, stews, or curries instead of regular bread or naan.

Because of its soft yet hearty texture, this flatbread also makes a great alternative to tortillas or pita bread.

Storage and Reheating

Store leftover flatbreads in an airtight container or zip-lock bag. They’ll keep well in the refrigerator for up to 4 days or in the freezer for up to 2 months. When ready to serve, simply warm them in a dry skillet or microwave for a few seconds to restore their softness. Avoid reheating for too long, as it may dry them out.

Why Cottage Cheese Makes This Recipe Unique

Cottage cheese isn’t just a filler ingredient—it’s the star of this recipe. Its mild tang and creamy curds enhance the dough’s texture, making the flatbread soft and rich without needing much fat. Unlike traditional flatbreads that rely solely on flour and water, this version uses cottage cheese to deliver a natural balance of protein, calcium, and probiotics, turning a simple bread into a nutrient-packed meal component.

Moreover, it’s a great option for those seeking low-carb, high-protein, or gluten-free alternatives. When using almond flour or oat flour, the result remains just as satisfying but lighter on carbs and gluten content.

Tips for Perfect Cottage Cheese Flatbread

  1. Blend the cheese thoroughly – A smooth texture ensures an even, flexible dough.

  2. Avoid over-kneading – Too much handling can make the bread tough.

  3. Cook on medium heat – Too high will burn the outside before the inside is done.

  4. Customize the flavor – Add herbs like basil, parsley, or spices like paprika for extra flair.

  5. Make it dairy-rich – For an even softer texture, brush each cooked flatbread with melted butter or ghee.

Final Thoughts

Cottage Cheese Flatbread is the perfect blend of simplicity and nutrition—a recipe that elevates an everyday staple into something special. Whether you’re looking for a healthier alternative to traditional breads or just want to try something new, this flatbread delivers both flavor and function. It’s satisfying enough to eat on its own yet adaptable for every meal of the day.

Soft, golden, and full of wholesome goodness, this flatbread proves that healthy eating doesn’t have to compromise on taste. With just a few ingredients and a few minutes on the stove, you can whip up a stack of warm, protein-rich flatbreads that make every bite both comforting and nourishing. Once you try this recipe, it’s bound to become a regular in your kitchen rotation—a modern twist on a timeless favorite.

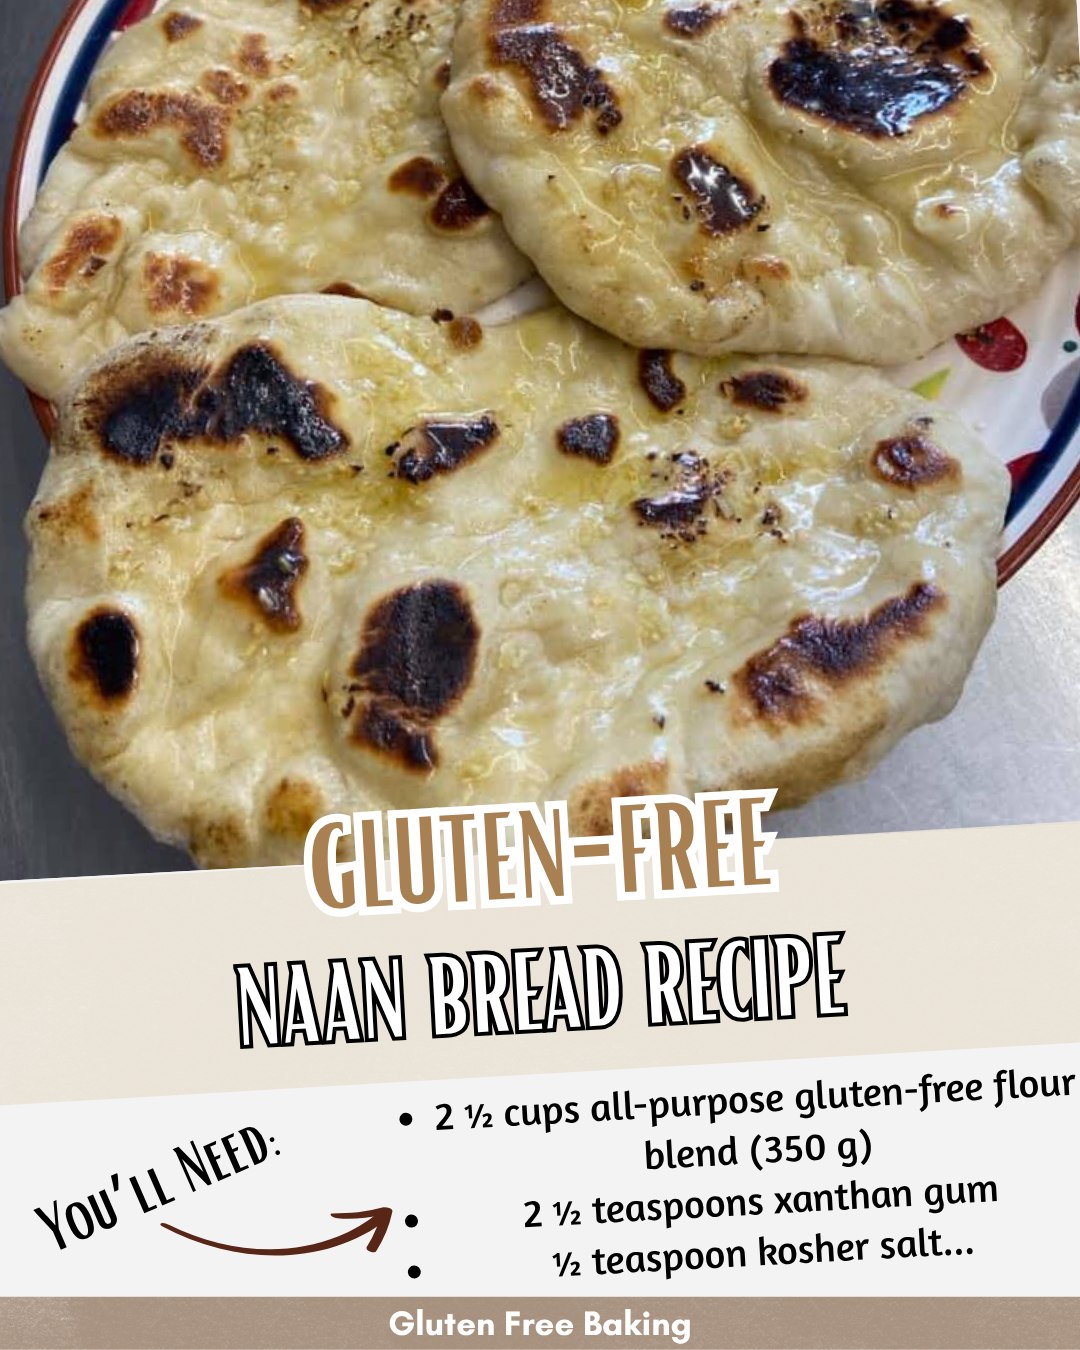
Gluten-Free Naan Bread

There’s just something comforting about warm, pillowy naan fresh off the skillet—soft in the center, lightly blistered on the outside, and perfect for scooping up curries, soups, dips, or simply enjoying with butter. However, if you’re gluten-free, traditional naan simply doesn’t cooperate. Wheat flour gives naan its signature stretch and chew, which can be tricky to replicate. That’s exactly why this recipe is special: it’s designed from the ground up to achieve that same tender texture using gluten-free ingredients—without being dense, gummy, or dry.

The secret is a thoughtful combination of gluten-free flour, yogurt, and a touch of psyllium husk, which mimics elasticity. This recipe is not only simple, but it produces naan that is soft, flexible, and unbelievably good. You’ll forget it’s gluten-free.

Ingredients

For the Dough:

  • 1 ½ cups gluten-free all-purpose flour (with xanthan gum included)

  • 2 tablespoons psyllium husk powder (not whole husks)

  • 1 teaspoon baking powder

  • ½ teaspoon baking soda

  • ¾ teaspoon fine salt

  • 1 teaspoon sugar or honey

  • ¾ cup full-fat plain yogurt (Greek yogurt works best)

  • ¼ cup warm water (plus a little extra if needed)

  • 2 tablespoons olive oil or melted ghee

For Cooking & Finishing:

  • Butter or ghee, for brushing

  • Optional: minced garlic, fresh cilantro, sesame seeds

Why This Recipe Works

Many gluten-free bread doughs turn out sticky and frustrating. This one avoids that. The psyllium husk hydrates and forms a flexible gel, helping the dough hold shape and stretch like real wheat-based dough. Yogurt adds moisture and tenderness while the baking powder and soda give the bread a gentle lift. The result? Soft, bendable naan that tears beautifully and tastes rich and satisfying.

Step-by-Step Instructions

Step 1: Hydrate the Psyllium
In a small bowl, whisk together the warm water and psyllium husk. Let it sit for about 1 minute—it will thicken into a gel. This step is crucial for achieving the right elasticity in the dough.

Step 2: Mix Dry Ingredients
In a medium mixing bowl, combine the gluten-free flour, baking powder, baking soda, salt, and sugar. Stir well so everything is evenly distributed.

Step 3: Form the Dough
Add yogurt and the psyllium gel to the dry ingredients. Stir with a spoon or your hands until a dough begins to form. Add olive oil or ghee and knead lightly until smooth. If the dough feels too dry, add 1 teaspoon of water at a time. The dough should be soft—not sticky and not crumbly.

Step 4: Rest the Dough
Cover the bowl and let it rest for 15 minutes. Resting allows the psyllium to fully hydrate and the dough to relax, making rolling easier.

Step 5: Shape the Naan
Divide the dough into 4–6 pieces. Dust your surface lightly with gluten-free flour. Gently roll each piece into a teardrop or round shape, about ¼ inch thick. Don’t roll too thin; you want softness, not crisp crackers.

Step 6: Cook the Naan
Heat a skillet or cast-iron pan over medium-high heat until hot. Place one naan on the skillet. Cook for 2–3 minutes until bubbles form and the bottom develops golden spots. Flip and cook another 1–2 minutes. If desired, place briefly over an open flame for slight charring (optional but delicious).

Step 7: Brush & Serve
Brush warm naan with melted butter or ghee. Sprinkle with garlic or cilantro if desired.

Serve immediately while warm and soft.

Flavor Variations

You can transform this gluten-free naan into something even more exciting:

  • Garlic Naan: Mix minced garlic into melted butter and brush after cooking.

  • Herb Naan: Fold chopped cilantro, parsley, or oregano into the dough.

  • Cheese-Stuffed Naan: Add a spoonful of mozzarella or paneer inside before rolling.

  • Everything Bagel Naan: Sprinkle with seeds before cooking.

Tips for Success

  • Make sure your gluten-free flour blend includes xanthan gum. If it doesn’t, add ¾ teaspoon separately.

  • Psyllium husk powder is essential—do not skip or substitute.

  • Do not over-flour your rolling surface; too much flour can make naan stiff.

  • Serve naan fresh. If reheating, warm in a covered pan so it stays soft.

Serving Ideas

Gluten-free naan pairs wonderfully with:

  • Chicken tikka masala

  • Butter chicken

  • Lentil dal or chickpea curry

  • Hummus, tzatziki, or labneh

  • Fried eggs and smashed avocado for breakfast

Or simply enjoy it warm with butter and a cup of tea—comfort in its purest form.

Storage

  • Refrigerator: Store in an airtight bag for up to 3 days.

  • Freezer: Wrap individually and freeze up to 2 months.

  • Reheat: Warm in a covered pan or wrap in foil and heat in the oven at 350°F.

This gluten-free naan bread is everything naan should be—soft, warm, flexible, and satisfying. Whether you’re gluten-free by choice or necessity, this recipe brings back the joy of warm bread made for dipping, tearing, and savoring. Enjoy every tender bite.

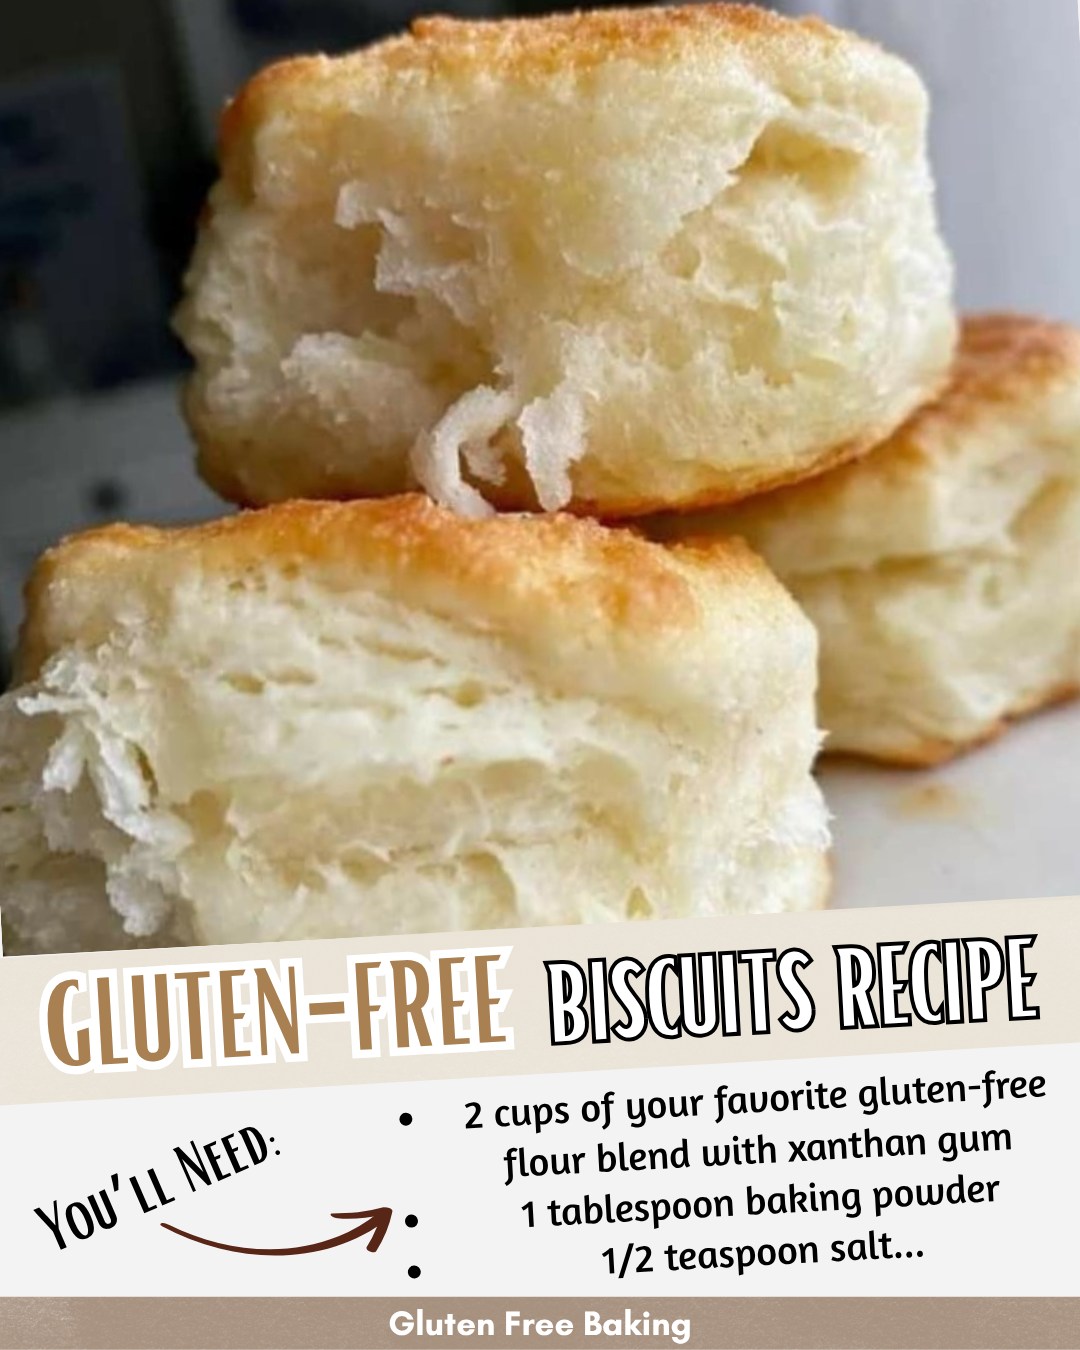
Gluten-Free Butter Drop Biscuits

When someone first transitions to a gluten-free way of eating, one of the foods they often miss most is a warm, fluffy biscuit. Traditional biscuits rely heavily on the stretch and elasticity of wheat flour, meaning gluten-free versions can sometimes turn out dense, crumbly, or bland. But today’s recipe turns that expectation on its head. These Gluten-Free Butter Drop Biscuits are pillowy, soft in the center, beautifully golden on top, and made with simple ingredients you likely already have. No complicated shaping or rolling needed—just scoop and bake.

This recipe uses buttermilk, a touch of tapioca starch, and cold butter to mimic the tenderness and rise of a classic Southern biscuit. Drop-style biscuits are easier and more forgiving than rolled ones, especially in gluten-free baking, where dough texture can vary. The result is a biscuit with a tender crumb, lightly crispy edges, and a rich buttery flavor that pairs with savory dishes or sweet toppings equally well.

Ingredients

  • 1 ¾ cups gluten-free all-purpose flour blend
    (preferably one containing xanthan gum; if not, add ½ tsp xanthan gum)

  • ¼ cup tapioca starch (helps give lightness and chew)

  • 1 tablespoon baking powder

  • ½ teaspoon baking soda

  • ½ teaspoon fine sea salt

  • 2 teaspoons sugar (optional, but recommended for flavor balance)

  • 6 tablespoons cold unsalted butter, cut into small cubes

  • 1 cup cold buttermilk
    (or make your own: 1 cup milk + 1 tbsp white vinegar, rest 10 minutes)

  • 1 teaspoon apple cider vinegar (optional, but improves tenderness)

  • Melted butter for brushing (optional but amazing)

Method

  1. Prepare the Dry Ingredients
    In a large mixing bowl, whisk together the gluten-free flour, tapioca starch, baking powder, baking soda, salt, and sugar. This step helps aerate the flour and ensures the biscuits rise evenly. Gluten-free flours sometimes settle, so whisking well makes a noticeable difference in texture.

  2. Cut in the Butter
    Add the cold, cubed butter to the flour mixture. Using your fingertips or a pastry cutter, rub the butter into the flour until it resembles coarse crumbs with some pea-sized pieces remaining. Do not overwork it. Those little butter chunks are what create steam during baking—giving you lift and layers.

  3. Add the Buttermilk
    Pour in the buttermilk and the apple cider vinegar. Stir gently with a fork or silicone spatula just until the mixture comes together. The dough will be shaggy and slightly sticky—that’s perfect.

  4. Form the Drop Biscuits
    Line a baking sheet with parchment paper. Using a large spoon or ice cream scoop, drop mounds of dough onto the sheet, spacing them about 2 inches apart. You should get 8–10 biscuits depending on size.

  5. Bake
    Bake at 425°F (220°C) for about 13–16 minutes, or until golden brown on top and firm to the touch. Brush while warm with a little melted butter for the ultimate flavor finish.

  6. Cool Slightly and Serve Warm
    These biscuits taste best fresh from the oven, but they also reheat very well.

Serving Suggestions

  • Spread with honey butter for a comforting breakfast.

  • Serve with sausage gravy for a classic Southern interpretation.

  • Use as a base for strawberry shortcake—yes, they’re that good.

  • Split and toast them to accompany soup or stew.

What Makes This Recipe Unique

  1. Tapioca Starch
    Rather than using only a gluten-free flour blend, this recipe adds tapioca starch to bring softness, chew, and a slightly stretchy texture reminiscent of wheat-based biscuits.

  2. Apple Cider Vinegar Boost
    Vinegar reacts with the baking soda to create lift, while also softening the crumb for a more bakery-like interior.

  3. Cold Butter Technique
    Just like in pie crust, cold butter ensures steam pockets during baking—creating the right biscuit structure without gluten.

  4. Drop Style Simplicity
    No rolling, no cutting, no sticking. The dough is scooped and dropped, making it nearly foolproof and beginner-friendly.

Storage and Reheating Tips

  • Store cooled biscuits in an airtight container at room temperature for up to 2 days.

  • For longer storage, freeze individually wrapped biscuits for up to 3 months.

  • Reheat in the oven at 350°F (175°C) for 8–10 minutes. They emerge tasting freshly baked again.

Variations to Try

Flavor Style Add-Ins
Cheddar & Chive ½ cup shredded sharp cheddar + 2 tbsp fresh chives
Garlic Herb 1 tsp garlic powder + 1 tbsp mixed dried herbs
Sweet Cinnamon 1 tbsp sugar + ½ tsp cinnamon + honey drizzle
Lemon Blueberry 1 tbsp sugar + ½ cup fresh blueberries + lemon zest

These biscuits are a foundation you can easily tailor to your table.

Final Thoughts

Gluten-free baking doesn’t have to feel like compromise. With a few smart ingredient choices and gentle handling, you can enjoy the same fluffy comfort foods you’ve always loved. These Gluten-Free Butter Drop Biscuits are proof—warm, tender, simple to prepare, and deeply satisfying. This recipe is one to save, share, and repeat often.

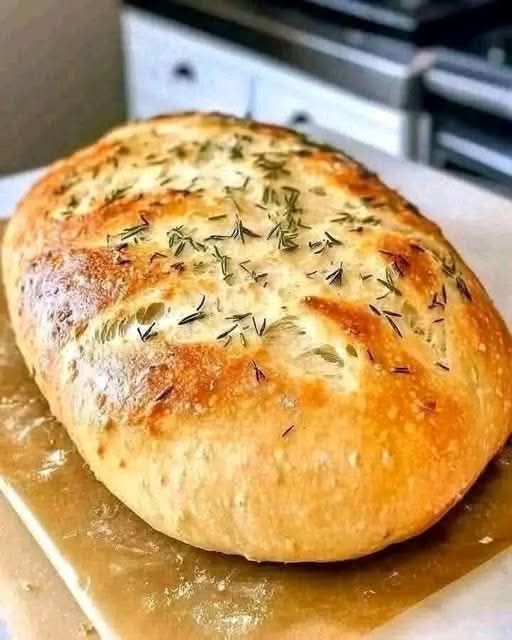
No Kneading, No Eggs, No Butter Bread

There’s something deeply comforting about pulling a fresh loaf of bread from your oven—the warm aroma filling your kitchen, the satisfying crackle as the crust cools, and that first slice you tear off while it’s still warm enough to melt into your fingertips. And the best part? You don’t need to be a professional baker, have special equipment, or spend hours kneading dough. Today, I’ll show you how to make a beautifully soft, airy, and flavorful bread without kneading, without eggs, and without butter. This recipe is incredibly forgiving, beginner-friendly, and naturally dairy-free and egg-free—yet the finished loaf tastes like something from an artisan bakery.

This dough uses time instead of muscle. The long rest allows gluten to develop naturally, forming a structure that traps air and creates that perfect bread texture—soft inside with a golden chewy exterior. And since this is a no-knead dough, your hands stay clean and your arms stay relaxed. The yeast does the work for you.

Ingredients

  • 3 cups (360g) all-purpose flour (or bread flour for extra chewiness)

  • 1 ½ teaspoons salt

  • 1 tablespoon sugar (optional but helps browning and boosts flavor)

  • 1 teaspoon instant yeast (or 1 ½ tsp active dry yeast)

  • 1 ½ cups (360 ml) warm water (not hot, just warm to touch)

  • 2 tablespoons oil (olive oil recommended for flavor, but vegetable oil works)

Equipment Needed

  • A large mixing bowl

  • A spatula or wooden spoon

  • Plastic wrap or a clean kitchen towel

  • A loaf pan or a heavy lidded pot (like a Dutch oven)

  • Oven

Instructions

Step 1: Mixing the Dough

In a large bowl, combine the flour, salt, sugar, and yeast. Stir with a fork or spoon to evenly disperse the ingredients. Add the warm water and oil. Stir until everything comes together into a sticky, shaggy dough. It will look messy—that’s exactly what we want.

There is absolutely no need to knead. Just make sure there are no dry pockets of flour. The dough will be wet and sticky, softer than a normal bread dough. That moisture is key—it produces steam while baking, which makes the bread fluffy and tender.

Step 2: First Rise (Let Time Do the Work)

Cover the bowl tightly with plastic wrap or a slightly damp kitchen towel. Leave it in a warm place for 2 hours—or up to 8–12 hours for overnight fermentation. The longer it sits, the more flavor it develops.

During this time, the yeast slowly ferments the carbohydrates in the flour, building flavor and gluten naturally. You’ll know it’s ready when the dough has doubled or even tripled in size and is filled with tiny bubbles on the surface.

Step 3: Shape the Dough (Gently!)

Once risen, lightly oil your hands and gently lift the dough from the bowl. Do not punch it or knead it. Just fold it over itself a few times to form a rounded or loaf shape.

If you’re using a loaf pan, lightly oil the inside and place the dough in. If baking in a Dutch oven, simply place the dough on parchment paper.

Step 4: Second Rise (Quick Rest)

Let the shaped dough rest for 30–45 minutes. This allows it to relax and expand again, giving you that fluffy texture.

Meanwhile, preheat your oven to 220°C (425°F). If using a Dutch oven, preheat it inside the oven for at least 20 minutes—this helps create steam, making the crust beautifully crisp.

Step 5: Baking

If using a loaf pan:
Bake uncovered for 35–40 minutes until golden on top.

If using a Dutch oven:
Place dough inside (on parchment), cover with the lid, and bake 30 minutes, then remove the lid and bake 10–15 minutes more to brown the crust.

When the bread is done, it should sound hollow when tapped on the bottom.

Let it cool at least 20 minutes before slicing. Yes, waiting is hard—but it helps the texture set and prevents gumminess.

Why This Bread Works Without Kneading or Eggs

Bread structure comes from gluten. Normally, kneading develops gluten manually. But when dough sits for hours, gluten forms naturally. This slow fermentation also creates a more complex, bakery-quality flavor.

Eggs and butter are usually added to enrich bread, making it softer or adding richness. But oil and high hydration (more water) accomplish the same—keeping the loaf moist, tender, and airy.

Variations to Try

Make this recipe your own! Here are delicious ways to switch it up:

Style What to Add
Garlic Herb Bread 1 tsp garlic powder + 1 tbsp dried herbs
Sweet Breakfast Loaf Extra 2 tbsp sugar + raisins or chocolate chips
Rustic Italian Bread Use olive oil + sprinkle coarse salt on top
Whole Wheat Replace up to 1 cup flour with whole wheat

Serving Ideas

  • Fresh with honey or jam

  • Toasted with avocado and sea salt

  • Dipped in olive oil and balsamic

  • Served alongside soups, stews, or pasta

  • For sandwiches—makes AMAZING grilled cheese!

Storing Your Bread

  • Room Temperature: Keep in a sealed bag for up to 3 days.

  • Freezing: Slice and freeze for up to 2 months. Toast straight from frozen!

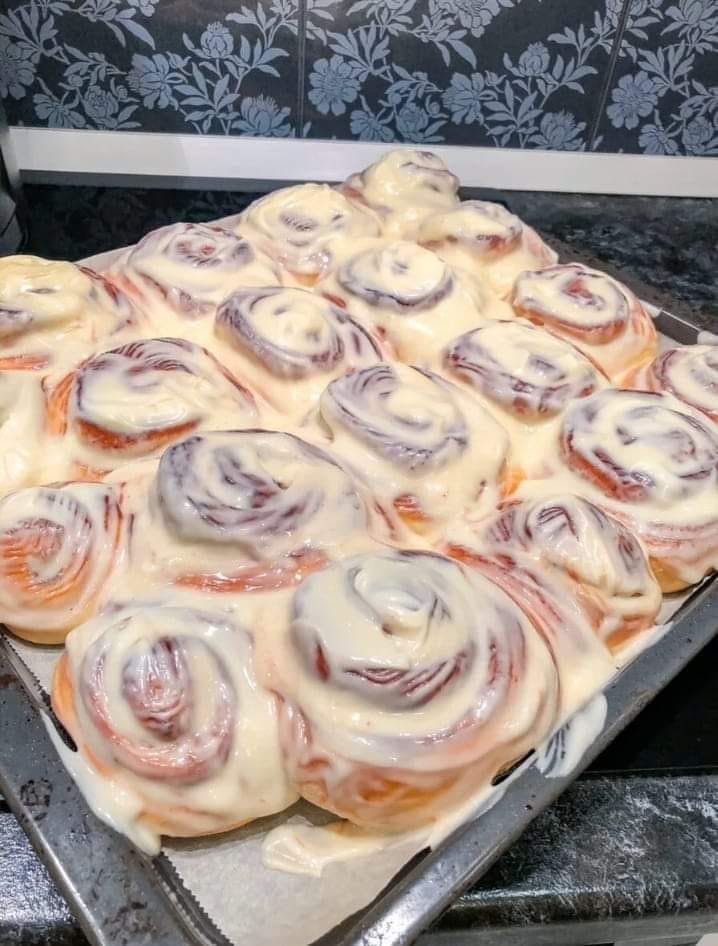
GLUTEN-FREE CINNAMON ROLLS

Gluten-free cinnamon rolls should be soft, tender, slightly chewy, and full of warm cinnamon fragrance—but anyone who has worked with gluten-free flour knows that achieving that perfect, bakery-style plush texture can feel like a delicate balancing act. Traditional dough relies on gluten strands for elasticity and rise, while gluten-free dough can easily become crumbly, dry, or dense. That is why this recipe is specially developed to mimic the tenderness of classic cinnamon rolls using a combination of yogurt, milk, melted butter, and a touch of cornstarch to bring moisture, binding power, and lift. The result is a dough that is smooth, pliable, and easy to roll, producing cinnamon rolls that come out soft every single time.

This recipe uses a gluten-free all-purpose blend that contains xanthan gum (or you can add your own), and it includes proofing the dough gently to encourage air pockets. The filling is a classic buttery cinnamon swirl with a balanced sweetness—but you can make the rolls more indulgent by adding raisins, chopped pecans, or even a drizzle of caramel sauce. Once baked, they are topped with a luscious vanilla cream cheese glaze that melts into the spirals like satin.

Ingredients

For the Dough

  • 2 ½ cups gluten-free all-purpose flour (with xanthan gum included)

  • 2 tbsp cornstarch (for softness)

  • 2 tbsp sugar

  • 1 packet (2 ¼ tsp) instant yeast

  • ½ tsp salt

  • ¾ cup warm milk (not hot)

  • ¼ cup melted butter

  • ¼ cup plain yogurt (adds elasticity and softness)

  • 1 large egg (room temperature)

  • 1 tsp vanilla extract

For the Cinnamon Filling

  • 4 tbsp softened butter (spreadable)

  • ½ cup brown sugar (light or dark)

  • 1 tbsp ground cinnamon

  • Optional: ½ tsp cardamom or nutmeg for warmth

For the Cream Cheese Glaze

  • 3 tbsp cream cheese, softened

  • 1 tbsp butter, softened

  • ⅔ cup powdered sugar

  • 1 tsp vanilla extract

  • 1–2 tbsp milk (to thin to desired consistency)

Instructions

Step 1: Prepare the Dough

In a mixing bowl, whisk together the gluten-free flour, cornstarch, salt, yeast, and sugar. The cornstarch is key—it lightens the structure and keeps the rolls from becoming dense. In another bowl, whisk the warm milk, melted butter, yogurt, egg, and vanilla until smooth.

Pour the wet mixture into the dry ingredients. Begin stirring with a spoon or dough spatula. Gluten-free dough will feel stickier and softer than wheat dough—this is normal. If it seems too thick, add a splash more milk. If too sticky, sprinkle in another tablespoon of flour. Your final dough should be soft and pliable, not crumbly.

Step 2: Let the Dough Rest

Gluten-free dough does not require kneading—but it does appreciate downtime. Let the bowl rest uncovered for 10 minutes. This allows the flour to absorb moisture, giving the dough structure and flexibility to roll later without cracking.

Step 3: Roll Out the Dough

Lay a sheet of parchment paper on your counter and lightly dust it with gluten-free flour. Turn the dough out onto the surface and gently sprinkle flour over the top. Using a rolling pin, carefully roll it into a rectangle about ½ inch thick. If the edges crack, simply press them back together—the dough is forgiving once rested.

Step 4: Add the Cinnamon Filling

Spread the softened butter over the rolled dough. In a bowl, mix the brown sugar with cinnamon (and optional spices). Sprinkle evenly over the butter. Press lightly to help the sugar adhere.

Step 5: Roll & Slice

Using the parchment paper to help guide it, gently roll the dough from the long side into a log. Don’t worry if small cracks appear; they smooth out during baking. Use a serrated knife or dental floss to slice the log into 9–12 rolls, depending on thickness.

Step 6: Proof the Rolls

Place the rolls into a greased baking dish, leaving a little space for expansion. Cover loosely and let them rise for 30–45 minutes in a warm place. Gluten-free dough will not double like wheat dough, but it will puff slightly—and that is exactly what we want.

Step 7: Bake

Preheat your oven to 350°F (175°C). Bake the rolls for 22–27 minutes, or until the tops are lightly golden and the centers bounce back when gently pressed.

Step 8: Make the Cream Cheese Glaze

Beat together the softened cream cheese and butter until smooth. Add powdered sugar and vanilla, mixing until silky. Add milk a little at a time until the glaze is pourable.

Spread over the warm rolls so it melts into all the spirals.

Tips for Perfect Gluten-Free Cinnamon Rolls

  1. Yogurt is essential—it gives elasticity and prevents crumbling.

  2. Do not overbake—gluten-free dough dries more quickly than wheat.

  3. Rolling on parchment keeps the dough smooth and prevents sticking.

  4. If using a flour blend without xanthan gum, add 1 tsp xanthan to the dry ingredients.

  5. For extra softness, brush the baked rolls with a little melted butter before glazing.

Variations

  • Maple Glaze: Replace vanilla with 1 tsp maple syrup.

  • Nutty Rolls: Add ½ cup chopped pecans to the filling.

  • Caramel Sticky Rolls: Drizzle caramel sauce in the baking dish before placing rolls.

Gluten-Free Donuts Recipe

Gluten-free donuts don’t have to be dry, crumbly, or flavorless. With the right balance of gluten-free flours, a touch of moisture, and a careful frying technique (or baking alternative), you can achieve a donut that is tender, light, and irresistibly delicious. This recipe combines rice flour, almond flour, and tapioca starch to give structure and chewiness while remaining completely gluten-free.

Ingredients

For the Donuts:

  • 1 cup gluten-free all-purpose flour (make sure it contains xanthan gum; if not, add 1 tsp)

  • ½ cup almond flour (adds moisture and nutty flavor)

  • ¼ cup tapioca starch (for chewiness and lightness)

  • ½ cup granulated sugar (or coconut sugar for a healthier alternative)

  • 2 tsp baking powder

  • ½ tsp baking soda

  • ¼ tsp salt

  • 1 tsp ground cinnamon (optional, adds warmth)

  • ½ cup milk (dairy or any plant-based milk, slightly warm)

  • 2 large eggs (room temperature)

  • ¼ cup unsalted butter, melted (or coconut oil for dairy-free version)

  • 1 tsp vanilla extract

  • 1 tsp apple cider vinegar (helps lift the donuts)

For the Glaze:

  • 1 cup powdered sugar

  • 2-3 tbsp milk (dairy or plant-based)

  • ½ tsp vanilla extract

  • Optional: a pinch of cinnamon, cocoa powder, or zest of citrus for flavored glazes

Optional Toppings:

  • Chopped nuts (almonds, pistachios)

  • Sprinkles

  • Mini chocolate chips

  • Shredded coconut

Instructions

Step 1: Preparing the Dough

  1. In a large mixing bowl, whisk together the gluten-free flour, almond flour, tapioca starch, sugar, baking powder, baking soda, salt, and cinnamon. Whisking ensures even distribution and prevents clumping.

  2. In a separate bowl, beat the eggs until slightly frothy. Add warm milk, melted butter, vanilla extract, and apple cider vinegar, mixing until smooth. The warmth of the milk helps activate the baking powder for a lighter donut.

  3. Gradually add the wet ingredients to the dry mixture. Stir gently using a spatula or wooden spoon until just combined. Be careful not to overmix; gluten-free batters are naturally denser, and overmixing can make them tough.

Step 2: Shaping the Donuts

You have two options for shaping your donuts:

Option A – Donut Pan (Baked Method):

  1. Preheat your oven to 350°F (175°C). Grease a donut pan with butter or oil.

  2. Spoon the batter into a piping bag or a zip-top bag with the corner cut off. Pipe the batter into each cavity, filling about ¾ full.

  3. Bake for 12-15 minutes, or until a toothpick inserted comes out clean. Allow donuts to cool for 5 minutes before removing them from the pan.

Option B – Frying (Classic Donut Method):

  1. Heat oil in a deep pot or fryer to 350°F (175°C). Use a thermometer for accuracy.

  2. Scoop the batter into a piping bag with a large round tip. Carefully pipe rings into the hot oil. Don’t overcrowd the pot.

  3. Fry each donut for about 2-3 minutes per side or until golden brown. Remove with a slotted spoon and drain on a paper towel-lined plate.

Step 3: Preparing the Glaze

  1. In a small bowl, whisk together powdered sugar, milk, and vanilla extract until smooth. Adjust consistency: for a thicker glaze, add more sugar; for a thinner glaze, add more milk.

  2. For extra flavor, you can mix in cocoa powder, cinnamon, lemon zest, or maple syrup.

Step 4: Glazing the Donuts

  1. Once the donuts are slightly cooled but still warm, dip each donut into the glaze. Hold it over the bowl for a few seconds to allow excess glaze to drip back.

  2. Place the glazed donuts on a wire rack. While the glaze is still wet, sprinkle with toppings like chopped nuts, sprinkles, or coconut.

  3. Let the glaze set for at least 10 minutes before serving.

Tips for Perfect Gluten-Free Donuts

  1. Room Temperature Ingredients: Eggs, milk, and butter at room temperature create a smoother batter and even cooking.

  2. Avoid Overmixing: Gluten-free doughs can become gummy if overworked. Stir until just combined.

  3. Temperature Control: For frying, maintain oil at 350°F. Too hot and the outside burns before the inside cooks; too cool and donuts absorb excess oil.

  4. Make Ahead: Donuts taste best fresh, but you can store them in an airtight container for 1-2 days. Reheat briefly in the microwave for softness.

  5. Flavor Variations: Add pumpkin puree, mashed banana, or zucchini to the batter for a naturally sweet and moist donut. Reduce milk slightly to balance moisture.

Alternative Variations

  • Chocolate Donuts: Add 2-3 tbsp cocoa powder to the dry ingredients. Top with chocolate glaze or a dusting of powdered sugar.

  • Filled Donuts: After baking or frying, use a piping bag to fill donuts with jam, Nutella, or custard.

  • Spiced Donuts: Incorporate pumpkin pie spice, cardamom, or ginger into the batter for seasonal flavors.

  • Vegan Version: Replace eggs with flax eggs (2 tbsp flaxseed + 6 tbsp water), and use coconut oil or vegan butter. Swap milk for plant-based milk.

Serving Suggestions

  • Serve warm with coffee, hot chocolate, or chai tea.

  • Create a dessert platter with glazed and chocolate-coated donuts, perfect for brunch or gatherings.

  • For a healthy twist, sprinkle with freeze-dried berries or chia seeds instead of sugar.

Troubleshooting Common Issues

  • Donuts too dense: Check that your baking powder is fresh. Overmixing the batter can also cause density.

  • Donuts fall apart: Ensure the batter has enough structure from almond flour or xanthan gum. Avoid cutting warm donuts aggressively.

  • Glaze too runny: Add more powdered sugar to thicken. You can also dip donuts twice for a thicker coating.

Conclusion

This gluten-free donut recipe combines simplicity with flexibility, allowing you to make tender, flavorful donuts at home. Whether baked or fried, the combination of almond flour, rice flour, and tapioca starch ensures a perfect texture reminiscent of traditional donuts. Add your favorite glaze, sprinkle toppings, or even stuff them with jam for a personalized touch. With practice, you’ll discover the magic of making light, fluffy, and irresistible gluten-free donuts that everyone—gluten-free or not—will love.

Cherry Cheesecake Bars

If you love the creamy indulgence of cheesecake paired with the sweet-tart burst of cherries, these Cherry Cheesecake Bars are a dream come true. Unlike traditional cheesecake, these bars offer a portable, sliceable treat that is perfect for parties, picnics, or simply enjoying at home with a cup of coffee. With a buttery crust, luscious cream cheese filling, and vibrant cherry topping, each bite is a harmonious blend of textures and flavors.

Ingredients:

For the crust:

  • 1½ cups graham cracker crumbs (about 10 full sheets)

  • ⅓ cup granulated sugar

  • ½ teaspoon ground cinnamon

  • 7 tablespoons unsalted butter, melted

For the cheesecake filling:

  • 16 oz (450 g) cream cheese, softened

  • ½ cup granulated sugar

  • 2 large eggs

  • 1 teaspoon vanilla extract

  • 1 teaspoon lemon zest (optional, for brightness)

  • 2 tablespoons all-purpose flour (helps stabilize the filling)

For the cherry topping:

  • 1½ cups fresh or frozen cherries, pitted

  • ¼ cup granulated sugar

  • 1 tablespoon cornstarch

  • 2 tablespoons water

  • ½ teaspoon vanilla extract

  • ½ teaspoon almond extract (optional, enhances cherry flavor)

Optional garnish:

  • Whipped cream

  • White chocolate shavings

  • Toasted almond slices

Instructions:

Step 1: Prepare the Crust

  1. Preheat your oven to 350°F (175°C) and line a 9×9-inch baking pan with parchment paper, leaving a slight overhang for easy removal.

  2. In a medium bowl, combine graham cracker crumbs, sugar, and cinnamon. Mix until evenly distributed.

  3. Pour in the melted butter and stir until the crumbs resemble wet sand and hold together when pressed.

  4. Press the crumb mixture firmly into the bottom of the prepared pan using a flat-bottomed cup or your fingers for an even layer.

  5. Bake the crust for 8–10 minutes until lightly golden and fragrant. Remove from oven and let cool slightly while preparing the filling.

Step 2: Make the Cheesecake Filling

  1. In a large mixing bowl, beat the softened cream cheese on medium speed until smooth and creamy, about 2–3 minutes.

  2. Gradually add the sugar and beat until fully incorporated.

  3. Add the eggs, one at a time, mixing gently after each addition to avoid overbeating, which can cause cracks during baking.

  4. Stir in the vanilla extract, lemon zest, and flour until the mixture is uniform and silky. The flour helps the filling set properly while keeping it creamy.

  5. Pour the cheesecake filling over the slightly cooled crust and spread it evenly with a spatula. Smooth the top for a polished finish.

Step 3: Bake the Cheesecake Bars

  1. Bake the cheesecake layer at 325°F (160°C) for 25–30 minutes, or until the edges are set and the center slightly jiggles.

  2. Avoid overbaking; the cheesecake will continue to set as it cools.

  3. Remove from oven and let it cool to room temperature, then transfer to the refrigerator for at least 2 hours, or overnight, for a firmer texture.

Step 4: Prepare the Cherry Topping

  1. In a small saucepan, combine cherries, sugar, cornstarch, and water.

  2. Cook over medium heat, stirring frequently, until the mixture begins to thicken and bubble, about 5–7 minutes.

  3. Remove from heat and stir in vanilla and almond extracts. Allow the topping to cool slightly.

  4. Once thickened and slightly cooled, gently spread the cherry topping over the chilled cheesecake layer. Avoid pouring while too hot, as it may seep into the cheesecake and make it watery.

Step 5: Chill and Serve

  1. Return the bars to the refrigerator for at least 1 hour to allow the cherry topping to set.

  2. Using the parchment overhang, lift the cheesecake from the pan and place it on a cutting board.

  3. Cut into squares or rectangles using a sharp knife, wiping the blade clean between cuts to maintain clean edges.

Optional: Top with whipped cream, white chocolate shavings, or toasted almonds for extra elegance and flavor.

Tips for Perfect Cherry Cheesecake Bars

  • Avoid cracks: Don’t overmix the cheesecake filling. Beat just until smooth.

  • Cherry variation: Fresh, frozen, or even canned cherries can be used, but fresh provides the best flavor. Adjust sugar if using tart cherries.

  • Make ahead: These bars taste even better after sitting overnight in the fridge, allowing flavors to meld.

  • Storage: Store in an airtight container in the refrigerator for up to 5 days. You can also freeze the bars for up to 2 months; thaw overnight in the fridge before serving.

Serving Suggestions

Cherry cheesecake bars are versatile. Serve them as a dessert at dinner parties, a treat at afternoon tea, or even as a decadent snack. Pair with a dollop of whipped cream or a scoop of vanilla ice cream for extra indulgence. The balance of the buttery crust, creamy cheesecake, and vibrant cherry topping makes every bite irresistible.

Final Thoughts

These Cherry Cheesecake Bars strike the perfect balance between creamy, sweet, and tangy. The golden graham cracker crust provides a solid foundation, the cheesecake layer is luxuriously smooth, and the cherry topping adds a burst of bright flavor and color. With simple ingredients and easy-to-follow steps, you can create a dessert that looks as beautiful as it tastes. Whether for a special occasion or a weeknight treat, these bars are sure to impress friends, family, or even yourself.

Cinnamon Peach Crumble Bread with Vanilla Glaze

There’s something about the aroma of fresh peaches mingled with warm cinnamon that makes a kitchen feel like home. This Cinnamon Peach Crumble Bread combines the soft, tender crumb of a quick bread with juicy peach chunks, a crunchy cinnamon-sugar crumble, and a drizzle of sweet vanilla glaze for a finish that’s both comforting and indulgent. Perfect for breakfast, brunch, or a cozy afternoon treat, this bread is a crowd-pleaser with layers of flavor and texture.

Ingredients

For the Bread:

  • 2 cups all-purpose flour

  • 1 tsp baking powder

  • ½ tsp baking soda

  • ½ tsp salt

  • 2 tsp ground cinnamon

  • ½ tsp nutmeg (optional for warmth)

  • ½ cup unsalted butter, softened

  • ¾ cup granulated sugar

  • 2 large eggs

  • 1 tsp vanilla extract

  • ½ cup sour cream or plain Greek yogurt

  • 1 cup fresh peaches, peeled, pitted, and diced (about 2 medium peaches)

For the Cinnamon Crumble Topping:

  • ½ cup all-purpose flour

  • ¼ cup granulated sugar

  • 2 tsp ground cinnamon

  • 3 tbsp unsalted butter, cold and cubed

For the Vanilla Glaze:

  • 1 cup powdered sugar

  • 2-3 tbsp whole milk

  • 1 tsp vanilla extract

Instructions

1. Prepare the Oven and Pan
Preheat your oven to 350°F (175°C). Grease a 9×5-inch loaf pan with butter or nonstick spray and line it with parchment paper for easier removal. Set aside.

2. Mix Dry Ingredients for the Bread
In a medium bowl, whisk together 2 cups flour, baking powder, baking soda, salt, cinnamon, and nutmeg. The cinnamon will infuse the bread with a warm aroma, while the nutmeg adds a subtle depth that complements the peaches.

3. Cream Butter and Sugar
In a large mixing bowl, cream together the softened butter and granulated sugar until light and fluffy, about 3-4 minutes. This step ensures a tender, soft crumb by incorporating air into the mixture.

4. Add Eggs and Vanilla
Beat in the eggs one at a time, followed by the vanilla extract. Each addition should be fully incorporated before adding the next. The eggs provide structure, while vanilla enhances the sweet, fruity notes.

5. Incorporate Sour Cream and Peaches
Fold in the sour cream (or Greek yogurt) until smooth. Gently fold in the diced peaches, being careful not to break them up too much. The peaches will add natural sweetness and moisture, keeping the bread soft and succulent.

6. Combine Dry and Wet Ingredients
Gradually fold the dry ingredients into the wet mixture until just combined. Avoid overmixing, which can make the bread dense. The batter should be thick but spreadable, with visible chunks of peach throughout.

7. Prepare the Crumble Topping
In a small bowl, combine ½ cup flour, ¼ cup sugar, and 2 tsp cinnamon. Cut in the cold butter using a pastry cutter, two knives, or your fingers until the mixture resembles coarse crumbs. The crumble will bake into a crunchy, sugary topping that perfectly contrasts the soft bread.

8. Assemble the Bread
Pour the batter into the prepared loaf pan and spread it evenly. Sprinkle the crumble topping generously over the surface. The topping will caramelize in the oven, forming a golden, crackly crust.

9. Bake
Bake for 50-60 minutes, or until a toothpick inserted into the center comes out clean (a few moist crumbs are okay). Baking times may vary depending on your oven and the ripeness of the peaches. About halfway through, tent the bread with aluminum foil if the crumble starts browning too quickly.

10. Cool the Bread
Allow the bread to cool in the pan for 15 minutes, then remove it onto a wire rack to cool completely. This prevents the bottom from becoming soggy and allows the flavors to set.

11. Prepare the Vanilla Glaze
In a small bowl, whisk together the powdered sugar, vanilla extract, and 2 tablespoons of milk. Add more milk if necessary to achieve a pourable consistency. The glaze should be thick enough to hold shape but thin enough to drizzle elegantly.

12. Glaze and Serve
Once the bread has cooled, drizzle the vanilla glaze over the top. Slice the bread with a serrated knife to maintain clean edges and reveal the beautiful cinnamon-swirled peach interior. Each bite should have the perfect balance of soft, fruity bread, crunchy crumble, and sweet vanilla glaze.

Tips for Success

  1. Use ripe peaches: They bring natural sweetness and juiciness. If using canned peaches, drain well to prevent soggy bread.

  2. Chill your butter for the crumble: Cold butter ensures a crunchy topping instead of a melted mess.

  3. Cut peaches evenly: Uniform chunks bake evenly and create a consistent texture.

  4. Storage: Keep bread wrapped at room temperature for 2 days or in the fridge for up to 5 days. It can also be frozen for longer storage.

  5. Optional add-ins: Chopped pecans or walnuts in the crumble add extra crunch, or a handful of shredded coconut pairs beautifully with peaches.