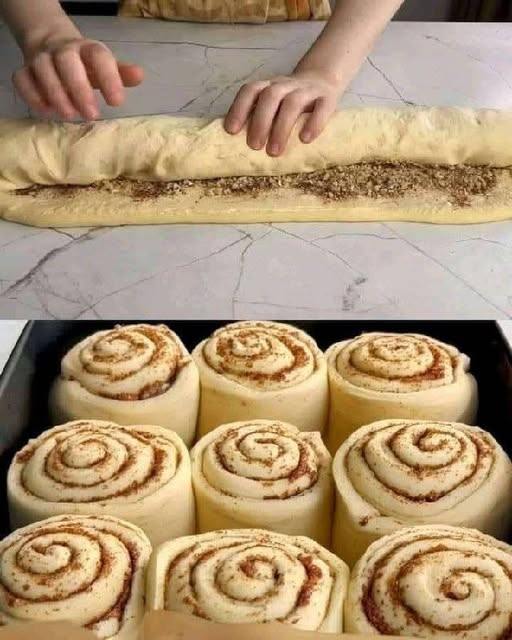
Cinnamon Rolls Recipe

Cinnamon rolls are the ultimate comfort food—soft, fluffy, and infused with the warm, aromatic scent of cinnamon and sugar. This recipe takes the classic cinnamon roll and gives it a little twist, making them extra indulgent, perfectly soft, and lightly caramelized on the edges. Whether it’s for breakfast, brunch, or an anytime treat, these cinnamon rolls will impress everyone at the table.

Ingredients

For the Dough:

  • 3 ½ cups all-purpose flour, plus extra for dusting

  • ¼ cup granulated sugar

  • 1 teaspoon salt

  • 2 ¼ teaspoons (1 packet) active dry yeast

  • ¾ cup warm milk (110°F/43°C)

  • ¼ cup unsalted butter, melted

  • 1 large egg

  • 1 teaspoon vanilla extract

For the Cinnamon Filling:

  • ½ cup unsalted butter, softened

  • ¾ cup brown sugar, packed

  • 2 tablespoons ground cinnamon

  • ½ teaspoon nutmeg (optional, for extra warmth)

For the Glaze:

  • 1 cup powdered sugar

  • 2–3 tablespoons milk or cream

  • ½ teaspoon vanilla extract

  • Pinch of salt

Instructions

Step 1: Prepare the Dough

  1. In a small bowl, combine the warm milk and sugar. Sprinkle the yeast on top and let it sit for 5–10 minutes until foamy. This ensures your yeast is active and will give your rolls a perfect rise.

  2. In a large mixing bowl, combine the flour and salt. Add the melted butter, egg, and vanilla extract.

  3. Pour the yeast mixture into the flour mixture. Mix until a sticky dough forms.

  4. Transfer the dough to a lightly floured surface and knead for 6–8 minutes until it becomes smooth and elastic. If you have a stand mixer with a dough hook, knead on medium speed for 5 minutes.

  5. Place the dough in a lightly greased bowl, cover it with a clean cloth, and let it rise in a warm place for 1–1.5 hours, or until it doubles in size.

Step 2: Prepare the Cinnamon Filling

  1. In a small bowl, combine the softened butter, brown sugar, cinnamon, and nutmeg (if using). Stir until it forms a smooth, spreadable paste. This mixture is the heart of your cinnamon rolls, so don’t skimp on the cinnamon—it makes all the difference.

Step 3: Roll Out the Dough

  1. Once the dough has doubled in size, punch it down gently to release the air.

  2. Transfer it to a floured surface and roll it into a rectangle about 16×12 inches. The thickness should be roughly ¼ inch.

  3. Spread the cinnamon-sugar filling evenly over the dough, leaving a small border (about ½ inch) around the edges to seal the rolls.

Step 4: Form the Rolls

  1. Starting from the long edge, roll the dough tightly into a log. Pinch the seam to seal.

  2. Using a sharp knife or dental floss, cut the log into 12 equal rolls. For extra flair, you can make them slightly larger or smaller depending on your preference.

  3. Arrange the rolls in a greased 9×13-inch baking dish, leaving a little space between them for expansion.

Step 5: Second Rise

  1. Cover the rolls with a clean kitchen towel and let them rise for another 30–40 minutes. They should puff up nicely and look soft and airy.

  2. Preheat your oven to 350°F (175°C).

Step 6: Bake the Cinnamon Rolls

  1. Bake the rolls in the preheated oven for 20–25 minutes, or until the tops are golden brown and slightly caramelized. Be careful not to overbake; you want them soft and tender, not dry.

  2. Remove from the oven and let them cool for 5–10 minutes before glazing.

Step 7: Prepare the Glaze

  1. In a small bowl, whisk together powdered sugar, milk, vanilla extract, and a pinch of salt until smooth. Adjust the milk to reach your desired consistency—thicker for drizzling, thinner for a light coating.

  2. Drizzle the glaze generously over the warm cinnamon rolls. The glaze will melt slightly into the crevices, making every bite decadently sweet.

Tips and Variations

  • Cheesy Twist: For a savory-sweet version, sprinkle a little cream cheese inside the filling before rolling. It adds a creamy, tangy contrast to the cinnamon.

  • Nutty Crunch: Add chopped pecans or walnuts to the filling for extra texture.

  • Fruit Flair: Dried fruits like raisins, cranberries, or chopped dates can be sprinkled inside for a fruity touch.

  • Make Ahead: Prepare the rolls up to Step 4, cover, and refrigerate overnight. Bake fresh in the morning for a warm, bakery-fresh treat.

  • Crispy Bottoms: For a slightly caramelized base, brush the baking dish with melted butter and a sprinkle of brown sugar before arranging the rolls.
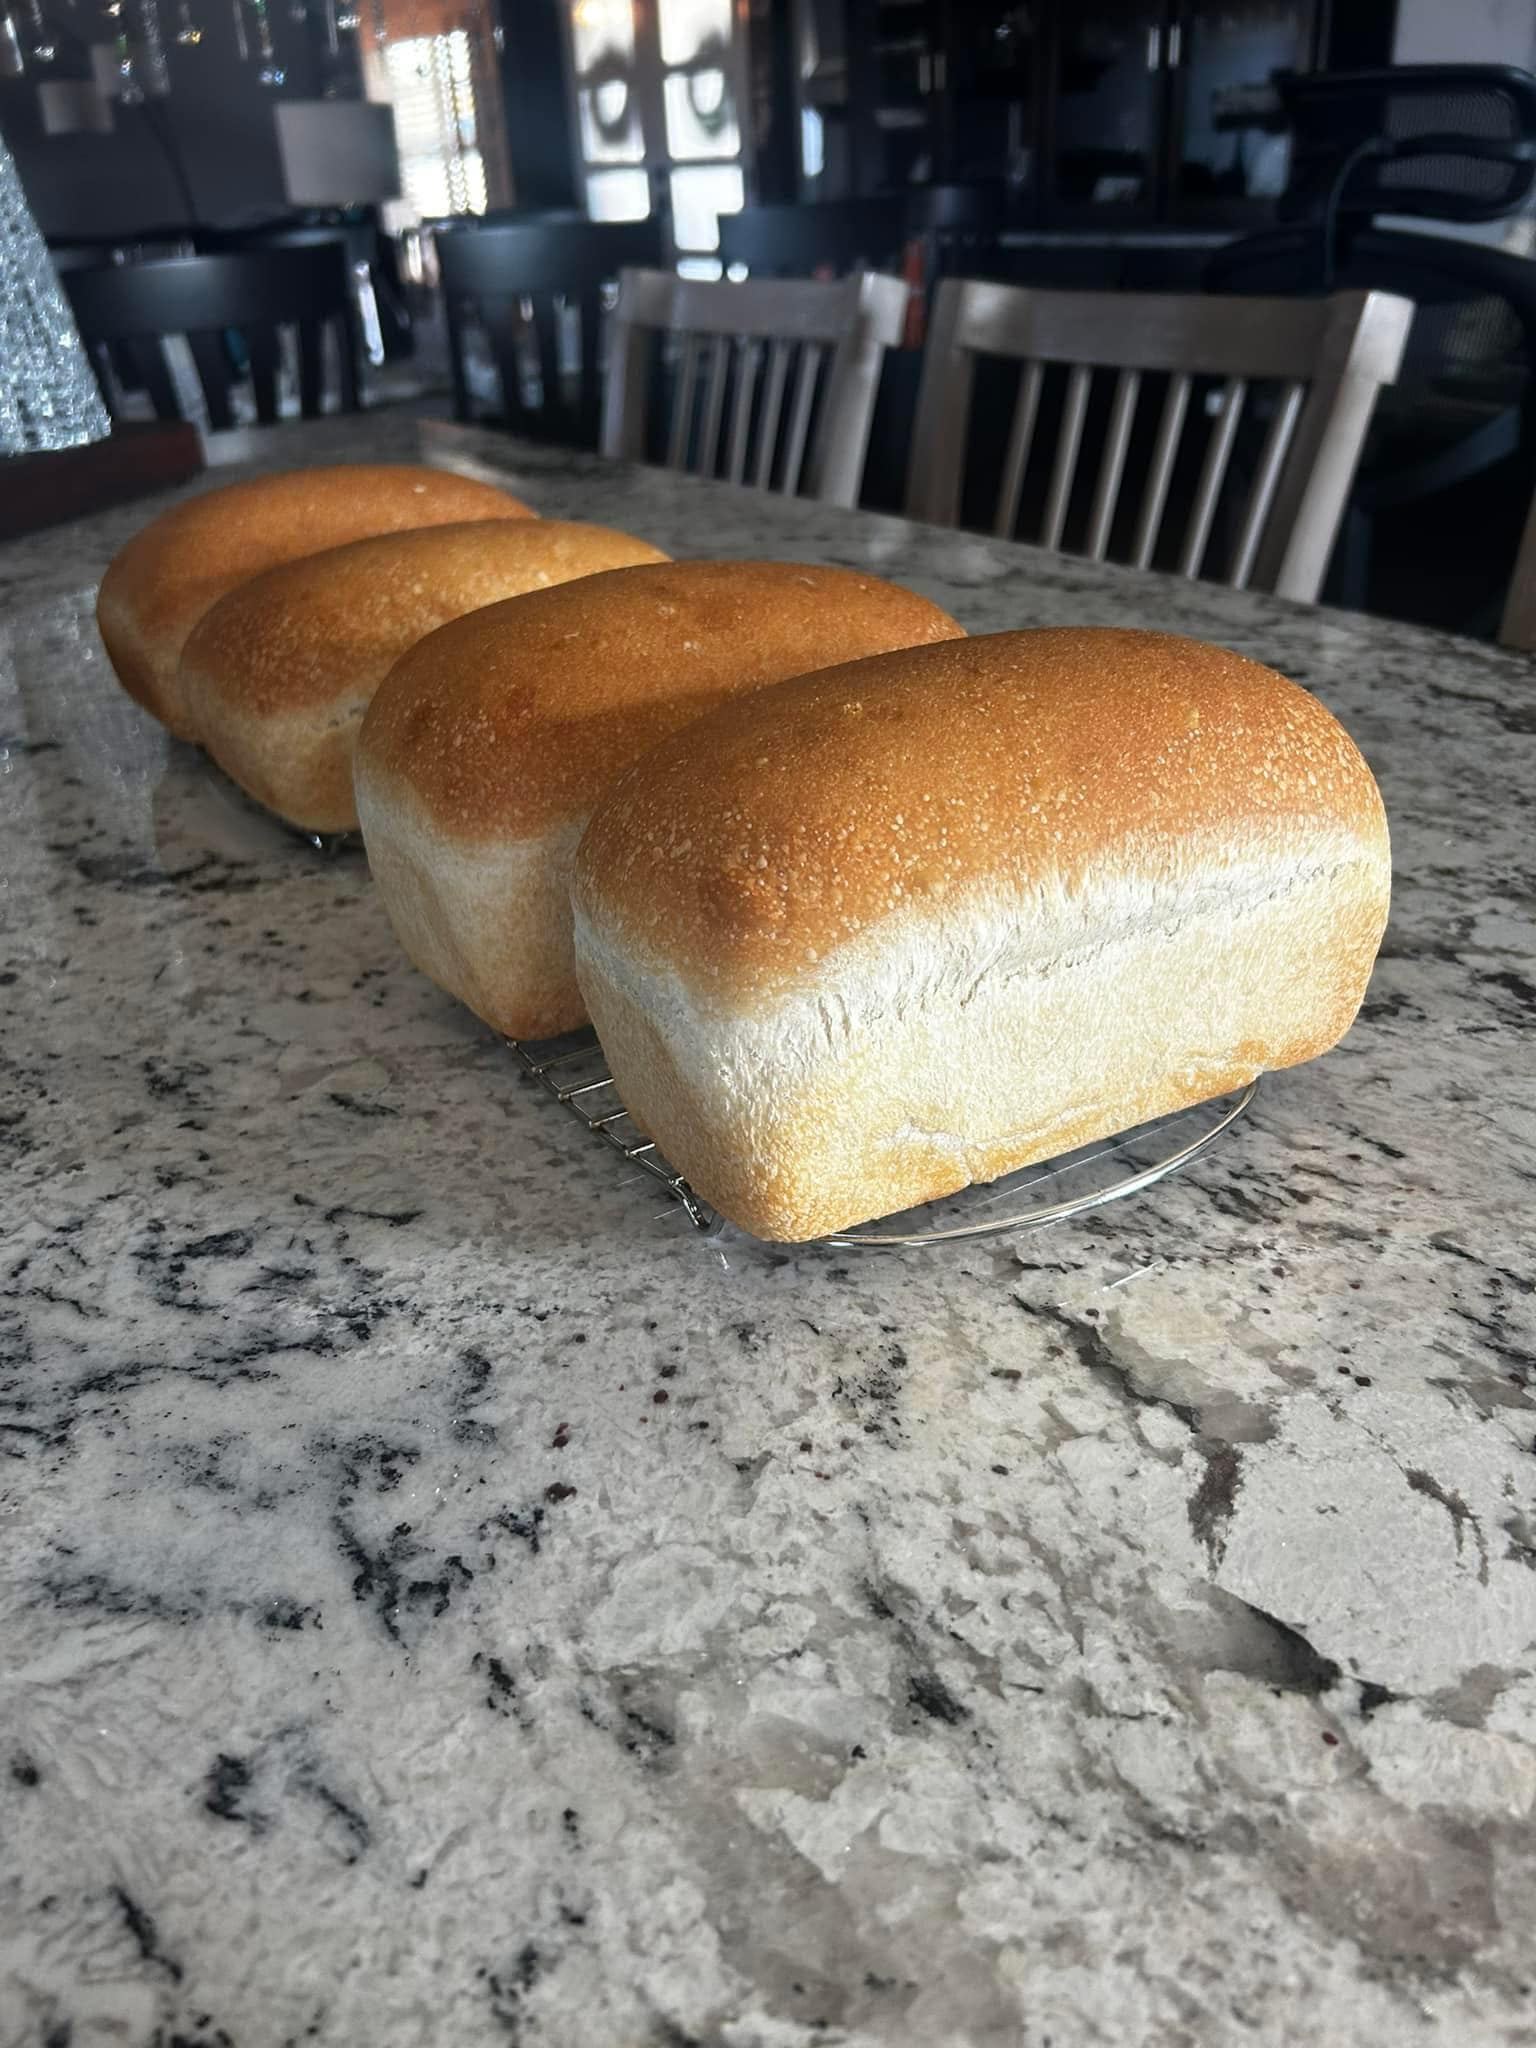
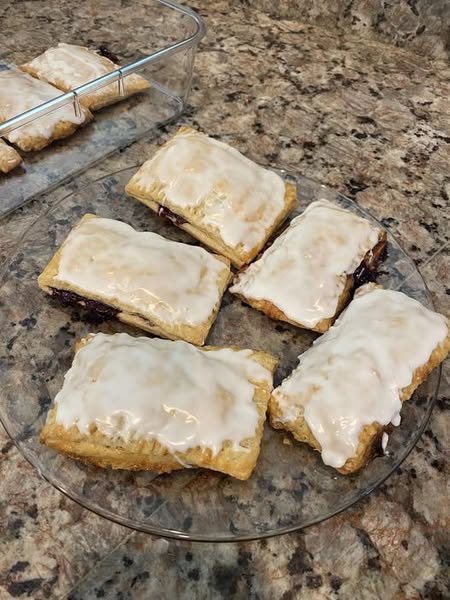
Gluten-Free Sandwich Bread

If you’ve ever tried to make gluten-free sandwich bread and ended up with a dense, dry brick instead of a soft, airy loaf, this recipe is about to change everything. This unique gluten-free sandwich bread combines a balanced blend of wholesome flours, a touch of natural starch for structure, and a few bakery-style secrets to create a soft, chewy crumb that’s perfect for sandwiches, toast, or even French toast. There’s no kneading, no complicated steps—just simple ingredients, patience, and a little magic from your kitchen.

The Secret Behind Perfect Gluten-Free Bread

Traditional bread relies on gluten to provide elasticity and structure, trapping air bubbles for a fluffy crumb. Without gluten, many recipes fall flat—literally. The trick is to mimic gluten’s role by combining the right mix of starches and binding agents. In this recipe, we use a trio of rice flour, tapioca starch, and sorghum flour, giving the bread a soft yet stable texture. Psyllium husk powder acts as the “gluten” replacement, providing stretch and moisture retention that keeps the loaf tender for days.

Unlike many gluten-free recipes that rely heavily on starch, this one balances nutrition and texture. Sorghum adds a nutty warmth, rice flour gives lightness, and tapioca contributes a pleasant chew—making each bite taste like real bread, not a substitute.

Ingredients

Dry Ingredients:

  • 1 ½ cups (180 g) white rice flour

  • 1 cup (120 g) sorghum flour

  • ¾ cup (90 g) tapioca starch

  • 2 tbsp psyllium husk powder (not whole husks)

  • 1 tbsp baking powder

  • 2 ½ tsp instant yeast

  • 1 tsp salt

  • 1 tbsp sugar (feeds the yeast and adds light sweetness)

Wet Ingredients:

  • 1 ½ cups (360 ml) warm water (about 100°F or 38°C)

  • 2 tbsp olive oil (adds richness and softness)

  • 1 tsp apple cider vinegar (enhances rise and flavor)

  • 2 large eggs, room temperature (for structure and moisture)

Optional for flavor:

  • 1 tbsp honey or maple syrup

  • 1 tsp chia seeds or flaxseed meal (for a rustic texture)

Step-by-Step Instructions

Step 1: Prepare the Yeast

In a small bowl, combine the warm water, sugar, and yeast. Stir gently and let it sit for about 5–7 minutes, until a foamy layer forms on top. This step is crucial—if the yeast doesn’t foam, it’s inactive and won’t make your bread rise.

Step 2: Mix the Dry Ingredients

In a large mixing bowl, whisk together rice flour, sorghum flour, tapioca starch, psyllium husk powder, baking powder, and salt. The psyllium husk will start to absorb moisture quickly once combined, so make sure it’s evenly mixed in now for consistent results later.

Step 3: Add the Wet Ingredients

Once the yeast mixture is ready, add it to the dry ingredients. Then, pour in olive oil, apple cider vinegar, and eggs. If you’re using honey, add it now. Mix with a hand mixer fitted with dough hooks or a sturdy spoon until the batter comes together.

Unlike wheat dough, this will be more like a thick batter than a firm dough—soft, sticky, and stretchy from the psyllium. That’s exactly what you want.

Step 4: Rest the Dough

Cover the bowl with a clean kitchen towel and let it rest for 10 minutes. During this time, the psyllium husk and flours fully hydrate, thickening the mixture and improving the final crumb structure.

Step 5: Shape and Rise

Line a 9×5-inch loaf pan with parchment paper. Spoon the dough into the pan and smooth the top with a wet spatula or your fingers. For a professional bakery look, make a shallow slit across the top using a sharp knife—this helps control the rise.

Cover loosely with plastic wrap or a damp cloth and let it rise in a warm place for 40–60 minutes, or until it has nearly doubled in size. Gluten-free dough doesn’t rise as high as wheat dough, but it should puff nicely.

Step 6: Bake the Bread

Preheat your oven to 375°F (190°C). Once preheated, place the pan in the center of the oven and bake for 45–50 minutes, or until the top is golden brown and firm. You can check for doneness by inserting a thermometer into the center—it should read about 200°F (93°C).

Step 7: Cool Completely

Remove the bread from the pan and let it cool completely on a wire rack. This step is non-negotiable! If you slice it too soon, the steam trapped inside will make the texture gummy. Once cool, slice with a serrated knife and enjoy the soft, fluffy slices.

Tips for Success

  1. Measure accurately. Use a kitchen scale for the flours—gluten-free baking is sensitive to small changes in ratio.

  2. Don’t skip the psyllium husk. It’s the secret to soft, flexible bread. Without it, the loaf will crumble.

  3. Warm environment matters. Letting the dough rise in a slightly warm place (like inside an off oven with the light on) ensures better lift.

  4. Store correctly. Wrap the loaf in plastic wrap or an airtight container. It stays fresh at room temperature for up to 3 days or freezes beautifully for up to a month.

  5. Toast before eating. Gluten-free bread shines when lightly toasted—it enhances the flavor and texture.

Why This Recipe Stands Out

What makes this gluten-free sandwich bread truly unique is its texture and flavor combination. Most gluten-free loaves lean on starch-heavy formulas that taste bland or artificial. Here, the blend of sorghum and rice flours introduces a mellow, almost nutty flavor, while the psyllium keeps it springy and moist.

The bread slices beautifully without crumbling and can handle sandwich fillings, spreads, or even a dunk in soup without falling apart. Whether you’re layering turkey and cheese, making peanut butter toast, or using it for French toast, it behaves like classic bread but feels lighter and easier to digest.

It’s also nutrient-balanced: sorghum flour offers protein and fiber, tapioca brings smoothness, and olive oil provides healthy fats. Together, they create a loaf that nourishes as it satisfies.

Variations to Try

  • Seeded Sandwich Bread: Mix in 2 tablespoons of sesame seeds, sunflower seeds, or pumpkin seeds for crunch.

  • Herbed Bread: Add 1 teaspoon of dried rosemary, thyme, or Italian seasoning for a savory twist.

  • Sweet Breakfast Loaf: Replace the vinegar with orange juice and stir in 2 tablespoons of honey and a handful of raisins.

  • Vegan Option: Swap the eggs for 2 flax “eggs” (2 tablespoons flaxseed meal + 6 tablespoons warm water). The texture will be slightly denser but still delicious.

Serving Ideas

  • Classic Sandwich: Stack ham, cheese, and mustard between two soft slices.

  • Avocado Toast: Top with smashed avocado, salt, and chili flakes.

  • French Toast: Dip slices in an egg mixture, fry, and drizzle with syrup.

  • Garlic Bread: Brush slices with butter and garlic powder, toast until golden.

Final Thoughts

This gluten-free sandwich bread isn’t just a replacement—it’s a recipe that stands proudly on its own. The soft interior, golden crust, and real bread flavor prove that gluten-free baking can be both wholesome and indulgent. Once you try this loaf, you may never go back to store-bought gluten-free bread again.

Whether you’re baking for health reasons or pure curiosity, this recipe gives you the satisfaction of pulling a warm, golden loaf from the oven—proof that with the right balance of science and soul, even gluten-free bread can be extraordinary.

Gluten-Free Pop-Tarts

Few things compare to the nostalgia of biting into a warm, flaky Pop-Tart straight from the toaster — the tender crust, the gooey filling, and the sweet glaze that glistens on top. But for anyone who’s gluten intolerant or simply prefers gluten-free baking, traditional Pop-Tarts are off the table. That’s where this unique gluten-free Pop-Tart recipe steps in — a handcrafted, bakery-quality version made entirely from scratch, with wholesome ingredients, rich flavors, and a flaky texture that rivals the real thing.

This recipe reimagines the classic breakfast pastry with a buttery gluten-free crust, customizable fillings, and a glossy vanilla glaze. Whether you’re craving strawberry, chocolate, or cinnamon brown sugar, this base recipe allows endless creativity while remaining 100% gluten-free.

The Secret to a Perfect Gluten-Free Pop-Tart

The key challenge in making gluten-free Pop-Tarts is recreating the signature flakiness of pastry dough without gluten — the protein that gives regular dough its structure and elasticity. The trick lies in using the right blend of gluten-free flours, combined with cold butter and a touch of xanthan gum for elasticity. The dough must stay cold and be handled gently to maintain its tender, flaky layers.

For the filling, you can use any jam, chocolate, or spiced mixture you love — the magic is in the balance between sweet, tart, and buttery. And to finish, a silky glaze poured over the cooled pastry creates that iconic Pop-Tart sheen.

Ingredients

For the Gluten-Free Pastry Dough:

  • 2 cups gluten-free all-purpose flour (with xanthan gum included; if not, add 1 tsp xanthan gum)

  • 1 tablespoon cornstarch (adds lightness)

  • ½ teaspoon salt

  • 1 tablespoon granulated sugar

  • ¾ cup unsalted butter, cold and cubed

  • 1 large egg

  • 3 tablespoons cold milk (dairy or non-dairy)

  • 1 teaspoon pure vanilla extract

For the Filling (Choose One or Mix & Match):

Strawberry Jam Filling:

  • ½ cup strawberry jam

  • 1 teaspoon cornstarch mixed with 1 teaspoon water (to thicken if jam is too runny)

Cinnamon Brown Sugar Filling:

  • ¼ cup brown sugar

  • 1 teaspoon ground cinnamon

  • 1 tablespoon gluten-free flour

  • 1 tablespoon softened butter

Chocolate Filling:

  • ¼ cup chocolate chips

  • 1 tablespoon heavy cream or coconut cream

For the Glaze:

  • 1 cup powdered sugar

  • 2–3 tablespoons milk (dairy or non-dairy)

  • ½ teaspoon vanilla extract

  • Optional: natural food coloring or sprinkles

Step-by-Step Instructions

1. Make the Dough

In a large mixing bowl, combine the gluten-free flour, cornstarch, salt, and sugar. Whisk until evenly blended. Add cold butter cubes, and using a pastry cutter or your fingertips, work the butter into the flour until the mixture resembles coarse crumbs. You should still see small pea-sized bits of butter — these are crucial for flakiness.

In a small bowl, whisk together the egg, milk, and vanilla. Pour the wet mixture into the flour mixture and gently stir with a fork until the dough begins to come together. If it feels too dry, add an extra teaspoon of milk at a time until it holds together but isn’t sticky.

Turn the dough onto a sheet of plastic wrap and form it into a rectangle. Wrap tightly and refrigerate for at least 30 minutes. Chilling helps firm up the butter and hydrate the flour for better rolling later.

2. Prepare the Filling

While the dough chills, prepare your filling.

For fruit jam: warm it slightly and mix with the cornstarch slurry to thicken if needed, then let cool.
For cinnamon sugar: stir together brown sugar, cinnamon, flour, and butter until a crumbly paste forms.
For chocolate: melt the chocolate chips and cream together in the microwave in 15-second intervals, stirring until smooth.

Let all fillings cool completely before using — this prevents the dough from becoming soggy.

3. Roll and Shape

Preheat your oven to 375°F (190°C) and line a baking sheet with parchment paper.

Remove the chilled dough from the fridge and divide it into two equal portions. Roll out one portion between two sheets of parchment paper until about ⅛ inch thick. Cut into equal rectangles (about 3×4 inches each). These will form the bottom halves of your Pop-Tarts.

Transfer the rectangles to your prepared baking sheet. Spoon about 1 tablespoon of your chosen filling into the center of each rectangle, leaving a small border around the edges.

Roll out the second portion of dough and cut matching rectangles for the tops. Gently place each top piece over the filling and press the edges with your fingertips. Use a fork to crimp the edges, sealing in the filling completely.

Prick the tops with a fork a few times to allow steam to escape during baking.

4. Bake to Golden Perfection

Brush the tops lightly with milk or beaten egg for a golden finish. Bake for 20–25 minutes, or until the Pop-Tarts turn light golden brown around the edges.

Remove from the oven and let them cool on the baking sheet for 5 minutes before transferring to a wire rack to cool completely. Cooling is essential before glazing — otherwise, the glaze will melt right off.

5. Glaze and Decorate

Whisk together powdered sugar, milk, and vanilla extract until smooth and glossy. Adjust consistency as needed — thicker for a bold icing, thinner for a glaze effect.

Spoon or drizzle the glaze over each Pop-Tart and, if desired, add colorful sprinkles, crushed freeze-dried fruit, or a drizzle of chocolate. Let the glaze set for about 15 minutes before serving.

Creative Variations

  1. Berry Bliss Pop-Tarts:
    Use mixed berry jam and top with a pale pink glaze made from powdered sugar and a drop of beet juice.

  2. Chocolate Hazelnut Dream:
    Fill with chocolate hazelnut spread and top with a cocoa glaze and crushed nuts.

  3. Apple Cinnamon Delight:
    Use apple butter or cooked apples with cinnamon filling for a warm fall flavor.

  4. Maple Pecan Pop-Tarts:
    Add crushed pecans and drizzle with maple icing for a breakfast-style treat.

  5. Lemon Blueberry Glow:
    Fill with blueberry jam and top with lemon icing — a tangy-sweet twist that tastes like summer.

Tips for Gluten-Free Success

  • Keep everything cold: Cold butter and minimal handling are key to a flaky crust.

  • Don’t skip chilling: Gluten-free dough needs time to firm up, making it easier to roll and shape.

  • Use parchment: It prevents sticking and ensures easy transfer to the baking sheet.

  • Avoid overfilling: Too much filling can cause leakage during baking.

  • Store properly: Once cooled, store in an airtight container for up to 3 days, or freeze for up to 2 months. Toast lightly before serving for that signature Pop-Tart warmth.

Why You’ll Love This Recipe

This gluten-free Pop-Tart recipe is a labor of love — one that brings together nostalgic flavors with a wholesome, from-scratch approach. Unlike store-bought versions filled with preservatives and artificial flavors, these pastries are tender, buttery, and endlessly customizable. Every bite offers a perfect balance: crisp edges, soft layers of dough, and a sweet, gooey center that melts in your mouth.

Whether you make them for breakfast, dessert, or a mid-afternoon snack, these homemade gluten-free Pop-Tarts capture the joy of childhood in a more natural, artisanal way. They’re proof that gluten-free baking doesn’t mean giving up indulgence — it means rediscovering it, one flaky, golden pastry at a time.

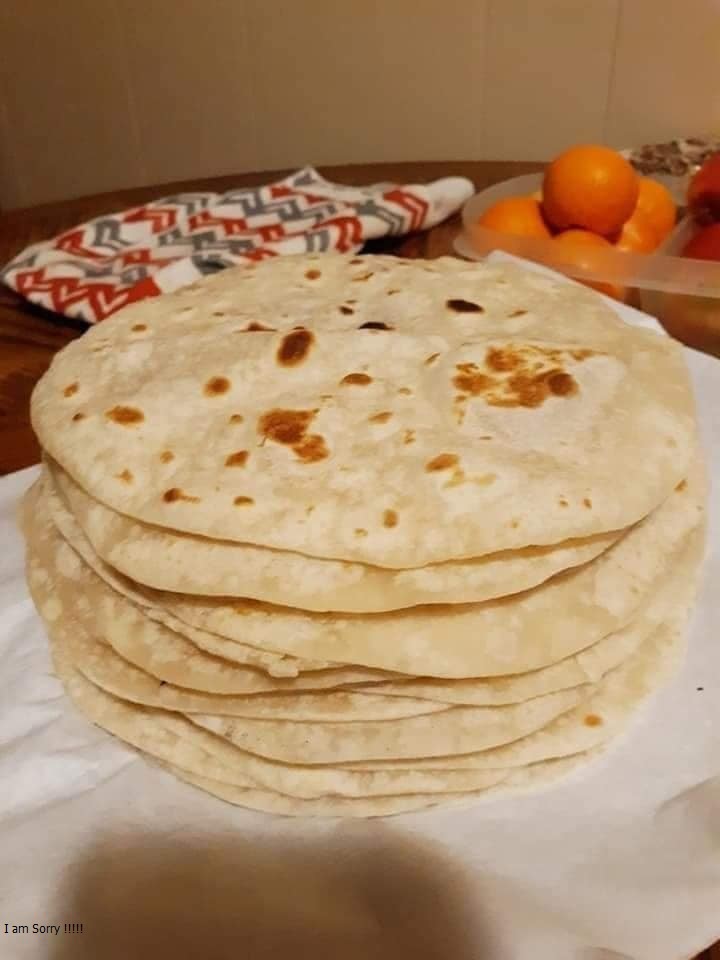
Gluten-Free Tortillas

If you’ve ever tried making gluten-free tortillas at home, you know that getting the texture right can be tricky. They can turn out too dry, crumbly, or stiff—but not this recipe. This unique gluten-free tortilla recipe delivers soft, flexible, and flavorful tortillas that are perfect for tacos, wraps, burritos, and quesadillas. The secret lies in using a blend of flours that mimic the elasticity of traditional wheat tortillas, along with a special resting technique that locks in moisture. These tortillas are naturally gluten-free, dairy-free, and easy to make, yet they taste just as authentic as the ones you’d find at a Mexican taqueria.


 Why This Recipe Works

Traditional tortillas depend on gluten for structure and flexibility, but gluten-free cooking requires creativity. This recipe combines brown rice flour for structure, tapioca starch for stretchiness, and a touch of psyllium husk powder to bind everything together. Warm water and oil add softness, while a short rest after mixing allows the flours to hydrate fully—creating a dough that rolls out beautifully and cooks up perfectly pliable.

Ingredients

Here’s what you’ll need for about 10 medium tortillas:

  • 1 cup brown rice flour – Provides a mild flavor and sturdy base.

  • ½ cup tapioca starch (or arrowroot powder) – Adds chewiness and flexibility.

  • ¼ cup potato starch – Helps achieve that soft, tender bite.

  • 1 teaspoon psyllium husk powder – Natural binder that replaces gluten.

  • 1 teaspoon sea salt – Enhances flavor.

  • 1 tablespoon olive oil (or avocado oil) – Adds moisture and softness.

  • ¾ to 1 cup warm water – Adjust as needed to form a pliable dough.

  • (Optional) ½ teaspoon baking powder – For slightly puffier tortillas.

Step-by-Step Instructions

Step 1: Mix the Dry Ingredients

In a large mixing bowl, combine brown rice flour, tapioca starch, potato starch, psyllium husk powder, salt, and baking powder (if using). Whisk well to distribute the ingredients evenly. This helps prevent clumping and ensures that the binding agents work uniformly.

Step 2: Add the Wet Ingredients

Pour in the olive oil and about ¾ cup of warm water. Stir with a spoon until the dough begins to come together. Then, use your hands to knead it gently inside the bowl. Gluten-free doughs behave differently from wheat doughs—they’re softer and a bit sticky at first but should firm up as you knead.

If the dough feels dry or cracks easily, add a tablespoon of water at a time until it becomes smooth and pliable. It should feel soft, like playdough, without sticking to your hands.

Step 3: Rest the Dough

Cover the bowl with a damp kitchen towel and let the dough rest for 15–20 minutes. This step is crucial because the psyllium husk and starches need time to absorb the water and develop elasticity. After resting, the dough will feel more cohesive and easier to roll.

Step 4: Divide and Shape

Divide the dough into 10 equal portions and roll each piece into a smooth ball. Keep them covered with a damp towel while you work to prevent drying out.

Using a rolling pin, roll one dough ball between two pieces of parchment paper until it forms a thin circle (about 6–7 inches). If the edges crack slightly, just press them back together. Gluten-free doughs are forgiving when handled gently.

Step 5: Cook the Tortillas

Heat a non-stick skillet or cast-iron pan over medium-high heat. When hot, carefully peel off one piece of parchment and transfer the tortilla onto the skillet. Cook for 40–50 seconds on the first side, or until small bubbles appear and the underside has light golden spots.

Flip the tortilla and cook for another 30–40 seconds on the other side. Avoid overcooking—it can make them stiff. Transfer the cooked tortilla to a plate lined with a clean towel and cover it immediately to trap steam. This steam keeps them soft and flexible.

Repeat the process with the remaining dough balls.

Step 6: Keep Warm and Store

Stack the cooked tortillas under a towel to stay warm and tender while finishing the batch. Once cooled, you can refrigerate leftovers in an airtight bag for up to 5 days or freeze for up to 2 months. To reheat, wrap in a damp paper towel and microwave for 20–25 seconds or warm briefly in a dry skillet.

 Tips for Perfect Gluten-Free Tortillas

  1. Hydration is key: Gluten-free flours absorb water differently, so adjust gradually until the dough feels supple but not sticky.

  2. Use parchment paper for rolling: It prevents sticking and tearing—no extra flour needed.

  3. Don’t skip resting: This allows the psyllium husk and starches to fully activate, creating that classic tortilla elasticity.

  4. Cook quickly at high heat: This locks in moisture and gives your tortillas those irresistible light brown spots.

  5. Steam after cooking: Stacking them under a towel immediately after cooking helps them stay soft and bendable.

 Serving Suggestions

These gluten-free tortillas are incredibly versatile and pair beautifully with many dishes:

  • Tacos: Fill with grilled chicken, shrimp, or sautéed veggies.

  • Wraps: Add hummus, greens, and roasted vegetables for a wholesome lunch.

  • Quesadillas: Stuff with melted cheese and beans, then pan-toast until crispy.

  • Breakfast Burritos: Wrap scrambled eggs, spinach, and salsa for a hearty morning meal.

  • Mini Pizzas: Top with tomato sauce, cheese, and herbs—bake for a fun twist.

 Variations

Once you master the base recipe, you can play around with flavors and ingredients:

  • Herb Tortillas: Add a teaspoon of dried oregano, basil, or rosemary for aromatic flavor.

  • Spinach Tortillas: Blend ½ cup cooked spinach with the water before adding to the dough for a vibrant green hue and added nutrition.

  • Turmeric Tortillas: Add ½ teaspoon turmeric powder for a golden color and subtle earthy taste.

  • Coconut Flour Blend: Replace 2 tablespoons of rice flour with coconut flour for a touch of sweetness and extra softness.

 Troubleshooting Guide

  • Tortillas cracking: The dough may be too dry—add a little more warm water.

  • Too sticky: Add a tablespoon of rice flour or chill the dough briefly before rolling.

  • Hard or brittle tortillas: They were cooked too long or not covered to steam after cooking.

  • Uneven browning: Make sure the pan is evenly heated before cooking each tortilla.

 Why You’ll Love These Gluten-Free Tortillas

These tortillas are not just a gluten-free substitute—they stand on their own as a flavorful, wholesome flatbread. The combination of flours gives them a delicate chew, while the psyllium husk provides flexibility that rivals traditional wheat tortillas. They’re perfect for meal prep, family dinners, or even as a base for sweet fillings like honey and fruit.

Every bite has that comforting warmth and homemade touch that store-bought versions can’t match. Whether you’re gluten intolerant or simply exploring cleaner eating, this recipe ensures you’ll never miss the classic tortilla texture again.

 Final Thoughts

Making gluten-free tortillas from scratch might seem intimidating at first, but this recipe transforms the process into something simple, fun, and rewarding. With just a few wholesome ingredients and the right technique, you can create tortillas that are soft, pliable, and packed with flavor—ready to wrap around your favorite fillings.

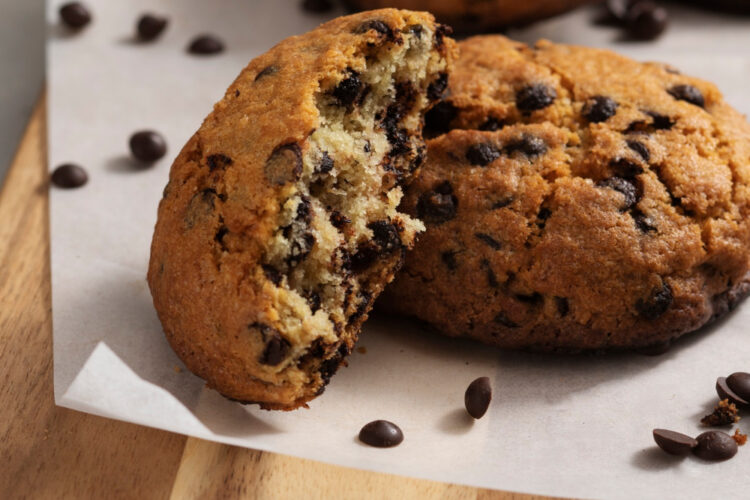
Super Easy Gluten-Free Chocolate Chip Cookies

There’s something deeply comforting about a warm chocolate chip cookie — the gooey center, the crisp golden edges, and the sweet aroma that fills your kitchen. But for anyone avoiding gluten, the challenge has always been recreating that same texture and flavor in a gluten-free version. That’s where this Super Easy Gluten-Free Chocolate Chip Cookies recipe comes in — chewy, buttery, perfectly balanced, and so simple that anyone can make them at home. With the right blend of gluten-free flour, a touch of cornstarch for tenderness, and the perfect ratio of sugar and butter, you’ll never miss the gluten again.

This recipe not only tastes indulgent but also captures that nostalgic homemade cookie essence. Whether you’re baking for yourself, your family, or for a gluten-sensitive friend, these cookies will impress everyone — even those who don’t follow a gluten-free lifestyle.

🌾 Why You’ll Love This Recipe

  1. Naturally chewy and soft: A perfect texture — crisp around the edges and chewy in the middle.

  2. Simple ingredients: No complicated gluten-free flour blends required — just everyday pantry staples.

  3. Customizable: You can easily add nuts, coconut, or different types of chocolate.

  4. No chilling required: You can bake them right away for instant gratification.

  5. Completely foolproof: Designed for both beginners and experienced bakers alike.

🍪 Ingredients You’ll Need

Here’s everything required for this delicious gluten-free treat:

  • 1 cup (2 sticks) unsalted butter, softened

  • 3/4 cup light brown sugar, packed

  • 1/2 cup granulated sugar

  • 2 large eggs, room temperature

  • 2 teaspoons pure vanilla extract

  • 2 1/4 cups gluten-free all-purpose flour blend (with xanthan gum included)

  • 1 teaspoon baking soda

  • 1 teaspoon cornstarch (for softness and chewiness)

  • 1/2 teaspoon salt

  • 1 1/2 cups semisweet chocolate chips (or mix with dark chocolate chunks)

🧁 Step-by-Step Instructions

Step 1: Cream the butter and sugars

In a large mixing bowl, beat together the softened butter, brown sugar, and granulated sugar using an electric mixer for about 2–3 minutes until the mixture becomes light and fluffy. This step is crucial for aerating the dough, helping your cookies rise slightly and stay soft.

Step 2: Add the eggs and vanilla

Beat in the eggs one at a time, ensuring each is fully incorporated before adding the next. Mix in the vanilla extract. You’ll notice the dough turning creamy and smooth — this is the flavor foundation of your cookies.

Step 3: Combine dry ingredients

In a separate bowl, whisk together the gluten-free flour, baking soda, cornstarch, and salt. Make sure the dry ingredients are evenly distributed to avoid clumps of baking soda in your cookies.

Step 4: Mix wet and dry ingredients

Gradually add the dry mixture into the butter mixture. Mix on low speed or with a spatula until everything is just combined. Overmixing can make the cookies dense, so stop once the dough looks evenly blended.

Step 5: Fold in the chocolate chips

Using a spatula, fold in the chocolate chips (and nuts if desired). Make sure every spoonful of dough has a good balance of chips for even chocolatey bites.

Step 6: Scoop and shape

Use a cookie scoop or tablespoon to form dough balls, about 1 ½ tablespoons each. Place them on a baking sheet lined with parchment paper, leaving about 2 inches between each cookie to allow for spreading.

Step 7: Bake to perfection

Preheat your oven to 350°F (175°C) and bake the cookies for 9–11 minutes, or until the edges are golden brown and the centers still look slightly soft. Remember — cookies continue baking slightly after being removed from the oven.

Step 8: Cool and enjoy

Allow the cookies to rest on the baking sheet for 5 minutes before transferring them to a wire rack to cool completely. This short resting time helps them set without losing their chewy texture.

🍫 Tips for Perfect Gluten-Free Cookies Every Time

  1. Use a quality gluten-free flour blend: A good 1:1 blend with xanthan gum ensures the cookies hold their shape and stay soft.

  2. Don’t skip cornstarch: It’s the secret to that tender bakery-style chewiness.

  3. Avoid overbaking: Gluten-free cookies can dry out quickly. Pull them out when they’re just golden around the edges.

  4. Resting the dough (optional): For even deeper flavor, you can chill the dough for 30 minutes — it enhances the buttery, caramel-like taste.

  5. Mix up your chips: Try half milk chocolate and half dark chocolate for a richer flavor balance.

🥥 Fun Variations

  • Double Chocolate Chip: Replace ¼ cup of flour with cocoa powder and use white chocolate chips.

  • Peanut Butter Chocolate Chip: Add ½ cup creamy peanut butter to the dough and reduce butter by 2 tablespoons.

  • Oatmeal Chocolate Chip: Stir in ½ cup of certified gluten-free oats for a heartier texture.

  • Nutty Bliss: Mix in chopped walnuts, pecans, or almonds for extra crunch.

  • Sea Salt Finish: Sprinkle a tiny pinch of flaky sea salt on top of each cookie before baking for a gourmet twist.

Pairing Ideas

  • Enjoy these cookies warm with a glass of cold almond milk.

  • Crumble them over vanilla ice cream for a decadent dessert.

  • Serve with coffee or tea for an afternoon pick-me-up.

  • Sandwich marshmallow fluff between two cookies for a gluten-free “s’more” style treat.

🌟 Storage and Freezing

These cookies store beautifully, making them perfect for meal prep or last-minute cravings.

  • Room temperature: Keep in an airtight container for up to 5 days.

  • Freezer (unbaked): Freeze the dough balls on a tray, then transfer to a zip-top bag. Bake from frozen, adding 1–2 minutes to the bake time.

  • Freezer (baked): Store cooled cookies in an airtight container for up to 3 months. Reheat in the microwave for 10–15 seconds for that fresh-from-the-oven feel.

💬 Final Thoughts

These Super Easy Gluten-Free Chocolate Chip Cookies are more than just a gluten-free adaptation — they’re a cookie-lover’s dream that happens to be gluten-free. The combination of soft centers, golden crisp edges, and rich pools of melted chocolate creates a bakery-quality cookie that feels indulgent and homemade at the same time.

The beauty of this recipe lies in its simplicity — no odd ingredients or complicated steps, just pure cookie joy. Whether you’re baking them for your kids, sharing them with friends, or treating yourself after a long day, these cookies guarantee comfort and satisfaction in every bite.

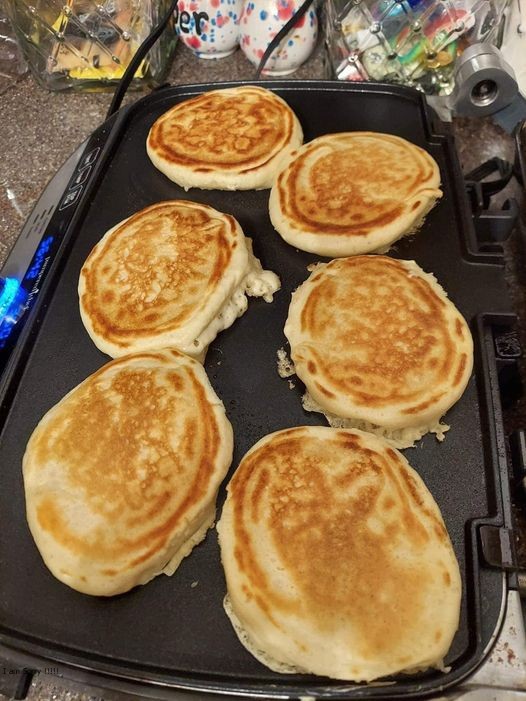
Gluten-Free Fluffy Pancakes

Pancakes are a universal breakfast comfort food, loved for their golden edges and soft, pillowy texture. But when gluten is off the table, finding that same tender, airy bite can be a challenge. This Gluten-Free Fluffy Pancakes recipe brings back the magic of classic diner-style pancakes—with a gluten-free twist so good, you’ll forget they’re wheat-free. The secret lies in a careful balance of flours, a touch of acid to activate lift, and just the right amount of moisture for the perfect bite. These pancakes rise tall, stay moist, and are packed with buttery flavor and a hint of vanilla warmth that makes every forkful irresistible.

The Secret to Gluten-Free Fluffiness

Creating gluten-free pancakes that rival traditional ones starts with understanding texture. Gluten provides structure and elasticity in regular pancakes, trapping air bubbles to create that soft fluff. When you remove it, you need a smart blend of ingredients that mimic its function.

Here’s what makes this recipe unique:

  • The flour blend: A mix of rice flour, tapioca starch, and a little almond flour creates a delicate yet hearty structure.

  • Buttermilk & lemon: These add acidity, which reacts with baking soda for a powerful rise.

  • Whipped eggs: Lightly beaten eggs add an extra lift, making the pancakes cloudlike.

  • Melted butter: Keeps the crumb tender while adding richness.

Ingredients

Dry Ingredients:

  • 1 cup gluten-free all-purpose flour blend (preferably with xanthan gum)

  • ¼ cup rice flour

  • 2 tablespoons almond flour

  • 2 tablespoons tapioca starch

  • 1 tablespoon granulated sugar

  • 2 teaspoons baking powder

  • ½ teaspoon baking soda

  • ¼ teaspoon fine sea salt

Wet Ingredients:

  • 1 cup buttermilk (or 1 cup milk + 1 tablespoon lemon juice, rested for 5 minutes)

  • 2 large eggs, separated

  • 3 tablespoons unsalted butter, melted and slightly cooled

  • 1 teaspoon pure vanilla extract

  • 1 tablespoon honey or maple syrup (optional, for subtle sweetness)

For Cooking:

  • Butter or coconut oil, for greasing the pan

Optional Toppings:

  • Fresh berries

  • Warm maple syrup

  • Whipped cream or Greek yogurt

  • Toasted nuts or a drizzle of nut butter

Step-by-Step Instructions

Step 1: Mix the Dry Base

In a large bowl, whisk together the gluten-free all-purpose flour, rice flour, almond flour, tapioca starch, sugar, baking powder, baking soda, and salt. The key here is to aerate the dry ingredients well. Sifting isn’t just for show—it helps incorporate air and prevents dense, gummy pancakes.

Step 2: Prepare the Buttermilk Mixture

In a medium bowl, combine buttermilk, egg yolks, melted butter, vanilla extract, and honey. Whisk gently until smooth. The melted butter should be warm—not hot—to avoid curdling the eggs.

This mixture gives the pancakes a buttery tang that balances perfectly with the sweetness of syrup or fruit toppings later on.

Step 3: Beat the Egg Whites

In a clean bowl, use a hand whisk or mixer to beat the egg whites until soft peaks form. This step is optional but transforms the texture dramatically. Folded into the batter later, the egg whites trap air bubbles, making the pancakes rise tall and stay feather-light.

Step 4: Combine Wet and Dry Ingredients

Create a well in the center of the dry mix and pour in the buttermilk mixture. Gently whisk until just combined. Do not overmix—lumps are perfectly fine and even desirable in pancake batter. Overmixing can break the air bubbles, leading to flat pancakes.

Now, carefully fold in the whipped egg whites with a spatula. Use a gentle motion to keep the batter airy. The final texture should be thick but pourable—similar to lightly whipped cream.

Step 5: Let the Batter Rest

Allow the batter to rest for 10 minutes. This gives the flours time to hydrate and the leavening agents time to start their gentle rise. The resting period ensures your pancakes will puff up beautifully when they hit the pan.

Step 6: Preheat and Grease the Pan

Heat a nonstick skillet or griddle over medium-low heat. Once hot, lightly grease it with butter or coconut oil. To test readiness, sprinkle a drop of water on the surface—it should sizzle gently and evaporate quickly.

Step 7: Cook the Pancakes

Pour ¼ cup of batter onto the skillet for each pancake. The batter will spread slowly; resist the urge to press it down. Cook for about 2–3 minutes, until small bubbles appear on the surface and the edges begin to look set.

Flip gently and cook another 1–2 minutes, until golden brown and cooked through. Gluten-free pancakes cook best at a lower temperature than regular ones—too high, and they’ll brown before cooking through.

Repeat with remaining batter, adding a touch more butter or oil to the pan as needed.

Step 8: Serve and Enjoy

Stack the pancakes high on a warm plate. Top with butter that melts into every crevice, drizzle generously with maple syrup, and finish with your favorite toppings.

Topping Ideas for Gourmet Flavor

  1. Berry Burst: Top with strawberries, raspberries, and blueberries, and a light dusting of powdered sugar.

  2. Banana Nut Crunch: Sliced bananas, toasted pecans, and a drizzle of honey or caramel.

  3. Chocolate Morning Bliss: Melted dark chocolate and whipped cream for a dessert-style breakfast.

  4. Citrus Sunrise: A dollop of Greek yogurt, orange zest, and a drizzle of agave syrup.

  5. Savory Twist: Skip the sugar in the batter, and serve with crispy bacon and a poached egg on top.

Tips for Pancake Perfection

  • Use a blend of flours: If you don’t have almond or rice flour, try sorghum or oat flour for a similar texture.

  • Don’t skip resting the batter: It’s essential for structure and tenderness.

  • Avoid over-flipping: Flip only once—too many flips make them tough.

  • Keep them warm: Place cooked pancakes on a parchment-lined baking sheet in a 200°F (93°C) oven while finishing the batch.

  • Add-ins at the right time: If you’re adding blueberries or chocolate chips, sprinkle them on the uncooked side after pouring the batter—this keeps them from sinking.

Storage & Reheating

Leftover pancakes can be stored in an airtight container in the refrigerator for up to 3 days or frozen for up to 2 months. To reheat, pop them in the toaster or warm them in a skillet over low heat—never microwave, as it can make them rubbery.

Why You’ll Love This Recipe

This recipe doesn’t just mimic traditional pancakes—it perfects them. Every bite offers a golden crisp edge followed by a soft, custard-like center. The blend of flours ensures a balanced flavor—nutty from almond, neutral from rice, and light from tapioca. The whipped egg whites elevate them to cloud status, while the buttery undertones make them indulgent yet wholesome.

They’re gluten-free, but more importantly, they’re joyfully delicious—the kind of pancakes that make mornings feel special. Whether you’re gluten-sensitive or simply looking for a lighter, fluffier breakfast treat, these pancakes promise to become your go-to weekend ritual.

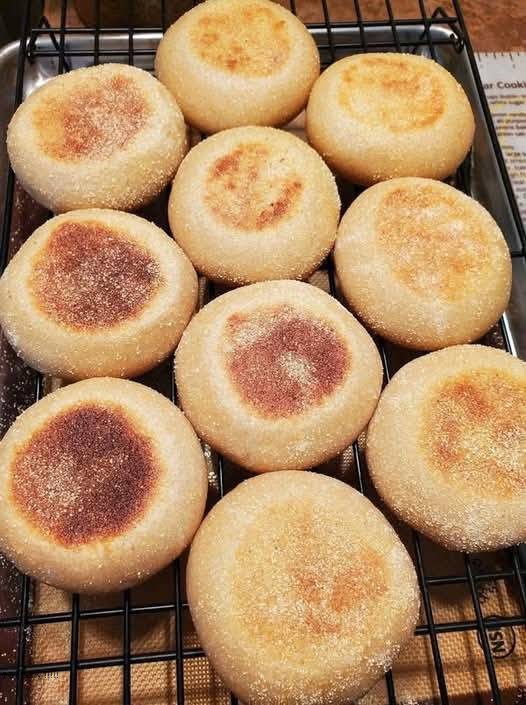
Gluten-Free English Muffins

There’s something wonderfully nostalgic about English muffins—their golden tops, soft interiors, and those signature “nooks and crannies” that soak up butter and jam. But for those avoiding gluten, finding the perfect English muffin can be a real challenge. Store-bought gluten-free versions often miss the mark, being either too dense or too crumbly. This  gluten-free English muffin recipe changes that narrative. It delivers everything you love about a classic English muffin: a crisp exterior, tender inside, and just the right chew—all without gluten.

What makes this recipe special is its combination of flours, fermentation, and baking technique. By using a balanced blend of gluten-free grains and a touch of natural sweetness, you’ll get muffins that rise beautifully and taste as comforting as the traditional wheat version. Whether you toast them for breakfast or turn them into mini sandwich buns, these muffins are sure to become a new favorite.

Ingredients

Dry Ingredients:

  • 2 cups gluten-free all-purpose flour (with xanthan gum included, such as Bob’s Red Mill 1-to-1 or Cup4Cup)

  • ½ cup almond flour (for moisture and nutty flavor)

  • 1 tablespoon psyllium husk powder (for structure and elasticity)

  • 2 teaspoons baking powder

  • ½ teaspoon baking soda

  • ½ teaspoon sea salt

Wet Ingredients:

  • 1 ¼ cups warm milk (dairy or plant-based, around 105°F)

  • 1 tablespoon honey or maple syrup

  • 1 packet (2 ¼ teaspoons) active dry yeast

  • 1 large egg, room temperature

  • 2 tablespoons melted butter or olive oil

  • 1 teaspoon apple cider vinegar

For Cooking:

  • Cornmeal or gluten-free semolina for dusting

  • Butter or oil for greasing

Step 1: Activate the Yeast

Start by combining the warm milk, honey, and yeast in a small bowl. Stir gently and let it sit for 10 minutes, or until the mixture becomes foamy. This step is crucial—it ensures your yeast is active and ready to help your muffins rise. If the yeast doesn’t foam, it may be expired or the milk too hot or cold, so try again for best results.

Step 2: Mix the Dry Ingredients

In a large mixing bowl, whisk together the gluten-free all-purpose flour, almond flour, psyllium husk powder, baking powder, baking soda, and salt. The psyllium husk acts like gluten in this recipe—it binds the dough and gives it that stretchy, chewy texture you’d expect from traditional English muffins.

Step 3: Combine the Wet and Dry Ingredients

Pour the activated yeast mixture into the dry ingredients. Add the egg, melted butter (or oil), and apple cider vinegar. Mix with a wooden spoon or hand mixer until a thick, sticky dough forms. Unlike wheat dough, gluten-free dough will not be elastic—it will resemble a thick batter, somewhere between bread dough and cake batter.

If it feels too dry, add 1–2 tablespoons of warm milk. If too wet, sprinkle in a tablespoon of flour at a time until it reaches the right consistency.

Step 4: Let the Dough Rise

Cover the bowl with a clean towel or plastic wrap and let it rise in a warm spot for about 45–60 minutes. The dough should expand slightly and develop air bubbles. This first rise gives your muffins lightness and depth of flavor.

If you prefer a tangy, sourdough-like taste, you can let the dough ferment in the fridge overnight—this long, slow rise enhances the flavor and texture.

Step 5: Shape the Muffins

After rising, gently stir the dough to release some air. Lightly dust a clean surface with gluten-free flour and cornmeal. Scoop out portions of dough (about ⅓ cup each) and shape them into small rounds using your hands dusted with flour. Each muffin should be around 3 inches wide and 1 inch thick.

Place them on parchment paper lined with a dusting of cornmeal, then sprinkle a little more cornmeal on top. Cover and let them rest for 20 minutes. This resting period allows the dough to firm up slightly and ensures better texture during cooking.

Step 6: Cook on the Skillet

Traditional English muffins are cooked on a griddle before baking, and this gluten-free version follows the same tradition for that authentic texture.

Heat a nonstick skillet or griddle over medium-low heat and lightly grease it with butter or oil. Place 3–4 muffins on the skillet (depending on size) and cook for about 5–6 minutes per side. The muffins should develop a golden-brown crust but remain soft in the center.

Be patient—if the heat is too high, the outsides will brown before the inside cooks. Low and slow is key.

Step 7: Finish in the Oven

To ensure the centers are fully cooked, transfer the skillet-cooked muffins to a preheated oven at 350°F (175°C). Bake for 10–12 minutes. This final step helps set the crumb and gives your muffins that perfect texture—crisp outside, fluffy inside.

Once baked, place them on a wire rack to cool completely.

Step 8: Toast and Enjoy

To serve, use a fork to split the muffins open (never a knife—fork-splitting creates those signature rough surfaces that trap butter and jam). Toast until golden, then slather with butter, honey, or your favorite spread.

They’re also perfect for breakfast sandwiches—try them with eggs, cheese, and bacon, or go sweet with peanut butter and sliced bananas.

Storage Tips

  • Room Temperature: Store cooled muffins in an airtight container for up to 2 days.

  • Refrigerator: Keeps fresh for up to 5 days.

  • Freezer: Wrap individually and freeze for up to 2 months. Reheat directly from frozen in a toaster or oven.

Customization Ideas

  1. Whole-Grain Twist: Replace ¼ cup of the all-purpose flour with sorghum or brown rice flour for a hearty flavor.

  2. Sweet Muffins: Add 1 teaspoon of cinnamon and a tablespoon of sugar to the dough for a slightly sweet breakfast option.

  3. Savory Muffins: Mix in shredded cheese, garlic powder, or chopped herbs for a delicious twist on the traditional English muffin.

  4. Dairy-Free Version: Use plant-based milk and olive oil or vegan butter for a 100% dairy-free version that tastes just as rich.

What Makes This Recipe Unique

Most gluten-free English muffin recipes rely solely on a commercial flour blend and eggs, resulting in a texture that’s often too dense or dry. This version stands out because it uses a multi-layered approach to texture and flavor:

  • Psyllium husk powder acts as a natural gluten substitute, trapping air and giving elasticity.

  • Almond flour introduces moisture and richness that prevent dryness.

  • A two-stage cooking process (skillet + oven) ensures a golden crust while keeping the center soft and light.

  • Apple cider vinegar subtly reacts with baking soda, giving lift and a mild tang reminiscent of traditional sourdough English muffins.

Every bite delivers that classic chew and toasty aroma—proof that gluten-free doesn’t mean giving up on texture or taste.

Final Thoughts

These gluten-free English muffins are a testament to how creativity can turn a classic into something even better. They’re wholesome, satisfying, and versatile enough for any meal of the day. Whether topped with melted butter at breakfast, used as a base for Eggs Benedict, or turned into a mini pizza crust, they deliver homemade comfort in every bite.

With a little patience and the right blend of ingredients, you can enjoy the nostalgic pleasure of English muffins again—gluten-free, golden, and utterly delicious.