4 Groups of People Who Should Avoid Eating Chayote

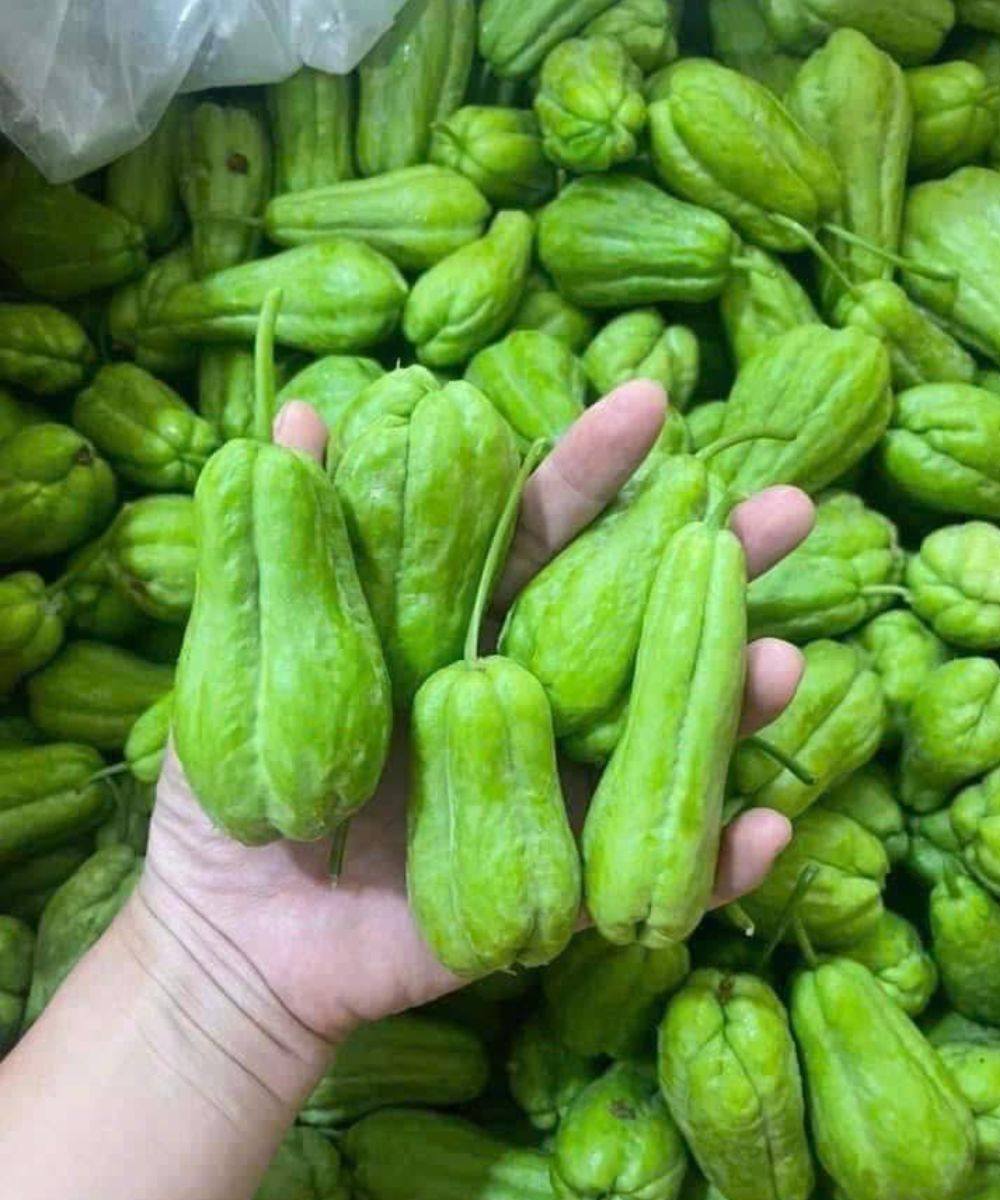
Chayote — also known as mirliton, vegetable pear, or “cholay” — is loved for its crisp texture, mild flavor, and ability to blend seamlessly into soups, sautés, and salads. While most people can enjoy this low-calorie, nutrient-rich vegetable without hesitation, there are specific groups of individuals who should minimize or completely avoid it due to its effects on the body.

Below are the 4 groups of people who should avoid chayote, explained in simple, practical terms, followed by a delicious unique chayote recipe you won’t find anywhere else.

1. People With Severe Kidney Problems

Chayote is naturally rich in potassium, which is usually beneficial for heart and muscle function. However, for people with chronic kidney disease (especially stage 4–5), high-potassium foods can be dangerous because the kidneys cannot eliminate excess potassium efficiently.

  • May lead to hyperkalemia (high potassium in the blood)

  • Can cause irregular heartbeat, fatigue, or serious complications

  • Kidney patients should avoid large amounts or consult their doctor first

2. Individuals With Latex-Fruit Syndrome

Some people experience allergic reactions to chayote due to latex-fruit syndrome, where the body reacts to natural latex-like proteins found in certain fruits and vegetables.

Chayote belongs to the same family as pumpkin and squash and may trigger symptoms such as:

  • Itching of the lips or throat

  • Hives

  • Swelling

  • Digestive upset

Anyone allergic to latex, avocado, banana, chestnut, or papaya may also react to chayote.


3. People With Low Blood Pressure

Chayote has mild diuretic and blood-pressure-lowering properties. This is ideal for people with hypertension, but not for individuals with naturally low BP.

If you already struggle with dizziness, fainting spells, fatigue, or hypotension, chayote may worsen:

  • Drop in blood pressure

  • Lightheadedness

  • Weakness or tiredness

Moderation is key, or avoid it completely if symptoms worsen.


4. Individuals Prone to Digestive Sensitivity

Though gentle for most, some people experience digestive discomfort from chayote, especially if eaten raw.

Those with IBS, chronic bloating, or sensitive digestion may notice:

  • Gas

  • Stomach cramps

  • Loose stools

  • Excessive bloating

Cooking it thoroughly often helps, but highly sensitive individuals may want to avoid it altogether.


BONUS: Unique Chayote Coconut Cream Stir-Fry Recipe

A silky, aromatic, lightly spiced chayote dish you’ll want to make again and again!

Ingredients

  • 2 medium chayote, peeled, seeds removed, thinly sliced

  • 1 small onion, sliced

  • 2 garlic cloves, minced

  • 1 tsp ginger, grated

  • ½ cup thick coconut milk

  • 2 tbsp oil or butter

  • ½ tsp turmeric

  • ½ tsp crushed red pepper

  • Salt to taste

  • 1 tbsp lemon juice

  • Fresh cilantro or parsley for garnish


Instructions

  1. Prepare the chayote:
    Peel and slice it thinly. Chayote can feel slippery—this is normal. Rinse once after cutting.

  2. Sauté aromatics:
    In a pan, heat oil or butter. Add onion, garlic, and ginger. Cook until fragrant and lightly golden.

  3. Add the spices:
    Sprinkle in turmeric and crushed red pepper. Stir for 10 seconds to bloom the spices.

  4. Add chayote slices:
    Toss well in the seasoned oil and cook for 3–4 minutes until slightly softened.

  5. Stir in coconut milk:
    Pour in the coconut milk and mix. Let it simmer on low heat for 7–10 minutes until the chayote becomes tender and the sauce thickens.

  6. Finish with lemon:
    Stir in lemon juice and adjust salt.

  7. Garnish & Serve:
    Top with fresh herbs and enjoy with rice, roti, or even over pasta for a fusion twist.

Homemade Dessert in 5 Minutes

A unique homemade dessert that comes together faster than you can set the table.

Sometimes the best desserts aren’t the ones that take hours—they’re the ones you throw together in a quiet moment when a craving hits. This 5-Minute Creamy Caramel Biscuit Delight is exactly that: a silky, rich, layered treat made from everyday pantry staples. It has the softness of a mousse, the sweetness of caramel, and the comforting crunch of cookies that instantly soak up flavor. No baking, no chilling, no fuss—just assemble, stir, and enjoy.

This recipe is also incredibly flexible. Swap flavors, layer it like a parfait, or make a whole tray in minutes. But even in its simplest form, it tastes like a dessert someone spent much longer preparing. The warm caramel melts into the cream, the cookies soften into a cake-like texture, and every bite feels indulgent without any of the effort.

Below is the full unique recipe, ready to become one of your fastest and most reliable sweet fixes.

Ingredients (Serves 1–2)

  • 6–8 tea biscuits (Marie, graham crackers, or digestives)

  • 3 tbsp sweetened condensed milk

  • 3 tbsp heavy cream or milk

  • 1 tbsp butter

  • 1 tsp vanilla

  • Pinch of salt

  • Optional toppings: crushed nuts, chocolate chips, banana slices, cinnamon, or shredded coconut

Instructions (Ready in 5 Minutes!)

Step 1 — Make Instant Caramel Cream

In a microwave-safe bowl, combine:

  • sweetened condensed milk

  • heavy cream

  • butter

  • vanilla

  • salt

Microwave 30–40 seconds until warm, then whisk until thick, glossy, and smooth.
This becomes your velvety caramel sauce.

Step 2 — Crush the Biscuits

Crush the biscuits with your hands into a small bowl or dessert glass.
Leave a few bigger pieces for texture.

Step 3 — Pour and Stir

Drizzle half of the warm caramel cream over the crushed biscuits.
Stir lightly to coat everything.

Step 4 — Layer for Extra Indulgence

Add more crushed biscuits, then spoon the remaining caramel cream on top.
Spread it like a soft frosting.

Step 5 — Add Toppings (Optional but Amazing)

Sprinkle with:

  • a handful of nuts

  • a dusting of cinnamon

  • a drizzle of extra condensed milk

  • or a few chocolate chips

Whatever you choose, it elevates the dessert instantly.

Why This Dessert Works

  • Instant caramel gives gourmet flavor in seconds.

  • Biscuits soften just enough to become cake-like.

  • Warm vs. crunchy textures make every bite feel layered and special.

  • You only need one bowl, no cooking, and no waiting.

Variations (All 5 Minutes!)

  • Chocolate Dream: Add 1 tsp cocoa powder to the caramel cream.

  • Banoffee Cup: Layer with banana slices and whipped cream.

  • Coffee Shot: Add 1 tsp instant coffee to the warm mixture.

  • Strawberry Shortcake: Add fresh chopped strawberries.

Ginger: A Natural Secret for Youthful Skin

If you’ve ever wished for a simple, natural, and affordable way to nourish your skin from the inside out, ginger might be the secret you’ve overlooked. This fiery root has been cherished for thousands of years for its healing properties, but what many don’t realize is how powerful it can be for skin health. When used in a daily tonic, ginger can help reduce inflammation, brighten dull skin, boost collagen, improve circulation, and fight free-radical damage—all the things that contribute to visibly youthful skin. Today, you’ll discover a completely unique recipe that uses ginger in a refreshing, glow-enhancing drink you can make in just minutes, along with an 800-word breakdown of exactly why it works and how to make it part of your beauty ritual.

Why Ginger Works Like Magic for the Skin

Ginger is loaded with antioxidants—especially gingerol—which fights oxidative stress that causes wrinkles, sagging, and uneven skin tone. It’s also a natural anti-inflammatory, meaning it helps calm redness, acne, puffiness, and general irritation. Many people notice that after a week of drinking ginger tonics, the face looks brighter and tighter, as if the skin had a natural “reset.”

One of ginger’s most underrated powers is improving blood circulation. Good blood flow means more oxygen and nutrients reach your skin cells, giving them the fuel they need to repair, rebuild collagen, and maintain elasticity. If you’re dealing with dull or aging skin, circulation is often the missing piece.

This recipe also incorporates honey for hydration, lime for vitamin C-powered brightness, and mint for a calming, refreshing finish. Combined, they create a soothing elixir that feels like a mini spa treatment in a glass.

Ginger Glow Youth Elixir – Unique Recipe

Ingredients (2 servings)

  • 2-inch piece of fresh ginger, peeled

  • Juice of 1 lime

  • 1 tablespoon raw honey

  • 6–8 fresh mint leaves

  • 2 cups warm water (not boiling)

  • A pinch of black pepper (activates ginger’s compounds)

  • Optional: 1 teaspoon chia seeds for extra skin hydration

Instructions

1. Prepare the Ginger Base

Peel the ginger and slice it thinly so the flavors release easily. Crushing the slices gently with the back of a spoon helps release more juices and oils. This base is where most of the skin-boosting power comes from, so the fresher the ginger, the better the results.

2. Infuse the Elixir

Place the ginger slices into a large mug or heatproof jar. Pour warm (not hot) water over them. Ginger’s antioxidants remain most powerful when not exposed to boiling temperatures, so keep the water around 60–70°C. Allow the ginger to steep for 10 minutes.

3. Add the Glow Ingredients

Once the ginger has infused, add lime juice, honey, mint, and a pinch of black pepper. Lime brings vitamin C for collagen support, while honey acts as a natural humectant, helping your skin retain moisture. The mint cools inflammation and adds a refreshing twist.

4. Optional Skin Boost: Chia Seeds

Chia seeds form a hydrating gel that helps plump the skin from within. If you add them, let the drink sit for an extra 5 minutes.

5. Sip Slowly

Drink warm or at room temperature. Sip it slowly so your body absorbs the goodness gradually.

Why This Drink Works for Youthful Skin (In-Depth 800-Word Breakdown)

Youthful skin isn’t just about moisturizers and serums—it starts INSIDE. The skin is the body’s largest organ, and it thrives when fed with nutrients, antioxidants, and hydration. This ginger elixir is designed to target the root causes of skin aging: inflammation, collagen breakdown, dryness, and sluggish circulation.

Ginger’s primary component, gingerol, is one of nature’s strongest antioxidants. Every day, your skin battles free radicals from pollution, sun exposure, stress, and lack of sleep. These free radicals cause premature aging, fine lines, and uneven tone. Ginger neutralizes them, preventing cellular damage before it even begins. Drinking ginger daily gives your body a steady supply of these protectors.

But antioxidants aren’t the only thing ginger brings to the table. One of the biggest contributors to premature aging is chronic inflammation—even the kind you don’t see. Inflammation weakens your skin barrier and affects collagen fibers. The anti-inflammatory compounds in ginger help settle this internal irritation, which often results in smoother, calmer skin. People with acne, sensitivity, or swelling especially notice a difference.

Lime juice is added for a reason—vitamin C. This vitamin is essential for collagen synthesis, the protein responsible for your skin’s elasticity and firmness. As we age, collagen naturally decreases. Sun damage and stress speed up the decline. By giving your body lots of vitamin C in its natural, fresh form, you support your skin’s ability to stay firm and supple. Lime juice also brightens skin from within, fading dark spots and dullness.

Honey plays a different role: hydration. Many aging skin problems—fine lines, texture, dryness—come from dehydration. When you drink honey in warm water, it acts as a humectant from the inside, drawing moisture toward your skin cells. The result is a naturally dewy, plump look that high-end creams often try to mimic.

Mint helps soothe inflammation, relax the digestive system, and support detoxification. When digestion improves, the skin improves—this connection is powerful. A healthy gut means clearer, brighter skin.

The optional chia seeds add omega-3s, fiber, and a unique gel-like hydration that slowly releases water into the body, keeping your skin moisturized longer throughout the day.

What makes this recipe “youthful” isn’t one magic ingredient—it’s the harmony of all of them working together. Ginger boosts circulation so nutrients reach your skin faster. Lime supports collagen and brightens. Honey hydrates. Mint calms the system. Together they create a daily ritual that supports your skin from the inside, rather than relying only on topical products.

If you drink this elixir each morning, you may notice changes within a week: a more even tone, fewer breakouts, and a natural pinkish glow. After a month, fine lines may soften, your face may look more sculpted due to improved circulation, and your overall complexion will appear brighter and more youthful.

How to Use This for Best Results

  • Drink it on an empty stomach for maximum absorption.

  • Use fresh ginger, not powdered.

  • Drink 4–5 times a week consistently.

  • Pair with water intake to enhance hydration.

Parsley, Lime & Kale Smoothie: The 60-Second Green Elixir That May Flush Toxins, Clear Skin, and Wake Up Tired Kidneys

There are smoothies that taste green, and then there are green elixirs that feel alive. This Parsley, Lime & Kale Smoothie belongs to the second category—a vibrant, electric-green drink that seems to wake up every cell the moment it hits your tongue. Built from humble ingredients but elevated through smart pairing and balanced flavors, this smoothie feels like a morning ritual, a metabolism reset, and a mini spa treatment for your insides. Bursting with chlorophyll, citrus, trace minerals, and hydrating plant compounds, it’s the kind of drink that supports detox pathways, encourages clearer skin, and may help rejuvenate sluggish kidneys—especially when enjoyed regularly. The best part? It takes only 60 seconds to prepare, blending into a silky, refreshing elixir that tastes far better than you expect from such a powerhouse combo.

Below is the complete recipe, crafted to be unique, vibrant, refreshing, and nourishing, with optional add-ins to tailor it to your goals.

 Ingredients (1 large energizing serving)

Green Base

  • 1 packed cup fresh kale (curly or lacinato, ribs removed)

  • ½ bunch fresh parsley (flat-leaf preferred for a softer flavor)

  • 1 small cucumber, chopped (adds hydration + smooth texture)

  • 1 green apple or pear, cored and sliced (natural sweetness + fiber)

Citrus & Detox Boost

  • Juice of 1–2 fresh limes (adjust to your tartness preference)

  • ½ inch fresh ginger root, peeled

  • 2–3 fresh mint leaves (optional but elevates freshness)

Hydration & Smoothness

  • 1 cup cold water or coconut water

  • 3–4 ice cubes

  • 1 tbsp chia seeds or flaxseed (optional for digestion and creaminess)

Optional Functional Add-Ins

  • ½ tsp spirulina or moringa powder – for extra detox minerals

  • 1 tbsp aloe vera gel – for gut support

  • A splash of honey or agave – if you prefer a lightly sweet finish

  • ¼ avocado – for creamier, richer texture

 60-Second Green Elixir — Quick Instructions

  1. Add liquids first to help the blades catch everything: water or coconut water, lime juice.

  2. Layer the greens: kale, parsley, cucumber.

  3. Add apple/pear, ginger, mint, and seeds or add-ins if using.

  4. Toss in the ice cubes.

  5. Blend on high for 60 seconds until completely smooth and vividly green.

  6. Taste and adjust: more lime for brightness, honey for sweetness, or water for thinning.

Pour into a chilled glass and drink immediately while the enzymes are at their peak.

What Makes This Smoothie Feel Like a “Green Elixir”?

This recipe wasn’t created to be another bland, grassy health drink. Instead, it’s a carefully balanced elixir built on five principles:

1. Chlorophyll Saturation for Detox Pathways

Kale and parsley are chlorophyll-dense greens known to support the body’s natural detox processes. They offer a gentle way to flush out toxins while avoiding harsh cleanses.

2. Kidney-Friendly Hydration

Cucumber, parsley, and lime encourage hydration and may support kidney function by promoting better fluid balance.

3. Skin-Brightening Vitamin C

Lime and green apple are loaded with antioxidants that help brighten skin, fight inflammation, and reduce dullness.

4. Ginger for Glow and Digestion

Ginger adds warmth and digestive support—meaning the nutrients in this smoothie don’t just enter your body; they’re used effectively.

5. Clean Energy, No Crash

Instead of stimulants, this elixir delivers minerals and plant enzymes that help wake the body naturally.

 Flavor Notes

This smoothie hits your palate in layers:

  • Bright lime comes first

  • Cooling cucumber and mint sweep in

  • Earthy parsley + kale add depth

  • Apple or pear brings crisp, clean sweetness

  • Ginger leaves a warm, energizing finish

The result is a refreshing, spa-green drink that tastes alive.

 Tips for the Best Texture & Flavor

  • For extra creaminess, blend the greens with water first, then add fruit.

  • If your blender struggles with kale, sub in baby spinach for a smoother texture.

  • Add a few pineapple chunks for a tropical twist without overpowering the greens.

  • Drink on an empty stomach for maximum detox + skin benefits.

 Why You’ll Want to Make This Every Morning

People love this smoothie because it feels like a reset button. Over time, many notice:

  • Smoother, clearer skin

  • Less bloating

  • More morning energy

  • Reduced sugar cravings

  • Better hydration and digestion

  • A general feeling of being “lighter” and more refreshed

It’s simple, honest nourishment—the kind your body immediately recognizes and uses.

Apple Crisp Cheesecake

Apple crisp and cheesecake are two desserts that rarely share the same plate—but when they do, something magical happens. This Apple Crisp Cheesecake blends the creamy decadence of a New York-style cheesecake with the warm, cinnamon-kissed comfort of a rustic apple crisp. It’s a dessert that feels like autumn in every bite, but it’s so irresistible you’ll want it year-round. Smooth, silky filling meets a buttery crumble, while fresh spiced apples add brightness and texture. The result is a perfectly layered masterpiece—familiar, nostalgic, and wonderfully new.

Below is a fully unique, richly detailed recipe crafted to be foolproof and unforgettable.

Ingredients

For the Crust

  • 2 cups graham cracker crumbs

  • 6 tablespoons melted butter

  • 3 tablespoons brown sugar

  • ½ teaspoon cinnamon

  • Pinch of salt

For the Cheesecake Filling

  • 24 oz (3 packages) cream cheese, softened

  • 1 cup granulated sugar

  • ½ cup sour cream

  • 2 teaspoons vanilla extract

  • 3 large eggs (room temperature)

  • 1 tablespoon lemon juice

  • 2 tablespoons all-purpose flour

For the Cinnamon Apple Layer

  • 4 medium apples, peeled & diced (Granny Smith or Honeycrisp work best)

  • 3 tablespoons butter

  • ¼ cup brown sugar

  • 1 teaspoon cinnamon

  • ¼ teaspoon nutmeg

  • 1 teaspoon lemon zest

  • 1 teaspoon cornstarch (optional, for thickening)

For the Crisp Topping

  • ¾ cup rolled oats

  • ½ cup all-purpose flour

  • ½ cup brown sugar

  • ½ teaspoon cinnamon

  • 6 tablespoons cold butter, cubed

  • Pinch of salt

Optional Drizzle

  • Caramel sauce, for serving

Instructions

1. Prepare the Crust

Preheat your oven to 325°F (163°C). Grease a 9-inch springform pan and line the bottom with parchment for easier release.

In a bowl, mix the graham cracker crumbs, melted butter, brown sugar, cinnamon, and salt. Stir until the mixture resembles wet sand. Press the mixture firmly into the bottom of the springform pan, creating an even, compact crust. Bake for 10 minutes, then set aside to cool slightly.

This brief bake ensures the crust holds together beneath the creamy filling and prevents sogginess once the apple layer is added.

2. Make the Cinnamon Apple Layer

In a skillet over medium heat, melt 3 tablespoons of butter. Add the diced apples, brown sugar, cinnamon, nutmeg, and lemon zest. Cook the mixture for 5–7 minutes, stirring occasionally, until the apples soften and release their natural juices.

If the mixture seems too liquidy, sprinkle in the cornstarch to help it thicken. The goal is to achieve tender apples coated in a glossy cinnamon syrup—sweet, fragrant, and not overly wet.

Remove from heat and let the mixture cool while preparing the cheesecake filling.

3. Prepare the Cheesecake Filling

In a large mixing bowl, beat the softened cream cheese until smooth, about 2 minutes. Add the sugar and mix again until fully combined.

Next, blend in the sour cream, vanilla, lemon juice, and flour. Mix until smooth but avoid overbeating to prevent air bubbles from forming.

Add the eggs one at a time, mixing gently after each addition. The batter should be creamy, silky, and pourable.

4. Assemble the Cheesecake

Pour half of the cheesecake filling over the baked crust. Spoon half of the cinnamon apple mixture over the filling, spreading it lightly.

Add the remaining cheesecake batter on top, smoothing the surface. Finally, spoon the rest of the apple mixture across the top—these apples will blend beautifully into the crisp topping.

5. Make the Crisp Topping

In a medium bowl, combine oats, flour, brown sugar, cinnamon, and salt. Add the cold cubed butter and use your fingertips or a pastry cutter to work it in until the mixture forms coarse, buttery crumbs.

Sprinkle this topping evenly over the apple layer.

6. Bake the Cheesecake

Place the springform pan on a baking sheet. Bake at 325°F (163°C) for 60–70 minutes, or until the edges are set but the center jiggles slightly like soft custard.

Once baked, turn off the oven, crack the door open, and let the cheesecake rest inside for 1 hour. This slow cooling prevents cracks and helps the cheesecake firm evenly.

7. Chill & Serve

Remove the cheesecake from the oven and allow it to cool completely at room temperature. Cover and refrigerate for at least 6 hours, preferably overnight.

Before serving, run a warm knife around the edges and release the springform.

Drizzle generously with caramel sauce for a glossy bakery-style finish.

Why This Recipe Works

This Apple Crisp Cheesecake is special because it combines three textures—a buttery crust, velvety cheesecake, and crispy sweet topping—into a single, harmonious bite. The spiced apples offer brightness and warmth, cutting through the richness of the cheesecake. Meanwhile, the oat topping delivers the perfect crunch. Layering each component carefully allows the flavors to stand on their own while still blending together beautifully.

It’s a dessert that feels nostalgic and comforting yet elevated and sophisticated. Whether you’re making it for a holiday dinner, a weekend treat, or a cozy night in, it offers indulgence without complication.

No-Bake German Chocolate Pie

There is something almost magical about German chocolate desserts—the deep cocoa flavor, the buttery caramel undertones of the coconut-pecan topping, and the melt-in-your-mouth richness that makes every bite taste nostalgic and indulgent. This No-Bake German Chocolate Pie captures all the classic flavors you love but delivers them in an easier, cooler, and foolproof format. No oven needed, no stress, and no complicated steps—yet you end up with a show-stopping pie that tastes like you spent hours on it. With layers of silky chocolate filling, a crunchy cookie crust, and a glossy coconut-pecan topping that tastes like it came straight from a bakery, this pie is destined to become a signature dessert at holidays, family dinners, potlucks, or any night you’re craving a slice of comfort.

Why This Recipe is Special

What sets this no-bake version apart is the layered texture experience and the balanced sweetness. Many German chocolate pies can be overwhelmingly sugary. This recipe uses a blend of bittersweet chocolate, a touch of creamy milk chocolate, and a whisper of espresso to deepen the cocoa notes without making the pie bitter or heavy. The filling is stabilized with cream cheese and whipped cream to create a lush, mousse-like texture. The crust is buttery and crisp, and the topping is cooked low and slow to develop that signature caramel flavor without becoming grainy. The final result? A pie that tastes gourmet, feels luxurious, and requires zero baking.

Ingredients

For the Crust

  • 2 cups chocolate graham cracker crumbs (or crushed chocolate digestives)

  • 6 tbsp unsalted butter, melted

  • 2 tbsp granulated sugar

  • Pinch of salt

For the Chocolate Filling

  • 1 cup bittersweet chocolate (60–70%), chopped

  • ½ cup milk chocolate, chopped

  • 2 tbsp cocoa powder

  • ¼ cup granulated sugar

  • ¼ tsp instant espresso powder (optional but recommended)

  • 8 oz cream cheese, softened

  • 1 tsp vanilla extract

  • 1 ½ cups cold heavy whipping cream

For the Coconut-Pecan Topping

  • 1 cup evaporated milk

  • 3 large egg yolks

  • ½ cup granulated sugar

  • ½ cup unsalted butter

  • 1 cup sweetened shredded coconut

  • ¾ cup chopped pecans (toasted for best flavor)

  • 1 tsp vanilla extract

  • Pinch of sea salt

Instructions

1. Prepare the Crust

In a medium bowl, stir together the chocolate crumbs, sugar, and salt. Pour in the melted butter and mix until everything resembles damp sand. Press the mixture firmly into the bottom and sides of a 9-inch pie dish. Use the flat bottom of a measuring cup to compact the crust well—this helps it hold together later. Place the crust in the refrigerator for at least 30 minutes, or freeze for 10 minutes if you’re in a hurry.

2. Make the Chocolate Layer

Place the chopped bittersweet and milk chocolate in a microwave-safe bowl. Heat in 20-second intervals, stirring each time, until fully melted and smooth. Stir in the cocoa powder and espresso powder. Let the mixture cool slightly.

In a large bowl, beat the cream cheese until creamy. Add the sugar and vanilla extract, mixing until smooth. Slowly pour in the warm melted chocolate and blend until fully combined.

In a separate bowl, whip the cold heavy cream until stiff peaks form. Gently fold the whipped cream into the chocolate mixture using a spatula. The mixture should be airy, silky, and mousse-like.

Spread the chocolate filling evenly into the chilled crust. Cover with plastic wrap and refrigerate while you prepare the topping.

3. Cook the Coconut-Pecan Topping

In a medium saucepan, whisk together the evaporated milk, sugar, and egg yolks. Add the butter and cook over medium heat. Stir continuously—slow, patient stirring is the secret to keeping it smooth and thick. After about 8–10 minutes, the mixture will become glossy, thickened, and pudding-like.

Remove from heat and stir in the shredded coconut, toasted pecans, vanilla, and a pinch of sea salt. Let the topping cool to room temperature. Spread the thick, fragrant mixture over the chocolate pie layer.

Final Touches & Serving

Refrigerate the finished pie for at least 4 hours, though overnight is even better. Slice with a warm knife for the cleanest cuts. Serve chilled, with optional whipped cream or chocolate shavings around the edges.

What Makes This Pie Unforgettable

Every bite gives you:

  • Creamy chocolate mousse

  • Crunchy pecans

  • Toasty, caramelized coconut

  • Silky crust with deep chocolate notes

It’s rich but not overwhelming, sweet but balanced, classic but modern—you could easily serve this at a holiday dinner or simply enjoy it on a quiet night with a cup of coffee.

Christmas Jam

Few recipes feel as magical as Christmas Jam—a ruby-red, spiced, sweet-tart spread that tastes like the holiday season in a jar. It’s a festive blend of berries, citrus, warm spices, and just enough sugar to make every spoonful feel like a winter morning. This unique recipe takes classic Christmas Jam and elevates it with fragrant vanilla, orange zest, and a whisper of holiday spice that lingers like carols in the air. Spread it on toast, swirl it into yogurt, or gift it in little jars tied with ribbon—it always brings a smile.

What Makes This Christmas Jam Unique

Most jellies rely on one or two fruits, but this version celebrates winter by blending cranberries and strawberries with orange zest, brown sugar, and holiday spices. Cranberries bring brightness, strawberries add natural sweetness, and the citrus lifts every bite. A touch of vanilla deepens the flavor, while cloves and cinnamon add warm Christmas notes. This jam is cooked slowly to allow the berries to break down and the spices to infuse deeply, creating a luxurious, jewel-like spread.

Ingredients (Makes about 5–6 cups of jam)

Fruit & Flavor

  • 2 cups fresh or frozen cranberries

  • 2 cups fresh or frozen strawberries, hulled

  • 1 large orange (zest + juice)

  • 1 teaspoon vanilla extract

  • 1 teaspoon fresh ginger, grated

  • 1 cinnamon stick (or ½ tsp ground cinnamon)

  • ⅛ teaspoon ground cloves

  • ⅛ teaspoon nutmeg

Sweetener

  • 2 cups granulated sugar

  • ½ cup brown sugar (adds caramel warmth)

Liquid

  • 1 cup water

  • 2 tablespoons lemon juice

Thickener

  • 1 packet (1.75 oz) powdered fruit pectin

How to Make This Unique Christmas Jam

1. Prepare the Fruit

Begin by rinsing your cranberries and strawberries. If you’re using frozen, no need to thaw; they’ll break down beautifully as they heat. Zest the orange first—it carries aromatic oils that will make the jam sing—then squeeze out the juice. The combination of strawberries and cranberries gives the jam its festive balance: sweet, tart, and deeply flavorful.

2. Start the Holiday Base

In a large heavy pot, combine the cranberries, strawberries, orange juice, orange zest, water, lemon juice, cinnamon stick, ginger, cloves, and nutmeg. Bring this mixture to a simmer over medium heat. As it warms, the cranberries will begin to pop, releasing their juices and softening their tart edges. The kitchen will begin to smell like Christmas morning.

3. Add the Sugar & Build Flavor Layers

Once the fruit looks softened, pour in the granulated sugar and brown sugar. Stir continuously so the sugar dissolves evenly and doesn’t scorch on the bottom. Brown sugar is the secret ingredient here—it melts into the fruit and gives a deeper caramel-like warmth that sets this jam apart from traditional recipes.

Simmer the mixture for another 10–12 minutes until thickened and aromatic. This stage is where the spices open fully: cinnamon adds cozy warmth, cloves add holiday depth, and ginger brightens the flavor beautifully.

4. Thicken with Pectin

When the berries are fully softened, remove the cinnamon stick and stir in the powdered pectin. Bring the jam to a full rolling boil—a boil that cannot be stirred down. Let it boil hard for exactly 1 minute. This activates the pectin and ensures your jam will set just right.

Add the vanilla extract right at the end. This keeps its aroma bright and prevents it from cooking away.

5. Check the Consistency

To check if your jam is ready, drop a small spoonful onto a cold plate. Let it sit for 30 seconds; if it wrinkles slightly when pushed, it’s perfect. If not, simmer for 1–2 more minutes.

6. Transfer to Jars

Ladle the hot jam into warm, sterilized jars, leaving ¼-inch headspace. Wipe the rims clean, seal with lids, and either refrigerate immediately (for short-term use) or process in a boiling water bath for 10 minutes for long-term storage.

Tips for a Truly Magical Christmas Jam

 Use Both Sugars

The combo of granulated and brown sugar gives this recipe its unique holiday depth. Don’t Skip the Orange Zest

Zest adds floral citrus oils that make the flavor lively and festive.

Spice Balance Is Key

A little clove and nutmeg go a long way. They add warmth without overpowering the fruit.

 Vanilla = Christmas Cozy Vibes

Stirred in at the end, it adds a soft bakery sweetness.

 Give as Gifts!

Tie jars with ribbon and add a handwritten tag. Homemade Christmas jam is personal, delicious, and never goes to waste.

How to Use Christmas Jam

This jam is surprisingly versatile. Try it:

  • Spread on toast, biscuits, or croissants

  • Swirled into oatmeal or yogurt

  • As a glaze for ham or roasted chicken

  • Between cake layers or inside thumbprint cookies

  • Melted and drizzled over cheesecake or vanilla ice cream

Each use gives a burst of berry-bright, spiced holiday flavor.

Final Thoughts

This unique Christmas Jam is more than a recipe—it’s a little jar of holiday memory. With tart cranberries, sweet strawberries, citrus brightness, and warm winter spices, it captures everything we love about the season. Make it ahead for gatherings, serve it at Christmas breakfast, or wrap it as a thoughtful homemade gift. Every spoonful feels like a hug wrapped in holiday cheer.

Egg Salad Sandwich

When it comes to comfort food, few things evoke nostalgia and satisfaction quite like an egg salad sandwich. Creamy, flavorful, and utterly satisfying, this simple dish has been a lunchtime favorite for generations. But what if we told you there’s a way to elevate this classic to something truly memorable? This unique egg salad sandwich recipe takes the traditional blend of eggs and mayonnaise and adds a few unexpected ingredients to create a burst of flavor and texture you won’t forget. Whether you’re preparing a quick lunch, a picnic spread, or a light dinner, this recipe promises to bring the humble egg salad sandwich to gourmet levels.

Why This Egg Salad Sandwich Stands Out

The secret to an unforgettable egg salad sandwich lies in the balance of texture, flavor, and freshness. Most traditional versions rely heavily on just eggs and mayo, but this recipe layers in tangy pickles, creamy Dijon mustard, a touch of Greek yogurt, and a hint of smoked paprika for depth. The addition of finely chopped herbs and crunchy celery adds brightness and bite, making every mouthful dynamic. To top it off, this sandwich is served on lightly toasted sourdough bread with crisp lettuce, turning a simple dish into a culinary masterpiece.

Ingredients You’ll Need

For the Egg Salad:

  • 6 large eggs

  • 3 tablespoons mayonnaise

  • 1 tablespoon Greek yogurt (for creaminess and tang)

  • 1 teaspoon Dijon mustard

  • 1 teaspoon lemon juice (freshly squeezed)

  • 1 celery stalk, finely diced

  • 1 tablespoon dill pickles, finely chopped

  • 1 tablespoon fresh chives, finely chopped

  • 1 tablespoon fresh parsley, finely chopped

  • 1/4 teaspoon smoked paprika

  • Salt and freshly ground black pepper, to taste

For Assembling the Sandwich:

  • 4 slices of sourdough bread (or your favorite hearty bread)

  • 2 leaves of crisp romaine or butter lettuce

  • 1 small tomato, thinly sliced (optional)

  • 1 tablespoon butter (for toasting the bread)

Step-by-Step Instructions

Step 1: Boil the Eggs Perfectly

Start by placing the eggs in a saucepan and covering them with cold water. Bring the water to a gentle boil over medium heat, then reduce the heat slightly and simmer for 10 minutes. Immediately transfer the eggs to an ice bath to stop the cooking process and make peeling easier. Let them cool for about 5 minutes before peeling.

Cooking Tip: For perfectly yellow yolks without a green ring, don’t overcook the eggs. The ice bath ensures they remain tender and easy to chop.

Step 2: Chop and Prepare the Ingredients

Once the eggs are peeled, chop them into medium-sized pieces—large enough to hold their texture but small enough to mix smoothly with the dressing. Dice your celery, pickles, and herbs finely. The goal is to create a balance of crunch and creaminess.

Step 3: Make the Dressing

In a medium mixing bowl, combine mayonnaise, Greek yogurt, Dijon mustard, lemon juice, and smoked paprika. Whisk them together until smooth and creamy. Season with salt and pepper to taste. The Greek yogurt lightens the traditional richness of mayonnaise, while the mustard and lemon juice add brightness and depth.

Step 4: Combine Everything

Add the chopped eggs, celery, pickles, chives, and parsley to the dressing. Gently fold everything together using a spatula until evenly coated. Avoid overmixing—some chunks of egg should remain visible for a more rustic and satisfying texture.

Taste and adjust seasoning if needed. A pinch of extra salt or a sprinkle of paprika can make all the difference.

Step 5: Toast the Bread

Heat a skillet or griddle over medium heat. Butter one side of each bread slice and place them buttered-side down until golden and crisp. This not only adds flavor but also creates a barrier that prevents the egg salad from soaking into the bread.

Step 6: Assemble the Sandwich

Lay out two slices of toasted bread. On each, place a crisp lettuce leaf—this helps keep the bread from getting soggy. Spoon a generous portion of the egg salad mixture on top, spreading it evenly. Add tomato slices if desired, then top with the remaining slices of bread.

Cut the sandwich diagonally for a classic presentation and serve immediately.

Optional Add-Ins for Extra Flair

If you’re feeling creative, here are some add-ons that can take your egg salad sandwich to the next level:

  • Avocado slices: Add creaminess and healthy fats.

  • Crispy bacon bits: For smoky crunch.

  • A dash of hot sauce: Adds heat and depth.

  • Capers or olives: Introduce a Mediterranean touch.

  • Everything bagel seasoning: Sprinkle on top before closing the sandwich for extra flavor.

Perfect Pairings

This egg salad sandwich pairs wonderfully with:

  • A cup of tomato basil soup

  • Fresh cucumber slices or coleslaw

  • Sweet potato fries

  • A chilled glass of lemonade or iced tea

Whether you’re serving it as a main dish or part of a brunch spread, its creamy, zesty profile makes it versatile and satisfying.

Pro Tips for Success

  1. Use older eggs for boiling. Fresh eggs can be harder to peel, while eggs that are a few days old come off cleanly.

  2. Adjust creaminess to your liking. Add more mayo for a richer texture or more yogurt for a tangy, lighter version.

  3. Keep it chilled. If making ahead, store the egg salad in the refrigerator for up to 3 days in an airtight container.

  4. Customize the bread. Rye, whole grain, or brioche can give unique twists to your sandwich.

Final Thoughts

This unique egg salad sandwich is proof that even the simplest dishes can be transformed into something extraordinary with a few thoughtful touches. The combination of creamy eggs, tangy dressing, fresh herbs, and buttery toasted bread creates a comforting yet elevated flavor experience. It’s a perfect blend of nostalgia and innovation—ideal for picnics, office lunches, or lazy weekend brunches.

When you bite into this sandwich, you’ll taste more than just eggs and mayonnaise; you’ll experience the warmth of tradition reimagined for modern palates. Whether you enjoy it solo or pair it with your favorite sides, this egg salad sandwich is sure to become your go-to recipe for any occasion.

Tangy Sweet Pickled Beets

If you’ve ever wanted to bring a splash of color and a burst of tangy sweetness to your plate, these Pickled Beets are the answer. They’re earthy, sweet, and slightly tart—perfect as a side dish, salad topping, or even straight from the jar. This recipe celebrates the natural beauty of beets, transforming them into something irresistibly flavorful that stays fresh for weeks.

Ingredients

  • 6 medium fresh beets, trimmed and washed

  • 1 cup white vinegar

  • 1 cup apple cider vinegar

  • 1 cup sugar (adjust to taste)

  • 1 teaspoon salt

  • 1 cup water

  • 1 cinnamon stick (optional, for warmth)

  • 4 whole cloves (optional, for subtle spice)

  • 1 small red onion, thinly sliced (for added flavor and color)

Instructions

  1. Boil the Beets:
    Place the cleaned beets in a large pot, cover with water, and bring to a boil. Reduce the heat and simmer for 35–40 minutes or until tender when pierced with a fork. Drain and cool slightly.

  2. Peel and Slice:
    Once cool enough to handle, slip off the skins using your hands or a paper towel. Slice the beets into rounds or wedges—whichever you prefer.

  3. Prepare the Pickling Brine:
    In a medium saucepan, combine both vinegars, sugar, salt, and water. Add the cinnamon stick and cloves if using. Bring to a gentle boil over medium heat, stirring until the sugar dissolves. Simmer for 5 minutes, then remove from heat.

  4. Pack the Jars:
    Layer the sliced beets and red onion in sterilized jars. Pour the hot brine over the top, making sure the beets are completely covered. Remove the spices if you prefer a cleaner flavor.

  5. Seal and Cool:
    Wipe the rims clean, seal tightly with lids, and let the jars cool to room temperature. Refrigerate for at least 24 hours before eating to let the flavors develop. For a deeper, more complex flavor, wait 3–5 days.

Serving Ideas

  • Add to salads for a burst of color and tang.

  • Serve alongside roast meats for contrast.

  • Layer in a sandwich or burger for a gourmet twist.

  • Enjoy as a snack straight from the jar—sweet, earthy, and satisfying.

Tips for Perfection

  • Use gloves when peeling beets to avoid staining your hands.

  • Try golden or striped beets for a fun visual twist.

  • Add a pinch of peppercorns or mustard seeds to the brine for extra depth.

  • Store refrigerated for up to 4–6 weeks.

Why This Recipe Stands Out

This unique pickled beet recipe strikes the perfect balance of sweetness, tang, and spice. The blend of vinegars creates a bright, crisp flavor, while the sugar softens the acidity. The result? A jar full of jewel-toned beets that brighten every bite. Whether you’re elevating your holiday spread or meal prepping for the week, these pickled beets are a delicious, colorful staple you’ll come back to again and again.

Slap Ya Mama Pound Cake

There’s something special about a cake that stops you in your tracks, makes your taste buds dance, and leaves everyone at the table speechless. That’s exactly what the Slap Ya Mama Pound Cake does—it’s that good. This uniquely rich, buttery, and perfectly moist Southern-style pound cake earns its cheeky name because one bite will have you saying, “It’s so good, it’ll make you wanna slap ya mama!” Of course, no mamas are harmed in the making of this cake—but the flavor is undeniably unforgettable. This recipe combines old-fashioned Southern charm with a twist of modern indulgence, giving you a dessert that’s sweet, comforting, and absolutely irresistible.

A Little Southern Soul in Every Bite

The essence of a pound cake lies in its simplicity—traditionally made with a pound each of butter, sugar, eggs, and flour. But this recipe elevates the classic to new heights. What makes this version so unique is the addition of a touch of heavy cream, a hint of vanilla bean paste, and a splash of bourbon or lemon extract (your choice). The result? A dense yet tender crumb with an aroma that fills the house with warmth and nostalgia. The outside develops a golden, crisp crust that crackles slightly when sliced, revealing a soft, velvety interior that practically melts in your mouth.

This isn’t just a cake—it’s an experience. Whether you serve it for Sunday supper, a family gathering, or just because you need a little sweetness in your life, this cake always delivers.

Ingredients

For the Pound Cake:

  • 3 cups all-purpose flour (sifted)

  • 1 teaspoon baking powder

  • ½ teaspoon salt

  • 1 cup unsalted butter (softened to room temperature)

  • ½ cup shortening (for extra richness and moisture)

  • 3 cups granulated sugar

  • 6 large eggs (room temperature)

  • 1 cup heavy cream

  • 1 tablespoon vanilla bean paste (or pure vanilla extract)

  • 1 teaspoon lemon extract or bourbon (optional, but highly recommended)

For the Glaze:

  • 1 cup powdered sugar

  • 2–3 tablespoons milk or heavy cream

  • ½ teaspoon vanilla extract

  • A pinch of salt

Directions

  1. Preheat and Prepare:
    Preheat your oven to 325°F (160°C). Grease and flour a large Bundt or tube pan generously, making sure every crevice is coated to ensure a smooth release after baking.

  2. Mix the Dry Ingredients:
    In a medium bowl, sift together the flour, baking powder, and salt. Sifting is key—it aerates the flour and ensures your cake stays light, not dense.

  3. Cream the Butter and Sugar:
    In a large mixing bowl, beat the butter and shortening together on medium speed until creamy and pale—about 3 minutes. Gradually add the sugar, one cup at a time, and continue to beat for another 4–5 minutes until the mixture is fluffy and light. This step creates the foundation for the cake’s signature texture.

  4. Add the Eggs:
    Beat in the eggs one at a time, ensuring each is fully incorporated before adding the next. Scrape down the sides of the bowl often to make sure everything mixes evenly.

  5. Blend in the Flavor:
    Add the vanilla bean paste and your choice of lemon extract or bourbon. These flavors build the cake’s signature Southern kick—sweet, aromatic, and a little bold.

  6. Incorporate the Dry Ingredients and Cream:
    Reduce your mixer speed to low. Alternate adding the flour mixture and heavy cream, beginning and ending with flour. Mix only until just combined—overmixing can toughen your cake.

  7. Bake to Perfection:
    Pour the batter into the prepared pan, smoothing the top with a spatula. Bake for 75–85 minutes, or until a toothpick inserted into the center comes out clean. The top should be golden brown and slightly cracked—an irresistible sign that the inside is buttery perfection.

  8. Cool and Glaze:
    Allow the cake to cool in the pan for 15 minutes before turning it onto a wire rack. While it cools, whisk together the glaze ingredients until smooth. Drizzle over the warm cake so it seeps slightly into the crust.

Serving Suggestions

The Slap Ya Mama Pound Cake stands beautifully on its own, but you can take it to the next level by serving it with:

  • A dollop of homemade whipped cream and fresh berries.

  • A scoop of vanilla ice cream with a drizzle of caramel.

  • Lightly toasted and buttered for breakfast with coffee.

  • Or, Southern-style—with a side of sweet tea on a sunny afternoon.

This cake keeps beautifully for up to five days at room temperature (covered tightly) or can be frozen for up to three months.

Chef’s Tips for the Perfect Pound Cake

  1. Room Temperature Ingredients: Make sure butter, eggs, and cream are at room temp. This ensures a smooth, even batter.

  2. Don’t Overmix: Mix only until ingredients are incorporated—overmixing creates a dense cake.

  3. Cool Slowly: Letting the cake cool gradually prevents it from collapsing or becoming gummy.

  4. Use Quality Extracts: Real vanilla bean paste or pure extracts make a world of difference in flavor.

  5. Experiment with Add-ins: Try folding in a handful of toasted pecans or swirling in a ribbon of cream cheese filling for a twist.