The Incredible Benefits of Dates: A Nutrient-Packed Superfood

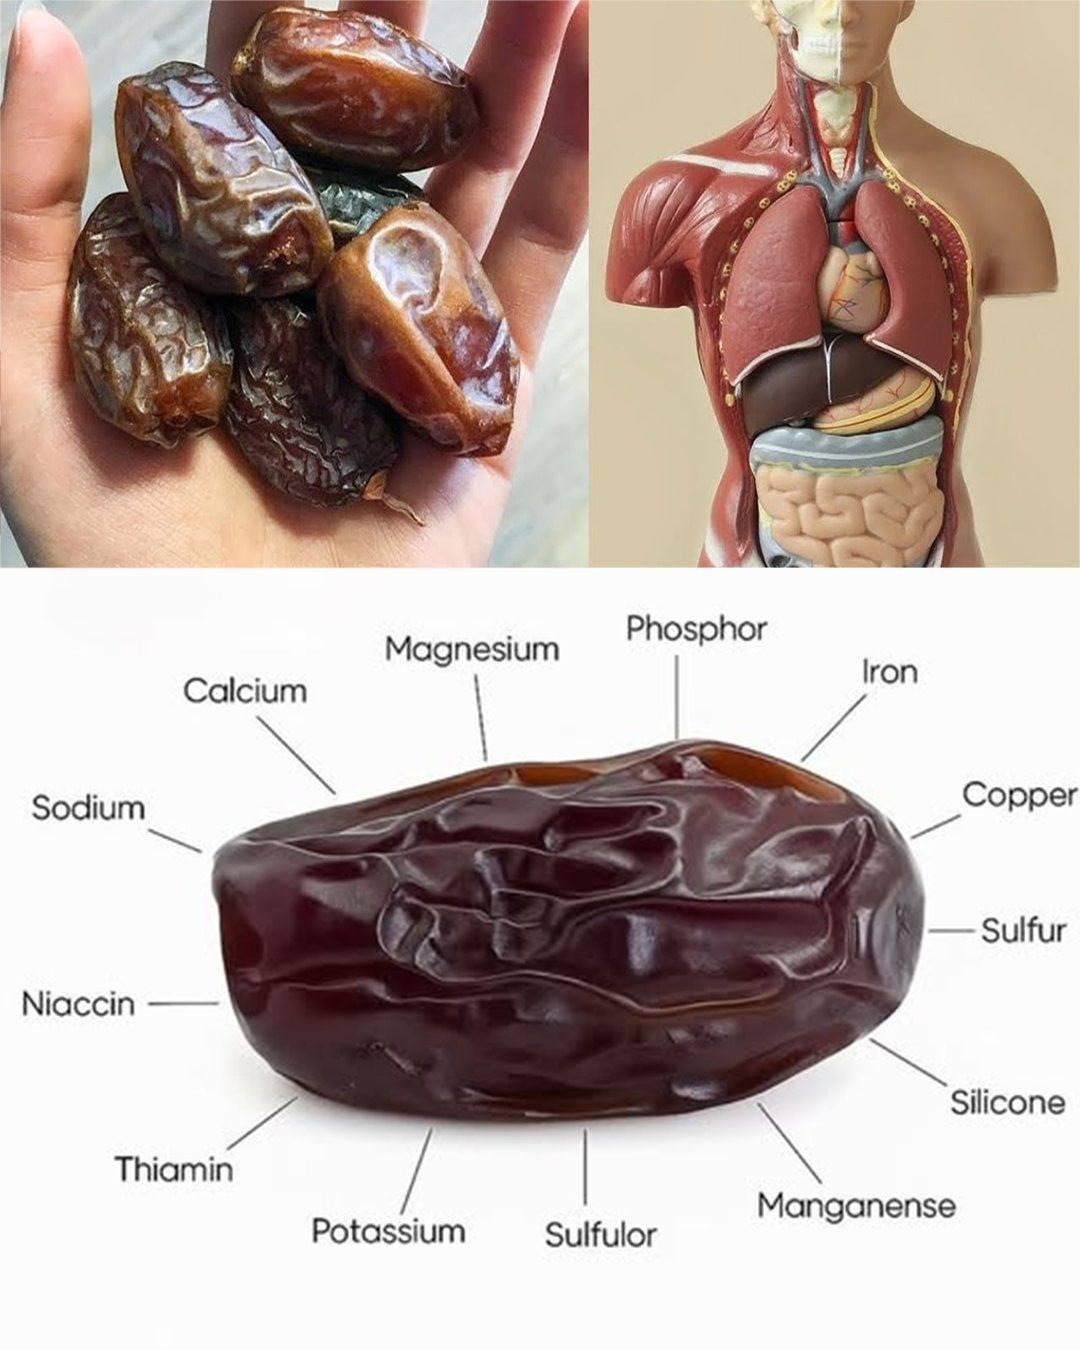
Dates have been cherished for thousands of years, not only for their naturally sweet taste but also for their remarkable nutritional value. Often referred to as “nature’s candy,” dates are far more than a sweet snack. These small, wrinkled fruits are packed with essential vitamins, minerals, antioxidants, and natural energy, making them one of the most powerful superfoods you can add to your daily diet.

What Makes Dates a Superfood?

Dates come from the date palm tree and are widely consumed in Middle Eastern, African, and South Asian cultures. Despite their sweetness, dates are 100% natural and free from added sugars. Their impressive nutrient profile includes fiber, potassium, magnesium, iron, vitamin B6, and powerful plant compounds that support overall health.

Unlike refined sugar, dates provide slow-releasing energy that fuels the body without causing sudden blood sugar crashes. This makes them ideal for people of all ages, from children to older adults.

Rich Source of Natural Energy

One of the most well-known benefits of dates is their ability to boost energy naturally. Dates are high in natural sugars such as glucose, fructose, and sucrose, which are easily digested and quickly converted into energy. This makes them an excellent snack before workouts, during long workdays, or when you feel fatigued.

Unlike energy drinks or sugary snacks, dates provide sustained energy without artificial ingredients, making them a healthier and more reliable option.

Supports Digestive Health

Dates are exceptionally rich in dietary fiber, which plays a crucial role in maintaining a healthy digestive system. Regular consumption of dates helps prevent constipation, promotes regular bowel movements, and supports gut health.

Fiber also feeds beneficial gut bacteria, improving digestion and reducing bloating. Eating dates in the morning or soaking them overnight can further enhance their digestive benefits.

Strengthens Heart Health

Heart health is another area where dates truly shine. They are rich in potassium and magnesium, two minerals essential for regulating blood pressure and maintaining healthy heart rhythms. Regular intake of dates may help lower bad cholesterol (LDL) while supporting good cholesterol (HDL).

Additionally, the antioxidants found in dates help reduce inflammation and oxidative stress, both of which are linked to heart disease.

Improves Brain Function

Dates contain compounds that support brain health and cognitive function. Studies suggest that dates may help reduce inflammation in the brain and lower the risk of neurodegenerative diseases. Vitamin B6 in dates plays a role in improving mood, memory, and concentration.

Including dates in your diet can support mental clarity and help fight mental fatigue, especially during stressful days.

Boosts Bone Strength

Dates provide important minerals such as calcium, phosphorus, magnesium, and potassium, all of which are essential for strong bones. Regular consumption can help prevent bone-related conditions like osteoporosis, especially in older adults.

Their mineral density makes dates an excellent addition to the diets of growing children and aging individuals alike.

Supports Healthy Pregnancy

Dates have long been recommended for pregnant women, particularly in the later stages of pregnancy. They may help support natural labor by promoting cervical dilation and reducing the need for medical intervention.

Dates also provide iron, which helps prevent anemia, a common concern during pregnancy. Their natural sugars help combat fatigue and provide much-needed energy.

Natural Immune Booster

Dates are rich in antioxidants such as flavonoids, carotenoids, and phenolic acid. These compounds help fight free radicals, strengthen the immune system, and reduce the risk of chronic diseases.

Regular consumption of dates can help the body defend itself against infections while supporting overall wellness.

Simple Daily Dates Recipe for Maximum Benefits

Ingredients:

  • 3–5 dates (preferably Medjool or Ajwa)

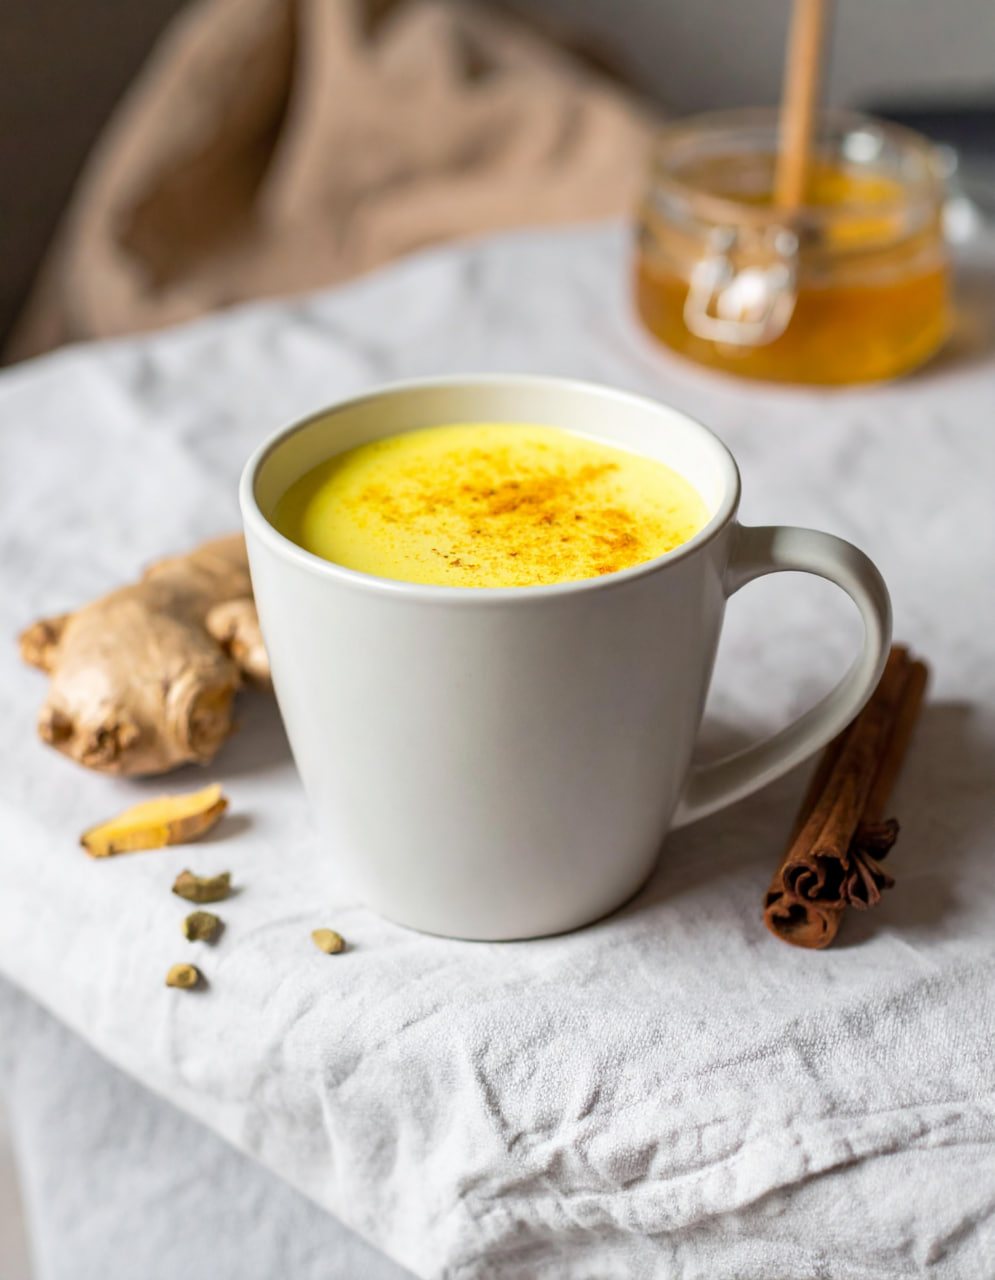
  • 1 cup warm milk or warm water

  • Optional: a pinch of cinnamon or cardamom

Instructions:

  1. Pit the dates and soak them overnight in warm water or milk.

  2. In the morning, consume the soaked dates along with the liquid.

  3. For extra flavor and health benefits, add a pinch of cinnamon or cardamom.

How to Use:

  • Eat daily on an empty stomach for digestion and energy

  • Ideal as a morning tonic or pre-workout snack

  • Can also be blended into smoothies or chopped into oatmeal

Final Thoughts

Dates are truly one of nature’s most complete foods. From boosting energy and digestion to supporting heart, brain, and bone health, their benefits are both wide-ranging and scientifically supported. Easy to store, naturally sweet, and incredibly versatile, dates deserve a regular place in your diet.

Water Retention (Edema): Causes, Symptoms, Prevention, and Natural Treatments

Water retention, medically known as edema, occurs when excess fluid builds up in the body’s tissues. It can affect the feet, ankles, legs, hands, abdomen, or even the face, often causing swelling, discomfort, and a heavy feeling. While edema is sometimes harmless and temporary, persistent or severe swelling may signal an underlying health issue. Understanding its causes, recognizing symptoms early, and using safe, natural strategies can help manage and prevent fluid retention effectively.

What Causes Water Retention (Edema)?

Edema develops when fluid leaks from tiny blood vessels (capillaries) into surrounding tissues or when the body retains more sodium and water than it should. Common causes include:

1. Excess Salt Intake

Sodium helps regulate fluid balance, but too much salt causes the body to hold onto water. Processed foods, fast food, and salty snacks are major contributors.

2. Hormonal Changes

Hormonal fluctuations—especially during pregnancy, menstruation, or menopause—can trigger water retention. Estrogen and progesterone shifts affect how the kidneys handle fluids.

3. Prolonged Sitting or Standing

Long periods of immobility (such as long flights or desk work) allow fluid to pool in the lower legs and feet due to gravity.

4. Dehydration

Ironically, not drinking enough water can cause the body to conserve fluids, leading to swelling.

5. Medical Conditions

Chronic edema may be linked to heart disease, kidney or liver problems, thyroid disorders, venous insufficiency, or lymphatic system issues.

6. Medications

Some blood pressure drugs, corticosteroids, NSAIDs, and hormonal medications can promote fluid retention.

Common Symptoms of Edema

Symptoms can vary depending on the cause and severity, but typical signs include:

  • Swelling in the feet, ankles, legs, hands, or face

  • Tight, shiny, or stretched skin

  • Puffiness that leaves a dent when pressed (pitting edema)

  • Stiff joints or reduced flexibility

  • A feeling of heaviness or discomfort

  • Rapid weight gain due to fluid buildup

If swelling is sudden, painful, affects only one limb, or is accompanied by shortness of breath or chest pain, medical attention is essential.

How to Prevent Water Retention

Prevention focuses on supporting healthy circulation, kidney function, and fluid balance.

1. Reduce Sodium Intake

Limit processed foods and cook more meals at home. Use herbs, garlic, lemon, and spices for flavor instead of salt.

2. Stay Hydrated

Drinking enough water helps flush excess sodium and prevents the body from storing fluids defensively.

3. Move Regularly

Simple movements—walking, stretching, or ankle rotations—improve circulation and reduce fluid pooling, especially if you sit for long periods.

4. Elevate Your Legs

Raising your legs above heart level for 15–30 minutes a day helps excess fluid return to circulation.

5. Maintain a Balanced Diet

Foods rich in potassium, magnesium, and protein support fluid regulation and reduce swelling.

Natural Treatments for Water Retention (UNIE Approach)

Natural remedies can help mild to moderate edema when combined with healthy lifestyle habits. These approaches are supportive, not substitutes for medical care.

1. Potassium-Rich Foods

Potassium counteracts sodium and helps balance fluids. Include bananas, avocados, sweet potatoes, spinach, tomatoes, and coconut water.

2. Magnesium Support

Low magnesium levels can worsen fluid retention, particularly around the menstrual cycle. Leafy greens, nuts, seeds, whole grains, and dark chocolate are excellent sources.

3. Herbal Teas

Certain herbs act as gentle natural diuretics:

  • Dandelion tea supports kidney function

  • Parsley tea helps flush excess fluid

  • Green tea improves circulation and reduces inflammation

Drink in moderation and avoid if you have kidney issues unless advised by a professional.

4. Anti-Inflammatory Foods

Chronic inflammation can worsen edema. Focus on turmeric, ginger, berries, olive oil, fatty fish, and leafy greens to calm inflammation and support circulation.

5. Epsom Salt Soaks

Soaking feet or the whole body in warm water with Epsom salt may reduce swelling and relax tissues by allowing magnesium absorption through the skin.

6. Compression and Massage

Gentle massage toward the heart and the use of compression socks can improve lymphatic drainage and reduce lower-leg swelling.

7. Adequate Protein Intake

Low protein levels can cause fluid to leak into tissues. Ensure adequate protein from eggs, fish, poultry, legumes, or dairy to maintain proper fluid balance.

When to Seek Medical Advice

While occasional swelling is common, consult a healthcare provider if:

  • Edema is persistent or worsening

  • Swelling is sudden or severe

  • One leg is significantly more swollen than the other

  • You experience shortness of breath, chest pain, or skin discoloration

These may indicate serious conditions requiring medical treatment.

Final Thoughts

Water retention (edema) is often manageable with mindful lifestyle choices, balanced nutrition, and natural supportive remedies. By reducing salt, staying hydrated, moving your body, and using gentle natural treatments, many people can ease swelling and discomfort. However, persistent or unexplained edema should never be ignored. Listening to your body and addressing the root cause is the key to long-term relief and overall health.

Home Teeth Whitening: Get Whiter Teeth in Just 2 Minutes

A bright, white smile can instantly boost confidence, yet professional teeth whitening treatments are often expensive and time-consuming. The good news? With the right safe, gentle home method, you can noticeably brighten your teeth in just 2 minutes—without damaging enamel or irritating your gums. This unique, easy recipe focuses on surface stain removal, which is where most discoloration comes from.

Before we begin, it’s important to understand one thing: no home method can permanently bleach teeth in minutes like professional treatments. However, you can remove surface stains and restore your teeth’s natural brightness quickly and safely.

Why Teeth Lose Their Whiteness

Teeth discoloration usually happens for a few common reasons:

  • Coffee, tea, cola, and red wine stains

  • Smoking or chewing tobacco

  • Poor oral hygiene

  • Pigmented foods like curry, berries, and soy sauce

  • Natural aging (enamel thins over time)

Most yellowing you see daily is surface staining, which responds well to gentle cleaning and polishing—exactly what this method targets.

The 2-Minute Home Teeth Whitening Recipe (Safe & Gentle)

Ingredients (Simple & Affordable)

  • ½ teaspoon baking soda

  • A few drops of water (or toothpaste if preferred)

  • Soft-bristled toothbrush

Optional: Add 1 drop of food-grade coconut oil for added smoothness and gum comfort.

How to Use (Exactly 2 Minutes)

  1. Mix the Paste
    Combine baking soda with a few drops of water to create a smooth, non-gritty paste.

  2. Apply Gently
    Dip your toothbrush into the mixture.

  3. Brush Lightly (2 Minutes Only)
    Use small, circular motions. Do not scrub hard—gentle pressure is key.

  4. Rinse Thoroughly
    Rinse your mouth well with water.

  5. Finish with Regular Toothpaste
    This removes residue and strengthens enamel with fluoride.

Why This Works So Fast

Baking soda is a mild abrasive with a natural ability to:

  • Lift surface stains

  • Neutralize acids in the mouth

  • Balance oral pH

  • Leave teeth looking visibly brighter

It does not bleach teeth, which makes it safer than harsh chemical methods when used correctly.

What Results Can You Expect?

After just one use, many people notice:

  • Teeth look cleaner and brighter

  • Yellow film from coffee or tea is reduced

  • Smile appears fresher and more polished

With 1–2 uses per week, results become more consistent and noticeable.

What NOT to Do (Very Important)

Avoid these common whitening mistakes that damage enamel:

  • ❌ Lemon juice or vinegar (acid erodes enamel)

  • ❌ Charcoal used daily (too abrasive)

  • ❌ Hydrogen peroxide without guidance

  • ❌ Scrubbing hard or whitening too often

Whitening should never hurt. Sensitivity is a sign you’re overdoing it.

How Often Is It Safe?

  • Maximum: 2 times per week

  • Ideal: Once weekly

  • Sensitive teeth: Once every 10–14 days

Daily use is not recommended.

Extra Tips to Keep Teeth White Longer

  • Rinse your mouth after coffee or tea

  • Drink staining beverages with a straw

  • Brush 30 minutes after meals (not immediately after acidic foods)

  • Use a fluoride toothpaste daily

  • Stay hydrated to prevent plaque buildup

Foods That Naturally Help Whitening

  • Apples and pears (gentle scrubbing effect)

  • Crunchy vegetables like carrots and celery

  • Cheese and yogurt (support enamel)

  • Water (flushes staining particles)

Who Should Avoid Home Whitening?

Consult a dentist before whitening if you have:

  • Cavities

  • Gum disease

  • Dental crowns or veneers (they don’t whiten)

  • Severe tooth sensitivity

Final Thoughts

This 2-minute home teeth whitening recipe is not a miracle bleach—but it is a safe, effective way to restore your teeth’s natural brightness quickly. When used properly, it removes surface stains, freshens your smile, and helps you look more confident without risking long-term damage.

Exploring the Vaseline and Cornstarch Beauty Hack

In the world of beauty and skincare, some of the most effective remedies don’t come from expensive bottles or complicated routines. Instead, they’re found right in your kitchen or bathroom cabinet. One such trending home remedy is the Vaseline and cornstarch beauty hack—a surprisingly simple combination that many people swear by for smoother, softer, and more youthful-looking skin. This unique recipe has gained attention for its affordability, versatility, and ease of use.

Let’s explore how this beauty hack works, why people love it, and how you can safely try it at home.

What Is the Vaseline and Cornstarch Beauty Hack?

This beauty hack combines petroleum jelly (Vaseline) with cornstarch to create a smooth, lightweight cream or mask. Vaseline is known for its powerful moisturizing and skin-protective properties, while cornstarch is often used to absorb excess oil and create a soft, matte finish.

When blended together, these two ingredients form a balanced skincare treatment that can help improve the look and feel of your skin—especially if you struggle with dryness, rough texture, or dullness.

Why This Combination Works

Vaseline (Petroleum Jelly)
Vaseline acts as an occlusive moisturizer. It doesn’t add water to the skin, but it locks in existing moisture, preventing dryness and helping the skin barrier repair itself. This makes it excellent for softening rough patches, smoothing fine lines caused by dehydration, and protecting the skin from environmental stress.

Cornstarch
Cornstarch is lightweight, soothing, and oil-absorbing. It helps reduce greasiness, making Vaseline more comfortable to use on the face. Cornstarch also gives the mixture a silky texture, leaving the skin feeling smooth rather than sticky.

Together, they create a DIY skincare blend that moisturizes deeply without feeling heavy.

The Unique Vaseline and Cornstarch Beauty Recipe

Ingredients:

  • 1 tablespoon Vaseline (petroleum jelly)

  • 1 teaspoon cornstarch

  • Optional: 2–3 drops vitamin E oil or rose water (for added benefits)

Instructions:

  1. Place the Vaseline in a clean bowl.

  2. Add the cornstarch gradually.

  3. Mix well using a spoon or spatula until you get a smooth, creamy consistency.

  4. If desired, add vitamin E oil or rose water and mix again.

  5. Your DIY beauty cream is ready to use.

How to Use This Beauty Hack

As a Night Cream
Apply a thin layer to clean skin before bed. Gently massage in circular motions. This helps lock in moisture overnight and leaves your skin soft by morning.

As a Face Mask
Apply a slightly thicker layer to your face, avoiding the eye area. Leave it on for 15–20 minutes, then wipe off gently with a warm, damp cloth.

For Dry Hands, Feet, and Elbows
This mixture works wonders on rough areas. Apply generously, cover with cotton gloves or socks, and leave on overnight.

As a Makeup Smoother
Use a very small amount to smooth dry patches before applying makeup. Cornstarch helps reduce shine while Vaseline prevents flakiness.

Potential Beauty Benefits

  • Deeply moisturizes dry skin

  • Softens rough texture and cracked areas

  • Helps skin look smoother and more even

  • Reduces the appearance of dryness-related fine lines

  • Leaves a soft, velvety finish

  • Budget-friendly and easy to make

This hack is especially popular during colder months when skin tends to lose moisture quickly.

Who Should Try It?

This recipe is best suited for:

  • Dry or combination skin

  • People dealing with flaky or rough patches

  • Anyone looking for an affordable skincare alternative

If you have very oily or acne-prone skin, use sparingly and do a patch test first, as Vaseline can feel heavy for some skin types.

Safety Tips and Precautions

  • Always perform a patch test before applying to your face.

  • Use clean tools and containers to avoid contamination.

  • Apply a thin layer—more is not always better.

  • Avoid using on broken or irritated skin.

  • Wash your face thoroughly before and after use.

Why This Hack Is So Popular

The Vaseline and cornstarch beauty hack stands out because it proves that skincare doesn’t have to be complicated or expensive. With just two simple ingredients, you can create a versatile product that rivals many store-bought creams. It’s customizable, easy to store, and takes less than five minutes to prepare.

Final Thoughts

Exploring the Vaseline and cornstarch beauty hack is a great way to reconnect with simple, traditional skincare practices. This unique recipe offers hydration, softness, and comfort using ingredients you likely already have at home. While it’s not a miracle cure, consistent and mindful use can help improve your skin’s appearance and texture over time.

The Ultimate Air Fryer Cheese Toast

There are few comfort foods as universally loved as cheese toast. It’s simple, nostalgic, and endlessly satisfying. But when you make it in an air fryer, something magical happens: the bread becomes perfectly crisp, the cheese melts evenly with golden bubbles on top, and the whole process takes just minutes. This ultimate air fryer cheese toast recipe elevates a humble classic into a quick gourmet treat you’ll want to make again and again.

Whether you need a fast breakfast, a cozy snack, or a side to pair with soup or salad, this recipe delivers maximum flavor with minimal effort. No oven preheating, no greasy pans—just crunchy edges, a soft center, and gooey cheese in every bite.

Why Air Fryer Cheese Toast Is a Game-Changer

The air fryer circulates hot air rapidly, which creates a texture that’s hard to achieve with a toaster or stovetop. Traditional toast can dry out or burn before the cheese melts, but the air fryer balances heat and airflow perfectly. The result is toast that’s crispy on the outside, tender inside, and topped with beautifully melted cheese that lightly browns without turning rubbery.

Another bonus? Speed. From start to finish, this recipe takes less than 10 minutes, making it ideal for busy mornings or late-night cravings.

Ingredients (Simple but Powerful)

  • 2 slices of bread (white, sourdough, whole wheat, or brioche)

  • 2 tablespoons softened butter or mayonnaise

  • ½ cup shredded cheese (cheddar, mozzarella, or a blend)

  • 1 tablespoon grated Parmesan (optional, for extra flavor)

  • ½ teaspoon garlic powder (optional)

  • ¼ teaspoon black pepper

  • A pinch of salt (only if your cheese isn’t salty)

  • Optional toppings: chili flakes, dried oregano, fresh herbs

Why mayonnaise instead of butter?
Mayonnaise spreads more easily and creates an ultra-golden, crispy base thanks to its oil and egg content. Butter gives a classic flavor. Both work beautifully—choose your favorite.

Step-by-Step Instructions

  1. Preheat the Air Fryer
    Set your air fryer to 180°C (350°F) and preheat for 2–3 minutes. This ensures even cooking and a crisp result.

  2. Prepare the Bread
    Lay the bread slices on a cutting board. Spread butter or mayonnaise evenly over one side of each slice. Make sure to reach the edges—this is key for even browning.

  3. Season Lightly
    Sprinkle garlic powder, black pepper, and a tiny pinch of salt over the buttered side. This subtle seasoning enhances the cheese without overpowering it.

  4. Add the Cheese
    Generously cover the bread with shredded cheese. Don’t press it down—letting it sit loosely helps it melt evenly. If using Parmesan, sprinkle it on top for a savory, nutty finish.

  5. Air Fry to Perfection
    Place the slices cheese-side up in the air fryer basket. Cook for 4–6 minutes, checking at the 4-minute mark. The toast is ready when the cheese is fully melted and lightly golden, and the bread is crisp underneath.

  6. Final Touches
    Remove carefully using tongs. Add optional chili flakes, herbs, or oregano while the cheese is still hot.

Pro Tips for the Best Cheese Toast

  • Choose the Right Cheese: Cheddar gives bold flavor, mozzarella offers gooey stretch, and a mix creates the best of both worlds.

  • Avoid Overcrowding: Cook in a single layer so air circulates properly.

  • Watch Closely: Air fryers vary—keep an eye on your toast the first time.

  • For Extra Crunch: Lightly toast the bread for 1 minute before adding cheese, then add toppings and finish cooking.

Delicious Variations to Try

  • Garlic Cheese Toast: Add fresh minced garlic or garlic butter before air frying.

  • Spicy Cheese Toast: Mix chili flakes or a dash of hot sauce into the cheese.

  • Herb & Cheese Toast: Sprinkle dried basil, thyme, or Italian seasoning.

  • Cheese & Tomato Toast: Add thin tomato slices under the cheese for a pizza-style twist.

  • Cheese Toast with Egg: Top with a soft-fried or poached egg after cooking.

What to Serve with Cheese Toast

This air fryer cheese toast pairs beautifully with:

  • Tomato soup or creamy vegetable soup

  • Fresh green salad with a tangy dressing

  • Scrambled eggs for breakfast

  • A warm cup of tea or coffee for a cozy snack

Final Thoughts

The ultimate air fryer cheese toast proves that simple ingredients can create extraordinary results when cooked the right way. Crispy, cheesy, and endlessly customizable, it’s a recipe that fits any time of day and any mood. Once you try it in the air fryer, you may never go back to the oven or toaster again.

Sizzling Chinese Pepper Steak with Onions

Few dishes capture the bold, irresistible aroma of Chinese takeout quite like Chinese Pepper Steak with Onions. The moment thin slices of beef hit a hot pan, sizzling alongside crisp bell peppers and sweet onions, the kitchen fills with a savory fragrance that instantly awakens the appetite. This classic stir-fry is loved for its tender beef, glossy sauce, and perfect balance of salty, sweet, and peppery flavors. Best of all, it’s surprisingly easy to make at home—faster than ordering takeout and far more satisfying.

This recipe delivers restaurant-quality results using simple ingredients and a smart cooking technique that keeps the beef juicy and the vegetables crisp. Whether served over steamed rice or noodles, this sizzling pepper steak is guaranteed to become a regular favorite.

Why This Pepper Steak Recipe Works

The secret to exceptional Chinese pepper steak lies in marinating the beef properly and cooking over high heat. A short marinade tenderizes the meat and infuses flavor, while quick stir-frying locks in moisture. Using fresh bell peppers and onions adds sweetness and crunch that perfectly contrast the savory sauce.

Unlike heavy, overly salty versions, this recipe creates a well-balanced sauce that lightly coats every bite without overpowering the dish.

Ingredients

For the Beef Marinade

  • 1 lb flank steak or sirloin, thinly sliced against the grain

  • 1 tablespoon soy sauce

  • 1 tablespoon cornstarch

  • 1 teaspoon sesame oil

  • 1 teaspoon minced garlic

  • ½ teaspoon freshly ground black pepper

For the Stir-Fry

  • 2 tablespoons vegetable oil (divided)

  • 1 large onion, sliced

  • 1 green bell pepper, sliced

  • 1 red bell pepper, sliced

For the Sauce

  • ½ cup beef broth

  • 2 tablespoons soy sauce

  • 1 tablespoon oyster sauce

  • 1 teaspoon sugar

  • 1 teaspoon cornstarch

  • ½ teaspoon black pepper (adjust to taste)

Step-by-Step Instructions

1. Marinate the Beef
Place the sliced beef in a bowl and add soy sauce, cornstarch, sesame oil, garlic, and black pepper. Mix well until every piece is coated. Let it marinate for at least 20 minutes. This step is essential for tender, flavorful beef.

2. Prepare the Sauce
In a small bowl, whisk together beef broth, soy sauce, oyster sauce, sugar, cornstarch, and black pepper. Set aside so it’s ready to use immediately during cooking.

3. Heat the Pan
Heat a large wok or heavy skillet over high heat until very hot. Add 1 tablespoon of oil and swirl to coat the pan.

4. Sear the Beef
Add the marinated beef in a single layer. Let it sear undisturbed for about 1 minute, then stir-fry for another 1–2 minutes until just browned. Remove the beef from the pan and set aside. Do not overcook.

5. Cook the Vegetables
Add the remaining tablespoon of oil to the pan. Toss in the onions and bell peppers. Stir-fry for 2–3 minutes until slightly tender but still crisp.

6. Combine and Sizzle
Return the beef to the pan with the vegetables. Pour in the prepared sauce and stir quickly. The sauce will thicken almost immediately, coating the beef and vegetables in a glossy sheen.

7. Finish and Serve
Cook for another 30–60 seconds, then remove from heat. Serve hot over steamed rice or noodles.

Tips for the Best Pepper Steak

  • Slice against the grain: This shortens muscle fibers and keeps the beef tender.

  • Use high heat: Stir-frying works best when everything cooks quickly.

  • Don’t overcrowd the pan: Cook in batches if necessary to avoid steaming the meat.

  • Fresh black pepper matters: It’s the signature flavor of this dish—use freshly ground pepper for the best taste.

Variations and Add-Ins

  • Spicy version: Add crushed red pepper flakes or sliced chili peppers.

  • Extra savory: A splash of dark soy sauce deepens color and flavor.

  • Vegetable boost: Mushrooms or snow peas make excellent additions.

  • Low-carb option: Serve over cauliflower rice or enjoy on its own.

Why You’ll Love This Dish

Sizzling Chinese Pepper Steak with Onions is the perfect combination of comfort food and quick cooking. It’s hearty enough for dinner, impressive enough for guests, and simple enough for busy weeknights. The tender beef, crisp vegetables, and bold peppery sauce deliver a satisfying meal that rivals any restaurant version.

This Vitamin Keeps Your Legs and Feet Healthy

Strong, pain-free legs and healthy feet are something many of us take for granted—until discomfort, numbness, swelling, or weakness begins to interfere with daily life. While exercise, proper footwear, and circulation all play vital roles, one often-overlooked factor is nutrition. In particular, Vitamin B12 stands out as a key nutrient that helps keep your legs and feet functioning at their best.

Why Leg and Foot Health Matters

Your legs and feet support your entire body weight, enable movement, and rely on a complex network of nerves, muscles, and blood vessels. When any part of this system is compromised, symptoms often appear first in the lower extremities. Tingling, burning sensations, cramps, cold feet, or unexplained fatigue in the legs can sometimes signal a nutritional imbalance rather than just aging or overuse.

The Power of Vitamin B12

Vitamin B12, also known as cobalamin, is essential for nerve health, red blood cell production, and DNA synthesis. Its role in maintaining the nervous system makes it especially important for the legs and feet, where nerve endings are dense and sensitive.

One of the most common signs of B12 deficiency is peripheral neuropathy—a condition marked by numbness, tingling, or pain in the hands and feet. Without adequate B12, the protective myelin sheath around nerves can deteriorate, leading to faulty nerve signaling. This is why people low in B12 often report “pins and needles” sensations or weakness in their legs.

How Vitamin B12 Supports Circulation

Healthy legs and feet depend on good blood flow. Vitamin B12 contributes to circulation by helping the body produce healthy red blood cells. When B12 levels are low, red blood cells can become large and inefficient, reducing oxygen delivery to tissues. This may lead to symptoms such as leg fatigue, heaviness, or cramping—especially during walking or standing for long periods.

By supporting efficient oxygen transport, Vitamin B12 helps muscles in the legs work smoothly and recover faster after activity.

Signs You May Be Low in Vitamin B12

Vitamin B12 deficiency is more common than many people realize, particularly among older adults, vegetarians, vegans, and individuals with digestive issues. Some warning signs related to legs and feet include:

  • Numbness or tingling in feet or toes

  • Burning or shooting pain in the legs

  • Muscle weakness or balance problems

  • Cold feet or poor circulation

  • Fatigue when walking short distances

If these symptoms persist, it’s important to consult a healthcare professional for proper testing and guidance.

Natural Sources of Vitamin B12

Vitamin B12 is primarily found in animal-based foods. Including these regularly in your diet can help maintain healthy levels:

  • Eggs

  • Milk, yogurt, and cheese

  • Fish such as salmon, tuna, and sardines

  • Poultry and lean meats

For those who follow a plant-based diet, fortified foods like breakfast cereals, nutritional yeast, and plant-based milks can provide B12, though supplementation is often recommended under medical guidance.

A Simple B12-Boosting Daily Drink (Food-Based Idea)

While supplements are commonly used, pairing B12-rich foods with supportive nutrients can enhance overall leg and nerve health.

Gentle Morning Strength Drink

  • 1 cup warm milk or fortified plant milk

  • 1 boiled egg (on the side)

  • A small handful of nuts (such as almonds or walnuts)

This simple combination provides B12 along with protein and healthy fats that support muscle and nerve function. While not a cure or treatment, consistent nutrient-dense meals like this can support overall lower-body health.

Who Needs Extra Attention to B12?

Certain groups are more prone to deficiency and may notice leg and foot symptoms sooner:

  • Adults over 50 (absorption decreases with age)

  • People with diabetes or digestive disorders

  • Those taking long-term acid-reducing medications

  • Vegetarians and vegans

Regular checkups and blood tests can help determine if dietary changes or supplements are needed.

Supporting Vitamin B12 with Healthy Habits

Vitamin B12 works best when combined with other healthy lifestyle choices. To protect your legs and feet:

  • Stay active with walking or gentle stretching

  • Avoid sitting for long periods without movement

  • Stay hydrated to support circulation

  • Wear comfortable, supportive footwear

  • Maintain balanced blood sugar levels

These habits, together with proper nutrition, create a strong foundation for lower-body health.

Final Thoughts

When it comes to keeping your legs strong and your feet pain-free, Vitamin B12 plays a crucial supporting role. From protecting nerves to improving circulation and reducing fatigue, this vitamin quietly supports every step you take. While it’s not a miracle cure, ensuring adequate B12 intake through food, fortified products, or professional guidance can make a meaningful difference in how your legs and feet feel each day.

Warning: 12 Weird Signs That Show You’re Having Liver Damage

Your liver is one of the hardest-working organs in your body. It filters toxins, processes nutrients, balances hormones, and supports digestion—yet it often suffers in silence. Liver damage doesn’t always cause obvious pain at first. Instead, it may show up through strange, unexpected symptoms that many people ignore or misinterpret. Recognizing these early warning signs can make a crucial difference in protecting your health.

Below are 12 weird and often overlooked signs that may indicate liver damage. This guide is for awareness only and does not replace medical advice.

1. Constant Fatigue That Doesn’t Go Away

Feeling tired all the time—even after rest—can be an early sign of liver trouble. When the liver is damaged, toxins build up in the blood instead of being filtered out, leading to chronic fatigue, weakness, and brain fog.

2. Yellowing of the Skin or Eyes (Jaundice)

One of the most well-known but still often ignored signs is a yellow tint to the skin or the whites of the eyes. This happens when bilirubin builds up in the bloodstream because the liver can’t process it properly.

3. Unexplained Itchy Skin

Persistent itching without a rash may seem harmless, but it can be linked to bile salt buildup under the skin—a sign the liver is struggling. This itch often worsens at night and doesn’t improve with creams.

4. Dark Urine and Pale Stool

Healthy urine is light yellow, and stools are brown. Liver damage can cause dark brown or orange urine and pale, clay-colored stools, indicating problems with bile production or flow.

5. Swelling in the Belly or Legs

Fluid buildup in the abdomen (ascites) or swelling in the legs and ankles can occur when the liver fails to regulate fluids and proteins in the blood. This is a serious sign that should never be ignored.

6. Easy Bruising and Bleeding

If you bruise easily or notice frequent nosebleeds or bleeding gums, your liver may not be producing enough clotting proteins. This can happen even in early stages of liver damage.

7. Sudden Loss of Appetite or Nausea

A damaged liver can disrupt digestion and metabolism, leading to nausea, vomiting, or a sudden disinterest in food. Many people mistake this for stress or stomach issues.

8. Unexplained Weight Loss or Gain

Rapid weight loss can result from poor nutrient absorption, while weight gain—especially around the belly—may be due to fluid retention. Both can be linked to liver dysfunction.

9. Bad Breath That Won’t Go Away

A sweet, musty, or foul breath odor—sometimes called fetor hepaticus—can occur in advanced liver problems. It’s caused by toxins like sulfur compounds entering the lungs via the bloodstream.

10. Mental Confusion or Mood Changes

Difficulty concentrating, memory problems, irritability, or confusion may be signs of hepatic encephalopathy, a condition caused by toxin buildup affecting the brain. This can start subtly and worsen over time.

11. Red Palms or Spider-Like Veins

Reddened palms (palmar erythema) and small spider-web-like blood vessels on the skin are linked to hormonal changes caused by liver disease. These signs are unusual but highly telling.

12. Frequent Headaches and Sensitivity to Smells

A struggling liver may fail to detoxify chemicals efficiently, making you more sensitive to smells, chemicals, and perfumes. This overload can also trigger headaches and nausea.

Why These Signs Matter

Liver damage can be caused by many factors, including fatty liver disease, viral hepatitis, alcohol overuse, certain medications, and toxin exposure. The liver has an incredible ability to regenerate—but only if damage is caught early.

Ignoring these strange signals may allow mild liver stress to progress into serious conditions like cirrhosis or liver failure.

How to Support Liver Health Naturally

While medical care is essential, simple lifestyle changes can support liver function:

  • Stay hydrated

  • Eat whole foods rich in vegetables and fiber

  • Limit alcohol and processed sugar

  • Avoid unnecessary medications

  • Maintain a healthy weight

  • Get regular blood tests if at risk

Final Warning

If you recognize several of these signs, do not self-diagnose. Consult a healthcare professional for proper testing and guidance. Early action can save your liver—and your life.

Vitamin B17: “The Greatest Cancer Cover-Up”

Few substances in alternative health circles have generated as much controversy as so-called Vitamin B17, often promoted as “the greatest cancer cure ever hidden from the public.” Supporters claim it was suppressed by governments and pharmaceutical companies because it threatens profits. Critics argue the entire story is built on misunderstanding, fear, and pseudoscience. To understand why this claim persists, we must separate history, belief, and scientific evidence.

What Is “Vitamin B17,” Really?

Despite its name, Vitamin B17 is not a vitamin. It is a compound called amygdalin, found naturally in the pits of apricots, peaches, cherries, and bitter almonds. In the 1950s, a semi-synthetic form called laetrile was marketed as an alternative cancer treatment and rebranded as “Vitamin B17” to make it sound essential and harmless.

Vitamins are substances the body needs to survive. There is no deficiency disease linked to the absence of B17, which alone disqualifies it from being a true vitamin. The name was a marketing strategy, not a scientific classification.

Why Did People Believe It Cured Cancer?

The belief stems from a theory proposed decades ago suggesting that cancer cells contain an enzyme that breaks down amygdalin into toxic compounds, selectively killing tumors while leaving healthy cells unharmed. This idea sounded elegant and natural — and it spread rapidly among people desperate for hope.

During the 1960s and 1970s, laetrile clinics appeared in the U.S., Mexico, and Europe. Testimonials flooded magazines and word-of-mouth networks. At the time, cancer treatments were harsh, survival rates were lower, and many patients felt ignored by conventional medicine. Laetrile offered something powerful: hope with a simple narrative.

What Does Science Say?

When laetrile was finally tested in controlled clinical trials, the results were clear and consistent:

  • No credible evidence showed that amygdalin cured or slowed cancer.

  • Tumors did not shrink.

  • Survival rates did not improve.

  • Some patients became seriously ill.

Amygdalin breaks down into cyanide inside the body. While small amounts may be detoxified, higher doses — especially from raw apricot kernels — can cause cyanide poisoning, leading to nausea, liver damage, nerve damage, low blood oxygen, coma, or death.

Multiple reputable health organizations concluded that laetrile was ineffective and dangerous, which led to its ban for cancer treatment in many countries.

Was It Really “Covered Up”?

The “cover-up” narrative is emotionally compelling but historically weak. Laetrile was not banned because it worked too well — it was banned because it failed to work and caused harm.

Science does not suppress effective cures. If a cheap, plant-based compound reliably cured cancer, it would revolutionize medicine overnight. Researchers, hospitals, and even pharmaceutical companies would benefit immensely from such a discovery. Cancer is not a single disease, and no universal cure has ever existed.

What was suppressed were false medical claims, not a miracle treatment.

Why the Myth Still Survives

Despite decades of evidence, the Vitamin B17 story refuses to die. There are several reasons:

  1. Cancer fear – Cancer is terrifying, and people naturally seek simple answers.

  2. Distrust of institutions – Past medical mistakes fuel suspicion of modern healthcare.

  3. Anecdotes over evidence – Personal stories feel more convincing than statistics.

  4. Natural appeal – “Natural” is often wrongly assumed to mean “safe” or “effective.”

  5. Online amplification – Social media spreads dramatic claims faster than facts.

Once someone believes they’ve found a hidden truth, contradictory evidence is often dismissed as part of the conspiracy.

The Real Danger of the B17 Myth

The greatest harm caused by the Vitamin B17 narrative is not political — it is personal. Some patients delay or abandon proven treatments in favor of untested alternatives. Others consume dangerous amounts of apricot kernels, believing more is better.

Hope is essential in illness, but false hope can be deadly.

What Actually Helps in Cancer Prevention?

While no vitamin cures cancer, research strongly supports practical, evidence-based steps that reduce risk and improve outcomes:

  • Early detection and screening

  • Balanced nutrition rich in fruits and vegetables (without toxic doses)

  • Avoiding smoking and excessive alcohol

  • Maintaining a healthy weight

  • Following medically approved treatments

  • Psychological and social support

Science advances through testing, transparency, and correction — not secrecy.

Final Thoughts

The story of “Vitamin B17 as the greatest cancer cover-up” is a powerful example of how fear, marketing, and misinformation can overshadow evidence. Amygdalin is not a vitamin, not a cure, and not suppressed truth. It is a cautionary tale about how badly we want simple answers to complex diseases.

The Ultimate Golden Elixir for Your Immunity

In a world where stress, pollution, and seasonal changes constantly challenge our health, supporting the immune system naturally has never been more important. Among the many traditional remedies passed down through generations, one stands out for its simplicity, warmth, and powerful reputation: the Golden Elixir. This vibrant, golden-hued drink combines time-honored ingredients known for their nourishing and balancing properties. While it is not a medicine or a cure, it is a comforting wellness ritual that can help you feel supported, energized, and cared for from the inside out.

What Is the Golden Elixir?

The Golden Elixir is a warm herbal drink centered around turmeric, often called “golden spice,” blended with complementary ingredients such as ginger, lemon, honey, and black pepper. Rooted in ancient traditions like Ayurveda, this drink has been enjoyed for centuries as part of daily self-care routines. Its appeal lies not only in its beautiful color but also in the way it warms the body, soothes the throat, and creates a sense of calm and balance.

Why These Ingredients Matter

Each ingredient in the Golden Elixir plays a unique role, working together in harmony:

  • Turmeric: Known for its bright yellow color, turmeric has long been valued in traditional cooking and wellness practices.

  • Ginger: A warming root that adds gentle heat and a comforting aroma.

  • Black pepper: Used in small amounts, it enhances the body’s ability to absorb turmeric’s natural compounds.

  • Lemon: Adds freshness and a pleasant tang, while contributing natural plant nutrients.

  • Raw honey: Brings natural sweetness and a soothing texture, especially comforting for the throat.

  • Milk or plant-based milk: Acts as a creamy base, making the drink rich and satisfying.

Together, these ingredients create a drink that feels grounding, revitalizing, and deeply nourishing.

The Ultimate Golden Elixir Recipe

Ingredients (Serves 1–2):

  • 1 cup milk or plant-based milk (almond, coconut, or oat)

  • ½ teaspoon ground turmeric (or freshly grated turmeric root)

  • ½ teaspoon freshly grated ginger (or ¼ teaspoon ground ginger)

  • 1 pinch black pepper

  • 1 teaspoon raw honey (adjust to taste)

  • 1–2 teaspoons fresh lemon juice

  • Optional: a pinch of cinnamon or cardamom for extra warmth

Instructions:

  1. Pour the milk into a small saucepan and warm it gently over low heat. Avoid boiling.

  2. Add turmeric, ginger, and black pepper. Whisk slowly to combine and prevent clumping.

  3. Let the mixture warm for 3–5 minutes, allowing the flavors to infuse.

  4. Remove from heat and let it cool slightly.

  5. Stir in honey and lemon juice just before drinking.

  6. Pour into your favorite mug, take a deep breath, and enjoy slowly.

How to Make It a Daily Ritual

The true power of the Golden Elixir lies in consistency and intention. Many people enjoy it in the morning to start the day feeling centered, or in the evening as a calming wind-down ritual. Sip it slowly, away from distractions, allowing the warmth to relax your body and mind.

You can also customize the recipe based on your preferences:

  • Add coconut oil or ghee for richness.

  • Use water instead of milk for a lighter version.

  • Adjust spices to suit your taste and tolerance.

When and Who Should Enjoy It

The Golden Elixir is suitable for most adults as part of a balanced lifestyle. However, if you are pregnant, nursing, or managing a medical condition, it’s always wise to consult a qualified healthcare professional before making dietary changes. Remember, this drink is a supportive wellness beverage, not a replacement for medical care.

Final Thoughts

The Ultimate Golden Elixir for Your Immunity is more than just a recipe—it’s a moment of care in a busy day. With its comforting warmth, rich color, and deeply rooted tradition, it invites you to slow down and nourish yourself naturally. Whether enjoyed daily or a few times a week, this golden drink can become a cherished part of your self-care routine, reminding you that small, mindful habits often make the biggest difference.