There are certain treats that transport you straight back to childhood, and homemade crunch bars sit proudly at the top of that list. Crunch bars are nostalgic, irresistibly crispy, and beautifully simple — the kind of sweet you can whip up with minimal effort yet maximum satisfaction. But today, we’re taking this old-school favorite and giving it a completely fresh spin, transforming it into a richer, smoother, more wholesome treat that tastes better than anything you’ll find in a wrapper. This unique recipe uses pantry staples, requires zero baking, and creates bars with the perfect balance of melting chocolate and airy crispiness.
Why These Homemade Crunch Bars Stand Out
Many crunch bar recipes are basic: chocolate and crispy rice cereal, mixed and chilled. Good? Yes. Memorable? Not really. This version upgrades the flavor and texture by adding three game-changing elements:
-
Silky nut butter to create a more tender bite and deeper flavor.
-
A touch of honey for natural sweetness and chewiness.
-
A combination of dark and milk chocolate to balance bitterness and creaminess.
The result is a crunch bar that snaps beautifully when cold, melts softly on the tongue, and delivers a layered chocolate flavor that feels handcrafted, not store-bought.
Ingredients (Makes 12 Bars)
-
2 cups crispy rice cereal (such as Rice Krispies, the hero crunch ingredient)
-
1 cup dark chocolate chips
-
1 cup milk chocolate chips
-
½ cup creamy peanut butter (or almond, cashew, or sunflower butter)
-
3 tablespoons honey
-
1 teaspoon vanilla extract
-
Pinch of salt (enhances the chocolate flavor)
-
Optional mix-ins: crushed nuts, mini marshmallows, coconut flakes, freeze-dried fruit
Instructions
Step 1: Prepare Your Pan
Line an 8×8 baking pan with parchment paper, leaving extra paper hanging over the edges for easy lifting later. A smooth, flat layer is key for perfectly shaped bars.
Step 2: Melt the Chocolate Base
In a heatproof bowl, combine the dark chocolate, milk chocolate, and peanut butter. Melt the mixture using the double-boiler method or microwave in 20-second increments, stirring each time until fully smooth.
Once melted, stir in the honey, vanilla extract, and salt. The honey adds shine, smoothness, and an addictive chew you won’t find in traditional crunch bars.
Step 3: Add the Cereal
Pour the crispy rice cereal into a large mixing bowl. Slowly pour the warm chocolate mixture over the cereal. Gently fold with a silicone spatula, making sure every piece is coated but not crushed. Lift and fold rather than stir vigorously — the crunch depends on the cereal staying whole.
Step 4: Press into the Pan
Transfer the mixture to the prepared baking pan. Smooth it out using a spatula or press gently with the back of a spoon. Do not press too hard, or the bars may become dense instead of airy and crisp.
Step 5: Chill
Refrigerate for 1 to 2 hours, or freeze for 30 minutes if serving sooner. Once firm, lift out using the parchment paper overhang and slice into squares or bars.
The Magic Behind This Recipe
This unique recipe stands out not only for its flavor but also its texture science. The peanut butter acts as a fat that softens the chocolate slightly, preventing the hard “snap” that makes some homemade crunch bars too brittle. Honey binds the chocolate and cereal without making the bars sticky, while the combination of dark and milk chocolate gives depth and creaminess.
The crispy cereal is naturally airy, and when coated correctly, it traps tiny pockets of air within the chocolate mixture. When chilled, these pockets solidify into delicate layers that create the signature crunch with every bite.
Variations to Make It Your Own
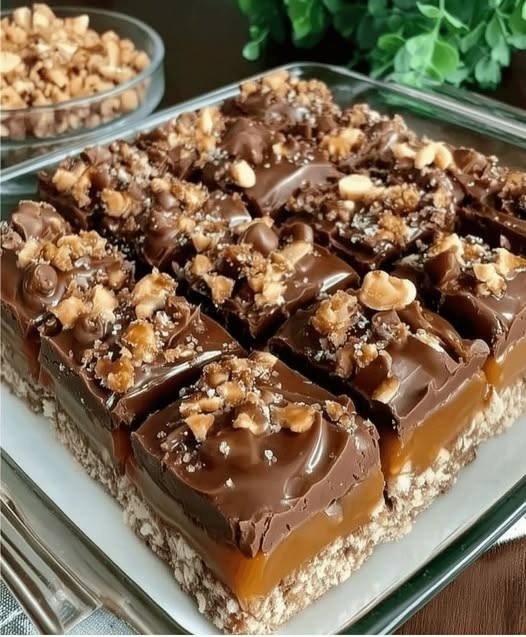
1. Salted Caramel Crunch Bars
Add 2 tablespoons caramel sauce into the chocolate mixture and sprinkle coarse sea salt on top.
2. Peanut Butter Swirl Bars
Reserve 2 tablespoons of peanut butter, melt it separately, and drizzle over the top before chilling. Swirl with a toothpick for a marbled look.
3. Rocky Road Crunch Bars
Add mini marshmallows, chopped walnuts, and chopped dark chocolate chunks before pressing into the pan.
4. Coconut Chocolate Crunch Bars
Mix ¼ cup shredded coconut into the cereal for a tropical twist.
5. Healthy Protein Crunch Bars
Replace half the chocolate with melted coconut oil + ½ cup chocolate protein powder.
Storage Tips
Homemade crunch bars store beautifully and stay fresh:
-
In the fridge: up to 10 days
-
In the freezer: up to 3 months
-
Wrap individually for lunchboxes, road trips, or quick dessert cravings.
Serving Ideas
These bars pair perfectly with:
-
A glass of cold milk
-
Hot coffee or espresso
-
A scoop of vanilla ice cream
-
A drizzle of warm melted chocolate
For a party or gathering, cut them into mini squares and arrange on a dessert board.
Final Thoughts
Homemade Crunch Bars may be one of the easiest treats you’ll ever make, but this upgraded version elevates them into something spectacular. It’s the perfect blend of childhood nostalgia and grown-up flavor — silky, crunchy, chocolatey, and endlessly customizable. Whether you want a quick dessert, a sweet snack, or a freezer-friendly treat to keep on hand, these no-bake bars deliver every single time. One bite and you’ll realize why homemade versions always taste better than store-bought: they’re fresher, richer, and made with real ingredients that turn simple sweets into memorable moments.
