
Bay Leaf and Clove Herbal Tea

Across many cultures, simple herbal teas have long been used as daily rituals for comfort, warmth, and balance. One such timeless blend is Bay Leaf and Clove Herbal Tea. Made with just two humble spices often sitting quietly in your kitchen, this tea has been cherished for generations for its soothing aroma, gentle warmth, and grounding flavor. While modern life often pushes us toward complex supplements and trendy drinks, this classic infusion reminds us that simplicity still has a place at the table.

Bay leaves and cloves are not newcomers to wellness traditions. Bay leaves were prized in ancient Mediterranean cultures, while cloves have deep roots in Asian and Middle Eastern households. When combined, they create a fragrant, slightly spicy tea that feels both calming and invigorating at the same time.

Why Bay Leaf and Clove Work Well Together

Bay leaves offer a mild, herbal bitterness with subtle floral notes. When simmered, they release a comforting aroma that feels instantly relaxing. Cloves, on the other hand, bring warmth and a gently sweet spice that balances the bay leaf beautifully. Together, they form a tea that is neither overpowering nor bland—just deeply satisfying.

Many people enjoy this tea in the evening to unwind, while others sip it in the morning as a gentle alternative to coffee. It’s caffeine-free, naturally aromatic, and easy to customize to your taste.

Ingredients for Bay Leaf and Clove Herbal Tea

This recipe makes 1–2 servings and can easily be doubled.

  • 2 dried bay leaves (or 3 small fresh bay leaves)

  • 3–4 whole cloves

  • 2 cups water

  • Optional additions:

    • 1 teaspoon raw honey

    • A small slice of fresh ginger

    • A cinnamon stick

    • A squeeze of lemon

How to Make Bay Leaf and Clove Herbal Tea

  1. Prepare the spices
    Lightly rinse the bay leaves under cool water to remove any dust. Measure out the whole cloves—avoid using ground cloves, as they can make the tea cloudy and overly strong.

  2. Bring water to a gentle boil
    Pour the water into a small saucepan and bring it to a soft boil over medium heat.

  3. Add bay leaves and cloves
    Once boiling, add the bay leaves and cloves. Reduce the heat to low and let the mixture simmer gently.

  4. Simmer and infuse
    Allow the tea to simmer for 10–15 minutes. The longer it simmers, the deeper and warmer the flavor becomes. Covering the pot helps preserve the aromatic oils.

  5. Strain and serve
    Remove from heat and strain into a cup. Add honey, lemon, or other optional ingredients if desired.

  6. Sip slowly
    Enjoy the tea warm, taking time to inhale the aroma before sipping. This tea is best appreciated slowly.

Flavor Profile and Serving Tips

Bay Leaf and Clove Tea has a warming, earthy taste with a soft spice finish. If you’re new to bay leaf tea, start with fewer cloves and increase gradually. For a milder version, steep for only 8–10 minutes.

This tea pairs wonderfully with:

  • A quiet evening routine

  • Light snacks like toast or biscuits

  • Cooler weather or rainy afternoons

Traditional Uses and Everyday Enjoyment

In many households, this tea is enjoyed simply because it feels good to drink. The warmth, aroma, and spice make it a favorite during colder months or after heavy meals. Some people drink it as part of a mindful routine—sipping slowly, breathing deeply, and allowing the body to relax.

Rather than thinking of this tea as a cure or treatment, it’s best viewed as a comfort beverage—one that supports hydration, relaxation, and a sense of balance. Herbal teas like this often work best when enjoyed consistently and gently, not as a quick fix.

Storage and Reuse Tips

  • Store dried bay leaves and cloves in an airtight container away from heat and light.

  • You can reuse the same bay leaves and cloves once more within 24 hours—simply add fresh water and simmer again.

  • For convenience, pre-mix bay leaves and cloves in small jars for quick tea preparation.

Who Should Enjoy This Tea

This herbal tea is suitable for most adults and can be enjoyed daily in moderation. If you are pregnant, nursing, or managing a medical condition, it’s always wise to consult a healthcare professional before adding new herbal habits to your routine.

Final Thoughts

The Bay Leaf and Clove Herbal Tea UNIE Recipe is a beautiful reminder that wellness doesn’t have to be complicated. With just two familiar spices and a few minutes on the stove, you can create a comforting drink that feels nourishing to both body and mind.
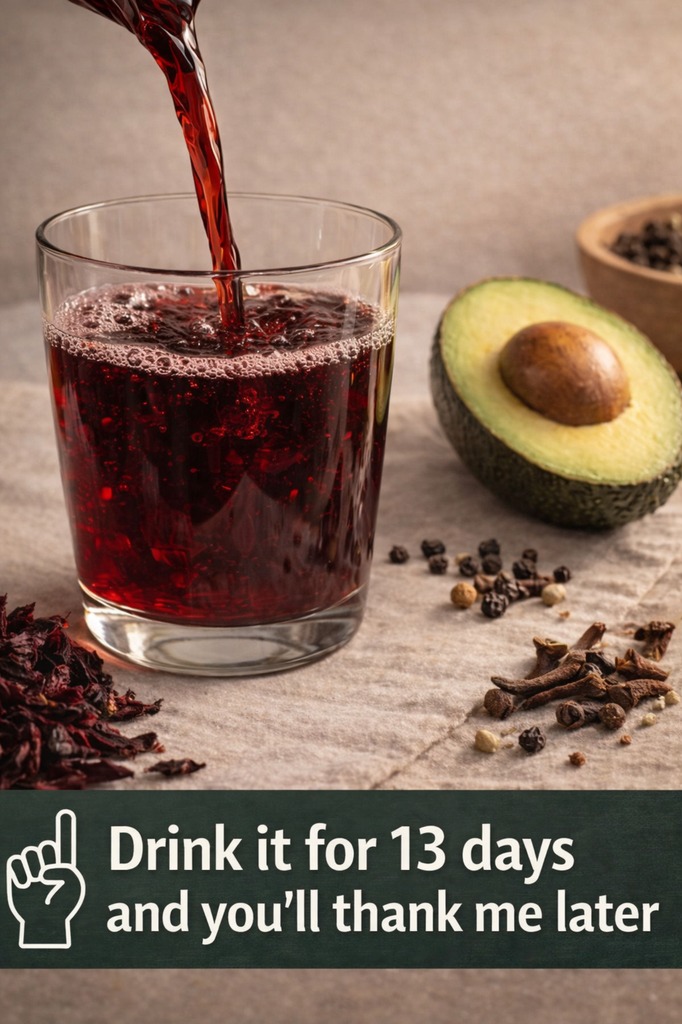
Powerful Natural Remedy: Avocado Pit, Hibiscus, and Cloves

In many traditional kitchens around the world, healing didn’t start in a pharmacy—it began with what was already on hand. Seeds, flowers, and spices were treated with respect, not waste. One such forgotten trio is avocado pit, hibiscus, and cloves. On their own, each has a long cultural history of use. Together, they create a deep, earthy infusion that many people enjoy as part of a mindful daily wellness ritual.

This remedy isn’t a miracle cure, but it is a comforting, antioxidant-rich drink that supports hydration, digestion awareness, and overall balance when paired with a healthy lifestyle.

Let’s break it down.

Why These Three Ingredients?

Avocado Pit
Most people throw it away, but the avocado pit has been traditionally dried and brewed in parts of Central and South America. It contains fiber and plant compounds that contribute to its bitter, grounding flavor. When gently simmered, it releases a mild, nutty aroma that pairs surprisingly well with floral and spice notes.

Hibiscus (Dried Flowers)
Hibiscus tea—often called karkade or sorrel—is widely enjoyed for its vibrant color and tangy taste. It’s naturally caffeine-free and rich in antioxidants. Many people drink hibiscus tea as a refreshing beverage to support hydration and circulation awareness.

Cloves
Cloves are small but powerful. Used for centuries in traditional remedies, they bring warmth, depth, and a comforting spice to infusions. Their bold aroma makes this drink feel soothing, especially in cooler months or during slow mornings.

Together, these ingredients create a balanced blend: earthy, tart, and gently spiced.

The UNIE Recipe: Herbal Infusion

Ingredients

  • 1 avocado pit

  • 1 tablespoon dried hibiscus flowers

  • 3–5 whole cloves

  • 4 cups water

  • Optional: honey or lemon to taste

Preparation Method

  1. Prepare the Avocado Pit
    Rinse the pit thoroughly. Allow it to air-dry for a day or two, or dry it in the oven at low heat (around 120°C / 250°F) for 1 hour. Once dry, carefully cut or grate the pit into small chunks. (It’s very hard—use caution.)

  2. Simmer Gently
    Add the avocado pit pieces to a pot with 4 cups of water. Bring to a gentle boil, then reduce heat and simmer for 15–20 minutes. The water will begin to turn a light amber or pinkish tone.

  3. Add Hibiscus and Cloves
    Turn off the heat. Add the hibiscus flowers and cloves, cover the pot, and let steep for another 10 minutes.

  4. Strain and Serve
    Strain into a cup or glass jar. Add honey or a squeeze of lemon if desired.

Enjoy warm or chilled.

How People Traditionally Enjoy It

This infusion is often taken:

  • In the morning as a gentle, grounding start

  • In the evening as a calming, caffeine-free tea

  • 2–3 times per week, not daily, as part of a varied routine

Because of its bold flavor, small servings are usually enough.

Taste & Aroma Profile

  • Earthy and slightly bitter from the avocado pit

  • Bright and tangy from hibiscus

  • Warm and aromatic from cloves

If you’re new to herbal teas, start with fewer cloves and more hibiscus to soften the flavor.

Important Notes on Safety

  • This is a traditional wellness drink, not a medical treatment.

  • Avoid if you are pregnant, breastfeeding, or sensitive to strong herbs unless advised by a healthcare professional.

  • Do not consume avocado pit powder in large amounts. Moderation matters.

  • Always listen to your body.

Natural doesn’t mean unlimited—balance is key.

Why This Remedy Is Making a Quiet Comeback

In a world of supplements and shortcuts, people are rediscovering slow, intentional rituals. Preparing this infusion takes time, patience, and care. That alone can be grounding.

It’s not about chasing dramatic promises—it’s about:

  • Using whole ingredients

  • Reducing kitchen waste

  • Creating a moment of pause in your day

Sometimes, the real benefit comes from the ritual itself.

Final Thoughts

The avocado pit, hibiscus, and clove infusion is a beautiful example of how traditional ingredients can still have a place in modern life. It’s bold, comforting, and deeply rooted in cultural wisdom.

Drink it slowly. Respect it. And let it be part of a bigger picture of nourishment—not a replacement for proper care, but a companion to it.

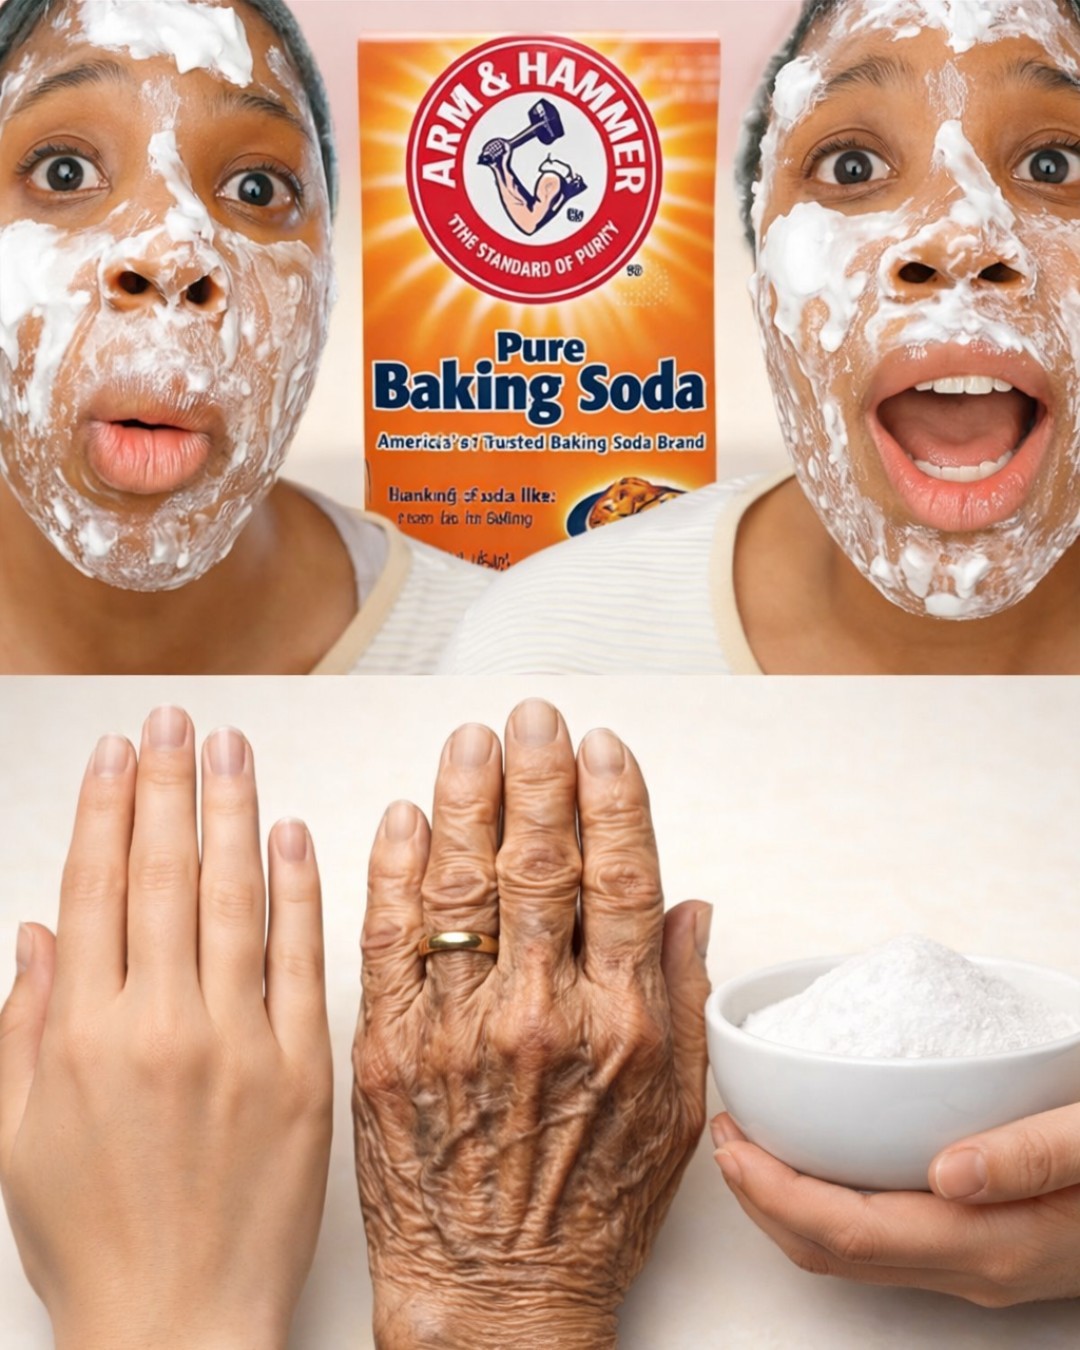
Baking Soda Face Masks: Popular Homemade Recipes and What You Need to Know for Skin Health

Baking soda face masks have been circulating online for years, praised as a cheap, easy way to cleanse pores, brighten skin, and fight acne. From DIY beauty blogs to viral social media videos, this pantry staple is often marketed as a miracle fix for everything from blackheads to dull skin. But before you mix baking soda with water and apply it to your face, it’s important to understand what it actually does—and what risks may come with it.

Let’s explore the most popular homemade baking soda face mask recipes and the essential facts you need to know to protect your skin health.

Why People Use Baking Soda on Their Face

Baking soda (sodium bicarbonate) is mildly abrasive and alkaline. Because of this, it’s often used as:

  • A physical exfoliant to remove dead skin cells

  • A cleanser to absorb oil

  • A quick “brightening” treatment

  • A home remedy for acne and blackheads

Its appeal lies in its simplicity and cost. Baking soda is inexpensive, widely available, and already trusted for cleaning and deodorizing—so many assume it must be safe for skin too.

However, skin is far more delicate than kitchen surfaces.

Popular Homemade Baking Soda Face Mask Recipes

Here are some of the most common DIY recipes people try at home:

1. Baking Soda and Water Mask

Ingredients:

  • 1 tablespoon baking soda

  • Enough water to form a paste

How it’s used:
Applied as a scrub or mask for 5–10 minutes, then rinsed off.

Why people try it:
This is the simplest version, often promoted for exfoliation and oil control.

2. Baking Soda and Honey Mask

Ingredients:

  • 1 teaspoon baking soda

  • 1 tablespoon raw honey

How it’s used:
Gently massaged onto damp skin and left on for a few minutes.

Why people try it:
Honey is naturally soothing and antibacterial, so people hope it offsets baking soda’s harshness.

3. Baking Soda and Lemon Juice Mask

Ingredients:

  • 1 teaspoon baking soda

  • A few drops of lemon juice

How it’s used:
Applied briefly to dark spots or oily areas.

Why people try it:
This combination is often advertised as a “skin whitening” or brightening mask.

⚠️ This is one of the riskiest combinations due to acidity and irritation.

4. Baking Soda and Coconut Oil Mask

Ingredients:

  • 1 teaspoon baking soda

  • 1 tablespoon coconut oil

How it’s used:
Used as a scrub or moisturizing exfoliant.

Why people try it:
Coconut oil is moisturizing, so users believe it balances the abrasive effect.

What You Really Need to Know About Skin Health

Here’s the part that often gets skipped in viral recipes.

Your Skin Has a Natural pH Balance

Healthy skin is slightly acidic, with a pH around 4.5–5.5. Baking soda has a pH of about 9, which is highly alkaline. When applied to the skin, it can disrupt this natural barrier.

This disruption may lead to:

  • Dryness and tightness

  • Redness and irritation

  • Increased oil production

  • Breakouts

  • Sensitivity over time

Ironically, using baking soda to “fix” oily or acne-prone skin can make those problems worse.

Physical Exfoliation Can Be Too Harsh

Baking soda particles are uneven and rough. When used as a scrub, they can cause tiny micro-tears in the skin, especially on the face where skin is thin and delicate.

Over time, this may weaken the skin barrier and make skin more prone to:

  • Inflammation

  • Breakouts

  • Premature aging

Is Baking Soda Ever Safe for the Face?

For most skin types, regular use is not recommended.

Some people with very resilient, non-sensitive skin may tolerate very occasional use (for example, once every few weeks), but even then, gentleness is key:

  • Use a tiny amount

  • Mix with soothing ingredients like honey or yogurt

  • Avoid rubbing or scrubbing

  • Limit contact time to under 5 minutes

  • Never use on broken, irritated, or acne-inflamed skin

Always patch test on a small area first.

Who Should Avoid Baking Soda Face Masks Completely?

You should skip baking soda on your face if you have:

  • Sensitive skin

  • Acne-prone skin

  • Rosacea or eczema

  • Dry or mature skin

  • A damaged skin barrier

For these skin types, baking soda often causes more harm than benefit.

Better Alternatives for Gentle Skin Care

If your goal is smoother, brighter, or clearer skin, safer options include:

  • Oatmeal masks for gentle exfoliation

  • Yogurt or milk masks for mild lactic acid exfoliation

  • Honey alone for soothing and antibacterial benefits

  • Clay masks formulated specifically for facial skin

These options work with your skin’s natural balance instead of against it.

Final Thoughts

Baking soda face masks are popular because they’re simple and cheap—but popularity doesn’t equal safety. While occasional use may not cause immediate damage for everyone, the long-term risks to your skin barrier are real.

Healthy skin thrives on balance, gentleness, and consistency—not harsh shortcuts. If you’re tempted to try a baking soda mask, do so cautiously and sparingly, or better yet, choose ingredients that support your skin rather than strip it.

8 Unusual Uses for Vicks VapoRub That Nobody Knows!

Most people recognize Vicks VapoRub as the minty-smelling hero of cold season. A little dab on the chest, a warm blanket, and suddenly breathing feels easier. But what if that familiar blue jar could do much more than help you through a stuffy night?

For decades, families around the world have quietly used Vicks in unexpected ways—passed down through whispers, not advertisements. While it’s not a miracle cure or medical treatment, its ingredients (menthol, camphor, eucalyptus oil, and petroleum jelly) give it some surprisingly versatile properties.

Let’s open that jar and uncover 8 unusual uses for Vicks VapoRub that most people never think of.

1. A Temporary Muscle Comfort Balm

After a long day on your feet or an intense workout, sore muscles can make even sitting uncomfortable. Many people gently massage a small amount of Vicks onto tired muscles for a warming, cooling sensation.

The menthol creates a soothing surface effect that can help you relax and feel more comfortable—especially before bedtime. It doesn’t treat injuries, but the sensation alone can be deeply calming.

Tip: Wash your hands afterward and avoid sensitive skin areas.

2. Helps Mask Strong Household Odors

Garbage cans, shoe racks, or pet areas can sometimes hold onto stubborn smells. A little-known trick is dabbing a tiny amount of Vicks on a cotton ball and placing it discreetly near the odor source.

The strong menthol aroma doesn’t eliminate smells—but it can overpower and neutralize unpleasant odors in enclosed spaces surprisingly well.

3. A Surprising Insect Deterrent

Some people swear by Vicks as a short-term insect deterrent when outdoors. The strong scent of camphor and eucalyptus can be unpleasant for mosquitoes and flies.

Dabbing a very small amount on socks, pant cuffs, or shoes (not directly on large areas of skin) may help discourage bugs from lingering nearby.

This is not a replacement for insect repellent—but it can be handy in a pinch.

4. Softens Rough Heels and Elbows Overnight

Dry, cracked heels and elbows are incredibly common, especially in colder months. Because Vicks has a petroleum jelly base, it works as a powerful occlusive moisturizer.

Before bed:

  • Apply a thin layer to clean feet or elbows

  • Cover with cotton socks or a soft cloth

  • Leave overnight

By morning, many people notice noticeably softer skin.

5. Helps Relax Before Sleep

The scent of menthol and eucalyptus can feel calming to the nervous system. Some people place a small amount under the nose (externally) or on the chest at night—not for congestion, but for sensory relaxation.

The familiar smell alone can trigger a comfort response, especially if you associate it with rest and care from childhood.

6. Temporary Nail Fungus Appearance Control (Not a Cure)

This one is often misunderstood, so clarity matters. Vicks does not cure nail fungus, but some people apply it to improve the appearance of affected nails.

The thick ointment can soften the nail and surrounding skin, while the menthol keeps the area feeling fresh. Think of it as cosmetic care—not treatment.

Always consult a professional for persistent nail issues.

7. Minor Scratch Comfort (Closed Skin Only)

For small, closed scratches or irritated skin (not open wounds), a tiny amount of Vicks can provide a cooling sensation that helps reduce the urge to scratch.

Important: Never apply Vicks to open cuts, broken skin, or burns. This is strictly for surface-level comfort.

8. Squeaky Door & Sticky Drawer Hack

Here’s a truly unexpected one. In a pinch, Vicks can act as a temporary lubricant for squeaky hinges or sticky drawers.

Rub a very small amount onto the problem area, wipe off excess, and enjoy the silence. It’s not a long-term mechanical solution—but it works surprisingly well when nothing else is available.

Why Vicks Is So Versatile

The secret lies in its simple but powerful combination:

  • Menthol & camphor for strong sensory effects

  • Eucalyptus oil for aroma

  • Petroleum jelly for moisture sealing

These qualities make it useful beyond medicine cabinets—when used carefully and appropriately.

A Gentle Reminder

Vicks VapoRub is not a cure-all, and it’s not meant to replace medical treatments. Always:

  • Use externally only

  • Avoid eyes, open wounds, and sensitive areas

  • Keep away from children unless directed

When used wisely, though, that humble blue jar can earn a permanent spot far beyond cold season.

Simple Morning Habit: Discover How 2 Tablespoons of a Natural Blend May Support Your Daily Comfort and Energy

Mornings set the tone for the entire day. Before the rush of responsibilities, notifications, and obligations begins, there’s a quiet window where small choices can make a big difference in how you feel. Around the world, many traditional wellness cultures emphasize gentle morning rituals—simple habits that help the body wake up naturally and feel supported rather than shocked into motion.

One such habit centers around a two-tablespoon natural blend, taken slowly in the morning. It’s not a miracle cure or a trendy shortcut. Instead, it’s a time-honored combination of everyday ingredients that people have used for generations to promote comfort, warmth, and steady energy throughout the day.

Let’s explore what this blend is, why mornings matter so much, and how you can easily make it part of your routine.

Why Morning Habits Matter More Than You Think

When you wake up, your body is transitioning from rest to activity. Digestion, circulation, and hydration are all shifting gears. Many people immediately reach for coffee or skip nourishment altogether, which can sometimes leave them feeling jittery, heavy, or drained later on.

A gentle morning habit can help you:

  • Rehydrate after sleep

  • Wake up digestion slowly

  • Feel warmer and more balanced

  • Ease into the day with steadier energy

The goal isn’t stimulation—it’s support.

The Natural 2-Tablespoon Morning Blend

This blend uses simple ingredients commonly found in home kitchens. Each one has a long history of traditional use for daily comfort and vitality.

Ingredients

  • Raw honey – 1 tablespoon

  • Fresh lemon juice – 1 tablespoon

  • Warm water – optional (for dilution)

That’s it. Simple, affordable, and familiar.

Combined, these ingredients create a soothing, lightly energizing blend that many people enjoy first thing in the morning.

How to Prepare It

  1. Squeeze fresh lemon juice to get 1 tablespoon

  2. Measure 1 tablespoon of raw honey

  3. Mix them together in a small cup

  4. Optionally add a little warm (not hot) water

  5. Stir gently and sip slowly

This blend is usually taken on an empty stomach, about 10–15 minutes before breakfast.

Why These Ingredients Work Well Together

Lemon Juice

Lemon juice has been used traditionally to gently wake up digestion and add a fresh, clean taste. Its natural acidity can help stimulate the senses and make mornings feel lighter rather than sluggish.

Raw Honey

Honey provides natural sweetness and is often associated with warmth and comfort. Unlike refined sugar, it’s commonly used in traditional remedies to support steady energy and ease.

Warm Water (Optional)

Warm water helps soften the blend, making it easier on the stomach and more soothing—especially in cooler weather or for those who don’t enjoy sharp flavors first thing in the morning.

What People Often Notice Over Time

While everyone’s experience is different, people who make this blend a regular habit often say they feel:

  • More comfortable in the morning

  • Less heavy or bloated after waking

  • Gently energized rather than wired

  • More consistent energy through the day

It’s not about dramatic overnight changes. This habit works best when it’s consistent and calm, not forced or rushed.

How to Make It a Sustainable Habit

The real power of this blend isn’t the ingredients—it’s the routine.

Here are a few tips:

  • Prepare it the same time every morning

  • Drink it slowly, without distractions

  • Pair it with deep breathing or a short stretch

  • Avoid immediately chasing it with coffee

Think of it as a signal to your body that the day is beginning gently.

Optional Variations (Keep It Simple)

If you like variety, you can occasionally try:

  • A pinch of grated ginger for warmth

  • A drop of apple cider vinegar for tang

  • A dash of cinnamon for aroma

Use additions sparingly. The original blend works best because it’s simple.

A Gentle Reminder

This natural blend is not a medicine, detox, or cure. It’s a supportive morning ritual, meant to complement a balanced diet and healthy lifestyle. If you have specific health conditions or sensitivities, it’s always wise to listen to your body and adjust accordingly.

Final Thoughts

Sometimes the most powerful changes come from the smallest habits. Two tablespoons. One quiet moment. A simple blend made with intention.

By starting your morning with something warm, natural, and familiar, you give yourself a chance to begin the day feeling grounded and supported—before the world starts asking for your attention.

95-Year-Old Chinese Doctor’s Daily Drink for a Healthy Liver and Intestines

In a small Chinese town, there’s a saying: “If the liver is clean, the body feels light.” It’s a belief rooted in Traditional Chinese Medicine (TCM), where the liver and intestines are seen as the body’s main “gatekeepers.” One retired doctor—now 95 years old—has lived by this philosophy for most of his life. Asked about his daily routine, he doesn’t mention rare herbs or complicated tonics. Instead, he smiles and points to a warm cup of a simple drink he’s prepared every morning for decades.

This drink isn’t a miracle cure. It’s not meant to replace medical care. But it reflects an old-school approach to supporting digestion, easing the workload on the liver, and keeping the intestines moving gently and regularly.

Why the Liver and Intestines Matter So Much

In both Eastern and Western traditions, the liver plays a central role in filtering substances, processing nutrients, and supporting metabolism. The intestines, meanwhile, are responsible for absorbing what the body needs and eliminating what it doesn’t.

When digestion feels sluggish, people often report bloating, heaviness, fatigue, or a general feeling of discomfort. Traditional Chinese Medicine connects these sensations to “stagnation”—when circulation and digestion slow down. The doctor’s daily drink is designed to gently warm the digestive system, hydrate the intestines, and support the liver’s natural rhythms.

The Philosophy Behind the Drink

What makes this drink special isn’t just the ingredients—it’s the timing and consistency. The doctor drinks it every morning, on an empty stomach, while the body is naturally shifting from rest to activity.

According to TCM principles:

  • Warm liquids are easier on digestion than cold ones

  • Gentle bitterness can support liver function

  • Mild sweetness can nourish without overwhelming the system

The drink balances all three.

The Daily Liver & Intestine Support Drink (UNIE Recipe)

Ingredients

  • 1 cup warm water (not boiling)

  • 1 teaspoon fresh lemon juice

  • ½ teaspoon raw honey (optional)

  • 3–4 thin slices of fresh ginger

  • A pinch of turmeric powder (or a small slice of fresh turmeric)

Instructions

  1. Heat the water until warm but comfortable to sip

  2. Add ginger and turmeric, letting them steep for 3–5 minutes

  3. Stir in lemon juice

  4. Add honey if desired

  5. Sip slowly, preferably seated and relaxed

Why These Ingredients Were Chosen

Warm Water
Hydration first thing in the morning helps wake up the intestines. Warm water is traditionally believed to stimulate gentle bowel movement and reduce internal tension.

Ginger
Used for centuries in Chinese and Ayurvedic medicine, ginger supports digestion, reduces feelings of bloating, and gently warms the body. The doctor believes it “turns on” the digestive fire without irritating it.

Turmeric
Often associated with liver support in traditional systems, turmeric contains compounds that are widely studied for their antioxidant properties. In small daily amounts, it’s used as a supportive—not aggressive—ingredient.

Lemon Juice
Lemon adds mild acidity, which can stimulate digestive enzymes. In TCM-inspired routines, lemon is often used to help the liver transition smoothly into the day.

Raw Honey (Optional)
Honey adds a touch of sweetness and comfort. The doctor emphasizes moderation—just enough to soften the taste and support balance.

How He Drinks It

The 95-year-old doctor follows a few simple rules:

  • Drinks it slowly, never rushed

  • Consumes it before breakfast

  • Avoids cold food for at least 30 minutes afterward

  • Skips the drink if feeling unwell or feverish

He often says, “The body speaks softly. You must listen.”

What People Notice Over Time

Those who adopt this routine commonly report:

  • Feeling lighter in the morning

  • More regular digestion

  • Reduced bloating

  • A calmer start to the day

These effects are subtle and gradual. The drink isn’t about instant results—it’s about supporting the body’s natural processes over time.

A Gentle Reminder

This drink is not a treatment for liver disease or intestinal disorders. Anyone with medical conditions, gallbladder issues, or who is taking medication should consult a healthcare professional before making dietary changes.

Final Thoughts

Longevity rarely comes from one secret. It’s built from small, consistent habits practiced with patience. The 95-year-old Chinese doctor’s daily drink reflects a philosophy many modern routines forget: simple, warm, gentle, and regular.

The Natural Rhythm of Sleeping All Night While Supporting Fat Burn

In a world obsessed with quick fixes, extreme diets, and punishing workouts, one of the most powerful fat-supporting tools is often overlooked: deep, uninterrupted sleep. Your body already has a natural rhythm designed to restore energy, balance hormones, and support healthy weight regulation—if you allow it to work the way it was intended.

Sleeping all night isn’t just about feeling rested. It’s about syncing with your biology so your body can shift into repair mode, optimize metabolism, and gently encourage fat burning while you rest. No stimulants. No starvation. Just rhythm.

Let’s explore how this natural process works and how you can support it in a realistic, sustainable way.

Why Sleep and Fat Burn Are Deeply Connected

When you fall asleep, your body doesn’t “shut down.” It gets busy.

During deep sleep, several key processes occur:

  • Growth hormone is released, supporting fat breakdown and muscle repair

  • Cortisol (the stress hormone) naturally lowers

  • Insulin sensitivity improves, helping regulate blood sugar

  • Appetite hormones rebalance, reducing late-night cravings the next day

Poor or fragmented sleep disrupts this rhythm. Studies consistently show that lack of sleep increases hunger, especially for sugary and high-fat foods, while slowing metabolic efficiency. In short: sleep deprivation tells your body to store, not burn.

Sleeping all night allows your body to complete full sleep cycles, especially the deep and REM stages where metabolic repair happens.

The Role of Circadian Rhythm

Your body runs on an internal clock known as the circadian rhythm. This clock regulates sleep, digestion, hormone release, and energy use.

When you go to bed and wake up at inconsistent times, that rhythm becomes confused. The result?

  • Slower metabolism

  • Increased fat storage signals

  • Higher evening cortisol

  • Poor nighttime recovery

Aligning your sleep schedule—even more than sleeping longer—helps restore balance. Consistency trains your body to expect rest, making it easier to fall asleep, stay asleep, and wake refreshed.

Nighttime Hormones That Support Fat Loss

Several hormones released during sleep influence body composition:

Melatonin
Known as the sleep hormone, melatonin also supports metabolic health. Darkness triggers its release, which is why late-night screens can interfere with both sleep quality and fat regulation.

Leptin and Ghrelin
Leptin signals fullness; ghrelin signals hunger. Short sleep lowers leptin and raises ghrelin, increasing appetite the next day. A full night of sleep helps rebalance both.

Growth Hormone
Released mostly during deep sleep, this hormone supports fat breakdown while preserving lean tissue.

When sleep is cut short, these hormones never reach optimal levels.

Creating a Sleep Environment That Works With Your Body

Supporting all-night sleep doesn’t require perfection—just intention.

Darkness matters
Use blackout curtains or dim lighting in the evening. Even small light sources can suppress melatonin.

Temperature matters
A slightly cool room (not cold) encourages deeper sleep.

Noise control
White noise or soft ambient sounds can prevent sleep disruptions.

Timing matters
Try to stop eating large meals 2–3 hours before bed. Digestion competes with sleep quality.

A Simple Night Ritual That Supports Rest and Metabolism

This isn’t a miracle cure—but it’s a gentle way to support your body’s natural rhythm.

Warm Cinnamon Milk (or Plant-Based Alternative)

  • 1 cup warm milk or unsweetened almond milk

  • A pinch of cinnamon

  • Optional: a drop of raw honey

Cinnamon may support blood sugar stability, while warmth signals relaxation. Drink slowly about 45 minutes before bed.

The goal isn’t to “burn fat instantly,” but to reduce nighttime stress and promote uninterrupted sleep—where fat-supportive processes naturally occur.

Stress: The Silent Sleep Disruptor

Even if you lie in bed for eight hours, stress can keep your nervous system alert. Elevated cortisol at night blocks deep sleep and signals fat storage.

Simple stress-lowering habits help:

  • Gentle stretching

  • Deep breathing (inhale 4 seconds, exhale 6 seconds)

  • Writing down tomorrow’s worries before bed

These small actions tell your body it’s safe to rest.

What to Expect When Sleep Improves

When you begin sleeping through the night consistently, many people notice:

  • Reduced late-night cravings

  • More stable energy during the day

  • Less emotional eating

  • Improved body composition over time

Weight changes may be gradual—but they’re sustainable because they’re rooted in biology, not restriction.

The Takeaway

Your body already knows how to support healthy fat balance. It doesn’t need extremes—it needs rhythm.

By prioritizing all-night sleep, aligning with your circadian clock, and creating a calm nighttime routine, you allow your body to do what it was designed to do: restore, regulate, and gently support fat burn while you rest.

Vinegar: The Key to Whiter Whites and Softer Towels (But Most People

Open almost any laundry advice thread and you’ll see vinegar mentioned like a magic spell. Pour it in. Whites glow. Towels turn fluffy. Odors vanish. Simple, right? Not quite. Vinegar can be a laundry game-changer—but only if you understand what it actually does and how to use it correctly. Most people dump it in randomly and then wonder why the results are “meh.”

Let’s fix that.

This is the real story behind vinegar in the wash, why it works, where people mess up, and the exact way to use it for whiter whites and softer towels—no gimmicks, no ruined clothes.

Why Vinegar Works in Laundry at All

White vinegar is mild acetic acid. That acidity is the secret sauce.

Modern laundry problems aren’t usually about dirt anymore—they’re about buildup. Detergent residue, fabric softener coating, hard water minerals, body oils, and even trapped bacteria all cling to fabric fibers. Over time, this buildup:

  • Dulls white fabrics

  • Makes towels stiff and scratchy

  • Traps odors instead of removing them

  • Reduces absorbency

Vinegar dissolves and loosens these residues. Instead of “adding softness” like fabric softener (which actually coats fibers), vinegar removes what’s making fabrics rough in the first place.

That’s why it works—when used properly.

The Big Mistake Most People Make

Here’s where things go wrong:
People use vinegar like detergent.

They add it to the wash cycle with soap, or worse, pour it directly over clothes without knowing where it goes.

Vinegar is not a cleaner on its own. It doesn’t remove grease or heavy soil the way detergent does. Its power comes after cleaning—when it rinses away residue.

Using it incorrectly can:

  • Cancel out detergent performance

  • Leave clothes smelling sour

  • Do absolutely nothing

Timing matters.

How to Use Vinegar for Whiter Whites

Whites don’t turn gray because they’re dirty—they turn gray because they’re coated.

The Correct Method

  1. Wash whites normally with your regular detergent

  2. Add ½ to 1 cup of plain white vinegar to the rinse cycle, not the wash

  3. Let the machine complete the rinse as usual

The vinegar strips away leftover detergent, mineral deposits, and body oils that make whites look dingy.

For Extra-Dull Whites

Once a month, do this:

  • Wash whites with detergent

  • Run an extra rinse with 1 cup vinegar

You’ll notice whites looking brighter—not bleached, not harsh—just clean again.

⚠️ Skip vinegar on silk, wool, or acetate. Cotton, linen, and synthetics are perfect.

How to Use Vinegar for Softer Towels (The Right Way)

If your towels feel stiff, smell musty, or barely absorb water anymore, fabric softener is usually the culprit.

Fabric softener leaves a waxy coating that builds up over time. Vinegar removes it.

Towel Reset Method

Do this once every 4–6 weeks:

  1. Wash towels with hot water and your normal detergent

  2. Run a second wash or rinse with 1 cup white vinegar

  3. Dry completely

After one cycle, towels feel lighter, fluffier, and actually dry your skin again.

For Everyday Maintenance

Add ½ cup vinegar to the fabric softener compartment during the rinse cycle. It won’t smell like vinegar once dry—promise.

What Vinegar Does Not Do

Let’s clear up some myths.

  • ❌ It does not disinfect laundry completely

  • ❌ It does not replace detergent

  • ❌ It does not permanently whiten stained fabrics

  • ❌ It does not damage modern washing machines when used occasionally

Vinegar is a helper, not the hero.

Will Clothes Smell Like Vinegar?

This is the most common fear—and the easiest one to calm.

No.

The vinegar smell disappears as clothes dry. If you do notice a lingering scent, it usually means:

  • Too much vinegar was used

  • Laundry wasn’t fully rinsed

  • Clothes sat wet too long

Stick to the recommended amounts and proper placement, and there’s no smell.

Vinegar vs Fabric Softener

Here’s the uncomfortable truth: fabric softener makes laundry feel nice short-term but harms it long-term.

Fabric Softener Vinegar
Coats fibers Removes buildup
Reduces absorbency Improves absorbency
Traps odors Releases odors
Builds residue Leaves nothing behind

Once people switch, they rarely go back.

The Simple Vinegar Laundry “Recipe”

Ingredients

  • Plain white vinegar (5% acidity)

How to Use

  • Whites: ½–1 cup in rinse cycle

  • Towels: 1 cup monthly reset, ½ cup regular rinse

  • Everyday loads: ¼–½ cup in fabric softener dispenser

Frequency

  • Regular loads: As needed

  • Towels: Monthly deep reset

The Bottom Line

Vinegar isn’t a miracle—but it is misunderstood.

Used correctly, it:

  • Brightens whites without harsh chemicals

  • Restores towel softness naturally

  • Removes residue that detergent leaves behind

  • Extends the life of fabrics

Okra Clove Collagen Toner: Better Than Botox

In the world of skincare, the most powerful ingredients are sometimes hiding in plain sight—right in your kitchen. One such underrated beauty duo is okra and clove. When combined into a simple homemade toner, they create a skin-loving formula that many natural beauty lovers call “better than Botox”—not because it freezes muscles or replaces medical treatments, but because it visibly smooths, plumps, tightens, and refreshes the skin with consistent use.

This toner is especially loved for its collagen-supporting, pore-tightening, and glow-boosting effects. It’s affordable, gentle, and packed with plant-based goodness that works in harmony with your skin.

Let’s break down why it works, how to make it, and how to use it safely for best results.

Why Okra Is a Collagen Hero

Okra, also known as lady’s finger, is rich in natural mucilage, a gel-like substance that forms when it’s soaked or boiled. This mucilage is what makes okra so special for skincare.

Skin benefits of okra:

  • Deeply hydrates and locks in moisture

  • Creates a natural “lifting” feel on the skin

  • Supports skin elasticity and softness

  • Smooths fine lines caused by dehydration

  • Helps skin look plump and refreshed

Okra is also packed with vitamin C and antioxidants, which play an important role in protecting existing collagen and supporting the skin’s natural renewal process.

Why Clove Is the Secret Weapon

Clove may be small, but it’s incredibly powerful. Used carefully and in low concentration, clove water adds a purifying and toning effect to the formula.

Skin benefits of clove:

  • Rich in antioxidants that fight premature aging

  • Helps tighten the appearance of pores

  • Supports clearer, balanced skin

  • Has mild antibacterial properties

  • Improves overall skin texture

Clove gives this toner its firming edge—helping skin look more refined and toned over time.

Okra Clove Collagen Toner Recipe

Ingredients:

  • 4–5 fresh okra pods

  • 3 whole cloves

  • 1½ cups filtered water

Optional additions (choose one):

  • 1 teaspoon rose water (for soothing and fragrance)

  • 1 teaspoon aloe vera gel (for extra hydration)

Step-by-Step Preparation:

  1. Wash and slice the okra into small pieces to release more mucilage.

  2. Add okra slices and cloves to a saucepan with the water.

  3. Bring to a gentle boil, then simmer for 10–12 minutes.

  4. Turn off heat and let the mixture cool completely.

  5. Strain the liquid using a fine sieve or clean cloth.

  6. Add rose water or aloe vera if using, and mix well.

  7. Pour into a clean glass spray bottle or jar.

Storage:
Keep refrigerated and use within 5–7 days for freshness.

How to Use the Toner

  • Cleanse your face gently.

  • Spray or apply the toner with a cotton pad.

  • Pat lightly into the skin—do not rinse.

  • Follow with a light moisturizer or facial oil.

Best time to use:
Morning and night for best results.

What Results to Expect

With regular use, many people notice:

  • Softer, smoother skin texture

  • A subtle tightening effect

  • More hydrated, bouncy skin

  • Reduced appearance of fine lines

  • A healthy, natural glow

This is why it’s often called “better than Botox” in natural beauty circles—it gives a temporary tightening and plumping effect without needles, chemicals, or harsh treatments.

Important Safety Tips

  • Always patch test before full use, especially if you have sensitive skin.

  • Avoid the eye area.

  • Use cloves sparingly—too much can irritate the skin.

  • This toner is not a medical treatment and does not replace professional procedures.

Final Thoughts

The Okra Clove Collagen Toner is a beautiful reminder that skincare doesn’t have to be complicated or expensive. With just two powerful ingredients, you can create a toner that hydrates, tightens, and revitalizes your skin naturally.

Dump this bottled Italian dressing and only 2 more ingredients over potatoes in the slow cooker for a delicious side made for winter comfort meals

When winter settles in and the days feel shorter, there’s something deeply comforting about a warm, buttery potato dish waiting for you at the end of the day. This is one of those “why didn’t I do this sooner?” recipes — the kind you make once and then keep coming back to all season long.

No chopping a dozen vegetables.
No fancy spices.
No babysitting the stove.

You literally dump bottled Italian dressing over potatoes, add just two more ingredients, turn on the slow cooker, and walk away. What comes back hours later is a rich, savory, melt-in-your-mouth potato side that tastes like you worked way harder than you actually did.

This recipe is perfect for cozy winter dinners, holiday spreads, potlucks, or those nights when you want comfort food without effort.

Why This Recipe Works So Well

Italian dressing is a secret weapon. It already contains oil, vinegar, garlic, herbs, and seasoning — everything potatoes love. When it cooks low and slow, the dressing seeps into every bite, infusing the potatoes with deep, herby flavor.

The other two ingredients do the rest of the magic:

Butter adds richness and that classic comfort-food feel
Parmesan cheese melts into the sauce, creating a savory, slightly salty finish that coats each potato

Together, they turn humble potatoes into something you’d happily serve alongside a roast or holiday ham.

Ingredients (That’s It!)

  • 2½ to 3 pounds baby potatoes (red or gold work best)

  • ¾ cup bottled Italian dressing (any brand you love)

  • ½ cup grated Parmesan cheese

  • ½ cup butter, cut into slices

Optional garnish (not counted as ingredients): chopped parsley or extra Parmesan

Slow Cooker Italian Dressing Potatoes

Step 1: Prep the Potatoes

Wash the potatoes well. If they’re small, leave them whole. If they’re larger, cut them in half so they cook evenly. No peeling needed — the skins help hold everything together and add texture.

Place the potatoes directly into the slow cooker.

Step 2: Dump and Layer

Pour the Italian dressing evenly over the potatoes, tossing gently so everything gets coated.

Sprinkle the Parmesan cheese over the top.

Lay the slices of butter evenly across the potatoes. As the butter melts, it combines with the dressing and cheese to form a rich, savory sauce.

That’s it. You’re done prepping.

Step 3: Cook Low and Slow

Cover and cook:

  • Low: 5–6 hours

  • High: 3–4 hours

The potatoes are ready when they’re fork-tender and buttery soft all the way through.

Step 4: Stir and Serve

Give everything a gentle stir before serving so the sauce coats each potato. Sprinkle with extra Parmesan or a bit of parsley if you like.

Serve hot.

What You’ll Love About These Potatoes

• Creamy inside with tender skins
• Packed with herby, garlicky flavor
• Rich without being heavy
• Perfect for cold weather meals
• Practically impossible to mess up

This dish feels indulgent, but it’s made with pantry staples and zero stress.

Best Potatoes to Use

  • Baby red potatoes: Slightly waxy, hold their shape beautifully

  • Baby gold potatoes: Creamy and buttery

  • Fingerlings: Elegant and flavorful

Avoid russets for this recipe — they tend to fall apart too much in the slow cooker.

What to Serve Them With

These potatoes are incredibly versatile. Pair them with:

  • Roast chicken or turkey

  • Beef pot roast

  • Meatloaf

  • Pork chops

  • Sausages

  • Grilled chicken in summer (yes, they work year-round)

They also shine on a holiday table when oven space is tight.

Make It Your Own (Optional Twists)

If you ever want to switch things up without ruining the simplicity:

  • Add whole garlic cloves for extra depth

  • Toss in sliced onions for sweetness

  • Finish with cracked black pepper

  • Use shredded Parmesan for a creamier sauce

But honestly? The base recipe is perfect as-is.

Storage & Reheating

Refrigerator:
Store leftovers in an airtight container for up to 4 days.

Reheat:
Warm gently in the microwave or on the stovetop with a splash of water or butter to loosen the sauce.

Why This Is a Winter Favorite

There’s something about coming home to a slow cooker filled with buttery, savory potatoes that just feels right in winter. This dish doesn’t try to be fancy — it’s honest, cozy food that warms you from the inside out.