Very Dirty Mop? Don’t Throw It Away Yet — Try This Simple Cleaning Method

A dirty mop is one of the most frustrating household problems. You use it to clean your floors, yet over time it becomes stained, smelly, and full of grime. Many people believe that once a mop reaches this stage, the only solution is to throw it away and buy a new one. However, that isn’t always necessary. With a simple cleaning method using common household ingredients, you can restore your mop, remove unpleasant odors, and make it usable again.

This easy technique is inexpensive, quick, and surprisingly effective. Instead of spending money on a new mop every few weeks, you can extend the life of the one you already have. Let’s explore why mops become so dirty and how you can bring them back to life with a simple “cleaning recipe.”

Why Mops Get So Dirty

Every time you mop your floor, the mop head collects dust, grease, food particles, hair, and bacteria. Over time these particles accumulate deep within the fibers of the mop. Even when you rinse it after cleaning, residue often remains trapped inside.

Moisture also plays a role. A damp mop stored in a bucket or closet becomes the perfect environment for bacteria and mildew to grow. That’s why old mops often develop a strong unpleasant smell.

Instead of replacing your mop repeatedly, cleaning it thoroughly once a week can keep it fresh and hygienic.

The Simple Mop Cleaning “Recipe”

This powerful cleaning mixture uses ingredients most people already have at home. The combination helps remove dirt, kill bacteria, and eliminate odors.

Ingredients

  • 1 liter of hot water

  • 1 cup white vinegar

  • 2 tablespoons baking soda

  • 1 tablespoon dish soap

  • Juice of half a lemon (optional for freshness)

Step-by-Step Method

1. Prepare a Deep Cleaning Bucket

Fill a large bucket or basin with one liter of hot water. The water should be hot but not boiling, as extremely hot water may damage certain mop materials.

2. Add the Vinegar

Pour one cup of white vinegar into the water. Vinegar is well known for its natural disinfecting properties. It helps dissolve grease, remove odors, and break down dirt trapped in the mop fibers.

3. Add Baking Soda

Slowly add two tablespoons of baking soda. The mixture may fizz slightly—this is normal. Baking soda helps lift stubborn stains and neutralize bad smells.

4. Add Dish Soap

Add one tablespoon of dish soap and mix gently. Dish soap cuts through oily residue that often builds up on mop heads, especially in kitchens.

5. Add Lemon Juice (Optional)

Squeeze in the juice of half a lemon. Lemon gives the mop a fresh scent and also has mild antibacterial properties.

Soaking the Mop

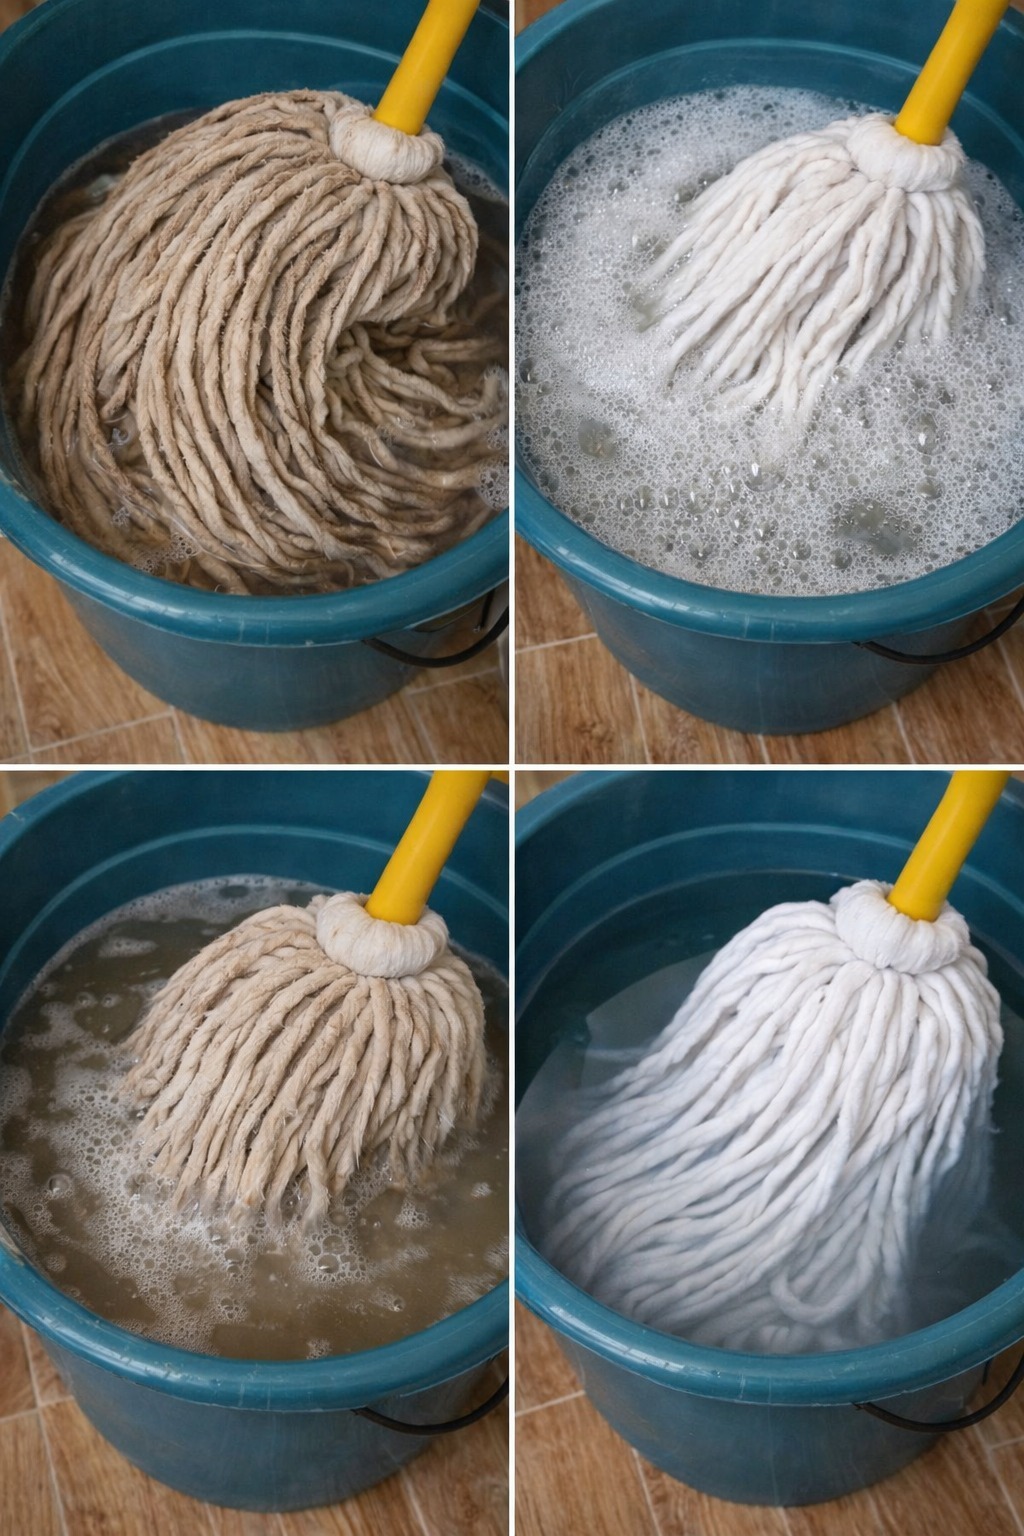
Place the dirty mop head into the bucket and fully submerge it in the mixture. Let it soak for 30 to 60 minutes.

During this time, the cleaning solution penetrates the fibers and loosens the dirt. If the mop is extremely dirty, you can gently press and squeeze it several times while soaking.

Scrub and Rinse

After soaking, remove the mop and gently scrub the fibers using a brush or your hands while wearing cleaning gloves. You will likely notice the water turning very dark as the dirt releases.

Rinse the mop thoroughly with clean running water until all the soap and residue are gone.

Proper Drying Is Important

Drying the mop correctly is just as important as washing it.

  1. Squeeze out as much water as possible.

  2. Hang the mop in a well-ventilated area.

  3. Allow it to dry completely before storing.

A dry mop prevents bacteria and mildew from returning.

Extra Tips to Keep Your Mop Clean Longer

Rinse After Every Use

After mopping your floors, rinse the mop head with hot water and wring it out well.

Use a Disinfecting Soak Weekly

Soaking your mop once a week in vinegar water can prevent odors and bacteria buildup.

Avoid Leaving It in Dirty Water

Never leave your mop sitting in the bucket after cleaning. This causes bacteria to multiply quickly.

Replace When Necessary

Even with good care, mop heads eventually wear out. If the fibers are falling apart or permanently stained, it may be time to replace it.

Why This Method Works

This simple cleaning combination works because each ingredient has a specific role:

  • Vinegar dissolves mineral buildup and disinfects.

  • Baking soda removes odors and loosens dirt.

  • Dish soap breaks down grease and grime.

  • Lemon adds freshness and mild antibacterial action.

Together, they create a powerful but natural cleaning solution.

Save Money and Reduce Waste

Many people throw away their mop the moment it becomes dark and smelly. But with this simple cleaning method, you can restore it easily and avoid unnecessary waste.

Regular mop cleaning also helps keep your floors truly clean. A dirty mop can spread bacteria around the house instead of removing it. By maintaining your cleaning tools, you make your home healthier and fresher.

Final Thoughts

A very dirty mop does not always mean it is time to buy a new one. With this easy household “recipe,” you can remove grime, eliminate odors, and bring your mop back to life in less than an hour.

I Soaked My Strawberries in Salt Water – Here’s What Happened (And Why You Might Want to Try It Too)

Strawberries are one of the most delicious and refreshing fruits you can enjoy. Their bright red color, sweet flavor, and juicy texture make them perfect for desserts, smoothies, salads, or simply eating fresh. But many people don’t realize that strawberries often carry tiny insects, dirt, and pesticide residues that are difficult to see with the naked eye. Recently, a simple kitchen trick has gone viral: soaking strawberries in salt water before eating them.

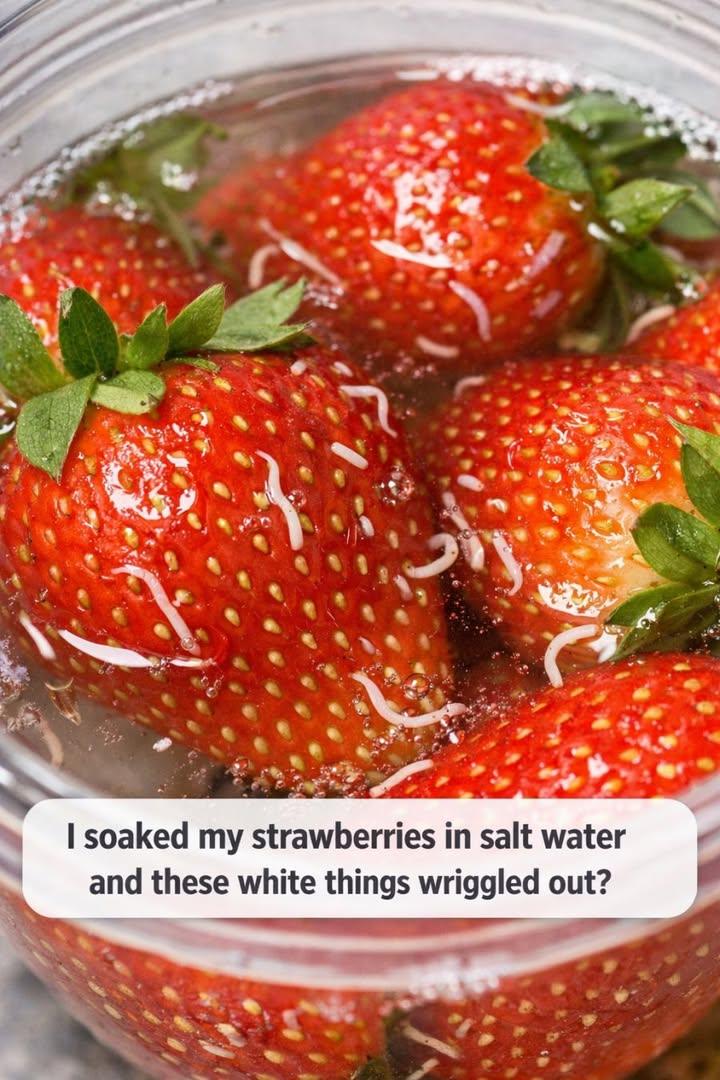
At first, this idea might sound strange, but many people who try it are surprised by what they discover. When strawberries are soaked in salt water for a few minutes, tiny white larvae or worms may wriggle out of the fruit. While this can be shocking, it is actually a natural occurrence. Strawberries grow close to the ground and can attract small insects during the growing process. These insects sometimes lay eggs inside the fruit, which can develop into tiny larvae.

This simple salt water trick helps reveal what may be hiding inside your strawberries while also helping clean them more thoroughly.

Why Soak Strawberries in Salt Water?

Soaking strawberries in salt water is an easy and natural method to remove:

  • Tiny insects or larvae

  • Dirt and debris

  • Pesticide residues

  • Hidden particles inside the fruit

Salt water works because the salt changes the environment around the fruit. The insects and larvae cannot tolerate the salty solution, so they come out of the strawberries.

Even if nothing appears, the soak still helps clean the fruit more deeply than a quick rinse with plain water.

Ingredients

To try this simple strawberry cleaning method, you only need a few things:

  • 1 pound fresh strawberries

  • 1 teaspoon salt

  • 2 cups warm water

  • A large bowl

  • Clean running water for rinsing

Instructions

Step 1: Prepare the Salt Water

Fill a large bowl with about two cups of warm water. Add one teaspoon of salt and stir until the salt dissolves completely. The water should taste slightly salty but not extremely strong.

Step 2: Add the Strawberries

Place the strawberries into the bowl. Make sure they are fully submerged in the salt water. If needed, gently move them around so all sides are covered.

Step 3: Let Them Soak

Allow the strawberries to soak for about 5 minutes. During this time, you may notice small white specks or tiny worm-like larvae coming out of the fruit and floating in the water.

Not every batch of strawberries will contain insects, but if they do, the salt water soak helps bring them out.

Step 4: Rinse Thoroughly

After soaking, remove the strawberries and rinse them very well under clean running water. This step is important because it removes the salt and anything that came out of the fruit.

Step 5: Dry and Enjoy

Pat the strawberries dry with a clean towel or paper towel. Now they are ready to eat, slice, or use in your favorite recipes.

Why Strawberries Sometimes Contain Tiny Larvae

Many people are surprised or even worried when they see tiny white worms coming out of strawberries. However, this is more common than most people realize.

Small fruit flies can lay eggs on strawberries while they are growing in the field. When the eggs hatch, the larvae remain hidden inside the fruit. Because strawberries have many small crevices and seeds on their surface, they provide a perfect hiding place.

These insects are generally harmless and often go unnoticed when people eat strawberries without soaking them first. The salt water trick simply reveals what might already be there.

Benefits of Cleaning Fruit Properly

Taking a few extra minutes to clean strawberries properly has several advantages:

1. Removes Hidden Dirt

Strawberries grow close to the soil, so they can easily collect dust and dirt during harvesting.

2. Reduces Pesticide Residue

While washing doesn’t remove all pesticides, soaking and rinsing can help reduce residues on the fruit’s surface.

3. Improves Freshness

Cleaning strawberries thoroughly can help them last longer in the refrigerator when stored properly.

4. Gives Peace of Mind

Knowing your fruit is clean and safe to eat helps you enjoy it without worry.

Tips for Choosing the Best Strawberries

When buying strawberries, keep these tips in mind:

  • Look for bright red berries with fresh green leaves

  • Avoid berries with mold or soft spots

  • Choose strawberries that smell sweet and fragrant

  • Store them in the refrigerator and wash them just before eating

Washing strawberries too early can cause them to spoil faster, so it’s best to clean them right before you plan to eat or use them.

A Simple Habit for Cleaner Fruit

Soaking strawberries in salt water may seem like a small step, but it can make a big difference in how clean your fruit really is. This simple kitchen trick has helped many people discover what might be hiding in their berries and encourages better fruit-washing habits.

I Soaked My Strawberries in Salt Water and These White Things Wriggled Out

Strawberries are one of the most beloved fruits in the world. Their bright red color, juicy texture, and sweet flavor make them a favorite in desserts, smoothies, salads, and snacks. However, many people recently discovered something surprising when cleaning their strawberries: tiny white worm-like creatures appearing after soaking the fruit in salt water. Videos showing this phenomenon have gone viral on social media, leaving many people shocked and concerned.

If you’ve ever tried soaking strawberries in salt water and noticed small white things wriggling out, you’re not alone. While it may look alarming at first, the explanation behind it is actually quite simple and surprisingly common in nature.

What Are the White Worms in Strawberries?

The tiny white creatures that sometimes emerge from strawberries during a salt water soak are usually the larvae of a small fruit fly called the Spotted Wing Drosophila (Drosophila suzukii). This insect lays its eggs inside soft fruits like strawberries, raspberries, and cherries. When the eggs hatch, the larvae grow inside the fruit.

Unlike many other fruit flies that only lay eggs in overripe fruit, the Spotted Wing Drosophila can pierce the skin of fresh fruit and deposit eggs while the fruit is still ripening. This means the larvae may be present even in strawberries that look perfectly fresh from the outside.

These larvae are extremely small—often only a few millimeters long—and are nearly transparent or white in color. Because they hide inside the fruit, they usually go unnoticed when people eat strawberries.

Why Salt Water Makes Them Come Out

Soaking strawberries in salt water is a simple trick that many people use to clean fruit more thoroughly. When strawberries are placed in a bowl of water mixed with salt, it creates an environment that irritates or disturbs small insects or larvae inside the fruit.

The salt causes the larvae to move toward the surface, and they may wriggle out of the fruit into the water. This is why people suddenly see the tiny white worms moving in the bowl after soaking their berries.

Although the sight can be unsettling, this process simply reveals something that may already exist in many fruits grown outdoors.

Are They Harmful to Eat?

The good news is that these larvae are generally harmless to humans. Fruits and vegetables grown outdoors often contain tiny insects or larvae because they are part of natural ecosystems. In most cases, people have unknowingly eaten them without any health problems.

Food safety experts say that accidental consumption of fruit fly larvae typically does not pose a health risk. Our digestive system easily breaks down these small organisms.

However, many people understandably prefer to remove them for peace of mind and better hygiene.

How to Properly Clean Strawberries

Cleaning strawberries thoroughly before eating them is always a good idea. Here is a simple method many people use:

Ingredients

  • 1 bowl of fresh strawberries

  • 4 cups of water

  • 1 teaspoon of salt

Instructions

  1. Fill a large bowl with water.

  2. Add the salt and stir until it dissolves.

  3. Place the strawberries in the bowl.

  4. Let them soak for about 5 minutes.

  5. You may notice tiny particles or larvae floating in the water.

  6. Remove the strawberries and rinse them well under clean running water.

  7. Pat them dry with a clean towel.

This method helps remove dirt, pesticide residue, and any small insects that may be present.

Other Ways to Wash Strawberries

Some people prefer alternative cleaning methods. One popular option is soaking strawberries in a mixture of water and vinegar.

For example, you can mix:

  • 1 part vinegar

  • 3 parts water

Soak the strawberries for a few minutes and then rinse them thoroughly. Vinegar helps kill bacteria and loosen dirt.

Another method is simply rinsing strawberries under running water while gently rubbing their surface. While this method is quicker, soaking may remove more hidden debris.

Why This Happens More Often Now

Many people believe the issue is becoming more common, but the truth is that it has likely existed for a long time. Social media has simply made people more aware of it.

Insects like the Spotted Wing Drosophila are widespread in many fruit-growing regions around the world. Farmers use various methods to control them, but it is difficult to eliminate them entirely without heavy pesticide use.

Because many consumers prefer fruits grown with fewer chemicals, occasional insect presence is considered a normal part of natural agriculture.

Should You Stop Eating Strawberries?

Absolutely not. Strawberries remain one of the healthiest fruits you can eat. They are rich in vitamin C, antioxidants, fiber, and other nutrients that support heart health and immune function.

The discovery of tiny larvae may be unpleasant, but it does not make strawberries unsafe. Proper washing and cleaning can greatly reduce the chances of encountering them.

In fact, the presence of small insects often indicates that the fruit was grown in a natural environment rather than being heavily treated with chemicals.

Final Thoughts

Seeing tiny white worms wriggling out of strawberries after a salt water soak can definitely be surprising. However, this phenomenon is simply part of the natural life cycle of small insects like the Spotted Wing Drosophila.

The important thing to remember is that strawberries are still safe, nutritious, and delicious. By washing them properly before eating, you can enjoy their sweet flavor while keeping them as clean as possible.

Discover the 9 Early Warning Signs of Stroke

A stroke is a serious medical emergency that occurs when the blood supply to the brain is interrupted or reduced. When this happens, brain cells begin to die within minutes due to a lack of oxygen and nutrients. Because strokes can cause permanent disability or even death, recognizing the early warning signs is extremely important. Many people experience subtle symptoms days or even weeks before a stroke occurs, but these signs are often ignored or mistaken for minor health problems.

Understanding these warning signs can help you or someone around you seek medical help quickly. Early treatment can dramatically reduce the risk of severe brain damage and improve recovery outcomes. In this article, we will explore nine early warning signs of stroke that everyone should know.

1. Sudden Numbness or Weakness

One of the most common early signs of a stroke is sudden numbness or weakness, especially on one side of the body. This may affect the face, arm, or leg. Many people notice that one side of their face feels droopy or that they struggle to lift one arm.

For example, if you try to raise both arms and one slowly drifts downward, it could indicate a neurological issue related to reduced blood flow in the brain. This symptom often appears suddenly and should never be ignored.

2. Difficulty Speaking or Understanding Speech

Another key warning sign is trouble speaking or understanding language. A person experiencing a stroke may suddenly have slurred speech or may struggle to find the right words.

Sometimes they may speak clearly but say things that don’t make sense. Others may have difficulty understanding what someone else is saying. These language problems occur because certain parts of the brain responsible for speech and comprehension are affected.

3. Sudden Vision Problems

A stroke can also affect your vision. You might experience blurred vision, double vision, or sudden loss of vision in one or both eyes. Some people describe it as a dark curtain suddenly covering part of their field of vision.

Vision issues related to stroke often happen quickly and may be accompanied by dizziness or confusion. Even temporary vision disturbances should be evaluated by a medical professional.

4. Severe Headache with No Known Cause

A sudden, intense headache that appears without any clear cause can be another warning sign. Some stroke survivors describe it as the worst headache of their life.

This symptom is particularly common in hemorrhagic strokes, which occur when a blood vessel in the brain ruptures. The headache may also be accompanied by nausea, vomiting, or sensitivity to light.

5. Dizziness and Loss of Balance

Feeling dizzy, unsteady, or unable to maintain balance can also signal a potential stroke. People may suddenly struggle to walk straight or feel like the room is spinning.

Because dizziness can have many causes, it’s sometimes dismissed as fatigue or dehydration. However, when it appears suddenly and is accompanied by other neurological symptoms, it could indicate a stroke.

6. Confusion or Trouble Thinking Clearly

Stroke can affect the brain’s ability to process information, leading to sudden confusion. A person may struggle to concentrate, forget simple things, or appear disoriented.

They might have difficulty following conversations, remembering familiar names, or completing simple tasks. If someone suddenly seems mentally confused without a clear explanation, it should be taken seriously.

7. Facial Drooping

Facial drooping is one of the most recognizable symptoms of a stroke. When the muscles on one side of the face become weak, the face may appear uneven.

A simple test is to ask the person to smile. If one side of the face droops or doesn’t move properly, it could be a sign of a stroke. This happens because the nerves controlling facial muscles are affected by reduced blood flow to the brain.

8. Sudden Fatigue or Weakness

While fatigue can occur for many reasons, sudden and unusual exhaustion may be an early warning sign of stroke, particularly in women.

Some people report feeling extremely tired for no apparent reason days before experiencing a stroke. This type of fatigue may come with other symptoms such as headaches, dizziness, or confusion.

9. Numbness or Tingling in the Body

Unexplained tingling sensations in the face, arms, or legs can also occur before a stroke. This sensation may feel similar to when a limb “falls asleep,” but it happens suddenly and without a clear cause.

Persistent or recurring tingling should always be evaluated by a healthcare professional, especially if it appears on only one side of the body.

Remember the FAST Method

Health experts often recommend remembering the FAST method to recognize stroke symptoms quickly:

  • F – Face: Ask the person to smile. Does one side droop?

  • A – Arms: Ask them to raise both arms. Does one arm drift downward?

  • S – Speech: Is their speech slurred or strange?

  • T – Time: If you notice any of these signs, call emergency services immediately.

Acting quickly can save a life and reduce long-term complications.

Final Thoughts

A stroke can happen suddenly, but the body often provides warning signals before a major event occurs. Recognizing these nine early warning signs—such as numbness, confusion, speech problems, vision changes, and severe headaches—can make a life-saving difference.

If you or someone around you experiences these symptoms, do not wait to see if they disappear. Immediate medical attention is essential because treatment is most effective when given as early as possible.

Vinegar Is Key to Whiter Clothes and Softer Towels, But Most People Use It Incorrectly

Many households are constantly searching for simple, affordable ways to keep clothes bright, towels soft, and laundry fresh. While there are countless commercial laundry products promising spotless results, one of the most effective cleaning agents has been sitting quietly in kitchen cabinets for decades: vinegar. This humble ingredient is inexpensive, natural, and incredibly versatile. However, despite its popularity in cleaning routines, many people unknowingly use vinegar the wrong way in their laundry, which prevents them from enjoying its full benefits.

Understanding how vinegar works and how to use it properly can completely transform the way your laundry looks and feels. When used correctly, vinegar can help restore whiteness to dull clothing, remove odors, soften towels, and even extend the life of fabrics.

Why Vinegar Works So Well in Laundry

White vinegar is a mild acid known as acetic acid. This natural compound has powerful cleaning abilities that help dissolve mineral deposits, detergent residue, and body oils that build up in fabrics over time.

Many people assume their laundry detergent is doing all the cleaning work, but detergent often leaves behind a thin film. Over time, that residue can trap odors, make fabrics feel stiff, and cause whites to look gray or yellow. Vinegar helps break down that buildup, allowing fabrics to return to their natural softness and brightness.

Another advantage of vinegar is its ability to neutralize odors. Unlike artificial fragrances that simply mask smells, vinegar eliminates odor-causing bacteria, leaving clothes smelling fresh and clean once they dry.

The Biggest Mistake People Make

One of the most common mistakes people make is pouring vinegar directly onto clothes in the washing machine. While vinegar itself is gentle, pouring it directly on fabric can weaken certain fibers over time and may cause uneven treatment.

Another mistake is mixing vinegar with bleach or adding it at the wrong time during the wash cycle. Combining vinegar with chlorine bleach can create harmful fumes, and adding vinegar too early in the wash may reduce the effectiveness of detergent.

The correct method is much simpler and safer.

The Right Way to Use Vinegar for Whiter Clothes

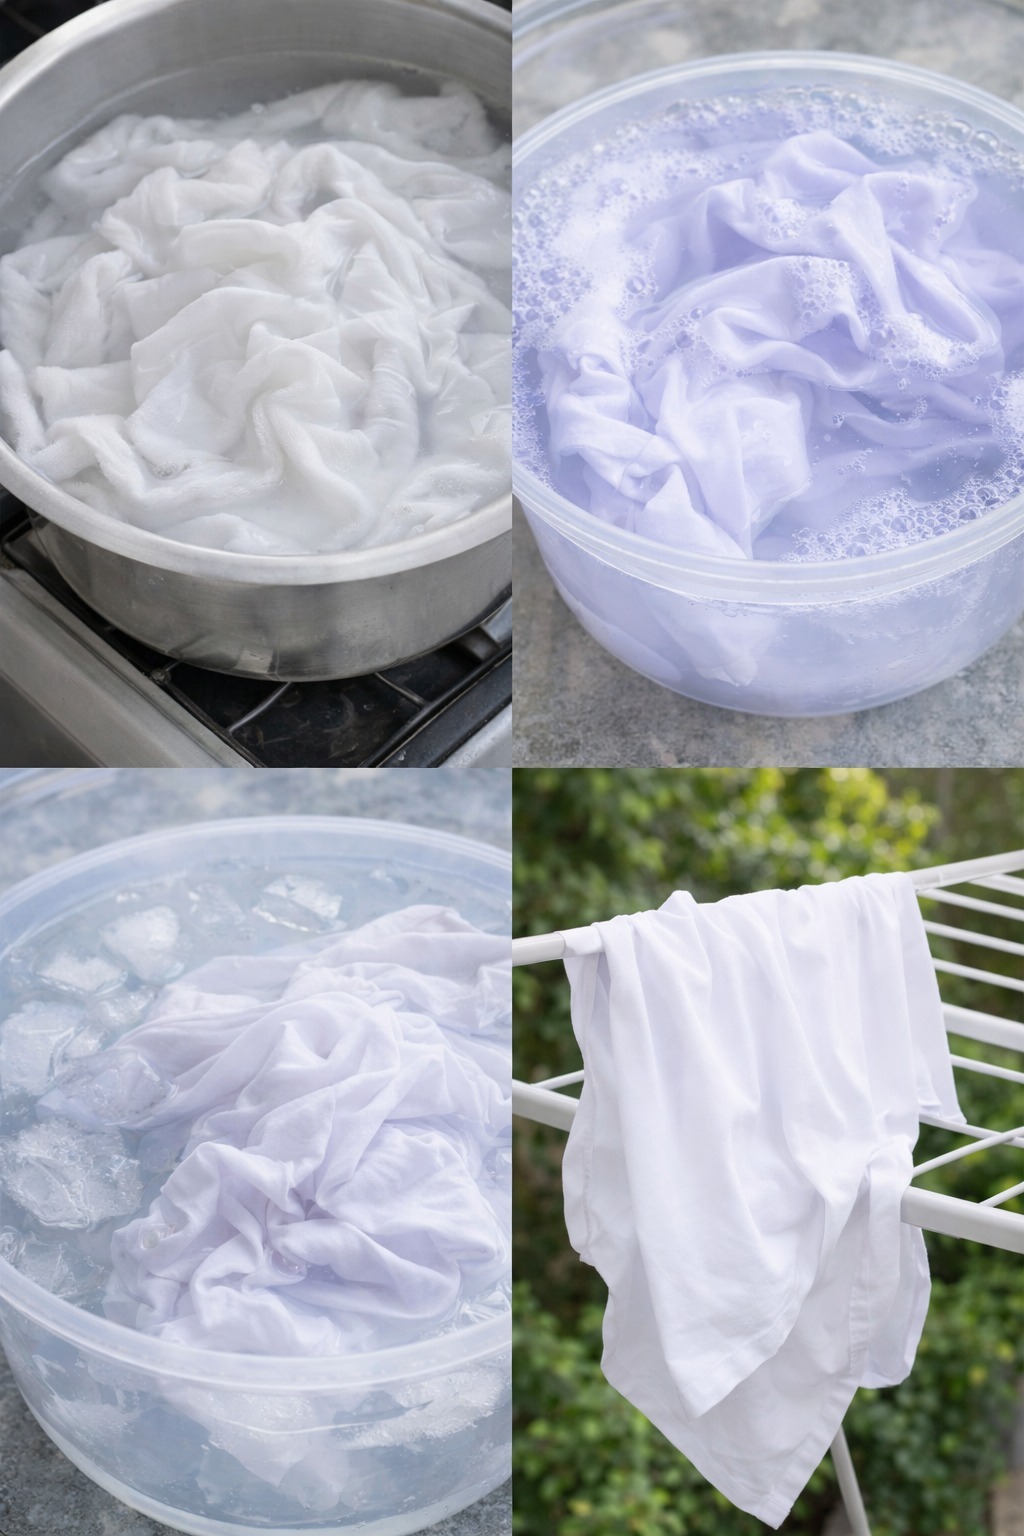
If your white clothes have started looking dull or slightly yellow, vinegar can help restore their brightness. Instead of adding it directly to the drum, pour ½ to 1 cup of white vinegar into the fabric softener dispenser of your washing machine.

This ensures the vinegar is released during the rinse cycle, when it can remove leftover detergent and mineral buildup from the fabric. As a result, clothes come out cleaner and brighter without any vinegar smell remaining.

For heavily stained or yellowed white clothes, you can also soak them before washing. Fill a basin or bucket with warm water and add one cup of vinegar. Let the clothes soak for about one hour before running them through a normal wash cycle.

How Vinegar Makes Towels Softer

Towels often become stiff and rough because of detergent residue and mineral deposits from hard water. Fabric softeners may temporarily mask the problem, but they actually leave behind a coating that reduces the towel’s absorbency.

Vinegar works differently. It breaks down that residue, restoring the towel’s natural fibers.

To soften towels, wash them as usual with detergent. During the rinse cycle, add one cup of white vinegar to the fabric softener compartment. After drying, the towels will feel noticeably fluffier and more absorbent.

If towels are extremely stiff, try washing them once with vinegar and no detergent at all. This deep cleaning cycle helps remove old buildup completely.

Eliminating Odors from Clothes

Gym clothes, kitchen towels, and heavily used fabrics often hold onto unpleasant odors even after washing. This happens because bacteria and detergent residue become trapped within the fibers.

Adding half a cup of vinegar during the rinse cycle helps neutralize these smells naturally. The vinegar breaks down the odor-causing bacteria, leaving clothes fresh once they dry.

For persistent smells, such as mildew from damp towels, soaking the fabric in warm water with vinegar for 30 to 60 minutes before washing can make a significant difference.

Cleaning the Washing Machine with Vinegar

Another benefit of vinegar is that it can help clean the washing machine itself. Over time, soap scum, mold, and mineral deposits can build up inside the machine, which may transfer unpleasant odors to clothes.

Running an empty hot wash cycle with two cups of white vinegar helps dissolve these residues and refresh the machine. This simple maintenance step can improve washing performance and keep laundry smelling cleaner.

When Not to Use Vinegar

Although vinegar is extremely useful in laundry, there are a few situations where it should be avoided.

Do not use vinegar on delicate fabrics such as silk or certain elastic materials, as the acidity may weaken them over time. Additionally, never mix vinegar with bleach or products containing chlorine, since the combination can create dangerous gases.

A Simple Ingredient with Powerful Results

Vinegar proves that effective cleaning does not always require expensive products or complicated routines. By using it properly during the rinse cycle, you can brighten whites, soften towels, remove stubborn odors, and even keep your washing machine cleaner.

I Didn’t Believe This Floor Trick Until I Tried It

Keeping floors clean and shiny can sometimes feel like a never-ending chore. Dust, footprints, food spills, and everyday dirt quickly take away that fresh, polished look we all want in our homes. Many people spend money on expensive cleaning products that promise sparkling floors but often leave streaks or chemical smells behind. For a long time, I believed that only strong store-bought cleaners could properly clean floors. However, I recently discovered a simple floor-cleaning trick that completely changed my mind.

At first, I was skeptical. The idea seemed too simple to actually work. But after trying it myself, I was surprised at how effective it was. Not only did it clean my floors beautifully, but it also made the entire house smell fresh and pleasant. The best part is that this trick uses common household ingredients that many people already have in their kitchens.

Why Traditional Floor Cleaners Can Be Problematic

Many commercial floor cleaners contain strong chemicals that may leave residue on surfaces. Over time, this buildup can actually make floors look dull instead of shiny. Some cleaners also create slippery surfaces, which can be dangerous, especially for children or elderly family members.

Another common issue is the strong artificial fragrance found in many products. While these scents may seem pleasant at first, they can sometimes cause headaches or discomfort for people sensitive to strong smells.

Because of these issues, many homeowners are starting to look for simpler and more natural cleaning methods.

The Simple Floor Cleaning Trick

This trick relies on a powerful yet gentle combination of three ingredients:

Ingredients

  • 1 bucket of warm water

  • 1 cup white vinegar

  • 1 tablespoon dish soap

  • Optional: a few drops of lemon essential oil for fragrance

Why These Ingredients Work

Each ingredient in this mixture plays an important role in cleaning the floor effectively.

White vinegar is known for its natural cleaning properties. It helps break down grease, remove dirt, and dissolve residue left by other cleaning products. Vinegar is also excellent at eliminating odors, leaving floors smelling fresh.

Dish soap helps lift dirt and grime from the floor surface. It breaks down oils and sticky residues that often build up in kitchens and high-traffic areas.

Warm water helps activate the cleaning power of the ingredients while loosening stubborn dirt and stains.

Lemon essential oil, if added, provides a light and refreshing scent that makes the entire home feel cleaner.

Step-by-Step Cleaning Method

This cleaning method is extremely simple and takes only a few minutes to prepare.

Step 1: Prepare the cleaning solution

Fill a bucket with warm water. Add the vinegar and dish soap, then gently mix the solution. If you like a pleasant scent, add a few drops of lemon essential oil.

Step 2: Sweep or vacuum the floor

Before mopping, remove dust, crumbs, and loose dirt using a broom or vacuum. This step prevents dirt from spreading while mopping.

Step 3: Mop the floor

Dip a mop into the cleaning solution and wring out the excess water. Mop the floor in sections, moving from one side of the room to the other.

Step 4: Allow the floor to air dry

One of the best parts of this trick is that the floor dries quickly without leaving streaks or sticky residue.

The Surprising Results

When I tried this method for the first time, I immediately noticed the difference. The floors looked brighter and cleaner than they had in a long time. Even areas that usually appeared dull began to shine again.

Another unexpected benefit was how fresh the entire room smelled. Instead of a heavy chemical odor, the house had a light, clean scent that felt much more natural.

The mixture also worked well on several types of floors, including tile, laminate, and vinyl. However, it’s always a good idea to test any cleaning solution on a small hidden area first, especially if you have delicate flooring.

Extra Tips for Even Better Results

If your floors are very dirty, you can slightly increase the amount of dish soap in the mixture. Just be careful not to add too much, as excess soap may create bubbles or streaks.

For extremely tough stains, allow the mop to sit on the area for a few seconds before wiping it away. This gives the vinegar time to break down stubborn dirt.

Another useful tip is to change the cleaning water if it becomes too dirty during the process. Fresh solution ensures the best cleaning results.

Why Simple Cleaning Methods Often Work Best

Many people are surprised to learn that some of the most effective cleaning solutions are also the simplest. Household ingredients like vinegar and soap have been used for generations because they are reliable, affordable, and easy to use.

Using simple cleaning mixtures can also reduce the number of harsh chemicals inside your home. This can create a healthier environment while still keeping surfaces spotless.

Final Thoughts

At first, I honestly didn’t believe this floor-cleaning trick would make much of a difference. It seemed too basic compared to the many commercial cleaners available in stores. But after trying it myself, I quickly realized how powerful this simple method can be.

Cauliflower Salad

Cauliflower salad is a refreshing and satisfying dish that brings together crisp vegetables, creamy dressing, and a delightful blend of textures and flavors. This simple yet delicious salad is perfect for family meals, picnics, potlucks, or even as a healthy side dish during busy weekdays. The star ingredient, cauliflower, is known for its mild flavor and incredible versatility. When combined with fresh vegetables and a rich dressing, it transforms into a vibrant dish that is both nutritious and incredibly tasty.

Cauliflower is packed with vitamins, minerals, and antioxidants that support overall health. It is rich in vitamin C, vitamin K, and fiber, making it a great choice for anyone looking to add more wholesome ingredients to their diet. The crunchy texture of raw cauliflower works beautifully in salads, offering a satisfying bite that pairs perfectly with creamy or tangy dressings.

One of the best things about cauliflower salad is how easy it is to customize. You can add different vegetables, herbs, proteins, or nuts to suit your taste preferences. Some people like to include crispy bacon for a smoky flavor, while others prefer sunflower seeds or almonds for extra crunch. Cheddar cheese, red onions, and fresh herbs can also enhance the flavor profile of the dish.

This recipe keeps things simple while delivering maximum flavor. The creamy dressing lightly coats the vegetables, creating a perfect balance between richness and freshness. The result is a salad that is light, refreshing, and full of texture.

Whether you are preparing a quick lunch, a light dinner side dish, or something to share with guests, cauliflower salad is always a wonderful option. It requires minimal cooking and can be made ahead of time, which allows the flavors to develop even more. Once chilled, the salad becomes even more delicious as the dressing blends with the vegetables.

Let’s explore how to prepare this delightful cauliflower salad step by step.

Ingredients

For the Salad

  • 1 medium head cauliflower, cut into small florets

  • 1 cup cherry tomatoes, halved

  • ½ cup red onion, finely chopped

  • ½ cup shredded cheddar cheese

  • ¼ cup chopped fresh parsley

  • ¼ cup sunflower seeds or chopped almonds

For the Dressing

  • ½ cup mayonnaise

  • 2 tablespoons sour cream

  • 1 tablespoon apple cider vinegar

  • 1 teaspoon Dijon mustard

  • ½ teaspoon salt

  • ½ teaspoon black pepper

  • 1 teaspoon honey (optional for a slight sweetness)

Instructions

Step 1: Prepare the Cauliflower

Start by washing the cauliflower thoroughly under cold running water. Remove the leaves and cut the cauliflower into small bite-sized florets. Smaller pieces work best for salads because they absorb the dressing better and are easier to eat.

If you prefer slightly softer cauliflower, you can blanch the florets in boiling water for about 1–2 minutes and then immediately transfer them to ice water. However, for a crisp and crunchy salad, raw cauliflower works perfectly.

Step 2: Chop the Vegetables

Next, slice the cherry tomatoes in half and finely chop the red onion. The red onion adds a mild sharpness that balances the creamy dressing. If you want a milder onion flavor, you can soak the chopped onions in cold water for about 10 minutes before adding them to the salad.

Chop the fresh parsley and measure out the sunflower seeds or almonds.

Step 3: Prepare the Dressing

In a small mixing bowl, combine the mayonnaise, sour cream, apple cider vinegar, Dijon mustard, salt, and black pepper. Whisk the ingredients together until the dressing becomes smooth and creamy.

If you like a slightly sweet balance, add one teaspoon of honey. This helps round out the tanginess of the vinegar and mustard.

Taste the dressing and adjust the seasoning if needed.

Step 4: Assemble the Salad

In a large salad bowl, add the cauliflower florets, cherry tomatoes, chopped red onion, shredded cheddar cheese, parsley, and sunflower seeds.

Pour the prepared dressing over the salad ingredients.

Step 5: Mix Everything Together

Gently toss the salad until all the ingredients are evenly coated with the creamy dressing. Make sure the dressing reaches every part of the cauliflower and vegetables for the best flavor.

Step 6: Chill Before Serving

Cover the salad bowl with plastic wrap or a lid and place it in the refrigerator for at least 30 minutes. This resting time allows the flavors to blend together beautifully.

Chilling the salad also enhances its refreshing taste.

Serving Suggestions

Cauliflower salad is incredibly versatile and pairs well with many dishes. You can serve it alongside grilled chicken, roasted meats, sandwiches, or burgers. It also works wonderfully as part of a summer barbecue spread or a light lunch.

For extra flavor, you can add crispy bacon bits, diced avocado, or even boiled eggs. A squeeze of fresh lemon juice can also brighten the flavors.

Storage Tips

Store leftover cauliflower salad in an airtight container in the refrigerator. It stays fresh for up to 3 days. Before serving again, give the salad a quick stir to redistribute the dressing.

Avoid freezing the salad because the creamy dressing may separate and the vegetables may lose their texture.

Final Thoughts

Cauliflower salad is a simple yet flavorful dish that combines freshness, crunch, and creamy goodness in every bite. With its nutritious ingredients and easy preparation, it is a perfect addition to any meal. Whether you enjoy it as a healthy side dish or a light main course, this salad offers a delicious way to enjoy the natural goodness of cauliflower.

Very Dirty Mop, Do Not Buy It Again: Just a Drop of This Ingredient Can Bring It Back to Life

Keeping your floors clean is an important part of maintaining a healthy and comfortable home. However, one problem many people face is dealing with a very dirty mop. Over time, mops absorb dust, grease, bacteria, and unpleasant odors. When this happens, many people think the only solution is to throw the mop away and buy a new one. But the truth is that you can restore a dirty mop easily using a simple household ingredient that works like magic.

Instead of wasting money on a new mop, you can revive your old one with just a small amount of a powerful cleaning ingredient: white vinegar. This natural cleaner has been used for generations to remove dirt, kill bacteria, and eliminate odors. With only a drop or two, you can bring your mop back to life and make it fresh again.

Let’s explore why mops get so dirty, how vinegar helps clean them, and the simple step-by-step method you can use at home.


Why Mops Become Extremely Dirty

Every time you clean your floor, your mop absorbs everything on the surface. Dust, grease, food residue, pet hair, and bacteria all collect in the mop fibers. Even if you rinse the mop after cleaning, some of that dirt remains trapped deep inside the material.

Over time, several problems start to appear:

  • Bad smells begin to develop because bacteria grow in the damp fibers.

  • Sticky residue makes the mop less effective when cleaning floors.

  • Gray or black stains appear as dirt builds up.

  • The mop spreads germs instead of removing them.

This is why many people get frustrated and decide to throw the mop away. But in most cases, the mop simply needs a deep cleaning.


The Secret Ingredient: White Vinegar

White vinegar is one of the most effective natural cleaning ingredients you can use in your home. It contains acetic acid, which helps dissolve dirt, grease, and mineral deposits.

Here are some of the reasons vinegar works so well:

  • It kills many types of bacteria

  • It removes unpleasant odors

  • It breaks down grease and grime

  • It softens mop fibers, helping them release trapped dirt

  • It is cheap, natural, and safe

Just a small amount can transform a dirty mop into a fresh, clean tool again.


Simple Mop Cleaning Recipe

Here is the easy method you can follow to clean even the dirtiest mop.

Ingredients

  • 1 bucket of hot water

  • 1 tablespoon white vinegar

  • 1 teaspoon dish soap

  • Optional: a few drops of lemon juice for freshness


Step-by-Step Cleaning Method

Step 1: Shake Out Loose Dirt

Before washing the mop, shake it outside or over a trash bin to remove loose dust, hair, and debris. This step helps prevent the dirt from spreading in the cleaning water.


Step 2: Prepare the Cleaning Solution

Fill a bucket with hot water. Add the tablespoon of white vinegar and the teaspoon of dish soap. Mix the solution well so the ingredients combine.

The hot water helps dissolve grease while vinegar works to disinfect and remove odors.


Step 3: Soak the Mop

Place the dirty mop into the bucket and allow it to soak for 20 to 30 minutes. During this time, the vinegar and soap will break down the dirt trapped in the fibers.

You may notice the water turning gray or brown, which means the grime is being released.


Step 4: Scrub If Necessary

If the mop is extremely dirty, gently scrub the fibers with your hands or a small brush. This helps remove stubborn buildup.


Step 5: Rinse Thoroughly

After soaking, rinse the mop under running water until the water runs clear. This removes any remaining dirt and cleaning solution.


Step 6: Dry the Mop Properly

Always allow the mop to dry completely before storing it. Hang it in a well-ventilated area so air can circulate around the fibers.

Drying is important because moisture encourages bacteria growth.


Extra Tips to Keep Your Mop Clean

Once your mop is clean again, these simple habits can help keep it fresh for longer.

1. Rinse After Every Use
Always rinse the mop thoroughly after cleaning floors.

2. Use Hot Water
Hot water helps remove grease and bacteria more effectively.

3. Disinfect Weekly
Soak the mop in vinegar solution once a week to prevent buildup.

4. Dry Completely
Never leave a mop sitting in a bucket of water.

5. Replace Only When Necessary
A well-maintained mop can last for many months before it needs replacing.


Why Natural Cleaning Methods Are Better

Using simple ingredients like vinegar is not only effective but also environmentally friendly. Many commercial cleaning products contain harsh chemicals that can irritate the skin and pollute indoor air.

Natural cleaning solutions are:

  • Safer for children and pets

  • Affordable and easy to find

  • Gentle on surfaces and cleaning tools

  • Better for the environment

With just a few household ingredients, you can keep your home clean without spending a lot of money.


Final Thoughts

A very dirty mop doesn’t always mean it’s time to throw it away. Often, it simply needs a deep cleaning to remove the dirt, grease, and bacteria trapped inside the fibers. With just a drop of white vinegar, a bit of dish soap, and hot water, you can restore your mop and make it fresh again.

Loaded Taco Salad Bowl Recipe

This vibrant, flavor-packed taco salad bowl is the perfect combination of fresh vegetables, seasoned ground beef, crunchy tortilla chips, and melted cheese. It’s hearty enough to serve as a complete meal yet fresh and crisp like a salad. Perfect for weeknight dinners, potlucks, or game-day gatherings, this recipe delivers bold Tex-Mex flavors in every bite.

Ingredients

For the Taco Meat:

  • 1 pound ground beef (80/20 for best flavor)

  • 1 small onion, finely diced

  • 2 cloves garlic, minced

  • 1 packet taco seasoning (or 2 tablespoons homemade taco seasoning)

  • ½ cup water

  • Salt and black pepper to taste

For the Salad Base:

  • 1 large head iceberg lettuce, chopped

  • 1 cup cherry tomatoes, halved (or 2 medium tomatoes, diced)

  • ½ cup red onion, finely diced

  • 1 cup canned black beans, drained and rinsed

  • 1 cup shredded cheddar cheese (or Mexican blend)

  • 1 ½ cups tortilla chips, lightly crushed

Optional Toppings:

  • ½ cup sour cream

  • ½ cup salsa

  • 1 avocado, diced or sliced

  • ¼ cup chopped fresh cilantro

  • Sliced jalapeños

  • Fresh lime wedges


Instructions

Step 1: Prepare the Taco Meat

In a large skillet over medium heat, add the ground beef and diced onion. Cook for 6–8 minutes, breaking the meat apart with a wooden spoon, until browned and fully cooked. Drain excess grease if necessary.

Add minced garlic and cook for another 30 seconds until fragrant. Stir in the taco seasoning and water. Reduce heat to low and let simmer for 3–5 minutes, allowing the flavors to blend and the sauce to slightly thicken. Taste and adjust seasoning with salt and pepper if needed. Remove from heat and set aside to cool slightly.

Step 2: Prepare the Salad Ingredients

While the meat is cooking, wash and thoroughly dry the lettuce. Chop it into bite-sized pieces and place it into a large serving bowl. Properly dried lettuce ensures the salad doesn’t become watery.

Add halved cherry tomatoes, diced red onion, and drained black beans over the lettuce. These ingredients add sweetness, crunch, and protein, creating a balanced base for the warm taco meat.

Step 3: Assemble the Salad

Once the taco meat has cooled slightly (it should be warm but not piping hot), spoon it evenly over the lettuce mixture. The warmth gently softens the cheese and slightly wilts the lettuce, enhancing the texture without making it soggy.

Sprinkle shredded cheddar cheese generously across the top. Add crushed tortilla chips for crunch. You can mix everything together just before serving or leave it layered for presentation and allow guests to toss their own portions.

Step 4: Add Optional Toppings

Top with dollops of sour cream, spoonfuls of salsa, creamy avocado slices, and a sprinkle of fresh cilantro. A squeeze of lime juice right before serving brightens all the flavors beautifully.

Serve immediately to maintain the crispness of the lettuce and chips.


Tips for the Best Taco Salad

1. Use Fresh, Crisp Lettuce:
Iceberg lettuce works best for its crunch and ability to hold up under warm toppings. Romaine can also be used for a slightly more nutrient-dense option.

2. Let the Meat Cool Slightly:
Adding extremely hot meat can overly wilt the lettuce. Letting it cool for 5 minutes ensures the perfect balance.

3. Customize the Protein:
You can substitute ground turkey, shredded chicken, or even seasoned tofu for a lighter or vegetarian version.

4. Make It Ahead (Smartly):
Prep all ingredients separately and store them in airtight containers. Assemble just before serving to keep everything fresh and crunchy.

5. Add Extra Flavor Layers:
A drizzle of Catalina dressing, ranch dressing, or chipotle crema can add a creamy tangy twist.


Storage Instructions

If you anticipate leftovers, store the components separately. Once fully mixed, the salad tends to become soggy due to the dressing and meat juices.

  • Refrigerate leftover taco meat in an airtight container for up to 3 days.

  • Store chopped vegetables separately for best freshness.

  • Keep tortilla chips in a sealed bag at room temperature.

Reheat the meat gently before assembling fresh portions.


Nutritional Benefits

This taco salad isn’t just delicious—it’s balanced. You get protein from the beef and beans, fiber from the vegetables and legumes, healthy fats from avocado, and calcium from cheese. By controlling toppings and portions, you can easily adjust it to fit your dietary needs.

For a lighter version:

  • Use lean ground beef or turkey.

  • Reduce cheese quantity.

  • Replace sour cream with Greek yogurt.

  • Add more vegetables like bell peppers or corn.


Serving Ideas

This taco salad is filling on its own, but it pairs wonderfully with:

  • Mexican rice

  • Refried beans

  • Fresh fruit salad

  • Iced tea or lime-infused water

It’s also great served in individual bowls for a build-your-own taco salad bar. Set out all toppings separately and let everyone customize their plate.


Final Thoughts

This loaded taco salad bowl is the perfect blend of comfort food and fresh ingredients. The seasoned meat provides savory richness, while crisp lettuce and juicy tomatoes bring freshness and texture. The cheese melts slightly into the warm beef, and the tortilla chips add irresistible crunch.

Whether you’re feeding your family on a busy weeknight or entertaining guests, this colorful and satisfying salad is always a crowd-pleaser. With simple ingredients and easy preparation, it’s a recipe you’ll return to again and again.

Is the Viral Vaseline and Salt Hack the Secret to Smoother Tighter-Looking Skin for Women Over 35

Is the Viral Vaseline and Salt Hack the Secret to Smoother, Tighter-Looking Skin for Women Over 35? Let’s break it down in a simple, honest way — and then I’ll share a safe, practical “UNIE-style” skincare routine you can try at home.

First, what is this viral hack? The trend usually involves mixing Vaseline (petroleum jelly) with regular table salt, applying it to the face, massaging gently, and leaving it on for a few minutes before rinsing. Some people claim it exfoliates, tightens skin, reduces wrinkles, and gives an instant glow — especially for women over 35 dealing with dryness, fine lines, and dullness.

But does it really work?

Let’s understand the ingredients.

Vaseline is an occlusive moisturizer. That means it seals moisture into the skin. It does not hydrate by itself, but it prevents water loss. This can make skin look smoother temporarily because dry lines appear less visible when the skin barrier is protected.

Salt, on the other hand, is a physical exfoliant. It removes dead skin cells through friction. However, regular table salt has rough, uneven edges. On facial skin — especially mature skin over 35, which tends to be thinner and more sensitive — salt can cause micro-tears, irritation, redness, and even worsen fine lines over time.

So what happens when you mix them?

The Vaseline reduces some of the harshness of salt, but it does not eliminate the risk of irritation. The result might be temporary smoothness because dead skin is removed and moisture is sealed in. However, this is not true tightening. It’s more of a short-term surface effect.

Now let’s talk about women over 35 specifically.

After 35, collagen production naturally declines. Hormonal shifts can cause dryness, loss of elasticity, and uneven texture. Skin barrier function also weakens slightly. That means harsh exfoliation can do more harm than good. Tightness after using salt often isn’t “lifting” — it’s mild inflammation or dehydration, which can actually accelerate aging if done frequently.

So is it a secret miracle?

No. It’s more of a temporary smoothing trick — and it’s not the safest method.

However, we can transform this idea into a safer “UNIE Glow Routine” that supports mature skin gently and effectively.

Here is a smarter version:

UNIE Gentle Glow Balm for Women 35+

Ingredients:
1 teaspoon petroleum jelly (like Vaseline)
1 teaspoon aloe vera gel (pure, no alcohol)
A pinch of fine sugar (not salt)
2 drops vitamin E oil (optional)

Why this works better:

Sugar has rounder particles than salt and is less abrasive. Aloe vera hydrates and soothes. Vitamin E supports skin barrier health. Petroleum jelly seals everything in to prevent moisture loss.

How to use:

First, wash your face with a gentle cleanser. Pat dry — do not rub.

Mix all ingredients in a small bowl until smooth.

Apply to your face with very light circular motions for no more than 60 seconds. Focus on areas with rough texture, not delicate eye areas.

Leave it on for 5 minutes as a hydrating mask.

Rinse with lukewarm water and pat dry.

Follow with a light moisturizer.

Use only once per week.

What to expect:

After one use, your skin may feel softer and look more radiant because dead skin cells were gently removed and moisture was sealed in. Over time, consistent gentle care supports smoother-looking skin.

But remember — real tightening comes from collagen support, not scrubbing.

For true long-term improvement, focus on:

Daily sunscreen (most important step)
Hydrating serums with hyaluronic acid
Retinol (if tolerated)
Adequate protein intake
Sleep and stress management

Also, always patch test new mixtures on your inner arm before applying to your face.

Important safety note:

If you have rosacea, eczema, active acne, or very sensitive skin, avoid physical exfoliants entirely. Choose mild chemical exfoliants like lactic acid instead.

Final Truth

The viral Vaseline and salt hack is not a miracle anti-aging secret. It may provide temporary smoothness but can irritate mature skin if overused. Women over 35 benefit far more from gentle hydration, barrier repair, sun protection, and collagen-supportive ingredients than from harsh exfoliation trends.