HomeBaby Lemon Impossible Pies

Some recipes feel like they belong in magic books rather than cookbooks. HomeBaby Lemon Impossible Pies fall exactly into that category—charming, comforting, and wonderfully nostalgic. Called “impossible” because they create their own layers while baking, these pies transform a simple batter into a tender crust, a silky lemon custard center, and a lightly golden top—without rolling, kneading, or fuss. You pour everything into one bowl, whisk, bake, and watch the oven perform its quiet miracle. The result is a bright, creamy lemon dessert that tastes like sunshine wrapped in velvet.

This unique version brings you a balanced blend of sweet and tangy lemon, rich texture from butter and eggs, a delicate crumb from coconut and flour, and an aroma that warms the entire kitchen. Small “HomeBaby” pies—mini versions baked in ramekins, muffin tins, or small pie dishes—add the adorable charm of individual servings, perfect for gifting, parties, or enjoying slowly with tea on a quiet afternoon.

Ingredients for HomeBaby Lemon Impossible Pies (Makes 8–10 Mini Pies)

  • 2 large lemons, zested and juiced (should yield about ¼ cup juice)

  • 1 cup whole milk (room temperature)

  • ½ cup granulated sugar

  • ½ cup unsalted butter, melted and slightly cooled

  • 3 large eggs

  • ½ cup all-purpose flour

  • ¾ cup sweetened shredded coconut (optional but traditional in impossible pies)

  • 1 teaspoon pure vanilla extract

  • ¼ teaspoon salt

  • Powdered sugar, for dusting

  • Extra fine lemon zest, for garnish

You can bake them in mini pie tins, ramekins, or a muffin pan. The texture will be the same—soft, silky, lightly set, and delicately lemony.

The Method: How the “Impossible” Happens

1. Prepare the pans

Preheat oven to 350°F (175°C). Grease your mini dishes lightly with butter or spray to ensure easy release later. Set them on a baking tray to move them easily in and out of the oven.

2. Build the lemon base

In a medium bowl, whisk the lemon zest, lemon juice, sugar, and melted butter. The citrus wakes up the sugar, dissolving it slightly and infusing aroma into the fat. That’s the key to a fragrant, sunny pie.

3. Whisk in the eggs

Add eggs one at a time, whisking gently. You want the mixture smooth, cohesive, and airy without whipping too much.

4. Add the milk and dry ingredients

Slowly pour in the milk, then whisk in the vanilla and salt. Finally, add the flour and coconut. Don’t overmix—the batter should be thin and pourable, almost like a custard.

5. Pour and bake

Divide the batter evenly into your mini dishes, filling about ¾ full. Bake for 28–34 minutes, depending on pan size. The pies will create their own layers:

  • A soft, tender crust forms at the bottom.

  • A lemon custard appears in the middle.

  • A slightly golden top forms naturally.

The tops should be lightly browned, the centers should jiggle just a little, and the edges should be set.

6. Cool and dust

Let them cool 20–30 minutes so the custard finishes setting. Dust with powdered sugar and a touch of zest before serving.

Why These Lemon Impossible Pies Are So Special

These HomeBaby Lemon Impossible Pies are more than a dessert—they are a memory. They taste like the pies grandmothers used to whip up without recipes, relying on simple ingredients and intuition. The “impossible” part is a nostalgic reminder of a time when baking felt magical: you combine everything in one bowl, yet the oven creates layers that look like you spent hours preparing them.

What makes this version unique is the brightness of fresh lemon zest and juice, which cuts through the richness and creates a refreshing tang. The coconut adds depth and a tiny bite that elevates the custard. The mini size means each person gets their own soft, delicate pie, making the experience more intimate and special. They’re perfect for family gatherings, breakfast treats, afternoon tea, Ramadan iftar sweets, school lunchbox surprises, or late-night treats with warm milk.

Serving Suggestions

  • Warm with a dollop of whipped cream

  • Cold with fresh berries

  • Drizzled with a spoon of lemon syrup

  • Topped with toasted coconut for extra texture

  • Served with vanilla ice cream for contrast

Their soft, pudding-like interior pairs beautifully with fresh fruit or cold cream.

Storage Tips

  • Refrigerate leftovers for up to 4 days.

  • Warm gently in a microwave for 10–12 seconds to restore texture.

  • Freeze for up to 2 months—just wrap individually and thaw overnight in the fridge.

Final Thoughts

HomeBaby Lemon Impossible Pies are proof that the simplest ingredients can create the most delightful desserts. The lemon flavor shines, the texture soothes, and the preparation is effortless. They’re the kind of treat that becomes a family tradition—something you make when you want comfort, warmth, and a little magic in your kitchen.


Homestyle Ground Beef Lo Mein

There’s something irresistible about a bowl of homestyle lo mein—warm, glossy noodles tangled with savory meat and vegetables, kissed with soy, garlic, and just the right amount of sweetness. But today, we’re giving this classic a down-to-earth twist by using simple ground beef instead of sliced steak or chicken. The result is a comfort-packed, budget-friendly dish that cooks quickly, tastes deeply satisfying, and uses ingredients you likely already have in your kitchen. This Homestyle Ground Beef Lo Mein is the kind of recipe that turns an ordinary weeknight into a cozy, steaming, flavorful escape.

Unlike takeout versions that rely heavily on oil and salt, this recipe balances flavors with a handmade sauce that’s lighter, fresher, and customizable. The ground beef soaks up every drop of the sauce, infusing the noodles with a rich umami depth that makes each bite unbelievably good. And the best part? It all comes together in one skillet, minimizing dishes and maximizing flavor. Now let’s dive into the magic of this homestyle dish.

Ingredients

For the Beef & Veggies

  • 1 lb (450g) ground beef

  • 1 medium onion, thinly sliced

  • 3 cloves garlic, minced

  • 1 cup shredded carrots

  • 1 cup shredded cabbage (green or Napa)

  • 1 red bell pepper, thinly sliced

  • 2 green onions, chopped

  • 2 tbsp neutral oil (canola, sunflower, or vegetable)

For the Noodles

  • 10–12 oz lo mein noodles (or spaghetti as a substitute)

  • Salt for boiling

For the Signature Lo Mein Sauce

  • 4 tbsp soy sauce

  • 1 tbsp dark soy sauce (for color & richness, optional but recommended)

  • 1 tbsp oyster sauce

  • 1 tbsp hoisin sauce

  • 2 tsp sesame oil

  • 1 tbsp brown sugar or honey

  • 1 tsp fresh grated ginger

  • ¼ tsp black pepper

  • ¼ cup beef broth or water

  • 1 tsp cornstarch (for slight thickening)


Instructions

1. Cook the Noodles

Bring a large pot of water to a boil, add a pinch of salt, and drop in your noodles. Cook until just al dente—tender but still slightly firm. Drain and rinse quickly under warm water to prevent sticking. Set aside.

2. Prepare the Signature Sauce

In a bowl, whisk together soy sauce, dark soy sauce, oyster sauce, hoisin sauce, sesame oil, brown sugar, ginger, black pepper, broth, and cornstarch. Stir until smooth. This sauce is the flavor backbone of your lo mein, delivering salty-sweet depth with a silky finish.

3. Brown the Ground Beef

Heat 2 tablespoons of oil in a large skillet or wok over medium-high heat. Add the ground beef, breaking it apart with a wooden spoon. Cook until browned and slightly crispy in spots—those crispy edges add incredible flavor. Drain excess grease if needed.

4. Sauté the Aromatics

Add the sliced onion and garlic to the beef. Cook for 2–3 minutes until the onion softens and the garlic becomes fragrant. This step deepens the savory base of the dish.

5. Add the Vegetables

Add the shredded carrots, cabbage, and bell pepper. Stir-fry for 3–4 minutes, until the veggies soften but still have crunch. Lo mein should never be mushy—your vegetables need life and texture.

6. Combine Everything

Add the cooked noodles directly into the skillet. Pour the sauce over the top and toss constantly until everything is beautifully coated. The sauce will slightly thicken, glaze the noodles, and cling to the beef and veggies.

7. Add Green Onions & Finish

Stir in the chopped green onions. Taste and adjust seasoning—add more soy for saltiness, more hoisin for sweetness, or a splash of broth if you want it saucier.

Serve hot and enjoy the bliss of this homestyle masterpiece.

Why This Recipe Works

This dish shines because it strikes the perfect balance between hearty and comforting while remaining light enough for lunch or dinner. Ground beef, often overlooked in Asian-style noodle dishes, performs astonishingly well here. It cooks fast, absorbs flavors instantly, and adds a warm richness that pairs beautifully with noodles. The sauce—an orchestration of soy, oyster, and hoisin—creates a harmony of sweet, salty, and umami notes that wrap the entire dish in delicious nostalgia.

Additionally, the use of inexpensive vegetables like cabbage and carrots makes this both economical and wholesome. They add sweetness, crunch, and color, turning the dish into a vibrant, rainbow bowl of comfort. Every component, from the ginger to the sesame oil, plays a small but deliberate role in building a deep, layered flavor profile.

Tips for the Best Homestyle Lo Mein

  • Don’t overcook the noodles—They finish cooking in the pan with the sauce.

  • Use high heat for stir-frying so the veggies stay crisp and bright.

  • Customize with mushrooms, broccoli, snap peas, or chili flakes.

  • Add a fried egg on top for extra richness.

  • Make it spicy by adding chili oil or sriracha to the sauce.

Magic weight lose Detox Drink in morning and before go to bed

If you’ve been searching for a simple, natural, and effective way to support your metabolism, improve digestion, and help your body release stubborn weight, this “Magic Weight-Loss Detox Drink” is the gentle daily ritual your body will love. Unlike harsh cleanses or sugary detox juices, this recipe uses whole, powerful ingredients known for boosting fat-burning, balancing blood sugar, reducing inflammation, and flushing out bloating. And the best part? It’s naturally soothing in the morning and deeply calming at night.

Below is a unique, detailed 800-word recipe + explanation, crafted to feel like a wellness ritual you look forward to every day.

MAGIC WEIGHT-LOSS DETOX DRINK

A Morning & Bedtime Ritual That Refreshes, Nourishes & Cleanses

Detoxing doesn’t mean starving your body—it means gently supporting your natural cleansing systems: the liver, kidneys, lymphatic system, and gut. This magical recipe combines thermogenic spices, antioxidant fruits, and digestion-soothing herbs to supercharge your metabolism without overstimulation. In the morning, it wakes up your system with soft energy. Before bed, it calms inflammation and promotes overnight fat-burning and cellular repair.

THE SECRET INGREDIENTS & WHY THEY WORK

1. Lemon

Loaded with vitamin C and natural enzymes, lemon boosts liver detoxification and helps break down stored fat. Warm lemon water in the morning also stimulates digestion and reduces bloating.

2. Ginger

A thermogenic root that fires up your metabolism, increases calorie burn, and improves gut motility. It also reduces inflammation—making it perfect for nighttime restoration.

3. Apple Cider Vinegar (with “mother”)

This ingredient stabilizes blood sugar, reduces cravings, triggers better fat metabolism, and improves digestion. It also helps the stomach break down heavy meals consumed during the day.

4. Cinnamon

A spice famous for balancing blood sugar and preventing fat storage. Cinnamon before bed has been shown to calm digestion and reduce overnight bloating.

5. Mint Leaves

Naturally refreshing, mint cools the stomach, helps remove toxins, and improves nutrient absorption.

6. Turmeric + Black Pepper

Turmeric helps fight inflammation—the root cause of stubborn weight gain—while black pepper activates curcumin absorption by over 2,000%.

7. Warm Water

Warm water supports circulation, hydrates cells, and helps move toxins through the digestive system during sleep and early morning.

MAGIC WEIGHT-LOSS DETOX DRINK RECIPE

(Serves 1 — prepare fresh every morning and night)

Ingredients

  • 1 cup warm water (not boiling)

  • 1 tablespoon fresh lemon juice

  • 1 teaspoon apple cider vinegar

  • ½ teaspoon grated fresh ginger or ¼ tsp ginger powder

  • ½ teaspoon cinnamon powder

  • ¼ teaspoon turmeric powder

  • 1 pinch black pepper

  • 4–5 fresh mint leaves

  • 1 teaspoon honey (optional, preferably for nighttime version)

HOW TO MAKE IT — MORNING VERSION

1. Warm the Water

Heat the water just until warm, not hot. Highly hot water destroys the natural enzymes in lemon and honey.

2. Add Lemon & Apple Cider Vinegar

Squeeze fresh lemon juice, then stir in apple cider vinegar. These two start activating your digestive system.

3. Mix the Spices

Add ginger, cinnamon, turmeric, and a pinch of black pepper. Stir well until everything dissolves.

4. Add Mint Leaves

Lightly crush the mint leaves between your fingers to release their aroma, then add them to the drink.

5. Sip Slowly

Drink on an empty stomach for best results.

BENEFITS OF DRINKING THIS IN THE MORNING

  • Boosts metabolism for all-day fat-burning

  • Clears digestive tract, reduces bloating

  • Stabilizes blood sugar and curbs cravings

  • Improves liver cleansing

  • Increases hydration and energy levels

  • Boosts immunity and reduces inflammation

This morning drink is like a gentle “reset button” for your body, preparing you to burn calories more efficiently throughout the day.

HOW TO MAKE IT — BEDTIME VERSION

The nighttime version is slightly different: gentler, more soothing, and designed to support overnight detox.

Ingredients Adjustments for Night

  • Add 1 teaspoon honey (helps relaxation)

  • Reduce ginger to ¼ teaspoon

  • Reduce ACV to ½ teaspoon

  • Add ¼ teaspoon cinnamon (extra calming)

Instructions

  1. Warm water and mix all ingredients as before.

  2. Stir in the honey last so it melts gently.

  3. Sip warm, slowly, 20–30 minutes before bed.

BENEFITS OF DRINKING THIS BEFORE BED

  • Helps burn fat while you sleep

  • Relaxes muscles and digestive system

  • Reduces overnight inflammation

  • Supports liver detox during sleep cycle

  • Balances hormones tied to hunger

  • Prevents morning bloating

  • Helps you wake up feeling lighter and cleaner

The combination of cinnamon, honey, and warm water has been used for centuries to calm the stomach and support restorative sleep—one of the most powerful fat-loss tools.

HOW TO USE THIS DRINK FOR BEST RESULTS

Drink it Twice Daily

  • Morning: on an empty stomach

  • Night: 20–30 minutes before sleep

Stay Consistent

You will notice changes in:

  • bloating (3–5 days)

  • energy levels (1 week)

  • cravings reduction (1–2 weeks)

  • visible weight changes (2–4 weeks depending on lifestyle)

Eat Normally

This is not a starvation detox. Eat balanced meals and drink plenty of water throughout the day.

Add Light Movement

Even 10–15 minutes of walking after lunch or dinner speeds results dramatically.

WHY THIS DRINK FEELS “MAGICAL”

Because it works on every major system involved in weight loss:

  • Metabolism (ginger, lemon)

  • Blood sugar control (cinnamon, ACV)

  • Inflammation reduction (turmeric)

  • Hormone balance (honey, mint)

  • Detoxification (warm water, lemon

Healthy Pickled Beets Recipe

Pickled beets are one of those timeless foods that feel both rustic and gourmet at the same time. Whether you enjoy them alongside a hearty dinner, tuck them into a salad, or savor them straight from the jar, their vibrant color and tangy-sweet flavor bring something truly special to any meal. What makes this healthy pickled beets recipe stand out is its balance: lighter on sugar, rich in natural nutrients, and infused with warm spices that elevate the beets without overpowering them. This is a recipe designed not just to preserve vegetables, but to preserve the soul of a wholesome kitchen tradition.

Below is a unique 800-word recipe and guide that walks you through crafting your own batch of healthy pickled beets—simple, nourishing, and wonderfully delicious.

Why Pickled Beets Deserve a Place in Your Kitchen

Beets are nutritional powerhouses. They’re packed with fiber, potassium, folate, antioxidants, and natural nitrates that help support healthy blood flow. When you pickle them using a gentle brine like the one in this recipe, you retain much of their natural goodness while adding depth of flavor. Plus, homemade pickled beets avoid the heavy refined sugars and preservatives found in many store-bought brands. The result: a snack and side dish that’s both healthy and irresistible.

Ingredients You’ll Need

For 2 medium jars (about 1 quart total):

For the Beets

  • 4–5 medium fresh beets, scrubbed

  • Water for boiling

For the Healthy Pickling Brine

  • 1 ½ cups apple cider vinegar (or white vinegar)

  • 1 cup water

  • 3–4 tablespoons honey or pure maple syrup (instead of refined sugar)

  • 1 teaspoon fine sea salt

  • 1 teaspoon whole black peppercorns

  • ½ teaspoon mustard seeds

  • 3 whole cloves (optional, warm flavor)

  • 1 bay leaf

  • 2 garlic cloves, smashed

  • ½ small red onion, thinly sliced (optional but wonderful)

Step-by-Step Method

1. Prepare the Beets

Start by trimming the beet greens, leaving about one inch of the stems attached. This helps prevent color loss during cooking. Do not peel the beets yet—boiling with the skins on makes them much easier to remove later.

Place the cleaned beets in a large pot, cover with water, and bring to a boil. Reduce to a gentle simmer and cook for 25–40 minutes, depending on the size of your beets. You’ll know they’re ready when a fork slides into the center with little resistance.

Once done, drain the beets and allow them to cool slightly. Wear gloves if you’d like and gently rub off the skins—they should peel off easily. Slice the beets into rounds, wedges, or cubes—whatever shape you enjoy most.

2. Make the Light, Healthy Brine

In a medium saucepan, combine the vinegar, water, honey (or maple syrup), salt, peppercorns, mustard seeds, cloves, bay leaf, and garlic. Bring the mixture to a simmer, stirring until the honey fully dissolves.

This brine is intentionally lighter and cleaner than traditional recipes. Instead of cups of sugar, we use a natural sweetener in moderation, allowing the earthy sweetness of the beets to shine.

Once it reaches a simmer, turn off the heat and let the spices infuse for a minute or two.

3. Pack the Jars

Divide the sliced beets evenly between clean, warm jars. If you’re using red onion, tuck the thin slices in between layers of beets—they soften beautifully in the brine and add extra flavor.

Carefully pour the hot brine over the beets, making sure they are fully submerged. Leave about ½ inch of headspace at the top.

Seal the jars with lids. If you’re making refrigerator pickles, simply allow them to cool and refrigerate.

For longer storage, you can process the jars in a boiling water bath for 10 minutes.

Flavor Notes That Make This Recipe Unique

This recipe balances savory, sweet, and tangy flavors without relying on heavy syrups or artificial ingredients. The warm spices—cloves, peppercorns, bay leaf—add depth but remain subtle. The apple cider vinegar brings a natural brightness, pairing beautifully with the earthy beet flavor. And the optional red onions add a gentle, tangy crunch that enhances every bite.

Serving Ideas to Inspire You

Healthy pickled beets are incredibly versatile. Here are amazing ways to enjoy your homemade batch:

  • Salads: Toss them into spinach, goat cheese, and walnut salads.

  • Sandwiches: Layer them into wraps, chicken sandwiches, or veggie burgers.

  • Bowls: Add them to grain bowls with quinoa, hummus, cucumbers, and herbs.

  • Side Dish: Serve them alongside roasted chicken, fish, or mashed potatoes.

  • Snacking: Chill them and enjoy cold, straight from the jar for an antioxidant boost.

Their jewel-like color also makes dishes pop visually—a culinary bonus.

How Long They Last

If refrigerated (without canning), your pickled beets will stay fresh for up to 6 weeks. If processed in a water bath, they can last up to 1 year in a cool pantry.

As they sit longer, their flavor deepens and mellows, becoming richer and more balanced. Many people say they taste best after at least 48 hours.

Health Benefits of This Version

This recipe is deliberately crafted to be healthier than traditional versions:

  • Lower sugar—uses natural sweetener instead of cups of refined sugar.

  • Apple cider vinegar adds probiotics and natural acidity.

  • No preservatives—just whole ingredients.

  • High fiber from beets helps digestion.

  • Rich in antioxidants like betalains and vitamin C.

You get all the tang, comfort, and satisfaction of classic pickled beets with far less guilt.

Final Thoughts

Healthy pickled beets are more than a quick kitchen project—they’re a celebration of color, nutrition, and homemade goodness. With minimal ingredients and a simple method, you can create jars filled with vibrant flavor that brighten meals all week long. Whether you’re preserving a garden harvest or just craving a wholesome, tangy side dish, this unique recipe brings you the best balance of tradition and health.

Unlocking the secrets of clove water

Clove water has quietly made its way from traditional herbal wisdom into modern wellness routines, and for good reason. This simple infusion, made from tiny dried flower buds, carries centuries of medicinal history and a surprisingly powerful blend of benefits. From digestion to skin health, from immunity support to natural energy, clove water is a small ritual with big effects. Today, we’ll explore the secrets behind this ancient remedy and share a unique, deeply nourishing recipe you can make at home.

Why Clove Water Works: The Ancient Science

Cloves are rich in eugenol, a potent antioxidant and anti-inflammatory compound prized in Ayurveda, Unani, and ancient Chinese medicine. For generations, cloves have been used to soothe an upset stomach, freshen breath, ease cold symptoms, improve circulation, and even calm the mind. When cloves are steeped in water, their essential oils slowly release, creating a fragrant, warming drink that supports overall wellness from the inside out.

The magic lies in its simplicity: unlike many herbal concoctions, clove water doesn’t require rare ingredients, complicated steps, or expensive tools. Just boiling water, a handful of cloves, and a few mindful moments. But when prepared intentionally—and enhanced with the right supporting ingredients—clove water transforms from a humble drink into a powerful daily tonic.

The Unique Clove Water Recipe

This special recipe blends tradition with a modern twist, enhancing the flavor and amplifying its natural benefits. It’s soothing, aromatic, and balanced enough to drink every day.

Ingredients:

  • 1 tablespoon whole cloves (preferably organic)

  • 2 cups water

  • 1 small cinnamon stick (optional for warmth & blood sugar support)

  • 1 thin slice of fresh ginger (optional for digestion)

  • 1 teaspoon honey or jaggery (optional for sweetness)

  • 1 teaspoon freshly squeezed lemon juice (added at the end)

How to Make It (The Slow-Release Method)

1. Rinse Your Cloves
Place the cloves in a small bowl and rinse them under cool water. This removes dust and wakes up the dried buds so their oils release more easily.

2. Crush Lightly (Optional but Powerful)
Using a mortar or the flat side of a knife, gently press the cloves until they crack slightly. Don’t grind them—just break them open to unlock their aroma and flavor.

3. Bring Water to a Gentle Boil
Pour 2 cups of water into a small pot. Add the crushed cloves, cinnamon stick, and ginger slice. Heat on medium until it begins to bubble lightly.

4. Simmer, Don’t Rush
Turn the heat to low and let the mixture simmer for 10–12 minutes. This slow extraction pulls out the essential oils without making the drink too bitter.

5. Rest & Infuse
Turn off the heat and let the liquid sit for 5 minutes. This deepens the flavor and ensures a rich, amber-colored infusion.

6. Strain & Sweeten
Strain the clove water into a cup. Add honey or jaggery if you like a hint of sweetness.

7. Add Lemon Last
Stir in the lemon juice right before drinking. Adding it earlier can dull the flavor and destroy some beneficial compounds.

How to Drink Clove Water for Best Results

  • Morning Ritual:
    Drink one warm cup on an empty stomach for digestion and bloating relief.

  • Before Bed:
    Sip slowly to unwind, reduce nighttime snacking urges, and support metabolism.

  • Cold Remedy:
    Drink twice a day when fighting cough, phlegm, or a sore throat.

  • Skin Health:
    Regular drinking helps clarify the skin from within—reduced acne, better glow, fewer breakouts.

Avoid consuming more than 1 cup per day consistently, unless recommended by a practitioner.

The Hidden Benefits of Clove Water

1. Supports Smooth Digestion

Clove water stimulates digestive enzymes, relieving common issues like bloating, gas, heaviness, and indigestion. The ginger addition enhances this effect.

2. Natural Antibacterial Power

Cloves naturally fight harmful bacteria that cause bad breath, oral infections, and even some gut-related issues. Many people notice fresher breath within days.

3. Elevates Immunity

Eugenol and vitamin C (from the lemon) create a powerful antioxidant blend that supports the immune system, especially during colder months.

4. Balances Blood Sugar Levels

Cinnamon + cloves is a traditional combination known to support healthier blood sugar regulation. This makes the drink ideal for people watching their glucose levels.

5. Warms the Body & Boosts Circulation

A natural warming spice, cloves help stimulate blood flow and improve overall energy.

6. Hormonal Support for Women

Cloves may help balance certain hormones naturally. Many women drink clove water to support easier cycles and reduce PMS symptoms.

7. A Detox for the Liver

Cloves help the liver break down toxins more efficiently. Drinking clove water regularly can support a natural detox without harsh cleansing diets.

Tips to Make Your Clove Water Even More Powerful

  • Use whole cloves, not powder—powder can turn gritty and bitter.

  • Store overnight batches in glass, not plastic, to preserve the aroma.

  • For a cold version, chill in the fridge and add a slice of lemon.

  • Experiment with additions like mint, fennel, cardamom, or turmeric for deeper wellness benefits.

Final Thoughts

Clove water is more than a drink—it’s a ritual. A moment of warmth, healing, and grounding in your day. Whether you seek better digestion, glowing skin, stronger immunity, or simply a soothing cup of something natural, this unique recipe offers a gentle yet powerful way to reconnect with traditional wellness wisdom. When prepared with intention, clove water becomes one of the easiest and most rewarding habits you can adopt.

Country Style Beef Ribs and Gravy

There are some dishes that feel like a warm handshake from the past—hearty, slow-cooked, deeply flavorful meals that transform simple ingredients into pure comfort. Country Style Beef Ribs with homemade gravy belongs proudly in that category. This dish doesn’t rely on fancy techniques or rare ingredients; rather, it celebrates patience, tradition, and the magic of turning tough, marbled beef into melt-in-your-mouth perfection. What makes this recipe unique is its balance of rustic simplicity and layered flavor: caramelized onions, garlic, a touch of smoky paprika, a splash of Worcestershire, and a broth-to-drippings gravy that clings to the ribs like velvet. It’s the kind of meal that fills the kitchen with the scent of Sunday supper—even if you’re cooking on a Wednesday.

Below is a fully original, 800-word recipe and storytelling guide to help you prepare unforgettable Country Style Beef Ribs and silky brown gravy.

 Country Style Beef Ribs & Gravy — A Rustic, Slow-Braised Favorite

Why This Recipe Works

Country style beef ribs aren’t really ribs—they’re cut from the chuck, meaning they have the perfect blend of lean meat, fat, and connective tissue. When braised low and slow, the fibers relax, the fat melts, and the meat becomes spoon-tender without falling apart into stringiness. This recipe uses searing, aromatics, and a controlled braise to build a deep flavor foundation. As the ribs simmer, they release drippings that later become a rich homemade gravy thickened with a golden roux.

This dish pairs beautifully with mashed potatoes, rice, buttered noodles, or even rustic bread to mop up the gravy. It’s humble, soul-warming, and deeply satisfying.

 Ingredients (Serves 4–6)

For the Ribs

  • 3–4 lbs country style beef ribs

  • 2 tbsp neutral oil (canola or vegetable)

  • 1 ½ tsp kosher salt

  • 1 tsp black pepper

  • 1 tsp smoked paprika

  • 1 tsp garlic powder

  • 1 tsp onion powder

For the Braising Base

  • 1 large onion, sliced

  • 4 cloves garlic, minced

  • 1 tbsp Worcestershire sauce

  • 2 cups beef broth

  • 1 bay leaf

  • 1 tsp dried thyme (or 3 fresh sprigs)

  • Optional: ½ cup diced tomatoes or tomato sauce for a deeper base

For the Gravy

  • 3 tbsp butter

  • 3 tbsp flour

  • 1–2 cups strained cooking liquid

  • Salt & pepper to taste

 Step-by-Step Cooking Instructions

1. Season the Ribs Generously

Pat the ribs dry—this helps them brown beautifully. Mix the salt, pepper, smoked paprika, garlic powder, and onion powder. Rub this blend over every surface of the ribs. Let them sit for 10 minutes while you prep your aromatics; this begins the tenderizing process.

2. Sear to Build Flavor

Heat oil in a heavy pot or Dutch oven over medium-high heat. Sear the ribs on all sides until deep brown. Don’t rush this step—browning develops the flavorful “fond” stuck to the bottom of the pot. Transfer the seared ribs to a plate.

3. Sauté the Onions & Garlic

Lower the heat to medium. Add the sliced onions and cook until softened and lightly golden, about 5–7 minutes. Add garlic and cook 1 minute until fragrant. Use the onions’ moisture to lift the brown bits from the bottom of the pot—those bits are flavor gold.

4. Add Liquids & Aromatics

Stir in Worcestershire sauce. Pour in the beef broth and scrape up any remaining fond. Add the bay leaf and thyme. If using tomatoes, add them now.

Bring everything to a simmer.

5. Braise the Ribs

Return the ribs to the pot, nestling them into the broth and onions. Cover with a lid and reduce heat to low. Braise for 2–2½ hours, or until the ribs are extremely tender but still holding shape.

Alternatively:

  • Oven method: 325°F (165°C), 2½ hours

  • Slow cooker: 6–7 hours on low

6. Remove Ribs & Prepare the Gravy

Once the ribs are done, carefully remove them to a plate and tent with foil. Strain the braising liquid to remove onions and herbs. Keep 1–2 cups of the liquid for gravy.

7. Make a Silky Brown Gravy

In a clean saucepan, melt butter over medium heat. Add flour and whisk continuously for 2 minutes to create a golden roux. Slowly pour in the reserved braising liquid while whisking to avoid lumps. Simmer until thickened. Season with salt and pepper to taste.

If the gravy becomes too thick, add a splash of broth. If it’s too thin, simmer longer.

8. Combine & Serve

You can either pour the gravy over the ribs or nestle the ribs back into the gravy to keep them warm until serving. Serve generously with mashed potatoes or any comforting side.

 Tips for Perfect Results

✨ Searing makes all the difference

Skipping the sear means losing depth and richness. Let each side brown fully before flipping.

✨ Low and slow is key

Beef ribs need time to break down. Avoid cranking up the heat to “speed it up”—you’ll get tough meat.

✨ Fat equals flavor

Do not trim the fat. It melts into the braise and ensures tenderness and richness.

✨ Gravy should be smooth

If your gravy gets lumpy, strain it once more for a restaurant-worthy finish.

 Serving Suggestions

Try pairing your Country Style Beef Ribs and Gravy with:

  • Buttery mashed potatoes

  • Garlic herb rice

  • Caramelized onion polenta

  • Roasted carrots and potatoes

  • Fluffy dinner rolls

  • Steamed green beans with lemon butter

 Final Thoughts

This unique version of Country Style Beef Ribs and Gravy blends old-fashioned cooking with modern flavor balance. It’s rustic without being heavy, slow-cooked without being complicated, and deeply savory without requiring specialty ingredients. Every bite tastes like it came from a seasoned cook’s kitchen—rich, comforting, and crafted with intention.

Cheese Meatloaf Casserole

There are casseroles that warm the belly, and then there are casseroles that warm the soul. This Cheese Meatloaf Casserole belongs to the second category—a layered, indulgent, family-pleasing dish that tastes like Sunday dinner and childhood memories woven together. Imagine creamy mashed potatoes spreading like a soft blanket over a rich meatloaf base, then topped with golden, bubbling cheese. It’s more than a meal; it’s a cozy moment on a plate.

This recipe reinvents the classic meatloaf by transforming it into a layered casserole, making it easier to serve, easier to customize, and undeniably more comforting. The result is a casserole with depth: a foundation of perfectly seasoned ground beef, a middle layer of buttery mashed potatoes, and a final crown of melted cheddar that ties everything together in glorious harmony.

Let’s dive into a version you can’t find anywhere else—one with texture, flavor, and heart.

 Ingredients

For the Meatloaf Layer

  • 2 lbs ground beef

  • 1 medium onion, finely diced

  • 1 green bell pepper, finely diced

  • 3 garlic cloves, minced

  • 1 cup breadcrumbs (or crushed crackers)

  • 2 large eggs

  • 1 tablespoon Worcestershire sauce

  • 2 tablespoons ketchup

  • 1 tablespoon Dijon mustard

  • 1 teaspoon paprika

  • 1 teaspoon dried thyme

  • 1 teaspoon salt

  • ½ teaspoon black pepper

For the Mashed Potato Layer

  • 5 medium potatoes, peeled and cubed

  • 4 tablespoons butter

  • ½ cup milk or cream

  • ½ teaspoon garlic powder

  • Salt and pepper to taste

Cheese Topping

  • 2 cups shredded cheddar cheese

  • Optional: ½ cup mozzarella for extra stretch

  • Optional garnish: chopped parsley or chives

 Instructions

Step 1 — Prepare the Meatloaf Base

Start by preheating your oven to 375°F (190°C).
In a large bowl, combine your ground beef with the onion, bell pepper, garlic, breadcrumbs, eggs, ketchup, Worcestershire sauce, Dijon mustard, and seasonings. Mix gently with your hands—too much mixing can make the meat dense.

Spread this mixture evenly into a 9×13 baking dish, pressing lightly to create a uniform layer. Bake for 25–30 minutes, allowing the meat to firm up and release some of its fat. This step is crucial because it ensures a clean, flavorful base without excess moisture.

Step 2 — Make the Creamiest Potatoes

While the meatloaf layer bakes, boil your potatoes in salted water until fork-tender. Drain them well, then mash with butter, warm milk, garlic powder, salt, and pepper. The potatoes should be creamy but sturdy enough to spread. If you want extra richness, add a spoonful of sour cream or cream cheese.

Step 3 — Layer the Comfort

Once the meatloaf layer is baked, carefully drain the excess liquid and use a spatula to even out the surface. Spread your mashed potatoes across the meat layer, smoothing it like frosting on a cake. Don’t worry if some beef juices rise—those become flavor gold.

Step 4 — Add Cheese (the More, the Merrier)

Generously sprinkle the shredded cheddar (and mozzarella if using) over the potatoes. The cheese should form a thick, even blanket that melts into a bubbling, golden crust as it bakes.

Bake the assembled casserole for another 15–20 minutes, or until the cheese is fully melted and beautifully golden around the edges.

Let it rest 10 minutes before slicing—the flavors deepen and the layers hold together perfectly.

 Why This Casserole Works So Well

This dish shines because it brings together three classic comfort foods—meatloaf, mashed potatoes, and cheesy baked casserole—and weaves them into one harmonious bite. The rich beef layer has texture and warmth from the onions and seasonings. The potatoes add softness and creaminess. The cheese adds boldness and indulgence.

Each bite feels like something your grandmother could have made, but with a modern twist that elevates its flavors and convenience. This is the kind of dish that accidentally becomes a household favorite because everybody asks for seconds.

 Variations to Make It Your Own

  • Tex-Mex Style: Add taco seasoning to the beef, swap cheddar for Mexican blend, and drizzle with salsa.

  • Italian Style: Mix Italian seasoning into the meat and top with mozzarella and parmesan.

  • Veggie Boost: Add shredded carrots or zucchini to the meat mixture.

  • Extra Creamy Topping: Use loaded mashed potatoes—add bacon bits, green onion, or cheese inside the potatoes.

 Serving Suggestions

Pair with:

  • Steamed green beans with garlic

  • A crisp garden salad

  • Buttery dinner rolls

  • Pickles or relish for tang

This casserole also reheats beautifully and makes incredible leftovers—some say it’s even better the next day.

 Final Thoughts

The Cheese Meatloaf Casserole is everything comfort food is meant to be: hearty, simple, flavorful, and deeply satisfying. It’s not flashy. It doesn’t need to impress. It simply delivers warmth in each bite. Whether you serve it for a busy weeknight, a family potluck, or a lazy Sunday dinner, this dish will always have a way of making everyone at the table smile.

Homemade Garlic Bread

Garlic bread isn’t just a side dish—it’s a warm handshake at the dinner table, an irresistible invitation to sit, tear, dip, and savor. What makes garlic bread truly magical is how simple ingredients—bread, butter, garlic, herbs—come together to create an aroma that can stop conversations, bring people to the kitchen, and make even the plainest meal feel like a feast. Today, we craft a garlic bread recipe that stands apart: deeply garlicky, crisp on the outside, soft and cloud-like inside, with a secret infusion that ensures flavor in every bite.

This is not your everyday garlic bread. This is Golden Melt-Away Garlic Bread with Herbed Butter Infusion, a recipe built to impress and comfort at the same time.

 Ingredients (Serves 4–6)

For the Garlic Butter Base

  • 1 loaf fresh French bread or Italian bread

  • 1/2 cup (1 stick) salted butter, softened

  • 4 tablespoons olive oil

  • 6 cloves fresh garlic, minced into a paste

  • 1 teaspoon garlic powder

  • 2 tablespoons fresh parsley, finely chopped

  • 1 teaspoon dried oregano

  • 1/2 teaspoon dried thyme

  • 1/2 teaspoon crushed red pepper flakes (optional but recommended)

  • 1/4 teaspoon black pepper

  • 1/4 teaspoon salt (adjust depending on your butter)

For the Secret Flavor Infusion

  • 2 tablespoons grated Parmesan cheese

  • 1 tablespoon mayonnaise (for creaminess and browning—secret ingredient!)

  • 1 teaspoon lemon juice

  • 1 tablespoon warm milk

Optional Topping

  • 1 cup shredded mozzarella cheese

  • Extra parsley for garnish

 Step-by-Step Instructions

1. Prepare the Flavor-Boosted Garlic Butter

In a mixing bowl, combine the softened butter and olive oil until smooth. This blend gives your garlic bread the perfect balance: butter for richness, olive oil for crisping. Add the minced garlic paste—pressing garlic into a paste instead of chopping releases more flavor and allows it to melt into the bread instead of burning on top.

Stir in garlic powder, parsley, oregano, thyme, red pepper flakes, black pepper, and salt. The mixture should smell fragrant enough to make your mouth water.

Now stir in the secret infusion ingredients: Parmesan, mayonnaise, lemon juice, and warm milk.

  • The Parmesan adds savory depth.

  • The mayonnaise melts into the bread, creating a crisp top and buttery-soft interior.

  • The lemon juice adds a bright note that cuts through the richness.

  • The warm milk softens the crumb and helps everything spread beautifully.

When combined, you will have a luxurious garlic butter that spreads like velvet.

2. Prepare the Bread

Slice your loaf horizontally to create two long halves. For extra flavor, score the bread lightly with diagonal cuts—just shallow enough to allow the garlic butter to sink into the surface.

Place both halves on a baking tray lined with parchment or foil, cut side up.

3. Spread Generously—No Holding Back

Using a spatula or the back of a spoon, spread the garlic butter mixture thickly and evenly across both halves.

Make sure to push some of the butter mixture into the small cuts you created. These pockets capture flavor and create a perfect blend of crisp edges and soft centers.

4. Bake to Perfection

Preheat your oven to 400°F (200°C).

Bake the garlic bread uncovered for 10–12 minutes, or until the edges turn golden and the garlic butter bubbles slightly.

If you want deeper color and crispiness, switch to broil for the last 1–2 minutes—but watch closely so it doesn’t burn.

5. The Cheesy Upgrade (Optional but Life-Changing)

If you love cheesy garlic bread, sprinkle mozzarella over the buttered surface halfway through baking.

Return to the oven until the cheese is melted, bubbly, and slightly browned in spots.

6. Slice, Garnish, and Serve

When the garlic bread comes out hot and fragrant, let it rest for 1 minute—just enough time for the butter to settle slightly.

Sprinkle with extra parsley for a fresh pop of color.

Slice into thick or thin pieces depending on your preference.

Serve warm with pasta, soups, salads, roasted meats, or as a standalone snack deserving of its own spotlight.

 Why This Garlic Bread Is Truly Unique

1. The Flavor Layers

Most garlic breads rely solely on butter and garlic. This version uses fresh garlic, garlic powder, Parmesan, herbs, and a bright hint of lemon—giving you a full spectrum of savory notes.

2. The Secret Creaminess

The addition of mayonnaise and warm milk ensures the bread never dries out. Instead, it stays tender in the center with a beautifully crisp top.

3. The Perfect Texture

Scoring the bread allows the butter to penetrate deeper, giving each slice extra flavor inside—not just on the surface.

4. Customizable

Craving spicy? Add more red pepper flakes.
Want ultra-cheesy? Add mozzarella or even provolone.
Prefer softer garlic bread? Wrap it in foil while baking.

 Chef’s Tips for Next-Level Garlic Bread

  • Use day-old bread: Slightly stale bread soaks up garlic butter better and crisps beautifully.

  • Try roasted garlic: Replace 3 cloves with roasted garlic for a sweeter, milder flavor.

  • Add herbs at the end: Fresh parsley added after baking gives brightness and color.

  • Dip ideas: Marinara, Alfredo, ranch, olive oil balsamic—each transforms the experience.

Final Thoughts

This garlic bread is more than a side dish—it’s a moment. A warm, aromatic bite that brings comfort and joy to any meal. Whether you’re serving it for guests or enjoying it on a quiet evening, this unique recipe guarantees that every crumb is soaked with flavor and love.

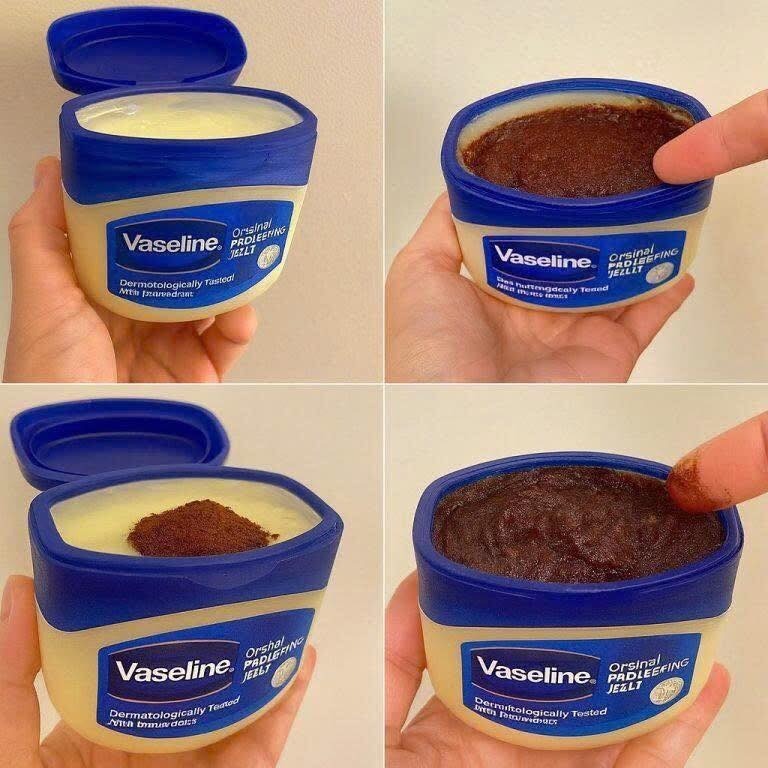
Mix Vaseline and Coffee

Sometimes the simplest ingredients—those tucked away in your bathroom drawer or sitting quietly in a kitchen jar—turn out to be the most transformative. Vaseline, a beloved old-school moisturizer, and coffee, the aromatic kitchen staple known for its antioxidant punch, come together in a surprising union to create a powerful beauty balm that smooths, softens, brightens, and revives tired skin. This isn’t your typical DIY scrub or mask. This is a multi-purpose treatment that acts like a gentle exfoliator, a lip rejuvenator, a hand-repair cream, and even an overnight glow booster. The recipe is incredibly simple, but the results feel spa-like—rich, warm, and luxuriously effective.

Welcome to the ultimate Mix Vaseline and Coffee Beauty Balm—a unique, 800-word recipe that shows you exactly how to create and use this magic blend.

Why Mix Vaseline and Coffee?

Vaseline (petroleum jelly) has been trusted for generations for its ability to lock in moisture and protect delicate skin. It creates a soft, occlusive barrier that prevents water loss, making it valuable for dry patches, cracked lips, and rough hands.

Coffee, on the other hand, is loaded with caffeine and antioxidants. When applied topically, coffee grounds can help improve circulation, gently exfoliate dead skin cells, brighten dull skin, and reduce the appearance of puffiness.

When these two come together, you get the best of both worlds:

  • Exfoliation + hydration

  • Brightening + protection

  • Firming + softening

The mixture transforms into a warming, aromatic balm that feels indulgent on the skin yet takes less than 5 minutes to prepare.

Ingredients for the Unique Vaseline–Coffee Balm

  • 2 tablespoons Vaseline (petroleum jelly)

  • 1 tablespoon finely ground coffee (use fresh grounds, not instant)

  • ½ teaspoon coconut oil or olive oil (optional for added smoothness)

  • 1–2 drops vanilla or cinnamon extract (optional for a luxurious scent)

How to Make the Balm

Step 1: Melt the Vaseline

Place Vaseline in a small heat-proof bowl. Warm it gently over steaming water (double-boiler style). You don’t want it hot—just softened enough to mix easily. This allows the coffee grounds to blend smoothly without clumping.

Step 2: Add the Coffee Grounds

Once the Vaseline is softened, stir in the ground coffee. Make sure the coffee is finely ground, almost powder-like, so it exfoliates gently and doesn’t scratch the skin.

Step 3: Enhance With Oils (Optional but Recommended)

Add coconut oil or olive oil to thin the mixture slightly. This transforms the balm from a dense paste into a silky, spreadable cream.

Step 4: Customize the Scent

Add a drop of cinnamon or vanilla extract for a warm aroma—this turns your balm into something that feels luxurious and homemade.

Step 5: Let It Cool and Set

Pour the mixture into a small container, let it cool, and it will firm up into a rich, aromatic beauty balm.

How to Use Your Vaseline–Coffee Balm

Here’s where the magic really happens. This isn’t a one-purpose recipe—it’s a multi-benefit beauty tool you’ll return to again and again.

1. Lip Exfoliator and Plumper

Coffee grounds gently remove dry skin while Vaseline deeply moisturizes.

How to use:
Take a pea-sized amount and massage onto your lips for 30 seconds. Wipe away. Enjoy soft, smooth, “awake-looking” lips.

2. Under-Eye Brightener (Use Sparingly)

Caffeine helps reduce puffiness temporarily, while Vaseline locks in hydration.

How to use:
Very gently dab a tiny amount under the eyes at night. In the morning, rinse thoroughly.

3. Hand and Cuticle Repair Cream

Rough hands and cracked cuticles heal faster with this thick, nourishing treatment.

How to use:
Massage the balm into your fingertips and knuckles. Put on cotton gloves overnight for best results.

4. Knee, Elbow, and Heel Softener

Dry joints and rough heels drink up this mixture like magic.

How to use:
Apply a generous layer to elbows, knees, or heels. Leave on for 10–15 minutes, then wipe off excess.

5. Face Scrub (Occasional Use Only)

The mixture can be used as a gentle exfoliator for dull skin but only occasionally because Vaseline is very occlusive.

How to use:
Massage onto damp skin for 20–30 seconds, then remove with warm water and a washcloth.

6. Brow Conditioner and Growth Massage

Coffee stimulates circulation while Vaseline nourishes.

How to use:
Massage a tiny bit along your eyebrows at night.

7. Lip Tint Balm (Optional Variation)

Add a pinch of cocoa powder or beetroot powder to turn the balm into a tinted lip treatment.

Storage and Shelf Life

Because this is an oil-based recipe with no water, it has a long shelf life.

  • Stable for 2–3 months

  • Keep container tightly sealed

  • Store at room temperature

  • Avoid letting water drip inside

The scent will grow softer over time, but the effectiveness remains beautifully strong.

Final Thoughts: The Beauty Secret Hiding in Plain Sight

This simple mixture of Vaseline and coffee proves that you don’t always need expensive products to get results. Nature and tradition often hold the secrets to glowing skin, soft lips, and nourished hands. This balm is warm, aromatic, energizing, and endlessly useful. Whether you use it as a scrub, moisturizer, plumping lip treatment, or nighttime repair ointment, it adds a little moment of ritual and comfort to your daily routine.

Mom’s Classic Cream Cheese Coffee Cake

There are recipes that impress, and then there are recipes that feel like home. Mom’s Classic Cream Cheese Coffee Cake belongs to the latter—a cozy, sweet, soul-stirring creation that has graced family tables for generations. It’s the kind of cake you remember from early weekend mornings, drifting awake to the smell of vanilla, butter, cinnamon, and that unmistakable hint of tangy cream cheese warmth. This version is not only unique but also crafted with a nostalgic twist, blending old-fashioned comfort with modern baking techniques for a moist, tender crumb that never dries out.

What makes this coffee cake unforgettable is its triple-layer structure: a buttery vanilla batter, a silky cream cheese filling, and a crisp cinnamon-brown sugar crumble on top. Each bite is a perfect marriage of creamy, crumbly, and cake-like textures. Whether you serve it warm with tea, pack it for brunch, or leave it on the counter for the entire family to grab from throughout the day, the result is the same—pure joy.

Ingredients

For the Cake Batter

  • 1 ½ cups all-purpose flour

  • 1 teaspoon baking powder

  • ½ teaspoon baking soda

  • ¼ teaspoon salt

  • ½ cup unsalted butter, softened

  • ¾ cup granulated sugar

  • 2 large eggs, room temperature

  • 1 tablespoon pure vanilla extract

  • ¾ cup sour cream (or plain yogurt for a lighter version)

For the Cream Cheese Filling

  • 8 oz cream cheese, softened

  • ⅓ cup granulated sugar

  • 1 large egg

  • 1 teaspoon vanilla extract

For the Cinnamon Crumble Topping

  • ½ cup all-purpose flour

  • ½ cup brown sugar

  • 1 teaspoon cinnamon

  • ¼ cup cold butter, cubed

How to Make Mom’s Classic Cream Cheese Coffee Cake

1. Prepare Your Pan and Oven

Preheat your oven to 350°F (175°C). Grease an 8×8-inch square pan or line it with parchment paper for easy removal later. Coffee cake is meant to be tender, so avoid metal pans that heat too aggressively—glass or ceramic works best.

2. Make the Cake Batter

In a medium bowl, whisk together the flour, baking powder, baking soda, and salt.
In a separate larger bowl, beat the softened butter and sugar until pale, fluffy, and creamy—about 3 minutes. This step traps air in the batter, giving the cake its cloud-like texture.

Add the eggs one at a time, mixing well after each addition. Stir in the vanilla.

Now switch to a spatula. Add the dry ingredients in two additions, alternating with the sour cream. Don’t overmix—fold until just smooth. The batter will be thick, rich, and silky.

3. Prepare the Cream Cheese Filling

Beat together the cream cheese, sugar, egg, and vanilla until the mixture is smooth and glossy. This filling will bake into a custardy, cheesecake-like layer that makes this coffee cake irresistible.

4. Create the Cinnamon Crumble

Using a fork or your fingers, combine the flour, brown sugar, and cinnamon. Add the cold butter and rub it in until the mixture resembles coarse, buttery sand. This crumble adds texture and warmth to the cake and fills the kitchen with a cinnamon-sugar aroma that feels like a hug.

5. Assemble the Layers

Spread half of the cake batter into your prepared pan.
Pour the cream cheese filling over the batter and spread gently.
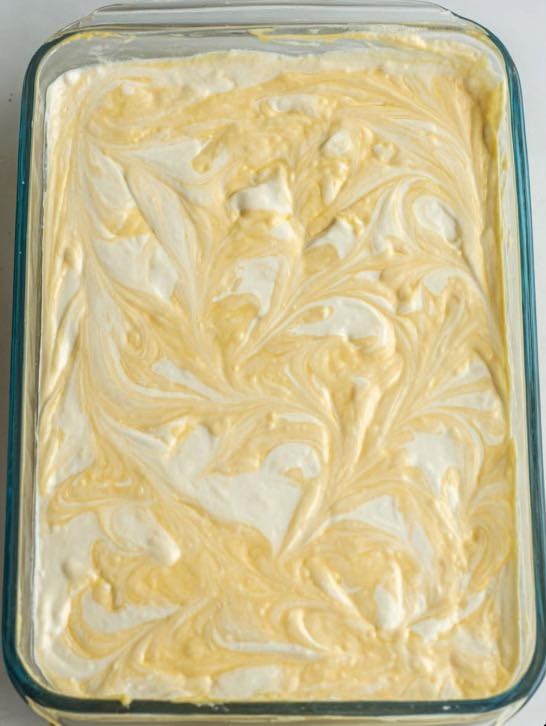
Dollop the remaining cake batter on top—it won’t completely cover the filling, and that’s okay. The magic happens during baking as the layers settle and swirl slightly on their own.
Finish with a generous sprinkle of the cinnamon crumble.

6. Bake

Place the cake in the center of the oven and bake for 38–45 minutes, or until the center is set and a toothpick inserted into the cake layer (not the cream cheese) comes out clean. The top will be golden, with tiny buttery craters from the crumble.

Let the cake cool for at least 20 minutes. It slices beautifully when warm and becomes even creamier as it rests.

Serving Suggestions

  • Warm for Breakfast: Serve with black coffee or chai.

  • Brunch Treat: Dust with powdered sugar for a café-style finish.

  • Holiday Version: Add a handful of blueberries or cranberries over the cream cheese layer before baking.

  • Nutty Upgrade: Add chopped pecans or walnuts to the crumble.

  • Glaze Lovers: Drizzle with a simple icing (1 cup powdered sugar + 2 tbsp milk).

Why This Recipe Works (The Unique Twist)

What separates this recipe from standard coffee cakes is the balance of textures and flavors:

  • The sour cream provides moisture and acidity, preventing dryness.

  • The cream cheese layer bakes into a velvety ribbon, transforming each bite into a cheesecake-meets-coffee-cake moment.

  • The crumble topping offers crunch, contrast, and warmth.

  • The layered assembly ensures flavor in every forkful—no plain edges, no bland middle, just consistent richness throughout.

This combination creates a dessert that tastes like something only a mom would know how to make—simple, comforting, and impossibly delicious.

Final Bite

Mom’s Classic Cream Cheese Coffee Cake isn’t just a recipe; it’s an edible memory. It brings back quiet Sunday mornings, handwritten recipe cards, the clatter of spoons in mixing bowls, and the aroma of cinnamon drifting through the house. It’s the kind of cake that makes you feel cared for.