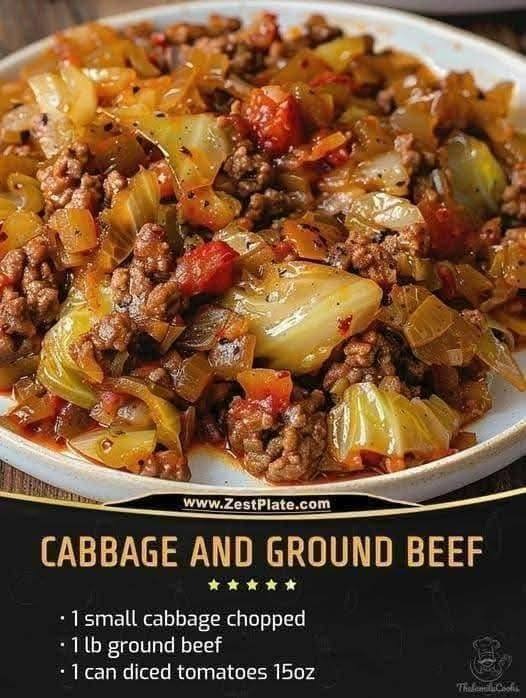
Ground Beef and Chopped Cabbage

There’s something profoundly comforting about the combination of ground beef and cabbage. It’s humble, hearty, budget-friendly, and deeply versatile. But this unique recipe takes the classic pairing and transforms it into a richly layered, flavor-forward skillet dish that tastes like something your grandmother might have made—if she had a secret stash of spices and a flair for bold, caramelized flavors. This Ground Beef and Chopped Cabbage Skillet is easy enough for a weeknight, nourishing enough for meal prep, and delicious enough to make again and again.

 What Makes This Recipe Unique

Most beef-and-cabbage dishes rely on simple sautéing, but here, we build flavor in stages.

  • Spiced beef gets browned until deeply caramelized.

  • Cabbage cooks low and slow until it becomes sweet, tender, and almost buttery.

  • A tangy tomato-garlic glaze coats every piece, making the dish feel both familiar and completely new.

  • A splash of soy sauce and apple cider vinegar adds an umami punch and bright finish.

  • A touch of smoked paprika and chili flakes brings warmth without overpowering the natural sweetness of cabbage.

The result? A one-pan masterpiece that tastes like comfort food elevated.

 Unique Ground Beef & Chopped Cabbage Skillet

Servings: 4

Prep Time: 10 minutes

Cook Time: 35 minutes

Total Time: 45 minutes

 Ingredients

For the Beef

  • 1 lb (450g) ground beef

  • 1 medium onion, finely chopped

  • 3 cloves garlic, minced

  • 1 tsp smoked paprika

  • 1 tsp chili flakes (optional but recommended)

  • 1 tsp black pepper

  • 1 tsp salt

  • 1 tbsp soy sauce

  • 1 tbsp tomato paste

For the Cabbage

  • 4 cups chopped green cabbage (½ medium head)

  • 1 large carrot, shredded

  • ½ cup diced tomatoes (fresh or canned)

  • 2 tbsp olive oil or butter

  • ½ cup beef broth or water

Finishing Touches

  • 1 tbsp apple cider vinegar

  • 1 tbsp Worcestershire sauce (optional but excellent)

  • 1 tsp sugar or honey (balances acidity)

  • Fresh parsley or green onions

  • Sesame seeds (optional)

 Step-By-Step Instructions

1. Brown the Beef for Deep Flavor

Heat a large skillet over medium-high and add the ground beef. Let it cook undisturbed for 3–4 minutes to develop a crust—this caramelization is key. Break it up with a wooden spoon, then add the chopped onion.

Cook until the beef turns brown and the onions soften. Drain excess fat if needed, then stir in garlic, smoked paprika, chili flakes, salt, pepper, soy sauce, and tomato paste. Let everything cook for 2 minutes until fragrant. This creates a savory, smoky flavor base.

2. Add the Cabbage in Two Stages

Add half of the chopped cabbage first. It will wilt quickly and soak up the seasoned beef juices. Stir well for about 5 minutes.

Then add the remaining cabbage along with the shredded carrot and diced tomatoes. Drizzle with olive oil or butter. Adding cabbage in layers allows even cooking and better flavor absorption.

3. Simmer to Sweet Perfection

Pour in the beef broth or water, then cover the skillet and reduce the heat to medium-low. Let it simmer gently for 10–12 minutes.

During this time, the cabbage softens, releases natural sweetness, and mingles with the beef and spices. It becomes tender but not mushy—the perfect texture.

4. Create the Tangy-Savory Glaze

Uncover the skillet and increase the heat to medium.

Add apple cider vinegar, Worcestershire sauce, and sugar or honey. Stir everything together and cook another 5 minutes until the liquid turns into a glossy, flavorful glaze that clings to the cabbage and beef.

Taste and adjust:

  • More vinegar for tang

  • More soy sauce for depth

  • More sugar for sweetness

  • More chili flakes for heat

5. Garnish and Serve

Remove from heat and top with chopped parsley or green onions. Add sesame seeds for a bit of nuttiness if you like.

Serve hot and enjoy the irresistible mix of savory, sweet, tangy, and smoky flavors.

 How to Serve This Dish

This skillet dinner is incredible on its own, but here are some serving ideas:

  • Over steamed rice

  • Next to butter-mashed potatoes

  • With garlic bread or flatbread

  • Stuffed into tortillas for fusion “beef & cabbage tacos”

  • As a low-carb bowl topped with avocado

 Tips for the Best Flavor

🔥 Let the beef brown properly

Don’t rush the first few minutes—color equals flavor.

🥗 Use fresh cabbage

The crispness of fresh cabbage creates better texture and sweetness.

🍅 Don’t skip tomato paste

It adds richness and umami that elevate the whole dish.

🥄 Taste before serving

This is a balancing dish—adjust seasoning until the sweet-savory-tangy notes hit perfectly.

 Why This Recipe Works

This dish shines because of contrast:

  • Soft cabbage vs. rich beef

  • Sweetness vs. acidity

  • Savory umami vs. smoky spices

Cooking the cabbage slowly gives it a beautiful melting quality, while the glazed finish adds a gourmet touch. Every bite delivers layers of flavor, transforming simple ingredients into something deeply satisfying.

Amazing Forgotten Chicken

Some recipes earn their fame not because they are fancy or complicated, but because they are dependable—warm, comforting, and impossibly simple to pull off. “Forgotten Chicken” is one of those dishes, a retro bake that got its name because you literally forget it in the oven and it magically transforms into a creamy, tender masterpiece. But today’s version goes beyond the old cookbook standard. This is an elevated, deeply flavorful, still-effortless Amazing Forgotten Chicken—a dish that captures why slow-baked comfort food will never go out of style.

Below is a full, unique 800-word recipe that reimagines the classic into something richer, more fragrant, and completely unforgettable.

Amazing Forgotten Chicken

Serves: 4–6
Prep Time: 10 minutes
Bake Time: 1 hour 30 minutes
Total Time: 1 hour 40 minutes

Why This Version Is Different

Traditional Forgotten Chicken uses condensed soups and basic rice, relying on the oven to do all the work. My upgraded recipe keeps the no-fuss method but deepens the flavor with toasted rice, garlic-sage butter, and a hint of paprika that turns the chicken golden and aromatic. Instead of blandness, you get rich chicken juices, creamy baked rice, and a layer of seasoning that feels almost gourmet—yet the effort is still minimal. This is the set-it-and-forget-it dinner that tastes like you hovered over the stove for hours.

Ingredients

For the Rice Base

  • 1 ½ cups long-grain white rice (NOT instant)

  • 1 can (10.5 oz) cream of chicken soup

  • 1 can (10.5 oz) cream of mushroom soup

  • 2 cups chicken broth

  • 3 tablespoons butter

  • 3 cloves garlic, minced

  • ½ teaspoon black pepper

  • ½ teaspoon onion powder

  • ½ teaspoon dried thyme

  • 1 teaspoon salt (adjust to broth saltiness)

For the Chicken

  • 4–6 boneless chicken breasts (or thighs for juicier results)

  • 1 teaspoon smoked paprika

  • 1 teaspoon garlic powder

  • 1 teaspoon Italian seasoning

  • ½ teaspoon salt

  • ½ teaspoon black pepper

  • Optional: pinch of cayenne for gentle heat

Finishing Options

  • Chopped fresh parsley

  • A squeeze of lemon

  • Grated parmesan

Instructions

1. Preheat and Prepare Your Pan

Set your oven to 325°F (165°C)—the low heat is what makes this recipe magical. Grease a 9×13-inch baking dish with butter or oil. Forgotten Chicken works best in a shallow, wide pan because it helps the rice cook evenly and absorb moisture gradually.

2. Toast the Rice for Better Flavor

This step is unique to this recipe and adds a deep, nutty flavor that sets it apart.
Heat a skillet over medium, melt the 3 tablespoons of butter, and add the rice. Toast for 2–3 minutes, stirring, until some grains turn opaque and lightly golden. Add the minced garlic and toast 30 seconds more. This simple change transforms the entire dish from ordinary to restaurant-level.

Transfer the fragrant rice-garlic mixture into the baking dish.

3. Build the Creamy Base

In a bowl, whisk together:

  • Cream of chicken soup

  • Cream of mushroom soup

  • Chicken broth

  • Onion powder

  • Thyme

  • Salt

  • Pepper

Pour this mixture over the rice and gently stir to spread everything evenly. You want the rice submerged but not drowned—if needed, you can add an extra splash of broth.

4. Season the Chicken Generously

Lay the chicken breasts or thighs on top of the rice mixture. Sprinkle the chicken with smoked paprika, garlic powder, Italian seasoning, pepper, salt, and optional cayenne. The seasonings will seep into the rice as it cooks, making every bite flavorful.

5. The “Forget It” Bake

Cover the dish tightly with aluminum foil. This traps moisture and steam, ensuring the rice becomes tender and the chicken remains juicy.

Place the pan in the oven and leave it completely undisturbed for 1 hour 30 minutes.
Don’t open the door. Don’t peek. Don’t stir.
Resist the temptation—this is the secret to perfectly cooked rice.

6. Optional Browning

For a golden top, uncover the dish during the last 10 minutes and broil on low. This adds a beautiful color and slight crispness to the chicken edges.

7. Finish and Serve

Remove from the oven and rest for 5 minutes.
Fluff the rice around the chicken gently. You’ll notice it’s creamy, rich, and perfectly cooked—never mushy, never dry.

Finish with fresh parsley, lemon, or parmesan depending on the mood you want:

  • Parsley = fresh and bright

  • Lemon = tangy and lively

  • Parmesan = rich and cozy

Why This Dish Works So Well

This recipe is comfort food engineering at its finest. Slow heat melts the fat in the chicken and pulls moisture downward through the rice, infusing it with flavor. The soups create creaminess without needing extra dairy. Toasting the rice adds depth, while garlic and thyme bring warmth and subtle aroma. The dish basically forms layers of flavor while doing all the work for you.

Even the name contributes to its charm—you really can forget it while the oven performs quiet magic.

Tips for the Best Forgotten Chicken

Use Thighs for Guaranteed Juiciness

If you’re worried about dry chicken, thighs are almost impossible to overcook.

Don’t Use Instant Rice

It will turn mushy. Long-grain only.

Add Veggies (If You Dare)

Forgotten Chicken purists may object, but peas, mushrooms, or finely chopped carrots work beautifully.

Make It Ahead

You can assemble the dish in the morning, refrigerate, then bake when ready. Just add 10 minutes to the cook time.

Final Thoughts

This Amazing Forgotten Chicken is more than a retro casserole—it’s a humble dish that honors simplicity while celebrating flavor. It’s the kind of meal families remember not because it’s fancy, but because it’s reliable, cozy, and always delicious. The rice becomes creamy, the chicken becomes tender, and the entire pan feels like a warm hug after a long day.

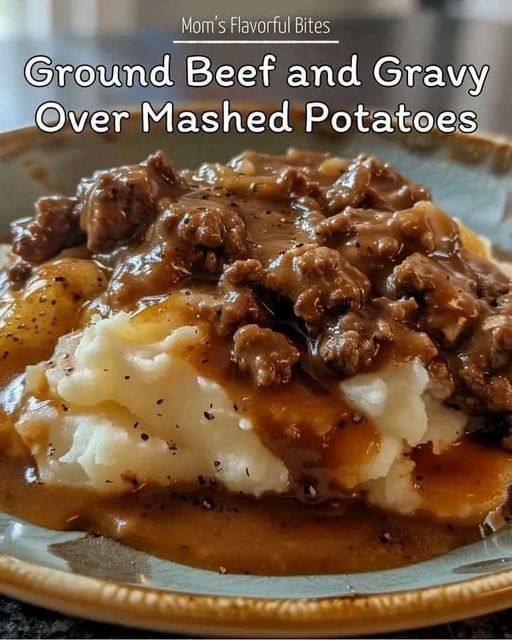
Beef and mashed potatoes

There are few dishes in the world as soul-satisfying as a bowl of tender beef nestled beside creamy, buttery mashed potatoes. It’s the kind of food that reminds you of childhood dinners, chilly evenings, and the comforting certainty that a warm meal can fix almost anything. But today, we’re not making just any beef and mashed potatoes. We’re crafting a unique, deeply flavorful, slow-braised beef with silky mashed potatoes that taste like they came straight out of a farmhouse kitchen—but elevated with chef-style techniques you can easily master.

This recipe brings together slow-cooked beef in a rich, savory gravy and mashed potatoes whipped to perfection. Each bite delivers melt-in-your-mouth meat, garlic-kissed potatoes, and a glossy sauce that ties everything together. Let’s dive into the magic.

 UNIQUE BEEF & MASHED POTATOES RECIPE (800 WORDS)

Why This Recipe Is Special

Instead of the typical stew or pan-seared beef, this recipe uses a hybrid method: the beef is first caramelized at high heat, then braised low and slow with aromatics and a secret umami booster—soy sauce—giving the gravy depth without overpowering the classic flavors. The mashed potatoes benefit from a two-step infusion technique with warm cream and garlic, creating a smooth, cloud-like texture.

This is comfort food refined, not reinvented—and it’s unforgettable.

 Ingredients

For the Beef

  • 1.5 lbs (700g) beef chuck, cut into large cubes

  • 2 tbsp oil (neutral or olive)

  • 1 medium onion, finely diced

  • 3 garlic cloves, minced

  • 1 carrot, grated or minced (adds sweetness and body)

  • 1 tbsp tomato paste

  • 1 tbsp soy sauce (secret flavor depth!)

  • 1 tsp Worcestershire sauce

  • 1 cup beef broth

  • ½ tsp black pepper

  • 1 tsp paprika

  • ½ tsp dried thyme

  • Salt to taste

For the Mashed Potatoes

  • 4–5 medium potatoes, peeled and chopped

  • 3 tbsp butter

  • ½ cup warm milk or cream

  • 2 garlic cloves, smashed

  • Salt to taste

  • Black pepper, optional

  • Fresh parsley, optional

 Step-By-Step Directions

1. Brown the Beef — The Flavor Foundation

Heat oil in a heavy pot over medium-high heat. Add the beef in a single layer. Let it SEAR—do not stir—for at least 2–3 minutes. This deep browning is the difference between “good” and incredible beef. Flip and brown all sides, then remove to a plate.

This caramelization builds the umami base that will make your gravy rich, dark, and complex.

2. Build the Savory Base

In the same pot, reduce heat to medium and add diced onions. Cook until golden. Add garlic and carrot; sauté until fragrant and softened.

Mix in tomato paste and cook it for 30–45 seconds—it should darken slightly. This step removes acidity and deepens the flavor.

3. Braise the Beef to Tenderness

Return the beef to the pot. Add soy sauce, Worcestershire, thyme, paprika, pepper, and enough beef broth to cover the meat halfway.

Bring to a simmer, then cover and cook on low for 1.5–2 hours, until fork-tender.

Your kitchen will smell heavenly. The broth will transform into a glossy gravy, thickened naturally by the reduced vegetables and collagen from the beef.

If you want a thicker sauce, simmer uncovered for 10 more minutes.

 Mash the Potatoes to Silky Perfection

4. Boil the Potatoes

Place peeled potatoes in a pot of salted water. Boil until very soft—this is key for smooth mash.

5. Infuse the Milk

Warm your milk or cream in a small pot with the smashed garlic cloves. Let it steep on low for 5 minutes, then remove the garlic.

This step infuses the potatoes with mellow, aromatic garlic flavor without harshness.

6. Mash & Whip

Drain potatoes and return to the pot to steam off excess moisture.

Add butter and start mashing. Slowly pour the warm garlic-infused milk while continuing to mash or whip with a hand mixer for extra creaminess.

Taste and adjust salt. Add pepper if desired.

 Assemble the Ultimate Comfort Bowl

Spoon a generous mound of mashed potatoes onto a plate or bowl. Make a small “well” in the center. Ladle the beef and glossy gravy right on top so it flows into the potatoes.

Garnish with parsley, cracked pepper, or even a swirl of melted butter.

Take your first bite—and feel the warmth.

 Chef Tips & Variations

✔ Add mushrooms
Sauté mushrooms with onions for extra earthy richness.

✔ Make it spicy
Add ½ tsp chili flakes or a chopped green chili when you add the garlic.

✔ Extra creamy potatoes
Replace half the milk with sour cream for a tangy, velvety mash.

✔ Crispy topping option
Spread mashed potatoes in a dish, broil until browned, then serve with beef on top.

✔ Slow cooker variation
Brown beef first, then cook all ingredients (except potatoes) on LOW 6–7 hrs.

 The Story Behind the Dish (Optional Introduction Paragraph)

Beef and mashed potatoes have long been a symbol of comfort—a meal that speaks a universal language of home and warmth. But this unique version transforms the familiar into something extraordinary by layering flavors, textures, and classic technique with modern touches. The tender beef melts effortlessly, the gravy hugs every bite, and the mashed potatoes offer the kind of creamy indulgence you only get when simple ingredients are treated with respect. It’s a plate that reminds you that comfort food doesn’t need to be complicated—it just needs to be made with intention.

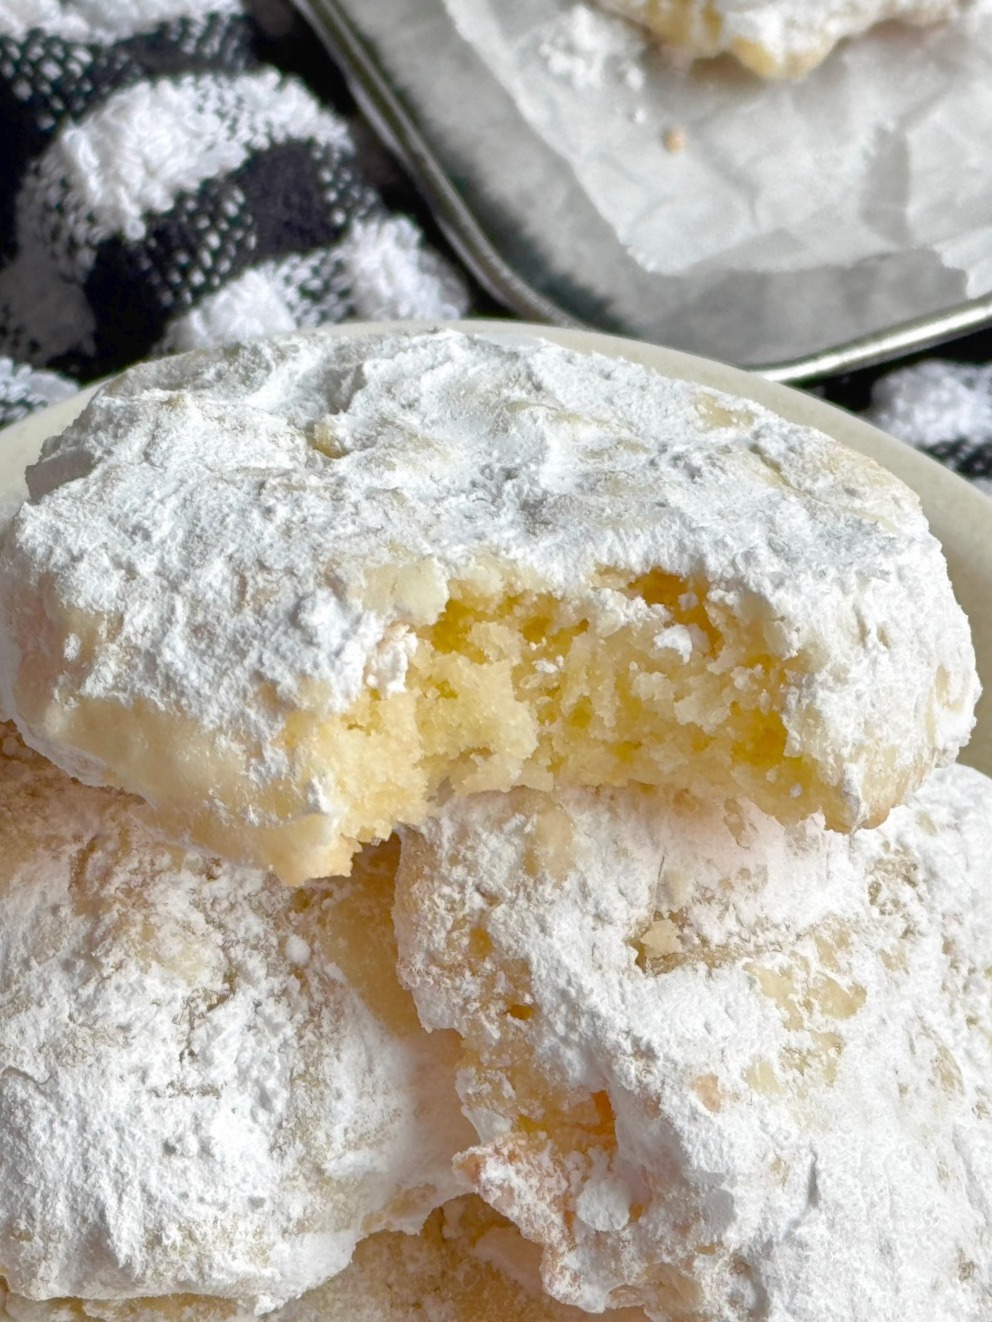
The Rise of Panko Cookie

For generations, cookies have stayed safely within the borders of flour, sugar, butter, and eggs—comforting, familiar, and predictable. But every so often, a simple twist ripples across the baking world, challenging what dessert can be. Enter Panko Cookies, the bold new treat that merges the airy crunch of Japanese panko breadcrumbs with the tender sweetness of a classic cookie. This unlikely pairing has taken over home kitchens, social media feeds, and bakery menus with shocking speed. Why? Because it works—beautifully and deliciously.

Panko, originally created for ultra-light, ultra-crispy Japanese fried dishes, seems like the last ingredient that belongs in a baking bowl. But its structure—feathery, flaky, and almost cloud-like—transforms cookies from predictable rounds into textural masterpieces. Instead of relying solely on flour and sugar for body, panko adds lift, crunch, and an addictive “whisper crisp” that melts away into buttery softness. It’s the kind of cookie that surprises you, then lingers in your memory long after the crumbs are gone.

The phenomenon began when adventurous bakers started swapping out a portion of flour for breadcrumbs to create lighter, airier desserts. Panko, with its distinct shape and ultra-low density, became the star. Suddenly, you had cookies with crisped edges, tender centers, and a subtle toasty flavor unlike anything else. The result felt gourmet, experimental, and strangely nostalgic—comfort food with an elegant twist. Before long, people were calling them the cookie you didn’t know you needed until you tried it.

Below is a unique, foolproof Panko Cookie recipe that showcases everything that makes this trend irresistible. Crisp, golden, airy, and lightly caramelized, these cookies are surprisingly simple to make yet taste like something from an artisan bakery.

THE RISE OF PANKO COOKIES – SIGNATURE RECIPE

Crispy-Soft Caramel Brown Butter Panko Cookies

Ingredients (Makes 18–20 cookies)

  • 1 cup (2 sticks) unsalted butter

  • 1 cup panko breadcrumbs

  • 1 cup all-purpose flour

  • ¾ cup brown sugar

  • ¼ cup white sugar

  • 1 large egg

  • 1 egg yolk

  • 1 tsp vanilla extract

  • ½ tsp baking soda

  • ½ tsp baking powder

  • ½ tsp salt

  • Optional mix-ins: ½ cup mini chocolate chips, toasted coconut, chopped nuts, or white chocolate chunks

Step-by-Step Instructions

1. Brown the Butter for Deep Flavor

Place the butter in a light-colored saucepan and melt over medium heat. Continue cooking until it foams, turns golden, and smells nutty—about 4–6 minutes. Remove from heat and cool 10 minutes.
This caramelized butter builds a warm, toasty backbone that balances the airy panko crunch.

2. Toast the Panko for Maximum Crisp

Spread the panko in a dry skillet. Toast over medium heat, stirring often, until lightly golden and fragrant—about 2–3 minutes.
Let it cool completely.
Toasting keeps the panko crisp inside the cookie instead of softening.

3. Mix the Wet Ingredients

In a bowl, whisk together the brown butter, brown sugar, and white sugar until smooth.
Add the egg, egg yolk, and vanilla. Whisk again.

4. Combine Dry Ingredients

In a separate bowl, mix the flour, toasted panko, baking soda, baking powder, and salt.

5. Make the Dough

Add the dry mixture to the wet mixture. Stir until a soft, thick dough forms.
Fold in optional mix-ins if using.

6. Chill the Dough (Important!)

Refrigerate for at least 45 minutes.
Chilling allows the butter to firm up, preventing overspreading and boosting crisp edges.

7. Scoop and Bake

Preheat your oven to 350°F (175°C).
Line a baking sheet with parchment.
Scoop 1½-tablespoon balls of dough and arrange 2 inches apart.
Bake 10–12 minutes or until edges turn deep golden and centers look puffed.
Cool on the sheet for 5 minutes before transferring to a rack.

8. Enjoy the Transformative Texture

The edges will be crisp from the toasted panko and caramelized butter, while the insides remain plush and soft.

Why Panko Cookies Just Work

A New Textural Frontier

Most cookies rely solely on flour for structure, but panko introduces an airy crispness that traditional crumb isn’t capable of delivering. With its jagged flakes and feather-light body, panko behaves like a pastry secret weapon—creating layers of crunch and melt.

A Better, Lighter Bite

Cookies often lean dense and heavy. Panko breaks that cycle, delivering a cookie that feels delicate but still satisfying. Every bite contrasts a caramelized edge with a tender center.

Flavor Amplification

Toasted panko brings a subtle nuttiness that enhances brown butter and vanilla. It’s understated but unforgettable.

Customization Potential

Panko cookies pair beautifully with:

  • melted chocolate drizzles

  • lemon zest and white chocolate

  • espresso powder

  • spices like cinnamon, cardamom, or chai mix

  • coconut flakes

  • crushed nuts

This makes them endlessly adaptable to seasons, cravings, and creativity.

Serving Suggestions

  • Sandwich Cookies: Fill with vanilla buttercream or chocolate ganache.

  • Ice Cream Toppers: Crumble over vanilla or salted caramel ice cream.

  • Breakfast Cookies: Add oats, dried cranberries, and nuts.

  • Holiday Treats: Dip half the cookie in melted chocolate and sprinkle crushed peppermint.

  • Final Thoughts

Panko cookies symbolize what makes modern home baking so exciting: curiosity, boldness, and discovery. They prove that even the simplest ingredients—breadcrumbs!—can reshape a classic dessert when used with imagination. The next time you crave something familiar yet new, something nostalgic yet innovative, bake a batch of these airy, crackly, golden cookies. You’ll see exactly why the rise of panko cookies isn’t just a trend—it’s the start of a delicious new chapter in cookie history.

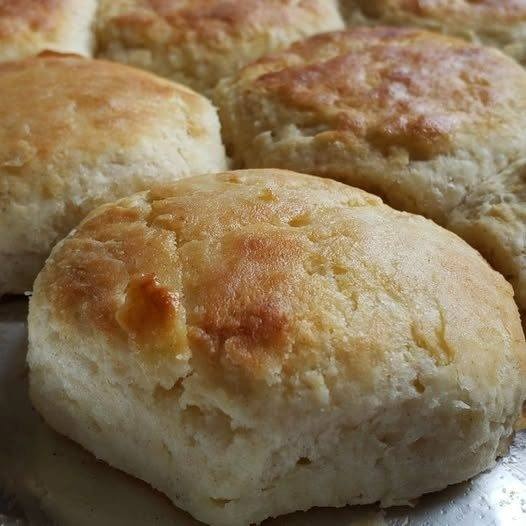
The Sacred Craft of Buttermilk Biscuits

There are recipes you merely follow… and then there are recipes you practice, like a quiet ritual passed from one pair of hands to the next. Buttermilk biscuits belong to that special second category. Soft, pillowy, golden biscuits with buttery layers don’t just appear because you mixed flour and fat—they rise because you respected the process. This is the sacred craft of buttermilk biscuits: part technique, part intuition, and part kitchen alchemy. Today, you’ll learn a one-of-a-kind recipe built on heritage, simplicity, and the pursuit of tender perfection.

Why Buttermilk Biscuits Are a Craft, Not Just a Recipe

True biscuits begin long before the oven heats. They start with cold ingredients, gentle hands, and the promise that the dough will be handled with care. Buttermilk provides tang and lift. Cold butter creates steam pockets—those beloved flaky layers. And the way you mix, fold, and shape the dough determines whether you’ll have cloud-soft biscuits or dense hockey pucks.

Consider this recipe your guide not just for making biscuits, but for mastering them.

Ingredients (Makes 10–12 Biscuits)

  • 2 ½ cups all-purpose flour (plus extra for dusting)

  • 1 tablespoon baking powder

  • ½ teaspoon baking soda

  • 1 teaspoon fine salt

  • 2 teaspoons sugar (optional but recommended)

  • ½ cup (1 stick/113 g) COLD unsalted butter, cubed

  • 1 cup COLD buttermilk, plus a little extra for brushing

  • 2 tablespoons melted butter (for brushing after baking)

The Sacred Method — Step-by-Step

1. Chill Everything First

This is the first sacred rule of biscuit making: cold ingredients = flaky biscuits.
Place your butter cubes, bowl, and even the flour in the fridge for 10 minutes before starting. Biscuits love the cold.

2. Whisk the Dry Ingredients

In a large chilled bowl, combine flour, baking powder, baking soda, salt, and sugar. Whisk lightly. This distributes the leavening and aerates the flour, setting the stage for lift.

3. Cut in the Butter (the Holy Step)

Add the cold butter cubes. Using a pastry cutter or your fingertips, gently work the butter into the flour until you have pea-sized pieces.
This step is sacred because every tiny butter piece becomes a steam pocket in the oven—your layers depend on this.

4. Make a Well, Pour Buttermilk

Create a small well in the center and pour in the cold buttermilk.
Using a fork or your hand in a claw shape, mix just until the dough comes together.
Stop early rather than mix too long—overworked dough toughens biscuits.

5. Turn the Dough Out and Start the Lamination Ritual

Scatter flour on your counter, turn out the dough, and gently pat it into a rectangle.
Now comes the biscuit-maker’s secret:

Fold the dough like a letter — fold the top third down and the bottom third up.
Turn it, gently pat into a rectangle again, and repeat 3 times.

This creates natural, buttery layers without a rolling pin.

6. Shape the Dough

Pat the dough into a 1-inch thick slab.
Use a biscuit cutter or a round glass dipped in flour.
Push straight down—never twist—twisting seals the edges and prevents rising.

Gather scraps and gently pat them together for more biscuits, but handle lightly.

7. Prepare for Baking

Place biscuits close together on a parchment-lined baking sheet if you want tall, soft biscuits, or spaced apart for crisper edges.
Brush the tops lightly with buttermilk.

8. Bake Until Golden

Bake at 450°F (230°C) for 12–15 minutes, or until the tops are tall, risen, and deeply golden.

9. Finish with Butter

When they emerge from the oven, brush each with melted butter. This gives a glossy, irresistible finish and softens the crust.

Expert Tips for Biscuit Mastery

✔ Keep Everything Cold

Warm butter melts too early and ruins the layers. If the dough softens, refrigerate it for 10 minutes before baking.

✔ Don’t Overwork

The less you touch the dough, the more tender the biscuits.

✔ Use Aluminum-Free Baking Powder

It gives a cleaner flavor and better rise.

✔ Buttermilk Substitute (If Needed)

Mix 1 cup milk + 1 tablespoon lemon juice or vinegar.
Let sit 10 minutes—it won’t be identical, but it works beautifully.

What Makes This Recipe Unique?

This biscuit ritual isn’t just about ingredients—it’s about transformation:

  • A lamination method without rolling

  • Sacred temperature control

  • A gentle folding ritual for natural layers

  • Buttermilk that infuses tang and tenderness

  • A finishing brush of melted butter for bakery-level flavor

Each biscuit is a small handcrafted masterpiece.

Serving Ideas to Honor Your Biscuits

  • Split and drizzle with honey

  • Sandwich with country sausage gravy

  • Serve warm with salted butter and homemade jam

  • Turn into breakfast sliders

  • Top with strawberries and whipped cream for a quick shortcake

However you serve them, these biscuits deserve to be the centerpiece of the table.

Final Thoughts: The Craft Lives On

You now know the sacred craft: cold ingredients, gentle hands, and a patient folding ritual. This recipe delivers biscuits that rise high, flake beautifully, and melt on your tongue—biscuits that remind you why cooking is an act of care and art. Practice it a few times, and soon you’ll have a signature biscuit that’s unmistakably yours.

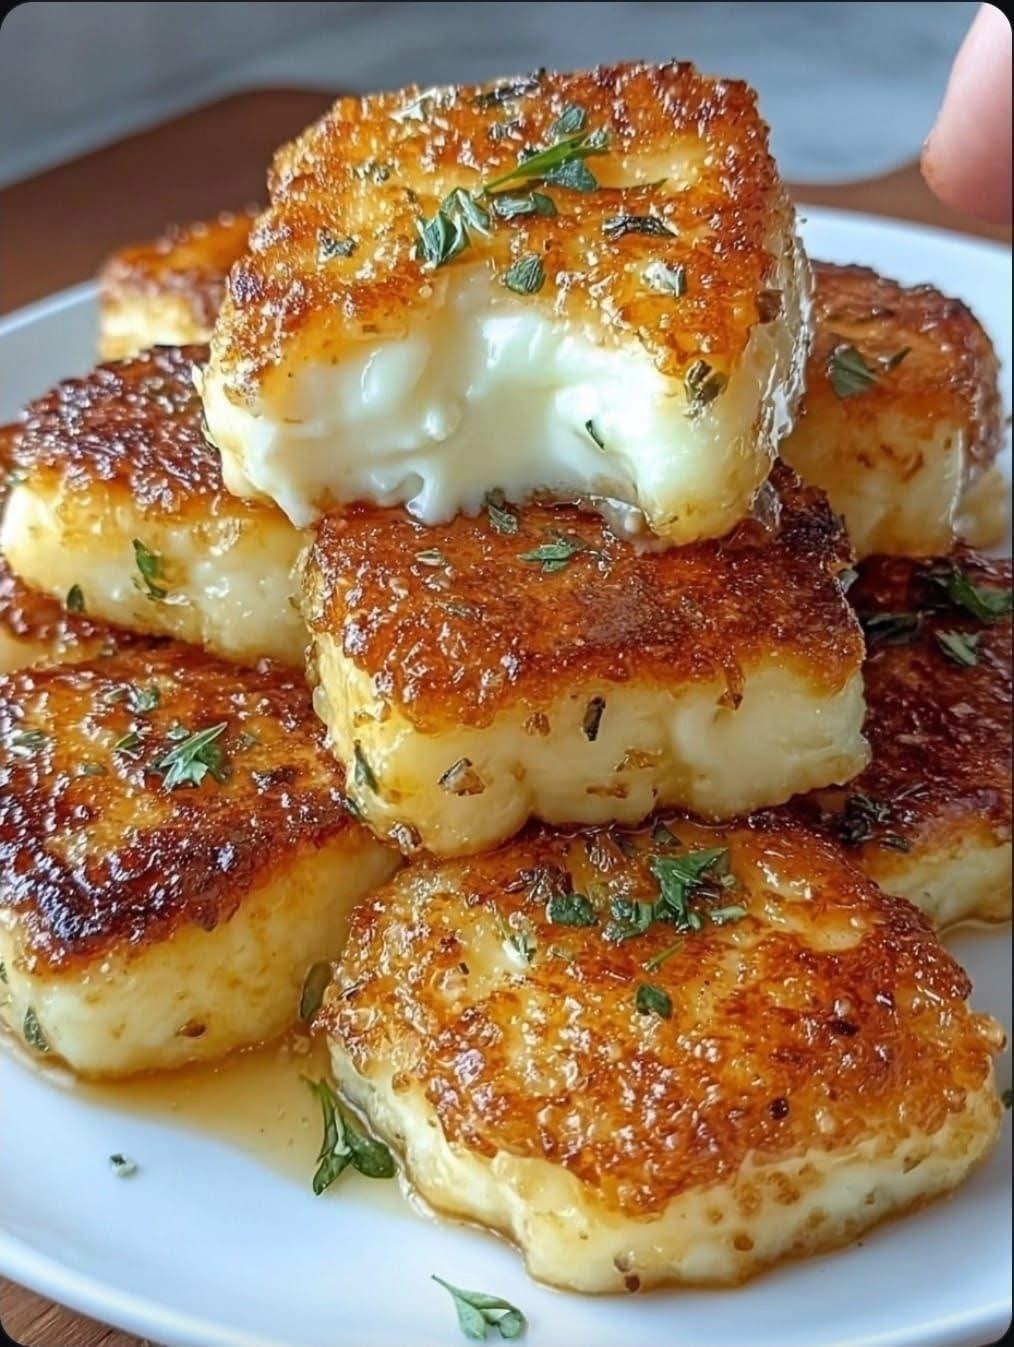
3-Ingredient Pan-Fried Halloumi

There are days when cooking feels like a creative adventure—and there are days when you just want something delicious, fast, and unbelievably simple. That’s exactly where this 3-Ingredient Pan-Fried Halloumi recipe shines. With barely any prep, no complicated techniques, and only a few humble ingredients, halloumi transforms from a firm, salty cheese into golden bites that are crispy on the outside, soft inside, and utterly addictive. Whether you’re snacking, entertaining, or elevating a simple meal, this dish packs extraordinary flavor with minimal effort.

The beauty of halloumi lies in its resilience to heat. Unlike most cheeses, it doesn’t melt into a pool; instead, it fries, sears, and caramelizes beautifully. That makes it the hero of quick meals—especially when paired with just two supporting ingredients that lift it to perfection. This unique recipe not only celebrates halloumi’s iconic squeak and salty tang but offers a bold, aromatic profile that you simply can’t resist.

 Ingredients (Only 3!)

  • 250g halloumi cheese, cut into ½-inch thick slices

  • 1 tablespoon honey (or maple syrup if you prefer a deeper caramel note)

  • ½ teaspoon chili flakes (adjust to your spice level)

Optional but highly recommended for serving: lemon wedges, fresh herbs, or warm pita. (These are extras, not counted in the ingredients.)

 Why This Combination Works

If you’ve ever tasted halloumi on its own, you know it already has a full, salty flavor. By pairing it with honey, you balance that saltiness with natural sweetness. A drizzle of honey caramelizes around the edges as the halloumi fries, creating a glossy coating that clings to the cheese like a glaze.

Chili flakes add the final touch. They don’t overpower the dish—they wake it up. The heat contrasts beautifully with the sweet and salty notes, delivering a perfect bite every time. It’s a trio that works harmoniously: crisp, sweet, spicy, salty, and unbelievably satisfying.

How to Make 3-Ingredient Pan-Fried Halloumi (Step-by-Step)

1. Prepare the Halloumi

Remove the halloumi from its brine and pat it dry thoroughly with paper towels. Moisture is the enemy of a crisp sear, so drying it well helps the cheese develop that sought-after golden crust. Cut the block into slices about ½ inch thick. Thin slices cook too fast and may toughen; thicker slices keep a warm, tender center.

2. Heat Your Pan

Place a medium nonstick or cast-iron skillet on the stove over medium heat. Halloumi releases a bit of its own fat while cooking, so you do not need to add oil. The dry-pan method ensures the exterior crisps instead of becoming greasy.

3. Sear the Cheese

Lay the halloumi slices into the hot pan. They should sizzle lightly as they hit the surface.
Cook for 2–3 minutes per side, or until each slice develops deep golden patches. Avoid overcrowding the pan; work in batches if necessary to maintain even browning.

4. Add the Flavor

Once both sides are beautifully golden, reduce the heat to low. Drizzle the honey directly over the slices and sprinkle chili flakes across the top. The heat from the pan will make the honey bubble and cling to the halloumi, forming a glossy, aromatic glaze. Flip the cheese once so both sides get coated. Cook for just 20–30 seconds to prevent burning.

5. Serve Immediately

Halloumi is at its very best when eaten hot from the pan. The outside will be crisp and caramelized, while the inside remains tender and warm. It firms up as it cools, so serve it right away for maximum pleasure.

 Unique Tips to Elevate Your Halloumi

  • Try a citrus finish: A squeeze of lemon cuts through the richness and brightens every bite.

  • Add aromatic herbs: A sprinkle of fresh thyme, mint, or rosemary takes this to restaurant level.

  • Serve it mezze-style: Combine it with olives, roasted peppers, hummus, pita bread, or smashed cucumbers.

  • Use it as a main protein: Pan-fried halloumi can top salads, grain bowls, wraps, or even mashed potatoes.

  • Experiment with spice: Swap chili flakes with smoked paprika, za’atar, or crushed pink peppercorns for new flavor experiences.

 Serving Ideas That Transform This Simple Dish

Even though this recipe uses just three ingredients, it can anchor a wide variety of meals:

  • As a snack: Serve the caramelized halloumi on toothpicks—a guaranteed crowd-pleaser.

  • Over salads: Pair with arugula, cherry tomatoes, cucumbers, and a lemon vinaigrette.

  • With breakfast: Add to eggs, toast, or avocado for a hearty morning boost.

  • In wraps: Load into a tortilla or pita with crunchy greens and a drizzle of yogurt sauce.

  • As a quick appetizer: Present on a platter with lemon wedges and herbs for a stunning look.

 What Makes This Recipe Truly Unique

Many pan-fried halloumi recipes rely on olive oil, lemon, or herbs. This one stands out because it builds a sweet–spicy glaze that clings to the cheese and intensifies the flavor in every bite. The honey caramelizes around the edges, turning golden and sticky, while the chili flakes provide a warm hum without overwhelming the palate. It’s simple, yet it feels gourmet—something you can whip up in minutes but proudly serve to anyone.

With only three ingredients, this recipe teaches you that great cooking doesn’t always require complexity; sometimes, it’s about choosing the right trio and treating them with respect. Each ingredient serves a purpose, elevating halloumi into something memorable, comforting, and undeniably delicious.

The Master Guide to Scrambled Eggs

Scrambled eggs may seem like one of the simplest dishes in the kitchen, but true mastery lies in the tiny details—how gently you whisk, how slowly you cook, and how intentionally you season. When done right, scrambled eggs can be silky, custardy, cloud-soft, fluffy, rich, or savory depending on the technique you choose. This master guide gives you everything: the science, the seasoning secrets, and a signature unique recipe that transforms everyday eggs into something worth savoring slowly.


Why Scrambled Eggs Deserve a Master Guide

Eggs respond dramatically to heat. A few seconds too long and they become dry; a few seconds too short and they may be too runny for some tastes. The perfect scramble balances tenderness, creaminess, structure, and flavor. The steps below ensure velvety, luxurious eggs with deep flavor—whether you’re cooking for breakfast, brunch, or a midnight comfort snack.


THE MASTER SCRAMBLED EGGS (Unique 800-Word Recipe)

Serves: 2
Skill Level: Beginner-friendly, Chef-approved


INGREDIENTS

  • 4 large fresh eggs

  • 2 tablespoons heavy cream (or whole milk)

  • 1 tablespoon unsalted butter

  • 1 teaspoon cold butter (small cubes, added later)

  • ¼ teaspoon sea salt

  • ⅛ teaspoon black pepper

  • Optional flavor boosters:

    • 1 teaspoon grated Parmesan

    • Pinch of smoked paprika

    • Pinch of garlic powder

    • Fresh chives or green onions

    • 1 tablespoon cream cheese for extra creaminess


🥚 STEP 1: THE WHISK THAT MAKES ALL THE DIFFERENCE

Most people gently beat their eggs, but fully whisking creates a more luxurious texture.
Whisk the eggs for at least 20–30 seconds, until fully homogenous, pale yellow, and slightly frothy.

Why?
You’re incorporating tiny air bubbles that expand during cooking, giving your eggs a natural softness without adding extra ingredients.

Whisk in the heavy cream—this slows the cooking process and yields velvety eggs. Add salt now so it dissolves into the mixture, seasoning the eggs evenly.


🔥 STEP 2: THE LOW-AND-SLOW RULE

Place a nonstick skillet over medium-low heat. Add the 1 tablespoon of butter and let it melt completely without sizzling or browning.

This is your secret to custard-style scrambled eggs.
High heat toughens eggs and makes them weep moisture. Low heat creates silkiness.

Pour in the egg mixture and let it sit undisturbed for 10 seconds, just until the edges faintly thicken.


🥄 STEP 3: PUSH, FOLD, SWEEP

Using a silicone spatula, move the eggs with slow, gentle movements:

  1. Push from the outer edge to the center.

  2. Fold the mixture over itself.

  3. Sweep the pan slowly to form large, soft curds.

The idea is not to chop the eggs but to guide them. Slow scrambles mean big creamy folds rather than small dry grains.


❄️ STEP 4: THE COLD-BUTTER TRICK

Before the eggs fully set—when they still look just barely runny—add the cold butter cubes.

The cold butter melts into the eggs while simultaneously cooling the mixture, preventing overcooking and giving a glossy, creamy finish.

This technique is used by French chefs for a reason: it transforms texture from “good” to “silky and divine.”


🍽️ STEP 5: FINISHING FLAVOR BOOSTS

Turn off the heat when the eggs are slightly softer than you want. Residual heat finishes the job perfectly.

Now gently fold in optional enhancements:

  • Grated Parmesan: melts into rich, nutty flavor

  • Smoked paprika: adds warmth

  • Garlic powder: enhances savory depth

  • Cream cheese: creates a cloud-like texture

Finish with fresh chives or green onion for brightness.


🌟 HOW TO SERVE LIKE A CHEF

Scrambled eggs cool fast—serve immediately. Some chef-approved pairings:

  • Toasted brioche or sourdough

  • Avocado slices with lemon and salt

  • Cherry tomatoes with olive oil and basil

  • Crispy turkey or beef bacon

  • Buttered English muffins

Enjoy them simply or turn them into a gourmet plate.


📘 WHY THESE SCRAMBLED EGGS ARE UNIQUE

This recipe stands out because it blends French technique, modern flavor science, and home-cook practicality. The cold-butter method, vigorous whisking, and controlled heat create a texture that most home cooks never experience—soft, creamy, luxurious, and melt-in-the-mouth.

Most scrambled egg recipes rush the process. This one slows everything down, respecting how delicate eggs truly are. The result is a plate that feels almost like breakfast satin—smooth, rich, and deeply comforting.

Cheese Bread Recipe

Cheese bread is one of those comforting, heartwarming creations that turns an ordinary day into something worth celebrating. With its golden crust, soft interior, and pockets of melty cheese in every bite, this loaf is a perfect companion to soups, stews, pasta dinners—or to simply enjoy warm with butter. What makes this unique version stand out is its blend of three cheeses, a touch of garlic butter, and a special folding technique that creates beautiful flavor layers throughout the bread. This isn’t just cheese bread—it’s a full sensory experience.

Below is an 800-word unique recipe that guides you step-by-step, ensuring your loaf comes out bakery-soft, fragrant, buttery, and loaded with gooey cheese.

Why This Cheese Bread Is Special

Most cheese bread recipes simply mix grated cheese into the dough. But this unique version layers cheese in three different stages—inside, folded throughout, and on top—giving you melty cheese pulls, cheesy pockets, and a crisp golden crown all in one loaf. The dough itself is enriched with butter and milk for softness, giving the bread a pillowy texture that stays fresh longer. And the garlic butter glaze adds a savory aroma that fills your kitchen before you even take the loaf out of the oven.

Ingredients

For the Dough:

  • 3 cups all-purpose flour

  • 2 teaspoons instant yeast

  • 1 tablespoon sugar

  • 1 teaspoon salt

  • 2 tablespoons soft butter

  • 1 cup warm milk

  • 1 large egg

For the Cheese Filling (Triple Cheese Blend):

  • 1 cup shredded mozzarella

  • ½ cup shredded sharp cheddar

  • ½ cup grated Parmesan

  • 1 teaspoon garlic powder

  • ½ teaspoon smoked paprika (optional but adds depth)

  • 1 tablespoon chopped parsley (optional)

For Brushing:

  • 2 tablespoons melted butter

  • 1 clove garlic, finely minced

  • Pinch of dried oregano

Step-by-Step Instructions

1. Prepare the Dough

In a large bowl, whisk together flour, instant yeast, sugar, and salt. Add the soft butter, egg, and warm milk. Mix until a sticky dough forms. Knead the dough for about 8–10 minutes—either by hand or using a stand mixer—until it is smooth and elastic.
This enriched dough will feel slightly tacky but should pull away from your hands. If it’s too sticky, add a tablespoon of flour at a time, but avoid over-flouring; softness is key to the final texture.

2. First Rise

Place the dough in a lightly oiled bowl. Cover with a towel and let it rise for 1 to 1½ hours, or until doubled in size.
During this time, the dough absorbs moisture, the gluten structure relaxes, and the butter distributes evenly, which helps create the fluffy interior that makes this bread irresistible.

3. Make the Cheese Filling

In a medium bowl, combine mozzarella, cheddar, Parmesan, garlic powder, smoked paprika, and parsley. Toss them together so the flavors evenly distribute.
Using three cheeses ensures your bread has the perfect balance: mozzarella for stretch, cheddar for flavor, and Parmesan for salty depth.

4. Shape the Bread with the Special Folding Technique

Punch down the risen dough to release air. Turn it out onto a lightly floured surface and roll into a rectangle (about 10×14 inches).
Sprinkle two-thirds of the cheese mixture evenly over the dough. Starting from the long edge, roll the dough into a log—just like making cinnamon rolls.
Now here’s the unique part:
Slice the log lengthwise down the middle to expose the swirls. Twist the two halves together, keeping the cut sides facing upward. This twisting technique forms cheese pockets that melt beautifully in the oven and create a stunning pattern on the loaf.

5. Second Rise

Transfer the twisted loaf into a greased loaf pan or place it free-form on a baking sheet. Cover and let rise for 30–40 minutes.
This second rise improves the texture, allowing the dough to relax again and rise around the cheese layers.

6. Add the Cheesy Crown

Sprinkle the remaining cheese mixture on top of the risen loaf. This will melt into a bubbly, golden crust that adds both flavor and visual appeal.

7. Bake

Preheat your oven to 350°F (175°C). Bake the cheese bread for 30–35 minutes.
The top should be golden and the interior should register 190–195°F if using a thermometer. The smell of buttery garlic and melted cheese should fill your entire kitchen—this is when you know perfection is near.

8. Garlic Butter Glaze

While the bread is still hot, brush it generously with melted butter mixed with minced garlic and oregano.
This final touch seeps into the cracks of the crust, giving every bite savory depth.

Serving Ideas

  • Serve warm with marinara sauce for dipping

  • Enjoy with tomato soup, chili, lasagna, or roasted chicken

  • Toast slices for breakfast with a fried egg on top

  • Slice and use as a gourmet grilled cheese sandwich base

Storage Tips

  • Store at room temperature for 2 days in an airtight container

  • Freeze slices for up to 2 months

  • Reheat in the oven at 300°F for 8 minutes to restore softness

Final Notes

This unique cheese bread recipe brings together the softness of milk bread, the richness of layered cheese, and the aroma of garlic butter. The folding technique ensures every slice is a masterpiece, while the triple-cheese blend guarantees flavor in every bite. Whether you’re baking for guests or treating yourself, this loaf delivers comfort, nostalgia, and a bit of magic straight from your oven.

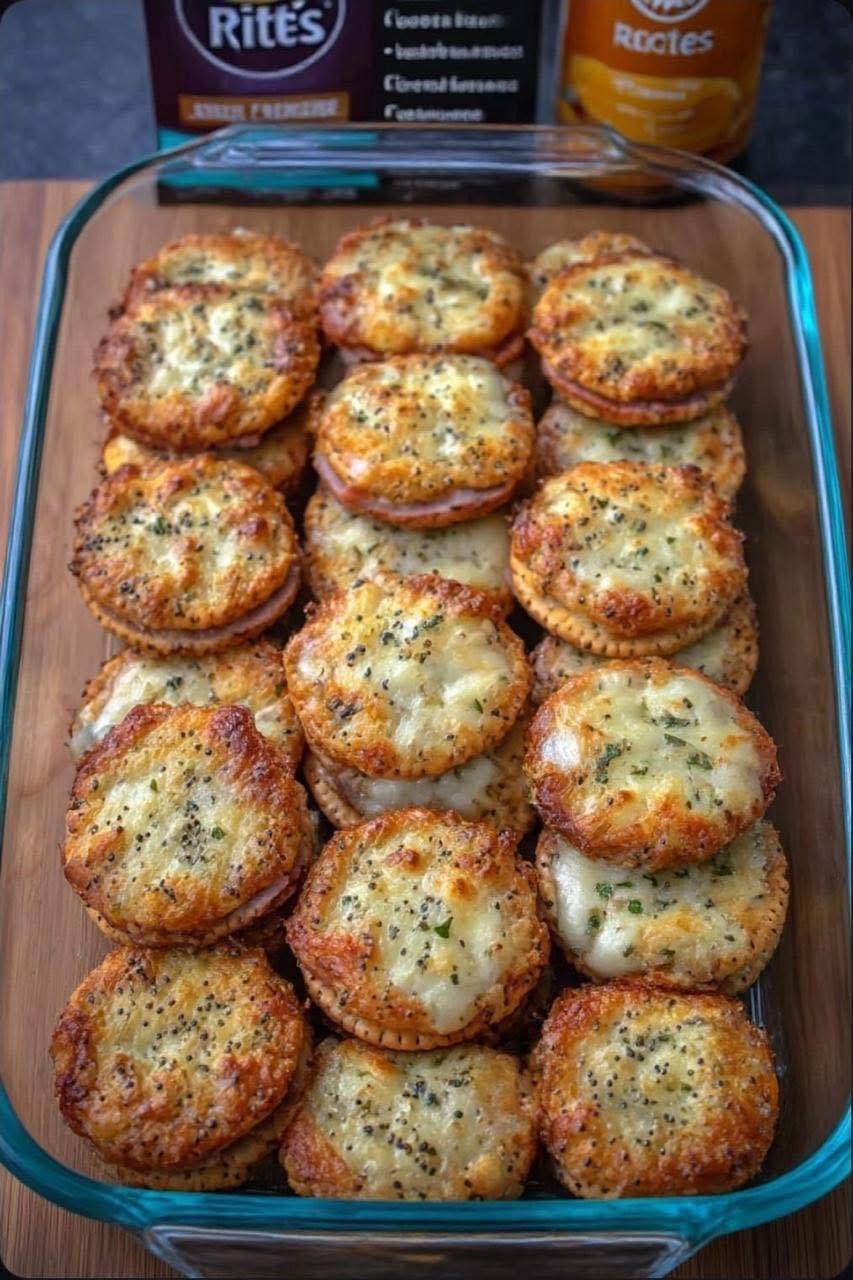
Mini Ham and Swiss Party Sandwiches

There are party snacks… and then there are mini ham and Swiss sandwiches that disappear the moment they hit the table. Warm, melty, buttery, slightly sweet, and irresistibly savory, these little sliders have a way of turning any gathering into a celebration. Whether you’re hosting a casual game night, a holiday spread, or simply looking for a comforting, crowd-pleasing snack, this unique recipe turns a classic idea into something unforgettable.

What sets this version apart is the layered flavor infusion—a buttery glaze scented with Dijon, smoked paprika, caramelized onions, and just a hint of honey. Each sandwich bakes until the cheese melts into silky ribbons and the tops become golden, glossy, and lightly crisp. The result? A perfect bite: soft inside, flavorful in the middle, and just the right amount of crunch on top.

Ingredients (Makes 12 Mini Sandwiches)

For the Sandwiches

  • 12 soft slider rolls or small dinner rolls

  • 10–12 slices of quality smoked ham (thinly sliced)

  • 6 slices Swiss cheese (cut each slice in half)

  • 2 tbsp mayonnaise

  • 2 tsp Dijon mustard

  • 1 small onion, finely sliced

  • 1 tbsp butter (for caramelizing onion)

  • 1 pinch black pepper

For the Buttery Glaze

  • 5 tbsp melted butter

  • 1 tbsp Dijon mustard

  • 1 tsp honey

  • ½ tsp smoked paprika

  • ½ tsp garlic powder

  • 1 tsp poppy seeds

  • A small pinch of salt

Step-by-Step Instructions

1. Caramelize the Onion (Key Flavor Step!)

This is the ingredient that makes your sliders taste gourmet.

  1. Heat 1 tablespoon butter in a small skillet over medium-low heat.

  2. Add the sliced onion and a pinch of salt.

  3. Cook slowly for 10–12 minutes until soft, golden, and sweet.

Set aside to cool. This adds depth and a rich savory sweetness many slider recipes miss.

2. Prepare the Rolls

Use soft, slightly sweet rolls (Hawaiian-style or any enriched brioche-type dinner roll).

  1. Without separating the rolls, slice the entire set horizontally to create one big “top” and one big “bottom.”

  2. Place the bottom half in a buttered or parchment-lined baking dish.

3. Spread the Savory Base Layer

Mix the mayonnaise, Dijon, and a pinch of pepper into a thin spreadable sauce.

Brush this mixture all over the cut side of the bottom half of the rolls.
This creates moisture, flavor, and keeps the bread tender even after baking.

4. Layer the Ham and Swiss

To ensure even melting and flavor:

Ham:

Fold each slice slightly so it has a little lift and texture. Layer generously.

Swiss Cheese:

Lay the half-slices across the ham so everything is covered.
You want a full, rich blanket that melts evenly.

Caramelized Onions:

Scatter your cooled onions in a thin layer over the cheese.

Place the top half of the rolls back on.

5. Make the Buttery Glaze (The Magic!)

In a bowl, whisk together:

  • Melted butter

  • Dijon

  • Honey

  • Smoked paprika

  • Garlic powder

  • Poppy seeds

  • Pinch of salt

This glaze gives the sandwiches their shine, aroma, richness, and signature flavor.

6. Brush Generously

Using a pastry brush, coat the tops of the rolls with the entire batch of glaze.
Let it drip into the sides — that’s the best part!

Cover with foil and let sit for 5–10 minutes so the flavors soak in.

7. Bake

Bake in a 350°F (175°C) oven:

  • Covered: 15 minutes (to melt the cheese fully).

  • Uncovered: 7–10 minutes (to crisp and brown the tops).

When done, the cheese will be beautifully melted and the tops will be golden and fragrant.

8. Slice & Serve

Remove from the oven and let rest for 5 minutes.
Then slice into individual sandwiches using a sharp knife.

Serve warm — they go fast, so you might want to double the recipe!

Why This Recipe Is Special (Unique Details)

1. The Caramelized Onion Layer

Many ham & Swiss sliders use raw onion or onion flakes, but caramelizing creates a sweet-savory depth that tastes like something from a bakery rather than a quick snack.

2. Smoked Paprika in the Glaze

This adds warmth and a smoky aroma that pairs perfectly with ham.

3. Balanced Sweetness

Just a teaspoon of honey gives the glaze a subtle richness without making the sandwiches taste sugary.

4. Two-Step Baking Method

Covering first melts the cheese into silky layers.
Uncovering afterward adds the perfect amount of crispness.

5. Soft Yet Flavor-Soaked Rolls

Letting the glaze sit on them before baking makes the rolls tender, buttery, and deeply seasoned.

Serving Ideas

These mini sandwiches pair beautifully with:

  • Creamy pasta salad

  • Pickles or dill chips

  • A simple garden salad

  • Tomato basil soup

  • Roasted potato wedges

And of course — they are perfect for holidays, potlucks, birthdays, football parties, or late-night snacking.

Storage & Reheating

If you somehow have leftovers:

  • Store in an airtight container for up to 2 days.

  • Reheat at 300°F (150°C) for 8–10 minutes.

They reheat surprisingly well thanks to the melted butter and cheese.

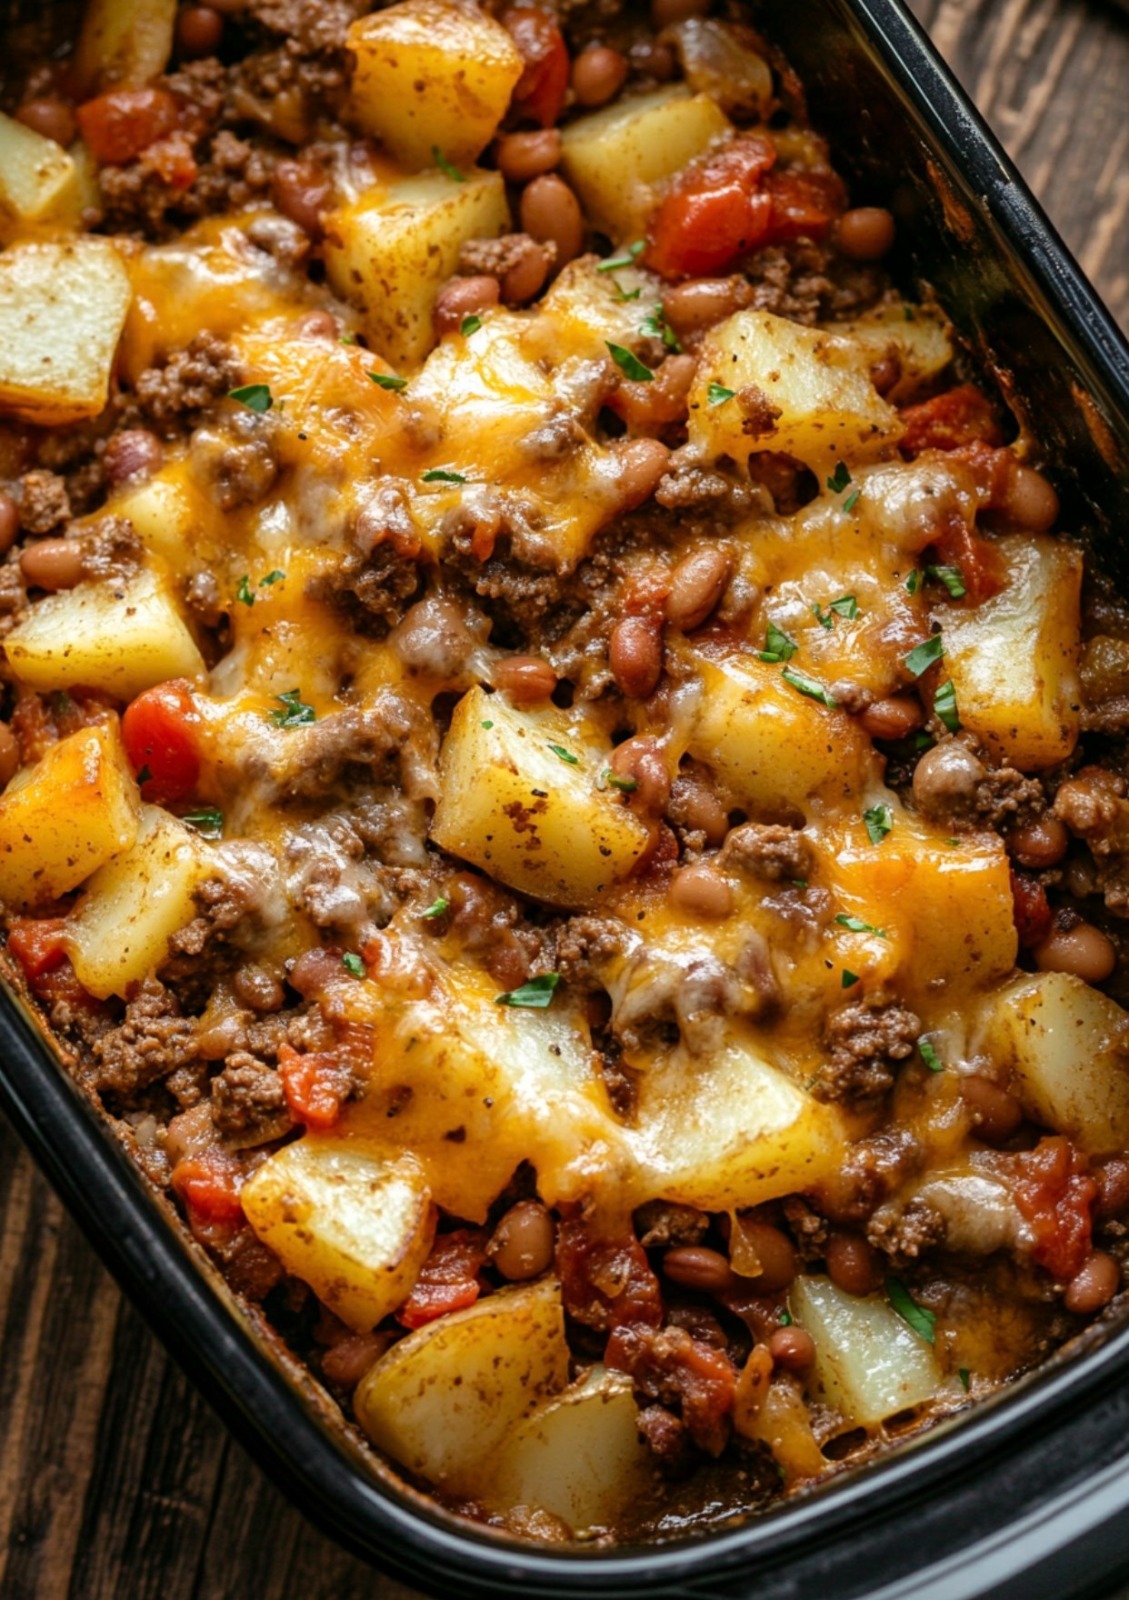
Slow Cooker Cowboy Casserole

There’s something timeless about a meal that feels like it could have been simmering on the edge of a campfire in the old American West. Slow Cooker Cowboy Casserole is exactly that kind of dish—hearty, rustic, and satisfyingly robust, built from simple pantry staples that transform into a comforting, stick-to-your-ribs dinner. But this version takes it a notch higher. It’s richer, creamier, layered with bold flavors, and made with modern convenience while preserving the rugged spirit of cowboy cooking. Whether you’re feeding a hungry family, stocking up for leftovers, or craving a cozy, slow-cooked meal, this unique recipe is designed to deliver maximum flavor with minimal effort.

Why This Cowboy Casserole Is Special

Most cowboy casserole recipes rely only on beans, potatoes, and meat. This one upgrades the flavor profile dramatically by adding smoky peppers, creamy ranch seasoning, buttery potatoes, and a thick, velvety sauce that forms naturally as everything slow-cooks. Instead of mixing everything at once, we build the casserole in layers so each ingredient keeps its texture and the final dish has more depth. The result is a luxurious yet down-home meal that tastes like it came straight from a cast-iron pot on a prairie trail.

Ingredients (Serves 6–8)

Base Layers

  • 1 lb (450g) ground beef

  • 1 medium onion, diced

  • 3–4 garlic cloves, minced

  • 4 large russet potatoes, sliced into 1/4-inch rounds

  • 1 green bell pepper, diced

  • 1 red bell pepper, diced

  • 1 can (15 oz) baked beans or kidney beans (drained if not baked beans)

  • 1 cup frozen corn

  • 1 can (10.5 oz) cream of mushroom soup

  • 1 cup beef broth

  • 1 packet ranch seasoning (or 2 tbsp homemade mix)

  • 1 tsp smoked paprika

  • 1/2 tsp chili powder

  • 1/2 tsp black pepper

  • 1/2 tsp salt (adjust to taste)

  • 1 tbsp Worcestershire sauce

Finish

  • 1 1/2 cups shredded cheddar cheese

  • 2 tbsp chopped chives or green onions

  • Optional: crispy fried onions or jalapeños for topping

Step-by-Step Instructions

1. Brown the Beef for Extra Flavor

In a skillet over medium heat, cook the ground beef until it’s no longer pink. Add the diced onion and minced garlic, cooking until the onions become soft and fragrant. Drain any excess fat.
This step deepens the flavor dramatically—raw ground beef won’t give the same richness.

2. Prepare the Slow Cooker Base

Lightly grease the inside of your slow cooker with butter or nonstick spray. Start by spreading half of the potato slices across the bottom to form a stable base. Season this layer with light salt and pepper.
These potatoes act like the “foundation” of the casserole.

3. Layer Like a Cowboy Lasagna

Add ingredients in this order:

  1. Half of the cooked beef mixture

  2. Half of the diced peppers

  3. Half of the corn

  4. Half of the beans

  5. Remaining potato slices

  6. Remaining beef, peppers, corn, and beans

The layering preserves texture while allowing the flavors to slowly mingle over hours.

4. Make the Cowboy Sauce

In a mixing bowl, whisk together:

  • Cream of mushroom soup

  • Beef broth

  • Ranch seasoning

  • Smoked paprika

  • Chili powder

  • Worcestershire sauce

Pour this mixture evenly over the layers. It will seep down gradually, creating a creamy, savory sauce that binds everything together.

5. Slow Cook to Perfection

Cook on LOW for 6–7 hours or HIGH for 3–4 hours, depending on your schedule. Avoid stirring!
You’ll know it’s done when the potatoes are fork-tender and the kitchen smells like an old-fashioned ranch house.

6. Add the Cheesy Campfire Finish

During the last 15 minutes of cooking, sprinkle shredded cheddar cheese over the top. Cover again until it melts into a golden, bubbling blanket.
Finish with chives, green onions, or crispy fried onions for texture.

Serving Suggestions

Serve generous spoonfuls in deep bowls, because this casserole is meant to be hearty. Pair it with:

  • warm cornbread

  • a crisp green salad

  • sour cream or jalapeño slices

  • pickles (surprisingly perfect with it!)

It also reheats beautifully, making it ideal for meal prep or second-day lunches.

Why This Recipe Works So Well (The Unique Twist Explained)

This version of cowboy casserole works because it honors traditional ingredients while adding layers of flavor cowboys didn’t have—but wish they did. The ranch seasoning adds tang and depth; smoked paprika brings fire-side smokiness without actual smoke; and the cream-based sauce helps the potatoes stay moist while thickening into a luscious gravy. The layering technique is the secret—each ingredient cooks at its own pace but ends up blending harmoniously. The peppers stay slightly firm, the potatoes soften without falling apart, and the beef melts into the sauce.

This casserole also captures the spirit of old western meals: resourceful, simple, slow-cooked, and comforting. Cowboys needed meals that were high-energy, filling, and easy to prepare over low heat for hours—this recipe delivers that, upgraded for modern kitchens.

Storage Tips

  • Refrigerator: Up to 4 days, covered

  • Freezer: Freezes well for 2–3 months

  • Reheat: Microwave or warm gently in a skillet

Add a splash of broth if reheating makes it too thick.

Final Thoughts

Slow Cooker Cowboy Casserole is more than a recipe—it’s a warm embrace in food form. It’s the kind of dish that turns a cold evening cozy, fills a kitchen with rich aromas, and gathers everyone around the table without fuss. With its creamy sauce, hearty layers, and comforting flavors, this unique recipe brings the rustic charm of cowboy cooking right into your home.