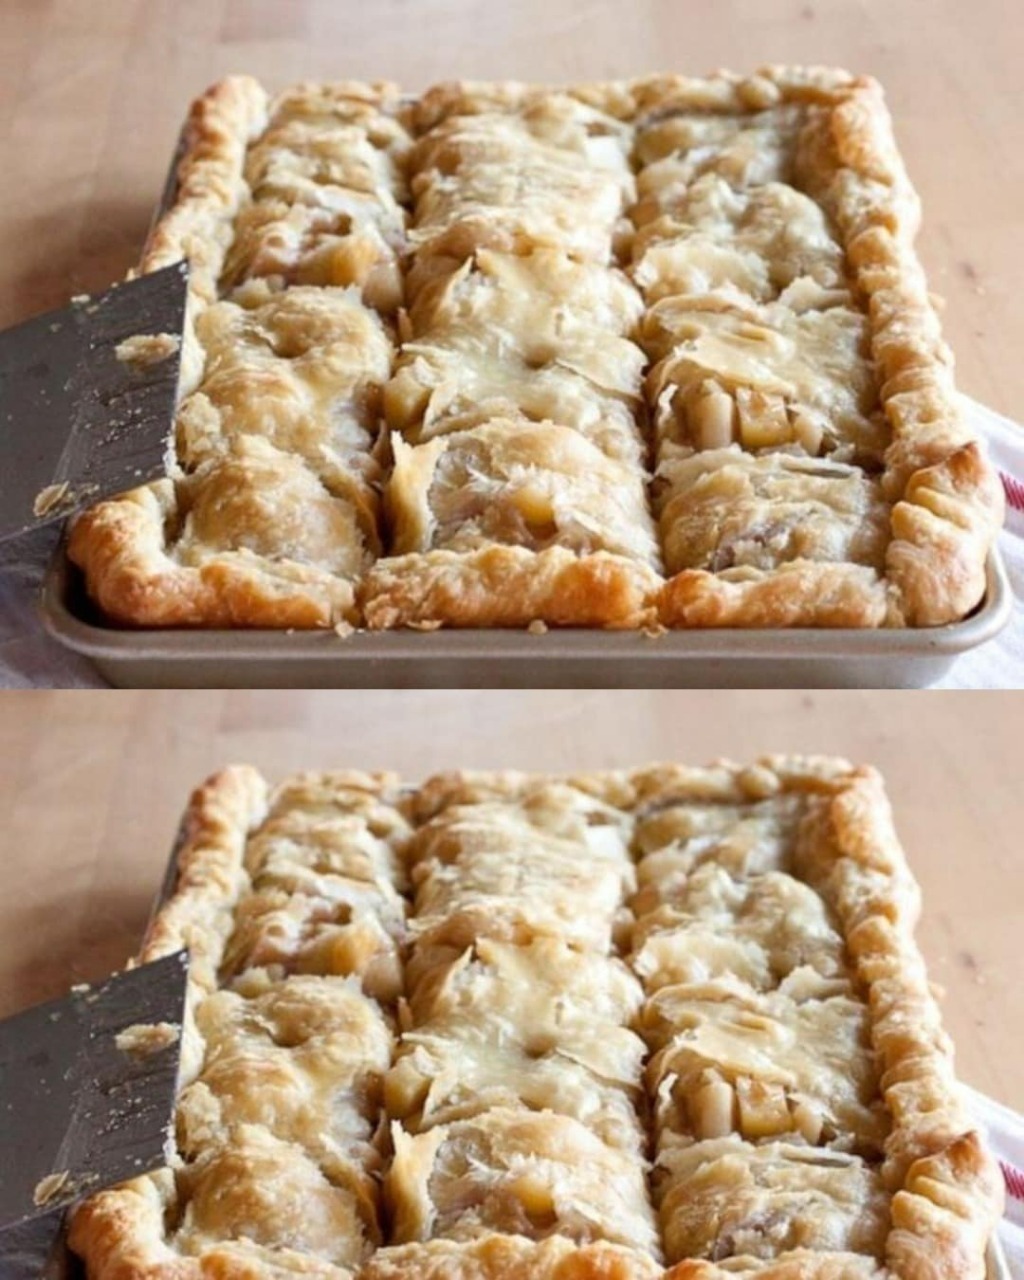
Apple Slab Pie

Apple pie is a dessert with a long and beloved history, but sometimes the familiar round version just isn’t enough. Whether you’re feeding a crowd, preparing for a potluck, or simply craving a dessert that slices cleanly and serves beautifully, an Apple Slab Pie delivers everything you love about the traditional dish—just bigger, bolder, and with more room for creativity. This version offers buttery, flaky layers, a deeply caramelized apple filling, and a playful streusel twist that makes it unforgettable.

What makes this slab pie unique is the combination of textures: crisp bottom crust, tender apple filling, a top crust that’s part lattice and part crumble, and a finishing glaze that catches the light like sugar on autumn leaves. It’s rustic, charming, and impressive all at once.


Ingredients

For the Crust

  • 3 ½ cups all-purpose flour

  • 1 tablespoon granulated sugar

  • 1 teaspoon fine sea salt

  • 1 ½ cups cold unsalted butter, cubed

  • ¾ cup ice water (more if needed)

  • 1 teaspoon apple cider vinegar

For the Filling

  • 8 cups peeled, thinly sliced apples (a mix of Honeycrisp, Granny Smith, and Fuji works best)

  • ¾ cup light brown sugar

  • ¼ cup granulated sugar

  • 3 tablespoons cornstarch

  • 1 tablespoon lemon juice

  • 1 tablespoon vanilla extract

  • 1 ½ teaspoons cinnamon

  • ¼ teaspoon freshly grated nutmeg

  • ¼ teaspoon ground cardamom (optional, but highly recommended)

  • ¼ teaspoon salt

  • 3 tablespoons unsalted butter, melted

For the Streusel Topping

  • ¾ cup all-purpose flour

  • ½ cup rolled oats

  • ½ cup brown sugar

  • ½ teaspoon cinnamon

  • 6 tablespoons cold unsalted butter, cubed

Finishing Touch

  • 1 egg beaten with 1 tablespoon milk (egg wash)

  • ½ cup powdered sugar

  • 1–2 tablespoons apple cider


Instructions

1. Prepare the Crust

Begin by whisking together the flour, sugar, and salt in a large bowl. Add the cold butter and work it in with a pastry cutter or your fingertips until the mixture resembles coarse crumbs with scattered pea-sized butter bits. The key to a flaky crust is keeping those butter pockets intact—so resist the urge to overwork it.

Combine the ice water and apple cider vinegar, then drizzle it into the flour mixture a little at a time. Gently mix until the dough just comes together. Divide it into two portions, one slightly larger for the bottom crust. Flatten each into a rectangle, wrap tightly, and refrigerate for at least one hour.

2. Make the Apple Filling

In a large mixing bowl, toss together the sliced apples, both sugars, cornstarch, lemon juice, vanilla, cinnamon, nutmeg, cardamom, and salt. Pour over the melted butter and stir until the apples are coated and glossy. Let the mixture sit for 10–15 minutes. This brief resting helps the apples release some of their natural juices and ensures the filling thickens perfectly in the oven.

3. Roll Out the Crust

Preheat your oven to 400°F (200°C). Line a 10×15-inch baking sheet with parchment paper.

On a lightly floured surface, roll out the larger dough portion into a rectangle several inches bigger than your pan. Carefully lay it into the sheet, allowing a bit of overhang on all sides. This ensures your slab pie holds all that luscious filling without collapsing.

Roll out the smaller dough portion into strips for a rustic lattice, or leave it whole if you prefer a more traditional top crust. For this unique version, we’re doing both—a partial lattice draped diagonally across the pie, leaving room for a crumble topping.

4. Add the Filling and Toppings

Spoon the apple filling onto the crust and spread it evenly. Arrange your lattice strips over the top at an angle so they cover about half the pie.

Next, prepare the streusel: Mix the flour, oats, brown sugar, and cinnamon, then cut in the butter until the mixture forms chunky crumbs. Scatter the streusel across the uncovered portion of the pie for a beautiful contrast of textures.

Brush the visible lattice strips with egg wash to help develop a golden sheen.

5. Bake to Perfection

Bake the slab pie for 40–50 minutes. The crust should be a deep golden brown, the streusel toasted, and the apple filling bubbling. If the edges begin to darken too quickly, tent the pie loosely with foil.

Let the pie cool for at least 30 minutes. This resting time allows the filling to set and ensures clean slices.

6. Glaze and Serve

Whisk together powdered sugar and apple cider until smooth and drizzle over the cooled pie. The glaze adds a sweet tang that brightens the warm spices.

Cut into squares and serve just as they are or alongside vanilla ice cream, whipped cream, or a drizzle of warm caramel.


Why This Apple Slab Pie Is Special

What sets this recipe apart is the interplay of textures and flavor profiles. The crisp bottom crust supports a filling that is both gooey and structured, thanks to the cornstarch-lemon-spice trio. The combination of lattice and streusel gives each bite a unique character—sometimes buttery and flaky, sometimes crunchy and cinnamon-kissed. And the apple cider glaze provides a finishing accent that pulls the entire dessert together.

This slab pie offers the heart of a traditional apple pie but reimagined to be more festive, more shareable, and more visually exciting. It’s the kind of dessert that brings people together around a table, forks in hand, ready to savor the first slice.
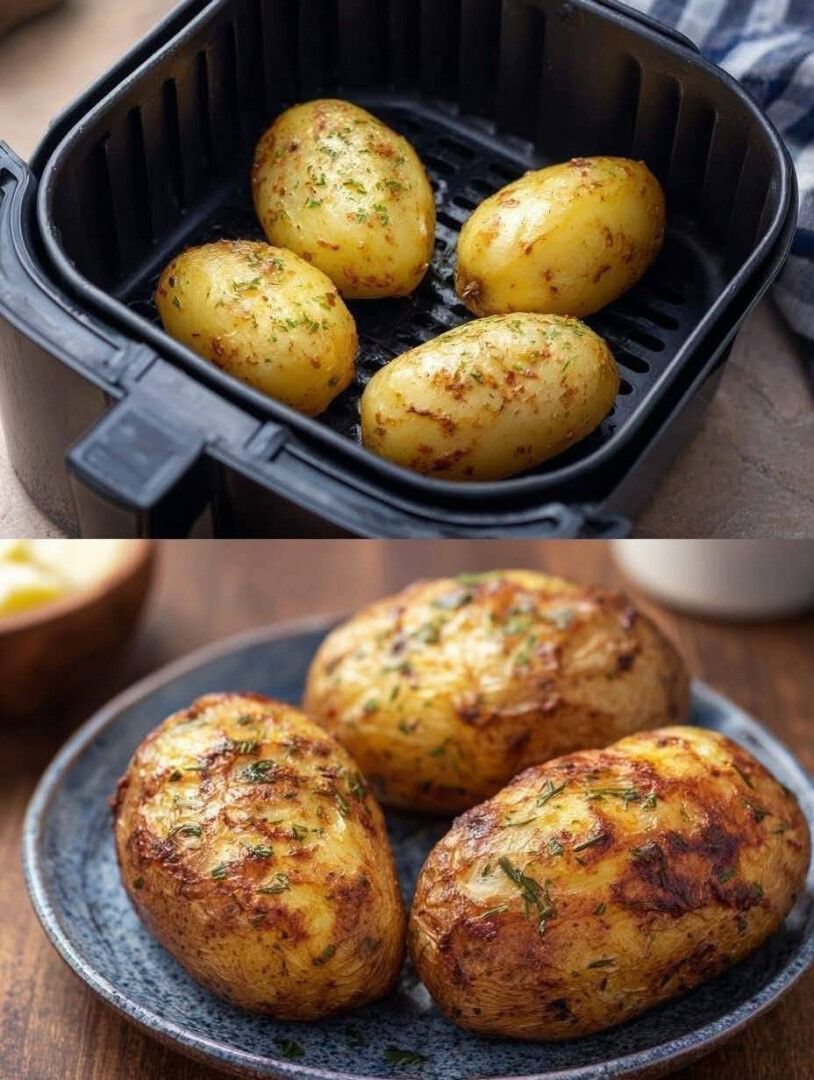
Air Fryer Baked Potato

Air fryer baked potatoes are a revelation: crisp skins that crackle when you tap them and cloud-soft, steamy centers that taste like they came straight from a steakhouse kitchen. What makes this recipe unique is the flavor-infused oil rub, the optional roasted-garlic steam bath, and a finishing step that seasons the potato after it cooks, boosting the flavor dramatically. Whether you’re cooking for a busy weeknight or elevating comfort food to something gourmet, this recipe gives you consistently perfect results.

Ingredients 

  • 2–4 large russet potatoes (between 8–12 oz each)

  • 1 ½ tbsp olive oil or avocado oil

  • ½ tsp flaky sea salt (plus more for finishing)

  • ½ tsp black pepper

  • ½ tsp smoked paprika

  • ¼ tsp garlic powder

  • Optional aromatic steam bath:

    • 3 whole garlic cloves, smashed

    • 1 sprig fresh rosemary or thyme

    • 1 tbsp water

Topping Ideas

  • Butter, sour cream, chives

  • Sharp cheddar + bacon crumbles

  • Greek yogurt + lemon zest

  • Chili + shredded Monterey Jack

  • Pesto + parmesan

  • Smoked salmon + dill cream

Instructions

1. Prep the Potatoes

Start by scrubbing the potatoes thoroughly. Russets are the gold standard because their high starch content creates a fluffy interior, but you can use Yukon Golds for a creamier, buttery texture. Dry the potatoes well—moisture is the enemy of crisp skin.

Use a fork to poke each potato 6–8 times. This venting keeps them from bursting and also allows steam to escape slowly, helping the inside stay soft rather than gummy.

2. Make the Flavor-Infused Oil Rub

In a small bowl, mix together:

  • Olive oil

  • Sea salt

  • Black pepper

  • Smoked paprika

  • Garlic powder

This blend gives the skin a savory, slightly smoky crust that you’ll actually want to eat. Unlike traditional baked potatoes that rely on plain salt, this rubbed seasoning caramelizes beautifully in the air fryer.

Massage each potato with the oil mixture until fully coated. Don’t rush this step—the more evenly the oil covers the skin, the better the crisping reaction.

3. Create the Optional Aromatic Steam Bath (Unique Step!)

This extra step subtly perfumes the potato’s interior.

Place a small piece of foil or a heat-safe cup in the corner of the air fryer basket. Add garlic, herb sprig, and 1 tablespoon water. As the air fryer heats, the aromatics release steam that circulates into the potato through the fork holes.

It doesn’t add strong flavor—just a faint roasted-garlic warmth that makes each bite feel more complex.

4. Air Fry the Potatoes

Preheat the air fryer to 390°F (200°C) if your model requires preheating.

Arrange the potatoes in the basket with space between them for airflow. Don’t stack or crowd; air fryers crisp using circulation, so each potato needs room.

Air fry for:

40–50 minutes, depending on size.

Turn them halfway through for even crisping.

You’ll know they’re done when a fork slides into the center without resistance and the skin feels firm and crackly.

5. Finish with the “Steakhouse Split” Technique

As soon as the potatoes are done, remove them with tongs and place them on a cutting board. Using a small knife, slice down the center lengthwise—but don’t cut all the way through.

Here’s the unique part:
Grasp both ends of the potato and push inward gently. This causes the interior to puff up like a cloud, giving that iconic steakhouse presentation.

While still piping hot, sprinkle a bit more flaky sea salt onto the interior. Adding the finishing salt after cooking heightens the flavor dramatically.

6. Load Up the Toppings

Butter is classic, but you can take your potato in many directions:

Classic Comfort

  • Butter

  • Sour cream

  • Fresh chives

  • Black pepper

Backyard BBQ

  • Cheddar

  • Bacon bits

  • Green onions

  • A drizzle of BBQ sauce

Mediterranean Inspired

  • Olive oil

  • Greek yogurt

  • Lemon zest

  • Chopped parsley

  • Pinch of sumac

Gourmet Twist

  • Truffle oil

  • Parmesan shavings

  • Cracked black pepper

Healthy & Vibrant

  • Pesto

  • Cherry tomatoes

  • Fresh basil


Tips for the Best Air Fryer Baked Potato

1. Use russet potatoes for the fluffiest interior

Their high starch content softens beautifully in dry air frying heat.

2. Don’t skip the oil

It helps crisp the skin and carries spices. If you want ultra-crunchy skins, use avocado oil for its higher smoke point.

3. Avoid wrapping in foil

Foil traps moisture and causes steaming rather than crisping—counterproductive in an air fryer.

4. Check doneness by feel, not just time

Cooking time varies with potato size. Aim for a potato that yields slightly when squeezed but still feels crisp on the outside.

5. Finish under a minute of broil (optional)

If your air fryer has a broil or crisp function, a final 1-minute blast makes the skin shatter-crisp.


Why Air Fryer Baked Potatoes Are Superior

Compared to oven baking, air fryer potatoes cook faster, use less energy, and create more consistent crisping. The circulating hot air mimics the effect of a convection oven but in a smaller, more concentrated space, ensuring even browning.

The interior texture is impressive—moist, fluffy, and evenly cooked without needing foil, extra butter, or long oven preheating.

Final Thoughts

This unique air fryer baked potato recipe delivers a perfect blend of texture, flavor, and ease. The infused oil rub and optional aromatic steam bath elevate simple ingredients into something restaurant-worthy. Whether you enjoy them loaded with toppings or simply split open with butter and salt, these air-fried baked potatoes are an incredibly satisfying side dish—or even a full meal.

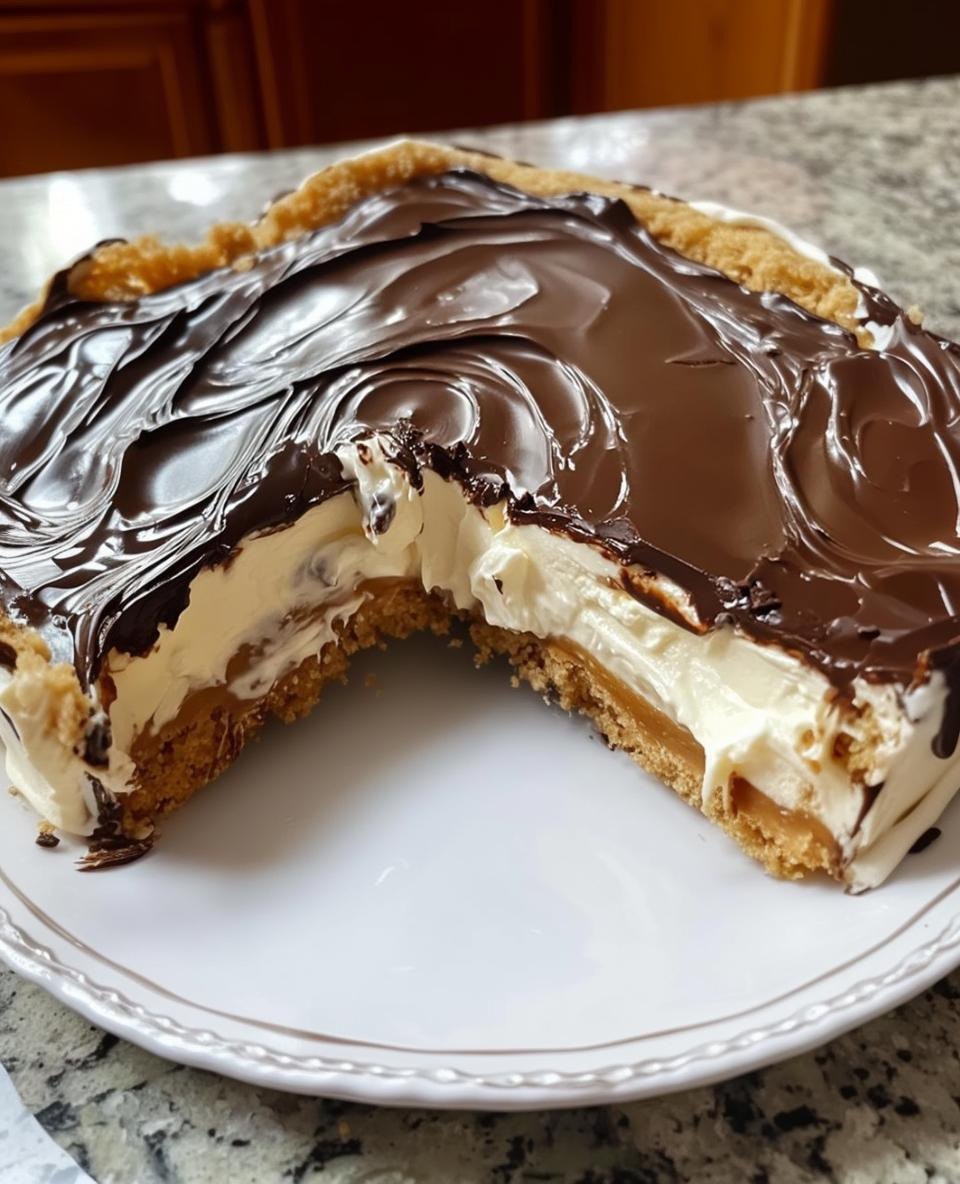
No-Bake Peanut Butter Éclair Cake

A no-bake éclair cake is already one of the easiest crowd-pleasing desserts out there, but adding creamy peanut butter transforms the classic into something richer, nuttier, and downright addictive. This version skips the traditional vanilla pudding filling and instead infuses it with a silky peanut butter cream. Layered between graham crackers and finished with a luscious chocolate-peanut butter ganache, this dessert feels like a cross between an éclair, a peanut butter pie, and the world’s best icebox cake—all without turning on the oven.

Whether you’re making this for a potluck, family dinner, or a late-night craving, the hardest part is waiting for it to chill.

Ingredients

For the Peanut Butter Filling:

  • 2 cups cold whole milk

  • 1 (3.4 oz) box instant vanilla pudding

  • 1 cup creamy peanut butter

  • 1 cup heavy whipping cream

  • ¼ cup powdered sugar

  • 1 teaspoon vanilla extract

For the Layers:

  • 1 box honey graham crackers (about 14–16 sheets)

For the Chocolate–Peanut Butter Ganache:

  • 1 cup semi-sweet chocolate chips

  • ½ cup heavy cream

  • 2 tablespoons unsalted butter

  • 2 tablespoons creamy peanut butter

  • ½ teaspoon flaky sea salt (optional)

Instructions

1. Prepare the Peanut Butter Filling

Start by whisking the cold milk and instant pudding mix in a large bowl. After one minute of whisking, the mixture will begin to thicken. Set aside briefly.

In a separate bowl, beat the heavy whipping cream with a hand mixer until soft peaks form. Add the powdered sugar and vanilla extract, then beat again until you achieve medium peaks—sturdy but still soft and glossy.

Scoop the creamy peanut butter into the pudding base and whisk thoroughly until smooth and fully combined. Fold the whipped cream into the mixture gently, using broad sweeping motions to maintain the airiness. When you’re done, you’ll have a light, mousse-like peanut butter filling that tastes like the interior of a peanut butter pie.


2. Assemble the Layers

Grab a 9×13-inch baking dish. Line the bottom with a single layer of graham crackers. They don’t need to fit perfectly—break pieces as needed to cover the surface.

Spread half of the peanut butter filling over the graham crackers, smoothing the surface with a spatula. Add a second layer of graham crackers on top, followed by the remaining filling. Finish with a final layer of graham crackers. These top crackers will soften as the cake chills, becoming cake-like and tender.

3. Make the Chocolate–Peanut Butter Ganache

Place the chocolate chips, butter, and peanut butter in a heatproof bowl. Heat the heavy cream in a small saucepan until it just begins to simmer—avoid a full boil. Pour the hot cream over the chocolate mixture and let it sit undisturbed for two minutes.

After the rest time, whisk until the ganache becomes silky, glossy, and uniform. It should pour easily; if it seems too thick, add one extra tablespoon of warm cream.

Pour the ganache evenly over the top layer of graham crackers. Tilt the dish gently so it spreads to every corner. If you like a sweet–salty contrast, sprinkle a little flaky sea salt over the surface.


4. Chill the Cake

Cover the dish with plastic wrap or a tight-fitting lid and refrigerate for at least 6 hours, though overnight is ideal. During this time, the graham crackers soften and meld with the peanut butter filling, creating a texture remarkably similar to a traditional éclair dessert—soft, creamy, and layered—without any baking at all.

Serving Suggestions

Once chilled, slice the cake with a warm knife (dip it in hot water and dry it first). Each cut will reveal the distinct layers of graham crackers, peanut butter cream, and shiny chocolate ganache.

This dessert is rich, so smaller pieces are usually enough, but no one complains about going back for seconds. Serve it as is, or dress it up with:

  • A drizzle of warm peanut butter

  • Whipped cream on each slice

  • Crushed peanuts for crunch

  • Sliced bananas or strawberries on the side


Tips, Tricks & Variations

1. For Even Silkier Filling

Swap ½ cup of the milk with half-and-half or evaporated milk for a more indulgent texture.

2. Add Crunch

Mix ½ cup chopped peanuts or Reese’s Pieces into the filling before layering.

3. Chocolate Lovers’ Upgrade

Use dark chocolate chips and add a tablespoon of cocoa powder to the ganache for a deeper flavor.

4. Make It Gluten-Free

Use gluten-free graham crackers—they work perfectly in the no-bake format.

5. Make It Ahead

This dessert keeps well for up to 3 days in the refrigerator. In fact, the longer it chills, the more cohesive the layers become.

Why This Version Works

This recipe goes beyond the standard éclair cake by focusing on texture and depth of flavor. The peanut butter whipped filling is cloud-like and airy, contrasting with the smooth, rich chocolate topping. Using graham crackers instead of traditional pastry eliminates both the hassle and the baking time, making the dessert perfect for warm weather or quick entertaining.

Sustainable Weight Loss: How Sesame, Chia, and Flax Seeds in Yogurt Helped Me Lose Weight the Healthy Way

When it comes to losing weight, the most powerful changes often come from the smallest habits. For years, I tried complicated diets, strict meal plans, and workout programs that left me exhausted and frustrated. Sustainable weight loss always felt out of reach—until I discovered a simple, nourishing combination that finally shifted my relationship with food: a daily bowl of yogurt mixed with sesame, chia, and flax seeds.

It sounds almost too easy, but this trio of seeds dramatically improved my digestion, balanced my cravings, and boosted my energy. Combined with a whole-food-focused lifestyle, this seed-powered yogurt became one of the most effective tools in my weight-loss journey. Here’s how these tiny seeds made a big difference—and how you can recreate the recipe that transformed my mornings.

Why Seeds Work: Tiny Ingredients With Big Benefits

Each of these seeds plays a unique role in supporting healthy, consistent weight loss.

1. Chia Seeds: The Hydration Hero

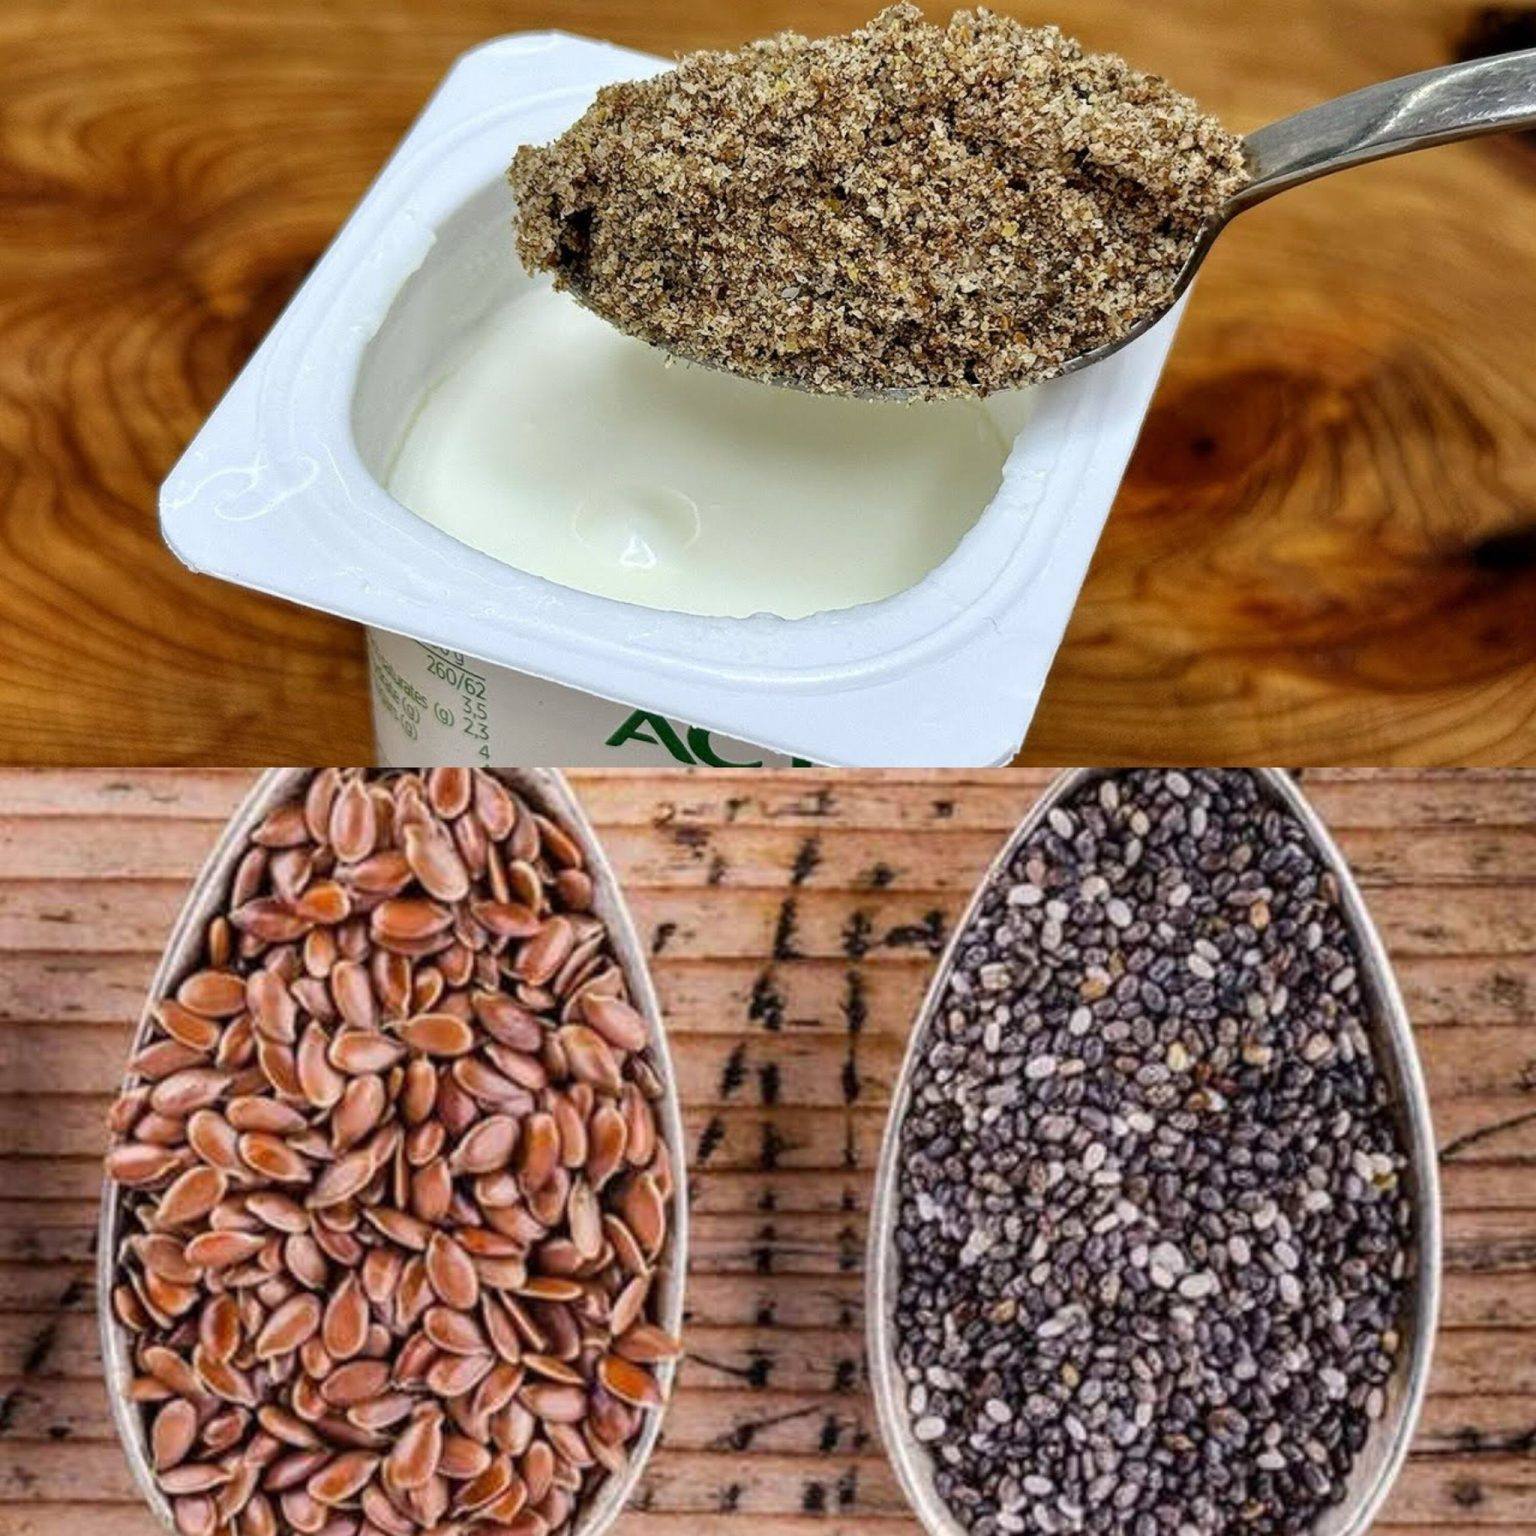
Chia seeds absorb up to 10–12 times their weight in liquid, creating a gel-like texture that expands in the stomach and naturally increases satiety. After adding chia seeds to my morning yogurt, I noticed:

  • My mid-morning cravings decreased significantly

  • My digestion improved

  • I stayed fuller for longer

Chia seeds are also rich in soluble fiber, which helps regulate blood sugar—a major factor in avoiding energy crashes and emotional eating.


2. Flax Seeds: The Omega-3 Powerhouse

Ground flax seeds became the second key ingredient in my routine. They’re packed with ALA omega-3 fatty acids, lignans, and fiber. These nutrients help reduce inflammation, support metabolism, and regulate hormones—especially important when appetite and cravings feel unpredictable.

What I loved most was how flax seeds created a smooth, nutty flavor in yogurt and subtly improved my digestion, helping reduce bloating—an unexpected but very welcome bonus on my weight-loss journey.


3. Sesame Seeds: The Underrated Metabolic Booster

Sesame seeds are often overlooked in Western diets, but they’re rich in healthy fats, protein, and minerals like calcium, zinc, and magnesium. These nutrients support thyroid function, muscle recovery, and metabolic health.

Including sesame seeds gave my yogurt a pleasant crunch and added a satisfying savory note that kept the bowl from tasting overly sweet.

Over time, I noticed:

  • More stable energy throughout the day

  • Reduced nighttime hunger

  • Less dependency on sugary snacks


Why Yogurt Makes the Perfect Base

Yogurt—especially Greek or Icelandic yogurt—is naturally high in protein, which plays an essential role in fat loss. Protein stabilizes blood sugar, promotes lean muscle maintenance, and increases thermogenesis (your body burns more calories digesting it).

Yogurt also contains probiotics that support gut health, and a balanced microbiome is closely linked to weight management, reduced inflammation, and mood stability.

When paired with nutrient-dense seeds, yogurt becomes a powerhouse meal that’s quick, filling, and exceptionally nourishing.

The Unique Recipe That Helped Me Lose Weight

This is the exact recipe that became my go-to morning ritual. I enjoyed it every day because it was easy to prepare, tasted great, and kept me full for hours.

 Crunchy Seed-Boosted Yogurt Bowl (Original Recipe) 🌱

Ingredients (serves 1)

  • 1 cup Greek yogurt (plain, unsweetened)

  • 1 tbsp chia seeds

  • 1 tbsp ground flax seeds

  • 1 tbsp toasted sesame seeds

  • 1 tsp honey or date syrup (optional)

  • ½ tsp cinnamon

  • ¼ cup fresh berries or diced fruit (optional)

  • 1 tbsp crushed nuts (almonds, walnuts, or pistachios)

  • A splash of cold water or milk (to loosen if needed)

Instructions

  1. Toast the sesame seeds (optional but recommended).
    In a dry pan over low heat, toast for 2–3 minutes until fragrant. This enhances flavor and digestibility.

  2. Combine the yogurt and cinnamon in a bowl. Stir until smooth and evenly mixed.

  3. Add chia and flax seeds.
    Give them a quick mix so they can start absorbing moisture.

  4. Drizzle with honey or date syrup if you prefer a touch of natural sweetness.

  5. Fold in berries or fruit for added fiber and antioxidants.

  6. Top with toasted sesame seeds and crushed nuts just before eating for an irresistible crunch.

  7. Let the bowl sit for 3–5 minutes so the chia seeds soften and the mixture thickens.


Why This Recipe Works for Weight Loss

  • Balanced macros: Protein from yogurt, healthy fats from seeds, fiber from both.

  • Low glycemic impact: Keeps blood sugar stable for hours.

  • High satiety: Prevents overeating later in the day.

  • Gut-friendly: Probiotics + prebiotic fiber improve digestion and reduce bloating.

  • Portable and quick: Perfect for busy mornings or midday hunger.

How This Daily Bowl Supported Sustainable Results

I didn’t lose weight because of restriction—I lost it because I finally found consistency.

This bowl helped me:

  • Control portion sizes naturally

  • Stop snacking between meals

  • Avoid “emergency hunger”

  • Stabilize my energy

  • Maintain better eating habits overall

Instead of thinking about dieting all the time, I began enjoying food again. And that shift made sustainable weight loss possible.

Final Thoughts

Healthy weight loss doesn’t need to be complicated. Sometimes all it takes is a nutrient-dense habit you genuinely enjoy. This simple yogurt-and-seeds routine transformed my mornings and played a major role in helping me lose weight naturally, steadily, and sustainably.

9 Warning Signs Your Kidneys Are Failing | Tests to Avoid Dialysis

Your kidneys quietly filter more than 150 quarts of blood each day, removing waste, balancing minerals, and regulating blood pressure. Because they work behind the scenes, kidney problems often go unnoticed until the damage is advanced. Recognizing early warning signs—along with getting the right medical tests—can help prevent progression toward chronic kidney disease (CKD) or the need for dialysis.

9 Warning Signs Your Kidneys May Be Failing

1. Persistent Fatigue or Low Energy

Healthy kidneys filter toxins that naturally build up in the blood. When they don’t function properly, these wastes accumulate and cause fatigue, weakness, and difficulty concentrating. Some people describe this as “brain fog.” If you feel exhausted despite adequate sleep, kidney dysfunction may be a contributor.

2. Changes in Urination

Your urine can reveal some of the earliest kidney problems. Concerning changes include:

  • Frequent urination, especially at night

  • Foamy or bubbly urine (excess protein)

  • Dark, orange, or red urine

  • Pain or discomfort while urinating

  • Dramatically decreased or increased urine output

Any persistent change should be evaluated.

3. Swelling in Legs, Ankles, or Around the Eyes

Kidneys help maintain fluid balance. When they struggle, fluid can accumulate in tissues, leading to swelling. Many people first notice puffiness around the eyes in the morning or tightness in shoes and socks by the afternoon.

4. High Blood Pressure

High blood pressure is both a cause and result of kidney damage. The kidneys regulate blood pressure using hormones and fluid balance. Uncontrolled hypertension can accelerate kidney failure, sometimes silently.

5. Shortness of Breath

Fluid overload from inadequate kidney filtration may cause fluid to collect in the lungs. Anemia—a common consequence of kidney disease—can also reduce oxygen levels. Both conditions can lead to breathlessness during ordinary activities.

6. Nausea, Vomiting, or Metallic Taste

Waste buildup in the bloodstream (uremia) can cause nausea, poor appetite, and a persistent metallic taste in the mouth. Some people also develop an unpleasant breath odor often described as “ammonia-like.”

7. Muscle Cramps

Electrolytes such as calcium, sodium, and potassium must stay within precise ranges. When kidneys fail to regulate them, muscle cramps—especially in legs—become more frequent.

8. Itchy, Dry, or Irritated Skin

Poor filtration leads to imbalances in minerals and nutrients, which can cause intense itching. Some notice patches of dry skin that do not respond to lotions. Severe itching can be a sign of advanced kidney disease.

9. Poor Appetite or Unexplained Weight Loss

As kidney function declines, toxins accumulate and appetite decreases. You may feel full quickly, lose interest in food, or unintentionally lose weight. Combined with nausea or changes in taste, this can significantly reduce overall nutrition.

Medical Tests That Help Detect Kidney Problems Early and Avoid Dialysis

Early diagnosis is essential for preventing kidney disease from progressing to dialysis. The following tests are routinely used by healthcare professionals:

1. Blood Test: Serum Creatinine

Creatinine is a waste product produced by muscles. Elevated levels indicate reduced filtration ability. This is one of the most important early markers.

2. Estimated Glomerular Filtration Rate (eGFR)

This calculation uses serum creatinine, age, and sex to estimate kidney function.

  • 90+ = normal

  • 60–89 = mild loss

  • 30–59 = moderate loss

  • Below 30 = severe loss
    Tracking changes over time is crucial.

3. Urine Albumin-to-Creatinine Ratio (ACR)

Protein in the urine (proteinuria) is an early sign that the kidneys’ filtering system is damaged. Even tiny amounts matter.

4. Blood Urea Nitrogen (BUN)

BUN rises when kidneys cannot eliminate urea efficiently. It’s best interpreted alongside creatinine and eGFR.

5. Urinalysis

A simple test that checks for protein, blood, crystals, infection, and other abnormalities.

6. Kidney Ultrasound

Uses sound waves to create images of the kidneys and can detect structural issues, blockages, or cysts.

7. CT Scan or MRI (if needed)

Provides more detail if tumors, stones, or serious structural abnormalities are suspected.

8. Blood Pressure Monitoring

Consistently high readings can indicate or worsen kidney problems. Home monitoring is often recommended.

9. Kidney Biopsy (only in select cases)

A small tissue sample helps diagnose underlying autoimmune or inflammatory diseases affecting kidney function.

Early testing—especially if you have diabetes, hypertension, or a family history of kidney disease—can dramatically reduce the risk of ever needing dialysis.

Unique Kidney-Friendly Recipe: Turmeric-Lemon Cauliflower Mash (Low Sodium, Low Potassium)

Why It’s Kidney-Friendly

Cauliflower is naturally lower in potassium than potatoes. Turmeric provides anti-inflammatory benefits, while lemon enhances flavor without excess salt.

Ingredients (4 servings)

  • 1 medium head cauliflower, chopped

  • 2 tbsp olive oil

  • 1 tsp turmeric

  • 2 cloves garlic, minced

  • 1 tbsp fresh lemon juice

  • ¼ cup unsweetened almond milk (or water)

  • Pinch of black pepper

  • Optional garnish: chopped parsley

Instructions

  1. Steam the cauliflower until very tender (about 10 minutes).

  2. In a small pan, lightly sauté garlic in olive oil over low heat until fragrant.

  3. Add turmeric to the garlic and stir to release flavor.

  4. In a blender or bowl, combine cauliflower, garlic mixture, lemon juice, and almond milk.

  5. Mash or blend until smooth and creamy.

  6. Add pepper and adjust flavor with additional lemon if desired.

  7. Serve warm as a nutritious side dish.

This recipe supports kidney health by reducing sodium load while providing antioxidants and anti-inflammatory compounds.

Crispy Southern-Style Fried Chicken Gizzards

Chicken gizzards often divide the room—some people adore their chewiness, while others aren’t quite sure what to make of them. But when cooked properly, especially with the right amount of patience and seasoning, gizzards become one of the most flavorful and satisfying bites you can pull from a fryer. This recipe takes the classic Southern approach and adds a few clever steps to make the gizzards exceptionally tender on the inside yet boldly crispy on the outside. The result is comfort food with character—deeply savory, lightly spicy, and irresistibly crunchy.

Why These Gizzards Are Special

Most recipes use either straight frying or boiling before frying. This version combines a buttermilk-brine, a light pressure simmer, and a double-dredge coating. The brine infuses flavor; the simmer softens the tough muscle fibers; and the double-dredge ensures a dramatic, craggy crust. Together they transform the gizzards from something ordinary into something craveable.

Ingredients

For the Buttermilk Brine

  • 1 ½ pounds chicken gizzards, cleaned

  • 1 ½ cups buttermilk

  • 1 tablespoon hot sauce (your choice)

  • 1 teaspoon smoked paprika

  • 1 teaspoon garlic powder

  • ½ teaspoon onion powder

  • ½ teaspoon salt

For the Tenderizing Simmer

  • 3 cups chicken broth (or water with bouillon)

  • 1 bay leaf

  • 3 cloves garlic, smashed

  • ½ teaspoon black pepper

For the Dredge and Fry

  • 2 cups all-purpose flour

  • ½ cup cornstarch

  • 2 teaspoons seasoned salt

  • 1 teaspoon black pepper

  • 1 teaspoon smoked paprika

  • 1 teaspoon dried oregano

  • ½ teaspoon cayenne pepper (optional but recommended)

  • Oil for frying (peanut, canola, or vegetable)

To Serve

  • Lemon wedges

  • Hot sauce or house-made dip

Instructions

1. Clean and Prep the Gizzards

Begin by rinsing the gizzards thoroughly. Trim off any excess connective tissue, leaving only the firm, meaty portions. Pat them dry so the brine adheres well. This little bit of prep work improves texture and allows the flavors to penetrate more deeply.

2. Brine for Flavor and Tenderness

Combine the buttermilk, hot sauce, smoked paprika, garlic powder, onion powder, and salt in a bowl. Add the cleaned gizzards and mix to ensure every piece is submerged. Cover and refrigerate for at least 4 hours, though overnight works even better.

The buttermilk’s acidity helps loosen the dense muscle fibers that make gizzards chewy. Meanwhile, the spices build a flavorful foundation before they ever touch the fryer.

3. Tenderizing Simmer

After brining, lift the gizzards from the mixture, letting any excess drip off. Place them in a pot with chicken broth, garlic cloves, a bay leaf, and black pepper. Bring the liquid to a gentle simmer—not a rolling boil—and cook for 35–45 minutes, or until the gizzards are noticeably more tender but still hold their shape.

This step ensures that when fried, the interior won’t be rubbery. The simmered gizzards should be soft enough to bite into comfortably yet firm enough to withstand dredging and frying.

Drain well and pat dry.

4. Prepare the Dredge

In a large bowl or shallow dish, whisk together the flour, cornstarch, seasoned salt, black pepper, smoked paprika, oregano, and cayenne. Cornstarch is key—it adds shatteringly crisp texture to the coating.

If you prefer a thicker crust, prepare a second bowl with a splash of the reserved brine or water. This gives you the option to double-dredge for more crunch.

5. Dredge the Gizzards (Double for Extra Crisp)

Roll the dried, simmered gizzards in the flour mixture, pressing gently so the coating adheres.

For a “restaurant-style” crust:

  1. Dip the flour-coated gizzards briefly into the liquid bowl.

  2. Return them to the flour mixture for a second coat.

The double-dredge creates rough, flaky ridges—the hallmark of great fried comfort food.

Place each coated piece on a tray, leaving space between them so the coating stays intact.

6. Fry to Golden Perfection

Heat your frying oil to 350°F (175°C). The oil should be hot enough to bubble immediately when a piece is added but not so hot that the coating burns before the interior warms.

Add the gizzards in small batches to avoid lowering the oil temperature. Fry for 5–7 minutes, turning occasionally, until they are deep golden brown.

Remove and drain on a wire rack. A rack works better than paper towels for maintaining crispiness.

7. Serve With Character

Pile the fried gizzards onto a serving platter. Squeeze a bit of lemon juice over them for a bright contrast to the savory crust. Serve with your favorite dip—ranch, spicy mayo, Creole remoulade, or simply a splash of hot sauce.

Tips for Perfect Gizzards Every Time

  • Don’t skip the simmer. This is the magic step that makes gizzards tender instead of tough.

  • Use cornstarch. It creates a lighter, crispier crust and helps prevent sogginess.

  • Keep the oil steady. Temperature swings cause greasy results.

  • Season every layer. Brine, broth, and dredge all contribute to building deep flavor.

  • Enjoy them hot. Gizzards are best within 15 minutes of frying while the crust is still loud and crackly.

Conclusion

This unique fried chicken gizzard recipe takes a humble, often-overlooked part of the bird and turns it into a dish worthy of center stage. By layering flavor, tenderizing the texture, and crafting a bold, crunchy coating, you end up with something far more exciting than simple fried offal. Whether served as a snack, appetizer, or the star of a comfort-food spread, these gizzards deliver nostalgia, Southern charm, and pure culinary satisfaction in every bite.

Canned pineapple + condensed milk + cream cheese

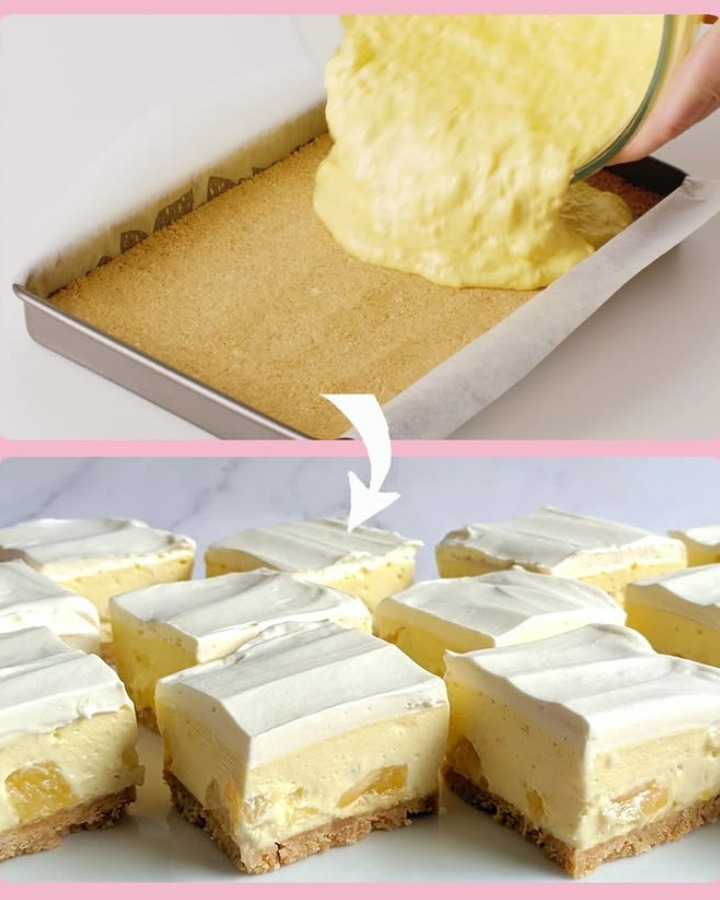
Tropical desserts often rely on heavy custards or elaborate baking steps, but this recipe is a refreshing exception. It transforms three humble pantry staples—canned pineapple, condensed milk, and cream cheese—into a bright, airy, dream-textured treat. What makes these Sunburst Pineapple Cloud Squares special is their balance: sweet but not cloying, creamy yet light, familiar but still surprising enough to feel new. It’s the kind of dessert that disappears from the table before anyone asks for the recipe.

This dish began with a simple question: What can I do with one can of pineapple tidbits and a forgotten block of cream cheese? The answer evolved into this layered, no-bake bar that tastes like cheesecake and tropical mousse combined. Imagine a cool, silky filling dotted with bursts of juicy pineapple on a buttery crumb crust. The flavor lands somewhere between pineapple sherbet, tres leches cheesecake, and a tropical cloud.

Ingredients

For the Crust

  • 2 cups crushed butter cookies or graham crumbs

  • 6 tablespoons melted butter

  • 1 tablespoon sugar

  • Pinch of salt

For the Pineapple Cloud Filling

  • 1 (8-oz) block cream cheese, softened

  • 1 cup sweetened condensed milk

  • 1 teaspoon vanilla extract

  • 1 (20-oz) can pineapple tidbits, drained very well

  • 1 tablespoon pineapple juice (reserved from can)

  • 1 cup whipped cream or whipped topping, gently folded

  • Zest of 1 lemon (optional but highly recommended)

For the Topping (Optional but Gorgeous)

  • Extra pineapple tidbits

  • Toasted coconut flakes

  • Crushed butter cookies

  • Thin lime or lemon curls

Directions

1. Prepare the Crust

Start by mixing the crushed cookies, melted butter, sugar, and salt in a medium bowl. Stir until the mixture looks like wet sand. Press the crust firmly into the bottom of an 8×8 pan lined with parchment paper. Use the flat bottom of a glass for even compression. A well-packed crust ensures clean slices later. Refrigerate the crust while preparing the filling to help it set.


2. Make the Pineapple Cloud Base

In a large bowl, beat the softened cream cheese for a full minute until it becomes fluffy and free of lumps. This step is essential; cold or stiff cream cheese will create a grainy texture, and the filling should be silky.
Add the condensed milk in a slow stream while continuing to beat. The mixture will turn glossy and luxuriously smooth. Blend in the vanilla and a tablespoon of pineapple juice for flavor depth.

3. Add the Fruit

Pat the drained pineapple tidbits dry with a paper towel—excess liquid can make the filling runny. Fold the fruit gently into the cream mixture. Pineapple adds brightness and tiny bursts of juiciness that contrast the creamy base.

4. Fold in the Whipped Cream

Add the whipped cream last. Fold, don’t stir; you’re preserving the airiness that gives the dessert its “cloud” texture. When no streaks remain, the filling is ready.


5. Assemble and Chill

Spread the pineapple cloud filling over the chilled crust. Smooth the top with a spatula. Cover the pan tightly and refrigerate for at least 6 hours, although overnight is ideal. The chilling process firms up the layers and intensifies the flavors.

6. Slice and Serve

Once chilled, lift the dessert out using the parchment. Cut into squares with a hot knife for the cleanest edges. Top with toasted coconut, extra pineapple, or cookie crumbs for added beauty and texture.

What Makes This Recipe Unique?

1. Dual Texture

This dessert blends the richness of cheesecake with the buoyancy of mousse. The filling is not baked, yet it has structure thanks to the balance of cream cheese and whipped cream.

2. Smart Use of Pantry Ingredients

Canned pineapple brings freshness without the unpredictability of fresh fruit. Condensed milk sweetens and binds without any cooking. It’s a pantry-friendly dessert that feels gourmet.

3. Adaptable Flavor Profile

The base is neutral enough to support additions like mango, coconut cream, lime zest, or even rum (for adult gatherings).

Variations

Pineapple-Coconut Dream Bars

Fold ½ cup coconut flakes into the filling and use coconut cookies for the crust.

Tropical Cheesecake Cups

Spoon the filling into small glasses instead of a pan. Add layers of pineapple, cookie crumbs, or even passionfruit pulp.

Chocolate-Dipped Pineapple Cloud Bites

Freeze the squares, then dip half of each piece in melted dark chocolate. Refreeze for a tropical-meets-truffle treat.

Lime-Kissed Version

Increase citrus zest and add 1 tablespoon lime juice for a brighter, tangier finish.

Serving Ideas

  • Serve cold on hot days with iced tea or sparkling water.

  • Add a dollop of whipped cream and a sprig of mint for a polished look.

  • Pair with grilled pineapple for a dramatic summer barbecue dessert.

  • For a holiday table, top with ruby-red pomegranate seeds for color contrast.


Storage Instructions

  • Refrigerator: Keeps well for 4–5 days in an airtight container.

  • Freezer: Freeze for up to 2 months; thaw in the fridge for 2–3 hours before serving.

The texture remains surprisingly luscious even after freezing, thanks to the fat content from cream cheese and condensed milk.

Final Notes

These Sunburst Pineapple Cloud Squares are the kind of dessert that turns simple ingredients into something memorable. Whether you’re preparing a last-minute treat for guests or simply want a cool, creamy homemade dessert, this recipe is both easy and impressive. Every bite delivers a sunny mix of sweetness, tang, and light tropical flavor—proof that pantry staples can still transport you somewhere warm.

Crispy Vanilla-Maple French Toast Bites

There’s something irresistibly joyful about food you can eat with your fingers, and French toast bites are one of those rare treats that feel playful yet decadent. They offer the comfort of classic French toast—creamy centers, golden edges, warm spice—but in miniature form with extra crispiness. This recipe takes the familiar breakfast favorite and reinvents it: cubes of brioche soaked in a luscious custard, lightly crisped in butter, then tossed in a vanilla-maple sugar and served with a warm dipping sauce. These bites are soft in the middle, caramelized on the outside, and designed to disappear quickly.

Why French Toast Bites Instead of Slices?

Traditional French toast is wonderful, but it comes with a problem: the center can get too soggy, or the slices can cook unevenly. French toast bites solve this beautifully. Smaller cubes of bread have a higher surface-to-interior ratio, which means more caramelized golden crust on every side. They cook evenly and quickly, and because they’re bite-sized, they’re perfect for a brunch board, a party appetizer, a kid-friendly breakfast, or an indulgence you can eat on the couch without utensils.

This recipe uses day-old brioche or challah, which holds custard beautifully. The custard itself is enriched with cream, cinnamon, nutmeg, vanilla bean paste, and a touch of maple syrup, creating a flavor that is warm and aromatic without being overly sweet.

Ingredients (Serves 4–6)

For the French Toast Bites

  • 1 loaf brioche or challah, preferably a day old (about 14–16 ounces)

  • 4 large eggs

  • ½ cup whole milk

  • ½ cup heavy cream

  • 3 tablespoons pure maple syrup

  • 2 teaspoons vanilla bean paste (or 3 teaspoons vanilla extract)

  • 1 teaspoon ground cinnamon

  • ⅛ teaspoon nutmeg

  • Pinch of salt

  • 4 tablespoons unsalted butter, plus more if needed

Vanilla-Maple Sugar Coating

  • ⅓ cup granulated sugar

  • 1 tablespoon brown sugar

  • ¾ teaspoon cinnamon

  • ½ teaspoon vanilla powder (optional but amazing)

  • Pinch of flaky salt

Optional Dipping Sauces

  • Warm maple syrup

  • Vanilla glaze (½ cup powdered sugar + 1 tablespoon milk + tiny splash of vanilla)

  • Salted caramel

Instructions

1. Prep the Bread

Cut the brioche or challah into cubes, about 1 to 1.25 inches. Aim for uniform size so they cook evenly. If your bread is very fresh, let the cubes sit out for 20–30 minutes to dry slightly. Staler bread absorbs custard without falling apart, giving you a silky interior without sogginess.

2. Make the Custard

In a large bowl, whisk together the eggs, milk, cream, maple syrup, vanilla bean paste, cinnamon, nutmeg, and a pinch of salt. You want the custard smooth and well-combined, with the spices evenly suspended. The maple syrup adds flavor while helping the bites caramelize.

3. Soak the Bread

Add the bread cubes to the bowl. Toss gently with your hands or a rubber spatula. Don’t mash—just fold the cubes so each one absorbs some custard. Let them rest for 10 minutes. You want them saturated but not falling apart.

4. Mix the Coating

In a shallow bowl, stir together the granulated sugar, brown sugar, cinnamon, vanilla powder, and a pinch of flaky salt. The vanilla powder gives it a dreamy bakery aroma, and the salt amplifies flavor.

5. Cook the Bites

Heat a large nonstick skillet over medium heat. Melt 1–2 tablespoons of butter. Once bubbling, add a batch of soaked bread cubes in a single layer. Avoid crowding; they need space to crisp.

Cook for 2–3 minutes per side, turning with tongs so all faces become golden brown. Add more butter as needed to keep that gorgeous caramelization going. The outsides should be crisp and evenly browned while the centers stay soft.

Transfer finished bites to a plate or sheet pan.

6. Coat in Vanilla-Maple Sugar

While still warm, roll or toss each bite in the sugar mixture. The heat melts the sugars slightly, forming a glistening coating that clings beautifully to the crisp edges. Work in small batches so the sugar sticks correctly.

7. Serve Warm

Transfer the French toast bites to a serving dish and pair them with warm maple syrup, vanilla glaze, or caramel sauce. They’re also spectacular dusted with a little powdered sugar and served with berries.


Tips for the Best French Toast Bites

Use the Right Bread

Brioche gives the richest, butteriest result. Challah works too, offering a slightly firmer bite. White sandwich bread isn’t ideal—it tends to dissolve.

Don’t Rush the Soak

Ten minutes is perfect. Too short and the centers stay dry; too long and they fall apart.

Maintain Medium Heat

High heat burns the sugar in the custard before the interior cooks. Medium heat ensures an even golden crust.

Make Them Ahead

You can prepare the cubes and sugar coating the night before. Cook them fresh in the morning; they reheat well in the oven at 350°F for 5–7 minutes.

Add-On Variations

  • Cinnamon Roll Style: Add a cream cheese drizzle.

  • Churro Style: Increase the cinnamon and add a tiny dash of cayenne.

  • Coconut Bliss: Swap half the cream for coconut milk and toss in toasted coconut.

  • Savory Version: Omit sugar and spices; add Parmesan and herbs.

Final Thoughts

These French toast bites are a perfect balance of texture and flavor—crispy edges, tender centers, a fragrant vanilla-maple aroma, and just enough sweetness to make each piece feel like its own tiny dessert. Whether you’re hosting brunch or sneaking a warm handful in the quiet morning hours, they deliver pure comfort in every bite. Enjoy!

Churro Snacks

There are few desserts in the world that can spark joy the way a churro does. The smell of warm cinnamon sugar, the crackle of a crispy outer shell, and that soft, tender interior—churros have a magical ability to transport you straight to childhood fairs, street-side stalls, or cozy holiday gatherings. But what if you could experience that same joy in a simpler, snackable, no-stress version? That’s where Churro Snacks come in: tiny golden bites that deliver all the flavor of classic churros without the fuss of piping long dough sticks or dealing with complicated techniques.

These bite-sized Churro Snacks are easy, fast, and dangerously addictive. They’re perfect for parties, movie nights, late-night cravings, and holiday gift boxes. Unlike traditional churros—which can be time-consuming and messy—this recipe gives you a shortcut that doesn’t sacrifice flavor. It uses a simple dough, a quick fry, and a magical toss in cinnamon sugar that seals the deal. Every bite hits with a crunchy exterior, a slight chew in the center, and that warm, sweet flavor that keeps you reaching back for more.

But what truly sets this recipe apart is the secret ingredient: a touch of vanilla milk infusion that gently hydrates the dough and adds a warm bakery aroma that elevates these tiny snacks into something extraordinary. You’re not just making dessert—you’re creating a flavor memory.

Ingredients You’ll Need

For the Dough

  • 1 cup all-purpose flour

  • 1 cup water

  • 2 tbsp unsalted butter

  • 2 tbsp sugar

  • ½ tsp salt

  • 1 tsp vanilla extract (secret flavor booster)

  • 1 large egg

For the Coating

  • ½ cup sugar

  • 1 tbsp ground cinnamon

  • Optional: pinch of nutmeg for depth

For Frying

  • Oil for deep frying (vegetable or canola)

Why This Technique Works

Most churros use a choux-style dough, but the trick for perfect Churro Snacks is consistency. When the dough is cooked on the stove with water, sugar, and butter, it becomes elastic and sturdy—strong enough to fry beautifully without falling apart. Adding an egg enriches the dough, giving it a tender center while maintaining the essential crisp crust. And the secret vanilla infusion? It perfumes the dough subtly so even the unfried dough smells like dessert heaven.

The bite-sized shape is intentional too. Since smaller bites fry faster, the interior stays soft while the outside becomes perfectly golden. Plus, this size makes them easier to serve to groups—just pile them in a bowl and watch them disappear.

How to Make Churro Snacks (Step-by-Step)

Step 1: Prepare the Dough

In a small saucepan, combine water, butter, sugar, and salt. Heat over medium flame until the mixture comes to a gentle boil and the butter melts completely. Turn the heat to low and add in the flour all at once. Stir quickly with a wooden spoon until the dough forms a smooth ball and pulls away cleanly from the sides of the pot. This usually takes about 30–40 seconds.

Remove from heat. Let the dough cool for 3–5 minutes—just enough so the egg doesn’t scramble. Add the vanilla extract and the egg. Stir well until fully incorporated and smooth. The dough should be thick, shiny, and slightly sticky.

Step 2: Shape the Churro Snacks

Because this version is a snackable recipe, you don’t need a piping bag with a star tip. Just lightly oil your hands and pinch off small, marble-sized balls of dough. You can also use two teaspoons to scoop and drop the dough.

Keep the sizes consistent so they fry evenly. Place the shaped pieces on a tray lined with parchment paper.

Step 3: Heat the Oil

Pour oil into a deep saucepan or pot until about 2 inches deep. Heat to 350°F (175°C). If you don’t have a thermometer, drop in a tiny piece of dough. If it sizzles immediately and rises to the top, the oil is ready.

Step 4: Fry the Churro Snacks

Carefully lower a handful of dough pieces into the oil. Do not overcrowd the pot. Fry for 2–3 minutes, turning occasionally, until golden brown. They should puff slightly and become crispy on all sides.

Remove and drain on paper towels.

Step 5: Coat in Cinnamon Sugar

Mix cinnamon, sugar, and optional nutmeg in a shallow bowl. While the churro bites are still warm, toss them generously in the mixture until fully coated and sparkling with cinnamon sugar bliss.

Serving Ideas That Make Them Even More Irresistible

Serve with any of these dips:

  • Warm chocolate sauce

  • Dulce de leche

  • Vanilla glaze

  • Cream cheese dip

  • Strawberry compote

These dips transform a simple snack into a full dessert experience. Want to go extra indulgent? Drizzle the churro bites with honey or top with powdered sugar.

For parties, serve them in small cups with a mini dipping pot inside. For gifting, pack in parchment-lined tins—they stay crisp for hours.

Storage and Reheating

Churro Snacks are best eaten fresh, but you can store leftovers:

  • Room temperature: 24 hours in an airtight container

  • Reheat: Air fryer 3 minutes or oven 5 minutes at 350°F

The coating stays crisp, and the interior stays soft.

Final Thoughts

These Churro Snacks prove that a simple idea can become something extraordinary with the right technique and a touch of creativity. They’re warm, crunchy, sweet, and comforting—everything dessert should be. Whether you’re cooking for guests or treating yourself, this recipe is guaranteed to become a repeat favorite.

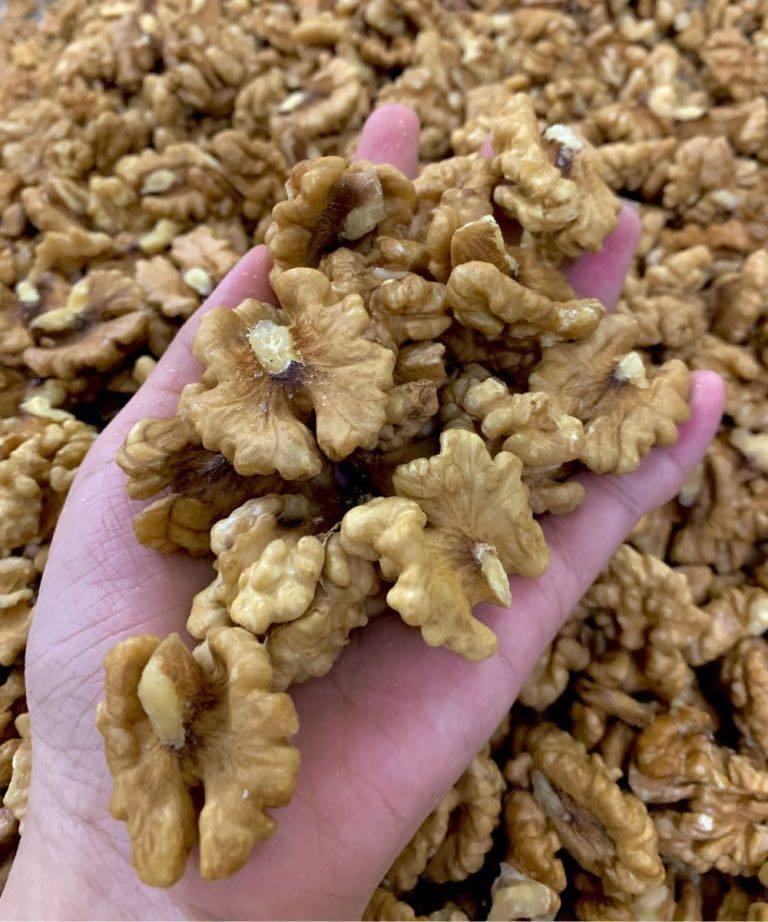
Doctors Reveal: Eating Walnuts Causes a Powerful Transformation in Your Body

For years, walnuts have quietly sat in kitchen jars and bakery bowls, never making much noise compared to trendy superfoods like chia seeds, kale chips, or acai bowls. But recently, doctors and nutrition experts have been shining a bright spotlight on this wrinkled little nut—because new research reveals something surprising: eating walnuts causes powerful, positive changes throughout the body, from brain protection to heart support to improved digestion. What many people thought was “just a snack” turns out to be one of nature’s most intelligent foods.

And yet, the best part is this: walnuts aren’t just nutritious—they are delicious, versatile, and incredibly easy to blend into both savory and sweet recipes. Today, we’re taking the scientific spotlight and turning it into a kitchen masterpiece with a unique walnut recipe that transforms this simple nut into a gourmet, nourishing dish you’ll crave again and again.

Welcome to your new favorite: Caramelized Walnut & Honey Yogurt Parfait with Cinnamon Toast Crunch Crumble.

But before we dive into the recipe, let’s explore why doctors are so fascinated by the humble walnut.

Why Doctors Are Talking About Walnuts

1. Walnuts Cause a Boost in Brain Function

Walnuts are often called the “brain nut”—not just because they look like one, but because they are naturally high in omega-3 fatty acids, antioxidants, vitamin E, and polyphenols. Doctors say these nutrients work together to protect brain cells, improve memory, and support long-term cognitive health.

2. Walnuts Cause Better Heart Health

Medical experts love walnuts because they contain healthy fats that help reduce LDL (bad cholesterol), lower inflammation, and support artery health. Just a handful a day can contribute to better circulation and cardiovascular protection.

3. Walnuts Cause Healthy Digestion

With natural fiber and prebiotics, walnuts feed good gut bacteria. A healthier gut often leads to better immunity, cleaner digestion, and improved nutrient absorption.

4. Walnuts Cause Steady Energy Instead of Sugar Crashes

Unlike sugary snacks, walnuts digest slowly and release steady energy. Doctors often recommend them for maintaining blood sugar balance and fighting fatigue.

So yes—walnuts “cause” major benefits, and now you can enjoy them in a recipe that tastes like a dessert but fuels your body like a superfood.

Caramelized Walnut & Honey Yogurt Parfait

with Cinnamon Toast Crunch Crumble**
(Unique Recipe • 800 Words)

This recipe celebrates walnuts in a way that feels luxurious, comforting, and irresistibly delicious. Each layer offers something different: creamy, crunchy, sweet, and warm. Yet it’s simple enough to whip up for breakfast, dessert, or an afternoon energy boost.

Ingredients

For the Caramelized Walnuts

  • 1 cup walnut halves

  • 2 tbsp honey or brown sugar

  • 1 tbsp butter

  • Pinch of sea salt

  • ½ tsp cinnamon

For the Yogurt Layer

  • 1 ½ cups Greek yogurt (plain or vanilla)

  • 1 tbsp honey

  • ¼ tsp vanilla extract

For the Crunch Layer

  • ½ cup Cinnamon Toast Crunch cereal (or granola of choice)

  • 1 tbsp crushed walnuts

  • Pinch of cinnamon

Optional Add-Ins

  • Fresh berries

  • Banana slices

  • A drizzle of maple syrup

  • A spoonful of peanut butter

Instructions

Step 1: Caramelize the Walnuts

Place a small nonstick pan on medium heat. Add butter and let it melt completely. Stir in honey (or brown sugar) until it begins to bubble lightly. Add walnuts, cinnamon, and a pinch of salt. Stir continuously for 3–4 minutes until the walnuts are glossy, coated, and lightly toasted.

Transfer to parchment paper and let cool. They will crisp up beautifully.

Step 2: Prepare the Creamy Yogurt Base

In a bowl, mix Greek yogurt with honey and vanilla extract. Whisk until the mixture becomes silky and smooth. Taste it—add more honey if you prefer sweeter.

Step 3: Build the Crunch Layer

Crush the Cinnamon Toast Crunch slightly with your hands. Mix with crushed walnuts and cinnamon. This adds a golden, warm, bakery-style crunch that elevates the parfait from simple to gourmet.

Step 4: Layer Like a Pro

Use a glass jar or parfait cup.

  1. Add a spoonful of yogurt.

  2. Add caramelized walnuts.

  3. Sprinkle crunch layer.

  4. Repeat until the glass is beautifully filled.

Finish with a drizzle of honey and a few whole walnuts on top.

Step 5: Chill or Serve Immediately

You can eat it right away for maximum crunch or chill it for 10–15 minutes to let the flavors meld together. Either way, it’s heavenly.

Why This Recipe Works

This parfait is delicious—but it’s also a clever way to deliver the benefits doctors rave about:

✔ Slow-release energy

The combination of yogurt and walnuts provides protein, healthy fats, and natural carbs.

✔ Brain-boosting nutrients

Every spoonful contains omega-3s, antioxidants, and minerals.

✔ Gut-friendly ingredients

Greek yogurt supplies probiotics while walnuts contribute prebiotic fiber.

✔ Naturally sweet—no refined sugar needed

Honey and cinnamon bring sweetness without the crash.

✔ Comforting and indulgent

This recipe tastes like dessert but nourishes like a balanced meal.

Final Thoughts

Walnuts may look simple, but doctors agree: they cause real, measurable changes in your body, especially when eaten regularly. From your heart to your brain to your digestive system, this one food supports long-term health in a surprisingly powerful way.