Christmas-Style Steak Pozole (Pozole Navideño con Carne de Res)

Pozole is one of Mexico’s most beloved dishes, deeply rooted in family gatherings, celebrations, and holidays. While pork pozole is the most common version, pozole de res made with tender steak is especially popular for Christmas in many regions, where its deep red broth, warm spices, and comforting aroma fill the house on cold December evenings. This Pozole Navideño con Carne de Res is hearty, festive, and perfect for sharing with loved ones after a long day of celebration.

Ingredients

For the broth and meat:

  • 2 ½ pounds beef steak, cut into large chunks (chuck steak, sirloin, or beef shank work well)

  • 1 large onion, halved

  • 6 cloves garlic

  • 2 bay leaves

  • 1 tablespoon salt (plus more to taste)

  • 12 cups water

  • 3 cans (15 oz each) white hominy, drained and rinsed

For the red chile sauce:

  • 6 dried guajillo chiles, stemmed and seeded

  • 3 dried ancho chiles, stemmed and seeded

  • 2 dried pasilla chiles (optional, for depth)

  • 2 cloves garlic

  • ½ teaspoon ground cumin

  • ½ teaspoon dried oregano (preferably Mexican oregano)

  • ¼ teaspoon ground cloves (a subtle Christmas touch)

  • ¼ teaspoon ground cinnamon

  • 1 teaspoon salt

  • 2 cups warm soaking liquid from the chiles

For garnish (essential):

  • Shredded cabbage or lettuce

  • Thinly sliced radishes

  • Chopped white onion

  • Fresh cilantro

  • Dried Mexican oregano

  • Lime wedges

  • Crushed red chile flakes or chile piquín

  • Warm corn tostadas or tortillas

Instructions

1. Cook the Beef

In a large stockpot or Dutch oven, place the beef chunks, onion halves, garlic cloves, bay leaves, salt, and water. Bring everything to a boil over medium-high heat, skimming off any foam that rises to the surface. Once boiling, reduce the heat to low, cover partially, and simmer for 1½ to 2 hours, or until the beef is fork-tender and deeply flavorful.

This slow simmer is the heart of pozole. As the meat cooks, the broth becomes rich and comforting, setting the foundation for the dish.

2. Prepare the Chile Sauce

While the beef cooks, place the dried chiles in a saucepan and cover them with hot water. Simmer gently for 10–15 minutes, until the chiles soften completely. Remove from heat and let them soak.

Transfer the softened chiles to a blender, along with garlic, cumin, oregano, cloves, cinnamon, salt, and about 2 cups of the soaking liquid. Blend until completely smooth. For a refined, velvety broth, strain the sauce through a fine mesh sieve, pressing with a spoon to extract all the flavor.

The warm spices in this chile sauce—especially the hint of clove and cinnamon—give this pozole its Christmas character without overpowering the traditional taste.

3. Combine and Simmer

Once the beef is tender, remove the onion, garlic, and bay leaves from the pot and discard them. Add the drained hominy directly into the broth.

Slowly stir in the red chile sauce, mixing well so the broth turns a deep, festive red. Let the pozole simmer uncovered for 30–40 minutes, allowing the flavors to meld. Taste and adjust salt as needed. If the broth becomes too thick, add a little more water or beef broth.

During this final simmer, the hominy absorbs the chile flavor while releasing its own subtle sweetness, creating the classic pozole texture.

4. Serve Christmas-Style

Serve the pozole piping hot in large bowls. Set up a garnish station so everyone can customize their bowl—this is a cherished part of the pozole experience.

Top with shredded cabbage, radishes, onion, cilantro, and a generous squeeze of lime. Sprinkle with oregano and chile flakes for extra warmth. Serve with tostadas or warm tortillas on the side, perfect for dipping into the broth.

Holiday Tips and Variations

  • This pozole tastes even better the next day, making it ideal for Christmas Eve preparation.

  • For extra richness, add a beef marrow bone to the broth during cooking.

  • You can substitute part of the beef with short ribs for deeper flavor.

  • Keep the garnishes colorful and abundant to reflect the festive spirit of the season.

The Science: Why the Green Ring Forms

If you’ve ever peeled a hard-boiled egg and noticed a dull green or grayish ring circling the yolk, you might have wondered what went wrong. Was the egg old? Was it unsafe to eat? Or did you somehow “overcook” it? This mysterious green ring has puzzled home cooks for generations, but the truth is far less alarming—and far more fascinating—than most people think. The green ring is not a sign of spoilage or poor quality. Instead, it’s a visible result of a simple chemical reaction driven by heat, time, and sulfur.

Let’s break down exactly why that green ring forms, what it means for taste and nutrition, and how you can prevent it if you prefer a perfectly golden yolk.

The Chemistry Inside an Egg

An egg may look simple, but it’s a remarkably complex structure. The egg white (albumen) is rich in proteins that contain sulfur-containing amino acids. The yolk, on the other hand, is packed with fats, vitamins, and iron.

When an egg is heated, its proteins begin to denature—meaning they unfold and bond together, transforming the egg from liquid to solid. This process is normal and desirable when cooking eggs. However, when heat is applied for too long or at too high a temperature, chemical reactions accelerate and new compounds begin to form.

One of those reactions is responsible for the green ring.

Sulfur Meets Iron: The Key Reaction

As the egg white heats up, sulfur-containing proteins release hydrogen sulfide gas. You might recognize hydrogen sulfide by its familiar “rotten egg” smell, though in cooked eggs it’s usually present in very small amounts.

At the same time, the yolk’s iron becomes more reactive under heat. When hydrogen sulfide migrates from the white toward the yolk, it reacts with the iron in the yolk to form iron sulfide. Iron sulfide is a greenish-gray compound, and it deposits itself right where the white and yolk meet—creating that unmistakable ring.

The longer the egg is cooked, and the hotter it gets, the more hydrogen sulfide is released and the more iron sulfide is formed. That’s why the green ring is most common in eggs that have been boiled too long or cooled too slowly.

Is the Green Ring Safe to Eat?

Yes—completely safe. The green ring may not be visually appealing, but it poses no health risk. Iron sulfide is harmless in the tiny amounts formed during cooking, and the egg remains perfectly edible.

In fact, the presence of the green ring has nothing to do with freshness. Even a very fresh egg can develop a green ring if it’s overcooked, while an older egg can avoid it if cooked gently and cooled properly.

The main downside of the green ring is texture and flavor. Overcooked yolks tend to become dry, crumbly, and slightly chalky. The sulfur compounds can also create a stronger eggy smell, which some people find unpleasant.

Why Timing and Temperature Matter

The green ring forms most readily under two conditions: high heat and long cooking times. Rapid boiling causes the egg white to heat aggressively, releasing more hydrogen sulfide. Prolonged cooking gives that gas plenty of time to react with iron in the yolk.

Cooling also plays a role. If hot eggs are left sitting in hot water after cooking, the residual heat continues the reaction. This is why eggs that are immediately cooled in cold or ice water are much less likely to develop the green ring.

In short, it’s not just how you cook the egg—it’s how you stop cooking it.

How to Prevent the Green Ring

Avoiding the green ring is surprisingly simple once you understand the science behind it.

First, don’t overcook the eggs. For classic hard-boiled eggs, bring the water to a boil, add the eggs, then reduce the heat to a gentle simmer. Cooking for about 9–10 minutes is usually sufficient for fully set whites and creamy, fully cooked yolks.

Second, cool the eggs quickly. As soon as cooking is complete, transfer the eggs to an ice bath or run them under cold water for several minutes. This rapid cooling stops the chemical reaction almost immediately.

Finally, peel or store properly. Cooling not only prevents discoloration but also makes eggs easier to peel and helps maintain better texture.

A Visual Lesson in Food Science

The green ring is a perfect example of how cooking is really applied chemistry. Tiny changes in heat and time can dramatically alter the appearance and texture of food, even when the ingredients remain exactly the same.

Rather than seeing the green ring as a mistake, it can be viewed as a lesson in balance. Gentle heat preserves color and texture, while excessive heat pushes reactions further than we want them to go.

The Takeaway

The green ring around a hard-boiled egg yolk forms when sulfur from the egg white reacts with iron in the yolk, creating iron sulfide. It’s harmless, common, and entirely preventable. While it may not look appetizing, it doesn’t mean the egg is bad or unsafe.

Understanding why it happens gives you control in the kitchen. With proper timing, moderate heat, and quick cooling, you can consistently produce hard-boiled eggs with bright yellow yolks and tender texture—no green ring in sight.

Hog Pogs: The Old-School Southern Bite That Never Goes Out of Style

Hog Pogs are one of those recipes that rarely show up in cookbooks but live on in family kitchens, church potlucks, and small-town gatherings. They’re hearty, crispy on the outside, tender on the inside, and deeply satisfying. At their heart, Hog Pogs are a clever combination of seasoned pork and cornmeal dough—pan-fried into golden, hand-held bites that feel both rustic and comforting. If you’ve never had them before, imagine a cross between a sausage fritter and a cornmeal hushpuppy, only richer and more filling.

This recipe stays true to that humble tradition while refining the texture and flavor just enough to make them unforgettable.

What Makes Hog Pogs Special

Hog Pogs were born from the idea of stretching simple ingredients into something filling and delicious. Pork was mixed with cornmeal, spices, and just enough moisture to bind everything together. The result was an affordable meal that could feed a crowd. Today, Hog Pogs are still loved for the same reasons—but also because they’re incredibly versatile. You can serve them for breakfast, lunch, or dinner, and they’re just as good hot from the skillet as they are reheated the next day.

Ingredients for Classic Hog Pogs

For the Pork Filling

  • 1 pound ground pork (or breakfast sausage for extra flavor)

  • 1 teaspoon salt

  • ½ teaspoon black pepper

  • ½ teaspoon smoked paprika

  • ½ teaspoon garlic powder

  • ¼ teaspoon crushed red pepper flakes (optional)

  • 1 small onion, finely minced

  • 1 tablespoon cold water

For the Cornmeal Dough

  • 1 cup yellow cornmeal

  • ½ cup all-purpose flour

  • 1 teaspoon baking powder

  • ½ teaspoon salt

  • 1 teaspoon sugar (optional, but traditional)

  • 1 large egg

  • ¾ cup buttermilk

  • 1 tablespoon melted butter

For Frying

  • Vegetable oil or lard, enough to shallow-fry

Step-by-Step Instructions

Step 1: Season the Pork

In a bowl, combine the ground pork with salt, pepper, smoked paprika, garlic powder, red pepper flakes, onion, and cold water. Mix gently with your hands until just combined. Overmixing can make the filling dense, so stop as soon as everything is evenly distributed. Set aside.

Step 2: Make the Cornmeal Dough

In a separate bowl, whisk together the cornmeal, flour, baking powder, salt, and sugar. In another small bowl, beat the egg with the buttermilk and melted butter. Pour the wet ingredients into the dry and stir until you have a thick, spoonable batter. Let it rest for 5 minutes—this allows the cornmeal to hydrate and improves texture.

Step 3: Combine Pork and Dough

Fold the seasoned pork into the cornmeal batter. The mixture should be thick but soft, able to hold its shape when scooped. If it feels too stiff, add a tablespoon of buttermilk. If it’s too loose, sprinkle in a little more cornmeal.

Step 4: Heat the Oil

Heat about ½ inch of oil in a heavy skillet over medium heat. The oil is ready when a small drop of batter sizzles immediately but doesn’t burn.

Step 5: Fry the Hog Pogs

Scoop the mixture by heaping tablespoons and gently drop into the hot oil. Flatten slightly with the back of the spoon. Fry for 3–4 minutes per side until deeply golden brown and cooked through. Transfer to a paper towel-lined plate to drain.

Serving Suggestions

Hog Pogs are best served hot, but they’re incredibly flexible. For breakfast, pair them with fried eggs and a drizzle of honey or maple syrup. At lunch, serve them with coleslaw or sliced tomatoes. For dinner, they shine alongside greens, beans, or mashed potatoes. Many people enjoy them dipped in mustard, hot sauce, or even a creamy gravy.

Tips for Perfect Hog Pogs

  • Use cold ingredients for better texture and juiciness.

  • Don’t overcrowd the skillet, or the oil temperature will drop.

  • Taste-test a small patty first and adjust seasoning if needed.

  • Rest the mixture for a few minutes before frying—it makes a big difference.

Clove Water Sitz Baths for Women: A Gentle Guide to Hygiene and Comfort

In many traditional cultures, natural sitz baths have long been used as a soothing ritual for feminine hygiene, relaxation, and personal comfort. One such time-honored practice is the clove water sitz bath. Simple, aromatic, and grounding, this gentle routine is not about harsh treatments or quick fixes—it’s about creating a calm moment of care for the body using warm water and cloves, a spice cherished for centuries.

This guide walks you through a unique, gentle clove water sitz bath recipe, explains how to prepare it safely, and shares tips on how to make the experience comforting and mindful.

What Is a Sitz Bath?

A sitz bath involves sitting in warm water that covers the hips and buttocks. Traditionally, it is used to promote cleanliness, relaxation, and comfort in the intimate area. Sitz baths are often part of postpartum routines, monthly self-care rituals, or simply moments of calm after a long day.

Adding cloves to the water introduces a warm, spicy aroma that many women find grounding and comforting.

Why Cloves?

Cloves (Syzygium aromaticum) are known for their strong scent and warming nature. In traditional home care practices, cloves have been valued for:

  • Their pleasant, calming aroma

  • A feeling of warmth and freshness

  • Helping create a sense of cleanliness and comfort

  • Supporting mindful self-care rituals

This is not a medical treatment, but rather a traditional wellness practice meant to enhance comfort and relaxation.

The Gentle Clove Water Sitz Bath Recipe (Unique Method)

Ingredients:

  • 1 tablespoon whole cloves

  • 1 liter (about 4 cups) clean water

  • Additional warm water (enough to fill your sitz bath or basin)

Optional Additions (Choose One Only):

  • A small piece of cinnamon stick (for aroma)

  • 1 tablespoon dried rose petals (for scent and softness)

  • 1 teaspoon sea salt (optional, mild and non-irritating)

Step-by-Step Preparation

Step 1: Prepare the Clove Infusion

Add 1 tablespoon of whole cloves to 1 liter of water. Bring it to a gentle boil, then reduce heat and simmer for 10–15 minutes. The water will turn light brown and release a warm, spicy aroma.

Step 2: Cool and Strain

Remove from heat and allow the clove water to cool until it is comfortably warm, never hot. Strain out the cloves completely.

Step 3: Prepare the Sitz Bath

Pour the strained clove water into a clean sitz bath basin or wide bowl. Add enough warm plain water so the level comfortably covers the hips when seated.

Step 4: Create a Calm Space

Choose a quiet area. Dim the lights, take slow breaths, and allow yourself to relax. This is a moment of care, not a rush.

Step 5: Sit and Relax

Sit in the bath for 10–15 minutes. Breathe deeply and allow the warmth and aroma to create a sense of ease.

Step 6: Gently Dry

After finishing, stand up slowly and gently pat dry with a clean, soft towel. Avoid rubbing.

How Often Can It Be Used?

  • 1–2 times per week is generally enough for comfort and hygiene rituals.

  • Some women enjoy it after menstruation, long days, or as part of a weekly self-care routine.

  • Avoid daily use unless advised by a healthcare professional.

Important Safety Tips

  • Always ensure the water is warm, not hot.

  • Do not use if you have open wounds, severe irritation, or known sensitivity to cloves.

  • Avoid using essential clove oil directly—whole cloves are gentler.

  • If you experience burning, itching, or discomfort, stop immediately.

  • This practice is not a replacement for medical care. Consult a healthcare provider for persistent symptoms.

Making It a Self-Care Ritual

A clove water sitz bath isn’t just about hygiene—it’s about slowing down. Consider pairing it with:

  • Soft music or silence

  • Deep breathing

  • Gentle stretching afterward

  • A warm cup of herbal tea

These small additions can turn a simple bath into a nurturing ritual.

Final Thoughts

Clove water sitz baths offer a gentle, traditional approach to comfort and personal care. Simple to prepare and deeply calming, they remind us that hygiene doesn’t need to be harsh or complicated. Sometimes, warm water, natural ingredients, and a few quiet minutes are enough to restore a sense of balance and well-being.

4 Gentle Ways to Erase Age Spots with Baking Soda for Younger, More Even Skin

Age spots—also called sun spots or liver spots—are one of the most common skin concerns as we get older. They usually appear on the hands, face, arms, and shoulders after years of sun exposure. While they’re harmless, many people feel they make the skin look uneven, tired, or older than it really is. One simple ingredient found in almost every kitchen—baking soda—has quietly earned a reputation for helping fade the appearance of age spots when used correctly and gently.

Baking soda works as a mild exfoliant. It helps remove dead skin cells on the surface, encourages fresh skin turnover, and balances the skin’s pH. When combined with soothing or nourishing ingredients, it can help brighten dull areas and soften the look of dark spots over time. Below are four gentle, practical ways to use baking soda safely for a more even-looking complexion.

1. Baking Soda and Water Spot-Smoothing Paste

This is the simplest and mildest method, making it a good starting point if you’re new to using baking soda on your skin.

What you need:

  • 1 teaspoon baking soda

  • 1–2 teaspoons clean water

How to use:
Mix the baking soda with water until you get a smooth, soft paste. Clean your skin and pat it dry. Using clean fingers, apply the paste directly to the age spots only—not the entire face. Gently massage in small circular motions for 20–30 seconds. Let it sit for another minute, then rinse thoroughly with lukewarm water. Finish with a gentle moisturizer.

Why it helps:
This method lightly exfoliates the top layer of skin, which can make age spots look less noticeable over time. Regular but limited use helps reveal brighter, fresher skin underneath.

How often:
1–2 times per week only.

2. Baking Soda and Lemon Juice Brightening Treatment

Lemon juice is naturally rich in vitamin C, which is often used to brighten uneven skin tone. When paired with baking soda, it can enhance surface exfoliation—but this method should be used carefully.

What you need:

  • 1 teaspoon baking soda

  • A few drops of fresh lemon juice

How to use:
Mix the ingredients to form a paste. Apply only to dark spots using a cotton swab or fingertip. Leave on for no more than 1 minute, then rinse well. Apply moisturizer afterward.

Why it helps:
Lemon juice helps visually brighten dark areas, while baking soda gently removes dead skin cells that trap pigment.

Important caution:
Lemon juice can make skin sensitive to sunlight. Use this treatment only at night, and apply sunscreen the next day.

How often:
Once a week maximum.

. Baking Soda and Honey Nourishing Mask

If your skin is dry or sensitive, this method is one of the gentlest options.

What you need:

  • 1 teaspoon baking soda

  • 1 teaspoon raw honey

How to use:
Mix well and apply to age spots or small areas of uneven tone. Gently massage for 20 seconds, then leave on for 5 minutes. Rinse with lukewarm water and pat dry.

Why it helps:
Honey is naturally soothing and moisturizing. It reduces dryness and irritation while baking soda exfoliates gently. This combination helps improve the skin’s overall appearance without stripping moisture.

How often:
2 times per week.

4. Baking Soda and Aloe Vera Skin-Renewal Blend

Aloe vera is known for its calming and skin-repairing properties, making it ideal for mature or sun-exposed skin.

What you need:

  • 1 teaspoon baking soda

  • 1 tablespoon pure aloe vera gel

How to use:
Mix until smooth. Apply to clean skin and massage lightly over age spots. Leave on for 5–7 minutes, then rinse and moisturize.

Why it helps:
Aloe vera supports skin renewal and hydration, while baking soda exfoliates. Together, they help soften the look of dark spots and promote smoother, healthier-looking skin.

How often:
2–3 times per week.

Important Safety Tips for Best Results

  • Always do a patch test before using baking soda on your skin.

  • Avoid using baking soda on broken, irritated, or very sensitive skin.

  • Never scrub aggressively—gentle pressure is enough.

  • Moisturize after every treatment to protect the skin barrier.

  • Results take time. Consistency over several weeks matters more than frequent use.

Final Thoughts

Baking soda isn’t a miracle cure, but when used carefully and sparingly, it can be a helpful, low-cost way to improve the appearance of age spots and uneven skin tone. The key is gentle exfoliation, proper moisturizing, and patience. Over time, these simple treatments can help your skin look smoother, brighter, and more refreshed—without harsh chemicals or expensive products.

This vitamin is a miracle after 50, improving circulation in the legs and feet

As we move past 50, many people notice subtle but frustrating changes in their bodies—cold feet, tired legs, nighttime cramps, or that heavy feeling after walking short distances. These are often signs that circulation isn’t as strong as it once was. While movement, hydration, and balanced nutrition all matter, one vitamin stands out for its unique role in supporting healthy blood flow: Vitamin B3, also known as niacin. Think of this not as a pill-first solution, but as a daily wellness recipe—a simple, consistent way to nourish circulation from the inside out.

Why Circulation Changes After 50

With age, blood vessels naturally lose some elasticity. Lifestyle factors like sitting too long, stress, and less physical activity can further slow circulation, especially to the legs and feet—the farthest points from the heart. When blood flow is less efficient, tissues receive less oxygen and nutrients, which may show up as tingling, numbness, swelling, or fatigue.

This is where Vitamin B3 quietly shines.

The Circulation Vitamin: Vitamin B3 (Niacin)

Vitamin B3 plays a key role in energy production, cholesterol metabolism, and most importantly for aging bodies, blood vessel function. One of niacin’s most well-known effects is its ability to support vasodilation, a gentle widening of blood vessels. When vessels relax, blood can move more freely—delivering warmth, oxygen, and nutrients to the legs and feet.

Many people recognize niacin because of the “niacin flush,” a warm, tingling sensation that can occur shortly after taking it. While surprising at first, this warmth is actually a sign of increased surface blood flow—evidence of niacin’s circulation-supporting action.

A Daily “Recipe” for Better Circulation After 50

Instead of thinking of this as a supplement alone, imagine a circulation-support recipe made from three simple components: nourishment, timing, and consistency.

Ingredient 1: Natural Sources of Vitamin B3

Food-first is always a smart approach. Niacin-rich foods include:

  • Chicken and turkey

  • Tuna and salmon

  • Peanuts and peanut butter

  • Mushrooms

  • Brown rice and whole grains

Including one or two of these daily helps maintain steady niacin levels and supports overall cardiovascular health.

Ingredient 2: Smart Supplement Support

Some people over 50 may benefit from a low-dose niacin or niacinamide supplement, especially if diet alone isn’t enough. Niacinamide supports circulation benefits without the strong flush, making it gentler for daily use. Always start low and increase gradually, and consult a healthcare professional if you take medications or have underlying conditions.

Ingredient 3: Circulation-Boosting Habits

Vitamin B3 works best when paired with supportive habits:

  • Daily walking (even 10–15 minutes) encourages blood return from the legs

  • Hydration keeps blood from becoming sluggish

  • Gentle stretching of calves and ankles promotes flow to the feet

Together, these habits act like the seasoning that makes the recipe truly effective.

What Improvements People Often Notice

With consistent use, many adults over 50 report:

  • Warmer feet and toes

  • Less heaviness or fatigue in the legs

  • Reduced nighttime cramping

  • Improved walking comfort

  • A general feeling of increased energy

These changes usually happen gradually over weeks, not overnight. Circulation improves step by step as vessels respond to better nutrition and movement.

Why Vitamin B3 Is Especially Helpful After 50

Niacin supports the body in ways that become more important with age:

  • Helps maintain healthy cholesterol balance, supporting vessel health

  • Supports energy metabolism, helping muscles use oxygen more efficiently

  • Encourages blood vessel flexibility, aiding flow to extremities

Unlike quick-fix stimulants, Vitamin B3 works with your body’s natural systems, which is why it’s often described as a “miracle” by those who feel the difference.

A Gentle Word of Caution

More is not better. High doses of niacin should only be taken under medical supervision. Mild flushing is common with certain forms, but dizziness, itching, or discomfort are signs to reduce the dose or switch forms. If you have liver issues, diabetes, gout, or take blood pressure or cholesterol medications, professional guidance is essential.

The Takeaway

After 50, improving circulation doesn’t require extreme measures. Sometimes, it’s about rediscovering a foundational nutrient the body relies on—like Vitamin B3—and using it consistently as part of a daily wellness recipe. When combined with nourishing foods, gentle movement, and patience, this vitamin can help legs and feet feel warmer, lighter, and more alive again.

super creamy lemon pie

There is something timeless about lemon desserts. They balance sweetness with brightness, comfort with freshness, and indulgence with elegance. This Super Creamy Lemon Pie takes that classic idea and elevates it into a dessert that feels luxurious, smooth, and unforgettable. The filling is not just creamy—it’s velvety, almost custard-like, with a vivid lemon flavor that dances on the tongue instead of overpowering it.

Unlike traditional lemon pies that can lean too tart or too gelatinous, this version focuses on creaminess first. Every bite melts softly, supported by a buttery crust that gently crumbles beneath the fork. Whether served chilled on a warm afternoon or as a show-stopping finale to a family dinner, this lemon pie delivers comfort and sophistication in equal measure.

 What Makes This Lemon Pie Special?

This recipe uses a clever combination of heavy cream, sweetened condensed milk, and fresh lemon juice to create an ultra-smooth texture without the need for complicated techniques. The acidity of the lemon naturally thickens the filling, producing a luscious consistency that sets beautifully while staying soft and creamy.

Another secret is the gentle infusion of lemon zest into the filling. Instead of sharp sourness, you get a rounded citrus aroma that enhances the creaminess and adds depth to the flavor. The result is a pie that tastes bright, but never harsh.

 Ingredients

For the Crust:

  • 1 ½ cups graham cracker crumbs (or digestive biscuits)

  • 6 tablespoons unsalted butter, melted

  • 2 tablespoons granulated sugar

  • Pinch of salt

For the Super Creamy Lemon Filling:

  • 1 can (14 oz) sweetened condensed milk

  • ¾ cup heavy cream

  • ½ cup fresh lemon juice (about 3–4 lemons)

  • 1 tablespoon finely grated lemon zest

  • 3 large egg yolks

  • 1 teaspoon vanilla extract

  • Pinch of salt

Optional Toppings:

  • Fresh whipped cream

  • Thin lemon slices

  • Lemon zest curls

  • Powdered sugar for dusting

Step-by-Step Instructions

1. Prepare the Crust

Preheat your oven to 350°F (175°C). In a bowl, combine the graham cracker crumbs, sugar, salt, and melted butter. Mix until the texture resembles damp sand. Press the mixture firmly into the bottom and sides of a 9-inch pie dish. Use the bottom of a glass to pack it tightly.

Bake the crust for 8–10 minutes, just until fragrant and lightly golden. Remove from the oven and let it cool slightly while you prepare the filling.

2. Make the Creamy Lemon Filling In a large mixing bowl, whisk together the sweetened condensed milk and heavy cream until smooth and glossy. Add the egg yolks one at a time, whisking gently to avoid incorporating too much air.

Stir in the lemon juice slowly. You’ll notice the mixture begin to thicken almost immediately—this is exactly what you want. Add the lemon zest, vanilla extract, and a pinch of salt. Whisk until everything is fully blended and silky.

. Bake to Perfection

Pour the lemon filling into the prepared crust. Smooth the top with a spatula. Bake at 325°F (165°C) for 18–22 minutes, just until the center is set but still slightly jiggly. Overbaking can rob the pie of its creamy texture, so keep a close eye on it.

Remove from the oven and let the pie cool at room temperature for about 30 minutes, then refrigerate for at least 4 hours, preferably overnight.

 Chilling Is the Magic Step

As the pie chills, the filling transforms into a luxuriously smooth, sliceable custard. The flavors deepen, the texture firms gently, and the lemon mellows into a perfect balance of sweet and tangy. Cutting into it too soon is tempting—but patience pays off here.

 Serving Suggestions

Serve your Super Creamy Lemon Pie cold, topped with a generous swirl of whipped cream. For extra elegance, add thin lemon slices or a sprinkle of fresh zest. Each slice should glide cleanly from the pie dish, revealing a glossy, pale-yellow filling that promises indulgence.

This pie pairs beautifully with:

  • Hot tea or coffee

  • Fresh berries

  • A drizzle of honey or raspberry sauce

 Final Thoughts

This Super Creamy Lemon Pie is proof that simple ingredients, when treated thoughtfully, can create extraordinary results. It’s smooth without being heavy, bright without being sharp, and comforting without being boring. Whether you’re baking for a special occasion or simply craving a dessert that feels like sunshine on a plate, this pie delivers every time.

Humpty Dumpty Dip

Humpty Dumpty may have had a great fall, but this dip certainly won’t—it stands tall as one of the most irresistibly creamy, savory, and nostalgic party dips you’ll ever serve. Inspired by the comfort of classic deviled eggs, the richness of a loaded egg salad, and the fun of snack-time finger foods, this Humpty Dumpty Dip turns simple ingredients into a bowl of magic. It’s smooth, flavorful, protein-packed, and absolutely addictive. Whether you’re hosting a family gathering, game night, potluck, or just craving something comforting and homemade, this dip brings bold flavor and childhood charm to the table.


Why This Recipe Is Called “Humpty Dumpty Dip”

The name comes from the idea of taking familiar, humble ingredients—mostly eggs—and “breaking” them down into a creamy, dreamy dip. Think of it as deviled eggs transformed into a velvety spread you can scoop with crackers, chips, veggies, or even smear on toast. It combines savory depth, tangy creaminess, and a hint of smoky spice to create a flavor profile that is unexpectedly elegant despite its simplicity.

Ingredients You’ll Need

This dip uses affordable, everyday items, yet the end result tastes restaurant-level.

Main Ingredients:

  • 6 large hard-boiled eggs

  • ½ cup mayonnaise

  • ¼ cup sour cream (adds smoothness)

  • 1 ½ tablespoons Dijon mustard

  • 1 tablespoon yellow mustard (for classic deviled-egg flavor)

  • 1 tablespoon apple cider vinegar (tangy balance)

  • ¼ teaspoon salt

  • ¼ teaspoon black pepper

  • ½ teaspoon garlic powder

  • ½ teaspoon onion powder

  • ½ teaspoon smoked paprika (plus extra for garnish)

  • 2 tablespoons finely chopped dill pickles or relish

  • 2 tablespoons finely chopped fresh chives

Optional Add-Ins:

  • 2 slices cooked crumbled bacon (for smoky crunch)

  • 1 tablespoon hot sauce (for heat lovers)

  • ¼ cup shredded cheddar (for cheesy version)


How to Make the Humpty Dumpty Dip (Step-by-Step)

Step 1: Prepare the Eggs

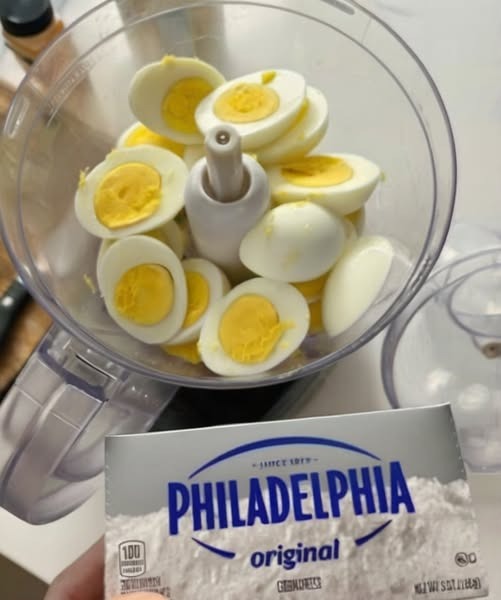
Hard-boiled eggs form the heart of this recipe. After boiling, cool and peel them carefully. Roughly chop the eggs—you want a mix of fine pieces and a few small chunks so the dip has great texture. Humpty Dumpty may have fallen apart, but this dip comes together beautifully.

Step 2: Build the Creamy Base

In a mixing bowl, combine:

  • mayonnaise

  • sour cream

  • Dijon mustard

  • yellow mustard

  • apple cider vinegar

Whisk these together until smooth. This mixture should be silky, tangy, and slightly thick. It’s the foundation of your dip, giving it that iconic deviled egg flavor but with much more richness.

Step 3: Add Seasonings for Depth

Stir in the salt, pepper, garlic powder, onion powder, and smoked paprika. These spices amplify the egg flavor and give your dip a warm, smoky, addictive undertone. Paprika especially gives it that classic deviled-egg finishing touch.

Step 4: Fold in the Eggs and Mix-Ins

Add the chopped eggs, dill pickles or relish, and chives. Gently fold until everything is evenly combined. If adding optional ingredients—such as bacon or cheddar—fold them in last.

Step 5: Chill for Best Flavor

Cover the bowl and chill in the refrigerator for at least 1 hour. This rest time allows the flavors to blend and deepen. When served cold, the dip becomes firmer, creamier, and even more flavorful.

Step 6: Plate and Garnish

Transfer the dip into a serving bowl. Dust the top with smoked paprika and sprinkle additional chives for an eye-catching finish. Serve chilled with your favorite dippers.

What to Serve With Humpty Dumpty Dip

This dip is incredibly versatile. Here are some perfect matchups:

  • Crackers: Ritz, wheat crackers, or butter crackers.

  • Chips: Kettle chips, pita chips, tortilla chips.

  • Bread: Toasted baguette slices, sourdough pieces, garlic bread chips.

  • Fresh Veggies: Celery sticks, cucumbers, bell pepper strips, carrots.

  • Protein: Smear it on chicken sliders or turkey sandwiches.

One unexpected but delightful pairing is pretzel rods. Their salty crunch matches the creamy dip perfectly.

Why This Dip Is So Addictive

Humpty Dumpty Dip hits every flavor note without being overwhelming:

  • Creamy from mayo and sour cream

  • Tangy from mustard and vinegar

  • Savory from eggs and seasonings

  • Smoky from paprika

  • Fresh from chives and pickles

It’s comfort food with a gourmet twist. A single scoop delivers the taste of deviled eggs, egg salad, and a creamy party dip all in one bite.

Tips for the Perfect Humpty Dumpty Dip

✔ Use Cold Eggs

Cold hard-boiled eggs chop better and keep the dip from thinning out.

✔ Adjust Creaminess

If you like your dip thicker, reduce the sour cream slightly.
If you prefer a smoother dip, mash the eggs more or blend half the mixture.

✔ Make It Spicy

Add jalapeños, cayenne, or your favorite hot sauce.

✔ Make It “Fancy”

Stir in minced parsley, add smoked salmon, or top with crispy shallots.

✔ Store Properly

Keep in an airtight container in the refrigerator for up to 3 days. The flavor improves over time.

A Fun Twist: The Humpty Dumpty Sandwich Spread

Leftover dip? Spread it generously on toasted bread, top with lettuce and tomato, and you have a mouthwatering sandwich filling. It also works beautifully in wraps or as a topping for baked potatoes.

Final Thoughts

The Humpty Dumpty Dip is a unique fusion of nostalgia, flavor, and creativity. It turns eggs—a simple, affordable ingredient—into a dish that tastes like something straight out of a gourmet café. With its creamy texture, bold tang, and smoky finish, this dip is guaranteed to become a new favorite in your recipe collection. Whether you’re making it for a party or simply treating yourself, every scoop delivers comfort and joy. Enjoy!

CLEAR YOUR THROAT & LUNGS OF MUCUS WITH THIS POWERFUL NATURAL RECIPE

When thick mucus begins to settle in the throat or lungs, it can feel heavy, irritating, and impossible to ignore. Whether it’s due to a lingering cold, seasonal allergies, dry winter air, or simply excess inflammation, your airways may respond by producing more phlegm than you can comfortably manage. While over-the-counter syrups can help, nature also provides a powerful, soothing recipe that has been used for generations to break down mucus, calm coughs, and open up the chest. This remedy blends anti-inflammatory ingredients with expectorants known to thin, loosen, and clear out stubborn phlegm.

This is not just a home remedy—it’s a complete ritual. One cup in the morning and one at night can help you breathe easier and feel lighter within a day or two.

THE MUCUS-MELTING ELIXIR

A Hot, Soothing Drink to Break Down Phlegm & Support Clear Lungs

Ingredients

Base

  • 1 cup hot water

  • 1 tablespoon fresh lemon juice

  • 1 teaspoon raw honey (or to taste)

  • 1 teaspoon grated fresh ginger

  • ½ teaspoon grated fresh turmeric (or ¼ teaspoon ground)

  • ¼ teaspoon black pepper

  • 1 pinch cayenne pepper

  • 1 crushed garlic clove (optional but powerful)

Finishing Touch

  • 1 teaspoon apple cider vinegar (raw + unfiltered)

This combination works together in a remarkable way:
Lemon cuts through thick mucus, ginger and turmeric calm inflammation, black pepper boosts absorption, garlic acts as a natural antimicrobial, cayenne opens the airways, and honey coats the throat for soothing relief. ACV breaks down stubborn phlegm and helps balance the respiratory tract.

HOW TO PREPARE THE ELIXIR

  1. Heat the water until hot but not boiling. Boiling water can destroy honey’s beneficial enzymes and make ginger taste slightly bitter.

  2. Add the grated ginger, turmeric, and garlic (if using) to a cup.

  3. Pour hot water over the ingredients and let them steep for 3 minutes. This allows the volatile oils—responsible for mucus breakdown—to be released.

  4. Add lemon juice, black pepper, cayenne, and ACV once the drink cools slightly. Stir well.

  5. Finish with raw honey. Stir gently and sip slowly while warm.

HOW TO DRINK IT FOR BEST RESULTS

  • Drink 1 cup first thing in the morning, before breakfast.

  • Drink another 1 cup at night, 30–45 minutes before bed.

  • Sip it slowly to allow the warm steam to loosen mucus in nasal passages and lungs.

  • Continue for 3–5 days, or until mucus production decreases significantly.

WHY THIS RECIPE WORKS

The Science Behind the Ingredients

1. Ginger – The Lung-Clearing Root

Ginger contains compounds called gingerols and shogaols, which help loosen mucus stuck to the walls of the respiratory tract. It also warms the body and increases circulation, helping your system push out phlegm naturally.

2. Turmeric – Anti-Inflammatory Powerhouse

Turmeric reduces inflammation in the airways, especially the bronchi. When your lungs are irritated, they produce thicker mucus. Turmeric calms this response, reducing congestion and helping air move freely.

3. Lemon – Natural Mucus Cutter

Lemon’s acidity breaks down sticky mucus and helps thin it. Vitamin C also strengthens immunity, which is especially helpful during colds or flu.

4. Honey – Soothes and Coats

Raw honey is one of the world’s oldest cough soothers. It coats irritated throat tissues, reduces coughing, and adds antimicrobial benefits that help fight mild infections.

5. Black Pepper – Boosts Absorption

Black pepper activates curcumin (the key compound in turmeric), making it much more effective at reducing inflammation.

6. Cayenne – Opens the Airways

Cayenne pepper contains capsaicin, which stimulates blood flow and helps break up mucus instantly. It may cause a mild “heat wave,” but that heat is clearing congestion.

7. Apple Cider Vinegar – Dissolves Thick Phlegm

ACV helps thin mucus and restore the natural pH balance of the lungs and throat, making it easier for your body to expel phlegm.

8. Garlic – Natural Antimicrobial

Garlic helps eliminate bacteria or mild infections that may be causing excess mucus. It’s optional but highly recommended for deeper congestion.

OPTIONAL BOOSTERS

Add any of the following for even more power:

  • ¼ teaspoon cinnamon – reduces throat irritation

  • A slice of fresh onion – strong expectorant

  • A sprig of thyme – traditional lung-clearing herb

  • A teaspoon of crushed mint leaves – opens nasal passages

A SIMPLE DAILY ROUTINE FOR CLEARER LUNGS

For best results, combine the drink with this easy routine:

Morning

  • Take a hot shower and inhale the steam deeply.

  • Drink one full cup of the elixir.

  • Lightly tap your chest with your fingertips to loosen lung mucus.

Afternoon

  • Stay hydrated—warm water helps thin mucus.

  • Avoid dairy if you notice it increases phlegm for you personally.

Night

  • Drink the second cup of the elixir.

  • Sleep with a humidifier or bowl of warm water in the room.

This routine softens and releases mucus naturally throughout the day.

WHO THIS REMEDY IS PERFECT FOR

  • People with seasonal or morning mucus

  • Those recovering from a cold or cough

  • Individuals with heavy throat congestion

  • Anyone who wants a natural lung-clearing detox

  • People exposed to cold winter air, dust, or pollution

FINAL WORD

This recipe works because it doesn’t just mask symptoms—it targets the root causes of mucus buildup: inflammation, thickened phlegm, airway irritation, and mild bacterial presence. The combination of warming spices, soothing honey, acidic lemon, and mucus-melting ACV creates a potent natural remedy that many people feel working almost immediately.

Crnock Pot Crack Chicken recipe

If you’ve spent any time in the world of slow-cooker comfort food, you’ve likely heard the buzz about Crack Chicken—the ultra-creamy, savory, bacon-studded dish that somehow manages to be hearty, simple, and wildly satisfying all at once. This Crock Pot version is one of the easiest ways to put a warm, crowd-pleasing meal on the table with minimal effort. What makes this recipe so popular is the way just a few pantry staples transform into something rich and flavorful during a long, slow simmer. The chicken becomes fall-apart tender, the ranch seasoning infuses every bite, and the melted cheese and crispy bacon bring everything together in a way that feels indulgent yet comforting.

This is a recipe that works for fast weeknight dinners, lazy weekends, game-day snacking, or even meal prep. Serve it on buns, spoon it over rice, roll it into tortillas, or simply eat it straight out of a bowl. No matter how you enjoy it, one thing’s certain—your Crock Pot is about to become your favorite kitchen companion.

Ingredients

For the Chicken Base

  • 2 pounds boneless, skinless chicken breasts (or thighs, if you prefer richer flavor)

  • 2 packages (8 oz each) cream cheese, softened

  • 1 packet ranch seasoning mix (or 3 tablespoons homemade ranch seasoning)

  • 1 cup shredded sharp cheddar cheese

  • ½ cup chicken broth

  • 1 teaspoon garlic powder

  • ½ teaspoon onion powder

  • ½ teaspoon smoked paprika (optional but adds depth)

For Finishing

  • 6–8 slices cooked bacon, crumbled

  • ½–1 cup additional shredded cheddar

  • ⅓ cup sliced green onions

  • Fresh cracked black pepper to taste

Instructions

1. Prepare the Crock Pot

Lightly grease your slow cooker insert or spray it with nonstick cooking spray. This helps prevent sticking as the cheese melts and forms a creamy sauce.

2. Add the Chicken and Seasonings

Place the chicken breasts in an even layer at the bottom of the Crock Pot. Sprinkle the ranch seasoning, garlic powder, onion powder, and smoked paprika evenly over the chicken.

3. Add the Cream Cheese and Broth

Cut the softened cream cheese into large cubes and scatter them over the seasoned chicken. Pour in the chicken broth, which will help create steam and keep the chicken juicy as it cooks.

4. Slow Cook Until Tender

Place the lid on your Crock Pot, set it to low for 6–7 hours or high for 3–4 hours. The key is ensuring that the chicken becomes ultra-tender and easy to shred.

5. Shred the Chicken

Once cooked, open the lid and use two forks to shred the chicken directly in the Crock Pot. It should tear apart effortlessly. The melted cream cheese will begin mingling with the shredded chicken at this stage.

6. Add Cheese and Bacon

Sprinkle the 1 cup of shredded cheddar directly into the Crock Pot and stir thoroughly until fully incorporated. Add the crumbled bacon (reserving a little for garnish if you like). Continue stirring until the mixture becomes creamy and well combined.

7. Optional: Thicken or Thin the Sauce

  • If you want a thicker, spreadable mixture (great for sandwiches), leave the Crock Pot uncovered for 5–7 minutes.

  • For a thinner, saucier consistency, stir in a few tablespoons of warm milk or additional broth.

8. Finish With Green Onions

Just before serving, scatter sliced green onions over the top for a burst of freshness and color.

Serving Ideas

One of the best features of Crack Chicken is its versatility. Here are some favorite ways to enjoy it:

1. Sandwiches

Spoon the mixture onto hamburger buns, brioche, slider rolls, or even toasted sourdough. Add extra cheddar, lettuce, or pickles to build a flavor-packed sandwich.

2. Over Rice or Pasta

If you’re craving a bowl-style meal, serve the chicken over steamed white rice, buttered noodles, or even cauliflower rice for a lower-carb option.

3. Stuffed Potatoes

Bake large russet potatoes until fluffy, then fill them with warm Crack Chicken. Top with chives, more bacon, and a dollop of sour cream.

4. Wraps or Tacos

Spoon the mixture into warm tortillas with shredded lettuce and diced tomatoes for an easy lunch.

5. Dip-Style

Serve in a bowl surrounded by tortilla chips, pretzels, or toasted baguette slices. Perfect for parties or game nights.

Tips for the Perfect Crack Chicken

  • Use chicken thighs if you want an even richer, juicier dish. They hold moisture slightly better than breasts.

  • Don’t skip the softening step for the cream cheese—it melts more smoothly when softened first.

  • For extra heat, stir in a chopped jalapeño, a pinch of cayenne pepper, or a splash of hot sauce.

  • Add veggies like spinach, diced bell peppers, or sautéed mushrooms for texture and variety.

  • Double the recipe if you’re feeding a crowd. Crack Chicken reheats beautifully and tastes even better the next day.

Storing and Reheating

  • Refrigerator: Store in an airtight container for up to 4 days.

  • Freezer: Freeze portions for up to 3 months.

  • Reheating: Warm on the stovetop or in the microwave, adding a splash of milk to restore creaminess.