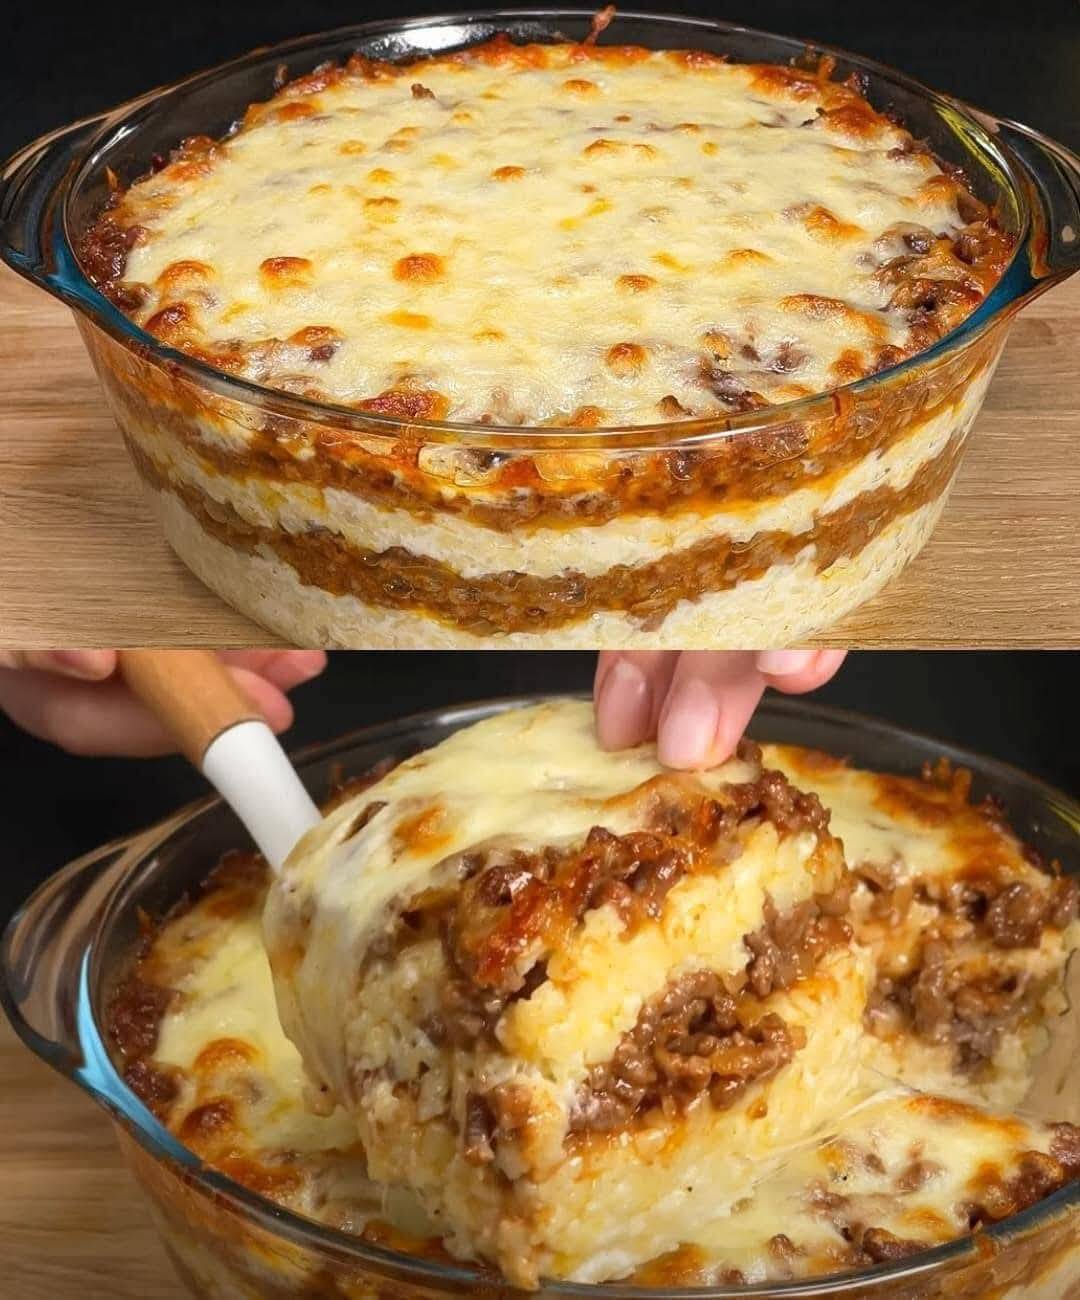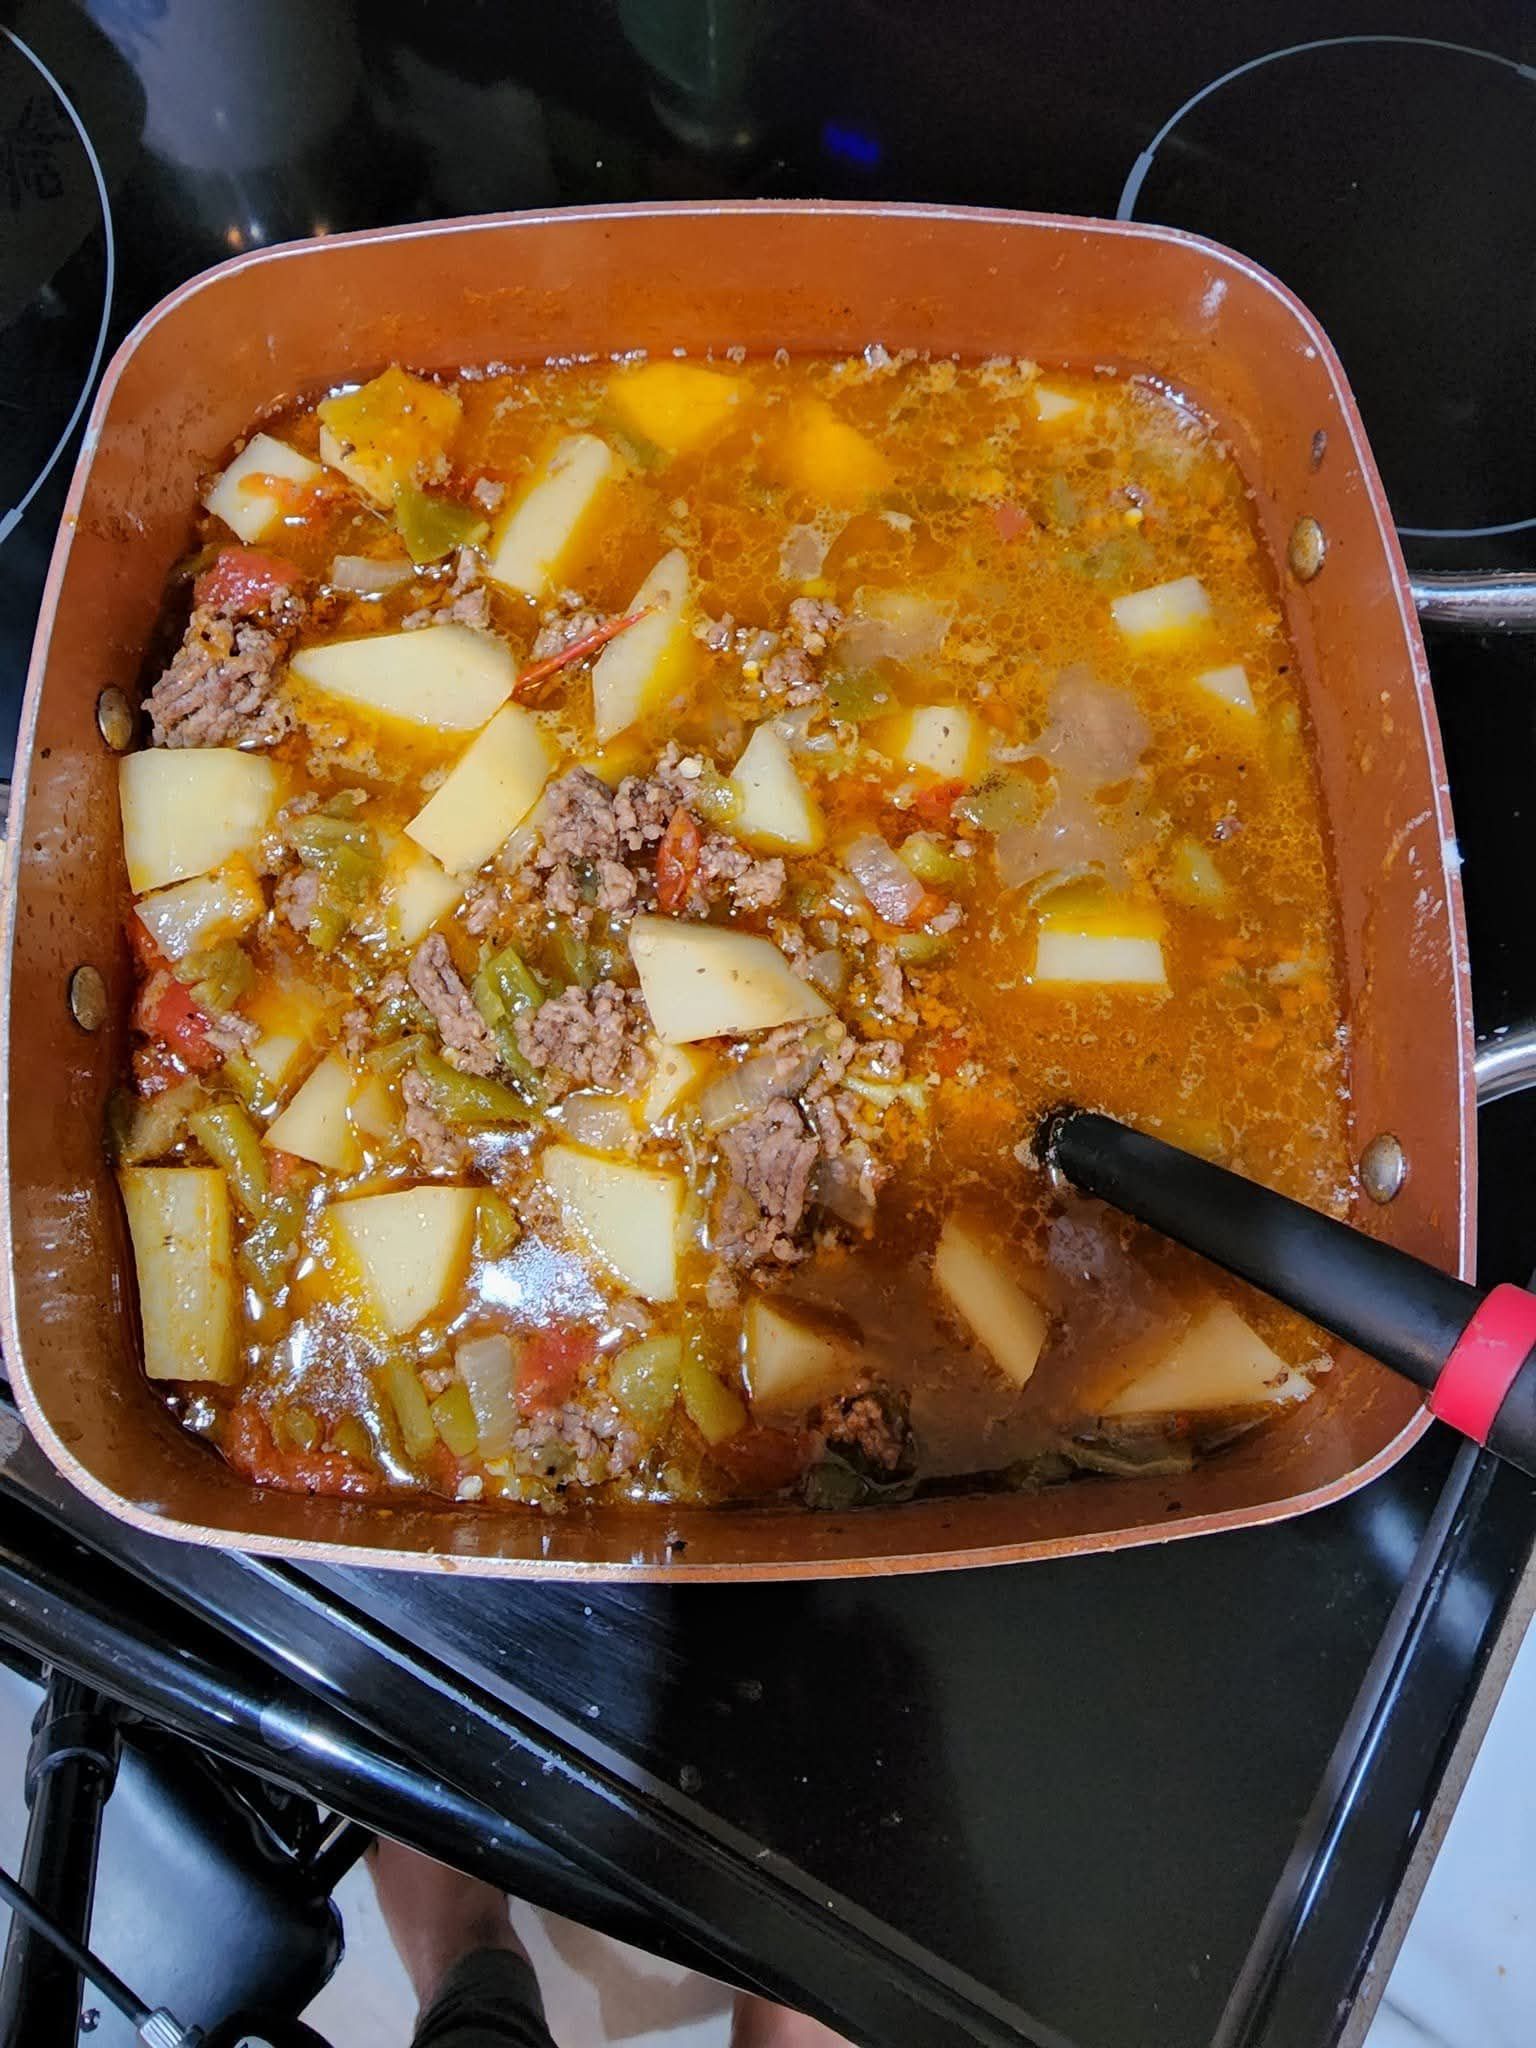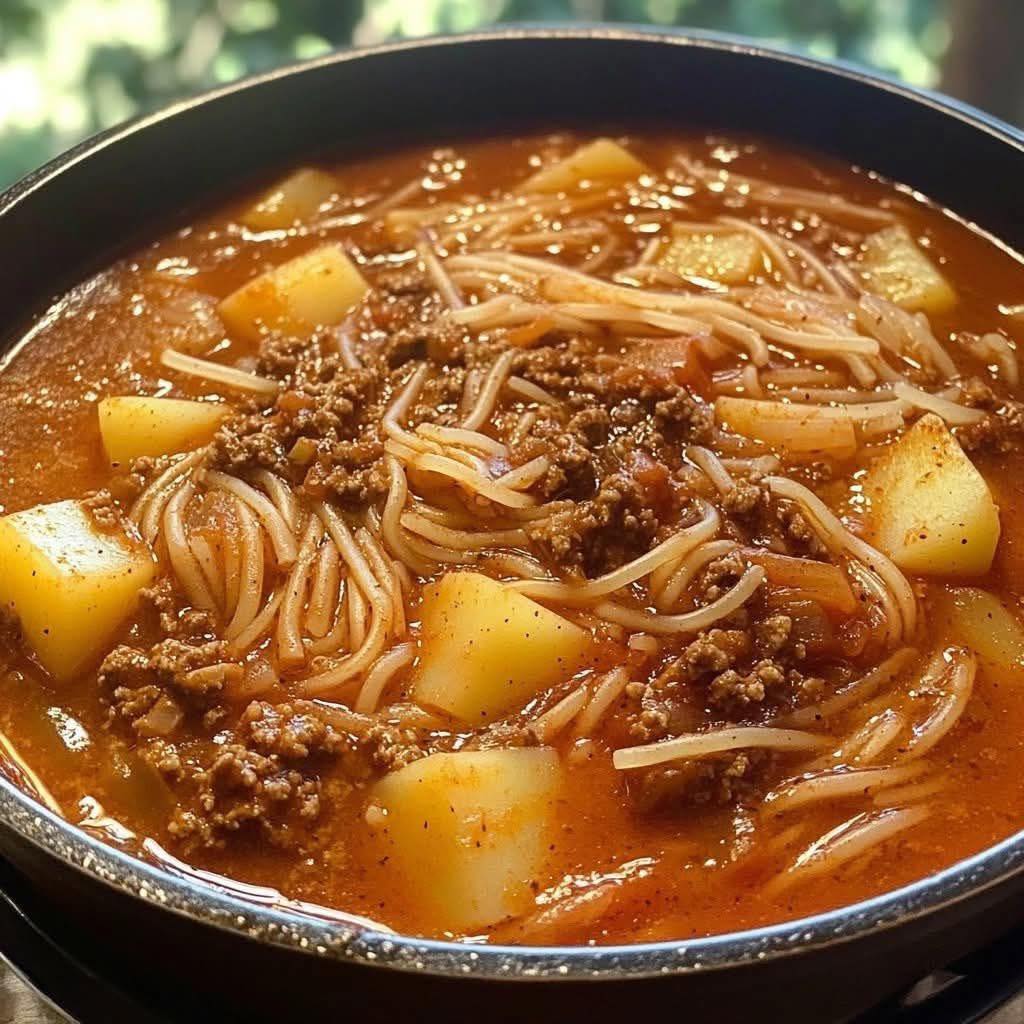
Fideo with potatoes and ground beef

Fideo with potatoes and ground beef is a dish many cultures recognize in one form or another, but this version elevates it by focusing on toasting, layering, and contrast. The pasta is nutty and golden, the potatoes are tender and creamy inside, and the beef is seasoned with warm spices and aromatics that build depth without overpowering the dish. Everything cooks in one pan, allowing the flavors to mingle and develop into something far greater than the sum of its parts.

Ingredients (Serves 4–6)

Base Ingredients

  • 2 tablespoons neutral oil (canola or avocado)

  • 1½ cups fideo pasta (or broken vermicelli)

  • 1 pound ground beef (80/20 preferred)

  • 1 medium onion, finely diced

  • 3 cloves garlic, minced

  • 2 medium potatoes, peeled and cut into small ½-inch cubes

  • 1 medium tomato, finely chopped (or ½ cup crushed tomato)

Seasonings & Flavor Builders

  • 1 teaspoon ground cumin

  • ½ teaspoon smoked paprika

  • ½ teaspoon ground coriander

  • ¼ teaspoon cinnamon (optional but recommended)

  • 1½ teaspoons salt (adjust to taste)

  • ½ teaspoon black pepper

  • 4 cups beef or chicken broth (warm)

  • 1 bay leaf

Finishing Touches

  • 1 tablespoon butter

  • 2 tablespoons chopped fresh cilantro or parsley

  • Juice of ½ lime (optional but brightening)

Step 1: Toast the Fideo for Depth

Heat a large, heavy-bottomed skillet or shallow pot over medium heat. Add the oil and let it shimmer. Add the fideo pasta and stir constantly for 2–3 minutes, ensuring even browning. The pasta should turn a deep golden color with a nutty aroma—this step is essential and sets the foundation for the entire dish.

Once toasted, transfer the fideo to a bowl and set aside. Do not wipe out the pan; the residual oil and browned bits are pure flavor.

Step 2: Build the Beef Base

Return the pan to medium-high heat and add the ground beef. Break it apart with a wooden spoon and allow it to brown undisturbed for about 2 minutes before stirring. Browning creates richness, so resist the urge to move it too soon.

Once the beef is mostly browned, add the diced onion. Cook for 3–4 minutes until the onion softens and becomes slightly translucent. Stir in the garlic and cook for 30 seconds, just until fragrant.

Now add cumin, smoked paprika, coriander, cinnamon, salt, and black pepper. Stir well so the spices bloom in the fat, coating the beef and onions evenly.

Step 3: Introduce Potatoes and Tomato

Add the diced potatoes to the pan and stir until they are well coated in the seasoned beef mixture. Let them cook for about 2 minutes to absorb flavor.

Add the chopped tomato and bay leaf. The tomato will release moisture, loosening the browned bits from the pan and forming the base of the sauce. Let this simmer for 2–3 minutes until slightly thickened and aromatic.

Step 4: Bring It All Together

Return the toasted fideo to the pan and stir gently to distribute it evenly among the beef and potatoes. Slowly pour in the warm broth, stirring once to prevent sticking.

Bring the mixture to a gentle boil, then reduce heat to low. Cover and simmer for 12–15 minutes, stirring once halfway through. The fideo will soften, the potatoes will become tender, and the broth will reduce into a silky, cohesive sauce.

If the mixture looks too dry before the potatoes are tender, add an extra splash of broth or water.

Step 5: Finish with Richness and Freshness

Once the potatoes are fork-tender and the pasta is fully cooked, remove the bay leaf. Stir in the butter, allowing it to melt into the sauce for a subtle richness.

Turn off the heat and sprinkle with fresh cilantro or parsley. Add a squeeze of lime juice if using—it cuts through the richness and brings the dish to life.

Let the dish rest for 5 minutes before serving. This allows the flavors to settle and the sauce to thicken slightly.

Serving Suggestions

Serve this fideo hot, straight from the pan. It pairs beautifully with:

  • Warm tortillas or crusty bread

  • A simple cucumber and onion salad

  • A dollop of sour cream or plain yogurt for contrast

Leftovers reheat exceptionally well and often taste even better the next day.

Why This Recipe Works

This version stands out because every ingredient is treated with intention. Toasting the pasta adds complexity. Spices are layered instead of dumped in. Potatoes act as both a hearty element and a natural thickener. The result is a dish that feels comforting, balanced, and deeply satisfying—without being heavy or bland.
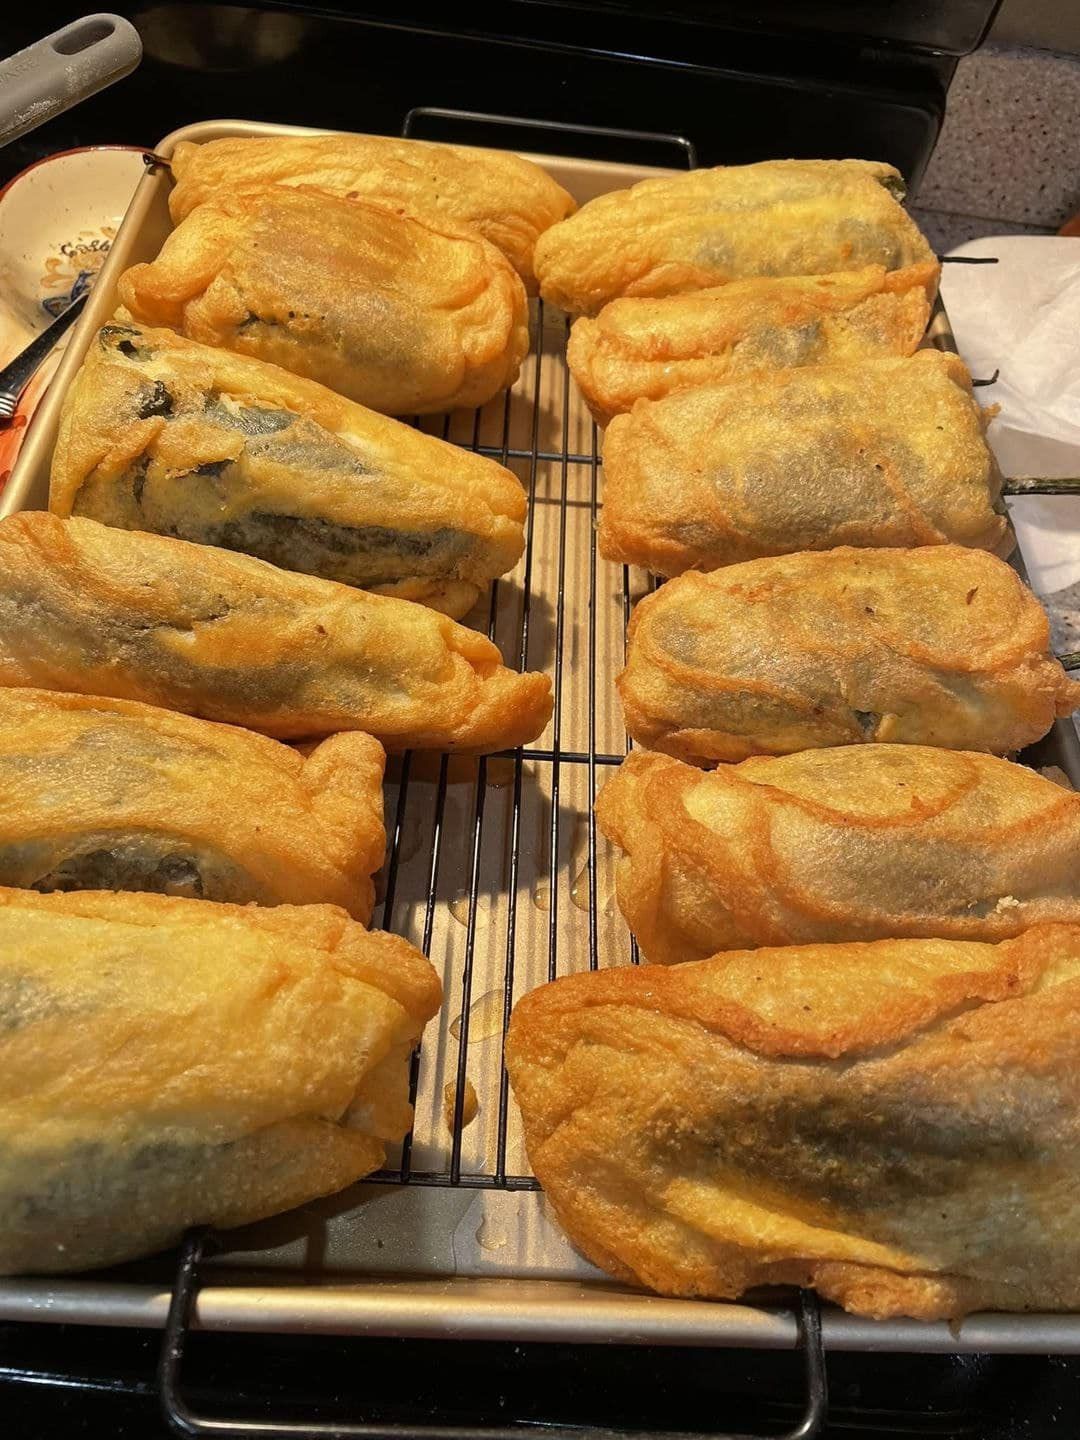
Chiles Rellenos

Chiles Rellenos are more than a dish—they are an expression of patience, heat, and balance. This version leans into smoky flavors and rustic textures, pairing fire-roasted poblanos with a creamy corn-and-cheese filling and a deeply roasted tomato sauce finished with Mexican squash (calabaza). The result is comforting yet bold, familiar yet unmistakably unique.

Ingredients

For the Chiles

  • 6 large poblano peppers

  • 1 tablespoon neutral oil (avocado or vegetable)

  • Pinch of sea salt

For the Filling

  • 1 tablespoon butter

  • 1 small white onion, finely diced

  • 2 cloves garlic, minced

  • 1 ½ cups fresh corn kernels (or thawed frozen corn)

  • ½ teaspoon ground cumin

  • ¼ teaspoon smoked paprika

  • Salt and black pepper to taste

  • 6 oz Oaxaca cheese, shredded (mozzarella is a substitute)

  • 2 oz queso fresco, crumbled

  • 1 tablespoon chopped fresh epazote or cilantro

For the Egg Batter

  • 4 large eggs, separated

  • ¼ teaspoon cream of tartar or a pinch of salt

  • 2 tablespoons all-purpose flour

For the Roasted Tomato-Calabaza Sauce

  • 4 ripe Roma tomatoes

  • 1 small calabaza or zucchini, chopped

  • ¼ white onion

  • 2 cloves garlic, unpeeled

  • 1 dried guajillo chile, seeded and soaked

  • 1 cup vegetable or chicken broth

  • Salt to taste

For Frying & Serving

  • Vegetable oil for shallow frying

  • Fresh cilantro

  • Mexican crema or sour cream

Step 1: Roast and Prepare the Poblanos

Place the poblano peppers directly over an open flame or under a broiler, turning until the skins blister and blacken evenly. This step is essential—it brings out a subtle sweetness and smoky depth that defines great Chiles Rellenos.

Transfer the peppers to a bowl and cover with a kitchen towel to steam for 10 minutes. Once cool enough to handle, gently peel away the charred skin. Make a small slit down one side of each pepper and carefully remove the seeds, keeping the stem intact. Lightly season the inside of each chile with salt and set aside.

Step 2: Create the Smoky Corn Filling

In a skillet over medium heat, melt the butter and sauté the diced onion until soft and translucent. Add the garlic and cook just until fragrant. Stir in the corn kernels and allow them to cook until lightly golden in spots—this caramelization adds texture and sweetness.

Season with cumin, smoked paprika, salt, and pepper. Remove from heat and let cool slightly before folding in the Oaxaca cheese, queso fresco, and chopped epazote or cilantro. The mixture should be creamy but not overly wet.

Gently stuff each poblano with the filling, being careful not to overpack. Close the opening by pressing the chile gently around the filling.

Step 3: Roast the Sauce Ingredients

On a dry skillet or comal, roast the tomatoes, onion, garlic, and calabaza until charred and softened. The garlic should be blackened on the outside and soft inside. Peel the garlic and transfer all roasted ingredients to a blender.

Add the soaked guajillo chile and broth, then blend until smooth. Pour the sauce into a saucepan, season with salt, and simmer for 10–15 minutes until slightly thickened and deeply flavorful.

Step 4: Prepare the Egg Batter

In a clean bowl, beat the egg whites with cream of tartar until stiff peaks form. In a separate bowl, lightly beat the egg yolks, then fold them gently into the whites along with the flour. The batter should be airy and light—this creates the iconic fluffy coating.

Step 5: Fry the Chiles

Heat about ½ inch of oil in a wide skillet over medium heat. Dip each stuffed chile into the egg batter, coating completely. Carefully lay them into the hot oil and fry until golden brown on all sides, turning gently with tongs.

Transfer to a paper towel-lined plate to drain excess oil.

Step 6: Assemble and Serve

Spoon warm tomato-calabaza sauce onto a plate and place a chile relleno on top. Drizzle with crema, sprinkle with fresh cilantro, and serve immediately.

Chef’s Notes & Variations

  • No frying option: Skip the batter and bake the stuffed chiles at 375°F (190°C) for 20 minutes, then top with sauce.

  • Protein twist: Add shredded rotisserie chicken or sautéed mushrooms to the filling.

  • Spicier version: Mix finely chopped serrano chile into the corn filling.

  • Sauce alternative: A light poblano cream sauce pairs beautifully with this filling.

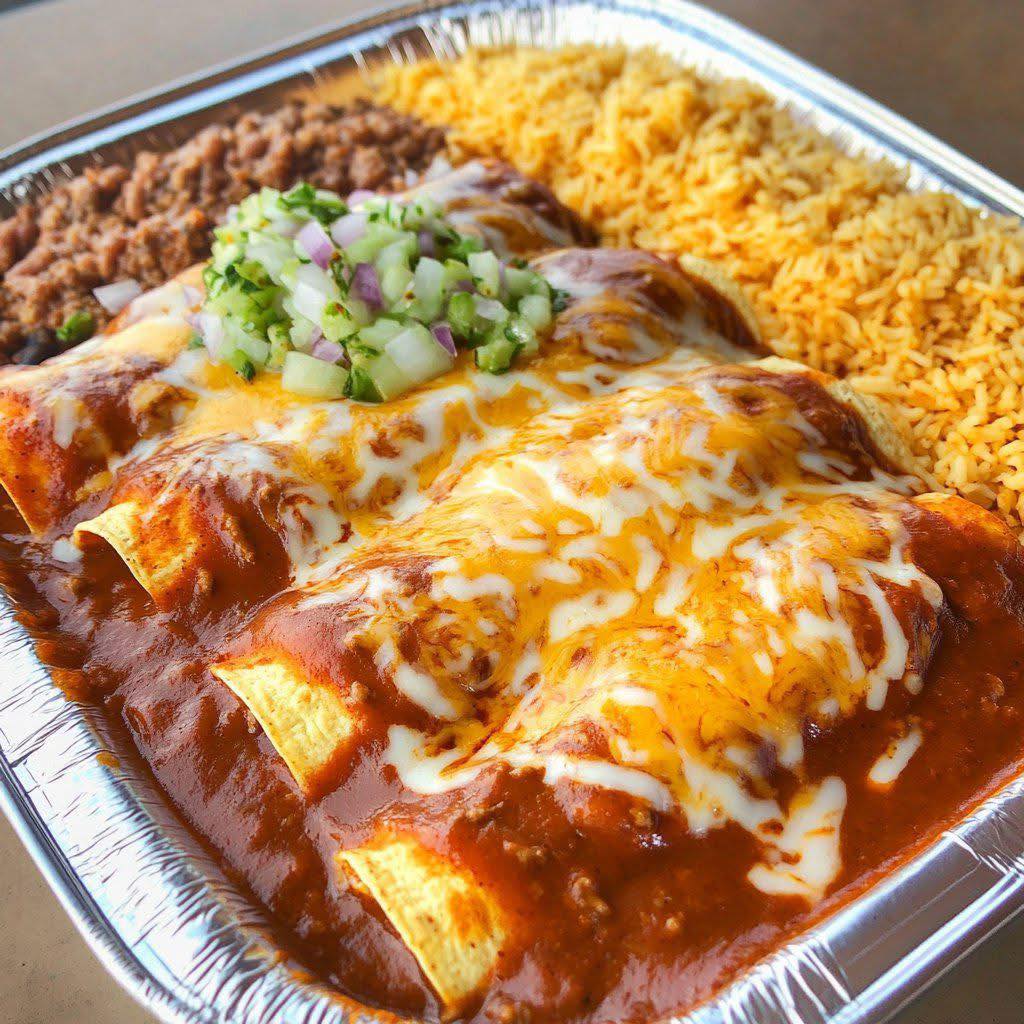
For BEEF ENCHILADAS with extra cheese on top

Beef enchiladas are comfort food at its finest—warm tortillas wrapped around savory beef, bathed in sauce, and finished with bubbling cheese. This recipe takes the classic idea and elevates it with a deeply flavored beef filling, a homemade smoky chili gravy instead of canned enchilada sauce, and a generous, unapologetic layer of melted cheese on top. These enchiladas are rich, satisfying, and perfect for a family dinner or a casual gathering where leftovers are welcome.

Ingredients

For the Beef Filling

  • 1½ pounds ground beef (80/20 for flavor)

  • 1 medium yellow onion, finely diced

  • 4 cloves garlic, minced

  • 1 teaspoon ground cumin

  • 1 teaspoon smoked paprika

  • ½ teaspoon ground coriander

  • ½ teaspoon dried oregano

  • Salt and freshly ground black pepper, to taste

  • 2 tablespoons tomato paste

  • ¼ cup beef broth

For the Smoky Chili Gravy

  • 3 tablespoons vegetable oil or beef drippings

  • 3 tablespoons all-purpose flour

  • 2 tablespoons chili powder (use a mild or medium blend)

  • ½ teaspoon cocoa powder (secret ingredient)

  • ½ teaspoon ground ancho or chipotle chili

  • 1 teaspoon garlic powder

  • ½ teaspoon onion powder

  • 2 cups beef broth

  • Salt to taste

For Assembly

  • 12 corn tortillas

  • 2½ to 3 cups shredded cheese (mix of sharp cheddar, Monterey Jack, and low-moisture mozzarella)

  • ½ cup crumbled queso fresco (optional, for topping)

  • Fresh cilantro, chopped (optional)

  • Sour cream or crema, for serving

Step 1: Build the Beef Filling

Start by heating a large skillet over medium-high heat. Add the ground beef and cook until browned, breaking it up with a spoon as it cooks. Once the beef has released its fat and developed some color, add the diced onion. Cook for another 4–5 minutes, until the onion softens and becomes lightly golden.

Stir in the garlic, cumin, smoked paprika, coriander, and oregano. Season generously with salt and black pepper. Let the spices toast for about 30 seconds—this step deepens their flavor and removes any raw edge.

Add the tomato paste and stir until it coats the beef. Cook for 1–2 minutes, allowing the paste to darken slightly. Pour in the beef broth and reduce the heat to medium-low. Simmer for 5–7 minutes, until the mixture is moist but not soupy. Taste and adjust seasoning. Remove from heat and set aside.

Step 2: Make the Smoky Chili Gravy

In a saucepan over medium heat, add the oil. Whisk in the flour and cook for about 1 minute, stirring constantly, until lightly golden. This roux will thicken the sauce and give it body.

Add the chili powder, cocoa powder, ancho or chipotle chili, garlic powder, and onion powder. Stir continuously for another 30 seconds to bloom the spices. Slowly whisk in the beef broth, making sure no lumps form.

Bring the sauce to a gentle simmer and cook for 5–8 minutes, until thickened enough to coat the back of a spoon. Season with salt to taste. The cocoa powder won’t make the sauce sweet—it adds depth and a subtle richness that complements the beef.

Step 3: Prepare the Tortillas

Preheat your oven to 375°F (190°C). Lightly grease a 9×13-inch baking dish.

Warm the corn tortillas so they’re pliable. You can do this by wrapping them in a damp towel and microwaving for 30–45 seconds, or by quickly warming them in a dry skillet. This prevents cracking when rolling.

Step 4: Assemble the Enchiladas

Spread a thin layer of chili gravy over the bottom of the baking dish. Take one tortilla, dip it lightly into the sauce (just enough to coat), then place it on a plate. Spoon a generous amount of beef filling down the center and sprinkle with shredded cheese.

Roll the tortilla tightly and place it seam-side down in the dish. Repeat with the remaining tortillas, lining them up snugly.

Pour the remaining chili gravy evenly over the enchiladas, making sure the edges are covered so they don’t dry out.

Step 5: Extra Cheese on Top (The Best Part)

Now for the star of the dish: the cheese. Sprinkle the remaining shredded cheese generously over the entire pan. Don’t hold back—this is where these enchiladas become indulgent. If using queso fresco, scatter it lightly over the top for contrast.

Step 6: Bake and Finish

Cover the dish loosely with foil and bake for 20 minutes. Remove the foil and bake for another 10–15 minutes, until the cheese is fully melted, bubbling, and lightly golden in spots.

Let the enchiladas rest for 5 minutes before serving. Garnish with fresh cilantro if desired and serve with sour cream or crema on the side.

Final Thoughts

These extra-cheesy beef enchiladas are bold, comforting, and deeply flavorful. The homemade smoky chili gravy sets them apart from typical enchiladas, while the layered cheeses add richness and stretch in every bite. Serve them with Mexican rice, refried beans, or a crisp green salad for a complete and satisfying meal.

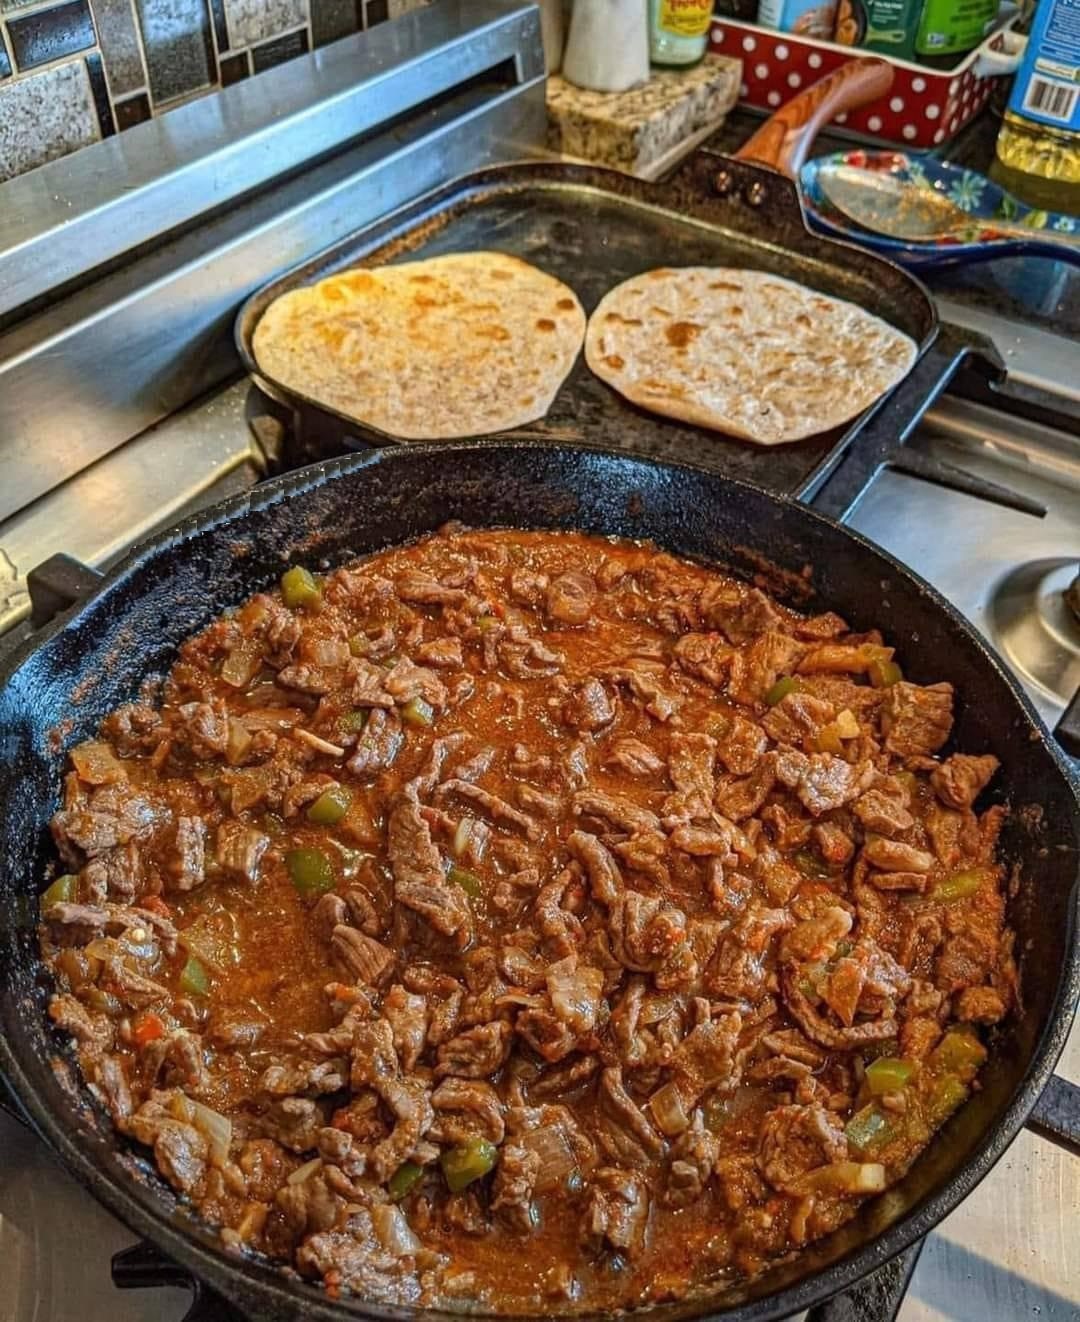
Carne Guisada with floor tortillas

Carne guisada is one of those dishes that fills the house with a smell so comforting it makes people wander into the kitchen without realizing why. It’s humble food—beef, onions, spices—but when treated with patience and care, it becomes something unforgettable. This version builds layers of flavor slowly, finishing with tender beef in a rich, savory gravy, served with warm, soft flour tortillas made by hand.

Ingredients

For the Carne Guisada

  • 2½ pounds beef chuck or beef shoulder, cut into 1-inch cubes

  • 2 tablespoons neutral oil (canola or avocado)

  • 1 large onion, finely diced

  • 1 poblano pepper, finely diced

  • 1 jalapeño, minced (optional for heat)

  • 4 cloves garlic, minced

  • 2 tablespoons all-purpose flour

  • 1½ teaspoons ground cumin

  • 1 teaspoon chili powder

  • 1 teaspoon smoked paprika

  • ½ teaspoon dried oregano

  • ½ teaspoon black pepper

  • 1½ teaspoons salt (adjust to taste)

  • 2 cups beef broth (preferably low sodium)

  • 1 cup water

  • 1 tablespoon tomato paste

  • 1 teaspoon apple cider vinegar or lime juice

  • Fresh cilantro for garnish (optional)

For the Flour Tortillas

  • 3 cups all-purpose flour

  • 1 teaspoon salt

  • 1 teaspoon baking powder

  • ⅓ cup lard or vegetable shortening

  • 1 cup warm water (approximately)

Step 1: Build the Foundation

Start by seasoning the beef generously with salt and black pepper. Heat the oil in a heavy-bottomed Dutch oven or deep skillet over medium-high heat. When the oil shimmers, add the beef in batches. Do not overcrowd the pan—this step is about browning, not cooking through. Each piece should develop a deep, golden crust.

Remove the browned beef and set it aside. Reduce the heat to medium and add the diced onion, poblano, and jalapeño. Cook slowly, scraping up the browned bits from the bottom of the pot. These bits are pure flavor. Once the vegetables are soft and slightly caramelized, add the garlic and cook for 30 seconds, just until fragrant.

Step 2: Create the Gravy

Sprinkle the flour over the vegetables and stir constantly for about one minute. This removes the raw flour taste and creates the base for the gravy. Add cumin, chili powder, smoked paprika, oregano, and salt, stirring until the spices bloom.

Slowly pour in the beef broth while stirring to avoid lumps. Add the water, tomato paste, and vinegar. The mixture should be thick but pourable. Return the browned beef to the pot along with any accumulated juices.

Bring everything to a gentle simmer, then reduce the heat to low. Cover partially and let it cook for 1½ to 2 hours, stirring occasionally. The beef should become fork-tender, and the gravy should be rich and glossy. Taste and adjust seasoning near the end.

Step 3: Make the Flour Tortillas

While the carne guisada simmers, make the tortillas. In a large bowl, mix flour, salt, and baking powder. Add the lard and work it into the flour with your fingers until the mixture resembles coarse crumbs.

Slowly add warm water, mixing until a soft dough forms. Knead gently for 2–3 minutes until smooth. Cover and let rest for at least 20 minutes—this relaxes the gluten and makes rolling easier.

Divide the dough into golf-ball-sized portions. Roll each into a thin circle on a lightly floured surface. Heat a dry cast-iron skillet over medium-high heat and cook each tortilla for about 30–40 seconds per side, until bubbles form and light brown spots appear. Stack them in a towel to keep warm.

Step 4: Serve and Savor

Serve the carne guisada spooned generously into warm flour tortillas. The gravy should cling to the meat, soaking slightly into the tortilla without dripping everywhere. Garnish with fresh cilantro if you like, and serve with rice, beans, or simply more tortillas.

Final Notes

This dish is even better the next day, when the flavors deepen and meld together. Carne guisada isn’t flashy—it’s soulful. It’s the kind of food made for slow afternoons, shared tables, and second helpings. Paired with homemade flour tortillas, it becomes more than a meal—it becomes a memory.

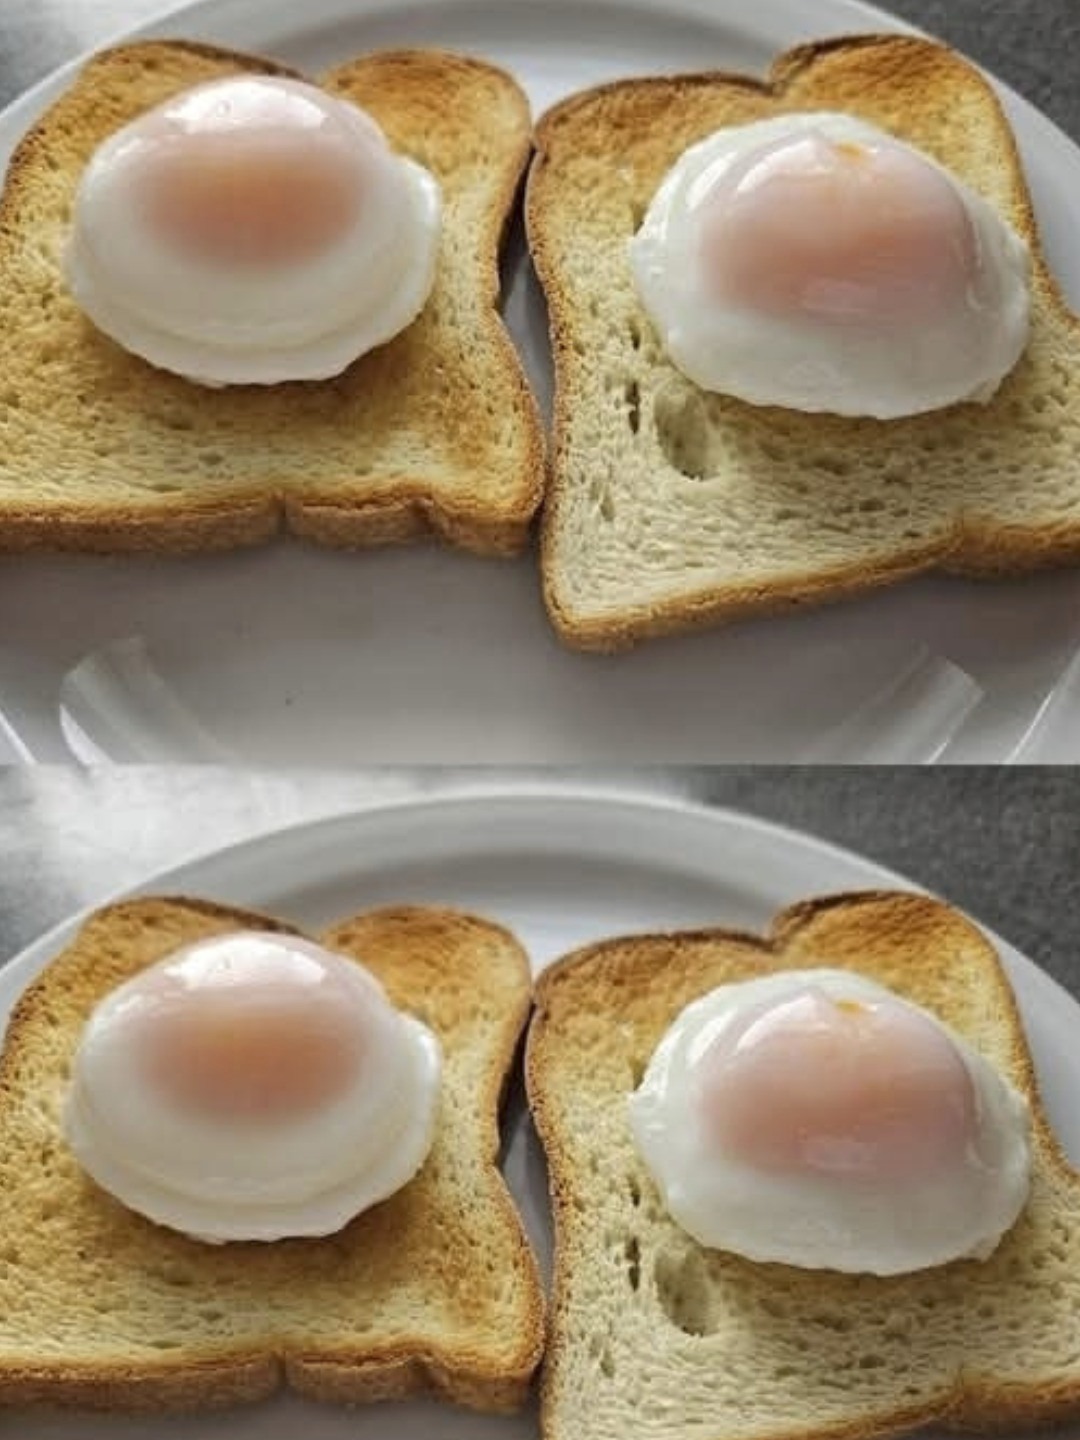
How to Make Perfectly Poached Eggs

Poached eggs are often treated as a culinary test of patience and precision. When done poorly, they become wispy clouds of egg white floating sadly in water. When done well, they are silky, elegant, and dramatic—firm whites encasing a molten, golden yolk that spills luxuriously onto toast, greens, or grains. This recipe takes a slightly unconventional approach, combining temperature control, gentle salinity, and timing to create consistently perfect poached eggs with minimal stress.

Why This Method Works

Traditional poaching relies heavily on vinegar and vigorous swirling. While effective, vinegar can alter flavor and swirling can create uneven shapes. This recipe replaces vinegar with salted water and controlled heat, allowing the egg whites to naturally coagulate without harsh acidity. The result is a cleaner taste and a more naturally rounded egg.

Ingredients (Serves 2–4)

  • 2–4 very fresh large eggs

  • 1½ liters (6 cups) water

  • 1 tablespoon fine sea salt

  • Ice water (optional, for holding eggs)

Optional flavor additions:

  • Fresh herbs (thyme, bay leaf, or dill stems)

  • A strip of lemon peel (not juice)

Equipment

  • Wide, shallow saucepan

  • Fine-mesh strainer

  • Small bowl or ramekin

  • Slotted spoon

  • Kitchen timer or clock

Step-by-Step Instructions

1. Start With the Freshest Eggs Possible

Freshness is the most overlooked secret of perfect poached eggs. Fresh egg whites are thicker and cling tightly to the yolk, preventing the stringy mess many people associate with poaching. If possible, use eggs that are less than a week old.

Crack each egg individually into a small bowl. This ensures you can gently slide the egg into the water and discard any broken yolks before they reach the pot.

2. Strain for Precision (The Unique Step)

Pour each cracked egg through a fine-mesh strainer for about 10 seconds. This removes the thin, watery portion of the egg white that causes feathering in the water. You’ll be left with a compact egg that holds its shape beautifully.

Transfer the strained egg back into a clean bowl or ramekin.

3. Prepare the Poaching Water

Fill a wide saucepan with 1½ liters of water and add the salt. Bring the water to a temperature just below a simmer—around 85–90°C (185–195°F). You should see tiny bubbles forming on the bottom of the pan, but no rolling boil.

If you like subtle aromatic notes, add a sprig of herbs or a strip of lemon peel. These gently perfume the egg without overwhelming its flavor.

4. Create a Gentle Landing Zone

Instead of stirring the water into a vortex, simply use a spoon to create a slow, shallow current in one direction. This soft movement helps the egg white wrap around the yolk naturally without tearing.

Lower the bowl close to the water’s surface and gently slide the egg in.

5. Poach With Patience

Set a timer for 2½ to 3½ minutes, depending on how runny you like your yolk.

  • 2½ minutes: very soft, flowing yolk

  • 3 minutes: classic runny yolk

  • 3½ minutes: slightly jammy center

Avoid touching the egg for the first minute. After that, you may gently nudge it away from the pan if it sticks.

6. Lift and Drain

Use a slotted spoon to lift the egg from the water. Let excess water drain off for a few seconds. If serving immediately, place directly onto toast or a warm plate.

If making multiple eggs, transfer finished eggs to an ice-water bath for up to 10 minutes. To reheat, return them to hot (not boiling) water for 30–45 seconds.

How to Serve Your Perfect Poached Egg

This poached egg is versatile and elegant. Try it:

  • Over sourdough toast with cultured butter and flaky salt

  • On sautéed greens with garlic and olive oil

  • With roasted vegetables and yogurt sauce

  • On rice or grains with chili oil and herbs

  • As a refined topping for soups or salads

Finish with cracked black pepper, smoked salt, or a drizzle of infused oil for extra depth.

Common Mistakes (and How to Avoid Them)

  • Boiling water: Aggressive bubbling breaks the egg apart. Keep the heat gentle.

  • Old eggs: Thin whites will never fully behave. Freshness matters more than technique.

  • Too much vinegar: It firms whites but compromises flavor. Salt is enough.

  • Overcrowding: Poach one or two eggs at a time for best results.

Final Thoughts

Perfectly poached eggs are less about tricks and more about respect for the ingredient. By slowing down, controlling temperature, and using a simple straining step, you can achieve restaurant-quality results at home—consistently and confidently. Once mastered, this technique turns a humble egg into something truly special.

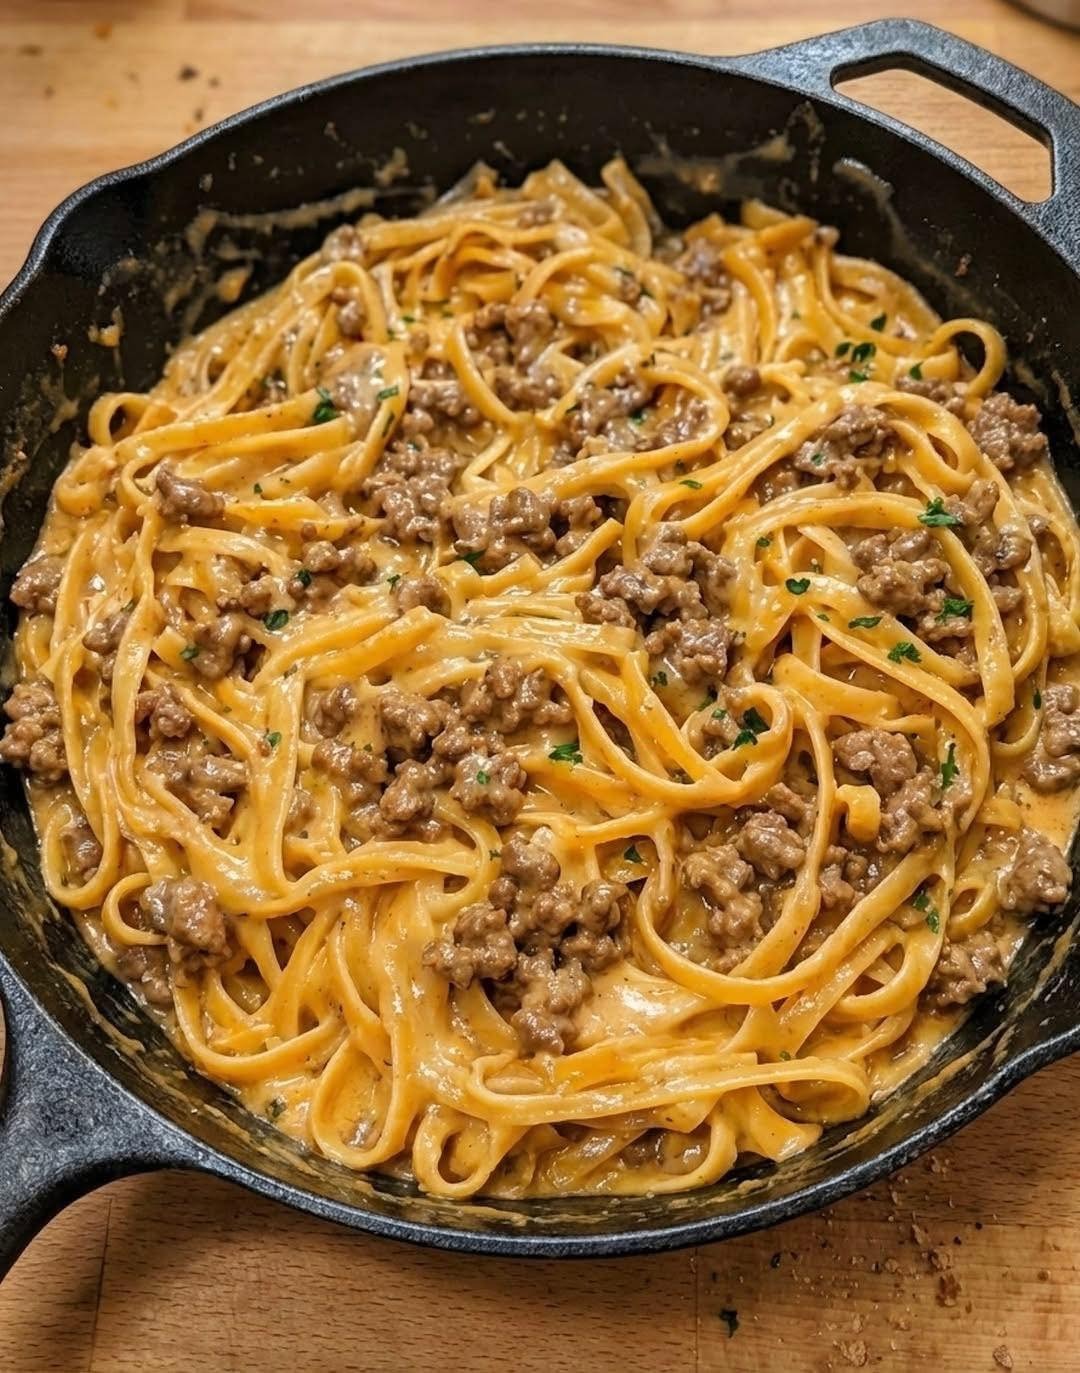
Garlic Butter Beef Pasta

Garlic butter beef pasta is one of those dishes that feels indulgent without being complicated. It sits perfectly between comfort food and restaurant-worthy elegance. This version leans into deep beef flavor, layered garlic, and a butter sauce that clings lovingly to every strand of pasta. What makes this recipe unique is the technique: instead of simply mixing beef and pasta, we build flavor in stages—browning, resting, infusing, and finishing—so every bite feels intentional.

This is not a rushed weeknight skillet meal. It’s a cozy, aromatic dish meant to fill your kitchen with the smell of sizzling butter and toasted garlic, and reward you with a pasta that tastes far more complex than the ingredients suggest.

Ingredients (Serves 3–4)

For the pasta

  • 350 g (12 oz) pasta (fettuccine, tagliatelle, or penne work best)

  • Salted water (as salty as the sea)

For the beef

  • 450 g (1 lb) beef sirloin or ribeye, thinly sliced against the grain

  • 1 tablespoon olive oil

  • ½ teaspoon smoked paprika

  • ½ teaspoon black pepper

  • ½ teaspoon salt

For the garlic butter sauce

  • 6 tablespoons unsalted butter

  • 8 cloves garlic, finely minced (yes, eight—this is garlic-forward)

  • ½ teaspoon chili flakes (optional, but recommended)

  • 1 teaspoon soy sauce or Worcestershire sauce (for umami depth)

  • ½ cup reserved pasta water

  • ¼ cup freshly grated Parmesan cheese

  • 2 tablespoons heavy cream (optional, for silkiness)

To finish

  • Fresh parsley or basil, finely chopped

  • Extra black pepper

  • Lemon zest (optional but transformative)

Step 1: Prepare the Beef with Intention

Start by patting the beef completely dry with paper towels. Moisture is the enemy of browning. In a bowl, toss the beef slices with olive oil, salt, black pepper, and smoked paprika. The paprika doesn’t make the dish smoky—it enhances the meatiness and adds warmth.

Heat a heavy skillet (preferably cast iron or stainless steel) over high heat until almost smoking. Add the beef in a single layer. Do not overcrowd the pan. Sear for 60–90 seconds per side, just until browned. The goal is caramelization, not overcooking.

Once browned, remove the beef from the pan and let it rest. This step is critical. Resting allows the juices to redistribute, keeping the meat tender when it’s added back later.

Step 2: Cook the Pasta Strategically

While the beef rests, bring a large pot of water to a rolling boil. Salt it generously—this is your only chance to season the pasta itself.

Cook the pasta until just shy of al dente, about one minute less than package instructions. Reserve at least 1 cup of pasta water before draining. That starchy water is liquid gold for the sauce.

Step 3: Build the Garlic Butter Base

Lower the heat under the beef pan to medium. Do not clean it—those browned bits are flavor. Add the butter and let it melt slowly. Once melted, add the garlic and chili flakes.

Stir constantly for about 30–45 seconds. The garlic should soften and become fragrant, not brown. Burnt garlic ruins everything.

Add the soy sauce or Worcestershire sauce, letting it sizzle briefly. This small addition deepens the sauce without making it taste “Asian” or “British.” It simply tastes richer.

Step 4: Create the Sauce

Pour in ½ cup of the reserved pasta water and stir, scraping the bottom of the pan to release all the caramelized bits. The sauce will look thin at first—this is correct.

Add the Parmesan cheese and stir until melted. If using cream, add it now. The sauce should become glossy and lightly thickened, coating the back of a spoon.

Taste and adjust seasoning. Remember, Parmesan and soy sauce add salt, so go gently.

Step 5: Bring Everything Together

Add the pasta directly into the sauce, tossing to coat. Let it cook in the sauce for about one minute, absorbing flavor.

Now return the beef to the pan along with any resting juices. Toss gently over low heat just until warmed through. Overcooking at this stage will toughen the meat.

Finish with freshly cracked black pepper, chopped herbs, and a touch of lemon zest if using. The zest doesn’t make the dish lemony—it lifts the richness and balances the butter.

How to Serve

Serve immediately in warm bowls. Top with extra Parmesan and herbs. This dish pairs beautifully with a simple green salad or roasted vegetables. No heavy sides needed—the pasta is the star.

Final Thoughts

This garlic butter beef pasta is bold, comforting, and deeply satisfying. It respects each ingredient instead of drowning it. The garlic is fragrant, the butter luxurious, the beef tender, and the pasta perfectly coated. It’s proof that a “simple” dish can still feel special when cooked with care.

Pineapple Upside-Down Sugar Cookies

If you love the nostalgic flavors of pineapple upside-down cake but crave the convenience and charm of cookies, these Pineapple Upside-Down Sugar Cookies are about to become your new obsession. They combine buttery sugar cookie dough, caramelized brown sugar, juicy pineapple, and a glossy cherry center—all in perfectly portioned, bakery-style cookies. Each bite delivers that familiar sweet-tart pineapple flavor with a soft, chewy cookie base that melts in your mouth.

These cookies are ideal for holidays, potlucks, bake sales, or simply when you want to surprise your family with something creative and unexpected. They look impressive, taste indulgent, and yet are surprisingly simple to make.

Why You’ll Love This Recipe

  • No cake pans required – all the magic happens on a baking sheet

  • Soft-centered, crisp-edged cookies

  • Classic pineapple upside-down flavor in cookie form

  • Easy to customize with coconut, rum extract, or citrus zest

  • Perfect make-ahead dessert that stores beautifully

Ingredients

For the Pineapple Topping

  • ½ cup brown sugar (light or dark)

  • 4 tablespoons unsalted butter, melted

  • 1 cup crushed pineapple, very well drained

  • Maraschino cherries, halved or quartered

For the Sugar Cookie Dough

  • ¾ cup unsalted butter, softened

  • ¾ cup granulated sugar

  • 1 large egg, room temperature

  • 1 teaspoon vanilla extract

  • ¼ teaspoon almond extract (optional but recommended)

  • 2 cups all-purpose flour

  • ½ teaspoon baking powder

  • ¼ teaspoon baking soda

  • ¼ teaspoon salt

Step-by-Step Instructions

Step 1: Prepare the Pineapple Base

In a small bowl, combine the brown sugar and melted butter until smooth and glossy. Spoon about 1 tablespoon of this mixture onto a parchment-lined baking sheet, spacing them several inches apart. Gently spread each into a small circle.

Place a teaspoon of crushed pineapple in the center of each sugar circle, then press a cherry piece into the middle. Pat the pineapple lightly with a paper towel to remove any extra moisture—this step ensures the cookies bake properly and don’t spread too much.

Step 2: Make the Sugar Cookie Dough

In a large bowl, cream the softened butter and granulated sugar together until pale and fluffy, about 2–3 minutes. Add the egg, vanilla extract, and almond extract, mixing until fully combined.

In a separate bowl, whisk together the flour, baking powder, baking soda, and salt. Gradually add the dry ingredients to the wet mixture, mixing just until a soft dough forms. Avoid overmixing to keep the cookies tender.

Step 3: Assemble the Cookies

Scoop about 1½ tablespoons of cookie dough and gently flatten it into a disc. Carefully place the dough on top of the pineapple mixture, fully covering it. Lightly press the edges down to seal.

Repeat with the remaining dough, leaving space between cookies for spreading.

Step 4: Bake to Perfection

Preheat your oven to 350°F (175°C). Bake the cookies for 11–13 minutes, or until the edges are set and just beginning to turn golden. The centers should still look slightly soft.

Allow the cookies to cool on the baking sheet for 5 minutes—this is crucial. While still warm, carefully flip each cookie upside down using a spatula, revealing the caramelized pineapple top.

Pro Tips for Success

  • Drain the pineapple extremely well to prevent soggy cookies

  • Flip while warm or the topping may stick

  • Use parchment paper instead of foil for easy release

  • For extra shine, brush the pineapple tops lightly with warm honey

Flavor Variations

  • Tropical Coconut: Add ¼ cup toasted coconut to the dough

  • Pina Colada Style: Replace vanilla with rum extract

  • Citrus Bright: Add orange or lime zest to the cookie dough

  • Brown Butter Dough: Brown the butter for deeper caramel flavor

Storage & Make-Ahead Tips

Store cookies in an airtight container at room temperature for up to 3 days, or refrigerate for 5 days. These cookies also freeze well—freeze in a single layer, then store in freezer bags for up to 2 months. Thaw at room temperature before serving.

Final Thoughts

Pineapple Upside-Down Sugar Cookies are the perfect blend of vintage dessert charm and modern cookie convenience. They bring sunshine to any table, whether served at a summer gathering or enjoyed as a cozy treat with coffee or tea. With their golden caramel tops, juicy fruit center, and soft sugar cookie base, these cookies are guaranteed to disappear fast—so you might want to make a double batch!

Christmas Appetizer Favorite’: Just 4 ingredients. I make this nonstop during Christmas season.

Christmas Appetizer Favorite: Just 4 Ingredients

There’s something magical about Christmas appetizers—the kind you can place on the table and watch disappear faster than you can say happy holidays. This four‑ingredient Christmas appetizer is exactly that kind of recipe. It’s simple, cozy, crowd‑pleasing, and almost suspiciously easy for how addictive it is. I make this nonstop during the Christmas season because it works for every occasion: family gatherings, office parties, unexpected guests, and those quiet nights when you just want something warm and festive without spending hours in the kitchen.

What makes this recipe special isn’t just the minimal ingredient list—it’s the way those ingredients come together to create bold flavor, creamy texture, and irresistible aroma. This appetizer hits all the right notes: salty, sweet, savory, and just a touch indulgent. Best of all, you don’t need fancy equipment or advanced cooking skills. If you can turn on an oven, you can make this.

The 4 Simple Ingredients

Here’s the beauty of it—only four ingredients, all easy to find, especially during the holiday season:

  1. Cocktail sausages (or mini smoked sausages) – These bring smoky, savory depth and make the appetizer hearty enough to satisfy hungry guests.
  2. Cream cheese – Soft, rich, and creamy, it balances the saltiness of the sausages and creates a luxurious texture.
  3. Sweet chili sauce – This adds a glossy finish with just the right balance of sweetness and mild heat.
  4. Puff pastry – Flaky, buttery layers that bake into golden perfection and hold everything together.

That’s it. No extra seasoning required. Each ingredient plays a role, and together they create a holiday appetizer that tastes far more complex than it actually is.

Why This Appetizer Is a Christmas Favorite

During Christmas, kitchens are already busy with main dishes, desserts, and endless cups of tea or coffee. This recipe shines because it requires minimal prep and delivers maximum impact. You can prepare it ahead of time, bake it just before serving, and it stays delicious even as it cools.

The puff pastry gives it a festive, bakery‑style look, making it feel special enough for Christmas while still being comfort food at heart. Guests love finger foods during the holidays, and these are perfectly sized—no plates or forks required.

Another reason I make this nonstop? Kids love it, adults love it, and picky eaters rarely turn it down. It’s familiar yet exciting, simple yet indulgent.

How to Make It Step by Step

Step 1: Prepare the Puff Pastry

Remove the puff pastry from the freezer and allow it to thaw slightly until it’s easy to unfold. Roll it gently on a lightly floured surface to smooth out the seams and create an even sheet.

Step 2: Spread the Cream Cheese

Using a spatula or the back of a spoon, spread a thin, even layer of cream cheese over the puff pastry. You don’t want it too thick—just enough to coat the surface and add creaminess to every bite.

Step 3: Add the Sweet Chili Sauce

Drizzle the sweet chili sauce over the cream cheese. Spread it gently so it blends slightly without fully mixing. This creates layers of flavor rather than a single note.

Step 4: Add the Sausages

Place the mini sausages evenly across the pastry. You can line them up for easy slicing or scatter them slightly for a rustic look.

Step 5: Roll, Slice, and Bake

Carefully roll the pastry into a log, keeping it snug but not too tight. Slice into bite‑sized rounds and place them cut‑side up on a lined baking tray. Bake in a preheated oven at 200°C (400°F) for about 18–22 minutes, or until puffed, golden, and fragrant.

The Holiday Aroma You’ll Love

As these bake, your kitchen fills with the buttery scent of puff pastry, the smoky aroma of sausages, and a subtle sweetness from the chili sauce. It instantly feels like Christmas. This is the kind of smell that makes people wander into the kitchen asking, “What’s in the oven?”

Serving Suggestions

Serve these warm for the best texture and flavor. Arrange them on a festive platter with a small bowl of extra sweet chili sauce on the side for dipping. They pair beautifully with:

  • Hot chocolate or spiced tea
  • Mulled juice or cider
  • A simple green salad for balance

They’re also great as part of a larger appetizer spread alongside cheese boards, dips, and roasted nuts.

Make‑Ahead Tips

One of the best things about this recipe is how well it fits into busy holiday schedules:

  • Prepare ahead: Assemble the rolls, slice them, and refrigerate up to 24 hours before baking.
  • Freeze for later: Freeze unbaked slices and bake straight from frozen—just add a few extra minutes.
  • Reheat easily: Warm leftovers in the oven to bring back the crisp pastry.

Shepherd’s Pie

Shepherd’s Pie is one of those dishes that instantly brings comfort. Warm, hearty, and deeply satisfying, it has fed families for generations. Traditionally made with minced lamb, vegetables, and topped with mashed potatoes, Shepherd’s Pie was born as a way to turn leftovers into something magical. This version stays true to its roots while adding a few thoughtful twists that deepen flavor and create a rich, unforgettable meal.

This is not rushed food. It’s the kind of dish that fills your kitchen with aromas and your home with calm. Perfect for family dinners, chilly evenings, or when you want something nourishing and timeless.

Why This Shepherd’s Pie Is Special

What makes this Shepherd’s Pie unique is balance. The meat filling is deeply savory without being heavy, the vegetables are tender but not mushy, and the mashed potato topping is creamy with a lightly crisped finish. A small splash of Worcestershire sauce and a hint of garlic elevate the flavor without overpowering it. The result is comfort food that feels familiar yet refined.

Ingredients

For the Meat Filling

  • 1½ pounds ground lamb

  • 1 medium onion, finely chopped

  • 2 carrots, diced small

  • 1 cup green peas

  • 3 cloves garlic, minced

  • 2 tablespoons olive oil

  • 2 tablespoons tomato paste

  • 1 tablespoon Worcestershire sauce

  • 1 teaspoon fresh thyme (or ½ teaspoon dried)

  • 1 teaspoon salt (adjust to taste)

  • ½ teaspoon black pepper

  • 1 cup beef or lamb broth

For the Mashed Potato Topping

  • 2½ pounds potatoes, peeled and cut into chunks

  • ½ cup warm milk

  • 4 tablespoons butter

  • ½ teaspoon salt

  • ¼ teaspoon black pepper

Optional topping upgrade:

  • ½ cup grated cheddar or parmesan cheese

Step-by-Step Instructions

1. Prepare the Potatoes

Place the potato chunks in a large pot and cover with cold, salted water. Bring to a boil and cook until fork-tender, about 15–18 minutes. Drain well and return them to the pot. Add butter, warm milk, salt, and pepper. Mash until smooth and creamy. Cover and set aside.

Tip: Warm milk makes the potatoes extra fluffy and prevents them from becoming gluey.

2. Build the Flavor Base

Heat olive oil in a large skillet over medium heat. Add chopped onion and carrots. Cook for about 5–7 minutes until softened and fragrant. Stir in garlic and cook for another 30 seconds, just until aromatic.

3. Cook the Lamb

Add ground lamb to the skillet. Break it up with a spoon and cook until browned and no longer pink. Drain excess fat if needed, but leave a little for flavor.

Stir in tomato paste, Worcestershire sauce, thyme, salt, and pepper. Let the tomato paste cook for a minute to deepen its flavor.

4. Simmer the Filling

Pour in the broth and stir well. Reduce heat to low and let the mixture simmer for 10–15 minutes, until slightly thickened. Add peas during the last few minutes so they stay bright and tender.

Taste and adjust seasoning if needed. The filling should be rich, savory, and spoonable—not soupy.

5. Assemble the Pie

Preheat your oven to 400°F (200°C). Spread the lamb mixture evenly into a baking dish. Spoon the mashed potatoes on top and gently spread them to the edges, sealing in the filling.

For texture, use a fork to create ridges on the surface of the potatoes. Sprinkle cheese on top if using.

6. Bake to Perfection

Bake uncovered for 25–30 minutes, until the top is lightly golden and the edges are bubbling. For extra crispiness, broil for the final 2–3 minutes, watching carefully.

Let the Shepherd’s Pie rest for 10 minutes before serving. This helps it set and makes serving easier.

Serving Suggestions

Shepherd’s Pie is a complete meal on its own, but it pairs beautifully with:

  • A simple green salad with lemon dressing

  • Steamed green beans or broccoli

  • Crusty bread to soak up every bite

Storage and Reheating

  • Refrigerator: Store leftovers in an airtight container for up to 3 days.

  • Freezer: Shepherd’s Pie freezes well for up to 2 months.

  • Reheat: Warm in the oven at 350°F until heated through, or microwave individual portions.

Final Thoughts

Shepherd’s Pie is more than a recipe—it’s tradition, comfort, and care baked into one dish. This version honors the classic while adding layers of flavor that make it memorable. Whether you’re cooking for loved ones or preparing meals ahead, this Shepherd’s Pie delivers warmth in every bite.

Homemade Picadillo with Roasted Pepper Sofrito and Warm Spices

Picadillo is one of those dishes that feels like home no matter where you’re from. Versions exist across Latin America, the Caribbean, and the Philippines, each shaped by local ingredients and family traditions. This recipe honors that comforting heritage while introducing a few unexpected layers—roasted peppers, warm spices, and a gentle sweetness that balances the savory depth. The result is a picadillo that tastes familiar yet unmistakably special, perfect for weeknight dinners or leisurely weekend meals.

What Makes This Picadillo Unique

Traditional picadillo usually relies on tomatoes, onions, garlic, and ground meat. In this version, we deepen the flavor by roasting the peppers first, blooming the spices in oil, and finishing the dish with a splash of citrus. A touch of cinnamon and smoked paprika adds warmth without overpowering the dish, while raisins and olives create the classic sweet-and-savory contrast that picadillo lovers crave.

Ingredients

For the Roasted Pepper Sofrito

  • 1 red bell pepper

  • 1 green bell pepper

  • 1 small yellow onion

  • 4 cloves garlic, unpeeled

  • 2 tablespoons olive oil

For the Picadillo

  • 1½ pounds ground beef (80/20 for best flavor)

  • 2 tablespoons olive oil

  • 1 teaspoon ground cumin

  • 1 teaspoon smoked paprika

  • ½ teaspoon ground cinnamon

  • 1 teaspoon dried oregano

  • 2 bay leaves

  • 1 cup crushed tomatoes

  • ½ cup beef broth or water

  • ⅓ cup green olives, sliced

  • ¼ cup raisins

  • 1 tablespoon capers (optional but recommended)

  • 1 tablespoon tomato paste

  • 1 teaspoon brown sugar

  • Salt and black pepper to taste

To Finish

  • Juice of ½ lime or orange

  • Fresh cilantro or parsley, finely chopped

Preparation

Step 1: Roast the Peppers

Preheat your oven to 425°F (220°C). Place the bell peppers, onion (cut into large chunks), and garlic cloves on a baking sheet. Drizzle with olive oil and toss lightly. Roast for 20–25 minutes, turning once, until the vegetables are blistered and slightly charred. The garlic should be soft and fragrant.

Once cooled, peel the garlic and transfer all the roasted vegetables to a blender or food processor. Blend into a coarse, rustic puree. This roasted sofrito is the backbone of the dish, delivering sweetness and smokiness that raw vegetables simply can’t achieve.

Step 2: Brown the Meat

Heat a large skillet or Dutch oven over medium-high heat. Add the olive oil, then the ground beef. Break it apart with a wooden spoon and allow it to brown deeply. Avoid stirring too much—those caramelized bits on the bottom of the pan will build richness.

Season lightly with salt and pepper as the beef cooks. Once browned, reduce the heat to medium and drain excess fat if needed, leaving about two tablespoons in the pan.

Step 3: Bloom the Spices

Add cumin, smoked paprika, cinnamon, oregano, and bay leaves directly to the beef. Stir continuously for about 30 seconds, allowing the spices to bloom in the warm fat. This step intensifies their aroma and ensures the spices permeate the entire dish.

Step 4: Build the Sauce

Stir in the roasted pepper sofrito, scraping up any browned bits from the pan. Add the crushed tomatoes, tomato paste, and beef broth. Mix well and bring to a gentle simmer.

At this stage, the picadillo should look slightly loose. That’s intentional—the flavors will concentrate as it cooks.

Step 5: Sweet and Savory Balance

Add the olives, raisins, capers, and brown sugar. Stir to combine. The raisins soften and release their sweetness, while the olives provide a briny counterpoint. This balance is what gives picadillo its signature complexity.

Lower the heat and let the mixture simmer uncovered for 20–25 minutes, stirring occasionally. The sauce should thicken and cling to the meat without becoming dry.

Step 6: Bright Finish

Remove the bay leaves. Squeeze in fresh lime or orange juice and stir gently. This final touch lifts the dish, cutting through the richness and awakening all the flavors.

Taste and adjust seasoning with salt and pepper. Sprinkle with chopped cilantro or parsley just before serving.

How to Serve

This picadillo is incredibly versatile:

  • Classic Style: Serve over fluffy white rice with black beans and sliced avocado.

  • Comfort Bowl: Spoon it over mashed potatoes or creamy polenta.

  • Handheld: Use as a filling for empanadas, tacos, or stuffed peppers.

  • Breakfast Twist: Top with a fried egg and serve with crusty bread.

Storage and Flavor Development

Like many braised dishes, picadillo tastes even better the next day. Store it in an airtight container in the refrigerator for up to four days or freeze for up to three months. Reheat gently on the stovetop, adding a splash of broth if needed.