BAKED GARLIC PARMESAN FRIES

There’s something irresistible about a tray of hot, golden fries—especially when they’re infused with roasted garlic, kissed with herbs, and finished with a snowfall of freshly grated Parmesan. Baked Garlic Parmesan Fries are the perfect balance of comfort food and gourmet flavors, and this unique recipe takes them to the next level. Instead of simply tossing potatoes with cheese after baking, this method layers flavor at each step: marinating, double-baking, and finishing with a warm garlic-butter infusion. The result? Fries that are crisp on the outside, tender inside, deeply savory, and unbelievably addictive.

Think of these fries as the luxurious, homemade version of your favorite restaurant side—only healthier because they’re baked, not fried. And the best part? You don’t need fancy tools or expensive ingredients. Just potatoes, garlic, Parmesan, herbs, and a few pantry staples. Let’s dive into this unique, flavor-layered recipe.

Ingredients

For the Fries

  • 4 large russet potatoes (the king of crispy fries)

  • 3 tablespoons olive oil

  • 1 teaspoon salt

  • ½ teaspoon black pepper

  • 1 teaspoon garlic powder

  • 1 teaspoon onion powder

  • 1 teaspoon paprika (optional for color)

  • 1 tablespoon cornstarch (secret crisping ingredient)

Garlic Butter Parmesan Coating

  • 4 tablespoons unsalted butter

  • 4 cloves garlic, minced (or roasted garlic for deeper flavor)

  • ¼ cup freshly grated Parmesan cheese

  • 1 tablespoon chopped fresh parsley

  • ½ teaspoon red pepper flakes (optional)

  • Extra Parmesan for topping

Unique Preparation Method (What Makes This Recipe Special)

Most garlic Parmesan fry recipes simply bake the potatoes, drizzle with garlic butter, and sprinkle cheese. This recipe takes a more thoughtful approach to maximize crispiness and deepen flavor. Here’s what makes it stand out:

1. A Cornstarch Dusting for Ultra Crispiness

Cornstarch forms a light coating that reacts with the oil to create a delicate, crunchy crust—very similar to restaurant-style fries.

2. Double Bake Technique Without Frying

You’ll first bake the fries at a moderate temperature to soften the insides, then bake again at a higher temperature to crisp the outside. This mimics deep-frying but keeps things light and healthy.

3. Hot Garlic Butter Infusion

Instead of mixing garlic into cold oil, the garlic is gently sautéed in butter before being tossed with the fries. This releases the oils in the garlic and infuses every fry with flavor.

4. Parmesan at Two Stages

Some Parmesan melts into the fries as soon as they’re hot, giving savory depth; the rest is sprinkled right before serving for that signature salty bite.

Instructions

Step 1: Prep the Potatoes

Wash and peel the russet potatoes. Cut them into even-sized sticks—roughly the thickness of your little finger. Keeping them uniform ensures they cook at the same pace.
Soak the sliced potatoes in cold water for 20–30 minutes. This step removes excess starch, helping the fries crisp instead of becoming gummy.
Drain the potatoes and pat them completely dry with a clean towel.

Step 2: Season and Coat

Place the dried potato sticks in a large bowl.
Sprinkle in the cornstarch and toss gently. The potatoes should look lightly dusted, not chalky.
Next, drizzle in the olive oil, salt, pepper, garlic powder, onion powder, and paprika.
Mix until every fry is evenly coated with seasoning and oil.

Step 3: First Bake (Softening)

Preheat your oven to 400°F (200°C).
Line a baking sheet with parchment paper and spread the fries in a single layer.
Bake for 20–25 minutes, flipping halfway through, until the potatoes soften and begin turning golden.

Step 4: Second Bake (Crisping)

Increase oven temperature to 450°F (230°C).
Continue baking for another 15–20 minutes or until the edges crisp up beautifully.
Keep an eye on them—your goal is crispy, not burnt.

Step 5: Make the Garlic Parmesan Butter

While the fries finish baking, melt butter in a small pan over low heat.
Add the minced garlic and sauté gently until fragrant.
Stir in chopped parsley, red pepper flakes, and ¼ cup Parmesan.
Turn off the heat but keep warm until the fries are done.

Step 6: Toss and Serve

When the fries are perfectly crisp and golden, transfer them immediately to a large bowl.
While still hot, pour the warm garlic-Parmesan butter over them. Toss thoroughly so every fry gets coated.
Top with another sprinkle of fresh Parmesan and a pinch of parsley.
Serve immediately.

Why These Fries Taste So Good

These Garlic Parmesan Fries are the perfect blend of textures and flavors. The creamy interior comes from using russet potatoes, while the double-bake technique ensures a golden, crunchy exterior. Garlic butter adds richness and aromatic depth, and the Parmesan melts just enough to cling to each fry, making every bite savory and addictive. The herbs brighten the whole dish, and the spicy flakes give a tiny kick if you choose to include them.

This recipe transforms a simple comfort food into a restaurant-worthy side you’ll want to make weekly. They pair beautifully with grilled chicken, steak, burgers, or served as a stand-alone snack with dipping sauces like garlic aioli, marinara, or spicy mayo.

Tips for the Best Results

  • Use fresh Parmesan. Pre-grated cheese won’t melt or cling the same way.

  • Don’t overcrowd the pan. Overlapping fries steam instead of crisping.

  • Flip only once per bake. Too much handling breaks the coating.

  • Serve immediately. Fries taste best fresh out of the oven.

The Secret Nutrient Strategy to Strengthen Collagen in Your Knees and Joints

Most people don’t realize that the stiffness in their knees, the cracking in their joints, and the slow loss of mobility as they age all trace back to the same hidden issue: collagen breakdown. Collagen acts like the cushion, glue, and shock absorber of your joints. When it weakens, the knees become sore, movement becomes painful, and climbing stairs feels like lifting a mountain. But here’s the good news: you can restore, rebuild, and protect the collagen in your joints by feeding your body specific nutrients—like a recipe designed to rebuild cartilage from the inside out.

Think of your joints like a kitchen sponge. When collagen is healthy, the sponge is thick, flexible, and springy. When it starts to break down—due to age, inflammation, stress, or poor nutrition—the sponge becomes dry, brittle, and cracks under pressure. Strengthening collagen is about hydrating that sponge again and rebuilding the fibers that keep it strong.

Why Collagen Breaks Down in the Knees

Before making the recipe, it helps to understand what’s happening inside your joints:

  • Loss of collagen fibers

  • Dehydration inside cartilage

  • Inflammation that “eats away’’ the cushion

  • Decreased production of joint fluid (synovial fluid)

  • Exposure to oxidative stress

Rebuilding collagen is not just about one vitamin. It is a combination of nutrients working together, like a team, to create stronger and more flexible joints.

THE 5 POWERFUL COLLAGEN-STRENGTHENING NUTRIENTS

These nutrients form the “ingredients” of the recipe for joint repair:

1. Vitamin C – The Collagen Activator

Vitamin C is like the spark plug for collagen production. Without it, your body cannot form strong collagen fibers.

How it helps:

  • Repairs knee cartilage

  • Stimulates new collagen scaffolding

  • Reduces inflammation and swelling

Sources: lemon, kiwi, guava, oranges, strawberries, capsicum.

2. Collagen Peptides – The Building Blocks

Hydrolyzed collagen is already broken down into smaller proteins, making it easy for the body to use for knee cartilage and joint cushioning.

Benefits:

  • Rebuilds cartilage

  • Increases knee flexibility

  • Strengthens tendons and ligaments

  • Helps reduce popping and cracking

3. Omega-3 Fatty Acids – The Joint Lubricator

These healthy fats act like WD-40 for the joints.

Benefits:

  • Reduce inflammation

  • Improve joint mobility

  • Protect collagen tissues from damage

Sources: fatty fish, chia seeds, walnuts, flax seeds.

4. Hyaluronic Acid – The Joint Hydrator

This nutrient increases synovial fluid, the gel-like substance that cushions and lubricates the knees.

Benefits:

  • Decreases friction

  • Improves shock absorption

  • Keeps collagen hydrated

5. MSM (Methylsulfonylmethane) – The Collagen Protector

MSM is rich in sulfur, which helps fortify collagen fibers and reduce knee pain.

Benefits:

  • Reduces joint inflammation

  • Strengthens connective tissues

  • Helps the body form strong collagen bonds

THE UNIQUE 800-WORD RECIPE: “COLLAGEN KNEE BUILDER TONIC”

This is not a food dish—it is a nutrient-based joint-repair formula, like an internal therapy for knee health. Drink it daily for 14 days to feel results.

Ingredients

  • 1 cup warm water

  • 1 tbsp hydrolyzed collagen powder

  • ½ tsp MSM powder

  • Juice of 1 full lemon (for vitamin C)

  • 1 tbsp chia seeds soaked for 10 minutes

  • 1 tsp honey (optional for taste)

  • 1 pinch turmeric (anti-inflammatory)

  • 1 tsp extra-virgin olive oil or flaxseed oil (omega-3 support)

Directions

  1. In a glass, add the lemon juice to warm water.

  2. Stir in the collagen powder until fully dissolved.

  3. Add MSM powder and mix well.

  4. Add the pre-soaked chia seeds.

  5. Add turmeric and honey, mixing gently.

  6. Finish with olive oil or flaxseed oil for joint lubrication.

  7. Drink first thing in the morning on an empty stomach for best absorption.

How This Recipe Works in the Body

This tonic gives your knees what they have been craving for years:

  • Collagen powder supplies the raw materials for rebuilding cartilage.

  • Vitamin C from lemon activates the collagen-building process.

  • MSM strengthens the new collagen fibers like steel reinforcing bars.

  • Chia seeds offer omega-3 for lubrication and reduced inflammation.

  • Turmeric reduces pain-causing swelling.

  • Healthy oil boosts synovial fluid lubrication.

Together, this forms a joint-rebuilding powerhouse.

ADDITIONAL NATURAL WAYS TO BOOST COLLAGEN IN THE KNEES

To support the recipe, here are lifestyle habits that accelerate knee repair:

1. Bone Broth

A natural source of gelatin and collagen that strengthens knee cartilage.

2. Gentle Strength Training

Exercises like squats, leg raises, and step-ups stimulate collagen formation in joints.

3. Hydration

Cartilage is 70% water. Drinking 8–10 glasses daily keeps collagen cushioned.

4. Avoid Sugar

Sugar breaks down collagen and accelerates knee degeneration.

5. Anti-inflammatory Foods

Ginger, garlic, berries, avocados, and leafy greens help protect collagen from damage.

FINAL WORD

Strengthening collagen in the knees and joints is not about waiting for pain to go away—it’s about actively feeding your body the materials it needs to repair itself. This unique 800-word recipe gives your joints the support, nourishment, and protection they need to stay flexible, cushioned, and pain-free.

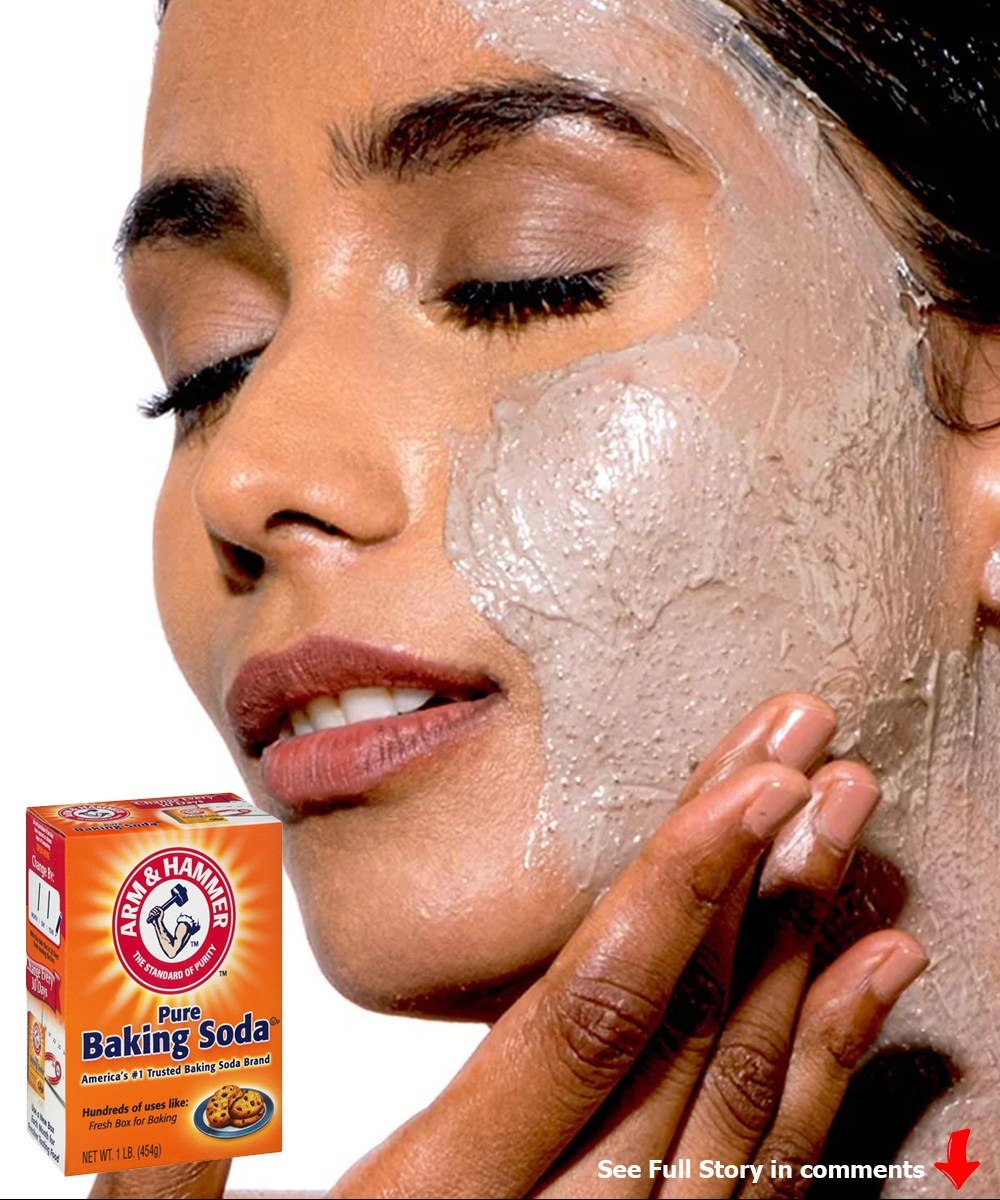
My nana swears by applying baking soda to her face. Here’s her 3 methods and how they work

Every family has that one remedy passed down through generations—simple, inexpensive, and used long before skincare aisles overflowed with serums and creams. For my nana, that remedy has always been baking soda. She kept a little jar of it near her bathroom mirror the way some keep luxury moisturizers, and whenever someone in the family had dull skin, clogged pores, or an unexpected blemish, Nana would say, “Go get the soda; it fixes everything.”

While baking soda is best used occasionally and gently—because it’s alkaline and can disrupt the skin barrier if overused—the methods she shared are clever, effective when used wisely, and surprisingly therapeutic. Here are Nana’s three signature baking-soda face treatments, how they work, and her comforting “kitchen-table logic” behind each one.

1. Nana’s Baking Soda Brightening Paste

Purpose: Exfoliation, glow-boosting, lifting dullness
Frequency: Once per week

Ingredients:

  • 1 teaspoon baking soda

  • 1 teaspoon filtered water

  • 2 drops honey (Nana’s “secret softener”)

How to Make It (Nana’s Recipe Style):
In a small bowl, mix the baking soda and water until you form a smooth, spreadable paste. Add the two drops of honey and stir until the texture becomes creamy and slightly glossy. Nana always said the honey was the “peacekeeper”—it soothed the skin while the baking soda did the heavy lifting.

Apply the paste gently across the face, focusing on areas that look dull: the forehead, around the nose, and the chin. Massage in tiny circular motions for 10–15 seconds only, then rinse with lukewarm water. Pat dry.

How It Works:
This method functions like a gentle mechanical exfoliator. Baking soda has a fine, soft grain that helps loosen old, dead skin cells sitting on the surface. Removing this buildup allows light to bounce off the skin more evenly, giving that “fresh glow” Nana always swore showed up instantly.

The added honey plays a protective role. Because baking soda has a high pH, honey helps provide a little moisture balance while calming redness. Used once weekly, this recipe can brighten skin without being too harsh.

2. Nana’s Blackhead-Banishing Baking Soda Steam Treatment

Purpose: Clearing clogged pores, softening blackheads, decongesting the T-zone
Frequency: Every 10–14 days

Ingredients:

  • A bowl of hot water

  • 1 teaspoon baking soda

  • Clean towel

How to Make It (Nana’s Recipe Style):
Nana believed steaming was “opening the door” of the skin before treating it. First, heat a bowl of water until it’s steaming—not boiling. Add the teaspoon of baking soda and stir until dissolved.

Sit comfortably over the bowl, place the towel over your head to trap the steam, and let your skin absorb the warm mist for 5 minutes. Nana insisted this step was “the gentle way to unclog, not the painful way.”

After steaming, rinse your face with cool water to tighten the pores back up.

How It Works:
The warm steam softens sebum and loosens debris inside the pores. Baking soda slightly enhances the softening effect by helping the water dissolve surface oil more effectively.

Unlike squeezing blackheads—which Nana forbade—this method uses heat and moisture to reduce congestion naturally. The result is skin that feels lighter, cleaner, and easier to maintain.

3. Nana’s Overnight Baking Soda Blemish Dot

Purpose: Reducing the appearance of pimples, calming inflammation, drying excess oil
Frequency: As needed

Ingredients:

  • ½ teaspoon baking soda

  • A few drops of water

How to Make It (Nana’s Recipe Style):
Mix the baking soda with just enough water to form a thick, sticky paste—the thicker the better. Using a cotton swab, dab a tiny dot directly on the blemish. Do not rub it across the skin; this recipe is spot-treatment only.

Leave the paste on for 20 minutes (Nana did overnight years ago, but modern advice suggests shorter for safety). Rinse thoroughly and pat dry.

How It Works:
Baking soda’s alkaline nature temporarily reduces surface oil, helping shrink the appearance of a new pimple. It also creates a mildly drying environment, which can help calm an inflamed spot. Because pimples thrive in oily environments, this drying action provides a quick visual improvement.

However, Nana’s overnight version worked for her because she had very oily skin; for most people, 20 minutes is ideal to avoid irritation.

How to Stay Safe While Using Nana’s Remedies

Nana always said, “A little soda goes a long way,” and she was right. Here’s how to keep these methods skin-friendly:

  • Don’t use baking soda daily. Its pH is high, and overuse can dry the skin or upset the moisture barrier.

  • Always patch test. Apply a tiny amount on your inner arm first.

  • Use soothing moisturizer afterward. Nana followed every treatment with a light layer of aloe or cold cream.

  • Avoid if you have sensitive or broken skin.

Used gently, these recipes offer classic old-school skincare charm with real benefits.

Nana’s Final Lesson

What made Nana’s baking-soda methods special wasn’t just the results—they were simple rituals that made you slow down, breathe, and care for yourself. Whether you used her brightening paste for a glow, her steam bowl to clear your head and your pores, or her spot treatment on a sudden blemish, each method felt like a warm piece of generational wisdom.

Cheesy Mashed Potato Puffs

If you’ve ever wondered what to do with leftover mashed potatoes, this Cheesy Mashed Potato Puffs recipe will make you look forward to having extra mash every time! These puffs are crispy on the outside, fluffy inside, and oozing with melted cheese — a perfect comfort snack or side dish that’s elegant enough for a dinner party yet simple enough for everyday meals.

Ingredients

(Makes 12–15 golden puffs)

  • 2 cups mashed potatoes (preferably cold leftovers)

  • 1 cup shredded cheddar cheese (or a blend of mozzarella and cheddar for a gooey center)

  • 2 large eggs

  • ¼ cup grated Parmesan cheese

  • 2 tablespoons butter, melted

  • 3 tablespoons milk or cream

  • 2 tablespoons chopped green onions or chives

  • ½ teaspoon garlic powder

  • ½ teaspoon onion powder

  • Salt and black pepper, to taste

  • ½ cup breadcrumbs (for coating, optional)

  • Cooking spray or a little melted butter (for greasing muffin tin)

Optional Add-Ins

  • Crumbled cooked bacon for a smoky touch

  • Finely chopped jalapeños for a spicy kick

  • Minced herbs like parsley or dill for freshness

  • A small cube of cheese hidden in the center for a molten surprise

Instructions

  1. Preheat & Prep
    Preheat your oven to 400°F (200°C). Grease a mini muffin pan lightly with cooking spray or melted butter. This helps the puffs lift out easily once baked.

  2. Mix the Base
    In a large mixing bowl, combine the mashed potatoes, eggs, milk, melted butter, Parmesan, and shredded cheddar. Mix until smooth and creamy. The eggs will help the mixture puff up beautifully in the oven.

  3. Season to Perfection
    Add garlic powder, onion powder, salt, pepper, and chopped green onions. Stir everything until evenly combined. The mixture should be thick but scoopable — if it’s too loose, add a spoonful of breadcrumbs or grated cheese to firm it up.

  4. Shape & Fill
    Spoon the mixture into the muffin cups, filling each one almost to the top. If you want a gooey surprise, press a small cube of cheese into the center of each puff and cover it with a little potato mixture.

  5. Crispy Finish (Optional)
    For extra crunch, sprinkle breadcrumbs over the tops or lightly roll each puff in breadcrumbs before baking.

  6. Bake to Golden Glory
    Bake for 20–25 minutes or until the tops are puffed and golden brown. The edges should crisp up, and you’ll smell that irresistible cheesy aroma filling the kitchen.

  7. Cool Slightly Before Serving
    Let the puffs rest for about 5 minutes before removing them from the pan. This allows them to firm up just enough to hold their shape perfectly.

Serving Ideas

Serve your Cheesy Mashed Potato Puffs as:

  • A snack or appetizer with sour cream or ranch dip

  • A side dish with roasted meats or grilled vegetables

  • A party favorite, easy to pick up and pop in your mouth

  • A breakfast bite, paired with scrambled eggs and crispy bacon

Chef’s Tips for the Perfect Puffs

  • Cold mashed potatoes work best because they’re firmer and hold their shape better.

  • Use sharp cheddar for a rich flavor, or swap for gouda, pepper jack, or Swiss.

  • Want to make them ahead? Mix and refrigerate the batter overnight, then bake fresh the next day.

  • You can also air fry them at 375°F (190°C) for 10–12 minutes for an even crispier crust.

Why This Recipe Is Unique

Unlike ordinary mashed potato fritters, these puffs are baked to perfection — not fried — making them light yet indulgent. The combination of Parmesan for flavor, cheddar for melt, and green onions for brightness transforms simple mashed potatoes into a gourmet delight. Each bite offers a contrast of textures: a crispy shell giving way to a soft, cheesy, cloud-like interior.

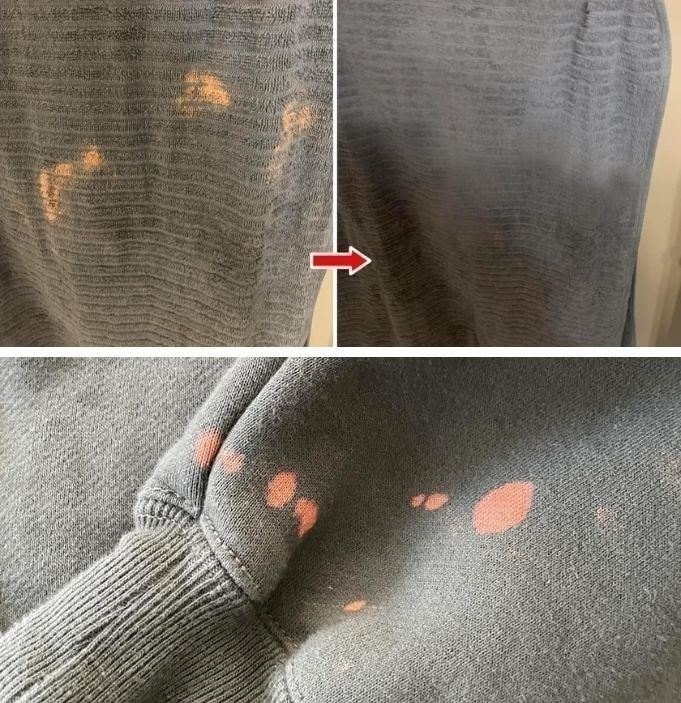
The 2 powerful techniques that you can apply at home to remove bleach stains

Bleach stains are one of the most frustrating laundry disasters. Unlike most stains, bleach doesn’t add color—it removes it. That means the fabric isn’t stained; it’s chemically lightened. But you’re not helpless. With the right “recipe,” you can disguise, restore, or completely revive the damaged area. This guide reveals two powerful at-home techniques—one for restoring color and one for camouflaging the damage—so your favorite clothes can look fresh again.

Technique 1: The DIY Color-Restoration Solution

“A Homemade Dye Repair Recipe That Brings the Color Back to Life”

This method works best for dark-colored clothing—black, navy, maroon, olive, chocolate brown, charcoal gray—anything where a small patch of fresh dye blends in smoothly. The goal is to reintroduce pigment only to the bleached area using ingredients easily found at home.

Ingredients (Your Color Repair Recipe)

  • 1 teaspoon fabric dye (black is most commonly used; match your garment’s color)
    OR instant alternatives:

    • Strong black tea

    • Strong coffee

    • Hair dye (temporary or semi-permanent; match color)

  • Q-tips or a fine paintbrush

  • A small bowl

  • Rubber gloves

  • White vinegar (optional—helps set dye)

  • Cotton swabs for blending

  • Warm water

Why It Works

Bleach strips pigments from fibers. This recipe adds controlled color only where needed. Tea and coffee contain natural tannins that cling to fibers, while fabric dye and hair dye act as concentrated color restorers.

Step-by-Step Recipe Instructions

1. Neutralize the Bleach First (VERY Important)

If bleach is still active, it will continue to eat the color—even the repair color you apply.
Make a neutralizing rinse:

  • Mix 1 tablespoon baking soda with 1 cup water.

  • Apply to the bleached spot.

  • Blot until the fabric no longer smells like bleach.

2. Prepare Your Color “Repair Dye”

Depending on the option you chose:

  • Fabric Dye: Mix ½ teaspoon dye with a few drops of warm water to create a paste.

  • Coffee/Tea: Brew extremely strong, almost syrup-level liquid.

  • Hair Dye: Mix according to instructions, but only make a teaspoon of mixture.

You want a thick, concentrated color—not watery.

3. Apply Color with Precision

Use a Q-tip or paintbrush and dab only on the bleached area.

  • Work slowly.

  • Build color little by little.

  • Let it absorb for 5 minutes.

  • Add more layers until the spot matches the rest of the fabric.

4. Blend the Edges

Use a slightly damp cotton swab to blur the edges so the repair looks natural, not like a block of color.

5. Set the Color

Dip a cotton pad in white vinegar and lightly press it on the stained area. Vinegar helps lock pigments into natural fibers.

6. Dry and Evaluate

Let the garment air dry completely.
If the spot is still faint, repeat another layer.

When This Technique Works Best

  • Small to medium bleach spots

  • Dark fabrics

  • Cotton, denim, canvas, linen, sweatshirts, hoodies

  • Clothing where a little variation won’t be visible

End Result

Your clothing regains a smooth, uniform color, and the bleach stain becomes unnoticeable—like it never happened.

Technique 2: The Fabric Color-Revive Paste (A Clever Camouflage Method)

“A paint-like recipe that hides bleach stains instantly”

Sometimes the bleach stain is:

  • too large,

  • too bright,

  • or the garment is multicolored or patterned.

In these cases, restoring exact color is nearly impossible—but camouflaging it is incredibly effective. This technique uses a fabric-safe paint paste that blends into the garment’s natural design.

Ingredients (Your Camouflage Paste Recipe)

  • 1 teaspoon fabric paint (color matched to garment)

  • ½ teaspoon acrylic paint (optional for blending)

  • 4–6 drops fabric medium (makes paint flexible)

  • Extra-fine paintbrush

  • A toothpick for mixing

  • Water

Why This Works

Fabric paint bonds to the fibers and creates a wearable, soft, permanent finish. Bleach spots usually appear light and irregular, and this technique allows you to “paint” the color back—almost like repairing a canvas.

Step-by-Step Instructions

1. Neutralize the Bleach (Same as Above)

Never skip this step.
Bleach must be fully deactivated before adding color.

2. Make the Color-Blending Paste

Mix:

  • 1 teaspoon fabric paint

  • 4 drops fabric medium

  • 2–3 drops water

Use a toothpick to blend until the texture is creamy—like thick yogurt.

3. Test the Shade

Paint a tiny dot on scrap fabric or inside the hem.
Adjust color by adding:

  • black → darken

  • white → lighten

  • brown → mute tone

  • a tiny bit of acrylic → adjust richness

4. Apply Thin Layers

Paint over the bleached patch with delicate strokes.
Let each thin layer dry before adding more.

This prevents cracking and ensures a smooth finish.

5. Blend the Surroundings

Use a barely-damp brush to feather the edges into the original fabric.
This gives a seamless effect.

6. Heat-Set for Permanence

Once fully dry:

  • Place a thin cloth over the area.

  • Iron on low heat for 20–30 seconds.

This locks the color permanently.

When This Technique Works Best

  • Large bleach spots

  • Multicolored or patterned clothing

  • Garments you want to artistically repair

  • T-shirts, hoodies, joggers, jackets, canvas totes

End Result

The stain becomes totally disguised, blending into the fabric’s natural tone. Sometimes the repaired area looks even better than the original, giving the garment a custom-designed look.

Final Thoughts: Choosing the Right Technique

  • If your stain is small and the garment is dark, choose Technique 1: Color Restoration.

  • If the stain is large or on patterned/light fabric, choose Technique 2: Camouflage Paste.

Both methods allow you to revive clothing that would otherwise be thrown away—saving money, reducing waste, and giving your garments a second life.

The 5 best nutrients to reduce swelling in the feet and legs

Swollen feet and legs—sometimes called edema—can sneak into your day like an uninvited guest. One minute you’re feeling light on your feet, and the next your ankles look like they borrowed water from the sea. Whether swelling happens after long hours standing, too much salt, hot weather, or circulation issues, one thing is clear: the right nutrients can make a world of difference. Think of this guide as a wellness recipe—each nutrient is an ingredient, and together they form a powerful remedy that supports circulation, reduces fluid buildup, and brings comfort back to your steps.

Just like a good dish needs balance, so does the body. Swelling is often a sign that your system is asking for extra support. Below are the top five nutrients that act like natural healers, helping to reduce swelling in the feet and legs while improving overall fluid movement.

1. Potassium – The Fluid Balancer

If swelling had a natural enemy, it would be potassium. This mineral keeps your body’s fluids in check by balancing sodium levels. When sodium is too high, water gets trapped in tissues—especially in the lower body. Potassium fights back by encouraging the kidneys to eliminate excess salt and water.

Best Sources

  • Bananas

  • Potatoes

  • Spinach

  • Avocado

  • Coconut water

Why It Reduces Swelling

Potassium acts like a traffic controller for your cells—guiding excess fluid out of the tissues and into circulation so it can be removed. Many people unknowingly consume too little potassium, making mild to moderate swelling much more common.

Simple “Recipe” Remedy

Coconut-Banana Potassium Smoothie

  • 1 banana

  • 1 cup coconut water

  • ½ cup spinach

  • 1 tsp lemon juice
    Blend and drink in the morning for improved fluid balance throughout the day.

2. Magnesium – The Circulation Supporter

If your feet feel heavy, tight, or achy, magnesium might be the missing link. This miracle mineral helps relax blood vessels, improve circulation, and prevent fluid from pooling in the legs.

Best Sources

  • Almonds

  • Dark chocolate

  • Black beans

  • Pumpkin seeds

  • Oats

Why It Helps

Magnesium supports nerve and muscle function and prevents the “stiff, swollen, tired” feeling in the lower body. It also fights inflammation, another hidden contributor to swelling.

Simple “Recipe” Remedy

Magnesium Morning Mix

  • 2 tbsp oats

  • 1 tbsp pumpkin seeds

  • 1 tbsp chopped almonds

  • Sprinkle of dark chocolate
    Enjoy as a quick snack or topping for yogurt. It fuels your body with magnesium that works behind the scenes to reduce fluid retention.

3. Vitamin C – The Vessel Strengthener

Vitamin C isn’t just an immune booster—it’s one of the most important nutrients for strengthening blood vessel walls. When capillaries weaken, fluid leaks into surrounding tissues, causing swelling in feet and legs. Stronger vessels = less leakage and faster recovery.

Best Sources

  • Citrus fruits

  • Strawberries

  • Bell peppers

  • Kiwi

  • Tomatoes

Why It Helps

Vitamin C boosts collagen production, which fortifies veins and arteries. It also reduces inflammation, helping swollen tissue recover faster.

Simple “Recipe” Remedy

Citrus Circulation Booster

  • 1 orange

  • ½ lemon

  • ½ cup strawberries

  • Dash of mint
    Blend into a refreshing drink to support healthy veins and reduce puffiness.

4. Omega-3 Fatty Acids – The Inflammation Fighters

When swelling is linked to inflammation—common in arthritis, prolonged standing, or poor circulation—Omega-3 fatty acids become an essential nutrient. They reduce inflammatory responses, helping swollen limbs return to normal size.

Best Sources

  • Salmon

  • Sardines

  • Walnuts

  • Chia seeds

  • Flaxseed oil

Why It Helps

Omega-3s improve blood flow by reducing blood thickness and calming inflammation throughout the body. This helps trapped fluid move more freely and prevents pressure from building in the legs.

Simple “Recipe” Remedy

Anti-Swelling Omega Bowl

  • 1 tbsp chia seeds

  • 1 tbsp crushed walnuts

  • ½ cup yogurt

  • 1 tsp honey

  • 1 tbsp flaxseed
    Mix and eat once daily for smoother circulation and reduced swelling.

5. Vitamin B6 – The Water Retention Regulator

Vitamin B6 is particularly powerful for people who experience swelling due to hormones, high salt intake, or chronic water retention. It helps regulate the body’s fluid processing systems and reduces bloating in the lower body.

Best Sources

  • Chicken

  • Tuna

  • Chickpeas

  • Spinach

  • Sunflower seeds

Why It Helps

Vitamin B6 supports kidney function and helps your cells release stored water. It also improves lymphatic flow, which is key for reducing puffiness around the ankles and calves.

Simple “Recipe” Remedy

B6 Power Snack

  • ½ cup chickpeas

  • 1 tsp olive oil

  • Pinch of paprika

  • Squeeze of lemon
    Enjoy as a mid-day snack to help your body shed excess water naturally.

Combine These Nutrients Into a Daily “Anti-Swelling Blend”

Just like a recipe becomes more powerful when ingredients complement each other, these nutrients work best when combined throughout your day. Here’s a sample wellness formula:

Anti-Swelling Daily Menu

  • Morning: Coconut-banana potassium smoothie

  • Mid-day: Chickpea B6 snack

  • Evening: Salmon or chia-walnut omega bowl

  • All day: Citrus water rich in vitamin C

  • Snacks: Almonds, oats, pumpkin seeds for magnesium

This simple routine supports circulation, reduces inflammation, strengthens blood vessels, and balances fluids—delivering noticeable relief in swollen feet and legs.

Rice Krispie Chocolate Chip Cookies

There are some cookies that make you stop mid-bite, look at the cookie in your hand, and wonder, “How did something this simple taste THIS good?” Rice Krispie Chocolate Chip Cookies fall exactly into that category. They are the perfect blend of nostalgia and creativity: the comforting warmth of homemade chocolate chip cookies paired with the airy crunch of Rice Krispies. These cookies hit every note—chewy centers, crisp edges, pockets of melted chocolate, and that delightful cereal snap that makes each bite feel like a celebration.

What makes this recipe special isn’t just the ingredients, but the technique and balance of textures. If you enjoy desserts that combine soft and crunchy elements, these cookies will become a constant in your kitchen. They’re also incredibly fun to make with kids, easy enough for beginners, and impressive enough to bring to parties or package as gifts. Let’s dive into the magic behind this unique cookie and how you can recreate it perfectly every time.

Why Rice Krispies Make These Cookies Unique

Classic chocolate chip cookies depend on butter, sugar, and flour for texture. But when you fold in Rice Krispies, the cookie transforms. The cereal acts like tiny flavor amplifiers—it soaks up a bit of the butter, stays crisp around the edges, and adds a lightness that regular cookies don’t have. Instead of being heavy or dense, these cookies feel almost “lifted,” offering crunch without hardness and chewiness without softness turning mushy.

Another advantage? Rice Krispies allow you to reduce flour slightly, which keeps the cookie tender. You’re essentially enhancing texture without compromising structure. The result is a cookie that tastes familiar yet completely new, bordering on bakery-level gourmet.


Ingredients You’ll Need

Dry Ingredients:

  • 1 ¼ cups all-purpose flour

  • ½ teaspoon baking soda

  • ½ teaspoon baking powder

  • ½ teaspoon fine salt

Wet Ingredients:

  • ½ cup (1 stick) unsalted butter, softened

  • ½ cup granulated sugar

  • ½ cup packed brown sugar

  • 1 large egg

  • 1 tablespoon vanilla extract

Mix-ins:

  • 1 ½ cups Rice Krispies cereal

  • 1 cup semi-sweet chocolate chips

  • Optional: ½ cup white chocolate chips or chopped pecans

Instructions – How to Make the Perfect Rice Krispie Chocolate Chip Cookies

1. Cream the Butter and Sugars

Start by beating softened butter, granulated sugar, and brown sugar together until light and fluffy. This step is crucial—it adds air to the mixture and ensures your cookies bake up soft and full-bodied with nicely lifted centers. Don’t rush it; two to three minutes of creaming makes a big difference.

2. Add the Egg and Vanilla

Mix in the egg and vanilla extract until fully combined. The vanilla enhances sweetness and brings warmth to the overall flavor profile, pairing beautifully with the cereal.

3. Whisk the Dry Ingredients Separately

In another bowl, whisk together flour, baking soda, baking powder, and salt. Keeping dry and wet ingredients separate until the right moment prevents overmixing, which keeps the cookies tender.

4. Combine Wet and Dry

Slowly add the dry ingredients into the butter mixture. Stir gently, only until the flour disappears. Overmixing at this stage leads to tough cookies, so stop as soon as it’s combined.

5. Fold in the Chocolate Chips and Rice Krispies

The best part! Add chocolate chips and Rice Krispies. Use a rubber spatula to fold them in instead of a mixer. This keeps the cereal from getting crushed and ensures even distribution.

Your dough will feel lighter and slightly crunchier than typical cookie dough—this is exactly what you want.

6. Chill the Dough (Optional but Powerful)

For thicker, bakery-style cookies, chill the dough for 25–45 minutes. The Rice Krispies maintain their crunch, and chilled butter prevents the cookies from spreading too much.

If you’re short on time, you can skip this step, but chilled dough produces a superior cookie.

7. Scoop and Bake

Preheat your oven to 350°F (175°C). Line a baking sheet with parchment paper.

Scoop about 2 tablespoons of dough per cookie and place on the sheet, leaving space because these will spread slightly. Bake for 9–12 minutes, depending on how soft or brown you want them.

The cookies should look slightly underbaked in the center when you take them out—this ensures that perfect chewy middle.

8. Cool and Enjoy

Let them cool on the tray for a few minutes before transferring to a rack. As they cool, the Rice Krispies regain a subtle crispness, giving each bite its signature texture.

Tips for Next-Level Cookies

  • Use browned butter for a richer, nutty flavor. Just cool it before mixing.

  • Mix cereal varieties—try Cocoa Krispies or Frosted Rice Krispies for playful variations.

  • Add mini marshmallows to turn these into “cookie-style Rice Krispie treats.”

  • Drizzle with melted chocolate after cooling for an elegant finish.

Why You’ll Make This Recipe Again and Again

Rice Krispie Chocolate Chip Cookies are one of those recipes that live on your fridge, get passed to friends, and become your signature treat. They’re soft. They’re crunchy. They’re nostalgic. And most importantly—they’re unique.

Moist Pineapple Cake”

There are cakes that impress with elaborate decoration, and then there are cakes that win hearts because every slice is irresistibly soft, fragrant, and unforgettable. This Moist Pineapple Cake belongs to the second category. It is the kind of dessert that feels like sunshine baked into a pan—lightly tropical, delicately sweet, and dripping with juicy pineapple goodness. What makes this particular recipe unique is the way pineapple is incorporated at three different stages: blended directly into the batter, folded in as small chunks, and finally used to create a luscious glaze that soaks into the warm cake. All of this results in the kind of velvety texture that makes people ask for seconds (and the recipe).

This is not a typical sponge cake with a splash of pineapple flavoring. Instead, this cake treats pineapple as the star, allowing its natural brightness, gentle acidity, and tender texture to define the entire experience. When baked, pineapple releases moisture that keeps the cake soft for days, making it an ideal treat for gatherings or make-ahead desserts. The batter itself is simple and forgiving—no mixer required, no complicated techniques—just wholesome ingredients and the magic of tropical fruit.

Ingredients

For the Cake

  • 1 ¾ cups all-purpose flour

  • 1 ½ teaspoons baking soda

  • ½ teaspoon baking powder

  • ½ teaspoon salt

  • 1 cup granulated sugar

  • ½ cup brown sugar, lightly packed

  • 2 large eggs, room temperature

  • ½ cup vegetable oil (or melted coconut oil for extra aroma)

  • 1 teaspoon vanilla extract

  • ½ teaspoon almond extract (optional but highly recommended)

  • 1 cup crushed pineapple (with juice, not drained)

  • ½ cup finely chopped pineapple tidbits

  • ½ cup plain yogurt or sour cream

For the Pineapple Glaze

  • ½ cup pineapple juice

  • 2 tablespoons butter

  • ¼ cup sugar

  • ½ teaspoon vanilla

  • Pinch of salt

Optional Toppings

  • Toasted coconut

  • Whipped cream

  • Pineapple flowers or caramelized pineapple pieces

Instructions

1. Prepare Your Pan

Preheat your oven to 350°F (175°C) and grease a 9-inch round pan or an 8×8 square pan. Line the bottom with parchment paper if you want a perfectly clean release. Pineapple cakes can be tender, so this small extra step is worth it.

2. Combine the Dry Ingredients

In a medium bowl, whisk together:

  • flour

  • baking soda

  • baking powder

  • salt

This step ensures that the cake rises evenly and stays light despite the moisture from the fruit. Pineapple-heavy cakes can sometimes become dense if the leavening isn’t well distributed, so do not skip the whisking.

3. Mix the Wet Ingredients

In a large bowl, whisk the eggs, granulated sugar, and brown sugar until the mixture looks pale and slightly thickened. Add:

  • oil

  • vanilla

  • almond extract (if using)

  • yogurt or sour cream

Whisk again until smooth. The yogurt helps create a beautifully velvety crumb and balances the sweetness with gentle tang.

4. Incorporate the Pineapple

Add the crushed pineapple with all its juice to the wet mixture. The juice is a key component—it keeps the cake moist and naturally sweet.

Then, fold in the pineapple tidbits. These small pieces will soften as they bake but still offer tiny pockets of fruit throughout the cake.

5. Add Dry to Wet

Gently fold the dry ingredients into the wet mixture. The batter will be slightly thick but glossy. Mix only until you no longer see streaks of flour. Over-mixing can create a tough cake, while gentle folding ensures tenderness.

6. Bake the Cake

Pour the batter into your prepared pan and smooth the top. Bake for 32–38 minutes, depending on your oven. The cake is done when the top is golden and a toothpick inserted in the center comes out clean or with moist crumbs.

While the cake bakes, prepare the glaze.

The Pineapple Glaze: The Secret to Deep Moisture

This glaze is where the magic happens. Instead of icing the cake after it cools, you pour the warm glaze over the still-warm cake. It seeps into the crumb, leaving behind a glossy finish and unbelievable moistness.

To Make the Glaze:

In a small saucepan, combine:

  • pineapple juice

  • butter

  • sugar

  • pinch of salt

Bring to a gentle simmer and cook for two minutes, just until the sugar dissolves and the mixture thickens slightly. Remove from heat and stir in the vanilla.

Glaze the Cake

Once the cake is out of the oven, poke tiny holes across the top with a toothpick or skewer. Slowly pour the warm glaze over the cake, allowing it to soak in.

Let the cake cool completely in the pan. As it cools, it absorbs the glaze, becoming incredibly soft and flavorful.

Serving Suggestions

This cake is delicious as-is, but it becomes extraordinary with a few optional garnishes:

  • Toasted coconut flakes sprinkled over the top

  • A dollop of lightly sweetened whipped cream

  • Fresh pineapple slices or caramelized pineapple pieces

  • A drizzle of rum-infused syrup for adults

It pairs beautifully with tea, coffee, or even a scoop of vanilla ice cream for a summery dessert.

Tips for the Perfect Moist Pineapple Cake

  1. Use pineapple in juice, not syrup.
    Syrup is too sweet and can make the cake heavy.

  2. Do not drain the crushed pineapple.
    The natural juice is essential to the cake’s moisture.

  3. Oil makes the cake softer than butter.
    But coconut oil adds lovely tropical aroma if you prefer.

  4. Let the cake rest for at least two hours before slicing.
    The texture improves significantly as it sets.

  5. This cake tastes even better the next day.
    Store it covered at room temperature or in the refrigerator.

Final Notes

This Moist Pineapple Cake is more than a simple dessert—it’s a comforting, sunshine-infused treat that brings the tropics to any kitchen. Simple ingredients, minimal effort, and a flavor that lingers long after the last bite. Whether you make it for a family gathering, a celebration, or a quiet afternoon indulgence, this cake promises warmth, tenderness, and tropical delight in every slice.

Old-Fashioned Rice Pudding

There’s something timeless about a bowl of old-fashioned rice pudding. Long before boxed mixes and instant desserts, rice pudding was a quiet luxury that simmered slowly on family stoves. It required patience, a gentle hand, and a willingness to let ordinary ingredients—milk, rice, sugar—transform into something comforting. This recipe stays true to those roots, but with a few modern touches that enhance flavor without compromising tradition.

Ingredients

  • 1 cup medium-grain white rice

  • 4 cups whole milk, plus 1 extra cup as needed

  • 1 cup heavy cream

  • ½ cup granulated sugar

  • ¼ teaspoon fine sea salt

  • 2 large eggs, lightly beaten

  • 2 tablespoons unsalted butter

  • 1½ teaspoons pure vanilla extract

  • ½ teaspoon ground cinnamon, plus more for dusting

  • ¼ teaspoon freshly grated nutmeg

  • ½ cup golden raisins (optional but strongly encouraged)

Why This Recipe Works

Old-fashioned rice pudding succeeds when the rice is allowed to release its starch slowly, creating a naturally creamy texture without relying too heavily on thickeners. Many modern recipes rush the process or rely on condensed milk for richness. This version is purposefully patient: gentle heat, gradual temperature changes, and a full hour of simmering make all the difference. The result is a pudding that tastes like something your grandmother might have made—if your grandmother was unreasonably committed to dessert perfection.

Medium-grain rice is ideal here. It sits comfortably between the chew of long-grain and the almost doughy quality of short-grain. As it cooks, it softens and plumps, but still maintains a pleasant bite. If all you have is long-grain, you can use it, but the texture will be slightly looser. Arborio rice, while creamy, can make the pudding overly thick and dense, so it’s not recommended unless you prefer a risotto-style dessert.

Step-by-Step Instructions

1. Rinse the Rice Thoroughly

Place the rice in a fine-mesh strainer and rinse under cold water until the runoff is mostly clear. This removes excess surface starch that can make the pudding gluey rather than creamy. Rinsing also prevents the rice from clumping as it cooks.

2. Start the Base Slowly

In a heavy-bottomed pot or Dutch oven, combine the milk, heavy cream, sugar, and sea salt. Heat over medium-low until tiny bubbles form around the edges.

This step matters. If you bring the dairy to a full simmer too quickly, it can scorch on the bottom or form a skin. Gentle heat encourages the rice to absorb the liquids evenly.

3. Add the Rice and Begin the Long Simmer

Stir in the rinsed rice and reduce the heat to low. Cover the pot halfway—enough to allow steam to escape—and cook for 45 to 55 minutes. Stir every ten minutes, scraping the bottom to prevent sticking.

You’ll notice the mixture gradually thickening. The grains will swell and soften, and the scent of warm milk will fill the kitchen. This slow transformation is the heart of old-fashioned cooking: simple ingredients rewarded with patience.

4. Temper the Eggs for Silky Richness

Once the pudding looks thick but still somewhat fluid, it’s time to enrich it with eggs. In a separate bowl, whisk the beaten eggs. Ladle in a small scoop of the hot pudding and whisk quickly to raise the eggs’ temperature without scrambling them. Add another ladleful and whisk again.

Now pour the tempered eggs back into the pot, stirring constantly. The mixture will quickly become creamier and slightly thicker.

5. Add Flavor and Finish

Remove the pot from the heat. Stir in the butter, vanilla extract, cinnamon, nutmeg, and raisins if using. The butter gives the pudding a velvety texture, while the spices add warm, nostalgic aromas.

Let the pudding sit for 10 minutes before serving. As it cools, it thickens naturally. If it becomes too firm, stir in up to 1 cup of additional warm milk to loosen it.

Serving Suggestions

Traditionally, rice pudding is served warm, spooned into bowls and dusted with a little extra cinnamon. Warm raisins become wonderfully plump, and the creamy texture is soothing without being heavy.

That said, old-fashioned rice pudding also shines cold. After a night in the refrigerator, the flavors deepen and the pudding becomes luxuriously thick. Serve with:

  • A drizzle of honey

  • A few toasted almonds for crunch

  • A spoonful of berry compote

  • Freshly grated nutmeg on top

Want a more decadent take? Add a dollop of whipped cream or swirl in a spoonful of caramel sauce.

Tips for Perfect Old-Fashioned Rice Pudding

1. Use a heavy pot. Thin pots scorch milk easily.
2. Stir frequently. A gentle stir prevents burnt patches from forming on the bottom.
3. Don’t rush the simmer. Low and slow is crucial to letting the rice release its natural starch.
4. Adjust thickness to taste. Some prefer pudding that’s spoonable; others like it almost pourable. Milk is your best friend for adjusting consistency.
5. Spices are flexible. Add cardamom, orange zest, or a splash of rum if you want a twist.

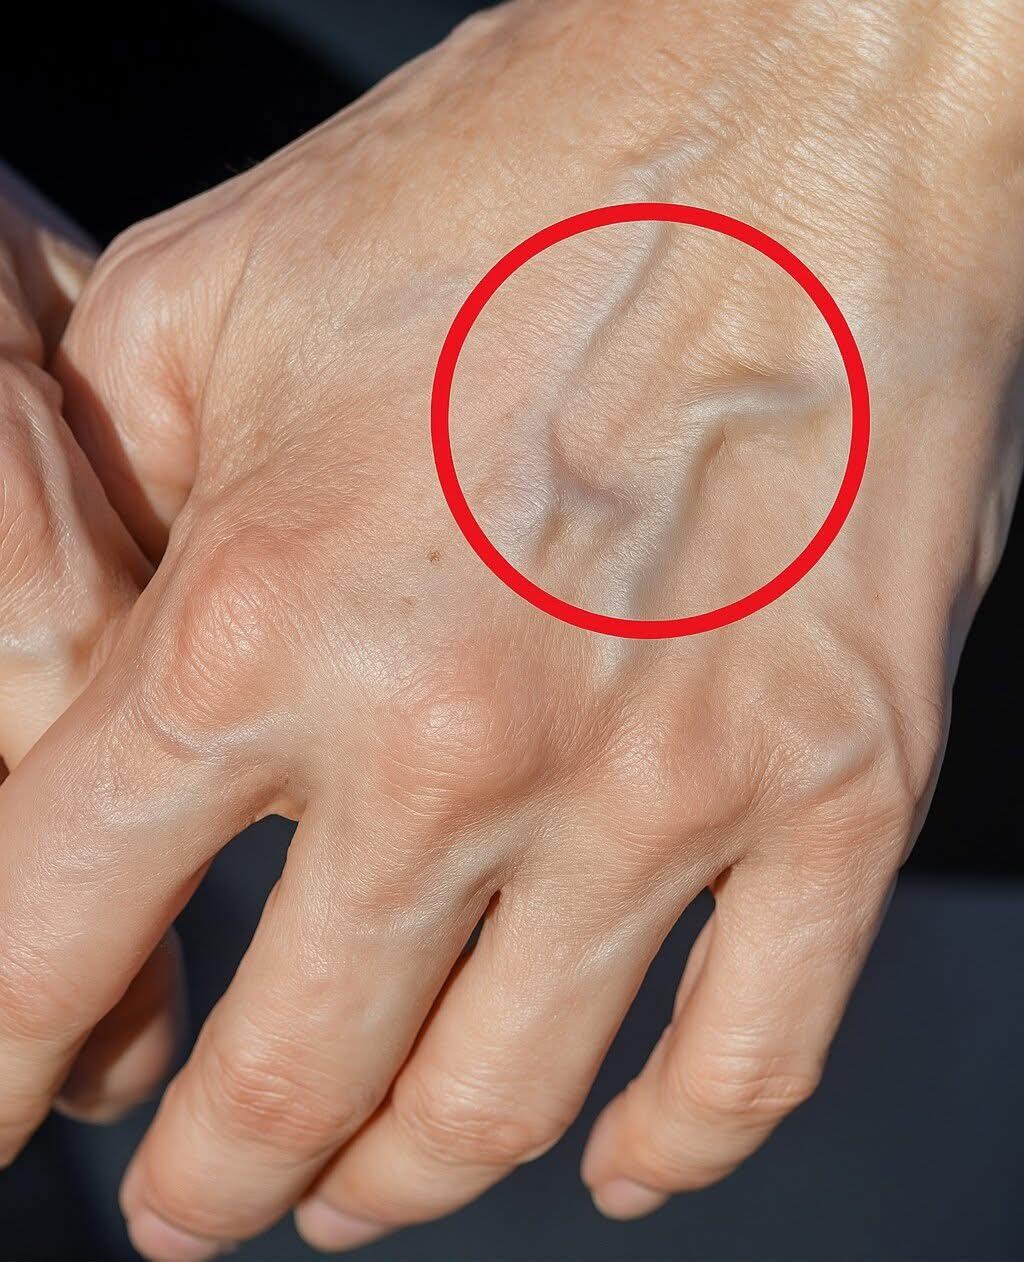
When to Worry About Veins That Appear Out of Nowhere

Just like cooking, understanding your body sometimes requires breaking things down into simple ingredients and clear steps. Sudden veins that pop up—on your hands, legs, chest, or anywhere else—can be alarming. Some are totally harmless; others are worth paying attention to. Consider this your unique recipe for knowing when a newly visible vein is normal… and when it’s time to take it seriously.

Ingredients You’ll Need

  • 1 cup of awareness of your normal vein appearance

  • 2 tablespoons of knowledge about common causes

  • A dash of caution for warning signs

  • A pinch of curiosity about long-term patterns

  • Optional: a professional medical opinion for peace of mind

Step 1: Prep Work – Know Why Veins Might Suddenly Become Visible

Before deciding something is wrong, understand that your veins can change appearance for many harmless reasons. Here are the most common factors:

1. Temperature Changes

Heat makes veins expand; cold makes them shrink. After a hot shower or a workout, you may notice veins you’ve never paid attention to before.

2. Exercise or Physical Strain

Weight lifting, running, yoga, or even carrying groceries can temporarily increase blood flow and make veins bulge.

3. Low Body Fat or Recent Weight Loss

Reduced fat under the skin gives veins less “padding.” Veins that were always there simply become more noticeable.

4. Aging

As skin thins with age, veins become easier to see. This is especially common on the hands and legs.

5. Genetics

Some people are naturally more vascular. If your parents had prominent veins, you may too.

These situations are the “basic ingredients”—normal, harmless, and expected.

Step 2: Add Seasoning – When Sudden Veins Are Not a Big Concern

You can usually relax when:

✔ The vein appears after exercise and fades afterward

Temporary swelling from increased blood flow is normal.

✔ You’ve lost weight recently

Veins near the surface may become more obvious.

✔ The weather has been unusually hot

Heat-induced dilation can reveal veins you hadn’t noticed before.

✔ The veins don’t hurt and there’s no swelling

Painless changes often reflect natural body variations.

Think of these as mild spices in your recipe—not signs of anything concerning.


Step 3: Simmer Slowly – When to Pay Attention

Certain symptoms mean you should keep the heat on low and observe carefully. Veins that seem to appear out of nowhere become significant when they’re accompanied by the following:

1. Pain, Tenderness, or Warmth Along the Vein

These can indicate:

  • Thrombophlebitis (vein inflammation)

  • A clot in a superficial vein

While often not dangerous, they do require medical evaluation.

2. Sudden Swelling in One Limb

If one arm or leg becomes swollen, tight, or heavy—especially with a new vein—this can be a sign of a deep vein thrombosis (DVT). DVT is serious and requires immediate medical care.

3. Veins That Are Twisted or Rope-Like

Large, bulging, twisting veins in the legs may be:

  • Varicose veins

  • Early signs of venous insufficiency

These conditions may worsen over time if ignored.

4. Skin Changes Around the Vein

Look for:

  • Redness

  • Darkening of skin

  • Dry, itchy patches

  • Ulcers forming near ankles (in chronic venous disease)

Changes in the “surface layer” of your recipe—your skin—can signal deeper issues.

5. Shortness of Breath or Chest Pain With a New Leg Vein

This combination is rare but serious and warrants emergency help.

6. Veins That Appear With No Clear Trigger

If you’re not exercising more, haven’t lost weight, and haven’t changed medications, new veins that appear suddenly and stay visible may need to be investigated.


Step 4: Blend It All Together – What Could Sudden Veins Mean?

Here are some possible explanations—again, general and not diagnostic:

  • Hormonal changes (pregnancy, menopause, birth control pills)

  • Increased blood pressure during exertion

  • Valve weakness in leg veins

  • Dehydration, which makes veins more pronounced

  • Infection, though rare

  • Autoimmune disorders affecting blood vessels

  • Medication effects (like steroids)

Most causes are benign, but knowing the possibilities helps you adjust your “health recipe” accordingly.


Step 5: Serve With Care – When to Seek Medical Advice

Reach out to a healthcare provider if:

  • The vein suddenly appears and is painful

  • The area is warm, red, or swollen

  • You notice multiple new veins appearing quickly

  • The change comes with fatigue, fever, or unexplained symptoms

  • You have risk factors such as recent surgery, long travel, pregnancy, or smoking

Think of your doctor as the master chef—there to help when your recipe isn’t turning out quite right.


Final Stir: How to Keep Your Veins Healthy

To support healthy veins:

  • Stay hydrated

  • Move regularly, especially on long flights or during desk work

  • Maintain a healthy weight

  • Elevate your legs when resting

  • Avoid tight clothing that restricts blood flow

  • Don’t ignore lingering leg pain or swelling


Conclusion

Sudden veins can be surprising, but they’re not always cause for alarm. Many are harmless changes in blood flow, temperature, or body composition. The key is paying attention to whether they come with discomfort, swelling, or skin changes. With this unique recipe in hand, you’ll know exactly when to relax and when to take action.