Papaya Seed Detox Drink for Liver Support and Belly Fat Reduction

Papaya is often celebrated as a digestive superfruit, but many people overlook its most powerful part—the seeds. Those small black seeds inside the fruit are packed with enzymes, antioxidants, and beneficial plant compounds that may help support liver function, improve digestion, and reduce bloating. Combined with fresh papaya flesh, this simple detox recipe can be a refreshing addition to your morning routine.

Below is a complete 800-word recipe and guide to preparing a papaya seed detox drink designed to support overall wellness.


Why Papaya and Papaya Seeds?

Papaya contains papain, a digestive enzyme that helps break down proteins and reduce digestive stress. It is rich in vitamin C, vitamin A, folate, and fiber. Papaya seeds, though slightly peppery in taste, contain compounds that may support liver cleansing and help reduce harmful bacteria in the gut.

When digestion improves and bloating decreases, the abdomen may appear slimmer. Supporting liver function can also help the body process fats more efficiently. While no drink alone causes dramatic weight loss, adding this nutrient-rich recipe to a balanced lifestyle may contribute to better overall health.


Ingredients

  • 1 cup ripe papaya cubes (fresh, not canned)

  • 1 teaspoon fresh papaya seeds (start with ½ teaspoon if new to them)

  • 1 tablespoon fresh lemon juice

  • 1 teaspoon raw honey (optional)

  • 1 cup cold water or coconut water

  • 3–4 ice cubes (optional)


Preparation Steps

Step 1: Prepare the Papaya

Cut a ripe papaya in half lengthwise. Scoop out the black seeds and set aside about one teaspoon. Remove the skin and chop one cup of the orange flesh into small cubes.

Make sure the fruit is ripe. It should be slightly soft to the touch and orange in color. Unripe papaya can taste bitter and may not blend well.

Step 2: Rinse the Seeds

Place the seeds in a small strainer and rinse them under cool water to remove any pulp. Pat them dry with a paper towel. Fresh seeds have a peppery, slightly bitter taste, similar to mustard or black pepper.

If you are new to papaya seeds, begin with half a teaspoon. The flavor can be strong at first, and it is best to allow your body to adjust gradually.

Step 3: Blend the Ingredients

In a blender, combine:

  • 1 cup papaya cubes

  • 1 teaspoon papaya seeds

  • 1 tablespoon lemon juice

  • 1 cup water or coconut water

  • 1 teaspoon honey (if desired)

Blend for 30–45 seconds until smooth. If you prefer a smoother texture, you may strain the drink, but keeping the pulp adds valuable fiber.

Add ice cubes and blend again briefly if you prefer it chilled.

Step 4: Serve Immediately

Pour into a glass and drink immediately for maximum freshness and nutrient benefit. This drink is best consumed in the morning on an empty stomach.


How to Use This Drink

For best results, drink this detox blend 3–4 times per week in the morning. Consistency matters more than quantity. Overconsumption of papaya seeds may cause digestive discomfort, so limit intake to no more than 1 teaspoon per day.

After drinking, wait at least 20–30 minutes before eating breakfast. This allows your digestive system to absorb the nutrients efficiently.


Potential Benefits

1. Supports Liver Health

Papaya seeds contain plant compounds that may help protect the liver from oxidative stress. Antioxidants help neutralize free radicals, which can damage cells over time.

2. Improves Digestion

Papain enzyme supports protein digestion and may reduce bloating and heaviness after meals. Fiber in papaya promotes regular bowel movements.

3. Reduces Bloating

Many people mistake bloating for body fat. Improving digestion and reducing water retention can create a visibly flatter abdomen.

4. Natural Detox Support

The combination of hydration, fiber, antioxidants, and digestive enzymes supports the body’s natural detoxification systems.


Optional Variations

If you want to enhance the benefits or adjust the flavor, try these additions:

  • ½ teaspoon grated ginger for extra digestive support

  • A pinch of turmeric for anti-inflammatory benefits

  • A few mint leaves for freshness

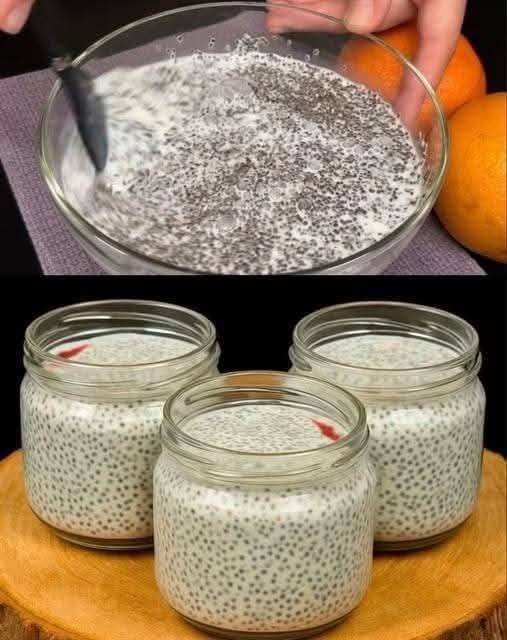
  • Chia seeds (1 teaspoon) for added fiber

Blend thoroughly if adding extra ingredients.


Important Precautions

  • Pregnant women should avoid papaya seeds.

  • Do not exceed recommended amounts.

  • If you have a medical condition or are on medication, consult a healthcare professional before starting any detox routine.

  • This drink is not a replacement for medical treatment or a balanced diet.

True health transformation comes from consistent habits: balanced nutrition, regular exercise, hydration, and quality sleep.


Lifestyle Tips to Maximize Results

To enhance the benefits of this drink:

  • Drink at least 6–8 glasses of water daily.

  • Reduce processed foods and added sugars.

  • Include lean protein and vegetables in meals.

  • Walk at least 30 minutes daily.

  • Get 7–8 hours of sleep each night.

These habits support liver function and healthy weight management naturally.


Final Thoughts

This papaya seed detox drink is simple, affordable, and easy to prepare at home. The combination of ripe papaya, seeds, lemon, and hydration creates a refreshing blend that supports digestion and overall wellness.

While no single recipe can magically transform the body, consistent healthy habits combined with nutrient-dense foods like papaya can make a noticeable difference over time. Start slowly, listen to your body, and enjoy this natural addition to your wellness routine.

Difference Between Green Onions Scallions Spring Onions and Chives

Green onions, scallions, spring onions, and chives are often used interchangeably in recipes, yet they are not exactly the same. While they all belong to the allium family—which includes garlic, leeks, and bulb onions—they differ in appearance, flavor intensity, and culinary use. Understanding these differences can elevate your cooking and help you choose the right ingredient for the right dish. Below is a detailed guide explaining how each one differs and how to use them effectively in your recipes.

Green Onions and Scallions: Are They the Same?

In most grocery stores and recipes, green onions and scallions refer to the same vegetable. They are young onions harvested before the bulb fully develops. You will recognize them by their long, slender green stalks and small white base. The bulb is either very small or slightly rounded but not fully formed.

Flavor Profile:
Green onions (or scallions) have a mild onion flavor. The white part has a sharper taste, while the green tops are milder and slightly grassy.

Culinary Uses:
They are incredibly versatile and can be eaten raw or cooked. You’ll often find them:

  • Sliced over soups and salads

  • Mixed into scrambled eggs or omelets

  • Stirred into fried rice or noodle dishes

  • Used as garnish for baked potatoes and tacos

Because their flavor is delicate, they are perfect for recipes where you want a hint of onion without overpowering the dish.

Spring Onions: A More Mature Version

Spring onions look similar to green onions but are harvested later in the growing process. Unlike scallions, they have a noticeable round bulb at the base. The bulb can be white or purple depending on the variety.

Flavor Profile:
Spring onions have a stronger, more traditional onion taste compared to scallions. The bulb is sweeter and more pronounced, while the green tops remain somewhat mild.

Culinary Uses:
Due to their fuller flavor, spring onions work well in both raw and cooked dishes:

  • Grilled whole with olive oil and salt

  • Roasted alongside meats and vegetables

  • Sliced thin for salads

  • Pickled for a tangy side

When cooked, the bulb becomes tender and slightly sweet, making it ideal for roasting or grilling.

Chives: The Delicate Herb

Chives are quite different from the others in appearance and use. They are classified more as an herb than a vegetable. Chives grow in thin, hollow green blades without any noticeable bulb.

Flavor Profile:
Chives have a very mild onion flavor, much subtler than scallions or spring onions. They add freshness rather than strong onion intensity.

Culinary Uses:
Chives are typically used fresh and added at the end of cooking:

  • Sprinkled over baked potatoes

  • Mixed into cream cheese or sour cream

  • Garnished on soups

  • Blended into salad dressings

Cooking chives too long can destroy their delicate flavor, so they are best used raw or lightly stirred in at the end.

Key Differences at a Glance

Appearance:

  • Green onions/scallions: Long green stalks, small undeveloped white bulb

  • Spring onions: Larger rounded bulb with thicker stalks

  • Chives: Thin, grass-like blades with no visible bulb

Flavor Strength:

  • Mildest: Chives

  • Mild to moderate: Green onions/scallions

  • Strongest and sweetest bulb: Spring onions

Best Uses:

  • Garnish: Chives and green tops of scallions

  • Stir-fries and sautés: Green onions

  • Grilling and roasting: Spring onions

Simple Recipe: Creamy Herb and Onion Spread

To truly appreciate the differences, try this simple creamy spread that uses scallions and chives together.

Ingredients:

  • 1 cup cream cheese (softened)

  • 2 tablespoons finely chopped green onions (white and green parts)

  • 1 tablespoon fresh chives, finely chopped

  • 1 tablespoon lemon juice

  • Salt and black pepper to taste

Instructions:

  1. In a medium bowl, combine the softened cream cheese and lemon juice.

  2. Stir in the chopped green onions and chives.

  3. Season with salt and pepper.

  4. Mix until smooth and evenly combined.

  5. Refrigerate for 30 minutes before serving to allow flavors to blend.

Serve this spread on toasted bread, crackers, or as a dip for fresh vegetables. The scallions add a mild onion bite, while the chives contribute a gentle herbal note.

Substitution Tips

If a recipe calls for scallions and you only have chives, you can substitute them, but use more chives for similar impact since they are milder. If you only have spring onions, use less of the bulb portion to avoid overpowering the dish.

For cooked recipes, spring onions can replace scallions, but keep in mind the stronger flavor. For raw garnishes, chives are usually the best choice.

Final Thoughts

Though green onions, scallions, spring onions, and chives are closely related, each brings something unique to the kitchen. Scallions and green onions are essentially the same and offer versatility and mild flavor. Spring onions provide a stronger, sweeter bulb perfect for roasting and grilling. Chives, delicate and herb-like, are ideal for finishing dishes with subtle onion freshness.

Knowing these distinctions ensures better flavor balance and more confident cooking. Whether you’re making a stir-fry, creamy dip, or fresh salad, choosing the right allium can make all the difference in your recipe’s final taste.

Golden Lemon Honey Infusion

Lemon, Ginger, and Honey Infusion

A soothing homemade tonic for overall wellness

If you’ve seen claims that a simple lemon and ginger drink can “restore 100% vision,” it’s important to approach them with caution. While lemons, ginger, and honey are incredibly healthy ingredients packed with nutrients and antioxidants, no drink can instantly reverse vision problems or replace medical treatment or prescription glasses. That said, this natural infusion can support overall wellness, hydration, and immune health — all of which contribute to maintaining healthy eyes and a healthy body.

Here’s a simple, refreshing recipe you can prepare at home.


Ingredients

  • 2 large organic lemons

  • 1 medium fresh ginger root (about 3–4 inches)

  • 1 cup raw honey (preferably organic)

  • 2½ cups warm filtered water (not boiling)

  • Optional: ½ teaspoon turmeric powder or a small fresh turmeric slice

  • Optional: a pinch of black pepper (if adding turmeric)


Why These Ingredients?

Lemons are rich in vitamin C, an antioxidant that helps protect cells from oxidative stress. Vitamin C plays a role in supporting immune health and may contribute to maintaining healthy tissues, including those in the eyes.

Ginger contains powerful compounds like gingerol, known for anti-inflammatory and antioxidant properties. It supports circulation and digestion and may help reduce inflammation in the body.

Honey is naturally antibacterial and soothing. It adds sweetness while offering trace antioxidants and enzymes, especially when raw and unprocessed.

Turmeric (optional) contains curcumin, another strong antioxidant that supports overall wellness.

While these ingredients promote health, they are not a cure for vision loss. However, a nutrient-rich diet can support long-term eye health when combined with proper medical care.


Step-by-Step Preparation

Step 1: Prepare the Lemons

Wash the lemons thoroughly under running water. If you’re using organic lemons, you can keep the peel for extra nutrients. Slice them into thin rounds, removing any seeds. Thin slices help release more flavor and nutrients into the infusion.

Step 2: Prepare the Ginger

Peel the ginger root using a spoon or vegetable peeler. Slice it thinly or grate it for a stronger infusion. The thinner the slices, the more intense the flavor will be.

Step 3: Layer the Ingredients

In a clean glass jar (about 1-liter capacity), begin layering lemon slices and ginger. Add a layer of lemon, then ginger, and repeat until the jar is nearly full.

If using turmeric, add it between layers. If adding black pepper, sprinkle just a tiny pinch to enhance turmeric absorption.

Step 4: Add Honey

Pour the raw honey slowly over the layered ingredients. Make sure the honey coats and covers the lemon and ginger completely. You may need to gently press the ingredients down with a spoon to remove air pockets.

Step 5: Add Warm Water

Warm your filtered water slightly — it should be warm to the touch but not hot, as excessive heat can destroy beneficial enzymes in raw honey. Pour the water into the jar, leaving about half an inch of space at the top.

Step 6: Seal and Rest

Close the jar tightly and allow it to sit at room temperature for 6–8 hours. After that, store it in the refrigerator for up to one week.

The flavors will intensify over time as the ingredients infuse.


How to Use

Each morning, stir the jar gently. Pour 2–3 tablespoons of the mixture into a cup and add warm water to dilute. You can also drink it chilled over ice for a refreshing beverage.

For best results:

  • Drink once daily in the morning.

  • Use consistently for 2–3 weeks.

  • Combine with a balanced diet rich in leafy greens, carrots, berries, and omega-3 fats for additional eye-supporting nutrients.


Potential Benefits

While it won’t “throw away your glasses,” this infusion may:

  • Support immune function

  • Provide antioxidant protection

  • Aid digestion

  • Promote hydration

  • Support circulation

  • Reduce mild inflammation

Good circulation and antioxidant intake are important for maintaining healthy eyes over time, but they are just one piece of the puzzle. Regular eye exams, proper lighting, screen breaks, and medical guidance are essential for preserving vision.


Storage Tips

  • Keep refrigerated after the first 8 hours.

  • Always use a clean spoon when scooping to prevent contamination.

  • Discard if you notice fermentation, mold, or an unusual smell.

  • Best consumed within 7 days.


Who Should Avoid It?

  • People with citrus allergies

  • Individuals with diabetes should monitor honey intake

  • Those with acid reflux may need to dilute it more

  • Anyone on blood-thinning medication should consult a healthcare provider before adding large amounts of ginger or turmeric


Final Thoughts

Natural remedies can be wonderful additions to a healthy lifestyle, but it’s important to separate wellness support from unrealistic claims. No homemade drink can instantly cure vision problems, cataracts, or refractive errors. However, nourishing your body with antioxidant-rich ingredients like lemon, ginger, and honey can contribute to overall vitality.

Think of this infusion as a daily wellness tonic — a gentle, natural way to support your immune system, improve hydration, and enjoy a refreshing boost. Pair it with a healthy diet, regular exercise, proper sleep, and routine eye checkups for the best long-term results.

Consistency matters more than quick fixes. Small daily habits often lead to meaningful improvements over time.

Enjoy your homemade lemon, ginger, and honey infusion as part of a balanced lifestyle — and keep your glasses if you need them!

Teriyaki Chicken Recipe

Teriyaki Chicken Recipe – Sweet, Savory & Irresistibly Juicy

Teriyaki chicken is one of those dishes that instantly brings comfort and bold flavor to the table. With its glossy, sticky glaze and perfect balance of sweet and savory notes, this Japanese-inspired classic has become a favorite around the world. The magic lies in the sauce — a beautiful blend of soy sauce, sugar, garlic, and ginger that caramelizes into a rich coating over tender chicken.

Whether you’re cooking for your family, meal prepping for the week, or craving takeout flavors at home, this easy teriyaki chicken recipe delivers restaurant-quality results with simple pantry ingredients.


What Is Teriyaki?

The word “teriyaki” comes from Japanese cooking techniques. “Teri” refers to the shine or glaze, while “yaki” means grilled or cooked. Traditionally, teriyaki sauce is made from soy sauce, mirin, and sugar. Over time, Western versions added garlic, ginger, and sometimes cornstarch for thickening — creating the sticky, glossy sauce many people love today.

This homemade version captures the authentic flavor while being simple and quick enough for a weeknight dinner.


Ingredients

For the Chicken:

  • 4 boneless, skinless chicken thighs (or breasts)

  • 1 tablespoon oil (vegetable or sesame oil)

  • Salt and black pepper (light seasoning)

For the Teriyaki Sauce:

  • ½ cup soy sauce (low sodium preferred)

  • ¼ cup brown sugar

  • 2 tablespoons honey

  • 1 tablespoon rice vinegar (or apple cider vinegar)

  • 1 teaspoon fresh grated ginger

  • 2 cloves garlic, minced

  • 1 tablespoon cornstarch

  • 2 tablespoons water

Optional Garnish:

  • Sesame seeds

  • Sliced green onions


Step-by-Step Instructions

1. Prepare the Sauce

In a medium bowl, combine soy sauce, brown sugar, honey, rice vinegar, grated ginger, and minced garlic. Stir well until the sugar dissolves.

In a small separate bowl, mix cornstarch with water to create a slurry. This will thicken the sauce later.

Set both mixtures aside.


2. Cook the Chicken

Heat oil in a large skillet over medium heat. Lightly season the chicken with salt and black pepper.

Place the chicken in the hot skillet and cook for about 5–7 minutes on each side, depending on thickness. The goal is to achieve a golden-brown crust while ensuring the chicken is fully cooked inside (internal temperature should reach 75°C / 165°F).

If using chicken thighs, you’ll get extra juiciness and flavor. Chicken breasts work well too but should not be overcooked to prevent dryness.


3. Add the Sauce

Once the chicken is cooked, reduce heat to medium-low. Pour the prepared teriyaki sauce mixture into the pan around the chicken.

Let it simmer gently for 2–3 minutes.

Now stir the cornstarch slurry again and pour it into the skillet. Stir continuously as the sauce thickens. Within a few minutes, it will transform into a glossy, rich glaze.

Turn the chicken pieces to coat them fully in the sauce. Spoon the thickened glaze over the top repeatedly for maximum flavor.


4. Finish and Garnish

Once the sauce reaches your desired thickness, remove from heat. Sprinkle with sesame seeds and sliced green onions for a fresh, vibrant touch.

Slice the chicken into strips and drizzle extra sauce over the top before serving.


Serving Suggestions

Teriyaki chicken pairs beautifully with:

  • Steamed white rice or jasmine rice

  • Fried rice

  • Stir-fried vegetables

  • Noodles

  • A simple cucumber salad

For a healthier option, serve it over brown rice or quinoa with steamed broccoli and carrots.


Tips for Perfect Teriyaki Chicken

Use Chicken Thighs for Juiciness: Thighs stay tender and flavorful even if slightly overcooked.

Do Not Overboil the Sauce: Simmer gently to avoid burning the sugars.

Balance the Sweetness: Adjust brown sugar or honey according to taste preference.

Add Heat if Desired: A pinch of red chili flakes or a drizzle of sriracha can give the sauce a subtle kick.

Marinate for Extra Flavor: If time allows, marinate the chicken in half of the sauce for 30 minutes before cooking.


Storage and Meal Prep

Teriyaki chicken stores well, making it ideal for meal prep.

  • Refrigerate in an airtight container for up to 4 days.

  • Reheat gently in a pan or microwave.

  • Add a splash of water if the sauce becomes too thick.

You can also freeze cooked teriyaki chicken for up to 2 months. Thaw overnight in the refrigerator before reheating.


Why This Recipe Works

This recipe works because it balances three key flavor components:

  • Saltiness from soy sauce

  • Sweetness from brown sugar and honey

  • Aromatic depth from garlic and ginger

The cornstarch slurry creates that signature glossy finish that clings beautifully to the chicken. Cooking the sauce directly in the same pan allows it to absorb the savory bits left behind from browning the meat — intensifying the flavor naturally.


Final Thoughts

Homemade teriyaki chicken is far better than takeout. It’s fresher, customizable, and free from unnecessary additives. With just a few simple ingredients, you can create a dish that looks impressive and tastes incredible.

Whether you serve it for a quick weeknight dinner or a special family gathering, this teriyaki chicken recipe is guaranteed to become a favorite in your kitchen. Sweet, savory, glossy, and perfectly tender — it’s comfort food done right.

The 6 Worst Osteoarthritis Foods You Should Avoid

The 6 Worst Osteoarthritis Foods You Should Avoid

Osteoarthritis is the most common form of arthritis, affecting millions of people worldwide. It develops when the protective cartilage that cushions the ends of bones gradually wears down, leading to pain, stiffness, swelling, and reduced mobility. While age, genetics, and joint injuries play major roles, diet can significantly influence inflammation levels in the body.

Certain foods can worsen inflammation, increase joint discomfort, and contribute to weight gain—placing extra pressure on already sensitive joints. If you’re managing osteoarthritis, avoiding the following six foods can make a noticeable difference in how you feel day to day.

1. Sugary Foods and Drinks
4

Sugary treats may satisfy your sweet tooth, but they can aggravate joint pain. High sugar intake triggers the release of inflammatory messengers called cytokines. Over time, chronic inflammation can intensify osteoarthritis symptoms.

Common culprits include:

Soda and sweetened beverages

Candy and chocolate bars

Cakes, cookies, and pastries

Flavored yogurt with added sugar

In addition to increasing inflammation, sugary foods promote weight gain. Extra body weight places more stress on weight-bearing joints like the knees and hips. Even a small weight increase can significantly raise pressure on these joints.

Better option: Choose natural sweetness from fresh fruits, especially berries, which are rich in antioxidants that help combat inflammation.

2. Refined Carbohydrates
4

Refined carbohydrates have been stripped of fiber and nutrients, leaving behind quickly digestible starch that spikes blood sugar levels. These rapid spikes can increase inflammatory markers in the body.

Examples include:

White bread

White rice

Regular pasta

Crackers made with white flour

Frequent consumption of refined carbs may worsen joint stiffness and swelling.

Better option: Replace refined grains with whole grains such as brown rice, quinoa, whole-wheat bread, and oats. These provide fiber and nutrients that help regulate inflammation.

3. Fried and Processed Foods
4

Fried and heavily processed foods are often high in unhealthy fats, advanced glycation end products (AGEs), and additives. AGEs form when foods are cooked at high temperatures, such as deep-frying, and they can trigger oxidative stress and inflammation.

Common offenders:

French fries

Fried chicken

Fast-food burgers

Packaged snack foods

These foods may not only worsen joint pain but also contribute to obesity and heart disease.

Better option: Opt for baked, grilled, or steamed meals prepared at home using fresh ingredients.

4. Processed and Red Meats
4

Red and processed meats contain high levels of saturated fats and compounds that can promote inflammation. Frequent consumption has been linked to increased inflammatory markers in the body.

Examples include:

Bacon

Sausages

Hot dogs

Fatty cuts of beef

These foods may aggravate joint swelling and discomfort over time.

Better option: Choose lean protein sources such as fish (especially salmon and sardines), skinless poultry, beans, lentils, and tofu.

5. Excess Salt
4

Too much salt can lead to water retention and increased inflammation in certain individuals. Many processed foods contain hidden sodium that exceeds daily recommendations.

High-sodium foods include:

Canned soups

Chips and salted snacks

Frozen dinners

Pickled and preserved foods

Excess sodium may also weaken bones over time, compounding joint issues.

Better option: Use herbs, garlic, turmeric, and spices to flavor meals instead of relying on salt.

6. Certain Vegetable Oils
4

Some vegetable oils, such as corn, soybean, and sunflower oil, are high in omega-6 fatty acids. While omega-6 fats are essential in small amounts, excessive intake—especially when not balanced with omega-3s—can promote inflammation.

These oils are often found in:

Packaged baked goods

Fried fast foods

Processed snacks

Better option: Cook with healthier fats like olive oil or avocado oil, and increase omega-3 intake through fatty fish, chia seeds, and walnuts.

Final Thoughts

Managing osteoarthritis isn’t only about medication and exercise—your daily diet plays a powerful role in controlling inflammation and protecting joint health. By reducing or eliminating sugary foods, refined carbohydrates, fried items, processed meats, excess salt, and inflammatory oils, you can help ease joint pain and improve mobility.

Instead, focus on a balanced diet rich in:

Fresh fruits and vegetables

Whole grains

Lean proteins

Healthy fats

Plenty of water

Small, consistent changes can lead to noticeable improvements over time. While no single food will cure osteoarthritis, avoiding these six worst offenders can help you feel more comfortable and maintain better joint function in the long run.

If symptoms persist or worsen, always consult a healthcare professional for personalized advice tailored to your specific condition.

How to achieve a deep piriformis stretch to eliminate back, hip, gluteal, and leg pain

How to Achieve a Deep Piriformis Stretch to Eliminate Back, Hip, Gluteal, and Leg Pain

If you struggle with persistent lower back, hip, gluteal, or leg pain, the culprit might be a small but powerful muscle deep in your pelvis: the piriformis. When tight or inflamed, this muscle can irritate the sciatic nerve, leading to discomfort that radiates from the buttock down the leg—a condition often referred to as piriformis syndrome.

The good news? A deep, targeted piriformis stretch can dramatically reduce tension, improve mobility, and relieve pain when done correctly and consistently.

Understanding the Piriformis Muscle
4

The piriformis is a small, flat muscle located deep in the buttock behind the gluteus maximus. It runs from the sacrum (base of the spine) to the top of the femur (thigh bone). Its primary function is to help rotate the hip outward and stabilize the pelvis during movement.

The sciatic nerve runs either underneath or, in some people, directly through the piriformis muscle. When the piriformis becomes tight or spasms due to prolonged sitting, poor posture, overtraining, or injury, it can compress the sciatic nerve. This leads to:

Lower back pain

Deep buttock pain

Hip stiffness

Tingling or numbness down the leg

Shooting pain resembling sciatica

Stretching this muscle properly can reduce pressure on the nerve and restore comfortable movement.

The Deep Piriformis Stretch (Step-by-Step)
1. The Supine Figure-4 Stretch (Beginner-Friendly)
4

This is one of the safest and most effective ways to deeply stretch the piriformis.

How to Do It:

Lie flat on your back with both knees bent and feet flat on the floor.

Cross your right ankle over your left knee, forming a “4” shape.

Reach through and grab the back of your left thigh.

Gently pull the left thigh toward your chest.

Keep your head and shoulders relaxed.

Hold for 30–60 seconds.

Switch sides.

Key Tips:

Keep your spine neutral.

Avoid pulling too aggressively.

You should feel a deep stretch in the buttock—not sharp pain.

Repeat 2–3 times per side.

2. Seated Deep Piriformis Stretch
4

Perfect if you sit for long hours (especially relevant if you work at a desk most of the day).

Steps:

Sit upright in a chair.

Place your right ankle over your left knee.

Keep your back straight.

Gently lean forward from your hips.

Stop when you feel a deep stretch in your glute.

Hold for 30–45 seconds.

Switch sides.

This stretch is excellent for relieving tension caused by prolonged sitting.

3. Advanced Pigeon Pose (Deepest Stretch)
4

If you want a very deep stretch, this yoga pose is highly effective.

How to Perform:

Start in a plank position.

Bring your right knee forward toward your right hand.

Place your shin across your mat (as parallel as comfortable).

Extend your left leg straight behind you.

Keep hips square to the floor.

Lower your torso forward for a deeper stretch.

Hold for 45–90 seconds.

Repeat on the other side.

⚠ If you feel knee pain, stop immediately. Modify by placing a cushion under the hip.

How Often Should You Stretch?

For best results:

Stretch 1–2 times daily.

Hold each stretch at least 30 seconds.

Breathe slowly and deeply.

Stay consistent for at least 2–3 weeks.

Most people feel noticeable improvement within 7–10 days when stretching daily.

Additional Tips to Eliminate Pain
1. Use Heat Before Stretching

Applying a warm compress for 10–15 minutes helps relax the muscle and increases flexibility.

2. Strengthen the Glutes

Weak glute muscles force the piriformis to overwork. Add:

Glute bridges

Clamshells

Side leg raises

3. Avoid Prolonged Sitting

Stand up every 45–60 minutes and move around.

4. Improve Posture

Slouching increases pelvic stress and tightens hip muscles.

When to Be Careful

Avoid aggressive stretching if you have:

Recent hip surgery

Herniated disc

Severe sciatica with weakness

Unexplained numbness

If pain worsens or lasts more than 4–6 weeks, consult a healthcare professional.

Final Thoughts

The piriformis may be small, but when tight, it can cause widespread discomfort from your lower back down to your leg. The key to relief is gentle, consistent, deep stretching combined with strengthening and posture correction.

If you commit to daily stretching and reduce long periods of sitting, you can dramatically improve flexibility, decrease nerve irritation, and eliminate chronic back, hip, and gluteal pain.

I’ve been eating this for breakfast for a month and now all my clothes are too big! A simple and quick breakfast for a slimmer waist, sugar-free

For the past month, I’ve been starting my mornings with a simple, sugar-free breakfast that has completely changed how I feel in my clothes. Without counting calories obsessively or following a complicated diet plan, I focused on one nourishing, satisfying meal each morning. The result? Better energy, fewer cravings, and yes — a noticeably slimmer waist.

The breakfast in question is a creamy chia-based bowl made with natural ingredients and no added sugar. It may look simple, but don’t underestimate its power. Sometimes the most effective habits are the ones that are easiest to stick with.

What makes this breakfast so effective is its nutritional profile. Chia seeds are tiny, but they are loaded with fiber. In fact, they are one of the richest plant sources of dietary fiber available. Fiber plays a major role in weight management because it slows digestion, keeps you full longer, and helps stabilize blood sugar levels. When your blood sugar remains steady, you’re less likely to experience sudden cravings for sweets or refined carbohydrates later in the day.

One of the biggest reasons people struggle with belly fat is constant snacking triggered by hunger spikes. A fiber-rich breakfast creates a feeling of fullness that can last for hours. Instead of reaching for mid-morning biscuits, sugary tea, or processed snacks, you naturally feel satisfied. Over time, this small daily change can significantly reduce overall calorie intake without feeling deprived.

Another important factor is the absence of added sugar. Many traditional breakfast options — cereals, flavored yogurts, pastries, even some smoothies — contain hidden sugars. These sugars cause quick energy spikes followed by crashes, leading to more hunger and more eating. By choosing a sugar-free breakfast, you allow your body to regulate energy more efficiently. This supports better insulin balance, which is closely linked to abdominal fat storage.

Chia seeds also absorb liquid and expand, forming a gel-like consistency. This physical expansion in your stomach enhances satiety. You feel like you’ve eaten a substantial meal, even though it’s relatively light in calories. This is one reason it can support gradual, sustainable weight loss when combined with balanced eating throughout the day.

Beyond weight management, this type of breakfast supports digestive health. The high fiber content helps promote regular bowel movements and supports beneficial gut bacteria. A healthy gut can influence metabolism, inflammation levels, and even how your body stores fat. When digestion improves, bloating often decreases — which alone can make clothes feel looser around the waist.

Protein is another important element. When paired with milk or a plant-based alternative that contains protein, chia seeds create a balanced meal of fiber, healthy fats, and protein. This combination is ideal for sustained energy. Unlike carb-heavy breakfasts that leave you tired by mid-morning, this type of meal helps maintain steady focus and stamina.

Healthy fats found in chia seeds, particularly omega-3 fatty acids, also contribute to overall wellness. These fats support heart health and may help reduce inflammation in the body. Chronic inflammation has been associated with weight gain and difficulty losing abdominal fat. While no single food is a miracle solution, consistently choosing anti-inflammatory foods can make a difference over time.

One overlooked benefit of repeating the same healthy breakfast daily is decision fatigue reduction. When you remove the stress of choosing what to eat each morning, you’re less likely to make impulsive, unhealthy choices. Simplicity builds consistency. Consistency builds results.

However, it’s important to keep expectations realistic. No single food will magically shrink your waist overnight. What makes this breakfast effective is how it fits into a bigger picture of mindful eating. It replaces high-sugar options, reduces cravings, supports digestion, and keeps you satisfied. When combined with moderate physical activity, proper hydration, and balanced meals throughout the day, the results become noticeable.

Hydration also plays a key role. Because chia seeds absorb liquid, it’s important to drink enough water during the day. Proper hydration supports metabolism and helps your body use stored fat more efficiently. Many people mistake thirst for hunger, so staying hydrated can naturally reduce unnecessary snacking.

Another reason this breakfast works well for weight management is portion awareness. Even though it’s healthy, it’s still important not to overeat. Listening to your body’s hunger cues makes a significant difference. Eating slowly and mindfully enhances satisfaction and prevents overconsumption.

Some people notice improvements within a couple of weeks, while others see gradual changes over a month or more. Weight loss that happens slowly is often more sustainable because it reflects genuine habit change rather than drastic restriction.

It’s also worth mentioning that stress and sleep affect waistline size. High stress increases cortisol, a hormone linked to abdominal fat storage. A balanced breakfast that stabilizes blood sugar may indirectly support better mood and energy, helping reduce stress-driven eating later in the day.

If your clothes start feeling looser after adopting a simple, fiber-rich, sugar-free breakfast, it’s likely the result of improved appetite control, reduced bloating, and steady energy rather than a miracle effect. That’s actually good news — it means the change is sustainable.

The real secret isn’t a trendy superfood. It’s consistency, simplicity, and choosing foods that nourish rather than spike and crash your system. A small bowl each morning may seem insignificant, but over 30 days, those small decisions add up.

When you fuel your body with whole, unprocessed ingredients first thing in the morning, you set the tone for the entire day. And sometimes, that’s all it takes for your wardrobe to start feeling a little bigger — in the best possible way.

Doctors reveal that eating beets causes

Bright, earthy, and naturally sweet, beets (also known as beetroot) have been praised by nutrition experts for their impressive health benefits. Doctors and dietitians often highlight beets as a powerful superfood because they are packed with essential nutrients, antioxidants, and plant compounds that support overall wellness.

So what really happens when you start eating beets regularly? Let’s explore the science-backed benefits — and then I’ll share a simple, delicious beet recipe you can make at home.


1. Your Blood Pressure May Improve

One of the most talked-about benefits of beets is their ability to support healthy blood pressure levels. Beets are naturally rich in nitrates, compounds that your body converts into nitric oxide. Nitric oxide helps relax and widen blood vessels, improving circulation.

Several studies suggest that drinking beet juice or eating whole beets can lead to noticeable reductions in blood pressure within just a few hours. This makes beets particularly beneficial for people looking to support heart health naturally.


2. Your Heart Gets Extra Protection

Beyond blood pressure, beets contain antioxidants such as betalains, which help fight inflammation and oxidative stress. Chronic inflammation is linked to heart disease, so including anti-inflammatory foods like beets in your diet may offer protective benefits.

Beets also contain potassium, which helps balance sodium levels in the body — another key factor in maintaining cardiovascular health.


3. You May Feel More Energetic

Athletes often consume beet juice before workouts. Why? Because the nitrates in beets improve oxygen flow to muscles. This may increase stamina and reduce fatigue during exercise.

Doctors sometimes recommend beet juice as a natural performance booster for endurance activities like running, cycling, and swimming.


4. Your Digestion Can Improve

Beets are a good source of dietary fiber. Fiber supports healthy digestion by promoting regular bowel movements and feeding beneficial gut bacteria.

If you struggle with occasional constipation, adding beets to your meals could gently support better digestive balance.


5. Your Brain May Benefit

Improved blood flow doesn’t just help the heart — it also supports the brain. Increased circulation may help deliver more oxygen and nutrients to brain tissue. Some research suggests that nitrates in beets may support cognitive function, especially in older adults.


6. Your Liver Gets Support

Beets contain compounds that may assist natural detox processes in the liver. Betalains have been studied for their role in reducing oxidative stress and supporting liver cell health.

While beets are not a miracle cure, they can be a valuable part of a balanced, nutrient-rich diet.


A Simple and Delicious Roasted Beet Recipe

Now that you know the benefits, here’s an easy recipe to help you enjoy beets in a flavorful way.

🥗 Honey Garlic Roasted Beets

Ingredients:

  • 4 medium fresh beets

  • 2 tablespoons olive oil

  • 2 cloves garlic (minced)

  • 1 tablespoon honey

  • 1 tablespoon lemon juice

  • Salt and black pepper to taste

  • Fresh parsley (optional, for garnish)


Instructions:

  1. Preheat the oven to 400°F (200°C).

  2. Wash and peel the beets. Cut them into bite-sized cubes.

  3. In a bowl, mix olive oil, minced garlic, honey, lemon juice, salt, and pepper.

  4. Toss the beet cubes in the mixture until evenly coated.

  5. Spread them on a baking sheet lined with parchment paper.

  6. Roast for 35–40 minutes, or until tender and slightly caramelized.

  7. Garnish with fresh parsley and serve warm.


Tips for Eating Beets Safely

  • If your urine or stool turns pink or red after eating beets, don’t panic. This is a harmless condition called “beeturia.”

  • If you are prone to kidney stones, consult your doctor before eating large amounts of beets, as they contain oxalates.

  • Start with small portions if you are new to beets, especially in juice form.


Final Thoughts

Doctors agree that adding nutrient-dense vegetables to your diet is one of the best ways to protect long-term health — and beets are an excellent choice. From supporting heart health and circulation to boosting energy and digestion, this vibrant root vegetable delivers impressive benefits in a simple, natural way.

Whether you roast them, blend them into smoothies, or drink fresh beet juice, incorporating beets into your weekly meals is a delicious step toward better wellness.

The Authentic Woolworth Cheesecake

There was a time when stepping into a Woolworth’s store meant more than shopping — it meant sitting at the lunch counter and ordering a thick, creamy slice of their legendary cheesecake. Simple, rich, and perfectly balanced between sweet and tangy, this old-fashioned dessert became a favorite across America.

Unlike modern cheesecakes overloaded with toppings and swirls, the authentic Woolworth cheesecake was all about texture and flavor. It featured a buttery graham cracker crust and a silky, lightly tangy cream cheese filling baked gently to perfection. No cracks, no fuss — just a smooth, bakery-style classic.

Here’s how to recreate that nostalgic dessert at home.


Ingredients

For the Graham Cracker Crust:

  • 1 ½ cups graham cracker crumbs

  • ¼ cup granulated sugar

  • ½ cup (1 stick) unsalted butter, melted

For the Cheesecake Filling:

  • 3 (8-ounce) packages full-fat cream cheese, softened

  • 1 cup granulated sugar

  • 3 large eggs, room temperature

  • 1 cup sour cream

  • 1 teaspoon pure vanilla extract

  • 2 tablespoons all-purpose flour

  • 1 tablespoon fresh lemon juice


Instructions

Step 1: Prepare the Pan

Preheat your oven to 325°F (163°C). Lightly grease a 9-inch springform pan and wrap the outside with aluminum foil if you plan to use a water bath.

Step 2: Make the Crust

In a medium bowl, combine the graham cracker crumbs and sugar. Stir in the melted butter until the mixture resembles wet sand.

Press the mixture firmly into the bottom of the springform pan, creating an even layer. Use the back of a measuring cup to pack it tightly.

Bake the crust for 8–10 minutes. Remove from the oven and let it cool while you prepare the filling.


Step 3: Prepare the Filling

In a large mixing bowl, beat the softened cream cheese until completely smooth and creamy. This step is crucial — no lumps!

Gradually add the sugar and continue beating until light and fluffy.

Add the eggs one at a time, mixing on low speed just until combined after each addition. Do not overmix, as this can introduce air and cause cracking.

Blend in the sour cream, vanilla extract, flour, and lemon juice. Mix just until smooth.


Step 4: Assemble and Bake

Pour the filling over the cooled crust and smooth the top with a spatula.

For best results, place the springform pan in a larger baking dish and add hot water halfway up the sides (water bath method). This helps create the smooth texture Woolworth’s cheesecake was known for.

Bake for 60–70 minutes. The center should still have a slight jiggle but not look wet.

Turn off the oven and leave the cheesecake inside with the door slightly open for 1 hour. This gradual cooling helps prevent cracks.


Step 5: Chill

Remove the cheesecake from the oven and let it cool to room temperature. Then refrigerate for at least 4 hours, preferably overnight.

Chilling allows the flavors to develop and gives you that classic dense yet creamy texture.


Tips for Authentic Flavor

  • Use full-fat cream cheese only. The original recipe relied on richness.

  • Room temperature ingredients are essential. This prevents lumps.

  • Avoid overmixing. Too much air leads to cracks.

  • Keep it simple. Traditionally, Woolworth’s served it plain or with a light fruit topping.


Optional Toppings (If You Want a Classic Twist)

While the original was often served plain, you can add:

  • Fresh strawberries or strawberry glaze

  • Cherry pie filling

  • A light dusting of powdered sugar

  • Fresh whipped cream

But honestly? A clean slice with nothing extra truly captures the nostalgic experience.


Storage Instructions

Store the cheesecake covered in the refrigerator for up to 5 days.

You can also freeze individual slices wrapped tightly in plastic wrap and stored in an airtight container for up to 2 months. Thaw overnight in the refrigerator before serving.


Why This Recipe Stands Out

The magic of the authentic Woolworth cheesecake lies in its simplicity. There’s no complicated technique, no fancy ingredients — just traditional baking done right. The lemon juice subtly balances the sweetness, the sour cream adds depth, and the graham cracker crust provides the perfect buttery contrast.

Each bite is creamy, smooth, and slightly tangy — exactly what customers loved at the lunch counter decades ago.

If you’ve never experienced the original, this recipe brings it back to life. And if you remember it fondly, one slice will take you straight back to those simpler days.


Final Thoughts

The Authentic Woolworth’s Cheesecake isn’t just a dessert — it’s a piece of culinary history.

Bake it for family gatherings, holidays, or whenever you crave a timeless classic. Serve chilled, slice generously, and enjoy every creamy bite of this old-fashioned favorite.

Fragrant Houseplants That Will Make Your Home Smell Incredible

If you love walking into a home that smells fresh, clean, and naturally inviting, fragrant houseplants are the perfect solution. Instead of relying on artificial sprays or chemical air fresheners, you can let nature do the work. These beautiful plants not only purify the air but also release delightful scents that instantly transform your living space.

Here are some of the best fragrant houseplants that will make your home smell absolutely incredible.

1. 🌸 Jasmine (Sweet & Romantic)
4

Jasmine is famous for its sweet, exotic fragrance that becomes stronger in the evening. Placing a jasmine plant near a sunny window allows it to bloom beautifully and fill your home with a soft, romantic scent.

Why you’ll love it:

Intensely fragrant flowers

Improves mood and promotes relaxation

Perfect for bedrooms and living rooms

Care tip:
Jasmine needs bright, indirect sunlight and slightly moist soil. Avoid overwatering, as this can damage the roots.

2. 🌿 Lavender (Calming & Fresh)
4

Lavender is well-known for its soothing scent. It’s commonly used in aromatherapy because of its relaxing properties. Keeping lavender indoors can help reduce stress and improve sleep quality.

Benefits:

Calms anxiety

Natural insect repellent

Fresh, clean fragrance

Care tip:
Lavender needs plenty of sunlight—at least 6 hours daily. Place it near a bright window and allow the soil to dry between watering.

3. 🌼 Gardenia (Rich & Floral)
4

Gardenias produce creamy white flowers with a strong, luxurious scent. Their fragrance is often used in high-end perfumes. A single blooming gardenia can scent an entire room.

Why choose gardenia:

Elegant appearance

Powerful fragrance

Ideal for entryways

Care tip:
Gardenias prefer bright light and slightly acidic soil. Keep the air humid, especially in dry climates.

4. 🍃 Eucalyptus (Clean & Spa-Like)
4

Eucalyptus brings a refreshing, spa-like aroma to your home. Its scent is crisp, clean, and slightly minty. Even brushing against the leaves releases a lovely fragrance.

Benefits:

Freshens air naturally

Helps clear nasal congestion

Modern decorative look

Care tip:
Place eucalyptus in bright light and water moderately. It prefers well-draining soil.

5. 🌹 Scented Geranium (Citrus & Mint Notes)
4

Unlike regular geraniums, scented varieties release fragrance through their leaves. Some smell like lemon, rose, mint, or even chocolate.

Why it’s special:

Unique fragrance options

Easy to grow

Naturally repels insects

Care tip:
Keep in bright light and water when the soil feels dry. Gently rub the leaves to release more scent.

🌿 Bonus Recipe: Natural Plant-Boosting Fragrance Mist

If you want to enhance your plants’ natural aroma, try this simple homemade plant mist.

Ingredients:

1 cup distilled water

5 drops essential oil (lavender, lemon, or jasmine)

1 teaspoon witch hazel

Instructions:

Mix all ingredients in a small spray bottle.

Shake well before each use.

Lightly mist around (not directly on delicate flowers) to boost fragrance.

This gentle mist refreshes your home and complements your plants’ natural scent.

🌼 Tips for Maximizing Fragrance at Home

Place plants near windows where sunlight helps stimulate blooming.

Keep leaves clean by wiping them with a damp cloth. Dust can block scent release.

Group fragrant plants together for a stronger combined aroma.

Ensure proper air circulation so the scent spreads evenly.

Final Thoughts

Fragrant houseplants are a simple, natural way to make your home smell wonderful every day. Whether you love the sweet romance of jasmine, the calming effect of lavender, or the clean freshness of eucalyptus, there’s a plant to match your style and mood.

Beyond scent, these plants add beauty, improve air quality, and create a peaceful atmosphere. With just a little care, your home can feel like a relaxing garden retreat—fresh, inviting, and wonderfully fragrant. 🌿✨