Here are the normal blood pressure values according to age.

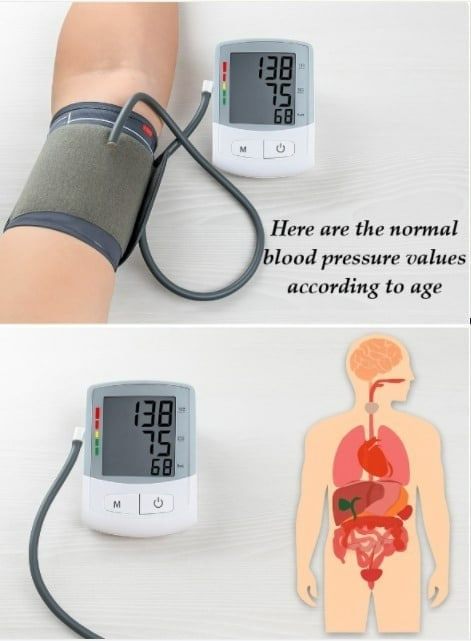
Understanding normal blood pressure values according to age is essential for maintaining long-term heart health. Blood pressure is the force of blood pushing against the walls of your arteries as your heart pumps. It is measured in millimeters of mercury (mmHg) and recorded as two numbers: systolic pressure over diastolic pressure.

Systolic pressure (the top number) measures the force when the heart beats. Diastolic pressure (the bottom number) measures the force when the heart rests between beats. Both numbers are important, and healthy values can vary slightly depending on age, lifestyle, and overall health.

According to the American Heart Association, a normal blood pressure reading for adults is generally less than 120/80 mmHg. However, age-related changes in the cardiovascular system can influence what is considered typical or acceptable.

For children and teenagers, blood pressure depends on age, gender, and height. Pediatric blood pressure charts are used by doctors to determine normal ranges. In general, children aged 6 to 13 years should have blood pressure below 110–120 systolic and 70–80 diastolic. For adolescents aged 14 to 18, normal readings are usually under 120/80 mmHg, similar to adults.

For young adults between 19 and 40 years old, the ideal blood pressure remains below 120/80 mmHg. At this stage, arteries are typically more flexible, and the heart pumps efficiently. Maintaining a healthy weight, staying active, managing stress, and limiting sodium intake are key strategies to keep blood pressure within the normal range.

Adults aged 41 to 60 may begin to see slight increases in systolic pressure due to natural stiffening of the arteries. For this age group, a systolic reading between 110 and 130 mmHg and a diastolic reading between 70 and 85 mmHg is often considered acceptable. However, readings consistently above 130/80 mmHg may indicate elevated blood pressure or hypertension and should be monitored carefully.

For adults over 60, systolic pressure may rise further as blood vessels lose elasticity. A reading around 120–140 systolic and 70–90 diastolic may be common. Some healthcare providers may accept slightly higher systolic levels in older adults if lowering it too much causes dizziness or falls. Still, the general goal is to keep blood pressure under 130/80 mmHg when possible, depending on individual health conditions.

Blood pressure categories for adults are commonly defined as follows:

Normal: Less than 120 systolic and less than 80 diastolic.
Elevated: 120–129 systolic and less than 80 diastolic.
Hypertension Stage 1: 130–139 systolic or 80–89 diastolic.
Hypertension Stage 2: 140 or higher systolic or 90 or higher diastolic.
Hypertensive crisis: Higher than 180 systolic and/or higher than 120 diastolic, requiring immediate medical attention.

It is important to understand that these values are general guidelines. Individual targets may vary depending on conditions such as diabetes, kidney disease, or heart problems. Always consult a healthcare provider for personalized advice.

Now, here is a simple heart-supporting drink recipe that may help promote healthy circulation and support normal blood pressure levels when combined with a balanced lifestyle.

Heart-Friendly Beet and Lemon Drink

Ingredients:
1 medium fresh beetroot
Juice of 1 lemon
1 small piece of fresh ginger (about 1 inch)
1 cup water
1 teaspoon honey (optional)

Instructions:
Wash and peel the beetroot, then chop it into small pieces. Add the beetroot, ginger, and water to a blender. Blend until smooth. Strain if desired. Add fresh lemon juice and honey. Stir well and drink immediately.

Beetroot contains natural nitrates that may help relax blood vessels and improve blood flow. Lemon provides vitamin C and antioxidants, while ginger supports circulation. Drinking this in the morning a few times per week may complement a healthy routine.

In addition to monitoring blood pressure and enjoying heart-supportive foods, consider these lifestyle tips:

Reduce salt intake and avoid highly processed foods.
Exercise at least 30 minutes most days of the week.
Maintain a healthy weight.
Limit alcohol consumption.
Avoid smoking.
Manage stress through breathing exercises, meditation, or prayer.
Get adequate sleep each night.

Regular monitoring is also crucial. Home blood pressure monitors are widely available and easy to use. Take readings at the same time each day, sit calmly for five minutes before measuring, and keep a record to share with your doctor.

Blood pressure naturally fluctuates throughout the day depending on activity, stress, and hydration. Occasional slightly higher readings are not always cause for alarm. However, consistently high numbers should never be ignored.

Here Are the 7 Best Bedtime Drinks for Diabetics to Support Healthy Bl00d Sugar Management at Night

Managing blood sugar levels at night can be one of the biggest challenges for people living with diabetes. While medication, balanced meals, and regular exercise are essential, what you drink before bed can also make a difference. The right bedtime beverage may help stabilize glucose levels, prevent nighttime spikes or crashes, and promote restful sleep — all of which are important for overall metabolic health.

Here are seven of the best bedtime drinks for diabetics to support healthy blood sugar management at night, along with simple recipes you can prepare at home.


1. Cinnamon Tea

Cinnamon has been studied for its potential role in improving insulin sensitivity and supporting healthy blood sugar levels. Research suggests that compounds in cinnamon may help cells respond better to insulin, which can be especially helpful overnight when the body is fasting.

Simple Cinnamon Tea Recipe

  • 1 cup hot water

  • ½ teaspoon ground cinnamon (or 1 small cinnamon stick)

  • Optional: a squeeze of lemon

Steep for 10 minutes and drink warm before bed. Avoid adding sugar or honey.


2. Chamomile Tea

Chamomile is widely known for promoting relaxation and better sleep, but it may also have mild blood sugar–supporting properties. Some studies suggest chamomile could help reduce fasting glucose levels and improve antioxidant status.

For a calming nighttime ritual, try organic chamomile tea about 30 minutes before sleep.

How to Prepare:

  • 1 chamomile tea bag

  • 1 cup boiling water
    Steep for 5–7 minutes and enjoy warm.


3. Golden Turmeric Milk (Low-Carb Version)

Turmeric contains curcumin, a powerful antioxidant that may help reduce inflammation — a key factor in insulin resistance. A low-carb golden milk made with unsweetened almond milk is a comforting and diabetes-friendly option.

Golden Milk Recipe:

  • 1 cup unsweetened almond milk

  • ½ teaspoon turmeric powder

  • A pinch of black pepper (enhances curcumin absorption)

  • A dash of cinnamon

Warm gently and stir well. Do not add sweeteners unless using a diabetes-safe alternative.


4. Unsweetened Almond Milk

Unsweetened almond milk is low in carbohydrates and contains magnesium, which plays a role in glucose metabolism and insulin function. Drinking a small glass before bed can provide nutrients without causing blood sugar spikes.

Choose plain, unsweetened varieties with no added sugars or syrups.


5. Fenugreek Water

Fenugreek seeds have been traditionally used to support blood sugar regulation. They contain soluble fiber, which may help slow carbohydrate absorption and reduce glucose fluctuations.

Fenugreek Water Recipe:

  • 1 teaspoon fenugreek seeds

  • 1 cup water

Soak the seeds overnight. Strain and drink the water before bed.

If you take medications for diabetes, consult your healthcare provider before using fenugreek regularly, as it may enhance the effect of glucose-lowering drugs.


6. Aloe Vera Juice (Diluted)

Some preliminary studies suggest aloe vera may help support healthy blood glucose levels. However, it must be consumed carefully and in moderation.

How to Prepare:

  • 1–2 tablespoons pure aloe vera juice

  • 1 cup water

Mix well and drink in small amounts. Always choose food-grade aloe vera juice and consult a healthcare professional before regular use.


7. Warm Lemon Water

Simple and refreshing, warm lemon water contains vitamin C and antioxidants. While it won’t dramatically lower blood sugar on its own, it can support hydration and digestion, both of which play roles in metabolic health.

Preparation:

  • 1 cup warm water

  • Juice of ½ fresh lemon

Drink about 20–30 minutes before bedtime.


Tips for Choosing Bedtime Drinks with Diabetes

  • Avoid sugary drinks, fruit juices, and flavored milks.

  • Keep portions small to prevent nighttime urination or discomfort.

  • Monitor your blood sugar regularly to see how your body responds.

  • Avoid adding honey, syrups, or artificial sweeteners that may impact glucose levels.

  • Pair drinks with consistent nighttime routines for better sleep.


Why Nighttime Blood Sugar Matters

During sleep, the body continues to regulate glucose. Some people experience the “dawn phenomenon,” where blood sugar rises in the early morning due to hormonal changes. Others may experience nocturnal hypoglycemia (low blood sugar). Choosing gentle, low-carb, anti-inflammatory beverages may help support more stable overnight levels.


A Final Word

Bedtime drinks alone won’t replace proper medical treatment, but they can complement a healthy lifestyle. Always speak with your healthcare provider before adding new herbal remedies or supplements to your routine, especially if you are on insulin or other glucose-lowering medications.

With mindful choices, a calming bedtime ritual, and regular monitoring, you can take small but meaningful steps toward better nighttime blood sugar management and overall well-being.

Discover the Power of Beet and Nopal Juice: A Vibrant Boost for Your Daily Routine

If you’re looking for a natural, refreshing way to energize your mornings and nourish your body, Beet and Nopal Juice might become your new favorite ritual. This bright, ruby-colored drink combines the earthy sweetness of beetroot with the fresh, slightly tangy flavor of nopal (cactus paddle), creating a nutrient-packed beverage that feels as good as it tastes.

Rooted in traditional Mexican wellness practices, nopal has been used for centuries for its nourishing properties, while beetroot is celebrated worldwide for its vibrant color and powerful plant compounds. Together, they create a simple yet effective juice that supports overall wellness and adds a burst of freshness to your day.

Let’s explore why this juice is so special — and how you can easily make it at home.

Why Beet and Nopal?

🌿 The Benefits of Nopal

Nopal, also known as prickly pear cactus pads, is rich in:

  • Fiber

  • Antioxidants

  • Vitamin C

  • Magnesium

  • Potassium

Its high fiber content may support digestion and help you feel full longer. Nopal is also hydrating and refreshing, making it a perfect ingredient for morning juices.

❤️ The Power of Beets

Beetroot is known for:

  • Natural nitrates

  • Folate

  • Iron

  • Vitamin C

  • Betalains (powerful antioxidants)

Beets are often associated with supporting circulation and stamina. Many people enjoy beet juice before workouts because it may help improve endurance and oxygen flow in the body.

A Perfect Morning Ritual

Starting your day with beet and nopal juice can feel like giving your body a gentle wake-up call. It’s:

  • Light yet nourishing

  • Naturally sweet with a subtle earthiness

  • Refreshing and hydrating

  • Free from processed sugars

Instead of reaching for sugary drinks or heavy breakfasts, this juice offers a clean, plant-based boost.

🌺 Beet and Nopal Juice Recipe

Ingredients:

  • 1 medium fresh beetroot, peeled and chopped

  • 1 fresh nopal paddle (about 1 cup, cleaned and diced)

  • Juice of 1 lemon

  • 1 cup fresh pineapple (optional for sweetness)

  • 1–2 cups cold water

  • Ice cubes (optional)

How to Prepare Nopal

Before blending, it’s important to clean the nopal properly:

  1. Rinse thoroughly under running water.

  2. Carefully scrape off any small thorns with a knife.

  3. Trim the edges.

  4. Dice into small cubes.

If you prefer a milder flavor, you can briefly boil the nopal pieces for 5 minutes and rinse before blending.

Instructions:

  1. Add chopped beetroot and nopal into a blender.

  2. Add pineapple (if using).

  3. Pour in cold water.

  4. Blend until smooth.

  5. Add lemon juice and blend again briefly.

  6. Strain if desired (optional).

  7. Serve immediately over ice.

Flavor Profile

This juice is:

  • Slightly sweet

  • Mildly tangy

  • Earthy but refreshing

  • Bright and energizing

The pineapple and lemon balance the earthiness of the beet and nopal beautifully.

When to Drink It

You can enjoy beet and nopal juice:

  • First thing in the morning

  • Before a workout

  • As a midday refresher

  • During a light detox routine

For best results, drink it fresh and avoid storing it for long periods, as nutrients are most potent right after blending.

Tips for Best Results

✔ Use fresh, firm beets
✔ Choose bright green nopal paddles
✔ Drink immediately after preparation
✔ Start with small portions if new to nopal
✔ Stay consistent — 3–4 times per week is ideal

A Gentle Wellness Reminder

While beet and nopal juice is nutritious, it’s not a miracle cure. It works best as part of a balanced diet that includes:

  • Whole foods

  • Adequate hydration

  • Regular physical activity

  • Proper sleep

If you have kidney issues, are prone to kidney stones, or are on medication for blood pressure or blood sugar, consult a healthcare professional before making it a daily habit.

A Simple Way to Add Color and Care

There’s something uplifting about drinking a naturally vibrant beverage. The deep red color from the beet and the fresh green notes from nopal symbolize vitality and balance.

This juice isn’t about extreme detoxes or quick fixes. It’s about small, nourishing choices that support your body over time. One glass in the morning can become a mindful ritual — a moment of self-care before your busy day begins.

Health Benefits of Cloves: How to Use Cloves to Combat Respiratory Infections and Bronchitis

Cloves are small, aromatic flower buds that have been used for centuries in traditional healing systems such as Ayurveda and Traditional Chinese Medicine. Though commonly found in kitchens around the world, cloves are far more than a flavorful spice. They are packed with powerful compounds that may help support the immune system, ease respiratory discomfort, and fight infections naturally.

If you often struggle with cough, chest congestion, bronchitis, or seasonal respiratory infections, cloves may be a simple and affordable addition to your wellness routine. Let’s explore how cloves work and how to use them effectively.

Why Cloves Are So Powerful

The key active compound in cloves is eugenol, a natural substance known for its antimicrobial, anti-inflammatory, and antioxidant properties. Eugenol helps:

  • Fight bacteria and viruses

  • Reduce inflammation in airways

  • Relieve throat irritation

  • Support immune response

  • Ease coughing

Cloves also contain vitamin C, fiber, manganese, and other plant compounds that strengthen the body’s defense system.

When respiratory infections strike — whether from cold weather, pollution, or weakened immunity — cloves may help soothe symptoms and support faster recovery.

How Cloves Help with Respiratory Infections

1. Loosens Mucus

Cloves have warming properties that may help loosen thick mucus trapped in the lungs and throat. This makes it easier to cough out phlegm and breathe more comfortably.

2. Soothes Sore Throat

Their natural numbing effect can reduce throat irritation and discomfort, especially during persistent coughing.

3. Fights Harmful Microbes

Thanks to eugenol’s antimicrobial activity, cloves may help reduce bacterial growth in the respiratory tract.

4. Reduces Inflammation

Bronchitis involves inflammation of the bronchial tubes. Cloves’ anti-inflammatory properties may help calm swollen airways.

5 Simple Ways to Use Cloves for Respiratory Relief1. Clove Tea for Chest Congestion

This is one of the easiest and most effective remedies.

Ingredients:

  • 4–5 whole cloves

  • 1 cup water

  • 1 teaspoon honey (optional)

  • A few drops of lemon juice (optional)

Instructions:
Boil water and add the cloves. Let them simmer for 5–7 minutes. Strain and allow to cool slightly. Add honey and lemon if desired. Drink warm.

Benefits:
This tea helps soothe the throat, loosen mucus, and support immune health. Drink 1–2 times daily during infection.

2. Clove Steam Inhalation

Steam therapy combined with cloves may help open airways.

How to do it:
Boil 3 cups of water and add 1 teaspoon of crushed cloves. Remove from heat. Lean over the bowl, cover your head with a towel, and inhale the steam for 5–10 minutes.

Benefits:
The steam carries the aromatic compounds into your respiratory system, helping relieve nasal congestion and bronchial irritation.

3. Clove and Honey Cough Mixture

Honey itself has soothing properties. When combined with cloves, the effect may be stronger.

Recipe:
Crush 2–3 cloves into powder and mix with 1 tablespoon raw honey. Take ½ teaspoon 2–3 times a day.

This mixture may help calm persistent cough and reduce throat inflammation.

4. Chewing Cloves for Throat Relief

Simply placing a whole clove in your mouth and gently chewing releases its oils slowly.

This may help:

  • Ease dry cough

  • Freshen breath

  • Soothe irritated throat tissue

Do not swallow whole cloves; spit them out after the flavor fades.

5. Clove and Ginger Respiratory Tonic

Ginger and cloves make a powerful combination.

Ingredients:

  • 3 cloves

  • 1-inch fresh ginger (sliced)

  • 1 cup water

  • Honey to taste

Boil for 8–10 minutes. Strain and drink warm.

This tonic may help reduce inflammation and improve circulation, which supports faster recovery during bronchitis.

Additional Health Benefits of Cloves

Beyond respiratory health, cloves may also:

  • Support digestion

  • Help regulate blood sugar levels

  • Promote oral health

  • Reduce oxidative stress

  • Support liver health

Their antioxidant capacity is particularly impressive, helping protect cells from damage caused by free radicals.

When to Be Cautious

Although cloves are natural, they are potent. Keep these precautions in mind:

  • Do not consume excessive amounts

  • Avoid clove oil internally unless guided by a professional

  • Pregnant or breastfeeding women should consult a doctor

  • People on blood-thinning medication should use caution

If symptoms of bronchitis last more than two weeks, worsen, or include high fever and chest pain, seek medical care immediately.

Natural remedies can support recovery, but they are not replacements for medical treatment when needed.

Final Thoughts

Cloves may be small, but they are powerful allies for respiratory wellness. Their antimicrobial and anti-inflammatory properties make them a valuable home remedy for coughs, congestion, and bronchitis support.

Adding clove tea, steam inhalation, or a simple clove-honey mixture to your routine during cold season may help your body fight infections more effectively.

Is Left-Side Sleeping the Secret to Better Health?

When it comes to improving your health, we often focus on what we eat, how much we exercise, and the supplements we take. But what if something as simple as the way you sleep could make a noticeable difference? Left-side sleeping has gained attention in recent years, especially in wellness discussions and traditional healing systems like Ayurveda. While it may sound like just another health trend, there is real science behind why sleeping on your left side might support digestion, heart health, and overall well-being.

Let’s explore what really happens when you switch to your left side at night.

1. Better Digestion and Reduced Acid Reflux

One of the most talked-about benefits of left-side sleeping is improved digestion. Your stomach naturally curves toward the left side of your body. When you lie on your left side, gravity helps keep stomach acid where it belongs, reducing the chance of it flowing back into the esophagus.

People who struggle with heartburn or gastroesophageal reflux disease (GERD) often notice fewer symptoms when they sleep on their left side. In contrast, sleeping on the right side can relax the lower esophageal sphincter in a way that may increase acid reflux episodes.

If you frequently wake up with a burning sensation in your chest or a sour taste in your mouth, simply turning onto your left side might offer natural relief.

2. Improved Heart Function

Your heart sits slightly toward the left side of your chest. When you sleep on your left side, gravity may help ease the heart’s workload by improving circulation and supporting blood flow from the body back to the heart.

For pregnant women, especially in the later stages, doctors often recommend left-side sleeping because it enhances circulation to both mother and baby. It reduces pressure on major blood vessels like the inferior vena cava, helping oxygen and nutrients flow more efficiently.

While more research is always ongoing, many experts agree that left-side sleeping can be beneficial for circulation.

3. Enhanced Lymphatic Drainage

The lymphatic system plays a crucial role in removing toxins and waste from the body. Interestingly, the left side of the body is considered the dominant lymphatic side. Sleeping on your left may help the body filter lymph fluid and process waste more effectively.

Over time, this could support immune function and reduce inflammation. While this doesn’t replace a healthy diet and hydration, it may complement your body’s natural detox processes.

4. Support for Brain Health

Recent research into the brain’s glymphatic system—the system responsible for clearing waste from the brain during sleep—suggests that side sleeping may improve its efficiency compared to sleeping on the back.

Some animal studies have shown that side sleeping may help clear metabolic waste linked to neurological conditions more effectively. Although more human research is needed, it adds another possible benefit to this simple sleep adjustment.

5. Reduced Snoring and Better Breathing

If you or your partner struggle with snoring, side sleeping in general can help keep the airways open. When you lie on your back, the tongue and soft tissues can fall backward, narrowing the airway and increasing snoring.

Sleeping on your left side can help maintain a more open airway, potentially reducing mild snoring and improving sleep quality.

6. Relief During Pregnancy

Pregnant women are often encouraged to sleep on their left side. This position improves blood flow to the placenta and reduces pressure on the liver, which sits on the right side of the abdomen. It can also reduce swelling in the legs and ankles by improving kidney function and circulation.

Because of these benefits, many healthcare providers recommend left-side sleeping during the second and third trimesters.

7. Possible Drawbacks

While left-side sleeping offers many potential benefits, it’s not perfect for everyone. Some people may experience shoulder or hip discomfort if they stay on one side too long. Using a supportive mattress and placing a pillow between the knees can help maintain proper spinal alignment and reduce pressure.

Additionally, individuals with certain heart conditions should consult a healthcare provider before making significant sleep changes, as comfort and individual medical needs vary.

How to Train Yourself to Sleep on Your Left Side

If you’re used to sleeping on your back or right side, changing positions may take time. Here are a few practical tips:

  • Place a firm pillow behind your back to prevent rolling.

  • Use a body pillow to hug and support your top leg.

  • Choose a mattress that supports side sleeping.

  • Start by lying on your left side as you fall asleep—even if you shift later, you’ll gradually adapt.

Consistency is key. Over a few weeks, your body may naturally begin to favor the new position.

The Bottom Line

Left-side sleeping isn’t a miracle cure, but it can be a simple, natural way to support your health. From reducing acid reflux and improving digestion to enhancing circulation and supporting lymphatic drainage, the benefits are promising and largely risk-free.

If you’re looking for a small change that could lead to better sleep and improved well-being, turning onto your left side tonight might be worth trying.

3 exercises to help you get pain on your leg causing sciatica: effective practice

Sciatica can be one of the most frustrating types of pain to deal with. That sharp, shooting discomfort that travels from your lower back down through your hip and into your leg is often caused by irritation or compression of the sciatic nerve — the longest nerve in the body. Conditions like a herniated disc, tight muscles, or prolonged sitting can all contribute to this issue.

While severe cases should always be evaluated by a healthcare professional, gentle and consistent exercise can play a powerful role in relieving pressure on the nerve and reducing discomfort. Below are three effective exercises that may help ease leg pain caused by sciatica. These movements are commonly recommended in physical therapy and supported by organizations such as the American Academy of Orthopaedic Surgeons and the National Institute of Neurological Disorders and Stroke for managing nerve-related back pain conservatively.

Before starting, remember: move slowly, never force a stretch, and stop if pain worsens.


1. Knee-to-Chest Stretch

This simple stretch helps reduce tension in the lower back and gluteal muscles, which can relieve pressure on the sciatic nerve.

How to Do It:

  1. Lie on your back on a comfortable surface.

  2. Bend your knees with feet flat on the floor.

  3. Gently pull one knee toward your chest using both hands.

  4. Hold for 20–30 seconds.

  5. Lower your leg slowly and repeat on the other side.

  6. Perform 3–5 repetitions per leg.

Why It Works:

Tight lower back muscles can aggravate sciatic pain. Bringing the knee toward the chest helps gently stretch the lumbar spine and surrounding muscles. This can improve flexibility and reduce nerve compression.

If comfortable, you may try pulling both knees to your chest at the same time for a deeper stretch.


2. Piriformis Stretch (Figure-Four Stretch)

The piriformis muscle lies deep in the buttocks and sits very close to the sciatic nerve. When this muscle becomes tight or inflamed, it can irritate the nerve — a condition sometimes called piriformis syndrome.

How to Do It:

  1. Lie on your back with knees bent and feet flat.

  2. Cross your right ankle over your left knee.

  3. Thread your hands behind your left thigh.

  4. Gently pull your left leg toward your chest.

  5. Hold for 20–30 seconds.

  6. Switch sides.

  7. Repeat 3 times per side.

Why It Works:

This stretch directly targets the piriformis muscle, helping release tension that may be pressing on the sciatic nerve. Many people who sit for long hours find this exercise particularly helpful.

Keep your head relaxed on the floor and avoid straining your neck during the movement.


3. Cat-Cow Stretch

This gentle spinal mobility exercise improves circulation to the spine and promotes flexibility in the lower back.

How to Do It:

  1. Start on your hands and knees in a tabletop position.

  2. Inhale and arch your back, lifting your head and tailbone upward (Cow position).

  3. Exhale and round your spine toward the ceiling, tucking your chin to your chest (Cat position).

  4. Move slowly and fluidly between these two positions.

  5. Repeat 10–15 times.

Why It Works:

The Cat-Cow movement increases spinal mobility and reduces stiffness. Gentle movement can help decrease inflammation and encourage proper nerve function. Controlled spinal motion also supports core engagement, which helps stabilize the lower back.

Move within a pain-free range and avoid forcing the arch.


Additional Tips for Managing Sciatica

Exercise is most effective when combined with healthy habits:

  • Avoid prolonged sitting. Stand and stretch every 30–60 minutes.

  • Use supportive seating with proper lumbar support.

  • Apply heat to relax tight muscles or cold packs to reduce inflammation.

  • Maintain a healthy weight to reduce spinal stress.

  • Practice gentle walking daily to keep circulation moving.

Consistency is key. Performing these exercises once may provide temporary relief, but practicing them daily can gradually improve flexibility and reduce flare-ups.


When to See a Doctor

While many cases of sciatica improve with conservative care, seek medical attention if you experience:

  • Severe or worsening pain

  • Weakness in the leg

  • Loss of bladder or bowel control

  • Numbness that spreads

These symptoms require immediate evaluation.


Final Thoughts

Sciatica pain in the leg can be uncomfortable and limiting, but gentle stretching and mobility exercises can make a meaningful difference. The Knee-to-Chest Stretch, Piriformis Stretch, and Cat-Cow Stretch are simple, low-impact movements that help reduce tension, improve flexibility, and support spinal health.

Start slowly, listen to your body, and stay consistent. With regular practice, many people experience reduced pain and improved mobility — allowing them to return to daily activities with greater comfort and confidence.

Two spoonfuls in the morning and goodbye to bone pain, nervous problems, anxiety, depression

Many people wake up with stiff joints, aching bones, low energy, or a sense of nervous tension that lingers throughout the day. Over time, bone discomfort, anxiety, and mood swings can become part of daily life — especially as we age. While serious or persistent symptoms should always be discussed with a healthcare professional, there is a gentle, nourishing morning blend you can add to your routine to support bone health, calm the nervous system, and encourage emotional balance.

This simple “two spoonfuls in the morning” recipe combines nutrient-dense ingredients that work together to support your body naturally. It’s easy to prepare, affordable, and can be taken daily as part of a healthy lifestyle.


Why This Morning Blend Works

Bone pain and nervous system discomfort are often linked to nutrient deficiencies — especially magnesium, calcium, vitamin D, omega-3 fatty acids, and certain antioxidants. Chronic stress can also drain the body of essential minerals, making anxiety and mood imbalances worse.

This recipe includes ingredients rich in:

  • Natural anti-inflammatory compounds

  • Healthy fats for brain and nerve function

  • Minerals that support bone density

  • Antioxidants that reduce oxidative stress

Taken consistently, this blend can help nourish your body from within.


🌿 Morning Bone & Nerve Support Blend

Ingredients:

  • 2 tablespoons raw honey

  • 1 tablespoon ground flaxseeds

  • 1 tablespoon chia seeds

  • 1 tablespoon sesame seeds (lightly toasted and ground)

  • ½ teaspoon turmeric powder

  • A pinch of black pepper

  • 1 tablespoon almond butter or crushed almonds

  • Optional: 1 teaspoon coconut oil


How to Prepare:

  1. Lightly toast the sesame seeds in a dry pan for 1–2 minutes until fragrant. Let cool and grind into a fine powder.

  2. In a small bowl, mix honey, ground flaxseeds, chia seeds, and ground sesame.

  3. Add turmeric and a pinch of black pepper (this improves turmeric absorption).

  4. Stir in almond butter and coconut oil if using.

  5. Mix until you get a smooth paste.

  6. Store in a glass jar in the refrigerator for up to 5 days.


How to Take It:

Take two spoonfuls every morning on an empty stomach. You can eat it directly or mix it into warm (not boiling) water or milk.

Consistency is key. Use daily for at least 3–4 weeks to notice improvements.


How Each Ingredient Helps

1. Sesame Seeds – Natural Calcium Power

Sesame seeds are one of the richest plant-based sources of calcium and magnesium. These minerals are essential for maintaining bone density and preventing discomfort associated with aging bones.

2. Chia & Flaxseeds – Omega-3 for Nerves and Mood

Both seeds are high in omega-3 fatty acids, which help reduce inflammation and support brain function. Omega-3s have been linked to improved mood stability and reduced symptoms of anxiety.

3. Turmeric – Natural Anti-Inflammatory

Turmeric contains curcumin, a compound known for its powerful anti-inflammatory and antioxidant properties. It may help relieve joint stiffness and support overall brain health.

4. Honey – Energy & Immune Support

Raw honey provides natural energy and contains antioxidants that support immunity and overall vitality.

5. Almonds – Magnesium for Calmness

Almonds are rich in magnesium, a mineral crucial for muscle relaxation and nervous system balance. Magnesium deficiency has been linked to increased anxiety and sleep disturbances.


Extra Tips for Better Results

While this blend is powerful, lifestyle matters too. For stronger bones and a calmer mind:

  • Spend 15–20 minutes daily in sunlight for natural vitamin D.

  • Stay hydrated throughout the day.

  • Include leafy greens, eggs, and fatty fish in your diet.

  • Practice deep breathing or light stretching in the morning.

  • Limit excess sugar and processed foods.

Gentle exercises like walking or yoga can also support joint flexibility and emotional balance.


Important Note

This natural blend supports general wellness but is not a cure for serious medical conditions such as osteoporosis, major depressive disorder, or nerve disorders. If you experience severe bone pain, chronic anxiety, numbness, or persistent depression, consult a qualified healthcare professional.

If you are taking medication — especially blood thinners, antidepressants, or anti-inflammatory drugs — speak with your doctor before adding turmeric or large amounts of seeds to your diet.


What to Expect

When taken regularly, many people report:

  • Reduced morning stiffness

  • Improved digestion

  • Better mood stability

  • Increased energy

  • Less nervous tension

Results vary from person to person, but natural remedies often work best when combined with healthy habits and patience.

Final Thoughts

Sometimes, small daily rituals can make a big difference. Two spoonfuls of this nutrient-rich blend each morning can gently support your bones, calm your nerves, and help you start your day feeling stronger and more balanced.

What Happens When You Take Magnesium Before Bed — A Natural Way to Support Better Rest

In today’s fast-paced world, falling asleep can feel like a nightly struggle. Racing thoughts, muscle tension, and restless legs often make it hard to truly relax. While many people turn to sleep aids, there’s a natural mineral that has quietly earned a reputation for promoting better rest: magnesium.

Magnesium is an essential mineral involved in more than 300 biochemical reactions in the body. It supports nerve function, muscle relaxation, heart rhythm, and even blood sugar control. But what happens when you take magnesium before bed? Let’s explore how this simple nighttime habit may support deeper, more restorative sleep.

How Magnesium Supports Relaxation

One of magnesium’s most important roles is calming the nervous system. It helps regulate neurotransmitters that send signals throughout the brain and body. In particular, magnesium supports gamma-aminobutyric acid (GABA), a neurotransmitter that promotes relaxation and reduces nerve activity.

When GABA levels are balanced, your brain shifts into a calmer state. This can make it easier to wind down at night, reduce racing thoughts, and prepare your body for sleep. That’s why magnesium is often associated with a more peaceful transition from wakefulness to rest.

May Help You Fall Asleep Faster

Some people struggle with sleep latency — the time it takes to fall asleep after getting into bed. Magnesium may help shorten this period by encouraging both mental and physical relaxation.

By relaxing muscles and calming nerve signals, magnesium can reduce the “wired but tired” feeling that keeps many people awake. When taken 30–60 minutes before bedtime, it may gently signal to your body that it’s time to rest.

Supports Deeper, More Restorative Sleep

Quality sleep isn’t just about falling asleep quickly — it’s about staying asleep and reaching deeper stages of rest. Magnesium may help improve overall sleep quality by supporting healthy circadian rhythms and balanced stress hormones.

It also plays a role in regulating melatonin, the hormone that controls your sleep-wake cycle. Balanced melatonin levels help your body maintain a natural rhythm, making it easier to stay asleep throughout the night.

May Reduce Nighttime Muscle Cramps

If you’ve ever been awakened by a leg cramp or muscle twitch, you know how disruptive it can be. Magnesium helps regulate muscle contractions and relaxation. A deficiency can contribute to muscle tightness, spasms, or restless legs.

Taking magnesium before bed may help reduce nighttime cramps and support smoother muscle function, leading to fewer interruptions during sleep.

Helps Ease Stress and Tension

Chronic stress is one of the biggest enemies of restful sleep. Magnesium supports the body’s stress response system and may help regulate cortisol, often referred to as the “stress hormone.”

When cortisol levels remain elevated at night, it can interfere with your ability to fall and stay asleep. By supporting a balanced stress response, magnesium may help create a calmer internal environment that’s more conducive to rest.

Supports Heart and Blood Pressure Health

Magnesium contributes to healthy heart rhythm and blood vessel relaxation. For some individuals, this may help promote a steady, relaxed state at night. A calm cardiovascular system supports overall nighttime comfort and may reduce sensations like heart pounding that sometimes disrupt sleep.

Different Forms of Magnesium for Sleep

Not all magnesium supplements are the same. Some forms are better suited for relaxation and sleep support:

  • Magnesium glycinate: Often recommended for sleep because it’s gentle on the stomach and contains glycine, an amino acid that also promotes calmness.

  • Magnesium citrate: Well absorbed but may have a mild laxative effect in some people.

  • Magnesium oxide: Contains more elemental magnesium but is less easily absorbed.

  • Magnesium threonate: Known for its ability to cross the blood-brain barrier, sometimes chosen for cognitive support.

Choosing the right form depends on your individual needs and tolerance.

How to Take Magnesium Before Bed

Most people take magnesium 30 to 60 minutes before bedtime. It can be taken with a small snack if you have a sensitive stomach. Dosage varies depending on age, sex, and individual health factors, but many adults use between 200–400 mg daily.

It’s important not to exceed recommended amounts unless guided by a healthcare professional. Too much magnesium can cause digestive discomfort, including diarrhea.

Who May Benefit Most?

Magnesium before bed may be especially helpful for:

  • People with difficulty falling asleep

  • Individuals experiencing high stress

  • Those with frequent muscle cramps

  • Adults over 50, who may be more prone to magnesium deficiency

  • Anyone with a diet low in leafy greens, nuts, seeds, and whole grains

However, individuals with kidney disease or certain medical conditions should consult a healthcare provider before starting supplementation.

A Simple Nighttime Magnesium Drink Recipe

If you prefer a more natural approach, you can create a calming magnesium bedtime drink.

Ingredients:

  • 1 cup warm water or herbal tea (like chamomile)

  • 200–300 mg magnesium glycinate powder (follow product instructions)

  • 1 teaspoon raw honey (optional)

  • A squeeze of fresh lemon (optional)

Instructions:
Warm your water or tea until comfortably hot. Stir in the magnesium powder until fully dissolved. Add honey and lemon if desired. Sip slowly about 30 minutes before bedtime while practicing deep breathing or quiet reflection.

Final Thoughts

Taking magnesium before bed is a simple and natural strategy that may support relaxation, ease stress, reduce muscle tension, and improve overall sleep quality. While it’s not a magic cure, consistent use combined with healthy sleep habits — such as limiting screen time and keeping a regular bedtime — can make a noticeable difference.

A Mixture of Ginger, Garlic, Onion and Lemon: Purify Your Body and Lungs

In today’s world, our bodies are constantly exposed to pollution, processed foods, stress, and environmental toxins. While the body naturally detoxifies itself through organs like the liver, kidneys, and lungs, certain natural ingredients can help support these systems. A powerful traditional combination of ginger, garlic, onion, and lemon has long been used in natural wellness practices to help cleanse the body, support respiratory health, and strengthen immunity.

This simple yet potent mixture combines anti-inflammatory, antibacterial, and antioxidant properties in one easy homemade remedy. Let’s explore why this blend works and how to prepare it properly at home.


Why These Ingredients Work Together

1. Ginger

Ginger is well known for its anti-inflammatory and antioxidant properties. It helps improve circulation, supports digestion, and may assist in clearing mucus from the respiratory tract. Ginger’s warming nature can soothe the throat and promote easier breathing, especially during seasonal changes.

2. Garlic

Garlic contains allicin, a powerful compound with antimicrobial and immune-boosting properties. Garlic has been traditionally used to support lung health and help the body fight infections. It may also support cardiovascular health by promoting healthy blood flow.

3. Onion

Onion is rich in quercetin, a strong antioxidant that may help reduce inflammation and support respiratory function. Onions have natural expectorant properties, meaning they may help loosen mucus and clear the airways.

4. Lemon

Lemon is packed with vitamin C and antioxidants. It supports immune function, helps alkalize the body, and assists in flushing toxins. Lemon also enhances the absorption of beneficial compounds from the other ingredients.

Together, these four ingredients create a natural tonic that supports detoxification, strengthens immunity, and promotes clearer breathing.


UNIE Ginger-Garlic-Lemon Lung Cleanse Recipe

Ingredients:

  • 1 medium fresh ginger root (about 2 inches)

  • 4 cloves fresh garlic

  • 1 medium onion

  • Juice of 1 large lemon

  • 2 cups water

  • 1 tablespoon raw honey (optional, for taste)


Instructions:

Step 1: Prepare the Ingredients

Peel and slice the ginger into thin pieces. Crush the garlic cloves slightly to activate their beneficial compounds. Chop the onion into small pieces.

Step 2: Boil the Mixture

In a small pot, add 2 cups of water. Add the ginger, garlic, and onion. Bring to a gentle boil and let simmer for 10–15 minutes.

Step 3: Cool and Strain

Remove from heat and allow the mixture to cool slightly. Strain the liquid into a cup or jar.

Step 4: Add Lemon

Once the mixture is warm (not hot), add freshly squeezed lemon juice. Avoid adding lemon while boiling, as high heat can reduce vitamin C content.

Step 5: Sweeten (Optional)

Add a tablespoon of raw honey if desired. Stir well.


How to Use

Drink one small cup (about ½ cup) once daily, preferably in the morning on an empty stomach or before bedtime. Use for 7–10 days during seasonal transitions or when feeling congested.


Potential Benefits

Supports Lung Health

This mixture may help loosen mucus, reduce throat irritation, and promote easier breathing.

Boosts Immunity

The combination of antioxidants and antimicrobial compounds helps strengthen the immune system.

Aids Digestion

Ginger and lemon support digestion, which plays a key role in overall detoxification.

Promotes Circulation

Garlic and ginger may improve blood flow, supporting oxygen delivery throughout the body.

Natural Anti-Inflammatory

All four ingredients contain compounds that may help reduce inflammation in the body.


Important Notes

While this remedy uses natural ingredients, it is not a substitute for medical treatment. If you have asthma, chronic lung conditions, ulcers, or are taking blood-thinning medications, consult your healthcare provider before using this mixture. Garlic and ginger can thin the blood, so caution is important.

Pregnant women and individuals with sensitive stomachs should start with small amounts to see how their body responds.


Extra Tip: Steam Version for Lung Support

For additional respiratory relief, you can also use these ingredients for steam inhalation:

  • Boil ginger and onion in water.

  • Remove from heat.

  • Lean over the pot with a towel over your head and inhale the steam carefully for 5–7 minutes.

This may help open nasal passages and soothe congestion.


Final Thoughts

The ginger, garlic, onion, and lemon mixture is a time-tested natural remedy that supports your body’s natural cleansing processes. Simple, affordable, and made from everyday kitchen ingredients, this tonic can be a helpful addition to your wellness routine.

Remember, true “detox” comes from consistent healthy habits: drinking enough water, eating whole foods, getting fresh air, exercising, and sleeping well. This natural blend simply works as supportive nourishment for your body and lungs.

10 Hiatal Hernia Signs and Symptoms You Should Know

A hiatal hernia is a condition many people have without even realizing it. It happens when part of the stomach pushes up through the diaphragm and into the chest cavity. The diaphragm is the muscle that helps you breathe and separates your chest from your abdomen. Normally, the esophagus passes through a small opening in the diaphragm called the hiatus before connecting to the stomach. When that opening weakens or widens, a hiatal hernia can develop.

Hiatal hernias are especially common in adults over 50 and are often associated with acid reflux and heartburn. While some people experience no symptoms at all, others may struggle with discomfort that affects their daily lives. Here are 10 important signs and symptoms you should know.

  1. Frequent Heartburn
    One of the most common signs of a hiatal hernia is persistent heartburn. This burning sensation in the chest often occurs after eating or when lying down. Because the stomach is partially displaced, acid can more easily flow back into the esophagus, causing irritation and discomfort.

  2. Acid Reflux
    Acid reflux happens when stomach acid moves upward into the esophagus. A hiatal hernia can weaken the lower esophageal sphincter, the valve that normally keeps acid in the stomach. As a result, you may experience a sour taste in your mouth, burning in your throat, or regurgitation of food and liquid.

  3. Chest Pain
    Chest pain related to a hiatal hernia can sometimes feel alarming. It may mimic the symptoms of a heart problem. The pain is usually caused by acid irritation or muscle strain in the esophagus. However, because chest pain can signal serious conditions, it is important to seek medical attention to rule out heart issues.

  4. Difficulty Swallowing
    Some people with a hiatal hernia notice that food feels stuck in their throat or chest. This condition, known as dysphagia, can happen if inflammation narrows the esophagus. Over time, chronic acid exposure can lead to scarring and further swallowing difficulties.

  5. Chronic Cough
    A persistent cough that does not seem linked to a cold or respiratory infection could be related to acid reflux from a hiatal hernia. Acid irritating the throat and airways can trigger coughing, especially at night.

  6. Hoarseness or Sore Throat
    When stomach acid reaches the throat, it can cause irritation and inflammation. This may lead to a raspy voice, frequent throat clearing, or a sore throat that lingers without signs of infection.

  7. Feeling Full Quickly
    A hiatal hernia can sometimes cause early satiety, meaning you feel full after eating only a small amount of food. The altered position of the stomach may interfere with normal digestion and create a sensation of pressure.

  8. Bloating and Burping
    Excessive burping and bloating are also common symptoms. When the stomach shifts upward, trapped air and digestive gases can build up more easily, leading to discomfort and frequent belching.

  9. Nausea
    Some individuals experience nausea, especially after meals. The pressure caused by the hernia and reflux may upset the stomach and make you feel queasy.

  10. Shortness of Breath
    In larger hiatal hernias, the stomach pressing into the chest cavity can interfere with lung expansion. This may lead to shortness of breath, particularly during physical activity or when bending over.

When to See a Doctor

While mild symptoms may be managed with lifestyle changes, it is important to seek medical advice if you experience severe chest pain, difficulty swallowing, unexplained weight loss, vomiting blood, or black stools. These could signal complications such as bleeding or significant esophageal damage.

Risk Factors

Several factors increase the likelihood of developing a hiatal hernia. Aging naturally weakens muscle tissue. Obesity puts extra pressure on the abdomen. Heavy lifting, chronic coughing, pregnancy, and frequent straining during bowel movements can also contribute.

Management and Treatment

Treatment often focuses on reducing acid reflux. Doctors may recommend smaller meals, avoiding trigger foods, losing excess weight, and not lying down immediately after eating. Elevating the head of the bed can also help reduce nighttime symptoms.

Medications such as antacids, H2 blockers, or proton pump inhibitors may be prescribed to reduce acid production and protect the esophagus. In severe cases or when complications occur, surgical repair may be necessary to reposition the stomach and tighten the diaphragm opening.

Final Thoughts

A hiatal hernia is a common but often overlooked condition. Recognizing the signs early can help you take steps to manage symptoms and prevent complications. If you frequently experience heartburn, chest discomfort, or swallowing issues, it is worth discussing these symptoms with a healthcare professional. With proper care and lifestyle adjustments, most people can successfully control their symptoms and maintain a good quality of life.