Ultimate Air Fryer Baked Potatoes

There is something utterly comforting about a perfectly baked potato. The crackle of the crisp skin, the soft and steamy interior, and that moment when butter melts into the fluffy potato like magic—this is simplicity at its finest. But while oven-baked potatoes have long been the traditional standard, the air fryer has changed the game. Now, instead of waiting over an hour and heating up your kitchen, you can achieve an even more delightfully crispy skin and tender interior in less time, with minimal fuss. This Ultimate Air Fryer Baked Potato recipe is simple, reliable, and produces results that are shockingly good every single time.

The secret is in how you prepare the potatoes before they cook: the right oil, the right salt, and a little bit of patience while you let the air fryer do its job. Russet potatoes work best because their starchy composition becomes soft and fluffy inside while forming a crisp, roasted exterior. The air circulating in the fryer ensures that every inch of the potato gets the heat it needs for that restaurant-quality finish—no soggy skins, no microwaved texture, just pure perfection.

Ingredients

  • 3 large Russet potatoes (choose firm, heavy, evenly shaped ones)

  • 1 ½ tablespoons olive oil (or melted butter for extra richness)

  • 1 teaspoon coarse sea salt (kosher salt works beautifully)

  • ½ teaspoon black pepper

  • ½ teaspoon garlic powder (optional but adds depth)

  • ½ teaspoon smoked paprika (optional, for an extra aromatic edge)

Optional Toppings (Highly Recommended)

  • Salted butter

  • Sour cream or Greek yogurt

  • Shredded cheddar or pepper jack cheese

  • Chopped green onions or chives

  • Crispy bacon bits

  • Fresh cracked black pepper

  • Ranch dressing or chipotle sauce

Instructions

  1. Prep the Potatoes
    Begin by scrubbing each potato thoroughly under running water. Since the potato skins become crisp and delicious, you want them clean. Pat them completely dry—dry skin is key to crisping.

  2. Pierce with a Fork
    Using a fork, poke 5–7 holes around each potato. This prevents steam from building inside and allows heat to penetrate more evenly.

  3. Season Generously
    Rub each potato all over with the olive oil or melted butter. You want every surface coated. Sprinkle salt and pepper on all sides, along with garlic powder and smoked paprika if using. Don’t skip the salt—it’s essential for that savory, flavorful crust.

  4. Air Fry
    Place the potatoes in the air fryer basket, making sure they don’t touch for air circulation. Set the air fryer to 200°C / 400°F and cook for 35–45 minutes depending on potato size. Turn them halfway through.
    Test for doneness: Insert a knife into the center; it should slide in like butter with zero resistance.

  5. Serve
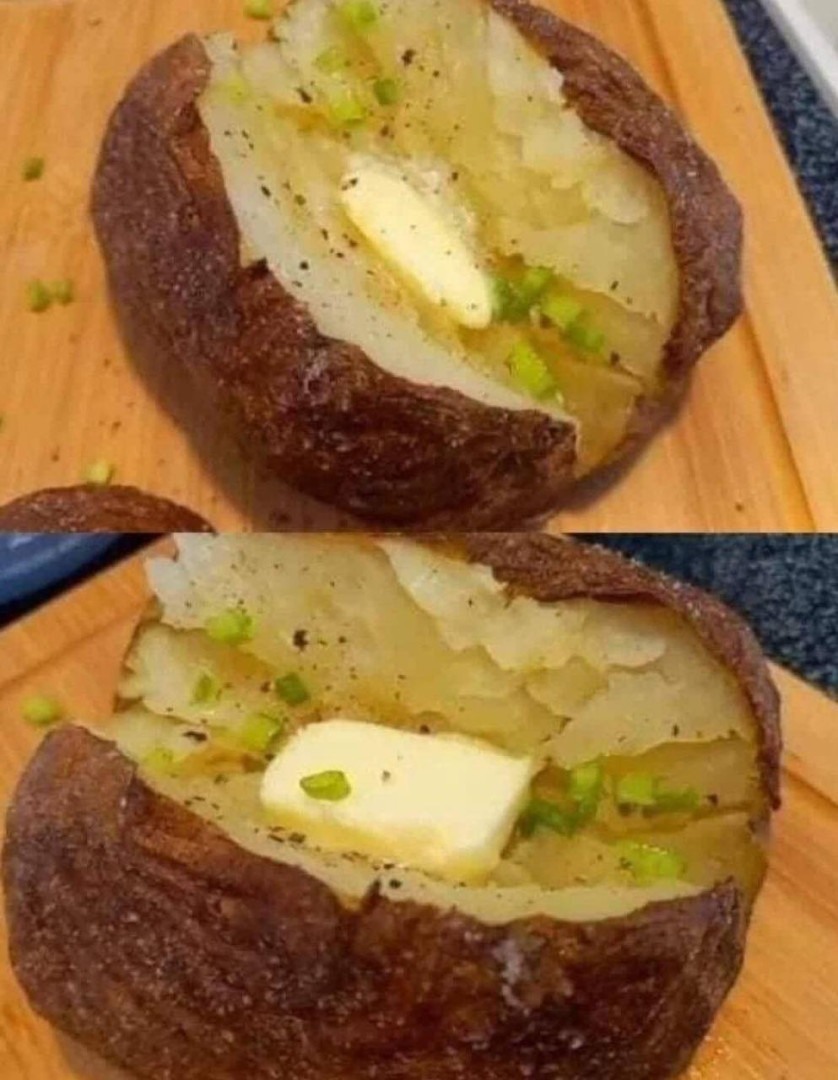
    Once done, let them rest for 2 minutes. Then, take a sharp knife and slice a deep slit across the top. Gently squeeze the sides inward to open the potato and expose the fluffy interior.
    Add butter first so it melts into the potato, then build your toppings however you like.

Why This Method Works

Traditional baked potatoes rely on oven heat that surrounds but doesn’t circulate. The air fryer acts like a mini convection oven, allowing hot air to constantly move around the potato, crisping all sides evenly. The result differs from microwaved potatoes, which often turn gummy or watery, and even from oven baking, which takes longer and can sometimes dry the potato interior. Here, you get both speed and superior texture: crisp skins and soft, pillowy centers.

Flavor Variations & Serving Ideas

  • Garlic-Parmesan Potato: After cooking, brush the potato skin with melted butter, sprinkle grated Parmesan, garlic powder, and parsley.

  • Cheesy Loaded Potato: Add shredded cheese while the potato is hot so it melts, then top with bacon and chives.

  • Tex-Mex Style: Add taco-seasoned ground beef, salsa, and Mexican blend cheese.

  • Breakfast Potato: Top with scrambled eggs, cheddar, and a drizzle of hot sauce.

This dish is not just a side—it can easily be the main event. Pair it with soup, steak, roasted vegetables, grilled chicken, or even a simple salad.

Tips for the Best Air Fryer Baked Potatoes

  • Always choose Russet potatoes for that fluffy interior.

  • Don’t skip drying the potatoes—moisture prevents crisping.

  • Coat evenly in oil for a beautiful golden crust.

  • If the potato is large, add 5–10 extra minutes of cook time.

  • For extra crispy skin, air fry 5 minutes longer after slicing and fluffing.

Conclusion

The Ultimate Air Fryer Baked Potato is the perfect union of simplicity and satisfaction. With minimal ingredients and just a bit of seasoning, the air fryer transforms an ordinary potato into something deeply comforting and effortlessly gourmet. Once you try this method, it’s almost guaranteed to become your weeknight staple, your go-to comfort food, and your reliable side dish for everything. Dinner just got easier—and more delicious.

Cranberry Orange Sour Cream Loaf

There is something magical about the bright, tart flavor of cranberries paired with the cozy warmth of freshly baked bread. This Cranberry Orange Sour Cream Loaf takes that classic flavor pairing and elevates it with a lush, moist crumb, a fragrant citrus aroma, and a glossy orange glaze that soaks into the loaf like liquid sunshine. It’s the kind of recipe you keep in your rotation year-round—perfect for holiday mornings, afternoon tea, or gifting to neighbors. The sweetness is gentle rather than overwhelming, letting the cranberries shine and the loaf feel satisfying without being heavy.

Unlike many cranberry loaves that can turn out dry or crumbly, this version uses sour cream and a touch of oil to create a beautifully tender, lush interior. The fresh orange zest ties everything together, adding natural brightness without any artificial flavor. And the glaze—simple, silky, and vibrant—adds the final touch that makes each slice irresistible.

Ingredients

For the Loaf:

  • 1 ¾ cups all-purpose flour

  • 1 cup granulated sugar

  • ½ cup sour cream (full-fat preferred)

  • 2 large eggs, room temperature

  • ⅓ cup vegetable oil or melted butter

  • 1 teaspoon vanilla extract

  • 1 tablespoon fresh orange zest (about one orange)

  • ½ cup freshly squeezed orange juice

  • 1 teaspoon baking powder

  • ½ teaspoon baking soda

  • ¼ teaspoon salt

  • 1 ¼ cups fresh or frozen cranberries (do not thaw if frozen)

  • 1 tablespoon flour (for tossing cranberries)

For the Orange Glaze:

  • 1 cup powdered sugar

  • 2–3 tablespoons orange juice

  • ½ teaspoon orange zest (optional)

Instructions

Step 1: Prepare the Pan and Oven
Preheat your oven to 350°F (175°C). Grease and line a standard loaf pan (8×4 or 9×5). Lining with parchment ensures the loaf comes out cleanly and keeps the bottom from over-browning.

Step 2: Mix the Wet Ingredients
In a mixing bowl, whisk together the sour cream, eggs, oil (or butter), vanilla, orange zest, and orange juice. Whisk until smooth and creamy. The orange zest is crucial—it releases natural citrus oils that infuse the batter with deep flavor.

Step 3: Combine the Dry Ingredients
In a separate bowl, whisk together flour, baking powder, baking soda, and salt. Combining dry ingredients separately helps ensure even rising and prevents clumping.

Step 4: Toss the Cranberries
Place the cranberries in a small bowl and toss them with 1 tablespoon of flour. This prevents them from sinking to the bottom of the loaf while baking.

Step 5: Build the Batter
Add the dry mixture to the wet mixture. Stir gently with a spatula—do not overmix. Overmixing causes dense bread. Once the flour is just combined, fold in the cranberries softly.

Step 6: Bake
Pour the batter into your prepared loaf pan and smooth the top. Bake for 50–60 minutes, or until a toothpick inserted into the center comes out clean.
If the top browns too quickly, loosely cover with foil during the last 15 minutes.

Step 7: Make the Glaze
Whisk powdered sugar and orange juice together until smooth and pourable. If too thick, add a bit more juice; if too thin, add powdered sugar. A touch of orange zest intensifies the flavor beautifully.

Step 8: Glaze and Cool
Allow the loaf to cool in the pan for 10 minutes, then transfer to a wire rack. Drizzle the glaze over while still slightly warm, allowing it to soak in and create a glossy finish.

Tips for Best Texture and Flavor

  • Use full-fat sour cream for the moistest crumb.

  • Fresh cranberries offer the brightest flavor, but frozen works perfectly—just do not thaw.

  • Orange zest is non-negotiable. It carries more orange flavor than juice alone.

  • Let the loaf cool completely before slicing for clean, bakery-smooth slices.

Serving Ideas

  • Serve slightly warm with softened butter or cream cheese.

  • Toast leftover slices and drizzle with honey for a breakfast treat.

  • Pair with tea, coffee, or hot spiced cider for ultimate cozy comfort.

Storage Instructions

  • Room temperature: Store wrapped for 3 days.

  • Refrigerator: Lasts up to 1 week.

  • Freezer: Wrap tightly and freeze up to 3 months; glaze after thawing for best results.

No-Bake Peanut Butter Eclair Cake

When you crave a dessert that feels luxurious, indulgent, and nostalgic all at once—but you don’t want to turn on the oven—this No-Bake Peanut Butter Éclair Cake steps onto the stage like a star. Inspired by the layered cream-filled éclairs found in French pastry shops, this version takes a playful American twist by introducing creamy peanut butter, velvety custard filling, and a silky chocolate glaze. You don’t need pastry skills, fancy tools, or hours of work. Just simple layering, chilling, and letting the magic happen.

This dessert is perfect for family gatherings, potlucks, holidays, or even late-night sweet cravings. It slices beautifully, sets firm, and melts in your mouth with each bite.

Ingredients

For the Layers

  • 2 packages graham crackers (rectangular sheets)

  • 2 cups cold heavy cream (or substitute with whipped topping, but fresh cream is best)

  • 1 cup cold milk

  • 1 box (3.4 oz / 96g) instant vanilla pudding mix

  • 1 cup creamy peanut butter

  • 8 oz cream cheese, softened

  • ½ cup powdered sugar

  • 1 teaspoon vanilla extract

  • Pinch of fine salt

For the Chocolate Ganache Topping

  • 1 cup semi-sweet chocolate chips

  • 3 tablespoons butter

  • ½ cup heavy cream

  • 1 tablespoon honey or corn syrup (gives a glossy finish)

Step-by-Step Instructions

Step 1: Create the Peanut Butter Cream Layer

Using a stand mixer or hand mixer, beat the softened cream cheese and powdered sugar until smooth and creamy. Add the peanut butter, vanilla extract, and a pinch of salt. Beat until fluffy.

Meanwhile, in a separate bowl, whisk together the cold milk and instant vanilla pudding mix until thickened. Fold in the whipped heavy cream gently until smooth and airy. Finally, fold the peanut butter mixture into the pudding mixture. The filling should be luscious, cloud-like, and silky.

This mixture is the heart of the cake—rich from peanut butter, yet light enough to create that classic éclair cream texture.

Step 2: Assemble the Layers

Prepare a 9×13-inch dish.

  • Place a layer of graham crackers across the bottom. Break pieces as needed, but keep gaps minimal.

  • Spread half of the peanut butter cream mixture over the graham cracker layer.

  • Add another layer of graham crackers.

  • Spread the remaining cream mixture evenly.

  • Finish with a final layer of graham crackers on top.

Lightly press the top layer to help settle the filling. The crackers will soften and turn into pastry-like layers as the dessert chills.

Step 3: Make the Chocolate Ganache

In a small saucepan or microwave, heat the heavy cream just until steaming—not boiling. Pour it over the chocolate chips and butter in a bowl. Let it sit for 1 minute, then whisk until smooth. Add the honey to give it that beautiful glossy shine.

Let the ganache cool for 5 minutes—just until slightly thickened—but still pourable. Pour it evenly over the top layer of graham crackers.

Use a spatula to smooth it out into a velvety chocolate blanket.

Step 4: Chill and Set

Cover the dish with plastic wrap and refrigerate for at least 6 hours, but overnight is ideal. During this time, the graham crackers transform—absorbing moisture and becoming tender like the outer layer of a traditional éclair.

When chilled properly, the cake slices beautifully and the layers look stunning.

Serving Ideas

  • Garnish with crushed peanuts or peanut butter chips.

  • Warm a knife under hot water before slicing for smooth, clean pieces.

  • Pair with cold milk, iced coffee, or hot espresso.

Why This Recipe Works

This no-bake dessert works beautifully because it relies on texture transformation. The graham crackers begin as crisp layers, but the creamy filling hydrates them slowly, turning them into something soft, tender, and close to pastry dough without any baking. Meanwhile, the peanut butter and cream cheese provide depth and richness, while the pudding and whipped cream keep things light and silky. The chocolate ganache gives that essential silky-smooth finish and ties everything together like a polished ribbon on a gift.

Unlike many no-bake éclair cakes that can feel overly sweet, this recipe balances flavors. The slight saltiness of the peanut butter prevents the dessert from leaning too sugary, while the chocolate topping provides a bittersweet contrast.

Storage

  • Refrigerate covered for up to 4 days.

  • Freeze portions for up to 2 months—thaw in the refrigerator before serving.

Tips for Perfection

  1. Use cold cream and milk to ensure the pudding sets properly.

  2. Do not rush the chilling time. The longer it sits, the better the texture becomes.

  3. To make it extra peanut-forward, drizzle warm melted peanut butter across the chocolate before chilling.

Loaded Baked Potato Soup

There is nothing quite as comforting as a steaming bowl of loaded baked potato soup—especially one that captures the flavor of an actual baked potato loaded with butter, cheese, bacon, sour cream, and chives. This version brings all those flavors together in a rich, velvety base that feels like a warm hug in a bowl. Every spoonful offers creamy potato goodness layered with smoky bacon, sharp cheese, and bright, fresh toppings. It’s the kind of recipe that fills the house with an irresistible aroma and instantly turns a simple meal into something unforgettable.

This soup works beautifully as a weeknight dinner, a cozy lunch, or even a dish to impress guests on chilly evenings. The secret to this recipe’s stand-out flavor is baking the potatoes instead of boiling them. Baking draws out moisture, concentrates flavor, and gives the potatoes a deeper, more developed taste that blends beautifully into the creamy broth.

Ingredients

For the Soup Base:

  • 4 large russet potatoes (washed and dried)

  • 6 strips thick-cut bacon

  • 1 tablespoon butter

  • 1 medium onion, finely diced

  • 3 garlic cloves, minced

  • 3 tablespoons all-purpose flour

  • 4 cups chicken broth

  • 2 cups whole milk (or half-and-half for extra creaminess)

  • 1 cup shredded sharp cheddar cheese

  • ½ cup sour cream

  • Salt and black pepper, to taste

For Serving (Optional but Recommended):

  • Extra shredded cheddar cheese

  • Extra crispy bacon pieces

  • Sliced green onions or chives

  • A dollop of sour cream

  • Cracked black pepper

Step-by-Step Instructions

Step 1: Bake the Potatoes

Preheat your oven to 425°F (220°C). Prick the potatoes all over with a fork, rub them lightly with oil and a pinch of salt, and place directly on the oven rack. Bake for 50–60 minutes, or until they feel soft when squeezed gently (use a towel to avoid burns). Let them cool enough to handle.

Once cooled, scoop out the tender potato flesh and roughly mash it with a fork. Don’t over-mash—you want small chunks for texture.

Step 2: Cook the Bacon

In a heavy pot or Dutch oven, cook the bacon on medium heat until crispy. Remove and set aside, leaving the flavorful bacon drippings in the pot. Chop the bacon into bite-sized pieces.

Step 3: Build the Flavor Base

Add the tablespoon of butter to the bacon drippings. When melted, stir in the onion and sauté for 5–7 minutes until soft and lightly golden. Add garlic and cook for 1 minute until fragrant.

Sprinkle the flour over the onion mixture and stir for 1–2 minutes to form a roux. This thickens the soup and creates a silky texture.

Step 4: Add the Liquids

Slowly whisk in the chicken broth and milk, making sure there are no lumps. Let the mixture come to a gentle simmer.

Add the mashed baked potatoes and stir well. Continue simmering for 10–15 minutes, allowing the soup to thicken and flavors to deepen.

Step 5: Add the Creaminess

Reduce heat to low. Stir in cheddar cheese until melted completely, then fold in the sour cream. Season with salt and black pepper to taste.

If you like a super smooth soup, blend with an immersion blender. If you prefer chunks (traditional loaded style), leave it as is.

Serving & Presentation

Ladle the soup into warm bowls. Top with:

  • A shower of shredded cheddar

  • Crisp bacon crumbles

  • Fresh sliced green onions

  • A small swirl of sour cream

  • A sprinkle of black pepper

The toppings bring texture, freshness, and layers of flavor that make the dish unforgettable.

Tips for the Best Flavor

  • For richer soup: Replace whole milk with half-and-half or heavy cream.

  • For smoky depth: Use smoked paprika or roasted garlic.

  • To make it vegetarian: Swap bacon for smoked mushrooms and use vegetable broth.

  • To store: Refrigerate up to 4 days. Reheat gently and add a splash of milk if thickened.

Why This Recipe Works

This soup mimics the taste of a real baked potato—not just any potato soup—because the potatoes are roasted, not boiled. The crispy bacon provides smoky contrast, the sour cream adds tangy silkiness, and the melted cheese brings savory richness. You get creaminess, chunky potato comfort, and a layered finish that satisfies on every level.

Golumpki Soup

Golumpki soup is a warming, nostalgic dish inspired by the classic Polish comfort food—golumpki, also known as cabbage rolls. Traditionally, golumpki are made by stuffing tender cabbage leaves with a seasoned mix of ground meat, rice, onions, and herbs, then simmering everything gently in a lightly sweet tomato sauce. Turning this beloved dish into a soup means you get all the comforting flavors without the extra work of rolling cabbage leaves. It’s hearty, soothing, and perfect for chilly weather, family gatherings, or those special evenings when you want a pot simmering on the stove filling your home with delicious aromas.

This unique version deepens the flavor with slow-sautéed onions, garlic, and a touch of smoked paprika. The broth develops a beautiful richness from crushed tomatoes and a hint of sweetness from carrots. The rice cooks right in the pot, absorbing the flavors around it and giving the soup a thick, satisfying body. Every spoonful tastes like the classic golumpki you know—but easier, creamier, and even more comforting.

Ingredients

For the Soup Base:

  • 1 pound ground beef (you may also do half beef, half pork for richer flavor)

  • 1 medium onion, finely chopped

  • 3 cloves garlic, minced

  • 2 medium carrots, peeled and diced

  • 1 tablespoon olive oil or butter

  • 1 small head green cabbage, chopped into bite-sized pieces

  • 5 cups beef broth (or chicken broth)

  • 1 can (28 oz) crushed tomatoes

  • 1 tablespoon tomato paste

  • 1 teaspoon smoked paprika (optional but recommended)

  • 1 teaspoon dried thyme

  • 1 teaspoon dried parsley

  • 1 bay leaf

  • Salt and black pepper to taste

For the Rice:

  • ¾ cup uncooked white rice (long grain or jasmine works best)

    • Or substitute with cooked rice: Use 2 cups, added at the end.

Optional Finishing Touches:

  • 1 tablespoon brown sugar (to balance acidity, optional but traditional)

  • 1 tablespoon red wine vinegar or apple cider vinegar

  • Sour cream for serving

  • Fresh parsley or dill for garnish

Instructions

  1. Start with Flavor Building
    Heat the olive oil or butter in a large heavy-bottomed soup pot over medium heat. Add the chopped onions and cook for 3–4 minutes, stirring often until they soften and turn slightly golden. Add the minced garlic and cook for another minute, releasing its wonderful aroma.

  2. Brown the Meat
    Add the ground beef (or beef and pork blend) into the pot. Break it apart with a spoon as it cooks. Season with a little salt and pepper and let the meat brown well—don’t rush this step. Browning brings depth and richness that forms the backbone of the soup’s flavor.

  3. Add the Vegetables and Seasonings
    Stir in the chopped carrots, cabbage, smoked paprika, thyme, parsley, and bay leaf. Allow everything to sauté together for 5 minutes. The cabbage will begin to soften and release a sweet, earthy smell.

  4. Add Tomatoes and Broth
    Mix in the crushed tomatoes and tomato paste. Pour in the beef broth and stir everything together. Bring the soup to a gentle boil.

  5. Add the Rice and Simmer
    Stir in the uncooked rice (if using cooked rice, wait to add later). Reduce heat to low, cover, and let it simmer for 25–35 minutes, stirring occasionally so the rice doesn’t stick to the bottom. The soup will thicken beautifully as the rice absorbs the broth.

  6. Balance the Flavors
    Taste the soup. If the tomatoes make it a bit too sharp, add the brown sugar and vinegar. This combination softens acidity and brings out a perfect savory-sweet harmony—just like traditional golumpki sauce.

  7. Finish and Serve
    Remove the bay leaf. Ladle the soup into deep bowls. Add a generous swirl of sour cream and a sprinkle of fresh parsley or dill.

Why This Soup Works

This unique recipe captures the heart and soul of golumpki without any fuss. The slow-simmered cabbage turns silky tender, the beef and rice create a hearty texture that comforts instantly, and the tomato broth ties every spoonful together. Smoked paprika provides a subtle warmth reminiscent of Old-World kitchens, while a touch of vinegar lifts and brightens the final flavor. It’s rustic, filling, and deeply satisfying.

Serving Suggestions

  • Serve with warm crusty bread or buttered dinner rolls.

  • Add a side of tangy pickles to mimic traditional Polish table spreads.

  • For extra indulgence, top with shredded cheese (mozzarella melts beautifully).

Storage and Reheating

Golumpki soup stores wonderfully.

  • Refrigerator: Up to 4–5 days.

  • Freezer: Up to 3 months (best to freeze before adding rice or use cooked rice added after reheating).

If the soup thickens too much in the fridge (it will!), simply stir in a splash of broth or water when reheating.

3 Minute Liquid Dough, Garlic Flatbread

If there is one kitchen trick that feels like pure magic, it’s the idea of making soft, fluffy, perfectly golden flatbread without kneading, without rolling, and without waiting for dough to rise. This recipe is exactly that: a 3-minute liquid dough garlic flatbread that cooks in just minutes and tastes like something straight from a cozy village bakery. The beauty lies in the batter-like consistency of the dough—it pours like pancake batter, spreads like magic, and cooks up into warm, chewy flatbreads with a tender inside and lightly crisp outside. Best of all, the garlic butter brushed over the top makes every bite fragrant, savory, and completely irresistible.

This recipe is perfect when you want bread on the table fast—whether it’s to scoop up soup, wrap around grilled chicken, serve with hummus, or simply enjoy warm as a snack.

Ingredients

For the Liquid Dough:

  • 1 cup all-purpose flour

  • 1 cup warm milk (or warm water for dairy-free)

  • 1 large egg

  • ½ teaspoon salt

  • 1 tablespoon olive oil

  • 1 teaspoon baking powder

For the Garlic Butter:

  • 3 tablespoons melted butter (or olive oil for vegan)

  • 3–4 cloves garlic, finely minced or grated

  • 1 tablespoon chopped fresh parsley (or ½ teaspoon dried)

  • Pinch of salt

Instructions

Step 1: Prepare the Liquid Dough

In a mixing bowl, whisk the egg and warm milk until smooth. Add the salt, olive oil, and baking powder, then sift the flour directly over the bowl to avoid lumps. Whisk until the batter becomes silky, smooth, and pourable—similar to crepe or pancake batter. If it feels too thick, add 1–2 tablespoons more milk. If it feels too thin, sprinkle in a little more flour.

This batter is where the magic happens: it allows the flatbread to puff slightly, develop soft air pockets, and cook evenly without kneading or resting. Because it’s “liquid dough,” you don’t need yeast or rising time at all.

Step 2: Make the Garlic Butter

In a small bowl, stir together melted butter, garlic, parsley, and a pinch of salt. Let it sit for a minute so the flavors infuse. This is the finishing touch that takes the bread from simple to heavenly.

Step 3: Cook the Flatbread

Heat a nonstick skillet or a cast-iron pan over medium heat. Lightly grease with a few drops of oil.

Pour a ladleful of batter into the center and gently tilt or spread the batter into a circle. Cook for 1–2 minutes, until bubbles form and the edges start to look dry. Flip and cook another minute until golden brown and lightly charred in spots.

Repeat with remaining batter.

Step 4: Brush and Serve

As soon as each flatbread comes off the pan, brush generously with garlic butter. The warm bread absorbs the flavor instantly, making every bite tender and aromatic.

Serve warm—and watch them disappear quickly.

Flavor & Texture

This flatbread turns out:

  • Soft inside

  • Slightly crisp edges

  • Buttery and richly garlicky

  • Flexible and perfect for wrapping or dipping

It is similar to naan in feel, but lighter and faster—no kneading, no yeast, no rising.

How to Serve

This fast bread pairs wonderfully with:

  • Grilled meats like tikka, shawarma, kebabs

  • Soups like creamy tomato, lentil, or potato

  • Sauces like alfredo, pesto, garlic yogurt, hummus, or baba ganoush

  • Eggs for breakfast—spread some cream cheese and roll!

Or enjoy simply with more butter or cheese. You truly can’t go wrong.

Customization Ideas

Add To The Batter Flavor Result
½ teaspoon cumin Warm, earthy aroma
½ cup shredded cheese Extra melty and rich
½ teaspoon chili flakes Slight heat
2 tablespoons yogurt More tender and slightly tangy

Tips For Success

  • Keep the heat medium—not too high—so the bread cooks fully without burning.

  • If the batter sticks, your pan is not hot enough or it needs a touch more oil.

  • Brush the garlic butter while the bread is hot, so it melts and sinks in.

  • You can double the batter and refrigerate it up to 24 hours.

Why This Recipe Is Special

Most flatbreads require kneading, resting, rolling, or yeast—but this one skips everything without sacrificing flavor or texture. The batter method is a clever shortcut that’s especially useful for beginners, busy cooks, or anyone who wants homemade bread without the effort.

It’s the kind of recipe that feels comforting, effortless, and satisfying—the sort that fits perfectly into everyday life.

Final Thought

This 3-minute liquid dough garlic flatbread is more than just quick; it’s a kitchen secret that feels almost too good to be true. Once you make it, you’ll find yourself turning to it again and again—whenever you want warm bread on the table with practically no work. Enjoy it fresh off the pan, buttery, fragrant, and made with love.

Philly Cheesesteak Casserole

There’s something legendary about a Philly cheesesteak. Thin ribbons of steak, golden pan-seared onions, peppers, soft bread, and a glorious blanket of melted cheese—simple ingredients layered into unforgettable comfort. This casserole version takes everything that makes the original sandwich iconic and transforms it into a cozy, bubbling dish that feeds the whole table with ease. It’s perfect for weeknights when you want something hearty, rich, and deeply satisfying, yet easier to assemble than building individual sandwiches.

This casserole has tender sliced steak (or ground beef, if you’re going for speed), caramelized onions, sautéed bell peppers, garlic, creamy seasoned sauce, and a layer of melty cheese that forms the golden cap on top. To give it structure and that comforting “bite,” we add cooked pasta or toasted bread cubes—your choice depending on whether you prefer more casserole texture or something closer to the classic sandwich.

Whether you want a centerpiece dish for the weekend, something comforting on a chilly evening, or a big-pan meal prep to last a few days, this Philly Cheesesteak Casserole hits the spot every time.

Ingredients

For the Casserole Base:

  • 1 lb (450g) ribeye steak thinly sliced (or substitute 1 lb ground beef)

  • 2 tbsp butter or olive oil

  • 1 large onion, thinly sliced

  • 1 green bell pepper, thinly sliced

  • 1 red bell pepper, thinly sliced

  • 3 cloves garlic, minced

  • 8 oz mushrooms, sliced (optional but traditional in many variations)

  • Salt and black pepper to taste

  • 1 tsp smoked paprika

  • 1 tsp Worcestershire sauce

For the Creamy Sauce Layer:

  • 1 ½ cups beef broth

  • 4 oz cream cheese

  • 1 cup heavy cream (or whole milk for lighter version)

  • 1 tbsp cornstarch + 2 tbsp water (optional thickener)

  • 1 tsp onion powder

  • 1 tsp garlic powder

For Structure:

  • 3 cups cooked penne / rotini pasta or 4 cups toasted bread cubes

For Topping:

  • 2 cups shredded provolone cheese (or mozzarella)

  • ½ cup grated Parmesan cheese

  • Fresh parsley for garnish

Step-by-Step Instructions

1. Prepare the Steak
If you’re using ribeye, freeze it for 20–30 minutes before slicing—this makes it easier to cut into thin strips. Heat a skillet with a splash of butter and quickly sear the steak, cooking just until browned. Season with salt, pepper, Worcestershire sauce, and paprika, then remove from the pan and set aside.
(If using ground beef, brown it fully and drain excess fat.)

2. Sauté the Vegetables
In the same skillet, add butter and the sliced onions. Let them cook slowly on medium heat until golden and softened. Add the bell peppers and mushrooms and cook another 6–8 minutes until everything is tender and slightly caramelized. Stir in garlic and cook 1 minute longer.

3. Make the Creamy Cheesesteak Sauce
Pour in the beef broth and bring to a light simmer. Whisk in cream cheese until fully melted. Then add heavy cream, onion powder, and garlic powder. If you want a thicker casserole, stir in the cornstarch slurry. Let the sauce gently bubble until creamy and smooth.

4. Combine the Casserole
Preheat your oven to 375°F (190°C).
In a baking dish, layer your cooked pasta or toasted bread cubes first. Spread the steak over the top. Then spoon the vegetable mixture and the creamy sauce evenly on top.

5. Add the Cheesy Topping
Sprinkle provolone generously across the surface and finish with a dusting of Parmesan.

6. Bake
Place in the oven for 18–22 minutes, or until the cheese is bubbling and lightly golden. Let it rest for 5 minutes before serving—this allows everything to settle and meld beautifully.

Serving Suggestions

  • Sprinkle with parsley or chives for color.

  • Serve with a crisp salad, roasted broccoli, or garlic bread if you’re feeling extra indulgent.

  • For heat lovers, add hot sauce, chili flakes, or pepperoncinis on the side.

Why This Casserole Works So Well

This dish captures the deep, savory, smoky flavor of a Philly cheesesteak while embracing the creamy richness of a casserole. The onions and peppers add sweetness and aroma. The steak adds flavor depth and texture. The cheese provides that melt-in-your-mouth comfort everyone craves. And the pasta or toasted bread gives the dish body so it’s hearty and fulfilling.

It’s a one-dish meal that tastes like something slow-cooked and cozy, yet it comes together faster than many baked casseroles. It stores and reheats beautifully, making it ideal for meal prep, lunches, leftovers, or potlucks.Make-Ahead and Storage Tips

  • Refrigerate: Keep covered up to 4 days.

  • Freeze: Freeze before baking for best texture. Thaw overnight, then bake.

  • Reheat: Warm in the oven at 350°F (175°C) for best texture.

Enjoy Your Philly Comfort!

Whether you’re feeding family, impressing guests, or simply treating yourself, this Philly Cheesesteak Casserole proves that classic flavors become even more divine when baked together into creamy, cheesy harmony. Every bite is rich, warm, familiar, and unforgettable. Enjoy!

White Bean and Potato Soup

There’s a special kind of comfort that comes from a warm bowl of soup simmering on the stove — especially one that is both hearty and nourishing. White Bean and Potato Soup is a dish that brings together creamy textures, rustic flavors, and a subtle richness that satisfies deeply without requiring complicated ingredients. This recipe leans into simple pantry staples like white beans, potatoes, onions, and broth, but transforms them into something luxurious with the magic of slow simmering and thoughtful layering of flavor. If you’re looking for a soup that feels wholesome, cozy, and homemade, this one is for you.

Why This Soup Works So Well

White beans offer natural creaminess when blended, making this soup silky without needing heavy cream. Potatoes, meanwhile, make the soup hearty and filling, turning it into a meal rather than just a starter. Aromatics like garlic, onion, and herbs build savory depth, while olive oil adds a gentle richness. The result is a velvety, warm bowl that feels both humble and elegant.

You can serve this soup with crusty bread, warm buttered rolls, or even on its own — it holds up beautifully either way.Ingredients

Ingredient Amount
Olive oil 2 tablespoons
Butter (optional, but adds richness) 1 tablespoon
Yellow onion, diced 1 large
Garlic cloves, minced 3–4
Carrots, finely chopped 2 medium
Potatoes (Yukon Gold or Russet), peeled and diced 3 cups
Canned white beans (cannellini, navy, or great northern), drained and rinsed 2 cans (15 oz each)
Vegetable or chicken broth 5 cups
Bay leaf 1
Dried thyme 1 teaspoon
Dried rosemary (crushed lightly) ½ teaspoon
Salt and black pepper To taste
Heavy cream or milk (optional) ½ cup
Fresh parsley or chives, chopped For topping

Step-by-Step Instructions

1. Build the Flavor Base

Start by heating the olive oil and butter in a large soup pot over medium heat. Add the diced onion and cook until soft and fragrant, about 5 minutes. This slow cooking unlocks sweetness and depth.

Stir in the minced garlic and carrots. Cook another 2–3 minutes, letting the aromatics gently release their oils. This forms the backbone of flavor for the entire soup.

2. Add Potatoes and Beans

Add your diced potatoes and rinsed white beans to the pot. Stir well so they become coated in the fragrant oil and aromatics. Let them sauté together for 2 minutes — this step helps the potatoes soak in flavor before the liquid goes in.

3. Pour in the Broth and Simmer

Pour in the broth and give everything a good stir. Add the bay leaf, dried thyme, rosemary, and a dash of salt and pepper. Bring the mixture to a gentle boil, then reduce the heat and let it simmer for 20–25 minutes, or until the potatoes are tender and easily pierced with a fork.

4. Blend for Creaminess

Remove the bay leaf. Using an immersion blender, blend about half of the soup directly in the pot — this thickens the soup naturally without removing all of the texture.

If you don’t have an immersion blender, simply transfer a few ladles of soup to a blender, blend until smooth, then return it to the pot.

5. Finish With Cream (Optional)

For an extra silky finish, stir in the heavy cream or milk. Taste and adjust seasoning — add more salt, pepper, or herbs if needed.

6. Garnish and Serve

Ladle into bowls and top with freshly chopped parsley or chives. A crack of fresh black pepper or a drizzle of olive oil adds an elegant finish.

Serving Tips

  • Pair with thick slices of toasted sourdough or buttery garlic bread.

  • Add shredded roast chicken or crisp bacon bits for protein.

  • For a spicy twist, finish with red pepper flakes or a splash of hot sauce.

  • Leftovers taste even better the next day as flavors deepen.

Why You’ll Love This Soup

This White Bean and Potato Soup is more than a recipe — it’s a reminder that the best meals come from the simplest ingredients. It has:

Creamy, rich texture without relying on heavy cream
Budget-friendly ingredients that feel gourmet
Comforting flavor that warms the soul
Nutritional goodness from beans and vegetables

It’s the kind of soup you’ll want to keep in your rotation — especially on cool evenings or days when you want something nourishing and homey.

Cheesy Pizza Burger Pie

When you can’t decide between a cheesy pizza and a juicy burger, there is one dish that steps in as the ultimate solution: Cheesy Pizza Burger Pie. This recipe combines the soul of a classic cheeseburger with the melty, savory richness of pizza—all wrapped into a warm, flaky pie crust. Imagine seasoned ground beef simmered in tomato-garlic sauce, layered with melty mozzarella and cheddar, then baked inside a golden crust until bubbling and aromatic. This is not just a meal. It’s comfort. It’s indulgence. It’s a weeknight miracle.

Why This Dish Works So Well

The flavors of pizza and burgers naturally complement each other. Both feature tomatoes, cheese, savory meat, and herbs like oregano. By combining them in a single pie, you create layers of textures and tastes that feel familiar yet exciting. The flaky crust holds everything together, the cheese melts into every corner, and the seasoned filling brings warmth and satisfaction. It’s the type of dish that makes everyone at the table pause, smile, and ask for seconds.

Serve it for family dinner, game night, or whenever you need something delicious with very little fuss.

Ingredients

For the Crust (You may also use store-bought pie crust or pizza dough):

  • 2 cups all-purpose flour

  • 1 teaspoon salt

  • ⅔ cup cold butter, cubed

  • 5–6 tablespoons ice water

For the Filling:

  • 1 tablespoon olive oil

  • 1 medium onion, finely chopped

  • 2 cloves garlic, minced

  • 1 pound (450g) ground beef

  • ½ teaspoon salt

  • ½ teaspoon black pepper

  • 1 teaspoon dried oregano

  • ½ teaspoon paprika

  • 1 cup pizza sauce or marinara sauce

  • 1 tablespoon tomato paste (optional for thickness)

  • 1 cup shredded mozzarella cheese

  • 1 cup shredded cheddar cheese

  • ¼ cup grated Parmesan cheese

Optional Flavor Boost Toppings (choose any):

  • Sliced pepperoni

  • Diced bell peppers

  • Sliced black olives

  • Red chili flakes

  • Fresh basil for garnish

Step-by-Step Instructions

Step 1: Prepare the Pie Crust

If using store-bought dough, skip to Step 2.

  1. In a mixing bowl, combine flour and salt.

  2. Add cold butter cubes and cut them into the flour using a pastry cutter or your fingertips.

  3. Drizzle ice water in slowly, stirring just until the dough holds together.

  4. Form into a disk, wrap, and chill for 20–30 minutes.
    This ensures a buttery, flaky crust that holds beautifully when baked.

Step 2: Cook the Savory Filling

  1. Heat olive oil in a skillet over medium heat.

  2. Add chopped onion and cook until softened and translucent.

  3. Stir in garlic and cook for 30 seconds more.

  4. Add ground beef, breaking it apart with a spoon.

  5. Season with salt, pepper, oregano, and paprika.

  6. Once browned, stir in pizza sauce and tomato paste.

  7. Let it simmer for 3–5 minutes until thick and saucy.

This filling should not be watery—thick is key so your pie slices beautifully.

Step 3: Assemble the Pie

  1. Preheat your oven to 375°F (190°C).

  2. Roll out your dough and place into a greased pie dish.

  3. Spoon half of the beef mixture over the crust.

  4. Sprinkle half the mozzarella, cheddar, and Parmesan.

  5. Add any toppings you love (pepperoni, peppers, olives).

  6. Layer remaining filling and then top with remaining cheese.

The double-layered cheese melts into the meat for a gooey, stretchy interior.

Step 4: Bake

  • Bake uncovered for 22–28 minutes or until cheese is golden and crust edges are browned.

  • Let the pie rest for 10 minutes before slicing.
    This allows everything to set and ensures clean slices.

Serving Suggestions

  • Serve warm with garlic bread, fries, or a fresh salad.

  • A drizzle of pizza sauce, hot honey, or ranch makes it extra indulgent.

  • Garnish with fresh basil or parsley for color and brightness.

Flavor Variations to Try

This recipe is a base you can adapt endlessly:

Style What to Add Flavor Outcome
BBQ Burger Pie Replace marinara with BBQ sauce, add caramelized onions Smoky, sweet, tangy
Spicy Supreme Pie Add jalapeños, hot sauce, and pepperoni Fiery and bold
Mushroom Swiss Pie Swap cheddar for Swiss and sauté mushrooms Rich and earthy
Bacon Cheeseburger Pie Add crispy chopped bacon Extra savory, smoky

Storage and Reheating

This dish stores beautifully:

  • Fridge: Up to 4 days in an airtight container.

  • Freezer: Freeze sliced portions wrapped tightly.

  • Reheating: Bake at 350°F (175°C) for 8–10 minutes or air fry for 4–6 minutes.

It reheats incredibly well—the flavors deepen overnight.

The Experience

When you slice into this pie, the first thing you’ll notice is the aroma: herbs, cheese, buttery crust, and tomato warmth. The cheese stretches in ribbons. The ground beef filling is juicy, seasoned, flavorful, and comforting. The crust adds a satisfying flaky crunch that holds everything together. Each bite tastes familiar yet unique—like your favorite comfort foods joined forces to create something powerful, nostalgic, and deeply satisfying.

This is the kind of dish that doesn’t just feed hunger—it feeds emotion. It feels homey, indulgent, warm, cozy, and deeply enjoyable. The kind of meal that makes people close their eyes while chewing.

Final Notes

  • Don’t skip the resting time after baking.

  • A little Parmesan on top before baking helps create a golden cheesy crust.

  • Make it your own—add toppings, mix cheeses, adjust spices.

Cheesy Baked Chili Dog Casserole

There’s something beautifully nostalgic about chili dogs. They remind us of ball games, backyard cookouts, cozy diners, and carefree summer evenings. But what if you could take everything wonderful about a chili dog—the savory smoky hot dogs, the hearty chili, the melt-in-your-mouth cheese—and turn it into a warm, bubbly, fork-friendly baked casserole? That is exactly what this Cheesy Baked Chili Dog Casserole does. It’s comforting, hearty, layered with flavor, and perfect for weeknight dinners, potlucks, or Sunday family meals. It’s the kind of dish that makes people lean back in their chairs, close their eyes in satisfaction, and say, “Oh wow… I need the recipe.”

This casserole is unique not only because of its flavor but also its texture: soft pillowy biscuit layers absorb the chili while still maintaining their structure, sliced hot dogs add a nostalgic bite, and a generous layer of cheese creates a golden, irresistible crust. Everything bakes together into hot, melty perfection that is comforting without being complicated.

Ingredients

For the Casserole Base:

  • 1 tbsp butter (for greasing the dish)

  • 2 tbsp olive oil or butter, for sautéing

  • 1 medium onion, finely chopped

  • 1 small green bell pepper, finely diced (optional, but great for flavor)

  • 2 cloves garlic, minced

  • 1 can (15 oz) chili with beans or homemade chili (recipe below)

  • 1 can (15 oz) chili without beans

  • 6–8 beef hot dogs, sliced into bite-sized pieces

  • 1 tsp smoked paprika

  • ½ tsp chili powder

  • ½ tsp cumin

  • Salt and black pepper, to taste

Bread & Cheese Layer:

  • 1 can (12 oz) refrigerated biscuit dough or crescent rolls

  • 2 cups shredded sharp cheddar cheese

  • 1 cup shredded mozzarella

  • 1 tbsp chopped fresh parsley or green onion (optional)

Homemade Quick Chili Option (Use instead of canned)

If you’d prefer a homemade chili flavor, try this simple version:

  • 1 lb ground beef

  • 1 small onion, chopped

  • 1 clove garlic, minced

  • 1 tsp smoked paprika

  • 1 tsp chili powder

  • 1 tsp cumin

  • ½ tsp black pepper

  • ½ tsp salt (or to taste)

  • 1 cup tomato sauce

  • ½ cup cooked kidney or pinto beans (optional)

  • ¼ cup water or broth, as needed

Cook beef with seasonings, add onion, garlic, tomato sauce, and beans; simmer 10–15 minutes.

Instructions

1. Prepare the Baking Dish

Preheat your oven to 375°F (190°C).
Grease a medium-sized casserole dish with butter, ensuring it coats all the sides. This helps prevent sticking and adds flavor.

2. Build the Flavor Base

Heat olive oil in a medium pan. Add the chopped onion and bell pepper. Sauté until soft and fragrant, about 3–4 minutes. Add garlic and cook 1 minute more.

Now stir in your chili (canned or homemade). Add the smoked paprika, chili powder, cumin, salt, and pepper. Let the chili warm and thicken slightly—it should bubble gently for 3–5 minutes. This quick simmer helps the flavors come together beautifully.

Add the sliced hot dogs and stir gently to coat them in the chili mixture.

3. Prepare the Biscuit Layer

Open your biscuit dough and cut each biscuit into quarters (or unroll your crescent dough and cut into squares).
Layer the biscuit pieces evenly across the bottom of your greased casserole dish. This forms a fluffy, pillowy, slightly crisp bread layer that absorbs flavor without getting soggy.

4. Assemble the Casserole

Pour your rich chili-hot dog mixture evenly over the biscuits.

Sprinkle the cheddar and mozzarella cheese generously over the top—but do not skimp. The cheese layer is what forms that glorious golden bubbly crust.

5. Bake

Place the dish in your preheated oven and bake for 25–35 minutes, or until:

  • The biscuits have puffed underneath,

  • The cheese is fully melted and lightly golden,

  • The edges are bubbling beautifully.

If the top browns too quickly, cover loosely with foil for the last 10 minutes.

6. Serve

Let the casserole cool 5–7 minutes before cutting. This rest time helps everything settle so the slices hold their shape.

Garnish with parsley or sliced green onion for color (optional).

Flavor & Texture Notes

  • The biscuits become soft and chewy where they touch the chili and crisp at the edges—creating a delightful contrast.

  • The hot dogs add smoky nostalgia, grounding the dish in childhood comfort.

  • The chili acts as both sauce and seasoning, making each bite hearty and satisfying.

  • The cheese forms a creamy, stretchy top layer that ties everything together.

Serving Suggestions

This casserole is delicious on its own, but pairing options make it extraordinary:

Side Dish Why It Works
Coleslaw Adds crunch and balances richness
Pickled jalapeños Bright tangy heat enhances flavor
Simple lettuce salad Adds freshness and contrast
Cornbread For extra Southern comfort
Crinkle fries For diner-style nostalgia

Variations to Try

Variation What to Change
Spicy Version Add sliced jalapeños inside or on top
Loaded Chili Dog Add diced tomatoes, corn, and black beans
Sweet & Smoky Use honey BBQ sausage instead of hot dogs
Extra Cheesy Add cream cheese swirls under the top cheese layer
Bacon Lovers Add crispy bacon bits before baking

Make-Ahead & Freezer Tips

  • Assemble the casserole up to 24 hours ahead and refrigerate (bake +10 minutes extra).

  • Freeze baked casserole in portions for easy reheating lunches.

  • Reheat in oven at 350°F (175°C) for best texture.

Final Thoughts

This Cheesy Baked Chili Dog Casserole captures everything we love about classic chili dogs, but transforms them into a warm, bubbly, family-style dish that feels like a hug. It’s nostalgic yet modern, hearty but simple, familiar but elevated. The flavors are bold, the textures satisfying, and the result irresistible. Whether shared at a potluck, served at a family dinner, or enjoyed in quiet comfort on a cold evening, this dish brings warmth, joy, and a moment of pure, delicious contentment.