I Don’t Buy Bread Anymore – The Easiest No-Knead, No-Egg Bread Recipe
There’s something deeply satisfying about pulling a golden, crusty loaf of bread out of your own oven. The aroma fills the kitchen, the crust crackles as it cools, and the inside is soft, airy, and perfect for slicing. The best part? You don’t need eggs, a mixer, or even kneading skills. This is truly the easiest bread recipe you’ll ever make.
If you’ve been buying bread every week, this simple homemade version might just change your routine forever. It requires only four basic ingredients, minimal effort, and delivers bakery-quality results every time.
Why You’ll Love This Recipe
-
No kneading required
-
No eggs
-
Only 4 simple pantry ingredients
-
Minimal hands-on time
-
Crispy crust with a soft, fluffy interior
-
Budget-friendly and preservative-free
This bread is perfect for sandwiches, toast, dipping in soup, or enjoying warm with butter and jam.
Ingredients
-
3 cups all-purpose flour (or bread flour)
-
1 ½ teaspoons salt
-
½ teaspoon instant yeast (or active dry yeast)
-
1 ½ cups warm water (not hot)
That’s it. No sugar, no oil, no eggs.
Step-by-Step Instructions
1. Mix the Dough
In a large mixing bowl, combine the flour, salt, and yeast. Stir gently to distribute everything evenly.
Slowly pour in the warm water while mixing with a spoon or spatula. The dough will look shaggy, sticky, and slightly messy — that’s completely normal. You do not need to knead it.
Once all the flour is incorporated, cover the bowl tightly with plastic wrap or a clean kitchen towel.
2. Let It Rise (The Magic Happens Here)
Leave the dough at room temperature for 8 to 12 hours, or overnight. During this time, the yeast works slowly, developing flavor and structure without kneading.
When ready, the dough should be bubbly, doubled in size, and soft.
3. Shape the Dough
Lightly flour your work surface. Gently scrape the dough out of the bowl. It will be sticky — sprinkle a little flour on top and fold it over itself a few times to form a rough ball.
Do not overwork it. The less you handle it, the better the texture will be.
Place the dough onto parchment paper and let it rest for about 30–45 minutes while you preheat the oven.
4. Preheat the Oven
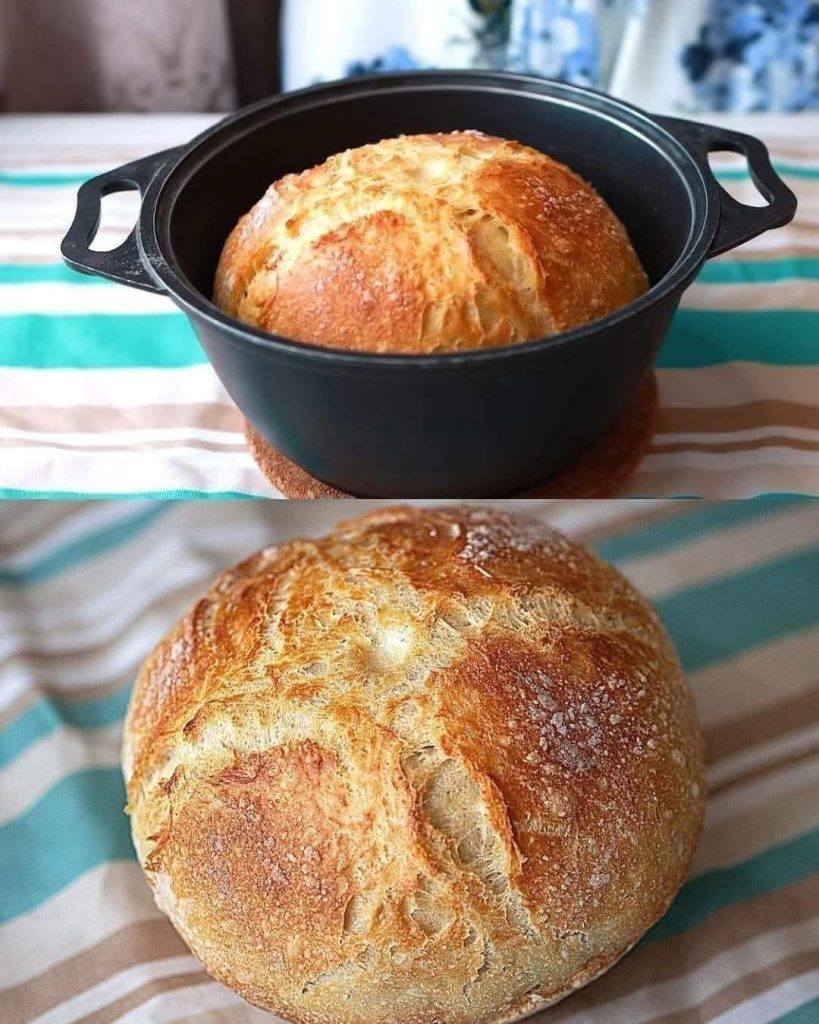
Place a Dutch oven (or any heavy oven-safe pot with a lid) inside your oven. Preheat to 230°C (450°F) for at least 30 minutes.
A hot pot is essential for creating steam, which gives the bread its crispy crust.
5. Bake
Carefully remove the hot pot from the oven. Lift the dough using the parchment paper and place it inside the pot. Cover with the lid.
Bake covered for 30 minutes.
Then remove the lid and bake for another 10–15 minutes until the crust is deep golden brown.
6. Cool Before Slicing
Remove the bread and place it on a wire rack. Let it cool for at least 30 minutes before slicing. Cutting too early can make the inside gummy.
Tips for Perfect Bread
1. Use warm, not hot water.
Hot water can kill the yeast. Aim for slightly warm to the touch.
2. Be patient with rising time.
Long fermentation improves flavor and texture.
3. No Dutch oven?
You can bake on a tray, but place a small pan of water in the oven to create steam.
4. Want whole wheat?
Replace up to 1 cup of white flour with whole wheat flour.
Flavor Variations
Once you master the basic recipe, you can customize it:
-
Add 1 teaspoon dried rosemary or thyme
-
Mix in minced garlic
-
Add shredded cheese
-
Stir in seeds like sunflower, sesame, or flax
Keep additions minimal to maintain structure.
Storage
-
Store at room temperature in a paper bag or wrapped in a clean towel for up to 3 days.
-
Freeze slices in an airtight bag for up to 2 months.
Avoid storing in plastic at room temperature, as it softens the crust.
Why This Recipe Works
This bread uses a slow fermentation method. Even with a tiny amount of yeast, the long resting time allows gluten to develop naturally. That means no kneading is required.
The covered baking method traps steam, creating that classic artisan crust — crisp outside, airy inside.
It’s simple science, but the result feels magical.
Cost Comparison
Homemade bread is incredibly economical. With just flour, salt, yeast, and water, you can make a large loaf for a fraction of store-bought artisan bread prices. Plus, you control the ingredients — no preservatives or additives.
Perfect Pairings
This bread is delicious with:
-
Butter and honey
-
Homemade jam
-
Olive oil and balsamic vinegar
-
Soup or stew
-
Toasted with avocado
-
Grilled into sandwiches
Final Thoughts
Once you try this recipe, you may never buy bread again. It’s beginner-friendly, forgiving, and delivers professional-looking results with almost no effort.
The crust is beautifully golden and crisp. The inside is soft, airy, and slightly chewy. Every slice feels fresh, wholesome, and made with care.
All it takes is a few minutes of mixing, some patience while it rises, and a hot oven. No kneading. No eggs. No complicated techniques.
Just simple, honest bread made at home.
If you’ve been hesitant to bake bread, this is your sign to start. Your kitchen will smell incredible, and your table will always have something warm and comforting on it.
