There is something wonderfully nostalgic about biting into a chocolate crunch bar—the crisp snap, the airy crackle of puffed rice, and the silky melt of chocolate on your tongue. But when you make them at home, without even turning on the oven, something magical happens. These no-bake homemade crunch bars are richer, fresher, and more satisfying than anything wrapped in foil from the store. This recipe transforms a handful of simple pantry ingredients into a decadent dessert that tastes like childhood comfort wrapped in gourmet chocolate luxury.
Whether you’re craving a quick treat, planning a party platter, or want a crowd-pleaser dessert that requires almost zero effort, these bars deliver perfection every single time. And the best part? They take just minutes to assemble and only need a short chill to set. No mixers, no stovetop pot juggling, no stressful techniques—just melt, mix, pour, and enjoy.
Why Homemade Crunch Bars Taste Better
Store-bought crunch bars are crispy, yes—but they’re also full of preservatives, stabilizers, and waxy chocolate substitutes. When you make your own, you control the quality. Use creamy chocolate, fragrant vanilla, real butter, and fresh crispy rice cereal, and the flavor instantly levels up. The texture becomes dreamy: crackly yet soft, sweet yet balanced, indulgent yet wonderfully light.
Moreover, the no-bake method keeps everything quick and fun. You can customize these bars endlessly: peanut butter swirl, caramel ribbons, coconut flakes, crushed nuts, or even a hot cocoa version. But today’s recipe focuses on the classic, clean, crunchy chocolate bar—simple, pure, unforgettable.
Ingredients for Homemade No-Bake Crunch Bars
-
2 cups chocolate chips (milk, dark, or semi-sweet—your choice)
-
1 cup creamy peanut butter (or almond/cashew butter)
-
3 tablespoons butter
-
1 tablespoon honey or maple syrup
-
1 teaspoon vanilla extract
-
3 cups crispy rice cereal (NOT cornflakes—stick to puffed rice)
-
Optional add-ins: ¼ cup crushed peanuts, almonds, coconut flakes, mini marshmallows, or caramel bits.
⭐ Step-by-Step Instructions
Step 1: Melt the Chocolate Base
In a microwave-safe bowl or on the stovetop, melt together:
-
chocolate chips
-
peanut butter
-
butter
-
honey
Stir gently until everything becomes smooth and glossy. The mixture should be creamy, pourable, and smell like a chocolate-peanut butter dream. The honey not only sweetens but also helps the bars set with the perfect snap.
Step 2: Add the Vanilla
Remove from heat and stir in vanilla extract. This tiny addition makes a surprisingly big difference—it deepens the flavor and adds warmth that takes the recipe from “good” to “fantastic.”
Step 3: Fold in the Crispy Rice
Add the rice cereal to the chocolate mixture.
Use a spatula to fold carefully so the cereal stays crisp and doesn’t get crushed.
You want every little grain coated in chocolate.
The mixture will look thick, shiny, and textured—exactly how a crunch bar should be.
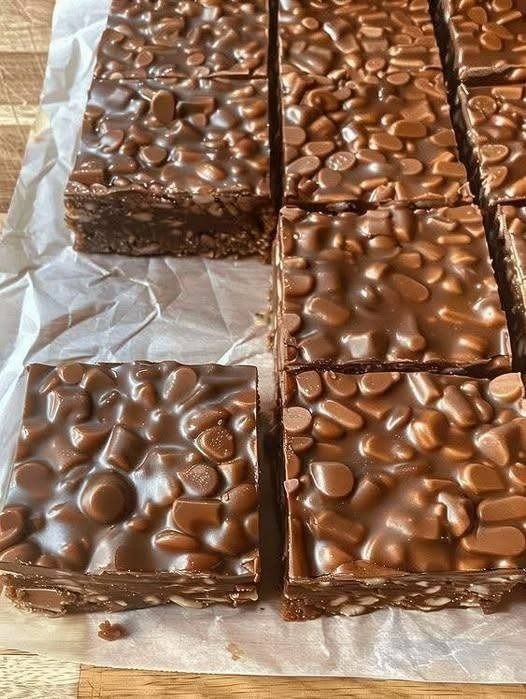
Step 4: Press Into a Pan
Line an 8×8 inch pan with parchment paper.
Pour the mixture in, spreading evenly and pressing slightly with the spatula.
Pack it just enough to hold together—but not so hard that the cereal becomes dense.
This balance is what gives you that light, airy crunch.
Step 5: Chill to Set
Place the pan in the fridge for 1 hour, or the freezer for 20–25 minutes if you’re impatient.
Once fully set, lift the block out by the parchment paper and slice into bars or squares.
You’ll hear that satisfying crack as the knife goes through—your sign that the magic worked.
⭐ Storage Tips
These bars store beautifully:
-
Fridge: up to 10 days
-
Freezer: up to 2 months (thaw 5 minutes before eating)
Keep them chilled for the best crunch and clean cuts.
⭐ What Makes This Recipe Unique
This recipe avoids refined sugar syrups, complicated tempering, and the overly sweet taste of commercial bars. Instead, it celebrates real chocolate, creamy nut butter, and natural sweetness.
A few things that make this recipe stand out:
1. The Butter-Chocolate Fusion
Butter makes the chocolate velvety but not greasy. It helps the bars soften at room temperature just enough to melt delightfully in your mouth.
2. Honey for Structure
Unlike white sugar, honey gives a soft chewiness underneath the crisp, making the bars feel gourmet—even though the recipe is simple.
3. Customizable Texture
You can choose between:
-
light crunch (use 2.5 cups cereal), or
-
extra crispy bars (use up to 3.5 cups cereal).
4. No Baking, No Mess
Every step is simple, approachable, and fast. Even beginner cooks turn into dessert heroes with this recipe.
⭐ Variations to Try
Chocolate-Caramel Crunch Bars
Drizzle caramel over the mixture before chilling.
Nutty Crunch Bars
Add ¼ cup crushed almonds or peanuts for a deeper bite.
White Chocolate Crunch Bars
Swap the chocolate for white chocolate chips—sweet, smooth, and holiday-perfect.
Protein Crunch Bars
Add 1 scoop chocolate or vanilla protein powder.
Coconut Crunch Bars
Mix in ¼ cup shredded coconut for a tropical twist.
Final Bite
These No-Bake Homemade Crunch Bars are everything a dessert should be: quick, delicious, and made with simple, honest ingredients. Each bar snaps beautifully, melts on the tongue, and delivers that irresistible chocolate crunch you crave—all without ever turning on the oven.
