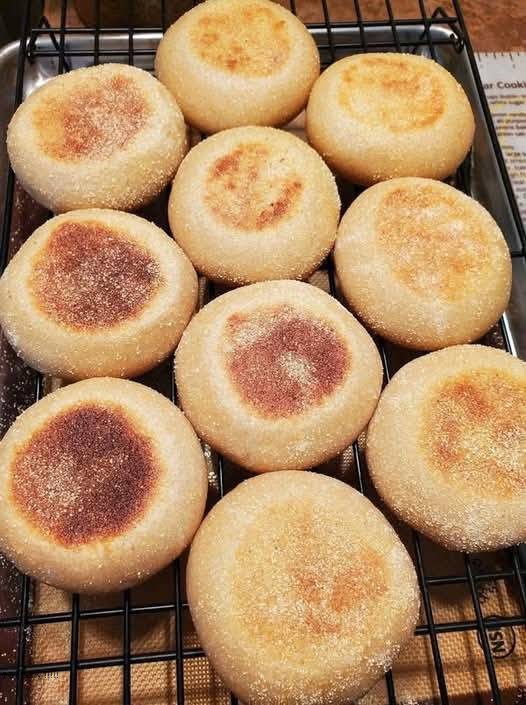
There’s something wonderfully nostalgic about English muffins—their golden tops, soft interiors, and those signature “nooks and crannies” that soak up butter and jam. But for those avoiding gluten, finding the perfect English muffin can be a real challenge. Store-bought gluten-free versions often miss the mark, being either too dense or too crumbly. This gluten-free English muffin recipe changes that narrative. It delivers everything you love about a classic English muffin: a crisp exterior, tender inside, and just the right chew—all without gluten.
What makes this recipe special is its combination of flours, fermentation, and baking technique. By using a balanced blend of gluten-free grains and a touch of natural sweetness, you’ll get muffins that rise beautifully and taste as comforting as the traditional wheat version. Whether you toast them for breakfast or turn them into mini sandwich buns, these muffins are sure to become a new favorite.
Ingredients
Dry Ingredients:
-
2 cups gluten-free all-purpose flour (with xanthan gum included, such as Bob’s Red Mill 1-to-1 or Cup4Cup)
-
½ cup almond flour (for moisture and nutty flavor)
-
1 tablespoon psyllium husk powder (for structure and elasticity)
-
2 teaspoons baking powder
-
½ teaspoon baking soda
-
½ teaspoon sea salt
Wet Ingredients:
-
1 ¼ cups warm milk (dairy or plant-based, around 105°F)
-
1 tablespoon honey or maple syrup
-
1 packet (2 ¼ teaspoons) active dry yeast
-
1 large egg, room temperature
-
2 tablespoons melted butter or olive oil
-
1 teaspoon apple cider vinegar
For Cooking:
-
Cornmeal or gluten-free semolina for dusting
-
Butter or oil for greasing
Step 1: Activate the Yeast
Start by combining the warm milk, honey, and yeast in a small bowl. Stir gently and let it sit for 10 minutes, or until the mixture becomes foamy. This step is crucial—it ensures your yeast is active and ready to help your muffins rise. If the yeast doesn’t foam, it may be expired or the milk too hot or cold, so try again for best results.
Step 2: Mix the Dry Ingredients
In a large mixing bowl, whisk together the gluten-free all-purpose flour, almond flour, psyllium husk powder, baking powder, baking soda, and salt. The psyllium husk acts like gluten in this recipe—it binds the dough and gives it that stretchy, chewy texture you’d expect from traditional English muffins.
Step 3: Combine the Wet and Dry Ingredients
Pour the activated yeast mixture into the dry ingredients. Add the egg, melted butter (or oil), and apple cider vinegar. Mix with a wooden spoon or hand mixer until a thick, sticky dough forms. Unlike wheat dough, gluten-free dough will not be elastic—it will resemble a thick batter, somewhere between bread dough and cake batter.
If it feels too dry, add 1–2 tablespoons of warm milk. If too wet, sprinkle in a tablespoon of flour at a time until it reaches the right consistency.
Step 4: Let the Dough Rise
Cover the bowl with a clean towel or plastic wrap and let it rise in a warm spot for about 45–60 minutes. The dough should expand slightly and develop air bubbles. This first rise gives your muffins lightness and depth of flavor.
If you prefer a tangy, sourdough-like taste, you can let the dough ferment in the fridge overnight—this long, slow rise enhances the flavor and texture.
Step 5: Shape the Muffins
After rising, gently stir the dough to release some air. Lightly dust a clean surface with gluten-free flour and cornmeal. Scoop out portions of dough (about ⅓ cup each) and shape them into small rounds using your hands dusted with flour. Each muffin should be around 3 inches wide and 1 inch thick.
Place them on parchment paper lined with a dusting of cornmeal, then sprinkle a little more cornmeal on top. Cover and let them rest for 20 minutes. This resting period allows the dough to firm up slightly and ensures better texture during cooking.
Step 6: Cook on the Skillet
Traditional English muffins are cooked on a griddle before baking, and this gluten-free version follows the same tradition for that authentic texture.
Heat a nonstick skillet or griddle over medium-low heat and lightly grease it with butter or oil. Place 3–4 muffins on the skillet (depending on size) and cook for about 5–6 minutes per side. The muffins should develop a golden-brown crust but remain soft in the center.
Be patient—if the heat is too high, the outsides will brown before the inside cooks. Low and slow is key.
Step 7: Finish in the Oven
To ensure the centers are fully cooked, transfer the skillet-cooked muffins to a preheated oven at 350°F (175°C). Bake for 10–12 minutes. This final step helps set the crumb and gives your muffins that perfect texture—crisp outside, fluffy inside.
Once baked, place them on a wire rack to cool completely.
Step 8: Toast and Enjoy
To serve, use a fork to split the muffins open (never a knife—fork-splitting creates those signature rough surfaces that trap butter and jam). Toast until golden, then slather with butter, honey, or your favorite spread.
They’re also perfect for breakfast sandwiches—try them with eggs, cheese, and bacon, or go sweet with peanut butter and sliced bananas.
Storage Tips
-
Room Temperature: Store cooled muffins in an airtight container for up to 2 days.
-
Refrigerator: Keeps fresh for up to 5 days.
-
Freezer: Wrap individually and freeze for up to 2 months. Reheat directly from frozen in a toaster or oven.
Customization Ideas
-
Whole-Grain Twist: Replace ¼ cup of the all-purpose flour with sorghum or brown rice flour for a hearty flavor.
-
Sweet Muffins: Add 1 teaspoon of cinnamon and a tablespoon of sugar to the dough for a slightly sweet breakfast option.
-
Savory Muffins: Mix in shredded cheese, garlic powder, or chopped herbs for a delicious twist on the traditional English muffin.
-
Dairy-Free Version: Use plant-based milk and olive oil or vegan butter for a 100% dairy-free version that tastes just as rich.
What Makes This Recipe Unique
Most gluten-free English muffin recipes rely solely on a commercial flour blend and eggs, resulting in a texture that’s often too dense or dry. This version stands out because it uses a multi-layered approach to texture and flavor:
-
Psyllium husk powder acts as a natural gluten substitute, trapping air and giving elasticity.
-
Almond flour introduces moisture and richness that prevent dryness.
-
A two-stage cooking process (skillet + oven) ensures a golden crust while keeping the center soft and light.
-
Apple cider vinegar subtly reacts with baking soda, giving lift and a mild tang reminiscent of traditional sourdough English muffins.
Every bite delivers that classic chew and toasty aroma—proof that gluten-free doesn’t mean giving up on texture or taste.
Final Thoughts
These gluten-free English muffins are a testament to how creativity can turn a classic into something even better. They’re wholesome, satisfying, and versatile enough for any meal of the day. Whether topped with melted butter at breakfast, used as a base for Eggs Benedict, or turned into a mini pizza crust, they deliver homemade comfort in every bite.
With a little patience and the right blend of ingredients, you can enjoy the nostalgic pleasure of English muffins again—gluten-free, golden, and utterly delicious.
