Homemade Chinese Egg Rolls

There is something deeply satisfying about biting into a freshly fried Chinese egg roll—the audible crunch of the golden wrapper giving way to a juicy, savory filling packed with flavor. While restaurant egg rolls are convenient, homemade egg rolls are on a completely different level. You control the ingredients, the seasoning, and the freshness, resulting in a crispier shell and a filling that’s perfectly balanced rather than greasy or bland. This unique homemade Chinese egg roll recipe blends classic flavors with a few thoughtful twists to create egg rolls that are bold, aromatic, and irresistibly crunchy.

Egg rolls originated as a Chinese-American creation rather than a traditional Chinese dish, but over time they have become an iconic comfort food. What makes this recipe special is the layering of flavor: tender meat, lightly caramelized vegetables, hints of garlic and ginger, and a finishing splash of sesame oil that ties everything together. These egg rolls are perfect as an appetizer, party snack, or even a main dish served with rice and dipping sauce.

Ingredients

For the Filling

  • 1 pound ground pork (or ground chicken or shrimp)

  • 2 cups finely shredded green cabbage

  • 1 cup shredded carrots

  • ½ cup finely chopped bean sprouts

  • 3 green onions, thinly sliced

  • 3 cloves garlic, minced

  • 1 tablespoon freshly grated ginger

  • 2 tablespoons soy sauce

  • 1 tablespoon oyster sauce

  • 1 teaspoon sugar

  • ½ teaspoon white pepper

  • 1 teaspoon sesame oil

  • 1 tablespoon cornstarch

For Wrapping and Frying

  • 20 egg roll wrappers

  • 1 egg, beaten (for sealing)

  • Vegetable or peanut oil for frying

Optional Dipping Sauce

  • Sweet chili sauce

  • Soy sauce with a splash of rice vinegar

  • Hot mustard

Preparing the Filling

Start by heating a large skillet over medium heat. Add the ground pork and cook until just browned, breaking it into small pieces as it cooks. Avoid overcooking at this stage; juicy meat is key to a flavorful egg roll. Once cooked, remove the pork from the skillet and set it aside.

In the same pan, add a teaspoon of oil if needed, then sauté the garlic and ginger for about 30 seconds until fragrant. Add the cabbage, carrots, and bean sprouts. Stir-fry the vegetables for 2–3 minutes, just until slightly softened but still crisp. This step is important—overcooked vegetables will release excess moisture and make your egg rolls soggy.

Return the pork to the skillet and add soy sauce, oyster sauce, sugar, white pepper, sesame oil, and cornstarch. Stir well until everything is evenly coated and the mixture thickens slightly. Fold in the green onions and remove from heat. Let the filling cool completely before wrapping; hot filling can tear wrappers and cause leaks during frying.

Wrapping the Egg Rolls

Lay one egg roll wrapper on a clean surface in a diamond shape, with one corner pointing toward you. Place about 2 tablespoons of filling near the bottom corner. Fold the bottom corner up over the filling, then fold in the left and right sides snugly. Roll upward tightly, brushing the top corner with beaten egg to seal.

The key to perfect egg rolls is tension—roll firmly but gently, making sure there are no air pockets. Place the finished egg rolls seam-side down on a tray while you finish the rest.

Frying to Crispy Perfection

Heat oil in a deep pan or heavy pot to 350°F (175°C). Fry egg rolls in small batches, turning occasionally, for 3–4 minutes or until deep golden brown and crisp. Avoid overcrowding the pan, which lowers the oil temperature and leads to greasy rolls.

Remove the egg rolls with a slotted spoon and drain on a wire rack or paper towels. Let them rest for a minute before serving; the filling will be extremely hot.

Tips for the Best Homemade Egg Rolls

  • Drain moisture: If your vegetables release excess liquid, drain them before mixing with the meat.

  • Cool the filling: This prevents soggy wrappers and splitting.

  • Freeze for later: Unfried egg rolls freeze beautifully. Fry straight from frozen, adding 1–2 extra minutes.

  • Air fryer option: Lightly brush with oil and air fry at 380°F for 10–12 minutes, turning once.

Serving and Storage

Serve homemade Chinese egg rolls hot with sweet chili sauce, soy-vinegar dip, or spicy mustard. Leftovers can be refrigerated for up to 3 days and reheated in the oven to restore crispness.

Final Thoughts

These homemade Chinese egg rolls prove that classic takeout favorites can be even better when made from scratch. Crispy on the outside, savory and aromatic on the inside, they’re a crowd-pleasing recipe that’s worth every step. Once you try them, frozen store-bought egg rolls will never compare again.

Lemon Blueberry Loaf

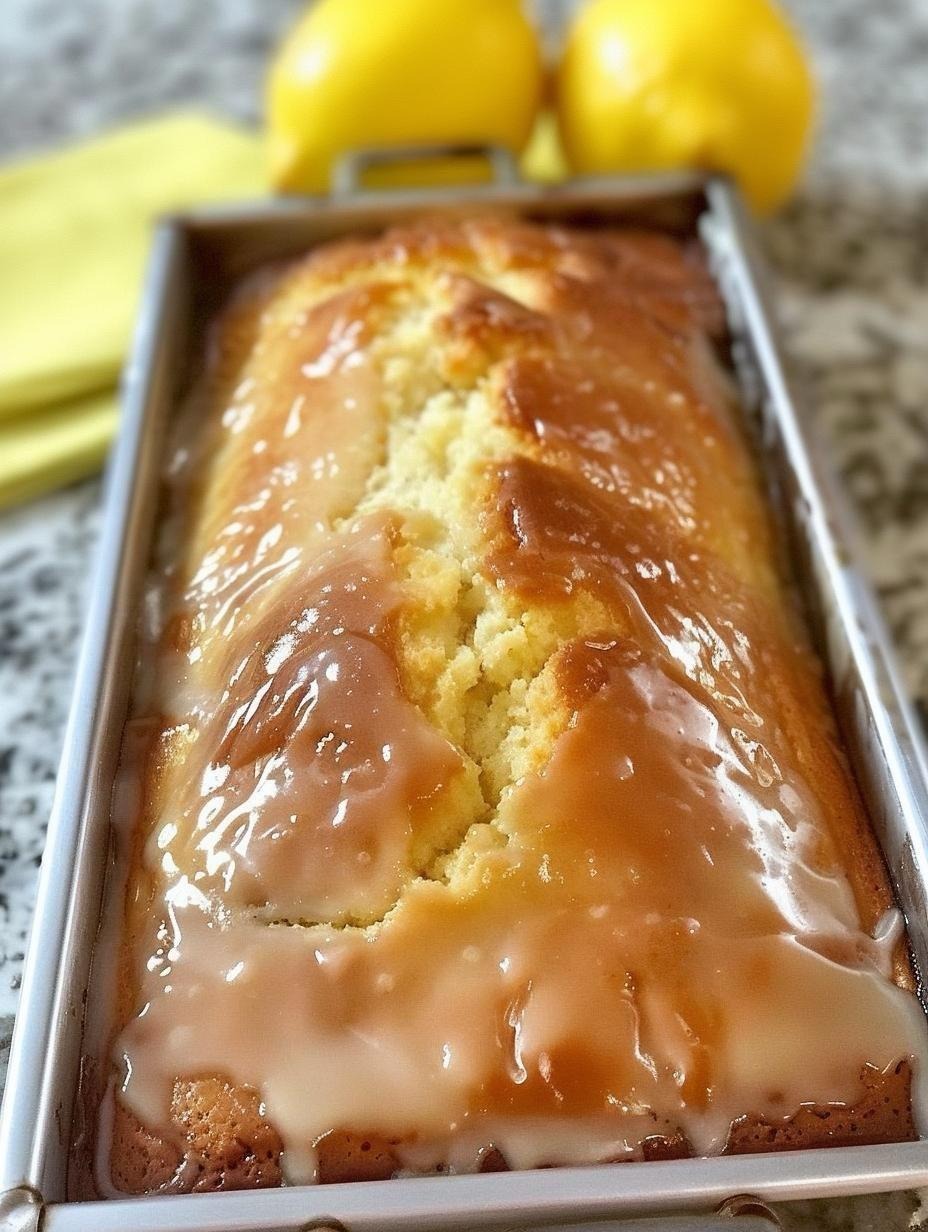
There are few flavor combinations as timeless and uplifting as lemon and blueberry. The citrusy zing of fresh lemon paired with bursts of juicy blueberries creates a loaf that feels both comforting and refreshing. This Lemon Blueberry Loaf is tender, moist, and fragrant, with a delicate crumb that slices beautifully. It’s perfect for breakfast, afternoon tea, dessert, or even as a thoughtful homemade gift.

What makes this recipe unique is its balance: it’s not overly sweet, the lemon flavor is bold without being sharp, and the blueberries stay suspended throughout the loaf instead of sinking to the bottom. A light lemon glaze adds a glossy finish and a final pop of brightness that takes this loaf from simple to unforgettable.

Why You’ll Love This Lemon Blueberry Loaf

  • Moist and soft for days thanks to a blend of butter and yogurt

  • Fresh lemon zest and juice for real citrus flavor

  • Bursting blueberries in every bite

  • Easy, no-fuss method—no mixer required

  • Versatile enough to customize with simple add-ins

This loaf is proof that you don’t need complicated techniques to achieve bakery-quality results at home.

Ingredients You’ll Need

For the Lemon Blueberry Loaf

  • 1 ½ cups all-purpose flour

  • 2 teaspoons baking powder

  • ¼ teaspoon baking soda

  • ¼ teaspoon salt

  • ¾ cup granulated sugar

  • Zest of 2 large lemons

  • ½ cup unsalted butter, melted and cooled

  • 2 large eggs, room temperature

  • ½ cup plain Greek yogurt or sour cream

  • ¼ cup fresh lemon juice

  • 1 teaspoon vanilla extract

  • 1 ¼ cups fresh blueberries (or frozen, not thawed)

  • 1 tablespoon flour (for tossing blueberries)

For the Lemon Glaze

  • ¾ cup powdered sugar

  • 1 ½–2 tablespoons fresh lemon juice

  • Optional: a pinch of lemon zest for extra aroma

Step-by-Step Instructions

1. Prepare Your Pan and Oven

Preheat your oven to 350°F (175°C). Grease a standard 9×5-inch loaf pan and line it with parchment paper, leaving an overhang on the sides for easy removal.

2. Infuse the Sugar with Lemon

In a large mixing bowl, combine the granulated sugar and lemon zest. Rub them together with your fingers until the sugar becomes fragrant and slightly moist. This simple step releases the lemon oils and ensures maximum citrus flavor throughout the loaf.

3. Mix the Wet Ingredients

Add the melted butter to the lemon sugar and whisk until smooth. Whisk in the eggs one at a time, followed by the yogurt, lemon juice, and vanilla extract. The mixture should be creamy and well combined.

4. Combine the Dry Ingredients

In a separate bowl, whisk together the flour, baking powder, baking soda, and salt. Gradually add the dry ingredients to the wet mixture, gently folding until just combined. Avoid overmixing, as this can make the loaf dense.

5. Prepare the Blueberries

Toss the blueberries with 1 tablespoon of flour. This helps prevent them from sinking to the bottom of the loaf during baking.

Gently fold the blueberries into the batter, being careful not to crush them.

6. Bake to Perfection

Pour the batter into the prepared loaf pan and smooth the top. Bake for 50–60 minutes, or until a toothpick inserted into the center comes out clean or with a few moist crumbs.

If the top begins to brown too quickly, loosely tent the loaf with foil during the last 10–15 minutes of baking.

7. Cool Completely

Allow the loaf to cool in the pan for 15 minutes, then lift it out using the parchment paper and transfer it to a wire rack to cool completely before glazing.

Lemon Glaze Instructions

In a small bowl, whisk together powdered sugar and lemon juice until smooth and pourable. Adjust the consistency by adding more sugar for thickness or more juice for a thinner glaze.

Drizzle the glaze generously over the cooled loaf, letting it drip naturally down the sides. Allow it to set for 10–15 minutes before slicing.

Tips for the Best Lemon Blueberry Loaf

  • Use fresh lemons whenever possible—bottled juice won’t deliver the same brightness

  • Room-temperature eggs blend more evenly into the batter

  • Do not overmix after adding flour to keep the crumb tender

  • Frozen blueberries work well, but bake the loaf a few minutes longer

  • For extra lemon flavor, brush the warm loaf with a tablespoon of lemon juice before glazing

Storage and Serving Ideas

  • Store tightly wrapped at room temperature for up to 2 days

  • Refrigerate for up to 5 days for longer freshness

  • Freeze individual slices for up to 2 months

Serve this loaf on its own, with a cup of tea or coffee, or topped with a dollop of whipped cream or vanilla yogurt.

Crockpot Steak Bites

There’s something incredibly comforting about a meal that cooks itself while you go about your day. Crockpot Steak Bites are the perfect example of effortless comfort food done right—deeply flavorful, fork-tender pieces of beef swimming in a buttery, savory sauce that tastes like it took hours of hands-on work (even though it didn’t). This recipe transforms simple steak cubes into a luxurious dish that works equally well for busy weeknights, meal prep, or casual entertaining.

Unlike grilled or pan-seared steak bites that rely on high heat, this slow-cooked version focuses on low, gentle heat to break down connective tissue and infuse the meat with bold flavor. The result? Steak so tender it practically melts in your mouth.

Why You’ll Love This Recipe

Crockpot Steak Bites are incredibly versatile. Serve them over mashed potatoes, rice, egg noodles, or even tucked into crusty bread for a hearty sandwich. They’re rich without being heavy, garlicky without overpowering, and comforting without feeling boring. Best of all, the slow cooker does all the work—no babysitting required.

This recipe also uses affordable cuts of steak, making it budget-friendly while still delivering steakhouse-level flavor.

Ingredients (Serves 4–6)

  • 2½ pounds beef steak, cut into 1½-inch cubes
    (Sirloin, chuck steak, or stew meat work beautifully)

  • 1 teaspoon salt

  • 1 teaspoon freshly ground black pepper

  • 1 teaspoon smoked paprika

  • ½ teaspoon onion powder

  • ½ teaspoon dried thyme

  • 1 tablespoon olive oil

  • 4 tablespoons unsalted butter, cut into pieces

  • 5 cloves garlic, minced

  • 1 cup beef broth

  • 2 tablespoons Worcestershire sauce

  • 1 tablespoon soy sauce

  • 1 tablespoon cornstarch

  • 2 tablespoons water

  • Optional garnish: fresh parsley or chives

Step-by-Step Instructions

Step 1: Season the Steak
Place the steak cubes in a large bowl and season generously with salt, pepper, smoked paprika, onion powder, and dried thyme. Toss well to ensure every piece is evenly coated. This seasoning blend creates a deep, savory base that holds up beautifully during long cooking.

Step 2: Optional Sear for Extra Flavor
While not required, quickly searing the steak enhances the final flavor. Heat olive oil in a skillet over medium-high heat and brown the steak cubes in batches for 30–45 seconds per side. You’re not cooking them through—just building a rich crust. Transfer the steak to the crockpot.

Step 3: Build the Sauce
Add minced garlic directly over the steak in the crockpot. Pour in the beef broth, Worcestershire sauce, and soy sauce. Gently stir to combine. Scatter butter pieces across the top; as they melt, they’ll create a silky, indulgent sauce.

Step 4: Slow Cook to Perfection
Cover and cook on LOW for 6–7 hours or HIGH for 3–4 hours, until the steak bites are extremely tender. Low and slow is recommended for the best texture.

Step 5: Thicken the Sauce
About 30 minutes before serving, whisk cornstarch and water together in a small bowl. Stir the mixture into the crockpot, cover, and continue cooking until the sauce thickens into a glossy, gravy-like consistency.

Flavor Variations

  • Garlic Butter Steak Bites: Add an extra tablespoon of butter and a pinch of garlic powder for ultra-rich flavor.

  • Spicy Kick: Stir in crushed red pepper flakes or a teaspoon of chili paste.

  • Mushroom Steak Bites: Add 8 ounces of sliced mushrooms during the last 2 hours of cooking.

  • Herb-Forward: Finish with fresh rosemary or thyme for a bright, aromatic touch.

Serving Suggestions

Crockpot Steak Bites shine when paired with something that soaks up the sauce:

  • Creamy mashed potatoes

  • Buttered egg noodles

  • Steamed rice or garlic rice

  • Roasted vegetables or green beans

  • Toasted baguette slices for dipping

They also make an excellent protein for meal prep—store leftovers in airtight containers for up to 4 days in the refrigerator.

Tips for Best Results

  • Cut steak into uniform pieces for even cooking.

  • Avoid lifting the crockpot lid too often—this releases heat and extends cooking time.

  • If the sauce becomes too thick, add a splash of beef broth before serving.

  • For deeper flavor, let the steak rest in the sauce for 10–15 minutes after cooking.

Final Thoughts

Crockpot Steak Bites are proof that simple ingredients, when treated right, can create something extraordinary. With minimal prep and maximum payoff, this dish delivers comfort, flavor, and flexibility in every bite. Whether you’re feeding a family or planning easy meals for the week, this slow-cooker favorite deserves a permanent spot in your recipe rotation.

Puff pastry smoked salmon rolls

Few appetizers manage to feel both luxurious and comforting at the same time, but puff pastry smoked salmon rolls do exactly that. With their golden, buttery layers and delicate filling, these rolls strike a perfect balance between crisp pastry and silky smoked salmon. They’re impressive enough for holiday gatherings, brunch spreads, or cocktail parties, yet simple enough to prepare on a relaxed weekend afternoon. This version takes the classic idea and elevates it with fresh herbs, citrus zest, and a creamy filling that complements the smoky richness without overpowering it.

What makes puff pastry so magical is its ability to transform a handful of ingredients into something that looks bakery-made. When paired with smoked salmon—a staple of elegant cuisine around the world—the result is an appetizer that feels refined but approachable. Each bite delivers crunch, creaminess, and a gentle hint of smoke, making these rolls hard to resist.

Why This Recipe Works

This recipe is designed to highlight contrast. The pastry is crisp and flaky, the filling is smooth and tangy, and the salmon brings depth and savory complexity. A touch of lemon zest brightens everything, while herbs add freshness that cuts through the richness. Unlike heavier salmon appetizers, these rolls feel light and balanced, encouraging guests to reach for more than one.

Another advantage is versatility. You can serve these rolls warm or at room temperature, making them ideal for entertaining. They also pair beautifully with a variety of dips, salads, or sparkling drinks.

Ingredients You’ll Need

  • 1 sheet frozen puff pastry, thawed

  • 120–150 g smoked salmon, thinly sliced

  • 120 g cream cheese, softened

  • 1 tablespoon sour cream or Greek yogurt

  • 1 teaspoon Dijon mustard

  • Zest of 1 small lemon

  • 1 tablespoon fresh dill, finely chopped

  • 1 tablespoon fresh chives, finely chopped

  • Freshly ground black pepper, to taste

  • 1 egg, beaten (for egg wash)

  • Optional: sesame seeds or poppy seeds for topping

Step-by-Step Instructions

1. Prepare the Filling

In a bowl, combine the softened cream cheese, sour cream (or Greek yogurt), Dijon mustard, lemon zest, dill, and chives. Mix until smooth and well blended. Season lightly with black pepper. Avoid adding salt, as smoked salmon is already salty.

The filling should be creamy but spreadable. If it feels too thick, add a teaspoon of lemon juice or milk to loosen it slightly.

2. Roll Out the Puff Pastry

Lightly flour your work surface and gently roll out the puff pastry into a rectangle, about 3 mm thick. Try not to press too hard—puff pastry needs those delicate layers to rise properly.

Spread the cream cheese mixture evenly over the pastry, leaving a small border around the edges.

3. Add the Smoked Salmon

Arrange the smoked salmon slices evenly over the cream cheese layer. Don’t pile it too thick; even distribution ensures clean rolling and balanced flavor in every bite.

4. Roll and Chill

Starting from the long edge, carefully roll the pastry into a tight log, similar to a cinnamon roll. Wrap the log in parchment paper and refrigerate for 20–30 minutes. Chilling helps the pastry firm up, making it easier to slice neatly.

5. Slice and Prepare for Baking

Preheat your oven to 200°C (400°F). Line a baking tray with parchment paper.

Remove the chilled pastry log and slice it into 1.5–2 cm thick rounds. Arrange them cut-side up on the baking tray, leaving space between each roll.

Brush the tops lightly with beaten egg and sprinkle with sesame or poppy seeds if desired.

6. Bake to Perfection

Bake for 18–22 minutes, or until the rolls are puffed and golden brown. The aroma alone will tell you they’re ready. Let them cool slightly before serving so the filling sets.

Serving Suggestions

These puff pastry smoked salmon rolls are incredibly versatile. Serve them warm with a simple lemon-dill yogurt dip, or offer them at room temperature alongside a crisp green salad. They’re also wonderful as part of a brunch spread with scrambled eggs, fresh fruit, and crusty bread.

For a more elegant presentation, garnish the platter with fresh dill sprigs, lemon wedges, or thinly sliced cucumbers.

Tips for Success

  • Always keep puff pastry cold until baking to ensure maximum rise.

  • Use high-quality smoked salmon for the best flavor.

  • Don’t overfill—too much filling can cause leaking during baking.

  • These rolls can be assembled a few hours ahead and baked just before serving.

Final Thoughts

Puff pastry smoked salmon rolls are proof that simple ingredients can create something truly special. With their flaky texture, creamy herb filling, and delicate smokiness, they offer a refined yet comforting experience in every bite. Whether you’re hosting guests or treating yourself to a gourmet snack, this recipe delivers elegance without effort—and once you make it, it’s bound to become a favorite in your kitchen.

Cheesy Carrot Flatbreads

Cheesy Carrot Flatbreads are one of those wonderfully unexpected recipes that surprise you with how simple ingredients can turn into something truly crave-worthy. Soft on the inside, lightly crisp on the outside, and packed with savory cheese and naturally sweet carrots, these flatbreads are perfect for breakfast, lunch, dinner, or even a satisfying snack. What makes this recipe unique is the way grated carrots melt seamlessly into the dough, adding moisture, subtle sweetness, and a beautiful golden hue—without overpowering the cheesy goodness.

This is the kind of recipe you’ll come back to again and again. It’s budget-friendly, quick to prepare, and endlessly versatile. You can enjoy these flatbreads on their own, use them as wraps, serve them alongside soups and salads, or even cut them into wedges for dipping. Best of all, no oven is required—just a simple pan on the stovetop.

Why Cheesy Carrot Flatbreads Work So Well

Carrots are often thought of as a side dish or salad ingredient, but when finely grated, they become an incredible addition to dough. They add moisture, allowing the flatbreads to stay soft and tender without needing much oil or fat. Their natural sweetness balances the saltiness of the cheese, creating a flavor that’s rich yet surprisingly light.

Cheese, on the other hand, brings everything together. As it melts inside the dough, it creates pockets of savory richness that make every bite irresistible. The result is a flatbread that feels indulgent but still wholesome—perfect for both kids and adults.

Ingredients

For this unique Cheesy Carrot Flatbread recipe, you’ll need:

  • 1 cup finely grated carrots (packed lightly)

  • 1 cup all-purpose flour

  • ½ cup shredded cheese (cheddar, mozzarella, or a blend)

  • 1 egg

  • 2 tablespoons plain yogurt or sour cream

  • ½ teaspoon salt

  • ½ teaspoon baking powder

  • ¼ teaspoon black pepper

  • ½ teaspoon garlic powder (optional)

  • 1 tablespoon olive oil or butter, plus more for cooking

Cheesy Carrot Flatbreads are incredibly versatile:

  • Serve warm with a dollop of yogurt or sour cream

  • Pair with soups like tomato, lentil, or vegetable soup

  • Use as a wrap for grilled chicken, eggs, or roasted vegetables

  • Cut into wedges and serve with hummus or garlic dip

They’re just as delicious fresh off the pan as they are reheated the next day.

Tips for the Best Flatbreads

  • Finely grate the carrots for a smoother dough and better texture

  • Use flavorful cheese—sharp cheddar adds depth, while mozzarella gives extra stretch

  • Don’t cook on high heat, or the outside will brown before the inside cooks through

  • Customize the flavor with herbs like parsley, chives, or paprika

Why You’ll Love This Recipe

This Cheesy Carrot Flatbread recipe is a perfect example of comfort food with a clever twist. It’s quick, nourishing, and packed with flavor, yet simple enough for everyday cooking. Whether you’re looking for a creative way to use carrots or just want a cozy, cheesy treat, these flatbreads deliver every time.

Grilled Cheese Sandwich

Few foods carry the emotional weight of a grilled cheese sandwich. It’s the meal of rainy afternoons, late-night cravings, and childhood memories wrapped in golden, buttery bread. Simple at first glance, yet endlessly customizable, the grilled cheese sandwich proves that comfort food doesn’t need to be complicated to be extraordinary. With the right technique, quality ingredients, and a little patience, this humble sandwich can transform into something unforgettable.

Why Grilled Cheese Never Goes Out of Style

The grilled cheese sandwich has survived generations for one simple reason: it delivers pure satisfaction. The contrast between crisp, toasted bread and a molten, gooey cheese center hits all the right sensory notes. It’s affordable, quick, and deeply nostalgic—yet versatile enough to feel new every time you make it.

While many people think grilled cheese is just bread and cheese thrown into a pan, the truth is that small details make a huge difference. The choice of bread, the type of cheese, the fat used for grilling, and even the heat level can elevate this classic into a restaurant-quality experience.

Ingredients (Serves 1)

  • 2 slices of high-quality bread (sourdough, white sandwich bread, or brioche)

  • 2–3 slices of cheese (cheddar, mozzarella, American, Gruyère, or a blend)

  • 1½ tablespoons butter, softened

  • Optional: pinch of salt, black pepper, or garlic powder

Choosing the Perfect Bread

Bread is the foundation of a great grilled cheese. Sourdough offers a slightly tangy flavor and sturdy texture that crisps beautifully. White sandwich bread delivers the most nostalgic result—soft inside, crispy outside. Brioche adds a touch of sweetness and richness that pairs wonderfully with sharp cheese.

Whatever bread you choose, make sure it’s not too thin. A slightly thicker slice helps create that ideal contrast between crunch and softness.

Cheese Matters More Than You Think

Cheese is the heart of the sandwich, and not all cheeses melt the same way. For the best results, combine cheeses. Sharp cheddar brings bold flavor, mozzarella provides the stretch, and American cheese ensures smooth melting. Gruyère or fontina can add a gourmet twist.

Always grate or thinly slice your cheese. Smaller pieces melt faster and more evenly, preventing burnt bread with unmelted cheese inside.

Step-by-Step Method

  1. Prepare the Bread
    Spread butter evenly on one side of each slice of bread. Go all the way to the edges—this ensures even browning and maximum crispness.

  2. Heat the Pan Slowly
    Place a non-stick or cast-iron skillet over low to medium-low heat. Patience is key. High heat will burn the bread before the cheese melts.

  3. Assemble the Sandwich
    Place one slice of bread, buttered side down, into the warm pan. Layer the cheese evenly over the bread. Add a pinch of black pepper or garlic powder if desired. Top with the second slice of bread, buttered side up.

  4. Grill to Golden Perfection
    Cook slowly for 3–4 minutes until the bottom is golden brown. Press gently with a spatula to help the cheese melt. Flip carefully and cook the other side for another 3–4 minutes.

  5. Rest Before Cutting
    Remove the sandwich from the pan and let it rest for 30 seconds. This allows the cheese to settle slightly, preventing it from spilling out immediately.

Pro Tips for the Best Grilled Cheese Ever

  • Low and slow wins: Rushing leads to burnt bread and cold cheese.

  • Cover the pan: Trapping heat helps melt the cheese evenly.

  • Butter vs. mayo: Butter gives classic flavor; mayonnaise creates extra crispiness.

  • Season lightly: A tiny pinch of salt enhances flavor without overpowering.

Delicious Variations

Once you master the classic, the possibilities are endless:

  • Garlic Grilled Cheese: Add minced garlic to softened butter.

  • Three-Cheese Melt: Combine cheddar, mozzarella, and Gruyère.

  • Spicy Kick: Add sliced jalapeños or a dash of hot sauce.

  • Sweet & Savory: A thin layer of honey or fig jam pairs beautifully with sharp cheese.

What to Serve With Grilled Cheese

Grilled cheese is perfect on its own, but pairing it with tomato soup creates the ultimate comfort meal. A simple green salad adds freshness, while pickles provide a tangy contrast. Even a bowl of crispy fries or roasted vegetables can turn this sandwich into a complete meal.

Final Thoughts

The grilled cheese sandwich is proof that the simplest foods often bring the greatest joy. With just a few ingredients and a mindful approach, you can turn an everyday snack into a memorable experience. Whether you enjoy it plain, loaded with cheese, or dressed up with creative additions, grilled cheese will always have a place at the table—and in the heart.

Mom’s Picadillo Con Papa. Ground Beef with Potatoes

Some dishes don’t need fancy techniques or rare ingredients to be unforgettable. They live in memory because they were cooked with care, served hot, and shared around the table. Mom’s Picadillo Con Papa is one of those dishes—a humble yet deeply comforting combination of ground beef, tender potatoes, tomatoes, and spices that fills the kitchen with warmth and nostalgia.

Picadillo is a beloved dish across many cultures, especially in Latin American and Caribbean kitchens. While variations exist from country to country, the heart of picadillo remains the same: well-seasoned ground meat simmered with vegetables into a savory, spoon-tender meal. This version, the one mom always made, features soft potatoes that soak up every bit of the rich, tomato-based sauce.

It’s the kind of recipe that doesn’t come from a cookbook but from watching, tasting, and learning over time. Simple ingredients, cooked just right, create something greater than the sum of its parts.

Why This Picadillo Is Special

What makes Mom’s Picadillo Con Papa stand out is balance. The beef is flavorful but not heavy, the potatoes are tender without falling apart, and the sauce is savory with just a hint of sweetness from tomatoes and onions. There’s no rush when making this dish—it’s meant to simmer gently, allowing the flavors to meld.

This picadillo is:

  • Comforting and filling

  • Budget-friendly

  • Easy to customize

  • Perfect for leftovers

  • Even better the next day

Serve it with rice, tortillas, or warm bread, and you have a complete meal that satisfies every time.

Ingredients (Serves 4–6)

  • 1½ pounds ground beef (80/20 preferred)

  • 3 medium potatoes, peeled and diced into small cubes

  • 1 medium onion, finely chopped

  • 3 cloves garlic, minced

  • 1 green bell pepper, diced

  • 1 (14–15 oz) can crushed or diced tomatoes

  • 2 tablespoons tomato paste

  • ½ cup beef broth or water

  • 2 tablespoons cooking oil

  • 1 teaspoon ground cumin

  • 1 teaspoon paprika

  • ½ teaspoon dried oregano

  • ½ teaspoon black pepper

  • 1 teaspoon salt (adjust to taste)

  • 1 bay leaf

  • Optional: a pinch of chili flakes or a splash of vinegar

Step-by-Step Instructions

1. Brown the Beef

Heat the oil in a large skillet or deep pan over medium heat. Add the ground beef and cook, breaking it up with a spoon, until browned and no longer pink. Season lightly with salt and pepper. Drain excess fat if needed, but leave a little for flavor.

2. Build the Flavor Base

Add the chopped onion and bell pepper to the beef. Cook for 4–5 minutes until softened and fragrant. Stir in the garlic and cook for 30 seconds, just until aromatic.

3. Add Tomatoes and Seasoning

Stir in the crushed tomatoes, tomato paste, cumin, paprika, oregano, black pepper, and bay leaf. Mix well so the beef is evenly coated. Let this cook for about 5 minutes to deepen the tomato flavor.

4. Add Potatoes and Simmer

Add the diced potatoes and pour in the beef broth or water. Stir gently, cover, and reduce heat to low. Let the picadillo simmer for 20–25 minutes, stirring occasionally, until the potatoes are fork-tender and the sauce thickens.

5. Adjust and Finish

Taste and adjust seasoning with more salt if needed. For brightness, add a tiny splash of vinegar or a pinch of chili flakes if you like a subtle kick. Remove the bay leaf before serving.

Serving Suggestions

Mom always served picadillo with steamed white rice, letting the sauce soak into every grain. It’s also wonderful with:

  • Warm flour or corn tortillas

  • Crusty bread for scooping

  • Over mashed potatoes

  • Inside empanadas or tacos

  • As a filling for stuffed peppers

Add a simple side salad or sliced avocado to complete the meal.

Tips from Mom’s Kitchen

  • Cut potatoes evenly so they cook at the same rate

  • Simmer gently, not rapidly, to avoid mushy potatoes

  • Let it rest for 10 minutes before serving for deeper flavor

  • Leftovers taste better the next day

A Dish That Feels Like Home

Mom’s Picadillo Con Papa isn’t flashy or complicated, but it’s the kind of food that brings comfort after a long day. It’s warm, hearty, and familiar—food that feeds both the body and the soul. Every bite carries the memory of home cooking, shared meals, and the simple joy of something made with love.

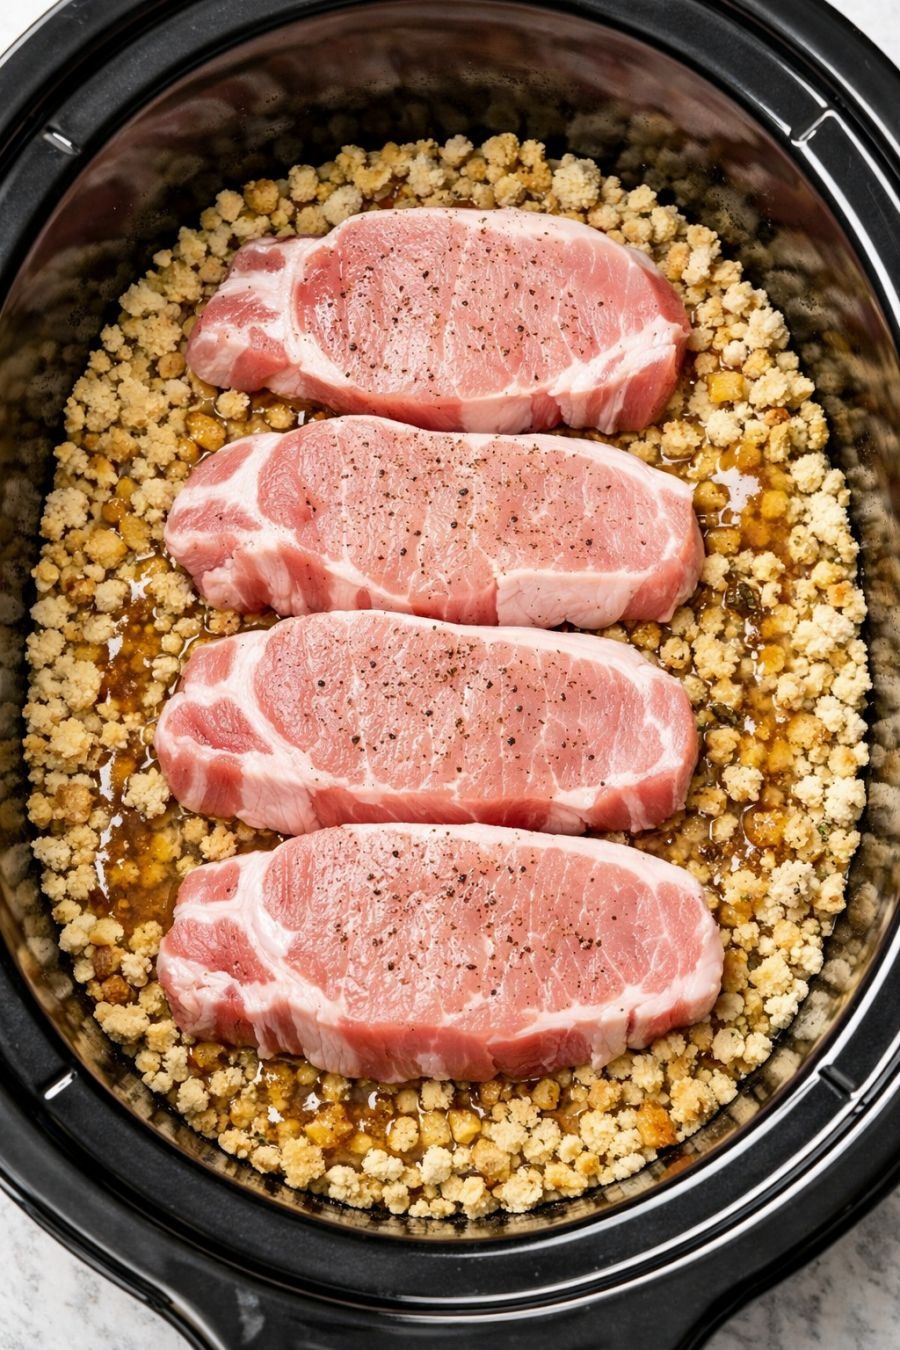
January potluck nostalgia: dump in boxed stuffing and 3 more things and watch everyone ask what’s going on in that crock

There’s something about January potlucks that feels different from the rest of the year. The holidays are over, the weather is colder, and everyone is craving comfort without complication. This is where nostalgic, cozy dishes shine—the kind that make people hover near the slow cooker, lifting the lid “just to check.” This recipe is exactly that kind of magic. You dump in a box of stuffing and three simple ingredients, walk away, and come back to a dish that tastes like it took far more effort than it did.

This slow cooker stuffing casserole is rich, savory, and familiar, yet surprising enough to spark curiosity. People will ask, “What is in this?” and “Who made this?”—which is always the goal at a potluck.

The Idea Behind the Dish

Boxed stuffing is one of those pantry staples most of us grew up with. It appeared on holiday tables, weeknight dinners, and sometimes even next to takeout chicken. In this recipe, that humble box becomes the foundation for a creamy, hearty casserole that feels like winter comfort food at its best.

The genius lies in the simplicity: stuffing mix, chicken, a creamy soup, and a touch of butter. The slow cooker does all the work, gently transforming dry crumbs into a spoonable, savory dish with layers of flavor. No sautéing. No pre-cooking. No complicated steps.

Ingredients (Only 4!)

  • 1 box savory boxed stuffing mix (chicken or herb flavored works best)

  • 2–3 cups cooked chicken, shredded or diced (rotisserie chicken is perfect)

  • 1 can cream of chicken soup (or cream of mushroom for a deeper flavor)

  • ½ cup melted butter

  • 1½ cups hot chicken broth or water (optional but recommended for extra moisture)

Optional add-ins: diced onions, celery, frozen peas, dried cranberries, or a sprinkle of poultry seasoning—but the base recipe works beautifully on its own.

How to Make It (The True “Dump and Go” Method)

  1. Spray your slow cooker lightly with nonstick spray.

  2. Pour the dry stuffing mix directly into the bottom of the crock.

  3. Add the chicken evenly over the stuffing.

  4. Spoon the cream of chicken soup over the top—no need to spread perfectly.

  5. Drizzle the melted butter evenly over everything.

  6. Pour the hot broth or water around the edges to help the stuffing absorb moisture.

  7. Cover and cook on LOW for 3–4 hours or HIGH for 2 hours.

That’s it. No stirring needed until the very end. When it’s done, gently fluff with a spoon and serve straight from the crock.

What Makes This Dish So Addictive?

As it cooks, the stuffing absorbs the buttery broth and creamy soup, swelling into soft, savory layers. The chicken becomes infused with herb flavor, and the edges slightly crisp where the heat hits just right. It’s not soup, not casserole, not stuffing—but somehow all three.

The aroma alone will pull people in. It smells like holidays, family dinners, and cold-weather comfort. Even people who claim they “don’t really like stuffing” will take a spoonful—and then come back for more.

Why This Is Perfect for January Potlucks

January gatherings are usually low-key. No one wants to fuss, but everyone wants something warm and satisfying. This dish checks every box:

  • Affordable: Pantry ingredients you may already have

  • Transport-friendly: The slow cooker keeps it warm for hours

  • Crowd-pleasing: Familiar flavors with a cozy twist

  • Stress-free: No last-minute prep or reheating disasters

It also pairs well with almost anything on the potluck table—green salads, roasted vegetables, meat dishes, or even as a main on its own.

Make It Your Own

Once you’ve made this once, you’ll start imagining variations:

  • Add frozen vegetables for a one-dish meal

  • Stir in sour cream or cream cheese for extra richness

  • Top with crispy fried onions just before serving

  • Swap chicken for leftover turkey for a post-holiday encore

This recipe is forgiving and flexible, which is exactly what makes it a repeat favorite.

he Nostalgia Factor

There’s something comforting about recipes like this. They remind us of handwritten cards, church potlucks, and casseroles passed down without measurements. It’s the kind of food that doesn’t try to be trendy—it just works. And in January, when everyone is easing back into routine, that kind of familiarity feels especially welcome.

Final Thought

If you’re looking for a dish that delivers maximum comfort with minimum effort, this is it. Dump in boxed stuffing and three more things, plug in the crock, and let nostalgia do the rest. Don’t be surprised when the slow cooker is empty by the end of the potluck—and someone asks you to bring “that stuffing thing” next time.

Everyone should know that clove steam has the power to

For centuries, cloves have been treasured across cultures not just as a warm, aromatic spice, but as a powerful natural remedy. Hidden inside these tiny dried flower buds is an impressive concentration of essential oils, especially eugenol, which gives cloves their distinctive scent and soothing properties. One of the most underrated ways to unlock their benefits is through clove steam—a simple, old-world practice that delivers surprising comfort to the respiratory system, skin, and overall well-being.

In today’s fast-paced world of pills and sprays, clove steam stands out as a gentle, natural ritual that anyone can do at home with minimal effort and cost. Yet many people have never heard of it or underestimate its power.

What Is Clove Steam?

Clove steam is created by infusing whole cloves into hot water and inhaling the aromatic vapor. As the water heats, the clove’s essential oils are released into the steam, allowing them to be absorbed through the nose, lungs, and skin. This method has been traditionally used in many parts of Asia, the Middle East, and Africa to support breathing, ease congestion, and promote relaxation.

Unlike harsh chemical inhalants, clove steam works gradually and naturally, making it ideal for people who prefer home remedies.

Why Clove Steam Is So Powerful

The strength of clove steam lies in its natural compounds:

  • Eugenol – known for its soothing, warming, and cleansing properties

  • Antioxidants – help protect cells from environmental stress

  • Natural aroma compounds – calm the nervous system and promote relaxation

When inhaled, these compounds interact directly with the airways, sinuses, and skin, offering benefits that go beyond simple comfort.

Benefits of Clove Steam Everyone Should Know

1. Clears the Airways Naturally
Clove steam is especially valued for helping loosen mucus and open blocked nasal passages. The warm vapor hydrates dry airways, while the clove aroma helps you breathe more freely.

2. Soothes Throat and Chest Discomfort
Inhaling clove-infused steam can create a warming sensation that feels comforting during seasonal changes, dry weather, or long days of talking.

3. Supports Sinus Comfort
The aromatic steam may help reduce the heavy, pressured feeling in the sinuses by encouraging drainage and relaxation of nasal tissues.

4. Promotes Deep Relaxation
Clove’s scent has a grounding, calming effect. Many people find clove steam helpful before bedtime or during stressful days to quiet the mind.

5. Refreshes and Cleanses the Skin
Facial exposure to clove steam can help open pores, making it easier to remove impurities while leaving the skin feeling refreshed.

6. Traditional Support for Oral Comfort
Cloves have long been associated with dental care. When used gently, steam inhalation may offer indirect comfort through its aromatic properties.

How to Make Clove Steam at Home (Simple Method)

Ingredients:

  • 5–8 whole cloves

  • 2–3 cups water

Instructions:

  1. Bring the water to a gentle boil in a pot.

  2. Add the whole cloves and let them simmer for 2–3 minutes.

  3. Remove from heat and place the pot on a stable surface.

  4. Lean over the pot carefully, keeping a safe distance.

  5. Drape a towel over your head to trap the steam.

  6. Inhale slowly through your nose and mouth for 5–10 minutes.

Take breaks if the steam feels too hot, and always keep your eyes closed.

Best Time to Use Clove Steam

  • Early morning to clear nasal passages

  • Evening to unwind and relax

  • During seasonal changes

  • After long exposure to dust or dry air

Using it 2–3 times per week is generally sufficient for most people.

Tips for Safe and Effective Use

  • Always use whole cloves, not clove powder

  • Keep steam warm, not scalding

  • Avoid use with children without supervision

  • Stop immediately if irritation occurs

  • Never apply clove oil directly to skin without dilution

Clove steam should feel soothing—not intense or overwhelming.

Why This Old Remedy Still Matters Today

Modern life exposes us to pollution, dry indoor air, stress, and constant stimulation. Clove steam offers a moment to slow down while supporting natural body functions. It doesn’t rely on synthetic ingredients or complicated equipment—just heat, water, and nature.

Sometimes the most powerful remedies are the simplest ones, passed quietly through generations and waiting to be rediscovered.

Final Thoughts

Everyone should know that clove steam has the power to comfort the body, refresh the senses, and support natural breathing—all with ingredients already sitting in the kitchen. While it’s not a replacement for medical care, it’s a timeless wellness ritual that blends simplicity, tradition, and effectiveness.

The most effective tricks for making the Christmas cactus bloom year-round

The Christmas cactus (Schlumbergera) is famous for its dazzling winter flowers, yet many plant lovers are disappointed when it blooms once and then refuses to flower again. The good news? With the right care and a few clever tricks, you can encourage your Christmas cactus to bloom not just at Christmas, but multiple times throughout the year. While it may never bloom continuously, it can reward you with repeat flowering cycles if you understand its needs and mimic its natural environment.

Below is a complete, practical guide to keeping your Christmas cactus healthy, stress-free, and ready to bloom again and again.

1. Understand How the Christmas Cactus Thinks

Unlike desert cacti, the Christmas cactus is a tropical plant native to Brazilian rainforests. It grows attached to trees, enjoying filtered light, humidity, and cooler nighttime temperatures. Blooming is triggered by shorter days, cooler nights, and stable conditions. If you want year-round blooms, your goal is to recreate these cues in cycles.

Think of blooming as a reward for balance—not force.

2. Master the Light Balance (Bright but Indirect)

Light is one of the biggest bloom influencers.

  • Place your cactus in bright, indirect light

  • Avoid harsh midday sun, which causes leaf scorching

  • Morning sun or filtered window light is ideal

Too little light leads to lush green growth but no flowers. Too much sun causes stress and leaf damage. A well-lit room near an east- or north-facing window works best.

Trick: After a blooming cycle, slightly increase light exposure for 4–6 weeks to recharge the plant before initiating another bloom cycle.

3. Use Temperature Drops to Trigger Buds

Temperature changes are essential for blooming.

  • Daytime: 65–75°F (18–24°C)

  • Nighttime: 55–65°F (13–18°C)

A consistent drop in nighttime temperature signals the plant to form buds.

Effective trick:
Move the plant to a cooler room or near a slightly open window at night for 2–3 weeks. Even a 10-degree difference can trigger blooming.

4. Control Darkness Like a Pro

Christmas cacti are short-day bloomers, meaning they need extended darkness to set buds.

  • 12–14 hours of uninterrupted darkness per night

  • Continue this for 2–4 weeks

Artificial light—even a lamp—can interrupt the process.

Simple method:
Place the cactus in a dark room or cover it with a breathable cloth every evening, then return it to light in the morning.

Once buds appear, stop the darkness routine.

5. Water Correctly (This Is Where Most People Fail)

Improper watering is the most common reason for poor blooming.

  • Water when the top inch of soil feels dry

  • Never allow the plant to sit in water

  • Reduce watering slightly before a bloom cycle

Too much water causes root rot and bud drop. Too little stresses the plant.

Pro tip:
During bud formation, maintain consistent moisture—sudden dryness can cause buds to fall off.

6. Feed Strategically, Not Constantly

Fertilizer supports blooms, but timing matters.

  • Use a balanced houseplant fertilizer (10-10-10 or 20-20-20)

  • Feed every 2–4 weeks during active growth

  • Stop feeding once buds form

To encourage blooms:

  • Switch to a low-nitrogen, higher-phosphorus fertilizer once every 6 weeks

Too much nitrogen promotes leaf growth at the expense of flowers.

7. Repot Only When Necessary

Christmas cacti prefer to be slightly root-bound.

  • Repot every 2–3 years

  • Use a well-draining soil mix (cactus soil + orchid bark or perlite)

Repotting too often focuses the plant on root growth instead of flowering.

Best time to repot:
Immediately after a blooming cycle ends.

8. Don’t Move It Once Buds Appear

This rule is critical.

Once buds form:

  • Do not change location

  • Do not rotate the pot

  • Do not change light or temperature

Even small changes can cause bud drop. Stability equals success.

9. Prune Lightly to Encourage More Blooms

Pruning stimulates branching, and more branches mean more flowers.

  • Prune 1–2 segments per stem

  • Do this right after flowering

  • Never prune during bud formation

Each cut encourages new growth that can bloom in the next cycle.

10. Create Bloom Cycles Throughout the Year

To encourage multiple blooms:

  1. Let the plant rest for 6–8 weeks after flowering

  2. Resume feeding and bright indirect light

  3. Reintroduce cool nights + darkness

  4. Maintain stable moisture

Many growers achieve 2–3 bloom cycles per year with this method.

Final Thoughts

Making a Christmas cactus bloom year-round isn’t about forcing it—it’s about understanding its rhythm. By managing light, temperature, darkness, watering, and feeding in gentle cycles, you can turn this once-a-year bloomer into a frequent showstopper.