7 benefits of Vicks Vaporub

When it comes to classic home remedies, few products are as well-known as Vicks VapoRub. For generations, families have relied on this menthol-scented ointment to ease cold symptoms and provide soothing comfort. While it’s most famous for relieving coughs and congestion, VapoRub has several other surprising uses that many people may not know about.

In this article, we’ll explore seven potential benefits of Vicks VapoRub, how it works, and tips for safe use.


1. Relieves Cough and Chest Congestion

The most popular use of Vicks VapoRub is for cough relief. The ointment contains menthol, camphor, and eucalyptus oil. When applied to the chest and throat, these ingredients release soothing vapors that can help calm coughing.

The strong aroma stimulates cold receptors in the nose and throat, creating a cooling sensation that can make breathing feel easier. While it doesn’t cure a cold, it can significantly reduce nighttime coughing, helping both children (over age 2) and adults sleep more comfortably.

Tip: Apply a thick layer on the chest and throat before bed, and cover with loose clothing to allow the vapors to circulate.


2. Eases Nasal Congestion

Blocked sinuses can make even simple tasks feel exhausting. Vicks VapoRub works by producing vapors that give the sensation of clearer airways. Menthol and eucalyptus oil create a refreshing cooling effect that can make breathing feel more open.

Many people place a small amount under the nose (externally only) to experience this benefit. However, always avoid applying it inside the nostrils, as this can cause irritation.

For added relief, you can rub some on your chest and inhale deeply while resting in a warm room.


3. Soothes Muscle and Joint Pain

Beyond cold symptoms, VapoRub can be used to relieve minor muscle aches and joint discomfort. The menthol and camphor act as counterirritants, meaning they create a cooling sensation that distracts the brain from deeper muscle pain.

After a long day of physical work or exercise, gently massaging VapoRub into sore areas may provide temporary comfort. Some people even use it after workouts to relax tired muscles.

Important: Do not use on broken skin or open wounds.


4. Helps With Headache Discomfort

The cooling effect of menthol may also help reduce tension headaches. Applying a small amount to the temples and gently massaging can create a soothing sensation that eases tightness.

The aromatic vapors can promote relaxation, especially when combined with rest in a quiet environment. While it’s not a replacement for medical treatment, it can be a simple home comfort option for mild headaches.

Be cautious to keep it away from your eyes, as it can cause irritation.


5. Softens Dry or Cracked Heels

Many people use Vicks VapoRub as a nighttime foot treatment. The thick, petroleum-based formula helps lock in moisture, while the essential oils provide a refreshing scent.

To try this method:

  • Wash and dry your feet thoroughly.

  • Apply a thin layer of VapoRub to dry or cracked heels.

  • Put on cotton socks overnight.

By morning, your feet may feel softer and smoother. With regular use, this can improve rough skin over time.


6. May Help Reduce Minor Skin Irritation

Thanks to its cooling properties, VapoRub can sometimes provide temporary relief from minor skin irritations like insect bites. The menthol may help calm itching by creating a cooling distraction on the skin’s surface.

Apply a very small amount to the affected area and monitor your skin’s reaction. If irritation worsens, wash it off immediately.

Always avoid sensitive areas and consult a healthcare professional if you have persistent or severe reactions.


7. Promotes Relaxation and Better Sleep

The comforting scent of menthol and eucalyptus has a calming effect for many people. Using VapoRub before bed can create a soothing bedtime routine, especially during cold and flu season.

The aroma may help clear the mind, ease breathing discomfort, and promote deeper rest. Some people even use it in steam inhalation (by adding a small amount to hot water and inhaling the vapor carefully) to enhance relaxation.

Better sleep is essential for recovery, and simple comfort measures like this can make a noticeable difference.


Safety Tips for Using Vicks VapoRub

While VapoRub is generally safe when used as directed, keep these precautions in mind:

  • Do not use on children under 2 years old.

  • Avoid applying inside the nose or mouth.

  • Keep away from eyes.

  • Do not heat the product or microwave it.

  • Stop use if skin irritation occurs.

Always follow the instructions on the packaging and consult a healthcare provider if symptoms persist.


Final Thoughts

Vicks VapoRub remains one of the most trusted over-the-counter remedies in households worldwide. From relieving cough and congestion to soothing sore muscles and softening dry skin, its versatility makes it a staple in many medicine cabinets.

While it’s not a cure-all, its cooling sensation and aromatic vapors provide comforting relief for a variety of minor issues. Used correctly and safely, VapoRub can be a simple yet effective addition to your home wellness routine.
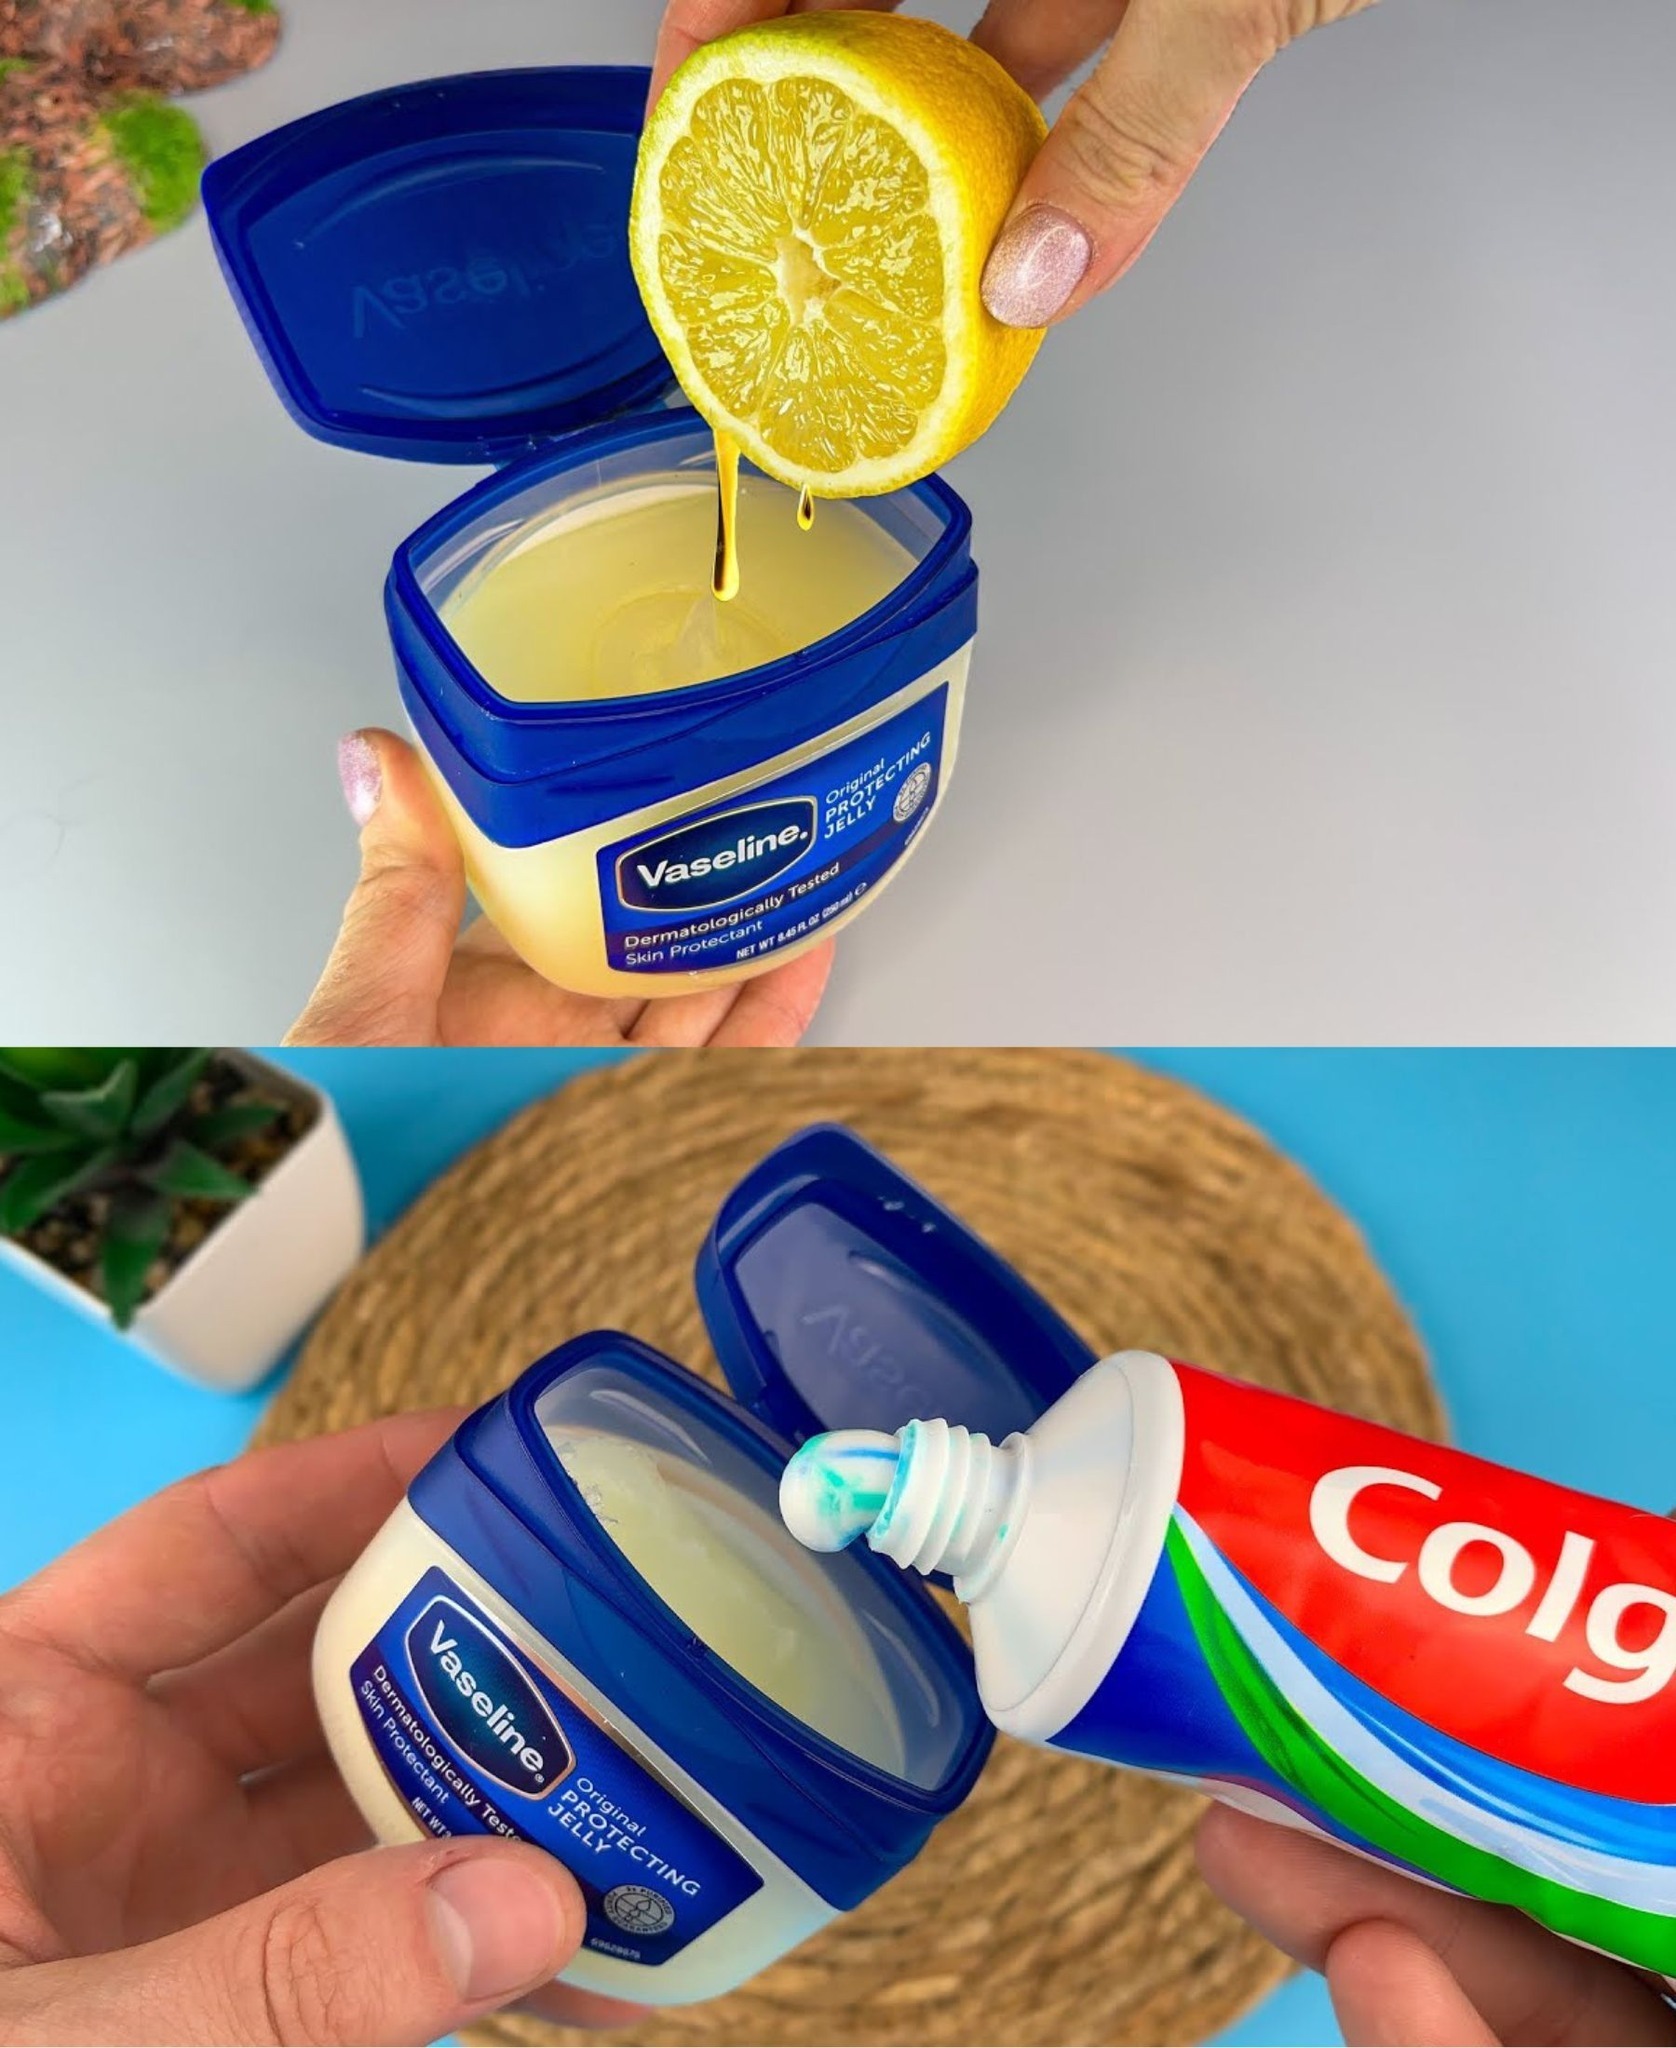

Vaseline: 18 unknown uses that will make your life easier and that you’ve never heard of

When most people think of Vaseline, they imagine a simple remedy for dry skin. But this humble jar of petroleum jelly is far more versatile than you might expect. Affordable, widely available, and incredibly effective, Vaseline has been a household essential for over a century. Beyond basic moisturizing, it offers dozens of surprising uses that can simplify daily life.

Here are 18 lesser-known ways to use Vaseline that may completely change how you see this classic product.


1. Make Perfume Last Longer

Before spraying perfume, apply a small dab of Vaseline to your pulse points (wrists, neck). The jelly locks in fragrance oils, helping the scent last significantly longer.

2. Tame Eyebrows Instantly

No brow gel? No problem. Rub a tiny amount between your fingers and smooth over your brows to keep them neat and in place all day.

3. Prevent Hair Dye Stains

Apply Vaseline along your hairline, ears, and neck before coloring your hair. It creates a barrier that prevents dye from staining your skin.

4. Remove Stubborn Makeup

Petroleum jelly breaks down even waterproof mascara. Massage gently onto lashes and wipe away with a cotton pad.

5. Stop Squeaky Hinges

If a door hinge is squeaking and you don’t have oil nearby, apply a thin layer of Vaseline. It works as a quick lubricant.

6. Heal Cracked Heels Overnight

Massage a generous layer onto your heels before bed and wear cotton socks overnight. You’ll wake up to softer, smoother feet.

7. Prevent Chafing

Apply to areas prone to friction (inner thighs, underarms) before exercise to prevent painful chafing.

8. Protect Minor Cuts

For small cuts and scrapes, apply a thin layer after cleaning. It keeps the wound moist, which can help healing.

9. Remove Ring Stuck on Finger

If a ring won’t budge, apply Vaseline around the finger. The lubrication makes removal much easier.

10. Polish Leather Shoes

No shoe polish? Rub a small amount onto leather shoes and buff with a cloth for instant shine.

11. Keep Nail Polish Off Skin

Before painting your nails, apply Vaseline around the nail edges. It prevents polish from sticking to your skin.

12. Soothe Sunburn

A light layer can help reduce dryness after a mild sunburn (once skin has cooled). It seals in moisture.

13. Prevent Split Ends

Rub a tiny bit between your palms and apply to dry hair ends. It adds shine and temporarily smooths split ends.

14. Make DIY Lip Scrub

Mix Vaseline with sugar to create a gentle exfoliating lip scrub. Massage and rinse for softer lips.

15. Protect Skin During Cold Weather

Apply a thin layer before going outdoors in harsh winter winds. It acts as a protective barrier against cold air.

16. Remove Gum from Hair

If chewing gum gets stuck in hair, coat the affected area with Vaseline. It loosens the gum so it slides out more easily.

17. Prevent Paint from Sticking to Skin

When doing home painting projects, apply around your wrists and hands. Dried paint peels off much easier.

18. Highlight Cheekbones Naturally

Dab a small amount on cheekbones for a natural, dewy glow without makeup.


Bonus: Household Hacks You Didn’t Expect

https://cdn-fastly.upstyledaily.com/media/2022/07/13/7982044/6-quick-easy-vaseline-hacks-from-diy-lip-balm-to-zipper-fixing.jpg?nocrop=1&size=720x845
https://www.housedigest.com/img/gallery/prevent-your-lightbulbs-from-sticking-in-the-light-socket-with-one-clever-vaseline-hack/l-intro-1684764781.jpg
https://www.slashgear.com/img/gallery/can-you-use-vaseline-on-your-car-battery-terminals-and-why-you-may-want-to/l-intro-1747153862.jpg
4
  • Fix a Stuck Zipper: Apply lightly to loosen it.

  • Prevent Light Bulbs from Sticking: Rub on threads before installing.

  • Protect Car Battery Terminals: A thin coat helps reduce corrosion.

  • Hide Minor Wood Scratches: Rub gently into scratches to make them less visible.


Safety Tips

While Vaseline is generally safe for external use, keep these precautions in mind:

  • Use only externally unless directed by a doctor.

  • Avoid applying inside the nose frequently.

  • Don’t use on deep wounds or serious burns without medical advice.

  • Use sparingly — a little goes a long way.


Why Vaseline Works So Well

Petroleum jelly is an occlusive agent, meaning it forms a protective barrier on the skin. This barrier prevents moisture loss and shields against environmental damage. Unlike many expensive beauty products, Vaseline contains very few ingredients, reducing the risk of irritation for most people.


Final Thoughts

Sometimes the simplest products are the most powerful. A single jar of Vaseline can replace multiple beauty and household items, saving you money and storage space. Whether you’re enhancing your beauty routine, solving small home problems, or protecting your skin, this timeless product proves that you don’t need complicated solutions for everyday challenges.

Keep a jar in your bathroom, your car, or your toolbox — you’ll be surprised how often you reach for it.

I Didn’t Believe This Floor Trick Until I Tried It

I’ll be honest — when I first heard about this simple floor cleaning trick, I rolled my eyes. It sounded like one of those exaggerated home hacks that promise sparkling floors with “zero effort.” I’ve tried countless methods over the years: expensive commercial cleaners, strong chemical solutions, and even steam mops. Some worked okay, some left streaks, and some made my house smell like a chemical factory.

But this one? It completely changed how I clean my floors.

The best part is that it uses just a few simple ingredients you probably already have in your kitchen. No harsh fumes. No sticky residue. No scrubbing on your hands and knees. Just shiny, fresh-smelling floors that look professionally cleaned.

Let me show you exactly how it works.

Why Most Floor Cleaners Fail

Before we get into the recipe, let’s talk about why many floor cleaning products disappoint:

  • They leave a dull film behind.

  • They make floors sticky over time.

  • They contain strong artificial fragrances.

  • They are expensive.

  • They can damage certain surfaces.

Over time, residue builds up. Even if your floor looks clean at first, it starts attracting more dust and grime. That’s when I knew I needed something simpler — and more natural.

The Simple Floor Trick Recipe

Ingredients:

  • 1 gallon (about 4 liters) warm water

  • 1 cup white vinegar

  • 1 tablespoon liquid dish soap

  • 5–10 drops essential oil (optional – lemon or lavender work beautifully)

That’s it. Four ingredients. No special tools required.

Why This Combination Works

White Vinegar
Vinegar is a natural disinfectant. It cuts through grease, removes odors, and dissolves mineral buildup. Don’t worry about the smell — it disappears once the floor dries.

Liquid Dish Soap
A small amount helps break down grime and dirt. The key is using just a tablespoon. Too much soap causes streaking.

Warm Water
Warm water helps dissolve dirt faster and allows the ingredients to mix properly.

Essential Oils (Optional)
This is just for fragrance. Lemon gives a fresh, clean scent, while lavender adds a calming touch.

Step-by-Step Instructions

  1. Fill your bucket with warm water.

  2. Add the white vinegar.

  3. Stir in the tablespoon of dish soap gently to avoid too many bubbles.

  4. Add essential oil if using.

  5. Dip your mop into the mixture and wring it out well. Damp — not soaking — works best.

  6. Mop as usual. No rinsing required.

  7. Let the floor air dry.

That’s it. No second pass. No polishing needed.

The First Time I Tried It

When I finished mopping, I honestly expected streaks. Instead, as the floor dried, I noticed something different. The shine looked natural — not glossy or artificial. There was no sticky feeling under my feet. And the fresh scent was subtle and clean.

The biggest surprise? My floors stayed cleaner longer. Dust didn’t cling the way it used to.

What Types of Floors Can You Use This On?

This mixture works beautifully on:

  • Tile floors

  • Vinyl flooring

  • Laminate

  • Sealed hardwood

⚠️ Important: Avoid using vinegar on natural stone floors like marble or granite. Vinegar is acidic and can damage the surface.

Extra Tips for Even Better Results

1. Sweep or Vacuum First
Always remove loose dirt before mopping. This prevents scratching.

2. Change the Water if It Gets Dirty
If you’re cleaning a large area, replace the solution halfway through.

3. Microfiber Mop = Best Results
Microfiber traps dirt better than traditional string mops.

4. Don’t Over-Soak Wood Floors
Too much moisture can cause damage over time.

Why I’ll Never Go Back to Store-Bought Cleaners

After trying this method for a few weeks, I realized:

  • My floors looked brighter.

  • My house smelled fresher without artificial scents.

  • I saved money.

  • I reduced chemical exposure in my home.

Sometimes the simplest solutions really are the best.

Bonus: Extra Shine Booster (Optional)

If you want even more shine for tile or vinyl floors, add:

  • 1 tablespoon rubbing alcohol

It helps the floor dry faster and enhances streak-free results.

Final Thoughts

I truly didn’t believe this floor trick until I tried it. It seemed too simple to work. But now it’s my go-to method, and I recommend it to everyone who wants clean, fresh floors without harsh chemicals or expensive products.

Be Careful About Falling in Love Again in Old Age: Wisdom for the Heart

Falling in love is one of life’s most beautiful experiences. It brings excitement, hope, companionship, and renewed energy. But when love comes later in life, it carries unique emotional, financial, and social considerations. While romance in old age can be deeply fulfilling, it also requires wisdom, clarity, and caution.

If you are considering opening your heart again after 50, 60, or even 70, here is a detailed guide to help you move forward safely and confidently.


1. Emotional Vulnerability Is Stronger Than You Think

As we grow older, many of us have experienced loss—whether through divorce, separation, or the passing of a spouse. Loneliness can become a powerful emotional force. When someone new offers attention, affection, and companionship, it can feel like a miracle.

However, emotional vulnerability increases with age. After years without intimacy, even small gestures can feel overwhelming. This may cause you to:

  • Ignore red flags

  • Move too quickly

  • Overlook incompatibilities

  • Trust too easily

Take time to understand whether your feelings are based on genuine compatibility or simply relief from loneliness.

Love at any age deserves patience.


2. Financial Protection Is Essential

Unfortunately, financial scams targeting older adults are increasing worldwide. Some individuals intentionally seek relationships with seniors for money, gifts, or inheritance benefits.

Before merging finances or making financial commitments:

  • Avoid giving large loans or gifts early in the relationship

  • Never share banking details or passwords

  • Be cautious about co-signing loans

  • Consult a financial advisor before changing wills or beneficiaries

Even if the relationship feels sincere, financial independence protects both partners and prevents future misunderstandings.

True love will respect boundaries.


3. Family Dynamics Can Become Complicated

When love enters later in life, family reactions can vary. Adult children may feel protective, suspicious, or even threatened—especially if inheritance or property is involved.

Common concerns include:

  • Fear of manipulation

  • Worries about financial exploitation

  • Emotional attachment to the memory of a deceased parent

Open communication is critical. Introduce your partner gradually. Allow family members time to adjust. Transparency reduces tension and builds trust.

Remember, your happiness matters—but so do healthy family relationships.


4. Health Compatibility Matters

At an older age, health becomes an important factor in any serious relationship. Chronic illnesses, mobility limitations, or caregiving needs can influence the dynamic significantly.

Ask yourself:

  • Are we physically and emotionally prepared to support each other?

  • Are expectations realistic?

  • Are we clear about future care responsibilities?

Discuss health history honestly. It may feel uncomfortable, but openness now prevents conflict later.

Love is not just romance—it is also responsibility.


5. Avoid Rushing Commitment

Older adults sometimes feel time pressure. There may be a sense of “not wanting to waste time” or fear that opportunities won’t come again.

But rushing into:

  • Marriage

  • Selling property

  • Moving in immediately

  • Changing legal documents

can create regret.

Healthy relationships grow through shared experiences. Travel together. Meet each other’s friends. Handle small conflicts. See how your partner responds to stress.

Time reveals character.


6. Recognize the Difference Between Companionship and Compatibility

Loneliness can make companionship feel like love. But companionship alone is not enough for a lasting partnership.

Ask important questions:

  • Do we share similar values?

  • Do we respect each other’s independence?

  • Can we communicate calmly during disagreements?

  • Are life goals aligned?

Compatibility includes emotional maturity, mutual respect, and shared expectations—not just chemistry.


7. Maintain Your Independence

One common mistake in later-life relationships is losing independence too quickly. After years of living alone, it’s easy to become emotionally dependent on someone who brings joy back into your life.

Keep:

  • Your friendships

  • Your hobbies

  • Your routines

  • Your financial autonomy

A healthy relationship enhances your life—it does not replace it.


8. Watch for Red Flags

Regardless of age, some warning signs should never be ignored:

  • Pressuring you for money

  • Isolating you from family or friends

  • Moving the relationship forward too fast

  • Avoiding transparency about their past

  • Inconsistent stories

Trust your instincts. If something feels off, pause. Consult a trusted friend or advisor.

Love should bring peace, not anxiety.


9. Understand That Love in Old Age Can Be Beautiful

While caution is important, do not let fear prevent you from experiencing happiness. Research consistently shows that companionship improves mental health, reduces depression, and even supports physical well-being in older adults.

Benefits of healthy later-life relationships include:

  • Emotional stability

  • Increased life satisfaction

  • Reduced stress

  • Stronger immune function

  • Renewed sense of purpose

Love does not have an expiration date.


10. Move Forward With Wisdom, Not Fear

The goal is not to avoid love—it is to approach it with awareness.

Before fully committing, take time to reflect:

  • Are you emotionally healed from the past?

  • Are you choosing from strength, not loneliness?

  • Is this relationship balanced and respectful?

Seek legal and financial advice if marriage is involved. Keep communication honest. Move at a comfortable pace.

Love in old age should feel safe, steady, and mutual.


Final Thoughts

Falling in love again later in life can be one of the most rewarding chapters you will ever write. It brings warmth, companionship, and renewed hope. But wisdom must guide the heart.

Be open—but be observant.
Be hopeful—but be practical.
Be loving—but protect your peace.

When approached thoughtfully, love in old age is not something to fear. It is something to cherish—with maturity, clarity, and courage.

Drink this before bed to eliminate all belly fat in just one week.

The idea that one single drink can magically eliminate all belly fat in just one week sounds tempting—but the truth is, no drink alone can completely remove belly fat that quickly. However, certain natural ingredients can support digestion, reduce bloating, improve metabolism, and help your body burn fat more efficiently when combined with a balanced diet and regular movement.

This simple bedtime drink is designed to support fat loss, especially around the stomach area, by improving digestion, reducing inflammation, and stabilizing blood sugar overnight.

Let’s dive into this powerful nighttime belly-fat-support drink recipe.

Lemon Ginger Cinnamon Fat-Burning Night Drink

Why This Drink Works

Each ingredient plays an important role:

  • Lemon helps detoxify the liver and reduce water retention.

  • Ginger improves digestion and boosts metabolism.

  • Cinnamon helps regulate blood sugar and reduce cravings.

  • Warm water helps the body absorb nutrients and supports digestion before sleep.

This combination can reduce bloating, improve gut health, and support steady fat loss over time.

Ingredients

  • 1 cup warm water (not boiling)

  • Juice of ½ fresh lemon

  • ½ teaspoon grated fresh ginger (or ¼ teaspoon ginger powder)

  • ½ teaspoon cinnamon powder (preferably Ceylon cinnamon)

  • 1 teaspoon raw honey (optional)


Instructions

  1. Heat one cup of water until warm but not boiling.

  2. Add freshly squeezed lemon juice.

  3. Stir in grated ginger or ginger powder.

  4. Add cinnamon powder and mix well.

  5. Add honey if desired.

  6. Let it sit for 2–3 minutes.

  7. Drink it 30 minutes before bedtime.

For best results, drink consistently for 7 days while following a light dinner plan.

How It Supports Belly Fat Reduction

1. Reduces Nighttime Bloating

Ginger and lemon help reduce gas and improve digestion, preventing the “puffy belly” look in the morning.

2. Balances Blood Sugar

Cinnamon helps stabilize blood sugar levels overnight. Stable blood sugar means fewer cravings and less fat storage.

3. Supports Liver Function

The liver plays a major role in fat metabolism. Lemon and warm water gently support natural detox processes.

4. Boosts Metabolism

Ginger increases thermogenesis (heat production), helping your body burn more calories—even at rest.

What You Should Avoid at Night

For this drink to work effectively, avoid:

  • Late-night sugary snacks

  • Fried or heavy dinners

  • Soda or sweetened drinks

  • Large portions right before bed

Instead, choose light meals such as grilled chicken, vegetables, soup, or salad for dinner.

Optional Powerful Additions

If you want to enhance the effect, you can rotate these ingredients during the week:

  • A pinch of turmeric for anti-inflammatory benefits

  • Apple cider vinegar (1 teaspoon) for appetite control

  • Fresh mint leaves for digestion

Simple 7-Day Belly Fat Support Plan

To maximize results:

  • Walk 20–30 minutes daily

  • Drink at least 6–8 glasses of water

  • Avoid refined sugar

  • Get 7–8 hours of sleep

Fat loss happens when your body is in a calorie deficit consistently. This drink supports the process but is not a magic solution.

Realistic Expectations

In one week, you may notice:

  • Reduced bloating

  • A flatter stomach appearance

  • Less water retention

  • Better digestion

  • Slight weight loss (mostly water and reduced inflammation)

Significant fat loss takes time, consistency, and lifestyle changes.

Important Safety Notes

  • If you have acid reflux, reduce lemon quantity.

  • If you have diabetes, consult your doctor before using cinnamon daily.

  • Pregnant women should consult a healthcare provider before adding concentrated ginger.

Final Thoughts

There is no overnight miracle for belly fat, but small healthy habits add up quickly. This lemon ginger cinnamon night drink can help reduce bloating, improve metabolism, and support your weight-loss journey when combined with mindful eating and light exercise.

Dear parents, please always keep your children’s baby teeth

As parents, we celebrate every milestone in our child’s life—their first smile, first word, and especially their first tooth. Those tiny pearly whites may seem temporary, but baby teeth are far more important than many people realize. Too often, parents think, “They’re just baby teeth—they’ll fall out anyway.” However, these small teeth play a powerful role in your child’s health, development, and future smile.

Let’s explore why keeping your children’s baby teeth healthy and intact is one of the best investments you can make in their overall well-being.

What Are Baby Teeth?
4

Baby teeth, also known as primary teeth, typically begin to appear around six months of age. By the time your child turns three, they usually have a full set of 20 baby teeth. These teeth remain in place until about age six, when they gradually begin to fall out to make room for permanent teeth.

Although temporary, baby teeth are essential for:

Proper chewing and nutrition

Speech development

Maintaining space for permanent teeth

Building confidence through a healthy smile

Why Baby Teeth Matter More Than You Think
1. They Help Your Child Eat Properly

Healthy baby teeth allow children to chew food correctly. When teeth are damaged or lost too early due to cavities or injury, chewing becomes difficult and sometimes painful. This may lead to poor eating habits or nutritional deficiencies.

Strong baby teeth support a balanced diet, ensuring your child receives the nutrients needed for healthy growth and development.

2. They Support Clear Speech Development

Teeth play an important role in pronunciation. Many sounds—like “s,” “th,” and “f”—require proper tooth placement. If baby teeth are lost too early, speech development may be affected. Children may struggle with articulation, leading to frustration or confidence issues.

Maintaining healthy primary teeth helps your child speak clearly and confidently.

3. They Hold Space for Permanent Teeth

Each baby tooth acts as a placeholder for the permanent tooth growing underneath. If a baby tooth falls out too early due to decay, neighboring teeth can shift into the empty space. This can block permanent teeth from coming in correctly, potentially leading to crowding or misalignment.

Orthodontic problems later in life often begin with early loss of baby teeth. Protecting these teeth can reduce the need for braces or complex dental treatments in the future.

4. They Prevent Infections and Pain

Tooth decay in baby teeth is not harmless. Cavities can cause significant pain, infections, and even abscesses. In severe cases, untreated dental infections can affect overall health.

Bacteria from decayed teeth may spread to other parts of the body. Maintaining good oral hygiene from infancy protects your child from unnecessary pain and medical complications.

Common Myths About Baby Teeth
Myth 1: “They’ll fall out anyway, so treatment isn’t necessary.”

This is one of the most harmful misconceptions. Even though baby teeth are temporary, they need proper care. Ignoring cavities can cause pain and long-term damage to permanent teeth developing beneath them.

Myth 2: “Children are too young for the dentist.”

Dental professionals recommend a child’s first dental visit by their first birthday or when the first tooth appears. Early visits help detect problems and establish healthy habits.

Myth 3: “Cavities in baby teeth don’t affect permanent teeth.”

Infections in baby teeth can damage developing permanent teeth underneath. Protecting baby teeth protects the future smile.

How to Care for Baby Teeth Properly
4

Caring for baby teeth does not need to be complicated. Simple daily habits make a huge difference.

1. Start Early

Even before teeth appear, gently wipe your baby’s gums with a clean, damp cloth after feedings. Once the first tooth erupts, use a soft-bristled toothbrush and a tiny smear of fluoride toothpaste.

2. Brush Twice Daily

Brush your child’s teeth in the morning and before bedtime. For children under three, use a rice-sized amount of toothpaste. For ages three to six, use a pea-sized amount.

Supervise brushing until your child develops proper technique, usually around age 7 or 8.

3. Limit Sugary Foods and Drinks

Frequent snacking on sugary foods increases the risk of cavities. Avoid putting your child to bed with milk or juice bottles, as sugars can sit on teeth overnight and cause decay.

Encourage water between meals and healthy snacks like fruits, vegetables, and cheese.

4. Schedule Regular Dental Visits

Routine dental checkups every six months help catch problems early. Dentists can apply protective fluoride treatments and sealants to reduce cavity risk.

Emotional and Social Benefits of Healthy Baby Teeth

A healthy smile builds confidence. Children with dental pain may avoid smiling, speaking, or interacting with others. Untreated dental problems can affect self-esteem and social development.

When children feel good about their smile, they are more likely to participate in school activities, communicate openly, and build friendships.

The Long-Term Impact

Good oral hygiene habits formed in early childhood often last a lifetime. Teaching your child to value dental health sets the foundation for healthy permanent teeth and fewer dental problems as adults.

Baby teeth are the training ground for lifelong oral health. By caring for them properly, you are teaching responsibility, discipline, and self-care.

A Loving Reminder to Parents

Dear parents, your child’s baby teeth may be small, but their importance is enormous. They are not disposable or unimportant. They guide speech, nutrition, facial development, and future dental alignment.

Protecting baby teeth means protecting your child’s comfort, health, and confidence. Simple daily care, regular dental visits, and healthy habits can prevent pain and costly treatments later.

When you help your child brush their tiny teeth each night, you are doing much more than cleaning enamel—you are building a foundation for a lifetime of healthy smiles.

1 tablespoon a day and your liver will be clean! It cures all diseases. All impurities are removed

You may have seen bold claims online saying, “1 tablespoon a day and your liver will be clean! It cures all diseases. All impurities are removed.” While no single food or drink can cure all diseases, it is true that certain natural ingredients can support your liver’s normal detoxification process. The liver is one of the hardest-working organs in your body. It naturally filters toxins, processes nutrients, balances hormones, and helps digest fats.

Instead of promising miracles, this recipe focuses on ingredients traditionally used to support liver health in a gentle, nourishing way. Think of it as a daily wellness booster — not a cure-all.

This simple one-tablespoon concentrate combines lemon, olive oil, turmeric, and honey — ingredients long associated with digestive and liver support.

Why These Ingredients?

Before we get into the recipe, let’s understand why these ingredients are chosen.

1. Lemon Juice

Fresh lemon juice is rich in vitamin C and antioxidants. It may support digestion and bile production, which helps the liver process fats efficiently.

2. Extra Virgin Olive Oil

High-quality olive oil contains healthy monounsaturated fats and antioxidants. It may help reduce inflammation and support overall liver function.

3. Turmeric

Turmeric contains curcumin, known for its anti-inflammatory and antioxidant properties. It has been studied for potential benefits in supporting liver health.

4. Raw Honey

Raw honey adds natural sweetness and contains antioxidants. It also helps make the mixture smoother and easier to consume daily.

Liver Support Daily Spoon Recipe

Ingredients:

  • 2 tablespoons fresh lemon juice

  • 2 tablespoons extra virgin olive oil

  • 1 teaspoon turmeric powder

  • 1 tablespoon raw honey

  • A pinch of black pepper (optional, improves turmeric absorption)

Instructions:

  1. In a small glass bowl, combine the fresh lemon juice and olive oil.

  2. Add the turmeric powder and mix thoroughly until smooth.

  3. Stir in the raw honey until fully incorporated.

  4. Add a small pinch of black pepper if desired.

  5. Transfer the mixture to a small glass jar with a lid.

  6. Store in the refrigerator for up to 3–4 days. Shake well before each use.

How to Use

Take 1 tablespoon each morning on an empty stomach. You may follow it with a glass of warm water if the taste feels strong. Continue for 2–3 weeks, then take a short break before restarting.

What This Drink May Support

While it does not “cure all diseases,” regular use alongside a healthy lifestyle may help:

  • Support normal liver detoxification

  • Promote better digestion

  • Reduce mild bloating

  • Provide antioxidant support

  • Encourage healthy bile flow

The liver naturally detoxifies your body every day. This mixture simply provides nutrients that may assist that natural process.

Important Truth About Liver “Cleansing”

Your liver does not need extreme cleanses, harsh detox drinks, or starvation diets. In fact, those can sometimes stress your body. The best way to keep your liver healthy includes:

  • Drinking plenty of water

  • Limiting processed foods

  • Reducing added sugars

  • Avoiding excessive alcohol

  • Eating leafy greens and fiber-rich foods

  • Maintaining a healthy weight

If you have liver disease, fatty liver, hepatitis, or any medical condition, consult a healthcare professional before trying new remedies.

Optional Boost Variations

If you want to enhance the mixture naturally, you can occasionally add:

  • A few drops of apple cider vinegar

  • Fresh grated ginger

  • A sprinkle of cinnamon

These additions can provide extra antioxidant and digestive support.

When You Might Notice Benefits

Some people report feeling lighter digestion and improved energy within 1–2 weeks. However, real liver health improvements come from consistent healthy habits, not one ingredient alone.

Final Thoughts

The idea that “1 tablespoon a day cures all diseases” is an exaggeration. No single food, herb, or drink can replace medical treatment or cure every illness. However, this simple liver-support spoon can be a gentle addition to a balanced lifestyle.

Small daily habits often lead to meaningful long-term benefits. Supporting your liver with nutrient-rich ingredients, staying hydrated, and eating whole foods is a smarter approach than chasing miracle cures.

Half a cup of this in the morning and say goodbye to bone pain, diabetes, nerves, anxiety, depression and heaviness.

Morning Healing Herbal Tea (Natural Wellness Drink)

A warm cup of herbal tea in the morning can be one of the simplest yet most comforting rituals you add to your daily routine. While no single drink can magically cure bone pain, diabetes, anxiety, or depression, certain natural ingredients are well known for supporting overall wellness, reducing inflammation, calming the nervous system, and promoting better digestion.

This Morning Healing Herbal Tea combines ginger, turmeric, cinnamon, and green tea—ingredients valued for centuries in traditional wellness practices. When enjoyed consistently as part of a balanced lifestyle, this tea may help support joint comfort, stable energy levels, and mental calmness.

Let’s prepare this nourishing morning drink step by step.


Why These Ingredients?

Before we begin, here’s why each ingredient is included:

  • Ginger: Known for its anti-inflammatory properties and digestive support. It may help reduce stiffness and discomfort.

  • Turmeric: Contains curcumin, a powerful antioxidant that supports joint and overall health.

  • Cinnamon: Often associated with supporting balanced blood sugar levels.

  • Green Tea: Rich in antioxidants that support metabolism and brain function.

  • Honey (optional): Adds natural sweetness and soothing properties.

  • Lemon (optional): Provides vitamin C and a refreshing taste.

Together, these ingredients create a warming, gently energizing drink perfect for mornings.


Ingredients (1 Serving)

  • 1 cup water

  • ½ teaspoon freshly grated ginger (or ¼ teaspoon ginger powder)

  • ½ teaspoon turmeric powder (or 1 teaspoon fresh grated turmeric)

  • ¼ teaspoon cinnamon powder

  • 1 green tea bag (or 1 teaspoon loose green tea)

  • A pinch of black pepper (enhances turmeric absorption)

  • 1 teaspoon raw honey (optional)

  • 1 teaspoon fresh lemon juice (optional)


Instructions

Step 1: Heat the Water

Pour 1 cup of water into a small saucepan and bring it to a gentle boil over medium heat.

Step 2: Add the Spices

Once the water begins to boil, reduce the heat slightly and add the ginger, turmeric, cinnamon, and a pinch of black pepper. Stir gently.

Allow the mixture to simmer for about 5–7 minutes. This helps extract the beneficial compounds from the spices.

Step 3: Add the Green Tea

Turn off the heat and add the green tea bag. Let it steep for 2–3 minutes. Avoid steeping too long, as it may turn bitter.

Step 4: Strain and Enhance

Strain the tea into your favorite cup. Add honey and lemon juice if desired. Stir well and enjoy while warm.


How to Use

Drink half to one cup in the morning on an empty stomach or after a light breakfast. Consistency matters more than quantity. This tea is meant to support wellness—not replace medical treatment.

If you have any medical conditions, are pregnant, or are taking medications (especially blood thinners or diabetes medications), consult a healthcare professional before making this part of your routine.


Potential Benefits of Regular Use

While results vary from person to person, here’s how this tea may support your body when combined with healthy habits:

1. Joint and Bone Support

Turmeric and ginger both contain natural compounds known for supporting inflammation balance in the body, which may contribute to improved comfort and flexibility.

2. Blood Sugar Balance

Cinnamon and green tea have been studied for their potential role in supporting healthy blood sugar levels when combined with proper diet and exercise.

3. Nervous System Calm

Warm herbal drinks naturally promote relaxation. Ginger and green tea may help improve focus and mood without causing jitteriness like strong coffee can.

4. Digestive Health

Ginger is widely used to ease bloating and support digestion. Drinking this tea in the morning may gently awaken your digestive system.

5. Energy Without Crash

Green tea contains a moderate amount of caffeine along with L-theanine, which may promote calm alertness rather than a sharp spike and crash.


Tips for Best Results

  • Use fresh ingredients whenever possible.

  • Pair this tea with a balanced diet rich in vegetables, lean protein, and whole grains.

  • Stay hydrated throughout the day.

  • Incorporate gentle daily movement such as walking or stretching.

  • Maintain regular sleep patterns.

Remember, no single drink replaces proper medical care, balanced nutrition, physical activity, or mental health support.


Optional Variations

Creamy Golden Version

Add 2 tablespoons of unsweetened almond milk or coconut milk for a smoother texture.

Caffeine-Free Version

Skip the green tea and use chamomile or rooibos instead.

Stronger Detox Version

Add a few fresh mint leaves during simmering for extra freshness.


Storage

This tea is best enjoyed fresh. However, you can prepare a larger batch (2–3 cups) and store it in the refrigerator for up to 24 hours. Reheat gently before drinking—do not boil again.


Final Thoughts

A simple cup of herbal tea in the morning can be more than just a drink—it can become a mindful ritual that sets the tone for your entire day. While it won’t magically eliminate serious health conditions, it may support your body’s natural balance when combined with healthy choices.

Small daily habits create long-term change. Start your morning with warmth, nourishment, and intention—and let that be the foundation of better wellness.

Eliminate fat from arms, belly

Creamy Chia Breakfast Pudding for a Slimmer, Energized Start

If you’re looking for a simple, nourishing breakfast that keeps you full for hours and supports healthy weight management, this creamy chia breakfast pudding might become your new favorite morning ritual. Packed with fiber, protein, and healthy fats, this easy recipe requires only a handful of ingredients and a few minutes of preparation. Make it the night before, and you’ll wake up to a delicious, ready-to-eat meal that feels indulgent but fuels your body the right way.

Chia seeds have become a staple in healthy kitchens for good reason. These tiny seeds absorb liquid and expand, creating a rich, pudding-like texture while delivering impressive nutritional benefits. They are high in soluble fiber, which supports digestion and helps you feel satisfied longer. This can naturally reduce cravings and prevent overeating throughout the day.

Below is a detailed, step-by-step guide to making a perfectly creamy chia breakfast pudding, along with helpful tips, variations, and serving ideas.


Why This Breakfast Works

This recipe supports balanced energy levels and appetite control because it combines:

  • Fiber from chia seeds to promote fullness
  • Protein from milk or yogurt to support muscle and satiety
  • Healthy fats to stabilize blood sugar
  • Natural sweetness without refined sugar

When eaten consistently as part of a balanced lifestyle, this breakfast can help you feel lighter, less bloated, and more energized.


Creamy Chia Breakfast Pudding Recipe

Ingredients (Serves 2–3)

  • 4 tablespoons chia seeds
  • 2 cups unsweetened almond milk (or any milk of choice)
  • 1/2 teaspoon pure vanilla extract
  • 1–2 teaspoons raw honey or maple syrup (optional)
  • 1 tablespoon fresh lemon or orange zest (optional, for brightness)
  • Fresh fruit for topping (berries, sliced banana, or diced apple)
  • 1 tablespoon chopped nuts or seeds for garnish (optional)

Step-by-Step Instructions

1. Combine the Base Ingredients

In a medium mixing bowl, pour in the almond milk. Add the vanilla extract and honey or maple syrup if using. Stir well to combine.

2. Add the Chia Seeds

Slowly sprinkle in the chia seeds while whisking continuously. This prevents clumping and ensures even distribution.

3. First Rest and Stir

Let the mixture sit for about 5 minutes. You’ll notice it beginning to thicken. Stir again thoroughly to break up any clumps.

4. Chill Overnight

Cover the bowl or divide the mixture into glass jars with lids. Refrigerate for at least 4 hours, preferably overnight. During this time, the chia seeds absorb the liquid and create a thick, creamy pudding texture.

5. Stir and Adjust

In the morning, stir the pudding. If it feels too thick, add a splash of milk and mix until smooth. Taste and adjust sweetness if needed.

6. Add Toppings

Top with fresh fruit, nuts, seeds, or a sprinkle of cinnamon. Serve chilled and enjoy.


Texture Tips for Perfect Pudding

  • Too thick? Add 1–2 tablespoons of milk and stir well.
  • Too thin? Add 1 teaspoon of chia seeds, stir, and refrigerate for another 30 minutes.
  • Lumpy texture? Blend the mixture briefly with a hand blender for a smoother consistency.

Flavor Variations

1. Citrus Fresh

Add orange zest and a squeeze of fresh orange juice for a bright, refreshing taste.

2. Berry Boost

Mix in mashed strawberries or blueberries before refrigerating for natural sweetness and antioxidants.

3. Cocoa Delight

Stir in 1 teaspoon unsweetened cocoa powder and a dash of cinnamon for a chocolate-inspired version.

4. Tropical Twist

Use coconut milk instead of almond milk and top with mango and shredded coconut.


Nutritional Highlights

Chia seeds are rich in omega-3 fatty acids, antioxidants, and minerals like calcium and magnesium. Just two tablespoons contain around 10 grams of fiber. This high fiber content helps support digestive health and promotes a steady release of energy.

Because this pudding is naturally low in refined sugars and high in nutrients, it helps reduce mid-morning crashes. Many people find that when they replace sugary cereals or pastries with a fiber-rich breakfast like this, their cravings decrease significantly.


Meal Prep Advantage

One of the best things about this recipe is how convenient it is. Prepare three or four jars at once and store them in the refrigerator for up to four days. This makes busy mornings stress-free and prevents unhealthy grab-and-go choices.

For best results:

  • Store in airtight glass jars
  • Keep refrigerated
  • Add fresh toppings just before serving

Who Will Love This Recipe?

  • Busy professionals needing a quick breakfast
  • Anyone looking for a lighter morning meal
  • People trying to manage portion control
  • Those who prefer no-cook recipes
  • Individuals wanting a plant-based option

Helpful Health Note

While this breakfast can support weight management, no single food causes dramatic body changes on its own. Sustainable results come from consistent healthy eating, hydration, regular movement, and good sleep. This pudding works best as part of a balanced lifestyle.


Final Thoughts

Creamy chia breakfast pudding is simple, customizable, and nourishing. With minimal effort, you get a breakfast that keeps you satisfied for hours and supports digestive wellness. Whether you prefer fruity, chocolatey, or citrus flavors, this versatile recipe adapts to your taste.

Make it tonight, and tomorrow morning you’ll have a cool, creamy, naturally sweet breakfast waiting for you. Over time, small daily habits like this can make a meaningful difference in how you feel — lighter, more energized, and ready to take on the day.

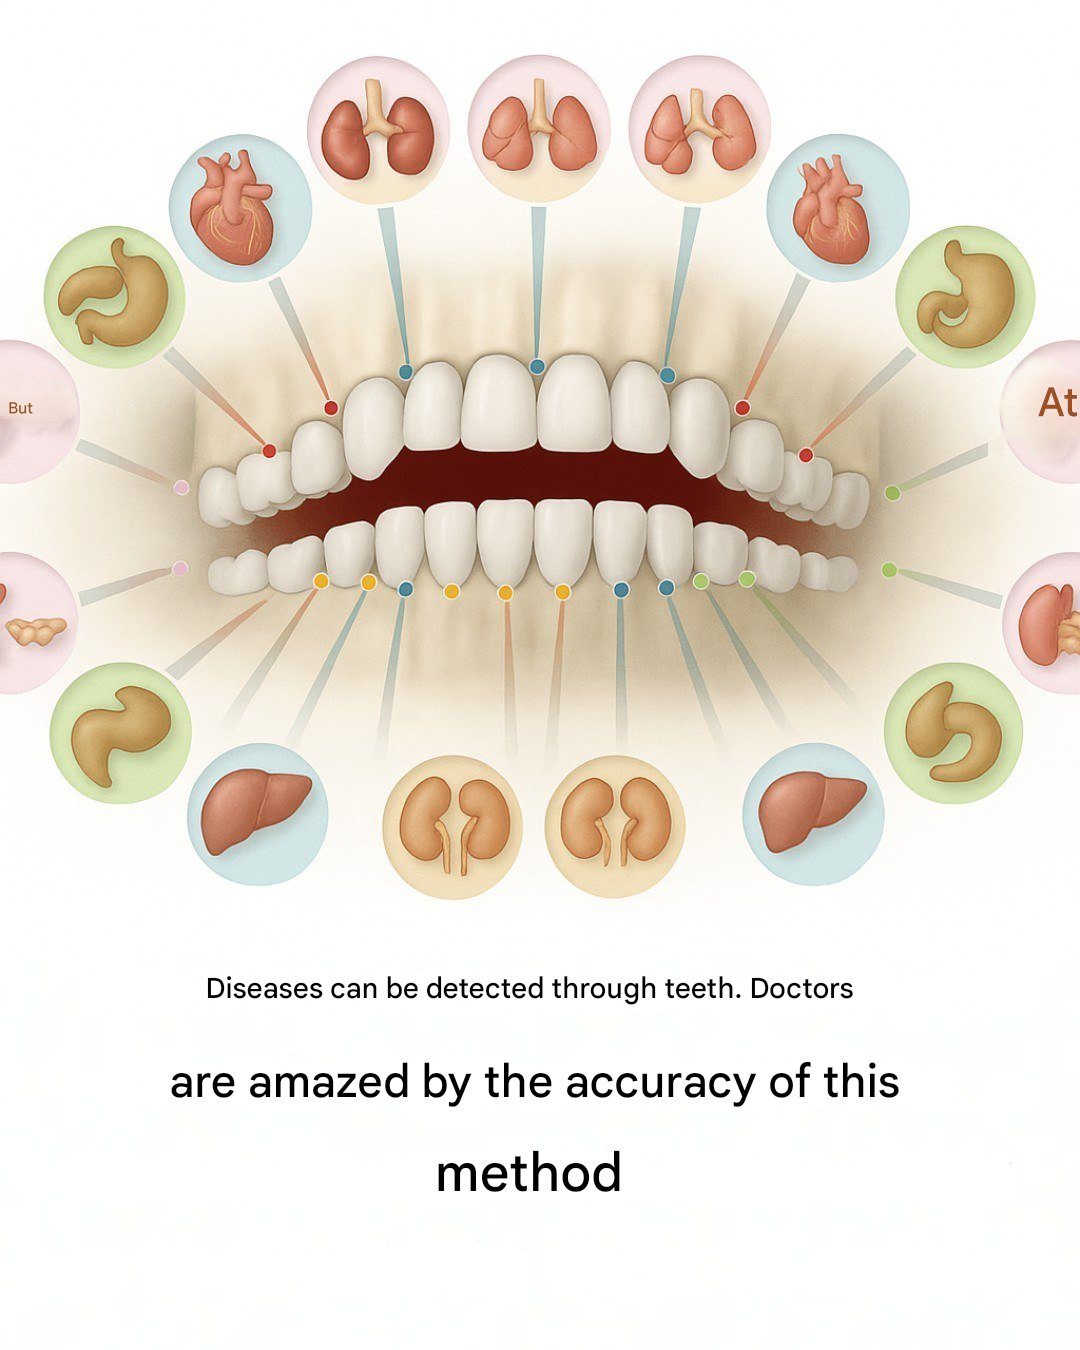
Each tooth is connected to an organ in the body dental pain can be an indicator of future problems

Many people are surprised to learn that oral health is deeply connected to overall wellness. While the idea that “each tooth is connected to a specific organ” is often associated with traditional healing systems, modern medicine strongly supports a broader truth: dental pain and gum disease can signal or even contribute to systemic health problems. Your mouth is not separate from your body — it is a gateway to it.

The Mouth–Body Connection

Your mouth contains millions of bacteria. Most are harmless, but poor oral hygiene allows harmful bacteria to multiply. When gums become inflamed (gingivitis) or infected (periodontitis), bacteria can enter the bloodstream and travel throughout the body. This can increase inflammation elsewhere and potentially worsen existing health conditions.

Dental pain is not just a localized issue. It may reflect infection, nerve damage, inflammation, or chronic gum disease — all of which can have effects beyond the teeth themselves.

Teeth and Organ Connections in Traditional Medicine

In systems like Traditional Chinese Medicine (TCM), teeth are believed to be energetically linked to different organs through meridians (energy pathways). For example:

  • Incisors are associated with kidneys and bladder

  • Canines are linked to the liver and gallbladder

  • Premolars relate to lungs and large intestine

  • Molars connect with stomach and spleen

While Western medicine does not confirm these direct one-to-one links, it does recognize strong associations between oral infections and systemic diseases. The concept may not be literal, but the mouth–body relationship is very real.

Dental Pain as a Warning Sign

Here are several ways dental problems may signal broader health concerns:

1. Gum Disease and Heart Health

Research has shown a connection between periodontal disease and cardiovascular conditions. Chronic gum inflammation may contribute to hardened arteries (atherosclerosis). People with severe gum disease may have a higher risk of heart attack or stroke.

If you experience bleeding gums, persistent bad breath, or loose teeth, it is important not to ignore these signs.

2. Diabetes and Oral Health

Diabetes and gum disease have a two-way relationship. High blood sugar can increase the risk of infections, including gum infections. At the same time, severe gum disease can make blood sugar levels harder to control.

Frequent gum infections, slow healing after dental procedures, or dry mouth may be early indicators that blood sugar control needs attention.

3. Tooth Infections and Systemic Inflammation

An untreated abscessed tooth can become serious. The infection can spread to surrounding tissues and, in rare cases, enter the bloodstream, leading to a life-threatening condition called sepsis.

Persistent tooth pain, swelling in the jaw, fever, or swollen lymph nodes require immediate medical attention.

4. Stress and Teeth Grinding

Chronic stress often leads to bruxism (teeth grinding), especially at night. This can cause jaw pain, headaches, cracked teeth, and gum recession. Stress itself also impacts immune function and increases inflammation in the body.

Jaw tension and unexplained dental wear may indicate emotional strain that needs addressing.

5. Acid Reflux and Tooth Enamel Damage

Frequent enamel erosion on the back of teeth may signal acid reflux (GERD). Stomach acid repeatedly entering the mouth can weaken enamel and increase tooth sensitivity.

If you notice tooth sensitivity along with heartburn or chronic throat irritation, it may be wise to discuss digestive health with a healthcare professional.

Why Inflammation Is the Key Factor

The common thread connecting oral disease and systemic illness is inflammation. Chronic inflammation is linked to:

  • Heart disease

  • Diabetes

  • Arthritis

  • Respiratory disease

  • Certain autoimmune conditions

Inflamed gums create a constant inflammatory burden on the body. Over time, this may contribute to broader health challenges.

Preventive Steps for Whole-Body Health

Protecting your teeth supports your overall wellness. Here are essential steps:

1. Maintain Excellent Oral Hygiene

  • Brush twice daily with fluoride toothpaste

  • Floss daily to remove plaque between teeth

  • Use an antibacterial mouthwash if recommended

2. Schedule Regular Dental Checkups

Professional cleanings remove tartar that brushing alone cannot. Dentists can also detect early warning signs of infection or disease.

3. Eat an Anti-Inflammatory Diet

A diet rich in vegetables, fruits, healthy fats, and lean proteins helps reduce inflammation. Limit sugar and processed foods, which feed harmful oral bacteria.

4. Stay Hydrated

Saliva protects teeth by washing away food particles and neutralizing acids. Drink plenty of water throughout the day.

5. Manage Chronic Conditions

If you have diabetes, heart disease, or autoimmune conditions, maintaining medical treatment and monitoring will also protect your oral health.

When to See a Professional

Seek dental evaluation if you experience:

  • Persistent tooth pain

  • Bleeding or swollen gums

  • Loose teeth

  • Chronic bad breath

  • Jaw pain

  • Mouth sores that do not heal

Early intervention prevents small issues from becoming serious health threats.

The Bottom Line

While the idea that each tooth is directly linked to a specific organ is not scientifically proven in a strict anatomical sense, the broader principle is true: your oral health reflects and influences your overall health. Dental pain should never be ignored. It can be a sign of infection, inflammation, or systemic imbalance.

Your mouth is a mirror of your body. Caring for your teeth and gums is not just about having a bright smile — it is a critical part of protecting your heart, blood sugar levels, immune system, and long-term well-being.

If you treat dental symptoms early and maintain strong oral hygiene habits, you reduce the risk of future