Homemade Teriyaki Chicken

Homemade Teriyaki Chicken Recipe

Teriyaki chicken is a classic Japanese dish loved worldwide for its sweet, savory, and umami-packed flavor. Making it at home is surprisingly simple and allows you to adjust sweetness, saltiness, and texture to your liking. This recipe is perfect for a weeknight dinner, meal prep, or a special occasion.

Ingredients

For the Teriyaki Sauce:

  • ½ cup soy sauce (preferably low-sodium)

  • ¼ cup mirin (Japanese sweet rice wine)

  • ¼ cup sake (or substitute with dry white wine if unavailable)

  • 3 tablespoons brown sugar

  • 1 teaspoon grated fresh ginger

  • 1 clove garlic, minced

  • 1 teaspoon cornstarch mixed with 2 teaspoons water (optional, for thickening)

For the Chicken:

  • 4 boneless, skinless chicken thighs (or breasts if preferred)

  • 1 tablespoon vegetable oil

  • Salt and pepper, to taste

  • Sesame seeds and chopped green onions, for garnish

Optional Sides:

  • Steamed white or brown rice

  • Stir-fried vegetables (broccoli, bell peppers, carrots)


Step 1: Prepare the Teriyaki Sauce

  1. In a small saucepan, combine soy sauce, mirin, sake, brown sugar, ginger, and garlic.

  2. Heat the mixture over medium heat, stirring occasionally until the sugar fully dissolves.

  3. Reduce the heat and let it simmer gently for 5–7 minutes. This allows the flavors to meld and the sauce to slightly thicken.

  4. If you prefer a thicker glaze, stir in the cornstarch-water mixture and cook for another 1–2 minutes until glossy.

  5. Remove from heat and set aside. The sauce should have a balanced sweet-salty taste with a hint of ginger and garlic aroma.

Tip: Taste your sauce and adjust sweetness or saltiness by adding more sugar or soy sauce.


Step 2: Prepare the Chicken

  1. Pat the chicken dry with paper towels to ensure it sears properly.

  2. Lightly season both sides with salt and pepper.

  3. Heat vegetable oil in a large non-stick skillet or cast-iron pan over medium-high heat.

  4. Once hot, place the chicken thighs skin-side down (if using skin-on) and cook for 5–6 minutes until golden brown.

  5. Flip the chicken and cook the other side for another 5–6 minutes. The internal temperature should reach 165°F (74°C) for safe consumption.

Tip: Using chicken thighs ensures juiciness and tenderness, but breasts work well too if you prefer lean meat.


Step 3: Glaze the Chicken

  1. Reduce the skillet heat to medium-low. Pour half of your prepared teriyaki sauce over the chicken.

  2. Spoon the sauce continuously over the chicken for 2–3 minutes, allowing it to caramelize slightly without burning.

  3. Turn the chicken occasionally to coat it evenly.

  4. Remove the chicken from the pan and let it rest for a few minutes.

Tip: Caramelizing the sauce over the chicken gives it that classic sticky teriyaki glaze. Avoid cooking on too high heat, which can make the sauce bitter.


Step 4: Serve

  1. Slice the chicken into bite-sized pieces or serve whole.

  2. Drizzle the remaining teriyaki sauce over the chicken.

  3. Garnish with sesame seeds and finely chopped green onions for a fresh, nutty, and colorful finish.

  4. Pair it with steamed rice and stir-fried vegetables to complete your meal.

Serving Tip: For a restaurant-style presentation, drizzle a bit of sauce in a criss-cross pattern over the chicken and sprinkle some toasted sesame seeds on top.


Tips for Perfect Homemade Teriyaki Chicken

  • Marinate for Extra Flavor: Marinate the chicken in a few tablespoons of teriyaki sauce for 30 minutes to 2 hours before cooking. This infuses flavor deeply.

  • Control Sweetness: If you like a sweeter glaze, increase the sugar or add honey. For a less sweet version, reduce sugar or mirin.

  • Make Ahead: Teriyaki sauce can be made a week in advance and stored in the refrigerator.

  • Air Fryer Version: Cook marinated chicken in an air fryer at 375°F (190°C) for 12–15 minutes, flipping halfway, then brush with sauce.

  • Add Veggies: For a balanced meal, toss in snap peas, bell peppers, or broccoli during the last 2–3 minutes of cooking for a quick stir-fry.


Variations

  1. Spicy Teriyaki Chicken: Add ½ teaspoon chili flakes or sriracha to the sauce.

  2. Honey Teriyaki Chicken: Replace brown sugar with honey for a floral sweetness.

  3. Grilled Teriyaki Chicken: Cook on a grill or grill pan, brushing with sauce while grilling for a smoky flavor.


Nutritional Info (Approximate per Serving)

  • Calories: 350–400 kcal

  • Protein: 28–32 g

  • Carbohydrates: 15–18 g

  • Fat: 18–20 g

This homemade teriyaki chicken recipe gives you juicy, flavorful chicken coated in a luscious, sticky glaze. With these steps, you can enjoy authentic Japanese flavors in your own kitchen. Adjust sweetness, saltiness, and thickness to match your taste, and don’t forget the garnishes—they elevate both flavor and presentation.


Eating Just One Bite is Already Harmful, But Many Still Eat It Without Worry

Eating Just One Bite Is Already Harmful, But Many Still Eat It Without Worry

Sometimes, what seems harmless can secretly be harmful. Certain foods or habits can have an outsized impact on health, even with minimal consumption. One such “culprit” that many people overlook is processed meats and ultra-processed snacks, which are often eaten casually but can carry serious risks. Let’s dive into why just a single bite can matter, and how to enjoy safer alternatives.

Why One Bite Can Be Harmful

Even small amounts of certain foods can trigger negative health effects due to their high content of harmful substances:

  1. Trans fats and hydrogenated oils – Even a tiny portion can raise “bad” LDL cholesterol levels and lower “good” HDL cholesterol. This increases the risk of heart disease over time.

  2. High sodium content – Processed snacks like chips, instant noodles, or cured meats can contain excessive salt. A single serving may surpass 20–25% of the recommended daily sodium intake, putting strain on the kidneys and heart.

  3. Artificial additives – Preservatives, artificial colorings, and flavor enhancers (like MSG) can provoke allergies, migraines, or digestive discomfort in sensitive individuals.

  4. Carcinogenic compounds – Certain processed meats, especially bacon, sausages, and hot dogs, contain nitrites and nitrates. Studies link even small regular exposure to an increased risk of colon cancer.

Common Examples of “One-Bite Risk Foods”

  1. Packaged Sausages and Hot Dogs – Often consumed casually in sandwiches or at parties, these contain nitrates, sodium, and preservatives.

  2. Instant Noodles – Quick and tempting, but loaded with sodium, MSG, and refined carbs.

  3. Deep-Fried Snacks – Chips, samosas, or fritters may be eaten in small amounts, yet they contain trans fats and oxidized oils that damage blood vessels.

  4. Candies and Sugary Treats – High sugar content can spike blood glucose, leading to insulin resistance if eaten repeatedly over time.

  5. Energy Drinks – Even a small sip can load your system with caffeine and sugar, straining the heart and nervous system.

How to Minimize the Risk

Even if you can’t completely eliminate these foods, there are ways to protect yourself:

  1. Read Labels Carefully – Look for sodium, sugar, trans fats, and preservatives. Avoid items with long lists of chemicals.

  2. Limit Frequency – Instead of making processed snacks a daily habit, reserve them for occasional treats.

  3. Opt for Whole Foods – Fresh fruits, vegetables, nuts, and whole grains provide nutrition without the hidden risks.

  4. Cook at Home – Preparing meats and snacks from scratch allows you to control ingredients and avoid harmful additives.

Healthy “Safe Bite” Alternatives

If you crave the taste of a snack or treat, there are healthier alternatives that don’t carry the same risks:

  1. Homemade Veggie Chips – Thinly slice carrots, beets, or zucchini, lightly drizzle with olive oil, and bake until crisp.

  2. Fruit-Based Sweets – Freeze grapes, make date energy balls, or enjoy fruit skewers with a yogurt dip.

  3. Lean Proteins – Grilled chicken, tofu, or beans can replace cured meats in sandwiches or salads.

  4. Natural Drinks – Green tea, coconut water, or fruit-infused water instead of sugary or energy drinks.

Step-by-Step Healthy Snack Recipe: Baked Carrot & Beet Chips

Ingredients:

  • 2 medium carrots, thinly sliced

  • 1 medium beet, thinly sliced

  • 1 tbsp olive oil

  • ½ tsp sea salt

  • ½ tsp paprika (optional)

Instructions:

  1. Preheat your oven to 180°C (350°F).

  2. Wash and peel carrots and beet. Use a mandoline slicer or sharp knife to cut them thinly.

  3. Toss the slices in olive oil, salt, and paprika. Ensure even coating.

  4. Place slices on a baking sheet lined with parchment paper, avoiding overlap.

  5. Bake for 15–20 minutes, flipping halfway through, until crisp but not burnt.

  6. Let them cool for 5 minutes and enjoy!

These chips are crunchy, satisfying, and much safer than packaged fried snacks. Even if you eat a handful, the health impact is minimal compared to one bite of processed fried food.

Long-Term Benefits of Avoiding Harmful Bites

By consciously avoiding even small amounts of harmful foods, you reduce your long-term risk of:

  • Heart disease

  • High blood pressure

  • Type 2 diabetes

  • Digestive issues

  • Certain types of cancer

Replacing these foods with whole, nutrient-dense alternatives improves energy, supports better digestion, and even boosts mental clarity.

Final Thoughts

The phrase “just one bite won’t hurt” can be misleading. For certain foods, even a small portion carries risks. Awareness is key: understand what you eat, and gradually shift toward healthier options. Your body will thank you over time, and you can still enjoy treats—just in smarter, safer ways.

Start today with small swaps, like baked veggie chips instead of fried snacks, and you’ll notice a big difference in health without feeling deprived. Remember, the best approach is moderation, mindfulness, and choosing nutrient-rich alternatives whenever possible.

Normal Blood Pressure For Each Age

Understanding Normal Blood Pressure for Each Age

Blood pressure is a key indicator of cardiovascular health. It measures the force exerted by blood against the walls of your arteries and is recorded in millimeters of mercury (mmHg) as two numbers: systolic pressure (the higher number) and diastolic pressure (the lower number). The systolic pressure measures the force when your heart beats, while the diastolic pressure measures the force when your heart rests between beats. Maintaining normal blood pressure is essential, as both high and low blood pressure can lead to serious health complications.

Blood pressure can vary depending on age, sex, activity level, and overall health. While “normal” ranges provide a guideline, individual factors may slightly alter what is considered optimal. The following is a comprehensive breakdown of normal blood pressure for different age groups.


Blood Pressure in Children

Children’s blood pressure differs significantly from adults, and it generally increases as they grow. Pediatric blood pressure is usually measured during routine doctor visits. Here’s an age-based guide:

  • Infants (0–12 months): Normal blood pressure ranges from 70–100/50–65 mmHg. Blood pressure in infants is naturally lower than in older children and adults.

  • Toddlers (1–3 years): Expected readings are around 85–105/55–70 mmHg. Rapid growth during this stage may cause small fluctuations.

  • Preschoolers (3–5 years): Normal values are roughly 90–110/55–75 mmHg. Monitoring is important, especially if the child has a family history of hypertension.

  • School-age children (6–12 years): Average blood pressure falls in the range of 95–115/60–75 mmHg. Diet, physical activity, and weight can influence readings.

  • Adolescents (13–18 years): Blood pressure begins to resemble adult ranges, with normal readings around 110–120/65–80 mmHg. Hormonal changes during puberty can temporarily affect blood pressure levels.

Early monitoring in children is vital because high blood pressure in youth can increase the risk of cardiovascular diseases in adulthood.


Blood Pressure in Adults

For adults, blood pressure standards are more established, and maintaining readings within the normal range is critical for preventing heart disease, stroke, and kidney problems.

  • Young Adults (19–29 years): The typical healthy range is 110–120/70–80 mmHg. Lifestyle factors like stress, diet, and physical activity play a significant role.

  • Adults (30–39 years): Normal readings remain around 115–125/75–80 mmHg. At this age, early signs of hypertension can appear, especially in individuals with poor lifestyle habits.

  • Adults (40–49 years): Healthy blood pressure is approximately 120–130/80 mmHg. Regular monitoring is crucial as the risk of developing hypertension increases with age.

  • Adults (50–59 years): Ideal readings are 125–135/80–85 mmHg. Arterial stiffening may begin, causing gradual increases in systolic pressure.

  • Adults (60+ years): Normal ranges can slightly increase to 130–140/80–90 mmHg. It’s common for older adults to have higher systolic pressure due to decreased elasticity of the arteries.

It’s worth noting that blood pressure above 130/80 mmHg in adults is often considered elevated, requiring lifestyle adjustments or medical intervention depending on individual risk factors.


Blood Pressure During Pregnancy

Pregnancy naturally affects blood pressure due to changes in blood volume and hormonal fluctuations. Normal ranges vary during the trimesters:

  • First trimester: Blood pressure may slightly decrease, averaging 110–120/70 mmHg.

  • Second trimester: A mild dip in readings is common due to hormonal effects on blood vessels.

  • Third trimester: Blood pressure gradually returns to pre-pregnancy levels. Consistently high blood pressure can signal preeclampsia, a serious condition requiring immediate attention.

Monitoring blood pressure throughout pregnancy is essential for both maternal and fetal health.


Factors Affecting Blood Pressure Across Ages

Blood pressure is influenced by numerous factors beyond age. Key contributors include:

  1. Weight: Overweight or obese individuals often have higher blood pressure.

  2. Diet: High salt intake, low potassium, and excessive processed foods elevate risk.

  3. Physical Activity: Regular exercise promotes heart and vascular health, helping maintain optimal readings.

  4. Stress: Chronic stress can temporarily increase both systolic and diastolic pressure.

  5. Medical Conditions: Diabetes, kidney disease, and hormonal disorders can affect blood pressure.

Maintaining a balanced diet, staying physically active, managing stress, and attending routine check-ups can help keep blood pressure within healthy limits at every age.


Monitoring and When to Seek Help

Blood pressure should be checked at least once every two years for healthy adults, and more frequently for those at risk of hypertension or cardiovascular disease. Home monitoring devices can provide additional insight and help track trends over time.

Seek medical attention if readings consistently exceed 130/80 mmHg for adults, or if children show significantly elevated values compared to the normal ranges for their age. Likewise, very low blood pressure (hypotension) — for instance, systolic below 90 mmHg in adults — can cause dizziness, fainting, and organ stress, requiring evaluation.

I am 60 years old and this diet has given me my sight back, removed fat from my liver and cleansed my colon Ho

At 60 years old, many people begin to take their health more seriously. The body changes with age—metabolism slows down, digestion becomes less efficient, vision may weaken, and the liver can struggle if years of poor eating habits have taken a toll. While no single food performs miracles, many people discover that simple, natural dietary changes can dramatically improve how they feel. One powerful food that often becomes part of that transformation is beetroot.

Beets may look simple, but they are one of nature’s most nutrient-dense vegetables. Their deep red color comes from compounds called betalains, which are powerful antioxidants. Antioxidants help fight oxidative stress, a process linked to aging and many chronic diseases. As we grow older, oxidative stress increases, affecting the eyes, liver, heart, and digestive system. Including antioxidant-rich foods like beets can help the body defend itself naturally.

One of the most talked-about benefits of beets is their impact on circulation. Beets are rich in natural nitrates. When consumed, these nitrates convert into nitric oxide in the body. Nitric oxide helps relax and widen blood vessels, improving blood flow. Better circulation means more oxygen and nutrients reach vital organs—including the eyes and liver. While beets cannot reverse blindness or cure eye disease, improved blood flow may support overall eye health and help reduce strain or fatigue.

For people concerned about liver health, beetroot is especially interesting. The liver is responsible for filtering toxins, processing fats, and supporting metabolism. Over time, high sugar intake, processed foods, and excess weight can lead to fatty liver. Beets contain a compound called betaine, which supports liver function and helps the body process fats more efficiently. Betaine may reduce inflammation and assist in preventing fat buildup in the liver. When combined with reduced sugar intake and regular exercise, beet consumption can be part of a strategy to improve liver health.

Digestive health is another area where beets shine. As we age, constipation and sluggish digestion become common complaints. Beets are high in dietary fiber, which supports regular bowel movements and feeds beneficial gut bacteria. A healthy gut microbiome is essential for nutrient absorption, immune function, and even mood regulation. Fiber acts like a gentle internal broom, helping move waste through the digestive tract efficiently. However, it’s important to understand that the colon naturally cleanses itself when supported by proper hydration and fiber intake. Beets assist this natural process rather than acting as a harsh cleanse.

Beyond specific organs, beets support heart health. High blood pressure is common after 60, and the nitric oxide produced from beet nitrates helps lower blood pressure naturally. Several studies have shown that beet juice can reduce systolic blood pressure within hours of consumption. Consistently including beets in a balanced diet may support cardiovascular health over time.

Beets also provide essential vitamins and minerals. They contain vitamin C, which supports immune function and collagen production. They offer folate, important for cell repair and DNA synthesis. Potassium in beets helps regulate fluid balance and nerve signals. Iron supports red blood cell production, helping prevent fatigue. These nutrients work together to support overall vitality.

Incorporating beets into your diet is simple. They can be boiled, roasted, steamed, or blended into smoothies. Roasting enhances their natural sweetness, while boiling keeps them soft and juicy. Beet salads with olive oil and lemon are refreshing and heart-friendly. Beet juice mixed with carrot and apple makes a vibrant drink packed with nutrients.

However, balance is key. Relying on one food alone is not enough. The real transformation often happens when people combine beet consumption with other healthy habits. Reducing refined sugar, avoiding heavily processed foods, increasing leafy greens, walking daily, staying hydrated, and getting enough sleep all contribute to noticeable improvements in energy and overall well-being.

It’s also important to maintain realistic expectations. Vision changes due to age-related conditions require professional evaluation. Fatty liver disease needs medical monitoring. Digestive problems should be discussed with a healthcare provider if persistent. Beets can support health, but they are not a replacement for medical care.

That said, many people in their 60s report feeling more energetic, lighter, and mentally clearer after improving their diet. This is not magic—it is biology. When the body receives nutrient-dense, anti-inflammatory foods consistently, it begins to function more efficiently. Inflammation decreases. Circulation improves. Digestion stabilizes. Energy levels rise.

The beauty of beetroot lies in its simplicity. It is affordable, widely available, and easy to prepare. Unlike complicated supplements or extreme detox plans, adding beets to meals is sustainable. Long-term health improvements come from sustainable habits, not quick fixes.

If you are over 60 and looking to feel better, consider making beets part of a broader healthy lifestyle. Combine them with colorful vegetables, lean proteins, whole grains, healthy fats, and regular physical movement. Small daily choices compound over time.

While no single diet can promise to “restore sight” or completely “cleanse” organs overnight, nourishing foods like beetroot can absolutely support the body’s natural healing systems. At any age, it is never too late to make changes that help you feel stronger, lighter, and more vibrant

Holiday Table Hero — Just 4 Ingredients

When the holidays roll around, the pressure to create a show-stopping dish can feel overwhelming. Between juggling guests, decorating, and preparing multiple courses, it’s easy to forget that sometimes the simplest recipes are the most memorable. This Holiday Table Hero proves exactly that. With just four simple ingredients, you can create a rich, flavorful centerpiece that tastes like it took hours of effort — but secretly comes together with minimal prep and maximum impact.

This recipe is perfect for Thanksgiving, Christmas, Eid gatherings, or any special dinner where you want something comforting, impressive, and absolutely delicious without spending the entire day in the kitchen.

The Magic 4 Ingredients

  • 1 whole chicken (about 4–5 pounds)

  • 1 packet dry onion soup mix

  • ½ cup unsalted butter (softened)

  • 1 pound baby potatoes

That’s it. No complicated marinades. No long ingredient list. Just four powerful components that work beautifully together.

Why This Recipe Works

The dry onion soup mix is the secret weapon. It’s packed with savory seasonings — onion, garlic, herbs, and salt — that instantly flavor the chicken without measuring multiple spices. The butter keeps the meat juicy while creating a golden, crispy skin. The baby potatoes roast underneath the chicken, soaking up all the flavorful drippings, becoming tender inside and crispy outside.

The result? A complete holiday-worthy main dish with built-in sides.

Step-by-Step Instructions

1. Preheat and Prepare

Preheat your oven to 375°F (190°C). Lightly grease a large roasting pan or baking dish.

Wash and pat dry your whole chicken thoroughly with paper towels. Removing excess moisture is key to getting crispy skin.

2. Season the Chicken

Place the softened butter in a small bowl and mix in the entire packet of dry onion soup mix until fully combined. You’ll have a thick, seasoned butter paste.

Gently loosen the skin over the chicken breast using your fingers. Spread about half of the butter mixture under the skin directly onto the meat. This keeps the chicken incredibly moist and flavorful.

Rub the remaining butter mixture all over the outside of the chicken, covering every surface.

3. Add the Potatoes

Spread the baby potatoes evenly across the bottom of the roasting pan. You can leave them whole if small, or halve larger ones. Place the seasoned chicken directly on top of the potatoes.

As the chicken roasts, the juices and butter drip down, coating the potatoes in rich flavor.

4. Roast to Perfection

Roast uncovered for approximately 1 hour and 20 minutes, or until the internal temperature reaches 165°F (75°C) in the thickest part of the thigh.

If the skin browns too quickly, loosely tent with foil during the last 20 minutes.

Once done, remove from the oven and let the chicken rest for 10–15 minutes before carving. This step locks in the juices.

The Flavor and Texture

The skin turns beautifully golden and crisp. The butter and soup mix create a savory crust that feels gourmet. Inside, the chicken stays tender and juicy, practically falling off the bone.

Meanwhile, the potatoes become deeply caramelized on the bottom while staying fluffy inside. They absorb the chicken drippings, making them taste like they were cooked in a rich gravy — even though no extra sauce was needed.

Serving Suggestions

While this dish stands strong on its own, you can easily elevate your holiday table with simple additions:

  • A fresh green salad with lemon vinaigrette

  • Steamed green beans or roasted carrots

  • Warm dinner rolls

  • Cranberry sauce or garlic yogurt dip

Because the main dish is so effortless, you’ll have time and energy to focus on small side details or desserts.

Make It Even More Special

Want to customize without adding more ingredients?

  • Squeeze fresh lemon over the chicken before serving for brightness.

  • Add a few whole garlic cloves to the pan for deeper flavor.

  • Sprinkle fresh parsley over the finished dish for color.

Even with slight variations, the core four ingredients remain the foundation.

Why It’s Perfect for the Holidays

Holidays should be about gathering, laughter, and sharing stories — not stressing in the kitchen. This recipe allows you to present something that looks grand and tastes indulgent, yet requires minimal preparation.

It’s budget-friendly, beginner-friendly, and nearly impossible to mess up. Even if you’re not an experienced cook, this dish delivers reliable results every time.

And when guests ask for the recipe (because they will), you’ll smile knowing it only took four simple ingredients to create something so impressive.

Storage and Leftovers

If you’re lucky enough to have leftovers:

  • Store chicken and potatoes in an airtight container in the refrigerator for up to 3 days.

  • Reheat in the oven at 350°F (175°C) to maintain crispiness.

  • Use leftover chicken for sandwiches, wraps, salads, or soups.

The flavor deepens overnight, making leftovers just as delicious the next day.

Final Thoughts

The beauty of this Holiday Table Hero lies in its simplicity. It proves that you don’t need a long ingredient list or complicated techniques to create something extraordinary. Sometimes, the best dishes come from trusting a few quality ingredients and letting them shine.

This plant is everywhere, but you had no idea it can treat tumors, diabetes, and high

If you’ve ever walked past a patch of tall grass with silky tassels swaying in the wind, chances are you’ve seen Imperata cylindrica — commonly known as cogon grass. In many regions, it’s considered invasive and stubborn. Farmers try to get rid of it, gardeners pull it out, and most people never give it a second glance. Yet in traditional herbal practices across parts of Asia, especially in systems like Traditional Chinese Medicine, this humble plant has been valued for generations.

Before we begin, it’s important to say clearly: no plant should replace medical treatment for serious conditions like tumors, diabetes, or high blood pressure. However, certain plants have been traditionally used to support overall wellness, and cogon grass root is one of them.

Today, we’ll explore how this overlooked plant has been used traditionally and share a simple herbal tea preparation often called a “root infusion.”

What Is Cogon Grass?

Cogon grass is a hardy perennial plant that grows in tropical and subtropical climates. It spreads quickly through underground rhizomes (roots), which are the part most commonly used in herbal remedies. In traditional systems, the dried root — sometimes referred to as “Bai Mao Gen” — has been used to support cooling, detoxifying, and diuretic effects in the body.

Historically, herbal practitioners have used it to:

  • Support urinary health

  • Help manage excess internal heat

  • Encourage natural detoxification

  • Support balanced blood sugar levels

  • Promote circulatory wellness

Again, these uses are based on traditional knowledge and early research — not a replacement for medical care.

Traditional Cogon Root Herbal Tea (Supportive Wellness Recipe)

Ingredients:

  • 1 tablespoon dried cogon grass root (washed and cleaned thoroughly)

  • 2 cups water

  • Optional: 1 teaspoon honey or a slice of fresh ginger

Instructions:

  1. Clean the Roots
    If using fresh roots, wash thoroughly to remove soil. If using dried roots, ensure they’re food-grade and properly sourced.

  2. Boil the Water
    In a small pot, bring 2 cups of water to a gentle boil.

  3. Simmer
    Add the root to the boiling water. Reduce heat and let simmer for 10–15 minutes.

  4. Strain
    Remove from heat and strain into a cup.

  5. Enhance Flavor (Optional)
    Add honey or ginger if desired. The natural taste is mild and slightly earthy.

  6. How to Use
    Traditionally consumed once daily for short periods.

Why It’s Traditionally Used

1. For Blood Sugar Support

Some preliminary laboratory studies suggest that certain compounds in cogon root may help support glucose metabolism. In traditional practices, it’s sometimes used as a supportive herb for maintaining balanced blood sugar levels when combined with proper diet and lifestyle.

2. For Circulatory Wellness

Because of its traditional “cooling” properties, herbalists have used it to help support the body during periods of heat or inflammation. This is sometimes linked with circulatory comfort and fluid balance.

3. For General Detox Support

Cogon root is often described as having mild diuretic properties. This means it may help the body release excess fluids naturally, which can support kidney and urinary tract health.

4. Traditional Tumor Support Claims

In folk medicine, many plants have historically been used in attempts to support the body during serious illnesses. While modern research is still limited and ongoing, some early studies examine antioxidant compounds in cogon grass. Antioxidants may help protect cells from oxidative stress, which is one area of scientific interest — but this does NOT mean it cures or treats tumors.

Important Safety Notes

  • Always consult a healthcare professional before using herbal remedies, especially if you have diabetes, high blood pressure, or any chronic condition.

  • If you are pregnant, breastfeeding, or taking medications, speak with your doctor first.

  • Herbs can interact with medications, including blood sugar or blood pressure drugs.

  • Never stop prescribed treatment in favor of herbal alternatives.

Why People Are Rediscovering Wild Plants

There’s a growing interest in natural living and rediscovering traditional plants that grow abundantly around us. Many cultures passed down knowledge of wild herbs for generations. While modern science continues to study these plants, tradition often sparks the curiosity.

However, “natural” does not automatically mean “safe” or “cure.” The key is balance — respecting traditional wisdom while relying on modern medical evidence.

Final Thoughts

Cogon grass might look like just another roadside weed, but in traditional herbal systems, its roots have been valued for centuries. Whether used as a gentle herbal tea or simply appreciated as part of natural heritage, it reminds us that sometimes the most overlooked plants have interesting stories behind them.

The Power of Fig Leaves: Hidden Benefits in These Leaves

When most people think of figs, they picture the sweet, honey-like fruit enjoyed fresh or dried. But long before the fruit became famous, the leaves of the fig tree (Ficus carica) were quietly valued in traditional kitchens and herbal practices around the world. From the Mediterranean to parts of Asia, fig leaves have been used in teas, wraps, and home remedies for centuries.

Today, these large, fragrant leaves are making a comeback as people rediscover their impressive nutritional profile and culinary potential. Let’s explore the hidden benefits of fig leaves and how you can prepare a simple fig leaf tea at home.

Why Fig Leaves Are So Special

Fig leaves are packed with plant compounds that may support overall wellness. While they shouldn’t replace medical treatment, they can be a nourishing addition to a balanced lifestyle.

1. May Support Healthy Blood Sugar

One of the most talked-about benefits of fig leaves is their potential role in supporting stable blood sugar levels. Traditionally, fig leaf tea has been consumed after meals. Some early research suggests that compounds in fig leaves may help improve insulin sensitivity.

If you’re mindful about managing sugar intake, adding fig leaf tea alongside a balanced diet may be helpful — always consult your healthcare provider if you have medical conditions.

2. Rich in Antioxidants

Fig leaves contain natural antioxidants, including flavonoids and phenolic compounds. Antioxidants help protect your cells from oxidative stress, which plays a role in aging and many chronic conditions. Drinking herbal infusions made from fig leaves may provide a gentle antioxidant boost.

3. May Support Heart Health

Traditional herbal practices have linked fig leaves with improved circulation and heart wellness. The leaves may help support healthy cholesterol levels when combined with a nutritious diet rich in fiber and healthy fats.

4. Digestive Support

Fig leaves have been used traditionally to calm digestive discomfort. Their mild, soothing properties may support healthy digestion and reduce occasional bloating. Many people enjoy fig leaf tea after heavier meals for this reason.

5. Skin and Topical Uses

In some cultures, fig leaf extracts have been applied to the skin. The leaves contain natural compounds that may support skin clarity. However, fresh fig leaves can sometimes irritate sensitive skin, so caution and patch testing are important.

Culinary Uses of Fig Leaves

Beyond wellness, fig leaves are surprisingly versatile in the kitchen. They have a subtle coconut-vanilla aroma when heated, making them popular for wrapping foods before grilling or baking.

You can:

  • Wrap fish or chicken in fig leaves before grilling

  • Infuse milk or cream with fig leaves for desserts

  • Use them to flavor rice or custards

  • Dry them for herbal tea

The aroma is delicate but distinct — slightly nutty, slightly sweet.

Fig Leaf Tea Recipe (Simple & Traditional)

Here’s an easy way to enjoy fig leaves at home.

Ingredients:

  • 3–4 fresh fig leaves (or 1 tablespoon dried fig leaves)

  • 2 cups water

  • Honey or lemon (optional)

Instructions:

  1. Rinse the fig leaves thoroughly to remove dust.

  2. Chop the leaves into smaller pieces.

  3. Bring 2 cups of water to a gentle boil.

  4. Add the chopped leaves and reduce to a simmer.

  5. Simmer for 10–15 minutes.

  6. Remove from heat and strain.

  7. Add honey or lemon if desired.

Drink warm once daily.

Important Safety Notes

While fig leaves are natural, that doesn’t mean they are suitable for everyone. Keep these points in mind:

  • Pregnant or breastfeeding individuals should consult a healthcare professional.

  • People taking blood sugar medication should monitor levels carefully.

  • Always use leaves from a pesticide-free tree.

  • Avoid using leaves that appear damaged or diseased.

If irritation occurs, discontinue use.

A Leaf Worth Rediscovering

The fig tree has symbolized abundance and healing across cultures for thousands of years. While the fruit often steals the spotlight, the leaves deserve recognition too. Whether brewed into a calming tea or used to flavor dishes, fig leaves offer a unique blend of tradition, nutrition, and aroma.

If you have hip pain it’s a clear sign that

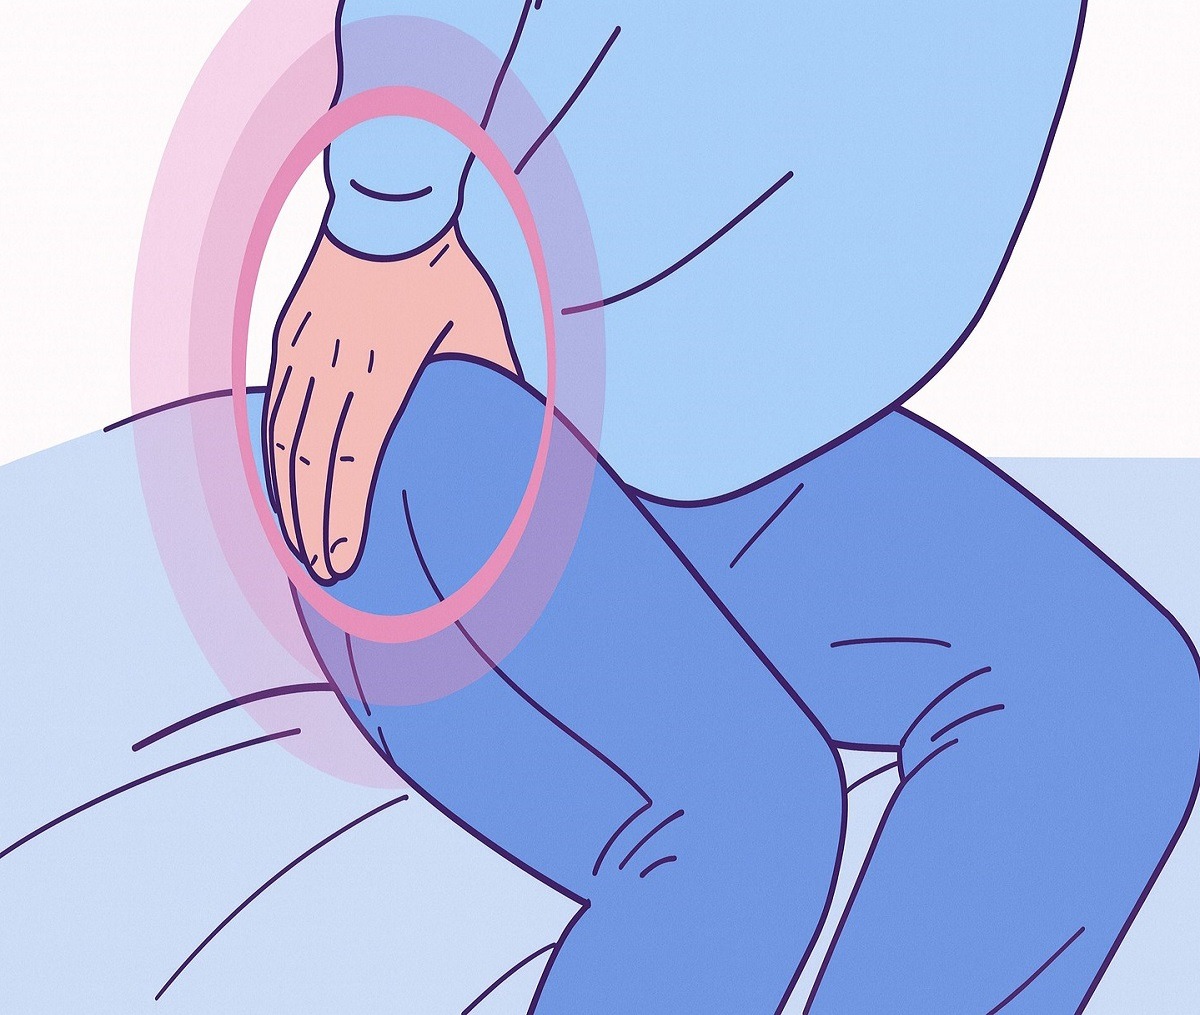
Hip pain is one of those symptoms many people ignore at first. You may feel a dull ache after a long walk, stiffness when getting out of bed, or sharp discomfort when climbing stairs. However, if you have persistent hip pain, it’s a clear sign that something in your body needs attention. The hip is a powerful, weight-bearing joint, and when it starts to hurt, it often signals deeper issues involving bones, muscles, cartilage, or even nerves.

Understanding what hip pain means can help you take early action and prevent long-term damage.

1. It May Signal Joint Wear and Tear

One of the most common reasons for hip pain is osteoarthritis. This condition happens when the protective cartilage cushioning the joint gradually wears down. Without enough cartilage, bones begin to rub against each other, causing stiffness, swelling, and pain.

Hip osteoarthritis is more common as we age, but it can also develop earlier due to past injuries, obesity, or repetitive strain. If your hip pain worsens in the morning or after periods of inactivity, and improves slightly with gentle movement, it may be a sign of degenerative joint changes.

Ignoring this type of pain can lead to reduced mobility over time.

2. It Could Indicate Muscle Imbalance or Weakness

Hip pain isn’t always about the joint itself. Sometimes, it’s a sign that surrounding muscles—such as the glutes, hip flexors, or hamstrings—are tight, weak, or imbalanced.

When certain muscles are weak, others compensate. This compensation can strain tendons and ligaments, leading to inflammation and discomfort. For example, weak gluteal muscles can place extra pressure on the hip joint and lower back.

If your pain increases after sitting for long periods or during physical activity, muscle imbalance could be the cause. Stretching and strengthening exercises often provide relief in these cases.

3. It May Point to Inflammation (Bursitis or Tendinitis)

If you feel sharp pain on the outer side of your hip, especially when lying on that side, it could be hip bursitis. Bursae are small, fluid-filled sacs that cushion the bones and soft tissues. When they become inflamed, movement becomes painful.

Similarly, tendinitis occurs when tendons become irritated or overused. This is common in athletes or people who suddenly increase their activity level.

Inflammation-related hip pain often feels tender to touch and may worsen with repetitive movement. Early treatment—such as rest, ice, and anti-inflammatory measures—can prevent chronic issues.

4. It Could Be a Sign of Nerve Compression

Sometimes hip pain isn’t coming directly from the hip joint. It may be referred pain from the lower back due to nerve compression, such as sciatica.

When the sciatic nerve is irritated, pain can radiate from the lower back into the hip and down the leg. This pain is often sharp, burning, or accompanied by tingling and numbness.

If your hip pain travels down your leg or worsens when sitting, nerve involvement might be the real cause. Addressing spinal alignment and core strength can make a significant difference.

5. It May Reflect Postural Problems

Poor posture doesn’t just affect your neck and shoulders—it can directly impact your hips. Sitting for long hours, especially with crossed legs or slouched posture, can misalign the pelvis.

Over time, this misalignment stresses the hip joint unevenly. One side may become tighter or weaker than the other, leading to chronic discomfort.

If you notice one hip feels tighter, or you tend to shift your weight to one side when standing, posture could be contributing to your pain.

6. It Could Indicate an Injury

Sudden hip pain after a fall, sports activity, or accident could indicate a strain, tear, or even fracture. Athletes are particularly at risk for labral tears, where the cartilage ring around the hip socket becomes damaged.

In older adults, especially those with osteoporosis, hip pain after a fall should never be ignored, as it could signal a fracture requiring immediate medical attention.

Severe pain, inability to bear weight, swelling, or bruising are warning signs that require prompt evaluation.

7. It May Be a Sign of Underlying Health Conditions

In some cases, hip pain can reflect systemic health issues such as rheumatoid arthritis or other inflammatory diseases. These conditions often cause pain in multiple joints and may be accompanied by fatigue, fever, or stiffness lasting more than an hour in the morning.

Persistent hip pain without obvious injury should always be evaluated to rule out these possibilities.

When to Seek Medical Help

While mild hip discomfort after exercise may resolve on its own, you should consult a healthcare professional if:

  • Pain lasts more than a few weeks

  • You have difficulty walking or standing

  • Swelling, redness, or warmth is present

  • Pain radiates down the leg

  • You experience sudden severe pain after a fall

Early diagnosis can prevent complications and improve treatment outcomes.

What You Can Do Now

If you’re experiencing hip pain, small changes can make a big difference:

  • Maintain a healthy weight to reduce joint stress

  • Strengthen glutes and core muscles

  • Stretch hip flexors and hamstrings regularly

  • Avoid prolonged sitting

  • Use proper footwear with good support

Listening to your body is key. Pain is not just discomfort—it’s communication. Your hip pain is a clear sign that something needs adjustment, whether it’s your posture, activity level, muscle strength, or overall health.

The sooner you respond to these signals, the better your chances of restoring comfort and protecting your mobility for years to come.

Slow Cooker Salisbury Steak with Rich Onion Gravy

If you’re craving a comforting, home-style dinner that tastes like it simmered all day, this Slow Cooker Salisbury Steak is the perfect recipe. Juicy, seasoned beef patties are gently cooked in a rich, savory onion gravy until tender and flavorful. It’s an easy, budget-friendly meal that pairs beautifully with mashed potatoes, rice, or buttered noodles. Best of all, the slow cooker does most of the work for you.

Ingredients

For the Patties:

  • 1 ½ pounds ground beef (80/20 for best flavor)

  • ½ cup breadcrumbs

  • 1 large egg

  • ¼ cup milk

  • 1 small onion, finely minced

  • 2 cloves garlic, minced

  • 1 tablespoon Worcestershire sauce

  • 1 teaspoon salt

  • ½ teaspoon black pepper

  • ½ teaspoon paprika

For the Gravy:

  • 2 cups beef broth

  • 1 packet (about 1 ounce) brown gravy mix

  • 1 tablespoon Worcestershire sauce

  • 1 tablespoon ketchup

  • 1 medium onion, thinly sliced

  • 1 tablespoon cornstarch

  • 2 tablespoons cold water

Instructions

Step 1: Prepare the Beef Patties

In a large mixing bowl, combine the ground beef, breadcrumbs, egg, milk, minced onion, garlic, Worcestershire sauce, salt, pepper, and paprika. Mix gently with your hands until just combined. Avoid overmixing, as this can make the patties tough.

Divide the mixture into 6–8 oval-shaped patties. Try to keep them uniform in size so they cook evenly.

Step 2: Brown the Patties

While you can technically skip browning, this step adds depth of flavor and helps the patties hold their shape. Heat a large skillet over medium-high heat and lightly oil it. Brown the patties for about 2–3 minutes per side. They don’t need to cook through—just develop a nice crust.

Transfer the browned patties to the bottom of your slow cooker, stacking gently if necessary.

Step 3: Prepare the Gravy

In a bowl, whisk together the beef broth, brown gravy mix, Worcestershire sauce, and ketchup until smooth. Arrange the sliced onions over the patties in the slow cooker, then pour the gravy mixture evenly over the top.

The onions will soften and infuse the gravy with incredible flavor as everything cooks.

Step 4: Slow Cook

Cover and cook on low for 5–6 hours or on high for 3–4 hours. The patties should be fully cooked and tender, absorbing the savory flavors of the gravy.

Try not to open the lid frequently, as this releases heat and extends cooking time.

Step 5: Thicken the Gravy

About 20–30 minutes before serving, mix the cornstarch with cold water in a small bowl to create a slurry. Stir it into the slow cooker. Cover again and allow the gravy to thicken.

If you prefer an even thicker gravy, you can add a little more cornstarch slurry as needed.

Serving Suggestions

Salisbury steak is best served hot, smothered in plenty of gravy. Classic pairings include:

  • Creamy mashed potatoes

  • Buttered egg noodles

  • Steamed white or brown rice

  • Roasted vegetables

  • Green beans or peas

For extra comfort, serve with warm dinner rolls to soak up the rich gravy.

Tips for the Best Salisbury Steak

1. Use the Right Beef:
An 80/20 blend provides the perfect balance of flavor and moisture. Leaner beef may result in drier patties.

2. Don’t Overwork the Meat:
Mix just until combined. Overmixing compacts the meat and makes it dense.

3. Customize the Flavor:
Add a splash of soy sauce, a pinch of dried thyme, or a spoonful of Dijon mustard to deepen the flavor.

4. Make It Mushroom Style:
Add sliced mushrooms to the slow cooker along with the onions for a classic mushroom gravy twist.

5. Prep Ahead:
You can shape the patties the night before and refrigerate them. This makes assembly even quicker the next day.

Storage and Reheating

Leftovers store beautifully, making this a fantastic meal prep option.

  • Refrigerator: Store in an airtight container for up to 4 days.

  • Freezer: Freeze in a freezer-safe container for up to 3 months.

  • Reheating: Warm gently on the stovetop or microwave, adding a splash of beef broth if needed to loosen the gravy.

Why You’ll Love This Recipe

This Slow Cooker Salisbury Steak is:

  • Budget-friendly

  • Family-approved

  • Perfect for busy weeknights

  • Rich, hearty, and satisfying

  • Easy to double for gatherings

It delivers that nostalgic, diner-style comfort food flavor without complicated steps. The slow cooking process ensures every bite is tender and infused with savory gravy.

Variations

Low-Carb Version:
Replace breadcrumbs with almond flour and serve over mashed cauliflower.

Turkey Salisbury Steak:
Substitute ground turkey for a lighter option. You may need to add a tablespoon of olive oil to keep the patties moist.

Extra Savory Upgrade:
Stir a tablespoon of sour cream into the gravy at the end for a creamy finish.

No need to scrub, just put the oven rack in a bag and it will be as good as new.

Cleaning oven racks is one of those chores most of us put off for as long as possible. They’re bulky, awkward to fit in the sink, and scrubbing baked-on grease feels like a full arm workout. If you’ve ever spent an hour scraping stubborn grime only to feel like you barely made progress, you’re not alone. The good news? There’s a surprisingly simple method that requires almost no scrubbing at all. All you need is a large bag, a couple of common household ingredients, and a little patience.

This easy “soak and relax” method works because it lets time and chemistry do the hard work for you. Instead of attacking grease with force, you allow cleaning agents to break it down gradually. When you finally remove the rack from the bag, most of the grime simply wipes away.

Here’s exactly how to do it.

Ingredients and Supplies
– 1 large heavy-duty trash bag (contractor bags work best)
– 1 cup baking soda
– 1 to 2 cups white vinegar
– Dish soap (a few tablespoons)
– Warm water
– An old sponge or cloth
– Optional: rubber gloves

Step-by-Step Instructions

Step 1: Remove the Oven Racks
Take the racks out of your oven and shake off any loose crumbs over a trash can. There’s no need to rinse or scrub them first. The whole point of this method is to avoid extra work.

Step 2: Prepare the Bag
Lay a large heavy-duty trash bag flat on the ground outside, in a bathtub, or in a laundry area. Make sure the surface underneath can handle a bit of moisture. Place the oven rack carefully inside the bag.

Step 3: Add the Cleaning Mixture
Sprinkle baking soda generously over the entire rack, making sure to coat both sides as evenly as possible. Next, slowly pour white vinegar over the baking soda. You’ll see fizzing — that reaction helps loosen grease and baked-on residue.

After the fizzing settles, add a few tablespoons of dish soap directly onto the rack. Finally, pour in enough warm water to lightly cover the rack without overflowing the bag.

Step 4: Seal and Wait
Seal the bag tightly, trapping the moisture inside. Let the rack soak overnight, or at least 8–12 hours. This is where the magic happens. The combination of baking soda (a mild abrasive and deodorizer), vinegar (a grease-cutting acid), and dish soap (which breaks down oils) works together to soften even the toughest buildup.

Step 5: Wipe Clean
The next day, carefully open the bag and remove the rack. Use an old sponge or cloth to wipe away the loosened grime. You’ll likely find that most of the grease slides right off. For any small stubborn spots, a gentle scrub should be all that’s needed — no heavy scraping required.

Step 6: Rinse and Dry
Rinse the rack thoroughly with warm water and dry it completely before placing it back in the oven.

Why This Method Works

Baking soda is slightly alkaline, which makes it excellent at cutting through grease. Vinegar is acidic, helping to dissolve mineral deposits and break down residue. When combined, they create a foaming reaction that penetrates grime. Dish soap enhances the process by targeting oils specifically. Together, these ingredients create a powerful yet gentle cleaning solution.

Benefits of the Bag Method

Minimal Scrubbing: The biggest advantage is that you avoid intense scrubbing.
Less Mess: Containing everything inside a bag keeps the cleaning solution from spreading.
Budget-Friendly: All ingredients are inexpensive and usually already in your kitchen.
Low Effort: Once sealed, you simply wait — no supervision required.

Extra Tips for Best Results

– Use a contractor-grade trash bag to avoid leaks.
– If your racks are extremely dirty, let them soak for a full 24 hours.
– Do this process outside if possible, especially when opening the bag, to avoid strong vinegar smell indoors.
– Place an old towel under the bag just in case of small drips.

Safety Notes

While this method is gentle, always avoid mixing cleaning products that contain bleach with vinegar, as that combination can create harmful fumes. Stick strictly to baking soda, vinegar, dish soap, and water for this method.

Maintaining Clean Racks

To keep oven racks from becoming heavily soiled again, consider wiping them down monthly with warm soapy water. Placing a baking sheet on a lower rack while cooking messy dishes can also catch drips before they burn onto the racks.

There’s something satisfying about finding a shortcut that actually works. Instead of dreading oven cleaning day, you can now rely on a simple bag-and-soak trick that saves time and effort. With just a few common household items and a little patience, your oven racks can look almost brand new — no exhausting scrubbing required.