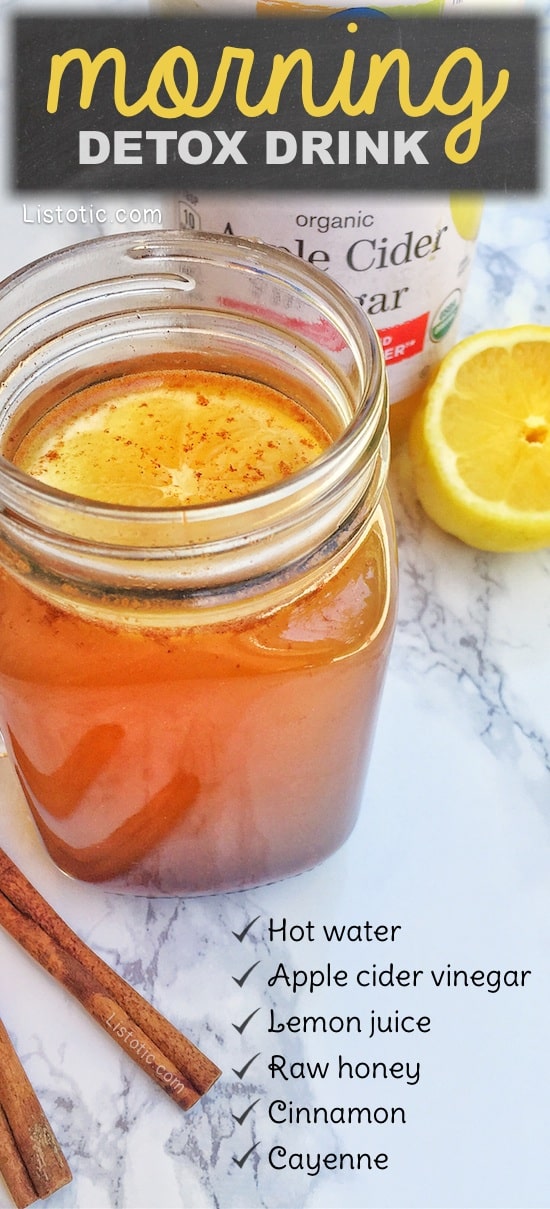
Homemade floor cleaner, with this mixture it will be like new

A sparkling, fresh-smelling floor can instantly make your entire home feel cleaner and more inviting. The good news? You don’t need expensive commercial cleaners filled with harsh chemicals to achieve that “like new” shine. With a simple homemade floor cleaner made from affordable, natural ingredients, you can remove dirt, grease, and buildup while leaving your floors beautifully refreshed.

This powerful yet gentle mixture works on tile, sealed hardwood, laminate, vinyl, and even marble (with slight adjustments). Let’s dive into this easy, effective recipe and how to use it properly.

Why Make Your Own Floor Cleaner?

Store-bought floor cleaners often contain synthetic fragrances, ammonia, and other strong chemicals that can leave residue behind. Over time, this buildup can actually dull your floors instead of making them shine.

Homemade cleaners:

  • Save money

  • Reduce chemical exposure

  • Are eco-friendly

  • Leave no sticky residue

  • Smell naturally fresh

When used regularly, this simple blend helps restore shine and keeps floors looking almost brand new.

Homemade Floor Cleaner Recipe

Ingredients:

  • 1 gallon (4 liters) warm water

  • 1 cup white distilled vinegar

  • 1 tablespoon liquid dish soap (mild, grease-cutting)

  • 10–15 drops essential oil (optional – lemon, lavender, or eucalyptus work beautifully)

Why These Ingredients Work

White Vinegar

White vinegar is a natural disinfectant and deodorizer. It helps break down grime, remove streaks, and dissolve mineral buildup. Its mild acidity cuts through dirt without damaging most sealed surfaces.

Dish Soap

Just a small amount lifts grease, food spills, and everyday dirt. It helps the solution spread evenly across the floor.

Warm Water

Warm water enhances cleaning power and helps dissolve grime more effectively than cold water.

Essential Oils (Optional)

These add a pleasant scent and light antibacterial properties. Lemon oil is especially great for boosting shine.

Step-by-Step Instructions

  1. Fill a bucket with one gallon of warm water.

  2. Add 1 cup of white vinegar.

  3. Mix in 1 tablespoon of dish soap.

  4. Add essential oils if desired.

  5. Stir gently to combine without creating too many bubbles.

Your cleaner is ready to use immediately.

How to Use It Properly

  1. Sweep or vacuum the floor first to remove dust and debris.

  2. Dip a microfiber mop into the solution.

  3. Wring out excess liquid — the mop should be damp, not soaking wet.

  4. Mop in sections, working your way across the room.

  5. Allow to air dry. No rinsing is needed.

For extra shine, you can buff the floor lightly with a dry microfiber cloth once it dries.

For Extra Shine (Optional Boost)

If your floors look dull or have buildup, try this enhanced mixture:

  • 1 gallon warm water

  • 1 cup vinegar

  • 1 tablespoon dish soap

  • 2 tablespoons baking soda

Add baking soda slowly to avoid fizzing overflow. This combination is excellent for deep cleaning tile and grout.

Important Surface Notes

  • Sealed Hardwood: Safe when mop is well wrung out. Avoid soaking the floor.

  • Laminate: Use very little liquid to prevent swelling.

  • Tile & Vinyl: Perfect for regular cleaning.

  • Marble or Natural Stone: Skip the vinegar. Instead use warm water with a few drops of dish soap only.

Always test in a small hidden area first if unsure.

How Often Should You Use It?

For normal households, once or twice a week keeps floors fresh and shiny. High-traffic areas like kitchens and entryways may benefit from more frequent cleaning.

Extra Cleaning Tips for “Like New” Floors

  • Change mop water if it becomes dirty.

  • Use microfiber mops instead of sponge mops for better dirt pickup.

  • Open windows while cleaning for better air circulation.

  • Avoid overusing soap, as too much can leave residue.

The Result

After using this mixture, you’ll notice:

  • Floors look brighter

  • No sticky or cloudy residue

  • Fresh, natural scent

  • Smoother feel underfoot

  • Restored shine

Many people are surprised at how effective such a simple solution can be. Sometimes the best cleaning secrets aren’t expensive products — they’re classic household ingredients used the right way.

Final Thoughts

This homemade floor cleaner is simple, affordable, and incredibly effective. With just vinegar, dish soap, and warm water, you can restore your floors’ natural beauty and maintain them easily week after week.

Once you try this mixture, you may never go back to store-bought cleaners again. Clean, shiny floors truly transform a space — and now you have the easy secret to keeping them looking like new.
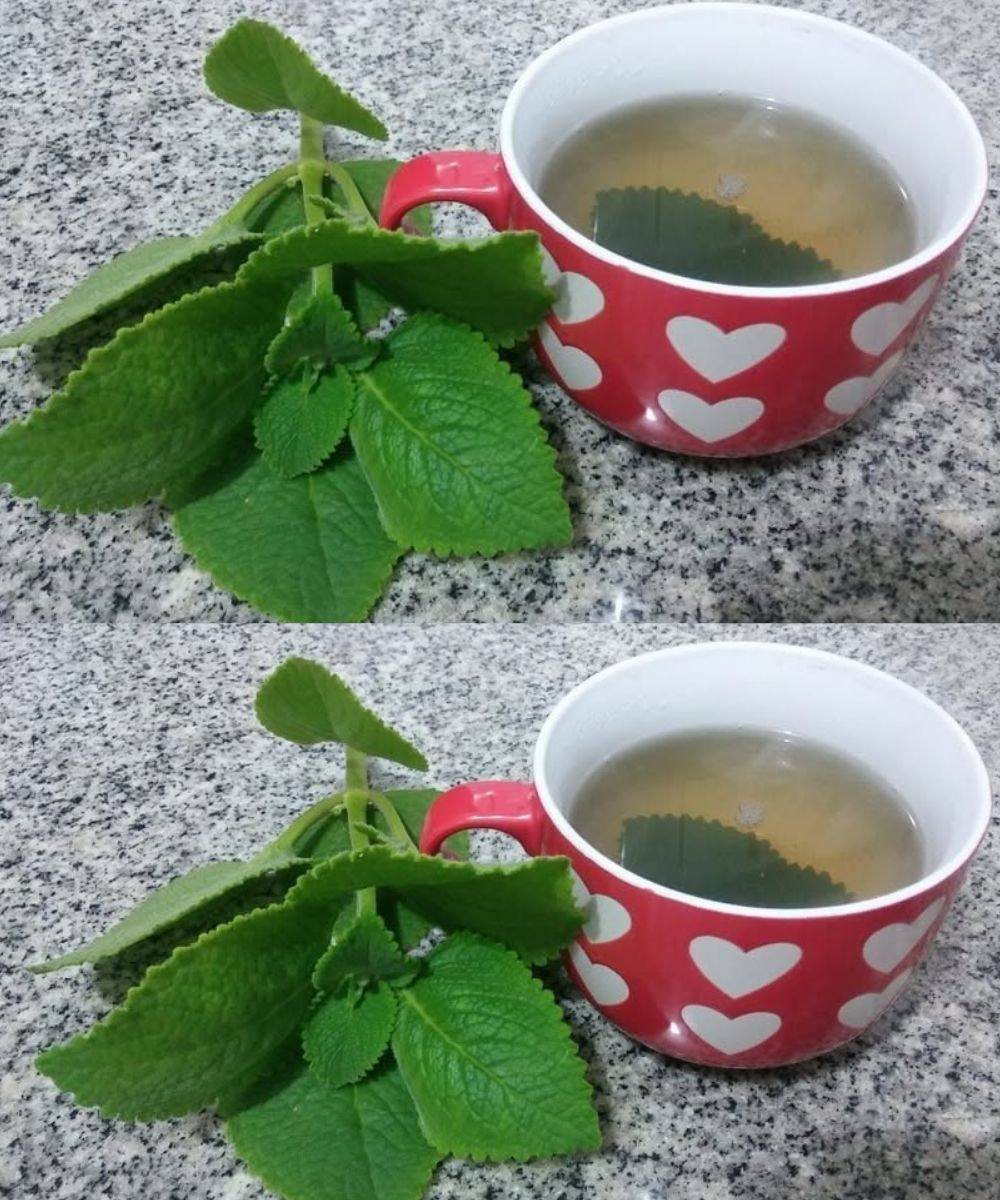

5 Reasons Seniors Should Add Oregano to Their Diet

Oregano is often seen as just a simple pizza topping or pasta seasoning, but this small, fragrant herb carries impressive health benefits—especially for seniors. Used for centuries in traditional Mediterranean cooking and natural remedies, oregano is packed with powerful compounds that can support overall wellness as we age. Adding it to your daily meals is easy, affordable, and flavorful.

Here are five important reasons seniors should consider including more oregano in their diet—plus a simple way to prepare it at home.

1. Supports a Strong Immune System

As we age, our immune system naturally becomes less efficient. Oregano contains antioxidants such as carvacrol and thymol, which help fight free radicals in the body. Free radicals contribute to inflammation and weaken the immune response.

The Mediterranean diet, popularized in regions like Mediterranean Sea countries, has long included oregano as a staple herb. Research has shown that diets rich in herbs and plant-based antioxidants are linked to better immune function and reduced risk of chronic disease.

Regularly using oregano in soups, stews, or teas can provide gentle immune support without relying solely on supplements.

2. Promotes Heart Health

Heart health becomes increasingly important in the senior years. Oregano contains compounds that may help support healthy cholesterol levels and reduce inflammation in blood vessels.

Carvacrol, one of oregano’s key active ingredients, has been studied for its potential role in supporting cardiovascular function. Inflammation is a major factor in heart disease, and oregano’s natural anti-inflammatory properties can help combat that.

Instead of adding extra salt to meals—which can raise blood pressure—try using oregano to boost flavor naturally. It enhances dishes like roasted vegetables, grilled chicken, and tomato-based sauces without increasing sodium intake.

3. Aids Digestion

Digestive issues such as bloating, gas, and indigestion are common in older adults. Oregano has traditionally been used to soothe digestive discomfort. It may help stimulate bile flow, which assists in breaking down fats more efficiently.

In herbal traditions across Greece and Italy, oregano tea has been consumed after meals to ease stomach discomfort. Its natural antimicrobial properties may also help balance gut bacteria.

Adding oregano to beans, lentils, and heavier meals may reduce digestive strain and make meals more comfortable to enjoy.

4. Supports Bone Health

Bone density decreases with age, increasing the risk of fractures and osteoporosis. Oregano contains small amounts of calcium, magnesium, and vitamin K—nutrients essential for maintaining bone strength.

While oregano alone won’t replace a calcium supplement, it can contribute to overall nutrient intake when used regularly as part of a balanced diet. Seniors who enjoy Mediterranean-style cooking often benefit from herb-rich meals that naturally include bone-supporting nutrients.

Sprinkle oregano over eggs, salads, or steamed vegetables to increase both flavor and micronutrient intake.

5. May Help Fight Inflammation and Joint Discomfort

Joint pain and stiffness are common concerns for seniors. Chronic inflammation plays a role in conditions such as arthritis. Oregano’s anti-inflammatory compounds may offer mild natural support.

In traditional herbal practices, oregano oil has been used externally for muscle and joint discomfort. While essential oils should be used carefully and diluted properly, culinary oregano used in food is a safe and flavorful way to incorporate its beneficial compounds.

Consistent use of anti-inflammatory herbs like oregano, combined with a balanced diet and regular movement, may contribute to better joint comfort over time.

Simple Oregano Tea Recipe for Seniors

Here’s an easy way to enjoy oregano daily:

Ingredients:

  • 1 teaspoon dried oregano (or 1 tablespoon fresh)

  • 1 cup hot water

  • Optional: honey and lemon

Instructions:

  1. Bring water to a gentle boil.

  2. Place oregano in a cup.

  3. Pour hot water over the herb.

  4. Cover and let steep for 8–10 minutes.

  5. Strain and add honey or lemon if desired.

  6. Drink once daily, preferably after meals.

This soothing tea can support digestion, immune function, and overall wellness.

How to Add More Oregano to Everyday Meals

  • Mix into scrambled eggs or omelets

  • Sprinkle over roasted potatoes

  • Add to homemade salad dressings

  • Stir into soups and lentil dishes

  • Blend into marinades for chicken or fish

You can also combine oregano with other Mediterranean herbs like basil and thyme for extra flavor and health benefits.

Important Considerations

While oregano is generally safe when used in food amounts, seniors taking blood-thinning medications or managing specific medical conditions should consult their healthcare provider before using oregano supplements or concentrated oregano oil.

Moderation is key. A small daily amount in food or tea is typically sufficient to enjoy its benefits.

Final Thoughts

Oregano is more than just a seasoning—it’s a powerful herb with a long history of supporting health. For seniors, adding oregano to the diet may support immunity, heart health, digestion, bone strength, and inflammation management.

Simple, affordable, and easy to use, oregano proves that sometimes the smallest ingredients can make the biggest difference. By incorporating this fragrant herb into daily meals, seniors can take a flavorful step toward better overall wellness.

The Surprising Power of Cloves and Cinnamon Tea on Your Body

Cloves and cinnamon are two of the most powerful spices found in kitchens around the world. Used for centuries in traditional remedies, these aromatic ingredients are known not only for their warm, comforting flavor but also for their impressive health benefits. When combined into a simple tea, cloves and cinnamon create a soothing drink that may support digestion, immunity, metabolism, and overall wellness.

Cloves come from the dried flower buds of the clove tree and are scientifically known as Syzygium aromaticum. These small, dark brown buds are packed with antioxidants and contain a powerful compound called eugenol, which gives cloves their distinctive aroma and many of their beneficial properties. Cinnamon, on the other hand, is derived from the inner bark of trees from the genus Cinnamomum. The most commonly used types are Ceylon cinnamon and Cassia cinnamon, both valued for their sweet, woody taste and potential health-supporting effects.

One of the most surprising benefits of cloves and cinnamon tea is its ability to support digestion. Both spices stimulate digestive enzymes, which help break down food more efficiently. Drinking this tea after meals may reduce bloating, gas, and indigestion. Cloves are traditionally used to ease stomach discomfort, while cinnamon helps regulate gut movement and may reduce irritation. A warm cup of this tea can feel especially comforting after a heavy meal.

For those looking to support weight management, cloves and cinnamon tea may offer gentle assistance. Cinnamon is sometimes associated with improved metabolism and reduced sugar cravings. Drinking this tea instead of sugary beverages can also help reduce calorie intake. While it is not a magic solution, it can be a helpful addition to a healthy diet and active lifestyle.

Oral health is another surprising benefit. Cloves have long been used in traditional practices for tooth discomfort due to their natural numbing effect. The antibacterial properties of both cloves and cinnamon may help reduce bacteria in the mouth, promoting fresher breath and healthier gums. While tea is not a substitute for brushing and flossing, it can complement good oral hygiene habits.

Additionally, this tea may promote relaxation. The warm aroma of cinnamon combined with the slightly spicy scent of cloves can create a calming effect. Enjoying a cup in the evening may help you unwind after a long day. The ritual of preparing and sipping the tea itself can also provide a mindful moment of comfort and stress relief.

Here is a simple and effective cloves and cinnamon tea recipe:

Ingredients:
1 teaspoon whole cloves
1 cinnamon stick (or 1 teaspoon ground cinnamon)
2 cups water
Optional: 1 teaspoon honey or a squeeze of fresh lemon

Instructions:

  1. Bring the water to a boil in a small saucepan.

  2. Add the cloves and cinnamon.

  3. Reduce heat and let the mixture simmer for 10–15 minutes.

  4. Remove from heat and strain into a cup.

  5. Add honey or lemon if desired.

  6. Enjoy warm.

For a stronger tea, you can allow it to steep a little longer. However, because cloves are quite potent, it is best not to overuse them. One cup per day is generally sufficient for most people.

It is important to remember that while cloves and cinnamon tea offers many potential benefits, it should be consumed in moderation. Cassia cinnamon contains coumarin, which in high amounts may affect the liver. Pregnant women, individuals with liver conditions, or those taking blood-thinning medications should consult a healthcare professional before consuming large quantities of these spices.

In conclusion, the surprising power of cloves and cinnamon tea lies in its simplicity. With just two natural ingredients, you can create a warm, flavorful drink that supports digestion, immunity, metabolism, and relaxation. While it is not a miracle cure, it can be a nourishing addition to your daily routine. Sometimes the most powerful remedies are already sitting in your kitchen cabinet, waiting to be brewed into a comforting cup of wellness.

I prefer this response
Response 2

The Surprising Power of Clove and Cinnamon Tea on Your Body

There’s something magical about a warm cup of spiced tea. The aroma alone can calm your mind, but when you combine cloves and cinnamon, you get more than just comfort — you get a powerful natural wellness drink that has been used for centuries in traditional remedies. This simple tea is rich in antioxidants, warming compounds, and natural antibacterial properties that may support digestion, immunity, and overall vitality.

Let’s explore why this tea is so special and how you can easily prepare it at home.

Why Cloves and Cinnamon Are So Powerful

Cloves are small but mighty. They contain a compound called eugenol, known for its strong antioxidant and anti-inflammatory properties. Cloves have traditionally been used to ease toothaches, improve digestion, and fight infections. They also help stimulate digestive enzymes, making them excellent after a heavy meal.

Cinnamon, on the other hand, is famous for its ability to help regulate blood sugar levels and improve circulation. It contains cinnamaldehyde, a compound responsible for its signature flavor and many of its health benefits. Cinnamon may help reduce inflammation, lower “bad” cholesterol levels, and support heart health.

When combined, these two spices create a warming tea that can:

  • Support immune function

  • Improve digestion

  • Help reduce bloating

  • Promote better circulation

  • Provide powerful antioxidants

  • Offer natural antibacterial support

Health Benefits of Clove and Cinnamon Tea

1. Boosts Immunity

Both spices are packed with antioxidants that help protect the body from oxidative stress. Their natural antimicrobial properties may help your body defend against seasonal illnesses. Drinking this tea during colder months can provide comforting warmth while supporting your immune system.

2. Supports Digestive Health

If you struggle with bloating, gas, or sluggish digestion, this tea may help. Cloves stimulate digestive enzymes, while cinnamon helps calm the stomach and reduce inflammation in the digestive tract. Many people find relief from discomfort after drinking a cup following a meal.

3. Helps Balance Blood Sugar

Cinnamon has been widely studied for its potential role in supporting healthy blood sugar levels. While it’s not a replacement for medical treatment, adding cinnamon tea to a balanced lifestyle may help support metabolic health.

4. Reduces Inflammation

Chronic inflammation can contribute to many health issues. The anti-inflammatory properties in both cloves and cinnamon may help soothe the body naturally.

5. Freshens Breath Naturally

Cloves are well-known for their ability to combat bad breath due to their antibacterial qualities. This tea can leave your mouth feeling clean and refreshed.

Clove and Cinnamon Tea Recipe

Ingredients

  • 2 cups water

  • 4–5 whole cloves

  • 1 small cinnamon stick (or ½ teaspoon ground cinnamon)

  • 1 teaspoon raw honey (optional)

  • A squeeze of fresh lemon juice (optional)

Instructions

  1. Pour 2 cups of water into a small saucepan and bring to a gentle boil.

  2. Add the cloves and cinnamon stick.

  3. Reduce heat and let simmer for 10–15 minutes.

  4. Remove from heat and strain into a cup.

  5. Add honey and lemon if desired.

  6. Sip warm and enjoy.

When to Drink It

  • In the morning to gently wake up your metabolism

  • After meals to aid digestion

  • In the evening for a calming, warming drink

Drinking 1 cup daily is generally sufficient. Moderation is key, as both cloves and cinnamon are potent spices.

Important Notes

While this tea is natural, it is still powerful. Pregnant women, people taking blood thinners, or individuals with medical conditions should consult a healthcare professional before consuming it regularly. Excessive cinnamon intake, particularly cassia cinnamon, may contain higher levels of coumarin, which should be consumed in moderation.

Final Thoughts

Sometimes the simplest ingredients hold the greatest power. Clove and cinnamon tea is a comforting, aromatic drink that not only warms the body but may also provide meaningful health benefits when enjoyed as part of a balanced lifestyle.

Whether you’re looking to soothe your stomach, support your immune system, or simply enjoy a cozy cup of something fragrant and natural, this tea is a wonderful addition to your daily routine.

5 clothing colors that age you the most and that you should stop wearing after 50

As we grow older, our style naturally evolves. After 50, clothing can either enhance your confidence and natural beauty—or unintentionally add years to your appearance. The right colors can brighten your complexion, soften fine lines, and make you look refreshed. The wrong ones? They can highlight wrinkles, dull your skin, and create a tired look.

Here are 5 clothing colors that can age you the most after 50, and what to wear instead to maintain a vibrant, modern look.


1. Harsh Black

Black is timeless and elegant—but as skin loses some of its natural pigment with age, pure black can become too harsh. It often emphasizes:

  • Under-eye shadows

  • Fine lines

  • Uneven skin tone

  • A pale or washed-out complexion

While black works beautifully in your 20s and 30s, after 50 it can create stark contrast against lighter or thinning skin.

What to wear instead:
Try softer alternatives like charcoal gray, navy blue, or deep espresso brown. These shades provide sophistication without draining warmth from your face.

Tip: If you love black, wear it away from your face—like black pants or skirts—paired with a softer-colored top or scarf.


2. Muddy Brown

Certain shades of brown—especially dull or muddy tones—can make mature skin appear lifeless. As we age, our natural glow softens, and flat browns can exaggerate that effect.

Brown can:

  • Blend too closely with aging skin tones

  • Highlight pigmentation

  • Make the face look tired

What to wear instead:
Choose warm camel, caramel, or creamy beige. These tones bring warmth and elegance while maintaining depth.

A camel coat or soft tan sweater can look luxurious and far more flattering than a flat chocolate brown top.


3. Mustard Yellow

Mustard yellow is trendy—but it’s one of the trickiest shades to wear after 50. The heavy, greenish undertone in mustard can emphasize sallowness and uneven skin tone.

It may:

  • Bring out yellow undertones in the skin

  • Highlight dark circles

  • Make teeth appear less white

What to wear instead:
Opt for softer yellows like butter, pastel lemon, or warm golden yellow. These lighter tones brighten your face instead of dulling it.

If you enjoy bold color, consider coral or soft peach for a youthful glow.


4. Ashy Gray

Gray hair is beautiful and empowering—but wearing ashy gray clothing near your face can create a washed-out effect.

Light gray without warmth can:

  • Blend too closely with silver hair

  • Remove definition from your features

  • Make skin appear dull

What to wear instead:
Choose warmer grays with a hint of beige (greige) or swap gray for soft lavender, dusty rose, or light teal.

These shades add dimension and make your skin appear more vibrant.


5. Neon and Overly Bright Colors

While bold colors can be fun, neon shades often overpower mature features. Extremely bright pinks, greens, or oranges can draw attention to texture rather than enhance natural beauty.

Neons can:

  • Create harsh contrast

  • Emphasize wrinkles

  • Look out of balance with mature elegance

What to wear instead:
Jewel tones like emerald, sapphire, raspberry, and deep teal are vibrant without being overpowering. These colors provide richness and sophistication while complementing mature skin beautifully.


Why Color Matters More After 50

As we age, several natural changes happen:

  • Skin loses collagen and elasticity

  • Complexion may become lighter or thinner

  • Hair color changes

  • Natural contrast between hair and skin softens

Because of these shifts, color becomes more important than ever. The goal isn’t to “dress younger”—it’s to dress in a way that enhances your current beauty.


General Color Tips After 50

✔ Wear color near your face that makes your eyes brighter
✔ Choose softer, warmer versions of your favorite shades
✔ Avoid extremely dull or extremely harsh tones
✔ Add contrast through accessories rather than overpowering color

Remember: Personal style has no age limit. The idea isn’t to restrict yourself—but to refine your choices so they highlight your confidence and vitality.


Final Thoughts

Turning 50 doesn’t mean giving up style—it means mastering it. By avoiding harsh black, muddy brown, mustard yellow, ashy gray, and neon brights, you can instantly look fresher and more polished.

Classic Vegetable Soup

There’s something deeply comforting about a bowl of classic vegetable soup. It’s simple, nourishing, budget-friendly, and endlessly customizable. Whether you’re looking for a light dinner, a healthy lunch, or a cozy meal on a chilly evening, this timeless recipe delivers warmth and flavor in every spoonful.

Made with fresh vegetables, aromatic herbs, and a rich broth, this soup is packed with nutrients and natural goodness. It’s perfect for anyone wanting to eat clean, reduce processed foods, or simply enjoy a homemade meal that tastes like it came straight from grandma’s kitchen.


🌿 Why You’ll Love This Recipe

  • Naturally healthy – Loaded with vitamins, minerals, and fiber

  • Low in calories – Filling without being heavy

  • Budget-friendly – Uses simple, affordable ingredients

  • Great for meal prep – Tastes even better the next day

  • Customizable – Use whatever vegetables you have on hand

This soup is also naturally vegetarian and can easily be made vegan or gluten-free.


🥕 Ingredients

Here’s what you’ll need to make a big, satisfying pot:

  • 2 tablespoons olive oil

  • 1 medium onion, chopped

  • 2 cloves garlic, minced

  • 2 carrots, sliced

  • 2 celery stalks, chopped

  • 2 medium potatoes, diced

  • 1 zucchini, chopped

  • 1 cup green beans, trimmed and cut

  • 1 cup chopped cabbage (optional)

  • 1 can (14 oz) diced tomatoes

  • 6 cups vegetable broth

  • 1 teaspoon dried thyme

  • 1 teaspoon dried oregano

  • 1 bay leaf

  • Salt and black pepper to taste

  • 1 cup fresh spinach or parsley (optional for garnish)


👩‍🍳 Step-by-Step Instructions

1️⃣ Sauté the Aromatics

Heat olive oil in a large pot over medium heat. Add chopped onion and cook for 3–4 minutes until softened. Stir in garlic and cook for another 30 seconds until fragrant. This step builds the flavor base of your soup.

2️⃣ Add the Hardy Vegetables

Add carrots, celery, and potatoes. Stir well and cook for about 5 minutes. This slight sauté enhances their natural sweetness.

3️⃣ Pour in Broth and Tomatoes

Add diced tomatoes (with juice) and vegetable broth. Stir to combine.

4️⃣ Season the Soup

Add thyme, oregano, bay leaf, salt, and black pepper. Bring the mixture to a gentle boil.

5️⃣ Simmer

Reduce heat and let the soup simmer uncovered for 20–25 minutes, or until vegetables are tender.

6️⃣ Add Softer Vegetables

Add zucchini, green beans, and cabbage. Simmer for another 10 minutes.

7️⃣ Finish and Serve

Remove the bay leaf. Stir in spinach or fresh parsley for extra color and nutrition. Taste and adjust seasoning if needed.

Ladle into bowls and serve warm.


🥄 Tips for the Best Vegetable Soup

Cut vegetables evenly so they cook at the same rate.
Don’t overcook – vegetables should be tender but not mushy.
Add pasta or rice for a heartier version.
Squeeze fresh lemon juice before serving to brighten flavors.
Use homemade broth if possible for deeper taste.


🥗 Nutritional Benefits

Classic vegetable soup is rich in:

  • Fiber – Supports digestion and gut health

  • Vitamin A – From carrots, supports eye health

  • Vitamin C – Boosts immunity

  • Potassium – Helps regulate blood pressure

  • Antioxidants – Protect against inflammation

Because it’s broth-based rather than cream-based, it’s naturally lower in fat and calories while still being filling.


🧊 Storage & Freezing

  • Refrigerator: Store in an airtight container for up to 4 days.

  • Freezer: Freeze for up to 3 months. Let cool completely before freezing.

  • Reheating: Warm gently on the stove or microwave. Add a splash of water or broth if needed.

The flavors actually deepen overnight, making leftovers even tastier.


🌎 Easy Variations

You can adapt this soup based on season or preference:

  • Add beans (kidney, cannellini, or chickpeas) for protein

  • Add lentils for a thicker texture

  • Add corn or peas for sweetness

  • Spice it up with red chili flakes

  • Add fresh herbs like basil or dill

This recipe is incredibly forgiving—use what you have and make it your own.


🍞 Serving Suggestions

Classic vegetable soup pairs beautifully with:

  • Crusty whole-grain bread

  • Garlic toast

  • Simple green salad

  • Grilled cheese sandwich

It can be served as a starter or a complete light meal on its own.


❤️ Final Thoughts

Classic vegetable soup proves that simple ingredients can create something truly satisfying. It’s wholesome, comforting, and perfect for any season. Whether you’re cooking for family, meal-prepping for the week, or just craving something warm and nourishing, this recipe never disappoints.

MOUNDS CAKE

If you love the classic combination of chocolate and coconut found in a Mounds candy bar, then this Mounds Cake will quickly become one of your favorite desserts. Rich, moist chocolate cake layered with sweet, creamy coconut filling and topped with luscious chocolate frosting creates a bakery-style dessert that looks impressive but is surprisingly simple to make at home.

This cake is perfect for birthdays, potlucks, holiday gatherings, or whenever you’re craving something indulgent. The contrast between the deep cocoa flavor and the soft, sweet coconut layer makes every bite unforgettable.


📝 Ingredients

For the Chocolate Cake:

  • 2 cups all-purpose flour

  • 2 cups granulated sugar

  • ¾ cup unsweetened cocoa powder

  • 2 teaspoons baking powder

  • 1½ teaspoons baking soda

  • 1 teaspoon salt

  • 2 large eggs (room temperature)

  • 1 cup whole milk

  • ½ cup vegetable oil

  • 2 teaspoons vanilla extract

  • 1 cup hot coffee (enhances chocolate flavor)

For the Coconut Filling:

  • 2 cups sweetened shredded coconut

  • 1 can (14 oz) sweetened condensed milk

  • 1 teaspoon vanilla extract

  • ½ cup heavy cream

For the Chocolate Ganache Frosting:

  • 1½ cups semi-sweet chocolate chips

  • 1 cup heavy cream

  • 2 tablespoons butter


👩‍🍳 Step-by-Step Instructions

Step 1: Prepare the Cake Pans

Preheat your oven to 350°F (175°C). Grease and line two 9-inch round cake pans with parchment paper. This prevents sticking and ensures easy removal.

Step 2: Mix the Dry Ingredients

In a large bowl, whisk together flour, sugar, cocoa powder, baking powder, baking soda, and salt. Mixing dry ingredients first ensures even distribution and a consistent texture.

Step 3: Add Wet Ingredients

Add eggs, milk, oil, and vanilla extract to the dry mixture. Beat on medium speed until smooth. Slowly stir in the hot coffee. The batter will be thin — this is normal and creates an ultra-moist cake.

Step 4: Bake

Divide the batter evenly between the prepared pans. Bake for 30–35 minutes, or until a toothpick inserted into the center comes out clean. Let cakes cool in pans for 10 minutes before transferring to a wire rack to cool completely.


🥥 Making the Coconut Filling

In a medium bowl, combine shredded coconut, sweetened condensed milk, vanilla extract, and heavy cream. Stir until thick and creamy. The texture should be spreadable but not runny. If needed, refrigerate for 20–30 minutes to firm up slightly.

This filling mimics the iconic texture of a Mounds candy bar — sweet, chewy, and perfectly coconut-rich.


🍫 Prepare the Ganache

Place chocolate chips in a heatproof bowl. Heat heavy cream in a saucepan until just simmering (do not boil). Pour the hot cream over the chocolate and let sit for 2–3 minutes. Stir gently until smooth. Add butter and mix until glossy.

Allow the ganache to cool slightly until thickened but still pourable.


🎂 Assembling the Cake

  1. Place one cooled cake layer on a serving plate.

  2. Spread the coconut filling evenly over the top, leaving a small border around the edges.

  3. Place the second cake layer on top.

  4. Pour ganache over the cake, letting it drip naturally down the sides for a dramatic finish.

For a bakery-style touch, sprinkle extra shredded coconut on top or add chocolate shavings.


💡 Tips for the Perfect Mounds Cake

  • Use room temperature ingredients for a smoother batter.

  • Do not overbake — chocolate cake can dry out quickly.

  • Chill before slicing for cleaner cuts.

  • Add a teaspoon of coconut extract to the filling for extra flavor.

  • Toast some coconut for garnish if you prefer a nutty flavor.


🥄 Storage Instructions

Store the cake in an airtight container at room temperature for up to 2 days. For longer freshness, refrigerate for up to 5 days. Bring to room temperature before serving for best texture and flavor.

You can also freeze individual slices wrapped tightly in plastic wrap for up to 3 months.


❤️ Why You’ll Love This Recipe

This Mounds Cake delivers:

  • Deep, rich chocolate flavor

  • Creamy, sweet coconut center

  • Smooth, glossy chocolate ganache

  • A perfect balance of textures

It tastes like your favorite candy bar transformed into an elegant dessert. Whether you serve it at a celebration or enjoy it with a cup of coffee after dinner, it’s guaranteed to impress.


🍽 Serving Suggestions

Pair this cake with:

  • A scoop of vanilla ice cream

  • Fresh berries for a fruity contrast

  • Hot coffee or espresso

  • Cold milk for a classic combo


🏁 Final Thoughts

Mounds Cake is the ultimate dessert for chocolate and coconut lovers. It’s indulgent yet comforting, elegant yet easy to make. Once you try this recipe, it may just replace your standard chocolate cake forever.

Every forkful delivers moist chocolate cake, sweet coconut filling, and silky ganache — a truly irresistible combination.

Put 4 drops in your ear and you will hear like new again

If you’ve ever struggled with muffled hearing, a feeling of fullness in the ear, or mild discomfort caused by wax buildup, you’ve probably searched for a simple home solution. One popular natural remedy people talk about is putting a few drops of oil in the ear to soften earwax and improve hearing clarity. But does it really work? And more importantly, is it safe?

Let’s explore how this simple method may help you “hear like new again” — and what you need to know before trying it.

Understanding Earwax and Hearing

Earwax, also known as cerumen, is not dirty or harmful. In fact, it plays an important protective role. It traps dust, bacteria, and small particles, preventing them from reaching the delicate inner parts of your ear. It also keeps the ear canal moisturized.

However, sometimes earwax builds up excessively. This can happen if:

  • You use cotton swabs frequently

  • You wear earbuds or hearing aids often

  • Your ears naturally produce more wax than average

When wax becomes impacted, it can cause symptoms such as:

  • Muffled hearing

  • Ringing in the ears (tinnitus)

  • A feeling of fullness

  • Mild dizziness

  • Ear discomfort

In these cases, softening and loosening the wax may help restore clearer hearing.

The 4-Drop Natural Ear Softening Method

One of the most common home remedies involves using natural oils to soften earwax. Oils can help break down hardened wax so it can move out of the ear naturally.

What You Can Use

Commonly used oils include:

  • Olive oil

  • Almond oil

  • Mineral oil

  • Coconut oil

These oils are gentle and help lubricate the ear canal.

How to Use It Safely

Here’s a step-by-step guide:

  1. Warm the oil slightly. It should be lukewarm, not hot. Test it on your wrist first.

  2. Lie on your side with the affected ear facing upward.

  3. Using a clean dropper, place 3–4 drops into the ear canal.

  4. Stay in that position for 5–10 minutes to allow the oil to penetrate and soften the wax.

  5. Sit up and gently wipe away any excess oil.

You can repeat this once daily for 3–5 days if needed.

Many people notice improved hearing after the wax loosens and naturally drains out.

Why It May Improve Hearing

When earwax is blocking sound waves from reaching the eardrum, your hearing can feel dull or reduced. Once the blockage softens and clears, sound can travel more freely again. This can create the sensation of “hearing like new.”

However, it’s important to understand that this method only helps if earwax buildup is the cause of your hearing issue. It does not treat age-related hearing loss, nerve damage, or infections.

Important Safety Warnings

While oil drops are generally considered safe for minor wax buildup, there are situations where you should not try this method:

  • If you have ear pain

  • If you suspect an ear infection

  • If you have a perforated eardrum

  • If there is discharge or bleeding

  • If dizziness is severe

In these cases, putting drops in your ear may worsen the problem.

If symptoms persist after a few days, consult a healthcare professional. Sometimes professional ear irrigation or manual removal is needed.

Why Cotton Swabs Make It Worse

Many people instinctively reach for cotton swabs when they feel ear blockage. Unfortunately, this often pushes wax deeper into the ear canal, making the blockage worse. It can also irritate or damage the ear canal lining.

The ear is self-cleaning. In most cases, wax naturally moves outward and falls away on its own.

When to See a Doctor

If you experience:

  • Sudden hearing loss

  • Severe pain

  • Persistent ringing

  • Fluid drainage

  • Fever

Seek medical care promptly. These symptoms may indicate infection or other conditions that require treatment.

An ear specialist can examine your ear using proper instruments and safely remove impacted wax if necessary.

Prevention Tips for Healthy Ears

To reduce the chances of future wax buildup:

  • Avoid inserting objects into your ears

  • Limit excessive earbud use

  • Clean only the outer ear with a soft cloth

  • Stay hydrated

For people prone to wax buildup, occasional preventive oil drops (once every few weeks) may help maintain clear canals.

The Bottom Line

Putting 4 drops of natural oil in your ear can be a simple and gentle way to soften earwax and potentially improve hearing clarity — if wax buildup is the cause. Many people find relief with this easy home method.

However, it’s not a miracle cure, and it’s not appropriate for every ear problem. Listening to your body and knowing when to seek professional advice is essential.

Healthy hearing is precious. Treat your ears gently, avoid harsh cleaning methods, and when in doubt, consult a qualified healthcare provider.

I am 73 years old I live alone and I feel fulfilled 4 tips that work for me

That’s a beautiful place to be in life — 73, living alone, and feeling fulfilled. Many people assume aging and solitude automatically mean loneliness, but that’s far from the truth. Fulfillment at this stage often comes from clarity, freedom, and knowing yourself deeply.

Here are 4 meaningful tips that truly work for living alone and feeling fulfilled at 73 (or any age).

1. Create a Gentle but Purposeful Daily Routine
4

Living alone gives you something priceless: control over your time. But without structure, days can blur together. A simple daily rhythm creates stability and purpose.

You don’t need a strict schedule — just anchors in your day:

A morning ritual (tea, prayer, stretching, reading)

A midday activity (walk, hobby, phone call)

An evening wind-down (music, journaling, light TV)

Psychologists like Viktor Frankl emphasized that meaning — not busyness — is what sustains us. Even small purposeful habits can give your day shape.

For example:

Watering plants every morning

Writing three things you’re grateful for

Taking a 20-minute walk after lunch

These small acts build emotional strength over time.

2. Stay Connected — But on Your Own Terms
4

Living alone does not mean living isolated.

The key is intentional connection. You don’t need constant social activity — you need meaningful interaction.

This might include:

Weekly calls with children or grandchildren

Coffee with a neighbor

Joining a local community or religious group

Learning to use video calls

Research from organizations like Harvard University shows that strong relationships are one of the biggest predictors of happiness in later life.

The important part? You choose the frequency. Living alone allows you to balance social time with peaceful solitude.

3. Keep Learning and Exploring
4

Fulfillment grows when the brain stays active.

Many people in their 70s discover new passions:

Painting

Writing

Gardening

Cooking new recipes

Learning a language

Exploring family history

Neuroscience research, including work discussed by Daniel J. Levitin, suggests the brain continues forming new connections even later in life.

You are never “too old” to begin something new.

Ask yourself:

What did I always want to try?

What makes me lose track of time?

What did I enjoy as a child?

Curiosity keeps the spirit young.

4. Make Peace with Solitude
4

There’s a powerful difference between loneliness and solitude.

Loneliness feels like something missing.
Solitude feels like something chosen.

When you live alone, silence can become your friend. It allows:

Reflection

Emotional healing

Gratitude

Spiritual growth

Writers like Maya Angelou often spoke about the importance of inner peace and self-knowledge.

Try:

Sitting quietly for 10 minutes daily

Watching the sunrise

Listening to calming music

Practicing slow breathing

Solitude can become one of the greatest gifts of later life.

A Final Thought

At 73, fulfillment often comes from:

Accepting who you are

Letting go of what you cannot control

Appreciating small joys

Protecting your peace

Living alone does not mean you are lacking something. In many cases, it means you have created a life that fits you perfectly.

If you’re feeling fulfilled, that’s something to celebrate. If you’re still searching for that feeling, start small. One routine. One call. One new hobby. One quiet moment.

Fulfillment is rarely loud — it’s usually quiet, steady, and deeply personal.

The Natural Nighttime Solution for Better Sleep and Fat Burning

Getting quality sleep is one of the most powerful — and most overlooked — tools for healthy weight management. When your body rests properly, it regulates hunger hormones, balances blood sugar, reduces stress, and supports natural fat-burning processes. On the other hand, poor sleep increases cravings, slows metabolism, and makes weight loss much harder.

If you’re looking for a gentle, natural nighttime solution that supports deeper sleep while encouraging healthy fat metabolism, this simple bedtime drink recipe may help. Made with calming herbs and metabolism-supporting ingredients, it’s easy to prepare and soothing to enjoy before bed.


Why Sleep Matters for Fat Burning

Before we get into the recipe, it’s important to understand the connection between sleep and weight.

When you sleep:

  • Your body repairs tissues

  • Growth hormone is released

  • Cortisol (stress hormone) levels decrease

  • Fat metabolism improves

  • Appetite hormones (ghrelin and leptin) balance out

Lack of sleep can increase cravings for sugary and high-carb foods. It can also elevate cortisol, which may encourage fat storage, especially around the belly area.

That’s why improving sleep quality can naturally support healthy weight management.


The Natural Nighttime Sleep & Slimming Drink

This warm, calming beverage combines ingredients known for relaxation, digestion support, and metabolic balance.

Ingredients

  • 1 cup warm water or unsweetened almond milk

  • ½ teaspoon ground cinnamon

  • 1 teaspoon raw honey (optional)

  • 1 tablespoon apple cider vinegar (with the “mother”)

  • ¼ teaspoon turmeric

  • A pinch of black pepper

  • 1 teaspoon fresh lemon juice

  • Optional: ½ teaspoon grated fresh ginger


Why These Ingredients Work

Cinnamon

Cinnamon helps regulate blood sugar levels, reducing late-night cravings and stabilizing insulin. Stable blood sugar can prevent fat storage and promote steady energy.

Apple Cider Vinegar

Apple cider vinegar may support digestion and help regulate blood sugar. Some people find it reduces nighttime hunger and supports gut health.

Turmeric + Black Pepper

Turmeric contains curcumin, a compound with anti-inflammatory properties. Black pepper enhances curcumin absorption. Lower inflammation can support better metabolic function.

Ginger

Ginger aids digestion and may support thermogenesis (the body’s calorie-burning process). It also has a soothing effect on the stomach.

Lemon

Lemon supports digestion and provides vitamin C, which plays a role in stress hormone regulation.

Honey (Optional)

A small amount of raw honey can promote relaxation by supporting serotonin production, which converts into melatonin — the sleep hormone.


How to Prepare It

  1. Warm your water or almond milk (do not boil).

  2. Add cinnamon, turmeric, and black pepper. Stir well.

  3. Add apple cider vinegar and lemon juice.

  4. Stir in honey if using.

  5. Mix thoroughly and drink 30–45 minutes before bedtime.

For best results, pair this drink with a relaxing bedtime routine.


Enhance the Results Naturally

This drink works best when combined with healthy nighttime habits:

1. Reduce Screen Time

Turn off bright screens at least 30–60 minutes before bed.

2. Keep Your Room Cool

A slightly cooler room supports deeper sleep.

3. Avoid Heavy Meals Late at Night

Eating large meals before bed can disturb digestion and disrupt sleep quality.

4. Stay Consistent

Go to bed and wake up at the same time daily.


Optional Variation: Calming Herbal Version

If you prefer a caffeine-free herbal version, you can replace the base liquid with chamomile tea.

https://www.organicvalley.coop/_next/image/?q=75&url=https%3A%2F%2Fcdn.sanity.io%2Fimages%2F5dqbssss%2Fproduction-v3%2Ff57c54bdb559a8f9ce764072408449d962d8cec0-2822x4233.jpg&w=3840
https://img.siterank.app/topic/what-to-mix-with-acv-for-weight-loss-7-easy-drinks-you-can-start-this-week.png
https://assets.epicurious.com/photos/5ac7a79fd4b56a0d2bf1b7f3/1%3A1/w_2560%2Cc_limit/golden-milk-05042018-instagram.jpg
4

Chamomile is widely known for its calming properties and can enhance relaxation before bed.


Who Should Avoid This Drink?

While this recipe uses natural ingredients, it may not be suitable for everyone:

  • People with acid reflux may find apple cider vinegar irritating.

  • Those on blood-thinning medication should consult a healthcare professional before using turmeric regularly.

  • Individuals with sensitive stomachs may want to start with smaller amounts.

Always listen to your body and consult a healthcare provider if you have underlying conditions.


Realistic Expectations

This is not a miracle weight-loss drink. No single beverage can melt fat overnight. However, improving sleep quality and supporting balanced blood sugar can help your body function optimally.

When combined with:

  • A balanced diet

  • Regular physical activity

  • Stress management

  • Adequate hydration

This nighttime drink can be a gentle addition to a healthy routine.


Final Thoughts

Better sleep and healthy metabolism go hand in hand. Instead of turning to extreme diets or stimulants, focusing on rest and relaxation may be the smarter long-term strategy.

This natural nighttime solution is simple, affordable, and easy to incorporate into your routine. With consistent use and healthy lifestyle habits, you may notice:

  • Improved sleep quality

  • Reduced late-night cravings

  • Better digestion

  • More balanced energy

  • Support for natural fat metabolism

What does it mean to let your hair go gray

Letting your hair go gray is more than a beauty decision—it is a personal statement, a lifestyle shift, and often a powerful act of self-acceptance. For decades, gray hair was seen as something to hide, cover, or “fix.” Today, more people are choosing to embrace their natural silver strands, redefining what aging and beauty look like in modern society. But what does it truly mean to let your hair go gray?

The Science Behind Gray Hair

https://silverist.com/cdn/shop/articles/fmarin-240621-silverist-0497_r2-v3_8c593d42-1c29-4897-9ec8-f464aaff6fd5.jpg?v=1756954081
4

Gray hair occurs when hair follicles gradually produce less melanin, the pigment responsible for hair color. As we age, the cells that create melanin (melanocytes) slow down and eventually stop functioning. Without pigment, hair grows in transparent or white, which appears gray when mixed with darker strands.

Genetics plays the biggest role in determining when this process begins. Some people notice gray hairs in their twenties, while others may not see any until their forties or fifties. Stress, nutritional deficiencies, and certain medical conditions can influence timing, but heredity is the strongest factor.

Letting your hair go gray means allowing this natural biological process to happen without artificial coloring. Instead of masking the change, you welcome it.

A Cultural Shift in Beauty Standards

For much of the 20th century, youthfulness was closely linked to beauty, especially for women. Gray hair was often associated with aging, decline, or being “past your prime.” Hair dye became a multi-billion-dollar industry, built on the promise of maintaining a youthful appearance.

However, cultural attitudes have evolved. Public figures like Jamie Lee Curtis, Helen Mirren, and Anderson Cooper have confidently embraced their gray hair, helping normalize and even glamorize silver strands. Social media movements such as #SilverHair and #GrayIsBeautiful have encouraged people worldwide to share their transition journeys.

Letting your hair go gray today often symbolizes confidence, authenticity, and resistance to outdated beauty norms. It reflects a growing belief that aging is not something to hide but something to honor.

The Emotional Journey

Deciding to stop coloring your hair can feel emotional. For many, hair color has been part of their identity for years—sometimes decades. Transitioning to gray may bring feelings of vulnerability at first.

There is often a “growing-out” phase where natural gray roots contrast with dyed lengths. This stage can test patience and confidence. Some people choose to cut their hair short to speed up the transition, while others blend colors gradually with highlights or lowlights.

Emotionally, letting your hair go gray can represent:

  • Acceptance of aging

  • Letting go of societal pressure

  • A desire for simplicity

  • Reclaiming natural beauty

  • Personal empowerment

Many individuals report feeling liberated once they fully transition. They no longer worry about root touch-ups every few weeks or scheduling salon appointments to maintain color. There is freedom in authenticity.

Practical Benefits

Beyond symbolism, there are practical reasons people choose to go gray.

1. Healthier Hair

Frequent coloring can weaken hair, causing dryness and breakage. By stopping chemical treatments, hair often becomes stronger and shinier over time.

2. Cost Savings

Salon visits, professional color treatments, and at-home dye kits can be expensive. Embracing gray significantly reduces these ongoing costs.

3. Time Freedom

No more rushing to cover visible roots. Letting your hair grow naturally simplifies your beauty routine.

However, gray hair does require care. Silver strands can become coarse or yellowed. Using purple shampoo helps maintain brightness, and deep conditioning treatments keep hair soft and manageable.

Challenging Ageism

Letting your hair go gray can also challenge age-related stereotypes. In professional environments, gray hair has historically been perceived differently depending on gender. Men with gray hair are often described as “distinguished,” while women may face unfair bias.

By embracing gray, many women are pushing back against this double standard. They are redefining what leadership, competence, and attractiveness look like at every age.

Gray hair can signal wisdom, experience, and maturity. Instead of hiding these qualities, embracing silver strands highlights them.

A Statement of Authenticity

In a world filled with filters, enhancements, and cosmetic procedures, choosing to let your hair go gray can feel refreshingly real. It says:

“I accept myself as I am.”

Authenticity has become a valued trait in modern society. Whether in personal relationships or professional spaces, people are drawn to those who appear genuine. Natural gray hair can reflect that inner confidence outwardly.

The Transition Process

If someone decides to let their hair go gray, there are different approaches:

  • Cold Turkey: Stop coloring and let natural roots grow out.

  • Gradual Blending: Use highlights or toner to soften the line between dyed and gray hair.

  • The Big Chop: Cut off dyed ends and start fresh.

The transition can take several months to over a year, depending on hair length. Patience is essential. Many find documenting the journey with photos helps them see progress and stay motivated.

Redefining Beauty at Every Age

Ultimately, letting your hair go gray is about redefining beauty on your own terms. It does not mean giving up on style or self-care. In fact, many people discover new fashion choices, makeup styles, and clothing colors that complement their silver hair beautifully.

Gray hair can look striking, elegant, modern, edgy, or sophisticated. It is not a sign of fading—it can be a sign of evolving.

Final Thoughts

Letting your hair go gray is a deeply personal choice. For some, it represents freedom from constant maintenance. For others, it symbolizes self-love and acceptance. It can challenge cultural norms, celebrate aging, and encourage authenticity.

In the end, gray hair is not about losing youth—it is about gaining confidence. It is about recognizing that beauty does not disappear with time; it transforms. And sometimes, the most powerful statement you can make is simply allowing yourself to be natural, exactly as you are.