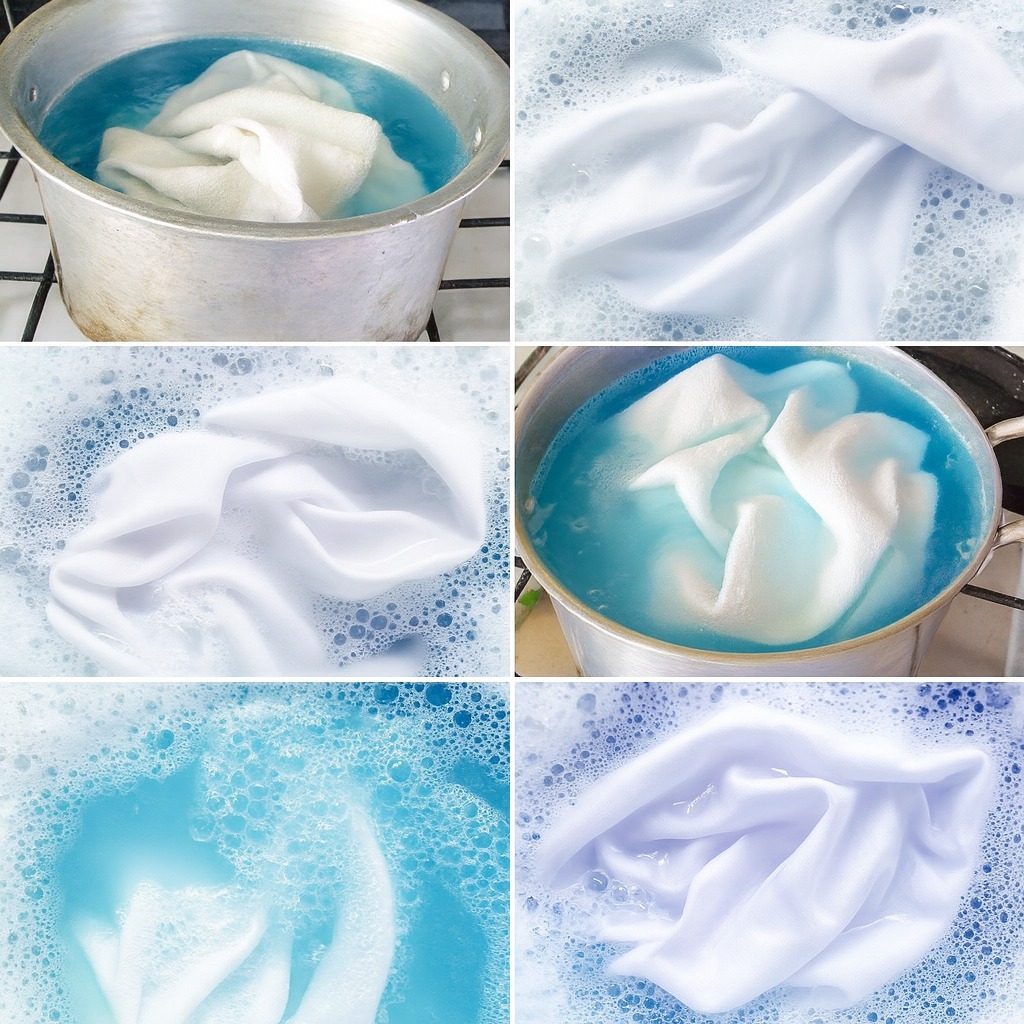
Goodbye to Yellow Sweat Stains on Clothes – You Only Need 1 Simple Ingredient for Bright White Results

Yellow sweat stains on white clothes can be frustrating and embarrassing. Over time, even your brightest shirts, blouses, and undershirts can develop stubborn discoloration around the armpits and collars. Many people assume these stains are caused by sweat alone, but the truth is a little more complex. The yellowing actually happens when sweat mixes with the aluminum compounds found in most deodorants and antiperspirants. The reaction binds to fabric fibers, creating those unpleasant yellow marks that regular washing often cannot remove.

The good news? You don’t need expensive stain removers or harsh chemical bleaches. There is one simple, powerful ingredient that can restore your white clothes and make them look fresh again: baking soda.

Baking soda is affordable, widely available, gentle on fabrics, and incredibly effective at lifting stains and neutralizing odors. It works by breaking down the buildup trapped in fibers while also balancing pH levels that cause discoloration. If used correctly, it can dramatically improve the appearance of your white garments.

Below is the complete, easy method to say goodbye to yellow sweat stains for good.

One-Ingredient Whitening Method (Baking Soda Treatment)

What You Need:

  • 4–5 tablespoons of baking soda

  • A small bowl

  • Warm water

  • An old toothbrush or soft brush

Step-by-Step Instructions:

Step 1: Create the Paste
In a small bowl, mix 4 to 5 tablespoons of baking soda with enough warm water to form a thick paste. The consistency should resemble toothpaste — not too runny and not too dry.

Step 2: Apply Directly to the Stain
Lay your stained white garment flat. Apply the baking soda paste generously over the yellow areas, making sure the fabric is fully covered.

Step 3: Gently Scrub
Using an old toothbrush or soft brush, gently scrub the paste into the fabric in circular motions. This helps the baking soda penetrate deep into the fibers and break down the stain buildup.

Step 4: Let It Sit
Allow the paste to sit on the fabric for at least 30 minutes. For older or more stubborn stains, let it sit for 1–2 hours. In extreme cases, you can leave it overnight.

Step 5: Wash as Usual
After the waiting period, rinse the garment lightly with warm water and then wash it in the washing machine as you normally would. Use a quality detergent and warm water (check the clothing label for safe temperature guidelines).

Step 6: Air Dry
Avoid using the dryer until you are sure the stain is completely gone. Heat can permanently set any remaining stain. Instead, air dry the garment in sunlight if possible — sunlight naturally enhances whitening.

Why Baking Soda Works So Well

Baking soda is a natural alkaline compound. Sweat stains are often acidic, and deodorant residue contains chemical components that bind tightly to fabric. Baking soda neutralizes acidity and helps loosen the bonds holding the stain in place. It also absorbs odor molecules, leaving your clothes smelling fresh.

Unlike chlorine bleach, baking soda is gentle on fibers and won’t weaken fabric over time. This makes it ideal for delicate cotton shirts, school uniforms, workwear, and everyday white garments.

Extra Tips for Best Results

  • Always treat stains as soon as possible. Fresh stains are much easier to remove than old, set-in ones.

  • Avoid mixing baking soda with too much water. A thick paste works better than a thin liquid.

  • Do not combine baking soda with vinegar during the stain treatment phase. While the reaction fizzes, it reduces cleaning power.

  • Check the stain before drying. If any yellow remains, repeat the process.

Preventing Future Yellow Stains

Now that your clothes are bright again, you’ll want to prevent the stains from returning. Here are some simple tips:

  1. Let deodorant dry completely before putting on clothes.

  2. Switch to aluminum-free deodorant if possible.

  3. Wash white clothes promptly after wearing.

  4. Avoid using too much deodorant.

  5. Add one tablespoon of baking soda to your regular laundry load occasionally to maintain brightness.

Final Thoughts

You don’t need expensive stain removers or harsh chemical treatments to restore your white clothes. With just one affordable ingredient — baking soda — you can remove stubborn yellow sweat stains safely and effectively. This simple method is budget-friendly, fabric-safe, and incredibly easy to use.


A Month Before a Stroke, Your Body Warns You: 10 Signs Not to Ignore

A stroke rarely happens without warning. In many cases, the body sends signals days or even weeks before a major event occurs. These early symptoms are often caused by what doctors call a “mini-stroke,” medically known as a Transient Ischemic Attack. Unlike a full stroke, symptoms may disappear quickly—but that doesn’t mean the danger is gone. A TIA is a serious red flag that a larger stroke could follow.

Here are 10 warning signs you should never ignore.

1. Sudden Weakness or Numbness on One Side

If your face, arm, or leg suddenly feels weak, numb, or heavy—especially on one side of the body—it could signal interrupted blood flow to the brain. You might notice your smile looks uneven or that you’re struggling to lift one arm. Even if the sensation fades after a few minutes, seek medical attention immediately.

2. Slurred or Confused Speech

Trouble speaking clearly, slurring words, or struggling to understand simple sentences can be an early warning sign. You may know what you want to say but can’t get the words out correctly. This symptom often appears suddenly and should never be brushed off.

3. Sudden Vision Problems

Blurred vision, double vision, or temporary blindness in one or both eyes can occur when blood supply to parts of the brain responsible for sight is affected. Some people describe it as a curtain falling over one eye. Even short episodes require urgent evaluation.

4. Severe Headache Without Cause

A sudden, intense headache—often described as “the worst headache of your life”—can be a sign of bleeding in the brain. If it appears without a known trigger and is accompanied by nausea, dizziness, or stiff neck, it could signal a serious issue.

5. Dizziness or Loss of Balance

Feeling unsteady, dizzy, or having difficulty walking can point to a stroke affecting the cerebellum or brainstem. If you suddenly can’t coordinate your movements or feel like the room is spinning, don’t ignore it.

6. Sudden Confusion

Confusion that appears abruptly—such as not recognizing familiar people or places—can indicate reduced blood flow to areas of the brain responsible for cognition. If mental clarity disappears without explanation, medical evaluation is critical.

7. Facial Drooping

One side of the face may droop or feel numb. A simple way to check is to smile in the mirror. If one side doesn’t move as it should, seek help right away. Facial asymmetry is one of the most recognized stroke symptoms.

8. Difficulty Swallowing

Trouble swallowing (dysphagia) may occur when muscles controlled by the brain are affected. If you suddenly choke on food or liquids without an obvious reason, it may be linked to neurological changes.

9. Sudden Fatigue or Weakness

Unexplained, extreme fatigue—especially when paired with other symptoms—can sometimes occur before a stroke. Some people report feeling unusually exhausted or drained days beforehand.

10. Numbness or Tingling

A pins-and-needles sensation in the face, arms, or legs, especially if isolated to one side, may indicate compromised blood flow. Even if it resolves quickly, it’s not something to dismiss.

Why These Signs Matter

According to health organizations like the American Stroke Association, up to one in three people who experience a TIA will later have a full stroke. The highest risk is within the first 48 hours after symptoms appear.

A stroke occurs when blood flow to part of the brain is blocked (ischemic stroke) or when a blood vessel ruptures (hemorrhagic stroke). Brain cells begin to die within minutes without oxygen. Rapid treatment can significantly reduce long-term damage.

Doctors often use the acronym FAST to remember the most urgent symptoms:

  • Face drooping

  • Arm weakness

  • Speech difficulty

  • Time to call emergency services

If any of these signs appear—even briefly—immediate medical care is essential.

Risk Factors to Watch

Certain conditions increase the likelihood of stroke, including high blood pressure, diabetes, high cholesterol, smoking, obesity, and heart disease. People over 55 are at higher risk, but strokes can occur at any age.

Managing blood pressure, staying physically active, eating a balanced diet, and avoiding tobacco can dramatically reduce risk. Regular medical checkups help detect silent problems before they become emergencies.

When to Seek Help

Never wait to see if symptoms improve. Even if they disappear within minutes, they may signal a looming stroke. Emergency evaluation can include brain imaging, blood tests, and monitoring to determine the cause and prevent a larger event.

Early intervention can save brain function—and lives.

Final Thoughts

Your body often whispers before it screams. Sudden weakness, confusion, vision changes, or speech problems are not “just stress” or “just fatigue.” They may be life-saving warnings.

This blend will smell so good in your home that your neighbors

There’s something magical about walking into a home that smells warm, fresh, and inviting. It instantly lifts your mood, makes the space feel cleaner, and creates a welcoming atmosphere for everyone who steps inside. Instead of relying on expensive store-bought air fresheners filled with artificial fragrances, you can create your own natural home fragrance blend using simple ingredients you probably already have in your kitchen.

This easy homemade simmer blend will fill your home with a rich, comforting scent that drifts from room to room. The aroma is warm, slightly sweet, fresh, and cozy all at once. It’s perfect for everyday use, special gatherings, or when you simply want your home to feel extra inviting.

Let’s make it.

The Ultimate Homemade Simmer Pot Blend

Ingredients:

  • 1 orange (sliced into rounds)

  • 1 lemon (sliced)

  • 2–3 cinnamon sticks

  • 1 tablespoon whole cloves

  • 1 teaspoon vanilla extract

  • 2 sprigs fresh rosemary (optional but amazing)

  • 4–6 cups water

Instructions:

  1. Slice the orange and lemon into thin rounds. No need to peel them—the peel contains natural oils that give off the strongest scent.

  2. In a medium pot, add the fruit slices, cinnamon sticks, cloves, vanilla extract, and rosemary.

  3. Pour in 4–6 cups of water (enough to fully cover the ingredients).

  4. Place the pot on the stove and bring it to a gentle boil.

  5. Once boiling, reduce the heat to low and let it simmer.

  6. Allow the blend to simmer for 1–3 hours, adding more water as needed so it doesn’t dry out.

As the water heats, the essential oils from the citrus peels, spices, and herbs are released into the air, naturally fragrance your entire home.

Why This Blend Smells So Incredible

This combination works beautifully because each ingredient adds a layer of scent:

  • Orange gives a bright, uplifting sweetness.

  • Lemon adds freshness and a clean aroma.

  • Cinnamon brings warmth and comfort.

  • Cloves add depth and a slightly spicy richness.

  • Vanilla softens everything with a cozy sweetness.

  • Rosemary introduces a fresh, herbal note that makes the scent feel balanced rather than overpowering.

Together, they create a fragrance that smells expensive, natural, and comforting all at once.

Bonus: Make It Last All Day

If you want the scent to linger even longer:

  • Keep the pot on the lowest simmer setting.

  • Add water every 30–45 minutes.

  • After turning it off, leave the pot uncovered so the residual heat continues releasing fragrance.

  • You can refrigerate the mixture overnight and reuse it the next day (just add fresh water).

Alternative Scent Variations

If you love switching things up, here are a few variations you can try:

Cozy Vanilla Spice

  • Apple slices

  • Cinnamon sticks

  • Nutmeg

  • Vanilla extract

Fresh & Clean

  • Lemon slices

  • Mint leaves

  • Rosemary

  • A splash of white vinegar (neutralizes odors)

Holiday Warmth

  • Orange slices

  • Cranberries

  • Cinnamon sticks

  • Cloves

  • Star anise

Each variation gives your home a completely different mood and energy.

Extra Tips for Maximum Fragrance

  • Slightly squeeze the citrus slices before adding them to release more oils.

  • Lightly crush the cloves and cinnamon sticks to intensify the scent.

  • Use a small slow cooker if you want a safer, longer-lasting option.

  • Keep interior doors open to allow airflow throughout your home.

Why Homemade Is Better

Store-bought air fresheners often contain synthetic chemicals that can trigger headaches or allergies. This natural simmer blend uses real ingredients and provides a clean scent without harsh additives. Plus, it’s incredibly affordable. For just a few dollars, you can fragrance your entire home for hours.

Another benefit? It subtly eliminates cooking odors, pet smells, and mustiness instead of simply masking them.

When to Use This Blend

  • Before guests arrive

  • After cooking strong-smelling foods

  • During cleaning day

  • On cozy evenings at home

  • During holidays or family gatherings

It creates an atmosphere that feels warm, welcoming, and well cared for.

Final Thoughts

This simple simmer pot blend proves that you don’t need expensive sprays or fancy diffusers to make your home smell amazing. With just fruit, spices, and water, you can create a scent that feels luxurious, comforting, and unforgettable.

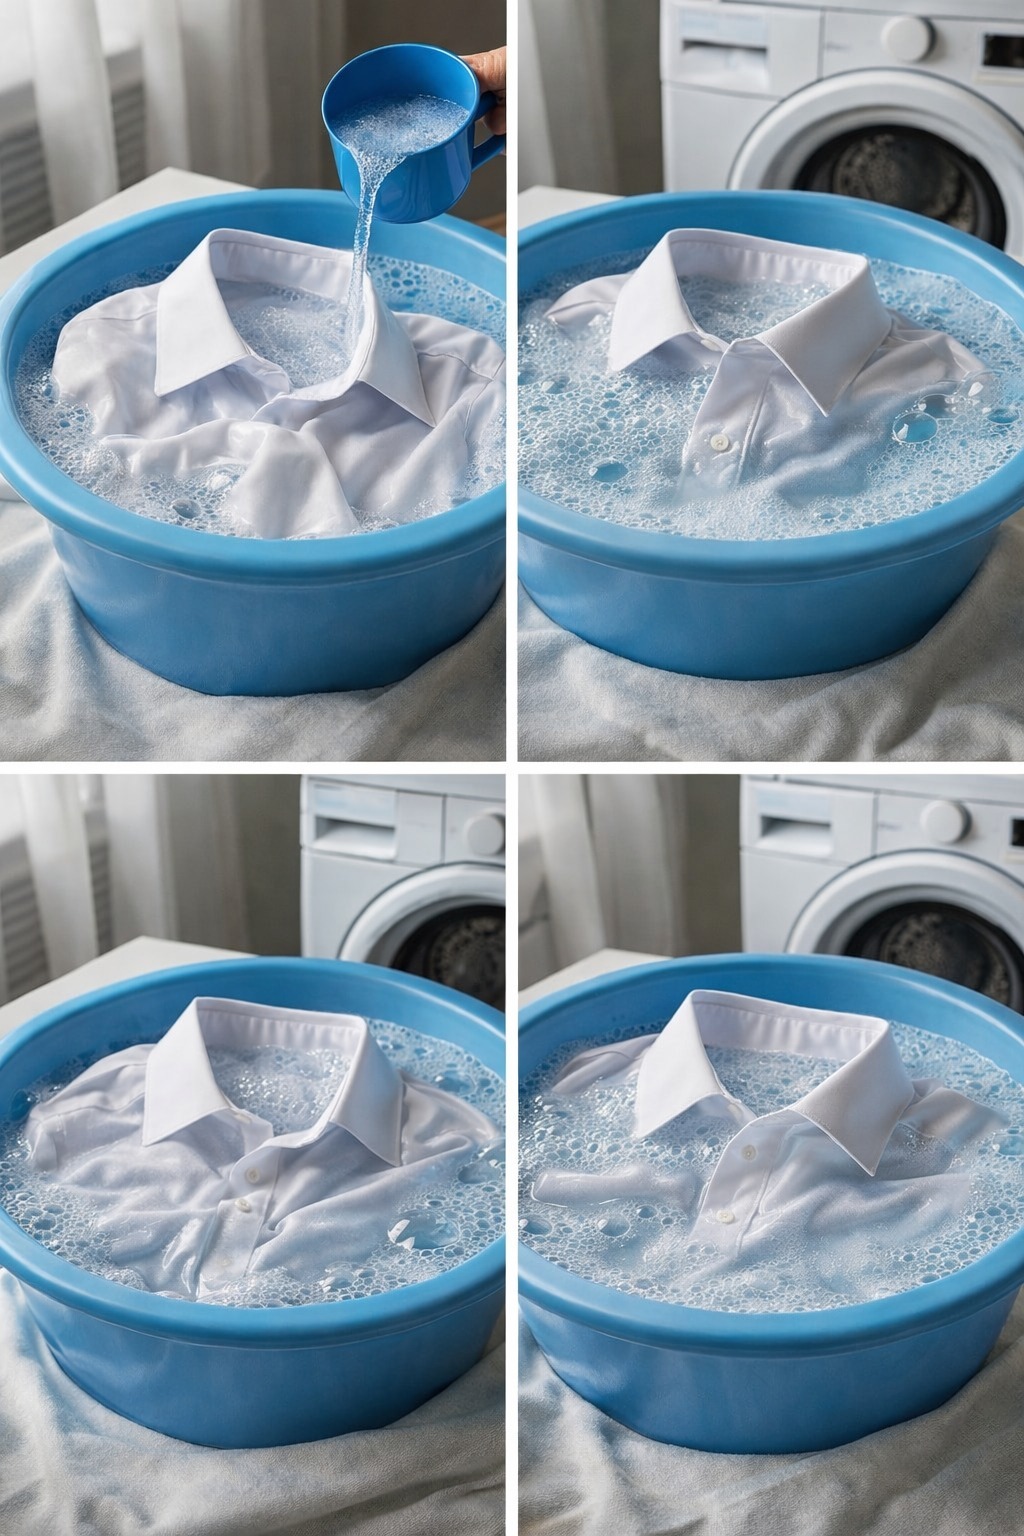
The powerful liquid detergent recipe for white clothes: 24 liters at 2 euros

If you’re tired of spending a fortune on store-bought laundry products and still not getting your white clothes brilliantly clean, this powerful homemade liquid detergent recipe is exactly what you need. With just a few affordable ingredients, you can make approximately 24 liters of effective detergent for the cost of about 2 euros (depending on local prices). It’s economical, easy to prepare, and perfect for keeping white fabrics fresh, bright, and spotless.

This recipe is ideal for cottons, bed linens, towels, and everyday white garments. It deeply cleans, helps remove odors, and keeps clothes looking crisp without harsh chemicals.

Why Make Your Own Liquid Detergent?

Homemade detergent is:

  • Budget-friendly

  • Customizable

  • Free from unnecessary additives

  • Gentle on fabrics

  • Long-lasting

Instead of paying high prices for commercial brands, you can prepare a large batch that lasts for months.

Ingredients for 24 Liters

Here’s what you’ll need:

  • 400 g white bar soap (laundry soap or plain household soap)

  • 500 g washing soda (sodium carbonate)

  • 250 g baking soda

  • 24 liters of water

  • Optional: 10–20 drops lemon essential oil (for fragrance)

These ingredients are inexpensive and widely available. The key cleaning power comes from the combination of soap and washing soda, which breaks down dirt and stains effectively.

Equipment Needed

  • Large pot (at least 5–6 liters capacity)

  • Large bucket or container (30 liters capacity)

  • Grater

  • Wooden spoon

  • Measuring jug

Step-by-Step Instructions

  1. Grate the Soap
    Using a kitchen grater, grate the 400 g of white bar soap into fine shavings. The finer the shavings, the easier they will melt.

  2. Heat the Water
    In a large pot, pour 4 liters of water and heat it over medium heat. Do not let it boil.

  3. Melt the Soap
    Add the grated soap to the hot water. Stir continuously until the soap fully dissolves. This may take 5–10 minutes. The mixture will look slightly thick and creamy.

  4. Add Washing Soda and Baking Soda
    Once the soap is completely melted, slowly add the washing soda and baking soda. Stir thoroughly until fully dissolved.

  5. Transfer to a Large Container
    Pour the hot mixture into a large bucket or storage container. Add the remaining 20 liters of warm water gradually while stirring.

  6. Mix Well
    Stir the mixture for several minutes to ensure everything is evenly combined.

  7. Let It Rest
    Cover the container and let the detergent sit for 12–24 hours. During this time, it will thicken into a gel-like consistency.

  8. Final Stir
    After resting, stir the detergent again. If it’s too thick, you can add a little more warm water to reach your desired consistency.

  9. Add Fragrance (Optional)
    Add lemon essential oil or another scent of your choice and stir well.

How to Use

Use approximately:

  • 150–200 ml per regular load

  • 250 ml for heavily soiled laundry

Shake or stir before each use, as homemade detergent can separate slightly.

Extra Whitening Boost

For even brighter whites, add one of the following directly into the drum:

  • 1 tablespoon baking soda

  • 1 tablespoon oxygen bleach

  • ½ cup white vinegar (in the softener compartment)

These natural boosters help maintain brightness and remove stubborn odors.

Storage Tips

Store the detergent in sealed plastic containers or large bottles. Keep it in a cool, dry place. Properly stored, it can last several months.

Important Notes

  • This detergent works best in warm or hot water.

  • For cold washes, dissolve the detergent in warm water before adding it.

  • Always test on delicate fabrics first.

  • Avoid using on wool or silk.

Cost Breakdown

White soap: approx. €0.80
Washing soda: approx. €0.70
Baking soda: approx. €0.50

Total: Around €2.00 for 24 liters

That’s a fraction of the cost of commercial detergents, making it ideal for large families.

Final Thoughts

This powerful homemade liquid detergent proves that effective cleaning doesn’t have to be expensive. With just a few simple ingredients and a little preparation time, you can produce 24 liters of reliable, fabric-friendly detergent that keeps your white clothes bright and fresh.

12 Unusual Warning Signs Your Liver Might Be Struggling (And Why You Shouldn’t Ignore Them)

Your liver is one of the hardest-working organs in your body. It filters toxins, processes nutrients, balances hormones, supports digestion, and helps regulate blood sugar. According to the World Health Organization, liver diseases are a growing global health concern, often progressing silently until significant damage has occurred.

The tricky part? Early liver stress doesn’t always show up as obvious pain. Instead, your body may send subtle and unusual warning signs. Here are 12 symptoms you should never ignore.

1. Persistent Fatigue

Feeling constantly tired—even after a full night’s sleep—can be an early sign of liver dysfunction. When your liver struggles to filter toxins efficiently, waste products can accumulate in your bloodstream, leaving you feeling drained and sluggish.

2. Yellowing of Skin or Eyes (Jaundice)

Jaundice is one of the more recognizable liver warning signs. It happens when bilirubin builds up in the blood due to poor liver processing. If you notice a yellow tint in your skin or the whites of your eyes, seek medical attention promptly.

3. Dark Urine

If your urine suddenly becomes darker (amber or brown) without dehydration being the cause, it may signal excess bilirubin in your system—a possible sign of liver stress.

4. Pale or Clay-Colored Stools

Healthy bile gives stool its brown color. When bile flow is disrupted due to liver or bile duct issues, stools may appear pale, gray, or clay-colored.

5. Unexplained Itchy Skin

Persistent itching without a rash may be linked to bile salt buildup under the skin. This can happen when the liver isn’t processing bile properly.

6. Swelling in the Abdomen

Fluid accumulation in the abdomen, known as ascites, can indicate advanced liver disease. It may cause noticeable bloating or tightness in the belly.

7. Easy Bruising or Bleeding

Your liver produces proteins necessary for blood clotting. If you find yourself bruising easily or bleeding longer than usual from minor cuts, it may be due to reduced clotting factors.

8. Nausea or Loss of Appetite

Chronic nausea, digestive discomfort, or a sudden aversion to food can occur when liver function declines. Since the liver helps process fats and toxins, digestive symptoms are common.

9. Bad Breath (Foetor Hepaticus)

In advanced cases, liver dysfunction can cause a distinctive musty or sweet breath odor known as “foetor hepaticus.” It results from toxins entering the bloodstream and being exhaled through the lungs.

10. Confusion or Brain Fog

When the liver cannot effectively remove toxins like ammonia, they can affect brain function. This condition, called hepatic encephalopathy, may lead to confusion, memory problems, or personality changes.

11. Spider-Like Blood Vessels on the Skin

Small, spider-shaped blood vessels (spider angiomas) appearing on the chest, neck, or face can be linked to hormonal imbalances caused by liver dysfunction.

12. Pain or Discomfort in the Upper Right Abdomen

The liver sits in the upper right portion of your abdomen. Persistent discomfort or a dull ache in this area can signal inflammation or enlargement.

Common Causes of Liver Strain

Liver problems can develop for many reasons, including:

  • Fatty liver disease

  • Excessive alcohol consumption

  • Viral hepatitis

  • Certain medications

  • Obesity and diabetes

Conditions like hepatitis are significant contributors worldwide, and organizations such as the Centers for Disease Control and Prevention emphasize regular screening for at-risk individuals.

When to See a Doctor

If you experience multiple symptoms on this list—especially jaundice, abdominal swelling, confusion, or severe fatigue—consult a healthcare professional immediately. Early detection can significantly improve outcomes.

Routine blood tests (like liver function tests) can identify problems before symptoms worsen. Lifestyle adjustments, medication, or further testing may be recommended depending on the cause.

How to Support Liver Health

While this article focuses on warning signs, prevention matters just as much. Here are simple steps to help protect your liver:

  • Limit alcohol consumption

  • Maintain a healthy weight

  • Eat a balanced diet rich in vegetables and lean protein

  • Exercise regularly

  • Avoid unnecessary medications and supplements

  • Get vaccinated for hepatitis if recommended

Final Thoughts

Your liver works tirelessly behind the scenes, often without recognition. But when it starts to struggle, your body sends signals—sometimes subtle, sometimes alarming.

Don’t ignore persistent fatigue, unusual skin changes, digestive issues, or unexplained swelling. Early attention could make the difference between reversible liver stress and long-term damage.

Mix These 3 Before Bed – A Soothing Nighttime Drink to Support Healthy Cholesterol

If you’ve been searching for a simple, natural way to support your heart health, this gentle bedtime drink might be exactly what you need. While no drink can magically “melt” cholesterol overnight, certain ingredients are known to support healthy cholesterol levels when combined with a balanced diet and lifestyle. This easy three-ingredient nighttime recipe is comforting, calming, and designed to help your body rest and repair while you sleep.

This warm tonic combines raw honey, ground cinnamon, and apple cider vinegar—three kitchen staples that have been traditionally used to support digestion, circulation, and overall wellness.

Why These 3 Ingredients?

1. Honey

Raw honey is packed with antioxidants and has natural anti-inflammatory properties. Antioxidants help fight oxidative stress in the body, which plays a role in heart health. Honey also adds natural sweetness without refined sugar, making this drink enjoyable before bed.

2. Cinnamon

Cinnamon has been widely studied for its potential to support healthy blood sugar and lipid levels. Some research suggests that regular cinnamon consumption may help reduce LDL (“bad”) cholesterol and triglycerides when paired with a healthy diet.

3. Apple Cider Vinegar

Apple cider vinegar contains acetic acid, which may support metabolism and help maintain healthy cholesterol levels. It also aids digestion, which can be helpful when taken before bedtime.

The Nighttime Cholesterol-Support Drink Recipe

Ingredients:

  • 1 cup warm (not boiling) water

  • 1 tablespoon raw honey

  • 1 teaspoon ground cinnamon

  • 1 tablespoon apple cider vinegar (with the “mother” if possible)

Instructions:

  1. Warm one cup of water until it’s comfortably warm but not boiling.

  2. Stir in the apple cider vinegar.

  3. Add the cinnamon and mix thoroughly.

  4. Stir in the honey last, allowing it to dissolve fully.

  5. Drink slowly about 30 minutes before bedtime.

How It Works While You Sleep

During sleep, your body goes into repair mode. Hormone levels balance, inflammation decreases, and metabolic processes regulate. This drink supports:

  • Healthy digestion overnight

  • Balanced blood sugar levels

  • Reduced oxidative stress

  • Relaxation before bed

Cinnamon helps stabilize blood sugar, which may prevent late-night spikes and crashes. Apple cider vinegar supports digestive function, and honey promotes calmness and may even support better sleep quality.

How Often Should You Drink It?

For best results, drink this mixture 4–5 nights per week for several weeks. Consistency matters more than intensity. Remember, this is not a quick fix—it’s part of a heart-healthy lifestyle.

Important Tips for Best Results

  • Choose raw, unfiltered apple cider vinegar.

  • Use Ceylon cinnamon if possible, as it’s lower in coumarin.

  • Combine this drink with a diet rich in fiber, vegetables, healthy fats, and lean proteins.

  • Stay active—regular walking can significantly improve cholesterol levels.

  • Drink plenty of water throughout the day.

Who Should Avoid This Drink?

  • People with acid reflux may find apple cider vinegar irritating.

  • Those on blood sugar medication should consult a healthcare provider.

  • If you’re on cholesterol-lowering medication, do not replace prescribed treatment with home remedies.

Bonus: Simple Lifestyle Boosters for Lower Cholesterol

While this drink can be supportive, here are additional habits that truly make a difference:

  • Eat more oats and soluble fiber

  • Add fatty fish like salmon to your weekly meals

  • Reduce processed foods

  • Quit smoking

  • Maintain a healthy weight

The Bottom Line

There is no magical drink that melts cholesterol overnight. However, this simple combination of honey, cinnamon, and apple cider vinegar can be a soothing and supportive addition to your nightly routine. When paired with smart food choices and regular activity, small habits like this can lead to meaningful improvements over time.

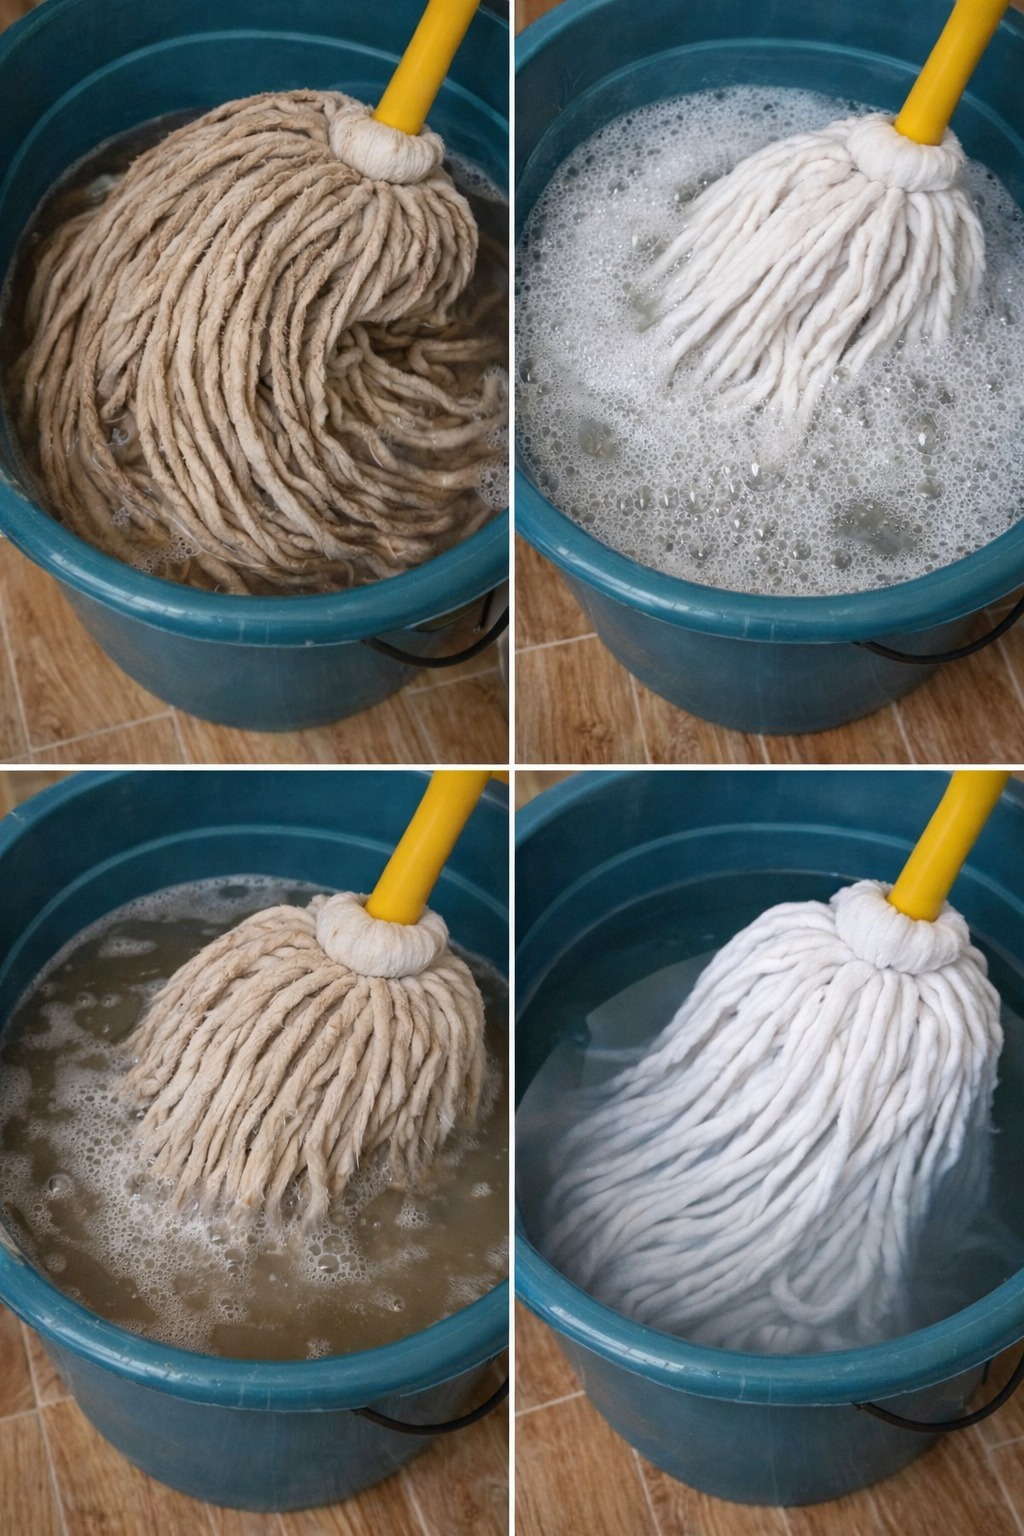
Very Dirty Mop? Don’t Throw It Away — Just Add a Drop of This Simple Ingredient

Before you toss that grimy, foul-smelling mop into the trash, stop. You don’t need to buy a new one. What looks permanently dirty can actually be restored in minutes with one powerful, inexpensive ingredient you probably already have in your kitchen: white vinegar.

For generations, households around the world have relied on the natural cleaning power of White Vinegar. It cuts through grime, neutralizes odors, breaks down mineral buildup, and kills many types of bacteria — all without harsh chemicals. When your mop starts to smell sour or leaves streaks instead of shine, it’s usually due to trapped bacteria and detergent residue. Vinegar solves both problems at once.

Let’s walk through the full step-by-step method to make your mop look and smell like new again.

Why Mops Get So Dirty So Fast

A mop absorbs everything: muddy footprints, cooking grease, spilled drinks, pet accidents, dust, and bacteria. Each time you dip it back into the bucket, some of that grime stays trapped deep inside the fibers.

Over time, this leads to:

  • Musty or sour odor

  • Sticky residue on floors

  • Gray or brown discoloration

  • Stiff or crusty strands

  • Spreading dirt instead of cleaning

Many people assume the mop is ruined at this stage. But in reality, it just needs deep sanitizing.

The One-Ingredient Miracle Solution

You’ll Need:

  • 1 cup hot water (very warm, not boiling)

  • 1–2 tablespoons white vinegar

  • A bucket or deep basin

That’s it.

Step-by-Step Mop Revival Method

Step 1: Shake Out Loose Dirt

Take your mop outside and shake or tap it firmly to remove loose debris, dust, and hair.

Step 2: Rinse With Hot Water

Run the mop under hot water to remove surface dirt and soften hardened residue.

Step 3: Vinegar Soak

Fill a bucket with hot water and add 1–2 tablespoons of white vinegar. Swirl gently to mix.

Submerge the mop completely and let it soak for 20–30 minutes. If it’s extremely dirty, leave it for up to one hour.

The vinegar works by:

  • Breaking down detergent buildup

  • Dissolving mineral deposits from hard water

  • Neutralizing bad smells

  • Loosening deep grime

Step 4: Agitate and Squeeze

After soaking, press and knead the mop fibers with your hands (wear gloves if preferred). You’ll likely see dirty water release from deep inside the strands.

Step 5: Final Rinse

Rinse thoroughly under hot running water until the water runs clear and there’s no vinegar smell left.

Step 6: Dry Completely

Hang the mop head in a well-ventilated area to air dry completely. Never store a damp mop — that’s how bacteria grow.

For Extra-Dirty Mops (Deep Reset Method)

If your mop hasn’t been cleaned in months, combine:

  • 1 tablespoon white vinegar

  • 1 teaspoon baking soda

  • 1 liter hot water

The fizzing reaction helps lift heavy buildup. Soak for 30 minutes, then rinse well.

How Often Should You Clean Your Mop?

For best hygiene:

  • Light home use: Clean every 1–2 weeks

  • Heavy traffic homes: Clean weekly

  • After spills or pet accidents: Clean immediately

A clean mop means cleaner floors. A dirty mop spreads bacteria.

Bonus Tip: Washing Machine Method

If your mop head is removable and machine-safe:

  1. Place it in the washing machine alone.

  2. Add ½ cup white vinegar (no detergent).

  3. Wash on hot cycle.

  4. Air dry fully.

This works especially well for microfiber mop heads.

Why Vinegar Works So Well

White vinegar contains acetic acid, which:

  • Dissolves grease

  • Kills odor-causing bacteria

  • Breaks down soap scum

  • Softens mineral buildup

It’s natural, affordable, and safe for most mop materials.

Important Safety Notes

  • Never mix vinegar with bleach.

  • Always rinse thoroughly before reuse.

  • Air dry completely to prevent mold growth.

  • Test on delicate mop materials first.

How to Keep Your Mop Cleaner Longer

  • Rinse thoroughly after every use

  • Wring it out completely

  • Hang it to dry (never leave in the bucket)

  • Replace mop heads every 6–12 months if heavily used

The Result

After this simple vinegar treatment, your mop will:

  • Smell fresh

  • Feel softer

  • Look brighter

  • Clean more effectively

All without buying a new one.

Sometimes the simplest household ingredients are the most powerful. Before you spend money replacing cleaning tools, try this easy method. One small drop of white vinegar can bring even the dirtiest mop back to life.

Clear your throat and lungs of mucus with this recipe – just 2 ingredients

When mucus builds up in your throat and chest, it can make breathing uncomfortable, trigger constant coughing, and leave you feeling tired and congested. Whether it’s from a seasonal cold, allergies, pollution, or mild bronchial irritation, excess mucus can be frustrating. Thankfully, there’s a simple, natural remedy you can make at home using just two powerful ingredients: honey and lemon.

This soothing mixture has been used for generations to calm irritated airways and help loosen mucus naturally. It’s easy, affordable, and gentle on the body when used correctly.

Let’s dive into this simple recipe and how it works.

Why Mucus Builds Up

Mucus is actually a protective substance produced by your respiratory system. It traps dust, bacteria, viruses, and other irritants. However, when your body produces too much of it, it can thicken and linger in your throat and chest.

Common causes include:

  • Colds and flu

  • Seasonal allergies

  • Air pollution

  • Smoking or secondhand smoke

  • Sinus infections

When mucus becomes thick, it’s harder to expel, which leads to persistent coughing and throat clearing.

The 2-Ingredient Mucus-Clearing Remedy

Ingredients:

  • 1 tablespoon raw honey

  • Juice of half a fresh lemon

That’s it — just two ingredients!

How to Prepare

  1. Squeeze the juice from half a lemon into a small cup.

  2. Add one tablespoon of raw honey.

  3. Stir well until fully combined.

  4. Consume immediately for best results.

For an extra soothing effect, you can mix it into a cup of warm (not boiling) water and sip slowly.

How It Works

Honey: Nature’s Soothing Agent

Honey coats the throat and helps calm irritation. Its natural antimicrobial properties may help reduce minor bacterial irritation in the throat. It also helps thin mucus, making it easier to cough up.

Studies have shown that honey can be as effective as some over-the-counter cough syrups for soothing nighttime coughs. It works by reducing throat inflammation and decreasing the urge to cough.

Lemon: Natural Mucus Breaker

Lemon is rich in vitamin C and natural acids that help break down thick mucus. It stimulates saliva production, which keeps your throat moist and less irritated. The acidity also helps thin mucus so your body can eliminate it more easily.

Together, honey and lemon create a powerful natural combination that supports your respiratory system.

How Often to Use It

For mild congestion:

  • Take once in the morning and once before bed.

For heavier mucus:

  • Use up to three times daily for a few days.

If symptoms last more than a week, worsen, or include fever, chest pain, or difficulty breathing, consult a healthcare professional.

Extra Tips to Help Clear Mucus

While this remedy helps, combining it with healthy habits can improve results:

1. Stay Hydrated

Drink plenty of warm fluids like herbal tea or warm water throughout the day. Fluids thin mucus naturally.

2. Steam Inhalation

Inhale steam from hot water for 5–10 minutes. The moisture loosens mucus in the chest and sinuses.

3. Humidify Your Room

Dry air thickens mucus. A humidifier keeps airways moist and comfortable.

4. Avoid Dairy (Temporarily)

Some people find dairy thickens mucus, though this varies from person to person.

5. Rest

Your body heals faster when well-rested.

Who Should Avoid This Remedy?

  • Children under one year old should not consume honey.

  • People with severe citrus allergies should avoid lemon.

  • Individuals with diabetes should monitor honey intake carefully.

If you have chronic respiratory conditions like asthma, COPD, or recurring bronchitis, speak to a medical professional before relying on home remedies.

A Gentle and Natural Approach

This two-ingredient recipe is not a miracle cure, but it’s a gentle and effective way to soothe your throat and support your body’s natural mucus-clearing process. Many people notice relief within a day or two when used consistently.

Natural remedies work best when combined with healthy habits and proper medical care when needed.

Final Thoughts

When mucus clogs your throat and chest, relief doesn’t have to come from complicated solutions. Sometimes, the simplest ingredients in your kitchen can offer comfort and support.

With just honey and lemon, you can create a soothing remedy that helps loosen mucus, calm irritation, and make breathing easier.

Slow Cooker Brown Gravy Meatballs (Just 4 Ingredients!)

If you’re looking for a cozy, no-fuss dinner that practically cooks itself, these Slow Cooker Brown Gravy Meatballs are about to become your go-to recipe. With frozen meatballs, a packet of brown gravy mix, and just three simple ingredients, you’ll have a rich, savory supper that tastes like you spent hours in the kitchen — when really, the slow cooker did all the work.

This is the kind of meal that fills the house with comforting aromas and brings everyone to the table without having to call twice. It’s hearty, satisfying, and incredibly versatile. Serve it over mashed potatoes, egg noodles, or fluffy rice for a dinner that always gets a “yes” in my house.

Let’s dive into this easy, family-friendly recipe.

Why You’ll Love This Recipe

  • Only 4 simple ingredients

  • Uses frozen meatballs (no prep needed!)

  • Perfect for busy weeknights

  • Rich, savory brown gravy flavor

  • Great for meal prep or potlucks

The combination of tender meatballs simmered in creamy brown gravy is pure comfort food. And because everything cooks low and slow, the flavors blend beautifully while you go about your day.

Ingredients

  • 1 (26–32 oz) bag frozen fully cooked meatballs

  • 1 packet brown gravy mix

  • 1 (10.5 oz) can cream of mushroom soup

  • 1 cup beef broth

That’s it! Four ingredients transform into a warm, hearty meal.

Instructions

Step 1: Add the Meatballs

Place the frozen meatballs directly into the bottom of your slow cooker. No need to thaw them first — they’ll cook perfectly from frozen.

Step 2: Mix the Gravy Sauce

In a medium bowl, whisk together the brown gravy mix, cream of mushroom soup, and beef broth until smooth. Make sure there are no lumps so your gravy turns out silky and rich.

Step 3: Pour and Stir

Pour the gravy mixture evenly over the meatballs in the slow cooker. Gently stir to coat all the meatballs in that delicious sauce.

Step 4: Slow Cook to Perfection

Cover and cook on LOW for 5–6 hours or on HIGH for 2–3 hours. Stir once or twice during cooking if possible to ensure even coating and heating.

The meatballs will become tender and soak up the savory brown gravy flavor as they simmer.

Step 5: Serve and Enjoy

Once hot and bubbly, give everything a final stir and serve warm over mashed potatoes, egg noodles, rice, or even toasted hoagie rolls.

Serving Suggestions

This dish is incredibly versatile. Here are a few ways to serve it:

  • Over creamy mashed potatoes for classic comfort food

  • Tossed with wide egg noodles for a stroganoff-style dinner

  • Spoon over steamed white or brown rice

  • Served on slider buns for party sandwiches

  • Alongside roasted green beans or buttered corn

If you’re feeding a crowd, this recipe doubles easily.

Optional Add-Ins & Variations

Want to customize it? Try these easy ideas:

  • Add sliced onions or mushrooms for extra flavor

  • Stir in ½ cup sour cream at the end for a creamy stroganoff twist

  • Sprinkle in garlic powder or black pepper for a flavor boost

  • Add a splash of Worcestershire sauce for deeper savory notes

You can even swap the cream of mushroom soup for cream of chicken if that’s what you have on hand.

Storage & Reheating

Refrigerator: Store leftovers in an airtight container for up to 4 days.
Freezer: Freeze for up to 2 months. Thaw overnight in the refrigerator before reheating.
Reheat: Warm gently on the stovetop or in the microwave until heated through. Add a splash of broth if the gravy thickens too much.

Tips for Best Results

  • Use fully cooked frozen meatballs for best texture.

  • Don’t overcook on HIGH — LOW heat keeps them tender.

  • If the gravy is too thick, stir in a little extra beef broth.

  • If it’s too thin, leave the lid slightly ajar for the last 30 minutes to thicken.

Why This Recipe Works

The brown gravy mix provides concentrated flavor and seasoning, while the cream of mushroom soup adds body and creaminess. The beef broth thins everything into the perfect gravy consistency. As the meatballs cook, they absorb the savory sauce, making every bite rich and satisfying.

It’s simple pantry cooking at its finest.

Perfect for Busy Families

This is one of those “dump and go” slow cooker meals that saves busy weeknights. You can set it up in the morning and come home to a hot, comforting dinner ready to serve. No complicated prep. No fancy ingredients. Just dependable, delicious food.

Whether you’re feeding kids, hosting guests, or simply craving something warm and hearty, these Slow Cooker Brown Gravy Meatballs deliver every time.

Final Thoughts

Sometimes the best recipes are the simplest ones. Frozen meatballs, a packet of brown gravy mix, and three pantry staples come together to create a savory supper that tastes homemade and comforting.

Keep this recipe in your back pocket for those days when you want maximum flavor with minimal effort. One bite of these tender meatballs coated in rich brown gravy, and you’ll understand why this dish is always a “yes” at the dinner table.

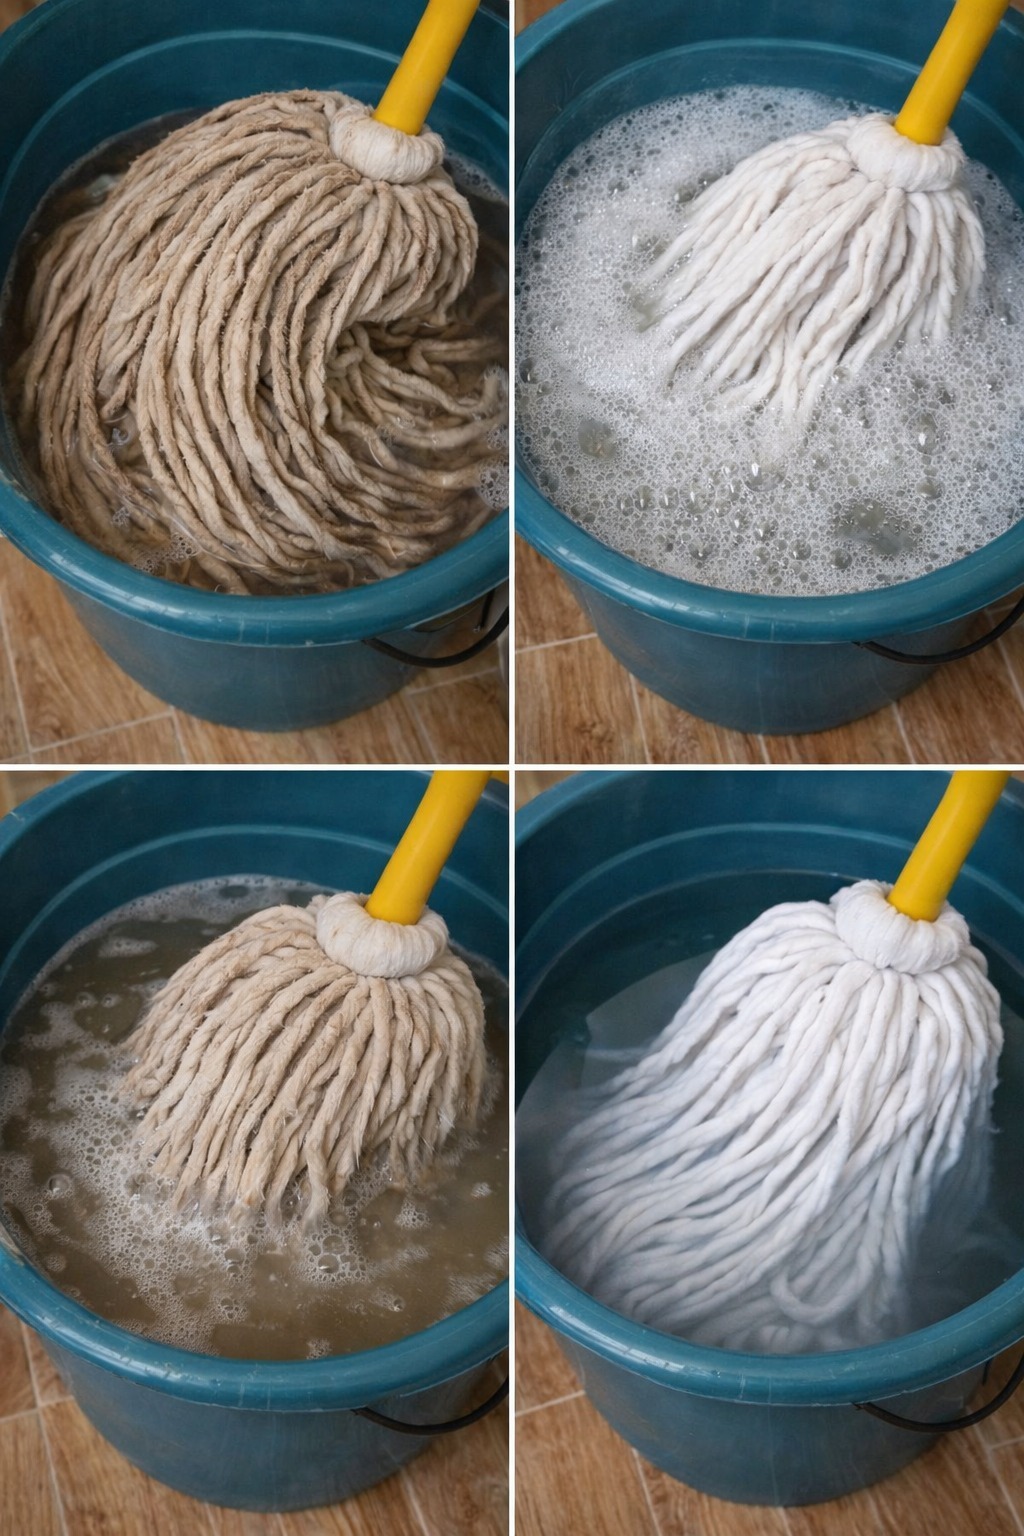
Very dirty mop, do not buy it again: a drop of this ingredient and it will be as good as new again

A dirty mop is more than just unpleasant to look at — it can actually spread bacteria, unpleasant odors, and grime across your floors instead of cleaning them. Over time, mop heads absorb dirt, grease, food particles, and moisture, creating the perfect environment for bacteria to thrive. If your mop smells bad even after rinsing or looks permanently stained, you might be tempted to throw it away.

But don’t buy a new one just yet.

With one powerful household ingredient, you can restore your mop to a clean, fresh, almost-new condition — and it only takes a few minutes of effort.

The Magic Ingredient: White Vinegar

The secret ingredient is simple and affordable: white vinegar.

White vinegar is a natural disinfectant, deodorizer, and mineral deposit remover. Thanks to its acetic acid content, it breaks down bacteria, dissolves grime, and eliminates stubborn odors. Unlike harsh chemical cleaners, vinegar is safe, eco-friendly, and inexpensive.

If you’ve never tried deep-cleaning your mop with vinegar, you’ll be surprised at the results.

Why Mops Get So Dirty

Before jumping into the cleaning method, it’s helpful to understand why mops become so unpleasant:

  • They stay damp for long periods.

  • They collect grease and sticky residue from kitchen floors.

  • They absorb bathroom moisture and bacteria.

  • They are often stored without fully drying.

All of this creates a breeding ground for odor-causing microorganisms.

Regular rinsing with water isn’t enough. You need something that disinfects and neutralizes odors — and that’s where vinegar comes in.

Deep-Clean Your Mop: Step-by-Step Method

What You’ll Need:

  • 1 cup white vinegar

  • Hot water

  • A bucket or sink

  • Optional: 1 tablespoon baking soda (for extra odor removal)

Step 1: Rinse the Mop First

Start by rinsing your mop thoroughly under hot running water. Squeeze it several times to remove loose dirt and debris. This prepares it for deep cleaning.

Step 2: Prepare the Vinegar Soak

Fill a bucket or sink with hot water — enough to fully submerge the mop head.

Add 1 cup of white vinegar. If your mop smells especially bad, add 1 tablespoon of baking soda. (Be careful — it will fizz!)

Mix gently.

Step 3: Soak for 30–60 Minutes

Place the mop head completely in the solution. Let it soak for at least 30 minutes. For extremely dirty or smelly mops, leave it for up to one hour.

The vinegar will:

  • Break down grease

  • Kill odor-causing bacteria

  • Loosen embedded dirt

  • Dissolve mineral buildup

Step 4: Rinse Thoroughly

After soaking, rinse the mop under hot running water again. Squeeze repeatedly until the water runs clear and the vinegar smell fades.

Step 5: Dry Properly

This is crucial.

Hang your mop upside down or in a well-ventilated area so it can dry completely. Never leave it damp in a bucket or closet — that’s how odors return.

Extra Boost for Extremely Dirty Mops

If your mop is still stained or smelly after the vinegar soak, try this advanced method:

  1. Boil a pot of water.

  2. Pour it carefully into a bucket.

  3. Add 1 cup vinegar.

  4. Soak the mop for 10–15 minutes (only if the mop material can handle high heat).

The heat helps kill stubborn bacteria and loosen deep grime.

How Often Should You Clean Your Mop?

To keep your mop fresh:

  • Rinse after every use.

  • Deep clean with vinegar once a week (if used frequently).

  • Replace the mop head every 3–6 months, depending on wear.

Regular maintenance prevents buildup and extends the life of your cleaning tools.

Why Vinegar Works So Well

White vinegar contains acetic acid, which:

  • Breaks down organic material

  • Disrupts bacterial cell membranes

  • Neutralizes alkaline odors

  • Dissolves hard water residue

Unlike bleach, vinegar doesn’t leave harmful chemical fumes behind. It’s safer for homes with children and pets.

However, never mix vinegar with bleach — this creates toxic fumes.

Signs Your Mop Is Truly Beyond Saving

While vinegar works wonders, some mop heads should be replaced. Look for:

  • Torn or frayed fibers

  • Mold spots that don’t disappear

  • Permanent strong odor after cleaning

  • Extremely flattened, worn-out strands

If the fibers are damaged, cleaning won’t restore performance.

Bonus Tip: Prevent Future Mop Odors

To keep your mop fresh longer:

  • Add a small splash of vinegar to your mop water regularly.

  • Always wring it out completely after use.

  • Store it hanging, not sitting flat.

  • Avoid leaving it soaking overnight.

A little prevention goes a long way.

Final Thoughts

Before you throw away that dirty, smelly mop, try this simple vinegar method. With just one inexpensive ingredient, you can eliminate odors, remove grime, and extend the life of your cleaning tool.

It’s easy, affordable, and environmentally friendly.

Sometimes the simplest solutions are the most powerful — and in this case, one cup of white vinegar can save you money and keep your home truly clean.