Famous Cream Puffs with Mom’s Celebrated Filling

There’s something timeless about cream puffs—the delicate, airy shells paired with a rich, luscious filling that feels both indulgent and comforting. This recipe, inspired by a treasured “mom’s kitchen” tradition, takes the classic cream puff and elevates it with a uniquely flavored, silky filling that makes every bite unforgettable.

The Magic of Cream Puffs

Cream puffs, or pâte à choux pastries, are known for their light, hollow structure. What makes them special is how simple ingredients—flour, butter, eggs, and water—transform into something elegant. But the true secret lies in the filling. This version features a “celebrated” homemade cream that blends classic vanilla custard with a subtle twist that sets it apart.

Ingredients

For the Cream Puff Shells:

  • 1 cup water

  • ½ cup unsalted butter

  • 1 cup all-purpose flour

  • ¼ teaspoon salt

  • 4 large eggs

For Mom’s Celebrated Filling:

  • 2 cups whole milk

  • ½ cup heavy cream

  • ¾ cup sugar

  • 4 egg yolks

  • 3 tablespoons cornstarch

  • 2 tablespoons butter

  • 1 tablespoon pure vanilla extract

  • 2 tablespoons cream cheese (the secret ingredient!)

  • Optional: 1 teaspoon orange zest or a hint of cardamom for uniqueness

Optional Toppings:

  • Powdered sugar

  • Melted chocolate drizzle

  • Crushed pistachios

Step 1: Prepare the Choux Pastry

Start by preheating your oven to 200°C (400°F). In a saucepan, combine water, butter, and salt. Bring it to a gentle boil until the butter melts completely.

Reduce the heat and add the flour all at once. Stir vigorously with a wooden spoon until the mixture forms a smooth dough and pulls away from the sides of the pan. This step is crucial—it develops the structure of your puffs.

Remove from heat and let it cool slightly for 5 minutes. Then add eggs one at a time, mixing well after each addition. The dough should become glossy and smooth, thick but pipeable.

Transfer the dough into a piping bag (or use a spoon) and form small mounds on a lined baking tray, leaving space between each puff.

Bake for 20–25 minutes until golden brown and puffed. Do not open the oven early, or they may collapse. Once done, let them cool completely.

Step 2: Make Mom’s Celebrated Filling

This is where the magic happens.

In a saucepan, heat milk and cream over medium heat until just warm (not boiling). In a separate bowl, whisk egg yolks, sugar, and cornstarch until smooth and pale.

Slowly pour the warm milk mixture into the egg mixture while whisking continuously. Then return everything to the saucepan.

Cook over medium heat, stirring constantly, until the mixture thickens into a custard. This usually takes 5–7 minutes. Once thick, remove from heat and stir in butter, vanilla extract, and cream cheese.

The cream cheese is the secret—it adds a subtle tang and richness that makes the filling unforgettable without overpowering the classic flavor.

If you want a unique twist, fold in orange zest or a pinch of cardamom. These flavors add depth and a slightly exotic note.

Let the filling cool completely, then refrigerate for at least 1 hour.

Step 3: Assemble the Cream Puffs

Once the shells are cool and the filling is chilled, it’s time to assemble.

You can either:

  • Slice each puff in half and spoon or pipe the filling inside, or

  • Use a piping tip to fill them from the bottom for a cleaner look

Fill generously—cream puffs should feel light but full.

Step 4: Finishing Touches

Dust the tops with powdered sugar for a classic finish, or drizzle melted chocolate for extra indulgence. Crushed pistachios add a beautiful crunch and a pop of color.

Serve immediately or keep refrigerated until ready to enjoy.

Tips for Perfect Cream Puffs

  • Don’t rush the eggs: Add them gradually to avoid a runny dough.

  • Bake thoroughly: Underbaked puffs will collapse. They should feel light and dry.

  • Cool completely before filling: Warm shells will melt the cream.

  • Chill the filling: This helps it set and enhances the flavor.


Why This Recipe Is Special

What makes this recipe stand out isn’t just technique—it’s the emotional touch behind it. The addition of cream cheese in the filling transforms a standard custard into something richer and more memorable. It’s the kind of small, thoughtful tweak that often comes from years of home cooking experience.

This “mom’s celebrated filling” strikes a perfect balance: creamy but not too heavy, sweet but not overwhelming, classic yet just different enough to surprise you.

Final Thoughts

Cream puffs are more than just a dessert—they’re a celebration of texture, flavor, and tradition. Whether you’re making them for a family gathering, a festive occasion, or simply to treat yourself, this unique recipe brings warmth and joy to every bite.

Vitamin D – why is it so important for our body?

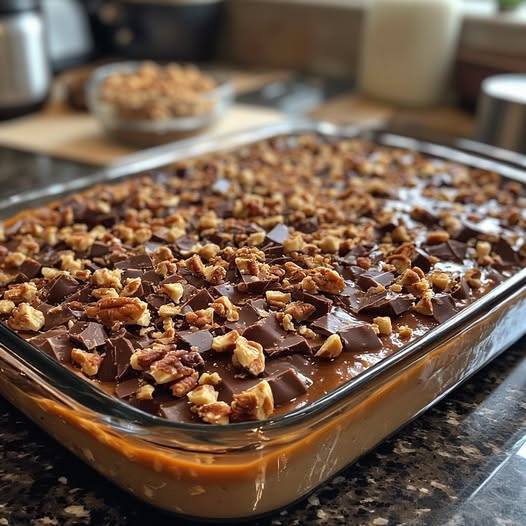
caramel chocolate crunc barscaramel chocolate crunc bars

Here’s a unique and indulgent recipe for Caramel Chocolate Crunch Bars—perfectly layered with gooey caramel, rich chocolate, and a satisfying crispy crunch. This version adds a twist with toasted nuts and a hint of sea salt for a gourmet touch.


🍫 Caramel Chocolate Crunch Bars (Unique Recipe)

🧾 Ingredients

For the Crunch Base:

  • 2 cups crispy rice cereal

  • 1 cup crushed digestive biscuits (or graham crackers)

  • ½ cup roasted almonds or peanuts (roughly chopped)

  • ½ cup unsalted butter

  • ½ cup brown sugar

  • ¼ cup honey or golden syrup

For the Caramel Layer:

  • 1 cup soft caramel candies (or homemade caramel)

  • 2 tablespoons heavy cream

  • ¼ teaspoon sea salt (optional, for salted caramel twist)

For the Chocolate Topping:

  • 1½ cups milk chocolate (or dark chocolate if preferred)

  • 1 teaspoon coconut oil or butter


🔪 Instructions

Step 1: Prepare the Crunch Base

Start by lightly greasing or lining a rectangular baking tray (around 9×9 inches) with parchment paper. This will make removing the bars easier later.

In a large mixing bowl, combine the crispy rice cereal, crushed biscuits, and chopped nuts. Mix well so the textures are evenly distributed.

In a saucepan over medium heat, melt the butter. Add the brown sugar and honey, stirring continuously until the mixture starts to bubble slightly and becomes smooth. This should take about 2–3 minutes.

Carefully pour the hot mixture over the dry ingredients. Stir quickly to coat everything evenly. While still warm, press the mixture firmly into the prepared tray using the back of a spoon or a spatula. Make sure it’s tightly packed—this helps the bars hold together.

Place the tray in the fridge for about 15–20 minutes to set.


Step 2: Make the Caramel Layer

In a heatproof bowl, combine the caramel candies and heavy cream. Melt them together using a microwave (in 20–30 second bursts, stirring each time) or over a double boiler.

Once melted and smooth, stir in the sea salt if you want that sweet-salty contrast.

Remove the chilled base from the fridge and pour the caramel evenly over it. Use a spatula to spread it out into a smooth layer.

Return the tray to the fridge again for about 20–30 minutes, or until the caramel firms up slightly.


Step 3: Add the Chocolate Topping

Melt the chocolate along with the coconut oil in a heatproof bowl. You can use a microwave or double boiler method. Stir until glossy and smooth.

Pour the melted chocolate over the caramel layer, spreading it evenly to cover the entire surface.

For an extra decorative touch, you can sprinkle a pinch of sea salt, crushed nuts, or even drizzle white chocolate on top.


Step 4: Chill and Set

Place the tray back into the fridge for at least 1 hour, or until everything is fully set.

Once firm, remove from the tray using the parchment paper and place on a cutting board. Use a sharp knife to cut into bars or squares.


✨ Tips for the Perfect Crunch Bars

  • Balance textures: The mix of crispy cereal, crunchy nuts, and smooth caramel makes these bars irresistible. Don’t skip the nuts unless you need a nut-free version.

  • Use good-quality chocolate: Since chocolate is the top layer, its flavor really stands out.

  • Don’t overheat caramel: Melt gently to avoid burning or making it too thick.

  • Clean cuts: Dip your knife in warm water before slicing for neat edges.


🌟 Optional Variations

  • Peanut Butter Twist: Add 2 tablespoons of peanut butter into the caramel mixture for a nutty richness.

  • Dark Chocolate Lovers: Swap milk chocolate with dark chocolate for a deeper flavor.

  • Extra Crunch: Add crushed pretzels into the base for a salty crunch.

  • Coconut Delight: Mix shredded coconut into the base for a tropical touch.


🍽️ Serving & Storage

Serve these bars chilled or at room temperature. They’re perfect as a dessert, tea-time snack, or even a homemade gift.

Store in an airtight container:

  • In the fridge: up to 1 week

  • At room temperature (cool climate): 2–3 days

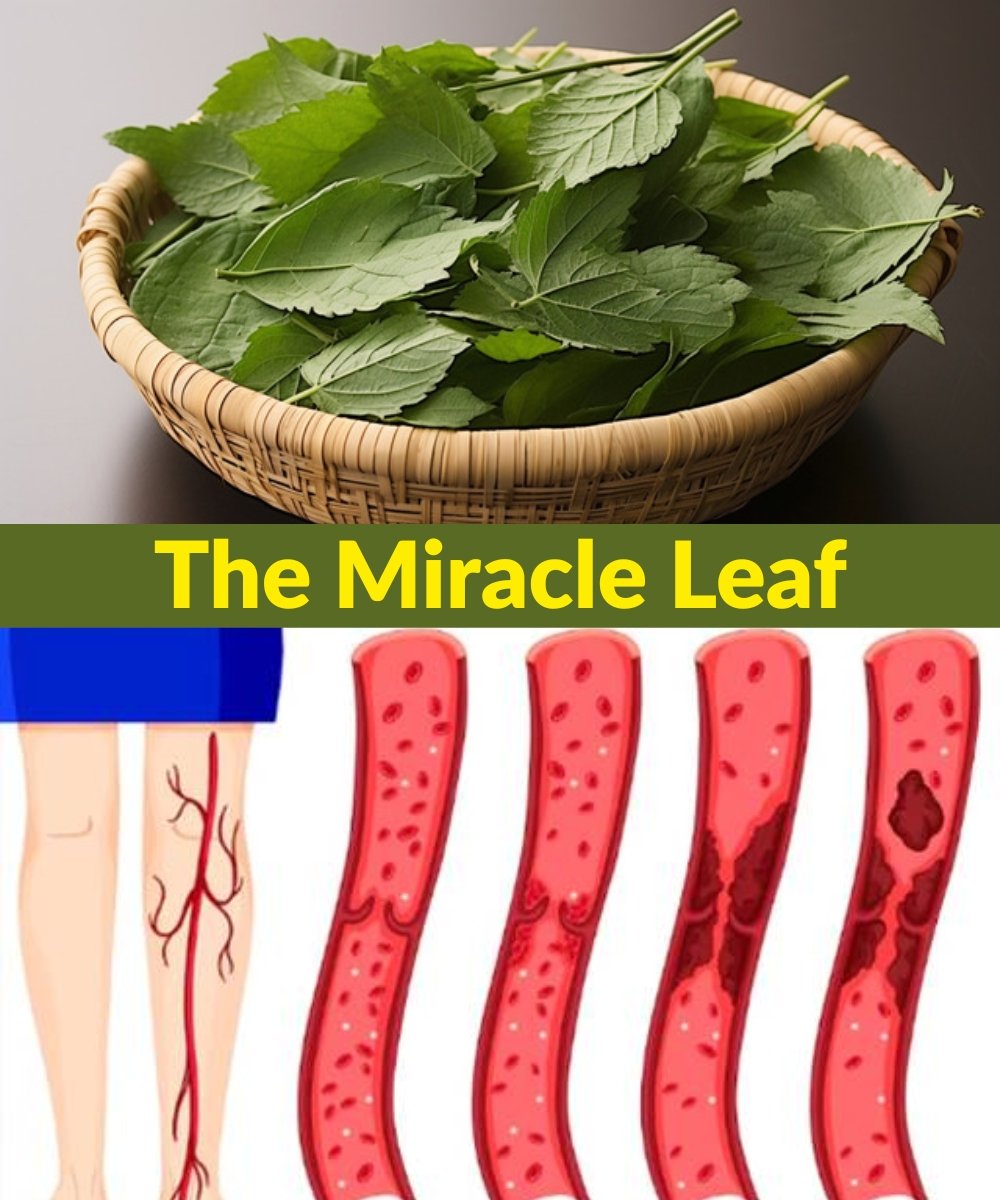
Leaf Reduces Diabetes, Bl00d Pressure, Ends Body Pain, Cholesterol and Eliminates Poor Circulation

Nature has always provided powerful remedies that support the body’s healing processes. Many traditional cultures rely on simple plant-based remedies to help maintain healthy blood sugar levels, regulate blood pressure, reduce body pain, improve cholesterol balance, and boost circulation. One of the most praised natural ingredients used for these purposes is the leaf of the Bay Leaf.

Often used as a flavoring agent in soups and stews, bay leaves are much more than a kitchen spice. They contain beneficial compounds, antioxidants, vitamins, and minerals that can help support overall health. When prepared as a simple herbal infusion, bay leaves may assist the body in managing several common health concerns such as diabetes, poor circulation, inflammation, and high cholesterol.

Below is a natural home remedy using bay leaves that many people enjoy as a gentle wellness drink.


Why Bay Leaves Are So Powerful

Bay leaves contain plant compounds such as flavonoids, tannins, and essential oils. These substances help the body fight inflammation and oxidative stress. Oxidative stress is one of the factors linked with diabetes, heart disease, and poor circulation.

Bay leaves also contain small amounts of vitamin A, vitamin C, calcium, iron, potassium, and magnesium. These nutrients contribute to healthy blood vessels and help support the body’s metabolism.

Many traditional herbal practices recommend bay leaf tea to assist with:

  • Supporting healthy blood sugar levels

  • Helping regulate blood pressure

  • Reducing inflammation and body pain

  • Supporting cholesterol balance

  • Improving circulation

  • Supporting digestion

While this natural remedy is not a cure for medical conditions, it can be a supportive addition to a healthy lifestyle.


Bay Leaf Healing Drink Recipe

Ingredients

  • 5 to 7 dried bay leaves

  • 2 cups water

  • 1 teaspoon fresh lemon juice (optional)

  • 1 teaspoon honey (optional)


Instructions

  1. Pour the water into a small pot and bring it to a gentle boil.

  2. Add the dried bay leaves to the boiling water.

  3. Reduce the heat and allow the leaves to simmer for about 10 minutes.

  4. Turn off the heat and let the tea steep for another 5 minutes.

  5. Strain the liquid into a cup to remove the leaves.

  6. Add lemon juice or honey if desired for flavor.

  7. Drink the tea warm.


How to Use

For best results, many people drink one cup in the morning on an empty stomach and another cup in the evening. This routine can be followed for about two weeks, after which a short break is recommended before repeating.

Consistency is key when using natural remedies. The benefits are usually gradual and work best when combined with healthy eating and regular movement.


Potential Health Benefits

1. May Support Healthy Blood Sugar

Some studies suggest that compounds in bay leaves may help improve insulin sensitivity and support balanced blood sugar levels. Drinking bay leaf tea regularly may help reduce sudden spikes in blood glucose when paired with a balanced diet.


2. Helps Support Blood Pressure Balance

Bay leaves contain potassium and antioxidants that may support healthy blood vessel function. These nutrients help relax blood vessels, which may assist the body in maintaining normal blood pressure levels.


3. May Help Lower Cholesterol

Certain plant compounds in bay leaves may help reduce LDL cholesterol (often called “bad cholesterol”) while supporting HDL cholesterol (“good cholesterol”). Maintaining balanced cholesterol levels is important for heart health and circulation.


4. Supports Better Circulation

Good circulation allows oxygen and nutrients to reach every part of the body. Bay leaf tea may help stimulate blood flow and improve circulation, which can help reduce fatigue, cold extremities, and feelings of heaviness in the legs.


5. Helps Reduce Body Pain and Inflammation

Bay leaves contain natural anti-inflammatory compounds that may help reduce muscle discomfort and joint stiffness. Many people find herbal infusions helpful for relieving mild aches and supporting recovery after physical activity.


6. Supports Digestion and Detox

Bay leaf tea may stimulate digestive enzymes and support healthy digestion. It may also help the body eliminate toxins by supporting liver function and improving metabolism.

Extra Tip for Stronger Benefits

For an even more powerful drink, some people combine bay leaves with Cinnamon or Ginger. These ingredients are also known for supporting healthy blood sugar levels and improving circulation.

Simply add a small cinnamon stick or a few slices of fresh ginger during the boiling process for added flavor and benefits.


Important Precautions

Although bay leaf tea is generally safe in moderate amounts, it is important to keep a few precautions in mind:

  • People taking medication for diabetes or blood pressure should consult a healthcare professional before using herbal remedies regularly.

  • Pregnant women should avoid consuming large amounts of bay leaf tea.

  • Do not chew whole bay leaves, as they remain stiff even after cooking. Always strain them from the tea.

Natural remedies work best as supportive practices rather than replacements for professional medical care.

Final Thoughts

Simple herbal drinks made from ingredients like bay leaves can be a gentle way to support overall health. This easy recipe combines tradition with natural nutrition to help the body maintain balance. When combined with a healthy diet, proper hydration, physical activity, and adequate sleep, bay leaf tea may support healthy blood sugar levels, balanced cholesterol, better circulation, and reduced inflammation.

As a Heart Surgeon, I’m WARNING: THIS Common Pill Weakens Senior Hearts

As people age, protecting heart health becomes more important than ever. Many seniors carefully manage their diets, stay active, and follow their doctor’s instructions to keep their hearts strong. However, there is one surprising factor that can quietly affect heart health in older adults: a very common pain-relief pill. Many people take it regularly without realizing that long-term or improper use may put additional stress on the heart, especially for seniors.

Pain relief medications are widely used to manage arthritis, muscle aches, and everyday discomfort. Among the most common are nonsteroidal anti-inflammatory drugs (NSAIDs), such as ibuprofen, naproxen, and certain prescription pain relievers. While these medications can be effective for reducing inflammation and relieving pain, research has shown that they may increase cardiovascular risks in some individuals, particularly older adults.

One of the reasons these pills can affect the heart is their impact on blood pressure. NSAIDs can cause the body to retain sodium and fluids, which may lead to increased blood pressure. For seniors who already struggle with hypertension or heart disease, this extra strain can place additional stress on the heart. Over time, this pressure can contribute to worsening heart function.

Another concern involves how these medications influence blood vessels. NSAIDs may interfere with substances in the body that help blood vessels relax and maintain healthy circulation. When blood vessels become more constricted, the heart has to work harder to pump blood through the body. In older adults whose cardiovascular systems may already be less flexible, this can create a dangerous situation.

Fluid retention is another effect that can be problematic for seniors. These medications can cause the body to hold onto extra water, which may lead to swelling in the legs, ankles, or feet. While swelling might seem like a minor issue, it can sometimes be a sign that the heart is struggling to keep up with the body’s demands. For individuals with existing heart conditions, this added fluid burden may increase the risk of heart failure symptoms.

It is important to understand that the risk is not the same for everyone. Many people use these medications safely when taken occasionally and at the recommended doses. Problems are more likely to occur when the medications are taken frequently, in high doses, or for long periods of time without medical supervision.

Seniors are particularly vulnerable because aging changes how the body processes medications. The kidneys and liver may work more slowly, which can cause drugs to stay in the system longer than expected. This increases the likelihood of side effects and interactions with other medications that seniors may already be taking for conditions such as high blood pressure, diabetes, or heart disease.

Certain warning signs should never be ignored. Seniors who take common pain-relief pills should pay attention to symptoms such as sudden swelling in the legs, shortness of breath, unexplained fatigue, chest discomfort, or rapid weight gain due to fluid retention. These signs may indicate that the heart is under stress and should be evaluated by a healthcare professional.

Fortunately, there are safer ways for seniors to manage pain while protecting heart health. Doctors often recommend starting with non-medication strategies when possible. Gentle physical activity, stretching exercises, physical therapy, and heat or cold therapy can help reduce pain and stiffness without placing additional strain on the heart.

Diet also plays a role in controlling inflammation and discomfort. Foods rich in antioxidants and anti-inflammatory compounds, such as leafy greens, berries, olive oil, nuts, and fatty fish, may help reduce chronic inflammation that contributes to joint pain. Staying well hydrated and maintaining a healthy weight can also reduce stress on joints and the cardiovascular system.

For those who do need medication, it is essential to consult a doctor before taking any pain relievers regularly. Healthcare professionals can evaluate a person’s medical history, current medications, and heart risk factors to determine which treatments are safest. In some cases, alternative medications or lower doses may be recommended to minimize risk.

Another important step is carefully reading medication labels. Many over-the-counter cold or flu remedies also contain NSAIDs, which means a person could accidentally take more than intended. Seniors should be particularly cautious about combining medications without guidance from a healthcare provider.

Heart health in later life depends on many factors, including lifestyle, diet, and medical care. While common pain-relief pills can be helpful when used responsibly, they should never be taken casually or for extended periods without professional advice—especially for older adults.

The key message is awareness. Seniors and their families should understand that even everyday medications can carry risks when used improperly. By staying informed, consulting healthcare providers, and choosing safer pain-management strategies, it is possible to protect both comfort and cardiovascular health.

Proven Health Benefits of Beets and Fermented Beets

Beets, also known as beetroot, have been valued for centuries as both a food and a natural remedy. Their deep red color, earthy flavor, and impressive nutritional profile make them a powerful addition to a healthy diet. Today, nutrition experts and researchers continue to highlight the many health benefits of beets and fermented beets. From supporting heart health to improving digestion, these vibrant root vegetables offer a wide range of advantages for the body.

In particular, fermented beets—often prepared through a natural fermentation process—can provide even greater health benefits. Fermentation enhances the nutritional value of foods while introducing beneficial probiotics that support gut health.

Nutritional Powerhouse

Beetroot is packed with essential vitamins and minerals. It contains vitamin C, potassium, iron, folate, magnesium, and fiber. These nutrients help support the immune system, improve circulation, and maintain overall health.

Beets are also rich in plant compounds called antioxidants. These antioxidants help protect the body from oxidative stress caused by free radicals. Over time, oxidative stress can damage cells and contribute to aging and chronic diseases.

One of the most important compounds found in beets is betalains, which give beets their deep red color. Betalains have strong anti-inflammatory and detoxifying properties that help protect the body from harmful toxins.

Supports Heart Health

One of the most well-known benefits of beets is their positive effect on heart health. Beets are rich in natural nitrates. When consumed, these nitrates are converted into nitric oxide in the body.

Nitric oxide helps relax and widen blood vessels, which improves blood flow and reduces blood pressure. Studies suggest that drinking beet juice or eating beets regularly may help lower the risk of heart disease and support overall cardiovascular health.

Fermented beets may provide an additional benefit because fermentation can make nutrients easier for the body to absorb.

Improves Digestion and Gut Health

Fermented foods are known for their powerful digestive benefits. During fermentation, beneficial bacteria grow and create probiotics that support a healthy gut microbiome.

Fermented beets are rich in probiotics that help balance the bacteria in the digestive system. A healthy gut microbiome plays an important role in digestion, immune function, and even mental health.

Consuming fermented beets regularly may help reduce bloating, improve digestion, and support better nutrient absorption.

Supports Liver Detoxification

Beets have long been associated with natural detoxification. The antioxidants and plant compounds found in Beetroot support the liver’s ability to remove toxins from the body.

The pigment betalain helps stimulate the liver’s detoxification enzymes. These enzymes help break down toxins and eliminate them more efficiently.

Because of these properties, beets are often included in detox diets and natural cleansing programs.

Boosts Energy and Athletic Performance

Another interesting benefit of beets is their ability to support physical performance. The natural nitrates found in beets improve oxygen delivery to muscles during exercise.

Several studies have shown that athletes who consume beet juice before workouts may experience improved endurance and stamina. This is because nitric oxide helps muscles use oxygen more efficiently.

For people who exercise regularly or simply want more natural energy, adding beets to their diet may provide a noticeable boost.

Helps Reduce Inflammation

Chronic inflammation is linked to many health problems, including heart disease, arthritis, and certain metabolic disorders. The antioxidants in beets help fight inflammation throughout the body.

The betalain pigments found in Beetroot are particularly known for their anti-inflammatory effects. Regular consumption of beets may help reduce inflammation and support long-term health.

Fermented beets may enhance these effects because fermentation can increase the availability of beneficial compounds.

Supports Brain Function

Improved blood flow does not only benefit the heart—it also supports brain health. Nitric oxide produced from the nitrates in beets may help increase blood flow to the brain.

Better circulation can help deliver more oxygen and nutrients to brain cells. This may support memory, concentration, and cognitive function.

Some researchers suggest that beet consumption may be especially beneficial for older adults because improved blood flow may help support brain health as people age.

Easy Fermented Beets Recipe

Making fermented beets at home is simple and requires only a few ingredients.

Ingredients

  • 3 medium fresh beets

  • 2 cups filtered water

  • 1 tablespoon sea salt

  • 2 cloves garlic (optional)

  • 1 small piece fresh ginger (optional)

Instructions

First, wash and peel the beets. Cut them into small cubes or thin slices.

Next, dissolve the sea salt in the filtered water to create a salt brine.

Place the beet pieces into a clean glass jar. Add garlic and ginger if desired for extra flavor.

Pour the salt brine over the beets until they are completely submerged. Leave about one inch of space at the top of the jar.

Close the jar loosely and leave it at room temperature for three to five days. During this time, natural fermentation will occur as beneficial bacteria grow.

Once the beets develop a slightly sour flavor, they are ready to eat. Store the jar in the refrigerator to slow the fermentation process.

Final Thoughts

Both fresh and fermented beets offer powerful health benefits. Their rich nutrient content, antioxidants, and natural nitrates support heart health, digestion, detoxification, and overall well-being.

Adding Beetroot to your daily diet—whether roasted, juiced, or fermented—can be a simple and delicious way to improve your health naturally. Fermented beets, in particular, combine the nutritional strength of beets with the gut-supporting benefits of probiotics, making them a valuable addition to a balanced diet.

Nostradamus Made Chilling ‘Seven Month’ WW3 Prediction For 2026

the famous 16th-century astrologer and seer, continues to fascinate people centuries after his death. His book, Les Prophéties, contains hundreds of mysterious quatrains—short, cryptic poems that many believe predict future events. Over the years, his writings have been linked to numerous historical moments, from wars to political upheavals. Recently, some interpreters claim that one of his predictions hints at a frightening possibility: a seven-month global conflict around the year 2026 that some associate with World War III.

While these interpretations remain controversial, they have captured the attention of historians, researchers, and curious readers around the world.

The Mysterious Quatrains

In 1555, Nostradamus published his collection of prophecies written in poetic quatrains. These writings were intentionally vague, combining symbols, metaphors, and references to astrology. Because of this cryptic style, many people believe his predictions can be interpreted in different ways depending on the historical context.

Some modern analysts claim that one of these quatrains hints at a devastating war lasting roughly seven months. According to their interpretation, the prophecy describes a period of intense global conflict involving multiple powerful nations, followed by destruction and widespread fear.

The verses mention violent clashes, burning cities, and political turmoil. Supporters of the theory argue that these descriptions resemble the type of devastation associated with modern warfare.

Why People Link It to 2026

Interest in Nostradamus’ predictions often resurfaces during times of global tension. Recently, discussions about geopolitics and international conflicts have led some researchers to revisit his writings and speculate about their connection to the present era.

A few interpreters believe certain astrological clues in his work point to the mid-2020s, with 2026 being highlighted as a critical year. According to their reading, the prophecy could refer to a conflict lasting seven months that dramatically reshapes global power structures.

However, historians emphasize that Nostradamus never mentioned specific modern years such as 2026. Instead, the dating comes from modern attempts to align his poetic descriptions with current events.

The “Seven Month War” Theory

The idea of a seven-month war has sparked intense debate online. Some believe Nostradamus was describing a short but extremely destructive global conflict involving advanced technology and powerful weapons.

Supporters of the theory argue that modern warfare could escalate quickly and cause massive damage in a relatively short period. They suggest that a conflict lasting seven months could still have catastrophic consequences for the global economy, environment, and political stability.

Others think the prophecy might refer not to a world war but to a regional conflict that escalates rapidly before ending within months.

Because Nostradamus used symbolic language, interpretations vary widely. One person might see a prediction of global war, while another might interpret the same passage as describing natural disasters or political revolutions.

Skeptics and Historical Reality

Many historians and scholars remain skeptical about linking Nostradamus’ writings to specific events. Experts note that his quatrains are so vague that they can often be interpreted to fit many different situations after the fact.

For example, Nostradamus has been retroactively credited with predicting events such as the rise of dictators, major wars, and disasters. Yet critics argue that these connections are usually made only after the events have already happened.

Scholars studying Nostradamus point out that his work reflects the fears and uncertainties of the 16th century. Europe during his lifetime faced plague outbreaks, political instability, and constant warfare, which influenced the imagery found in his writings.

Why Nostradamus Still Fascinates People

Despite skepticism from historians, Nostradamus remains one of the most famous prophetic figures in history. His mysterious style invites endless interpretation, allowing each generation to see its own anxieties reflected in his words.

The idea that someone centuries ago could foresee modern events continues to intrigue people. During times of uncertainty—whether political, economic, or environmental—many individuals search for clues about the future in ancient texts and prophecies.

This fascination explains why discussions about Nostradamus frequently resurface in the media whenever global tensions rise.

Looking at Predictions with Caution

While the idea of a predicted world war in 2026 is dramatic, most experts urge caution when interpreting Nostradamus’ writings. Predictions attributed to him are often the result of creative translation and speculation rather than clear historical evidence.

Prophecies are rarely precise, and history has shown that human actions, diplomacy, and international cooperation can change the course of events. Rather than focusing solely on ominous predictions, many scholars encourage people to view Nostradamus’ work as a cultural and historical curiosity.

Final Thoughts

The supposed seven-month war prediction attributed to Nostradamus is another example of how his cryptic verses continue to spark imagination and debate. Some see them as eerie glimpses into the future, while others view them as poetic reflections of the fears of his time.

Whether one believes in prophecy or not, Nostradamus’ writings remain a fascinating part of history. They remind us that people across centuries have always wondered about the future—and have searched for meaning in mysterious words and symbols.

Natural Anti-Wrinkle Cream: The Simple Homemade Recipe That Helps Smooth Wrinkles and Rejuvenate Your Skin

Taking care of your skin does not always require expensive treatments or complicated skincare routines. In fact, many of the most effective beauty solutions can be found right in your kitchen. Natural ingredients have been used for centuries to nourish, hydrate, and protect the skin. If you are looking for a gentle and affordable way to help reduce the appearance of wrinkles, this simple homemade anti-wrinkle cream may be exactly what you need.

This natural cream combines ingredients known for their moisturizing and skin-repairing properties. When used regularly, it can help improve skin texture, boost hydration, and give your face a more youthful and radiant appearance. Best of all, it contains no harsh chemicals or artificial additives, making it suitable for most skin types.

Why Natural Ingredients Work for Skin

As we age, our skin gradually loses collagen and elasticity. This can lead to fine lines, wrinkles, and dryness. Environmental factors such as sun exposure, pollution, and stress can also accelerate the aging process.

Natural ingredients often contain vitamins, antioxidants, and healthy fats that nourish the skin deeply. They support skin repair and help maintain moisture, which can make wrinkles appear softer and less visible.

For example, ingredients like oils, honey, and plant extracts are packed with nutrients that support healthy skin cells. These components can improve hydration and help the skin maintain a smooth and glowing look.

Ingredients for the Homemade Anti-Wrinkle Cream

To prepare this natural anti-aging cream, you will need only a few simple ingredients:

  • 2 tablespoons coconut oil

  • 1 tablespoon aloe vera gel

  • 1 teaspoon honey

  • 5 drops vitamin E oil

  • 3–4 drops essential oil (optional, such as lavender or rose)

These ingredients work together to hydrate the skin, support collagen production, and provide antioxidant protection.

Benefits of Each Ingredient

Coconut Oil

Coconut oil is rich in fatty acids that deeply moisturize the skin. It helps restore the skin barrier and prevents dryness, which can make wrinkles appear more noticeable. It also contains antioxidants that help protect the skin from environmental damage.

Aloe Vera Gel

Aloe vera is widely known for its soothing and healing properties. It hydrates the skin while promoting cell regeneration. Aloe vera may also help improve skin elasticity and reduce the appearance of fine lines over time.

Honey

Honey is a natural humectant, meaning it attracts and retains moisture in the skin. This helps keep the skin soft and plump. Honey also has antibacterial and antioxidant properties that can support overall skin health.

Vitamin E Oil

Vitamin E is a powerful antioxidant that helps protect the skin from free radicals. It also supports skin repair and may help reduce the visible signs of aging, including fine lines and dryness.

Essential Oils (Optional)

Essential oils like lavender or rose can add a pleasant scent while providing additional skin benefits. Lavender is known for its calming and soothing effects, while rose oil may help improve skin tone and texture.

How to Prepare the Cream

Making this homemade anti-wrinkle cream is quick and simple. Follow these steps:

  1. In a small bowl, place the coconut oil and allow it to soften if it is solid.

  2. Add the aloe vera gel and mix well until the texture becomes smooth and creamy.

  3. Stir in the honey and continue mixing until all ingredients are well combined.

  4. Add the vitamin E oil and optional essential oil.

  5. Mix everything thoroughly until you obtain a light, creamy consistency.

  6. Transfer the mixture into a small clean glass jar with a lid.

Your natural anti-wrinkle cream is now ready to use.

How to Use the Cream

For best results, apply the cream daily, preferably at night before going to bed.

Start by washing your face with a gentle cleanser and patting your skin dry. Take a small amount of the cream and gently massage it into your face using upward circular motions. Pay special attention to areas where wrinkles commonly appear, such as around the eyes, forehead, and mouth.

Allow the cream to absorb into the skin overnight. The nourishing ingredients will work while you sleep, helping to hydrate and rejuvenate your skin.

Tips for Better Results

Consistency is key when it comes to natural skincare. Using this cream regularly can help improve skin hydration and texture over time. However, it is also important to support your skin from the inside.

Here are a few additional tips that may help maintain youthful skin:

  • Drink plenty of water to keep your skin hydrated.

  • Eat a balanced diet rich in fruits and vegetables.

  • Protect your skin from excessive sun exposure.

  • Get enough sleep to allow your body to repair and regenerate.

Combining healthy lifestyle habits with natural skincare can make a noticeable difference in how your skin looks and feels.

Storage and Shelf Life

Because this cream contains natural ingredients and no preservatives, it is best stored in a cool place. You can keep it in the refrigerator to extend its freshness.

The cream should remain usable for about one to two weeks. If you notice any change in smell or texture, it is best to prepare a fresh batch.

Final Thoughts

Creating your own natural anti-wrinkle cream at home is a simple and rewarding way to care for your skin. With just a few nourishing ingredients, you can make a gentle moisturizer that supports hydration and helps soften the appearance of fine lines.

While natural remedies may not completely erase wrinkles, they can play an important role in maintaining healthy, glowing skin. By using this homemade cream regularly and following a healthy lifestyle, you may notice your skin becoming smoother, softer, and more refreshed over time.

Add this to the water. Even when you don’t clean the floor in a week, it will remain clean without any dust

Keeping floors clean can feel like a never-ending chore. Dust settles quickly, footprints appear within hours, and before you know it, the shine you worked so hard to achieve disappears. Many people spend hours sweeping, vacuuming, and mopping only to see dust return the very next day. But what if a simple trick could help your floors stay cleaner for much longer?

There is a surprisingly effective method that many home cleaning enthusiasts swear by. By adding just a couple of simple ingredients to your mop water, you can help reduce dust buildup and keep your floors looking fresh for days. This trick works on most hard surfaces such as tile, laminate, and sealed wood floors.

Why Floors Get Dusty So Quickly

Before understanding the solution, it helps to know why dust keeps returning. Dust in your home is made up of tiny particles such as dirt, fabric fibers, pet dander, pollen, and even microscopic skin cells. These particles float in the air and eventually settle on surfaces like floors and furniture.

When you mop with plain water, it removes some dirt, but it does little to prevent new dust from sticking again. In fact, plain water can sometimes leave a residue that attracts dust faster. That is why adding the right ingredients can make a big difference.

The Simple Dust-Repelling Floor Cleaner

This natural cleaning mixture is easy to prepare and uses ingredients that many people already have at home. It not only cleans your floors but also helps repel dust and leaves a pleasant fresh scent.

Ingredients

  • 1 bucket of warm water

  • 1 tablespoon white vinegar

  • 1 teaspoon liquid dish soap

  • 1 tablespoon fabric softener

Why These Ingredients Work

Each ingredient plays a specific role in keeping your floors cleaner for longer.

White vinegar is a powerful natural cleaner. It helps dissolve grease, remove grime, and kill many bacteria. Vinegar also breaks down residue that can trap dust on the floor.

Liquid dish soap helps lift dirt and sticky particles from the surface. Even a small amount can break down oils and grime that regular water might leave behind.

Fabric softener is the secret ingredient in this trick. Fabric softeners contain anti-static compounds that help repel dust. When used in small amounts on floors, they reduce static electricity, which is one of the reasons dust clings to surfaces.

How to Use the Mixture

Using this cleaning solution is simple and only takes a few minutes.

  1. Fill a bucket with warm water.

  2. Add one tablespoon of white vinegar.

  3. Add one teaspoon of liquid dish soap.

  4. Add one tablespoon of fabric softener.

  5. Mix everything gently until combined.

  6. Dip your mop into the solution and wring out excess water.

  7. Mop the floor as you normally would.

After mopping, allow the floor to air dry. You will notice that the surface feels smoother and looks shinier.

What Makes This Trick So Effective

Once the floor dries, the fabric softener leaves behind a very light anti-static layer. This layer helps prevent dust particles from sticking to the floor. As a result, dust tends to stay airborne longer until it is captured by air filters or settles somewhere else.

This means your floors remain cleaner for longer periods. Many people notice that even after several days, the floor still looks tidy and fresh.

Extra Tips to Keep Floors Cleaner Longer

Although this trick is helpful, combining it with a few simple habits can keep your floors spotless for even longer.

Remove shoes at the door. Shoes bring dirt, dust, and outdoor debris into your home. Leaving them near the entrance reduces the amount of dirt that reaches your floors.

Use entry mats. Placing doormats inside and outside entrances helps trap dust before it spreads through the house.

Clean from top to bottom. Dust furniture and shelves before cleaning floors so particles fall down and can be removed during mopping.

Use microfiber mops. Microfiber materials are excellent at trapping dust and dirt compared to traditional cotton mops.

Improve air circulation. Good airflow and clean air filters can reduce airborne dust in your home.

Surfaces Where This Method Works Best

This mixture works well on many types of hard flooring, including:

  • Ceramic tile

  • Vinyl floors

  • Laminate flooring

  • Sealed hardwood floors

  • Stone surfaces

However, it is always wise to test a small hidden area first, especially if you have delicate flooring.

A Fresh Home With Less Effort

Cleaning your home does not always require expensive products or complicated routines. Sometimes the simplest tricks provide the best results. By adding a small amount of vinegar, dish soap, and fabric softener to your mop water, you can help your floors stay cleaner and dust-free for much longer.

The result is a home that looks tidy, smells fresh, and requires less daily effort to maintain. Instead of constantly worrying about dust building up, you can enjoy cleaner floors for days at a time.

Give this easy cleaning trick a try the next time you mop your floors. You may be surprised by how effective such a simple solution can be.

7 walking mistakes that are ruining your health after 50

Walking is one of the simplest and most powerful exercises for people over 50. It improves heart health, strengthens muscles, boosts mood, and supports joint mobility. Many doctors recommend daily walking because it is gentle on the body while still providing excellent physical benefits. However, not all walking habits are healthy. In fact, some common mistakes can reduce the benefits or even lead to pain and injury.

If you are over 50 and rely on walking as your main form of exercise, avoiding these mistakes can help protect your joints, improve your posture, and maximize the health benefits of every step you take.

1. Wearing the Wrong Shoes

One of the biggest walking mistakes people make is wearing improper footwear. Shoes that lack support, cushioning, or proper fit can cause foot pain, knee strain, and even back problems.

As we age, the natural cushioning in our feet becomes thinner. This means supportive shoes become even more important. Walking shoes should have good arch support, shock absorption, and enough room for your toes to move comfortably.

Old or worn-out shoes can also be harmful. Experts recommend replacing walking shoes every 500–800 kilometers of use to maintain proper support.

2. Walking With Poor Posture

Many people walk while slouching or looking down at the ground. Poor posture can strain the neck, shoulders, and lower back.

Good walking posture keeps your body aligned and reduces unnecessary pressure on joints. Try to keep your head up, shoulders relaxed, and back straight. Your gaze should be forward, not downward.

When posture improves, breathing becomes easier and muscles work more efficiently, allowing you to walk longer without discomfort.

3. Taking Steps That Are Too Long

Long strides may seem like a good way to walk faster, but they often put excessive pressure on the hips and knees. Overstriding can lead to joint pain, especially for adults over 50.

A healthier approach is to take shorter, natural steps while maintaining a steady rhythm. This keeps the body balanced and reduces stress on the joints.

Shorter steps also allow your feet to land more naturally beneath your body, improving stability and lowering the risk of falls.

4. Walking Too Fast Too Soon

Many people start walking quickly without giving their body time to warm up. This sudden intensity can increase the risk of muscle strain, joint discomfort, or fatigue.

A better strategy is to start slowly for the first five to ten minutes. This warm-up period helps increase blood flow to muscles and prepares the body for activity.

After warming up, you can gradually increase your pace. Ending your walk with a slower pace is also beneficial because it allows the heart rate to return to normal gradually.

5. Not Using Your Arms

Walking should involve the entire body, not just the legs. Many people keep their arms stiff at their sides or barely move them at all.

Proper arm movement helps maintain balance and increases the intensity of the exercise. Bend your arms at about a 90-degree angle and swing them naturally as you walk.

Arm movement can also help improve rhythm and encourage a more efficient stride.

6. Skipping Strength and Flexibility Work

Walking is excellent for cardiovascular health, but it does not strengthen every muscle in the body. If walking is the only activity you do, certain muscles may weaken over time.

Adding simple strength exercises and stretching to your routine can greatly improve walking performance. Strengthening the legs, hips, and core helps support the joints and improves balance.

Flexibility exercises also help reduce stiffness, which becomes more common after age 50.

7. Walking the Same Route Every Day

Walking the exact same route at the same pace every day can limit physical progress. The body adapts quickly, and the workout becomes less effective over time.

Changing your route, adding gentle hills, or varying your pace can challenge different muscles and improve endurance. Even small variations, such as alternating between faster and slower walking intervals, can make a big difference.

New routes also keep walking enjoyable and mentally stimulating.

Final Thoughts

Walking is one of the best exercises for maintaining health after 50, but small mistakes can reduce its benefits. By paying attention to posture, footwear, pace, and overall movement, you can transform a simple walk into a powerful health routine.

The key is to walk mindfully and listen to your body. Proper technique helps protect joints, improve circulation, and strengthen muscles over time.