Classic Pot Roast with Carrots and Potatoes

There are few dishes as comforting and deeply satisfying as a classic pot roast. It’s the kind of meal that feels like home—warm, slow-cooked, tender, and full of flavors that come together effortlessly in one pot. This version stays true to tradition while adding just enough thoughtful touches to make it stand out. We’ll build layers of flavor slowly—browning the meat, caramelizing the onions, and letting the vegetables absorb all those savory juices. It’s the kind of recipe that fills your kitchen with aromas so cozy it feels like a hug.

Why This Pot Roast Is Special

This recipe focuses on creating unmatched tenderness and richness. Using a well-marbled chuck roast ensures the meat becomes incredibly soft as it braises, and the slow cooking turns carrots and potatoes into buttery, flavor-soaked bites. Fresh herbs, garlic, and a touch of Worcestershire deepen the flavor, giving the broth a silky, savory finish. The key is patience—this is slow food meant to be enjoyed slowly.

Ingredients

For the Pot Roast:

  • 3 to 4 lb beef chuck roast

  • 2 tbsp olive oil

  • 1 large onion, sliced

  • 4 garlic cloves, minced

  • 4 carrots, peeled and cut into thick chunks

  • 4 russet potatoes, peeled and cut into large chunks

  • 2 cups beef broth

  • 1 cup water

  • 2 tbsp tomato paste

  • 1 tbsp Worcestershire sauce

  • 1 tsp dried thyme or 2 sprigs fresh

  • 1 tsp dried rosemary or 1 sprig fresh

  • 2 bay leaves

  • Salt & pepper to taste

Step-by-Step Instructions

1. Season and Sear the Roast

Start by generously seasoning the roast with salt and freshly cracked black pepper on all sides. Don’t be shy—this seasoning will help create the savory crust that gives pot roast its iconic flavor.

Heat the olive oil in a heavy Dutch oven or deep cast iron pot over medium-high heat. When the oil is shimmering, carefully place the roast into the pot. Sear each side until deep brown, about 4–5 minutes per side. Browning isn’t just for color—it develops a rich, caramelized flavor base that defines the entire dish.

Remove the roast and set it aside.

2. Build the Flavor Base

In the same pot, add the sliced onions. Sauté them slowly, letting them soften and pick up the browned bits on the bottom. After about 5 minutes, stir in the garlic and cook just until fragrant—about 1 minute.

Add tomato paste and stir for another minute. This helps intensify the broth’s richness.

3. Add Liquid and Herbs

Pour in the beef broth and water, scraping the bottom with a wooden spoon to lift all the flavor. Add Worcestershire sauce, thyme, rosemary, and bay leaves. Stir and bring to a light simmer.

Return the roast to the pot, nestling it into the broth. The liquid should come halfway up the meat—not fully submerge it. This ensures proper braising rather than boiling.

4. Slow Cook to Perfection

Cover the pot with a lid and lower heat to maintain a gentle simmer. Alternatively, place the pot in a 300°F (150°C) oven.

Let the roast cook for 2 hours.

After 2 hours, add the carrots and potatoes around the roast. Cook for another 1 to 1.5 hours, or until the meat is fall-apart tender and the vegetables are soft.

5. Final Touches

Remove the bay leaves and herb stems. Taste the broth and adjust with salt and pepper as needed.

For a thicker gravy, remove the roast and vegetables, then simmer the liquid uncovered for 10 minutes, or stir in a teaspoon of cornstarch mixed with cold water.

Slice or shred the meat into large pieces, allowing it to absorb the juices again.

Serving Suggestions

Serve your pot roast family-style in a large serving dish with the vegetables arranged around it. Spoon rich ladlefuls of the broth over everything. Warm dinner rolls or cornbread make perfect companions for dipping into the sauce. And if you want to add a touch of brightness, sprinkle fresh chopped parsley on top before serving.

Storage & Reheating

Leftovers taste even better the next day. Store in the refrigerator up to 4 days, or freeze for up to 3 months. Reheat gently on the stove to keep everything tender.

Final Thoughts

This Classic Pot Roast with Carrots and Potatoes is more than just a meal—it’s tradition, comfort, and shared moments all tied together in one pot. It’s the kind of dish that brings people to the table and invites them to slow down. Whether you make it for Sunday dinner, a holiday gathering, or just because you want something warm and nourishing, it will always feel like home.
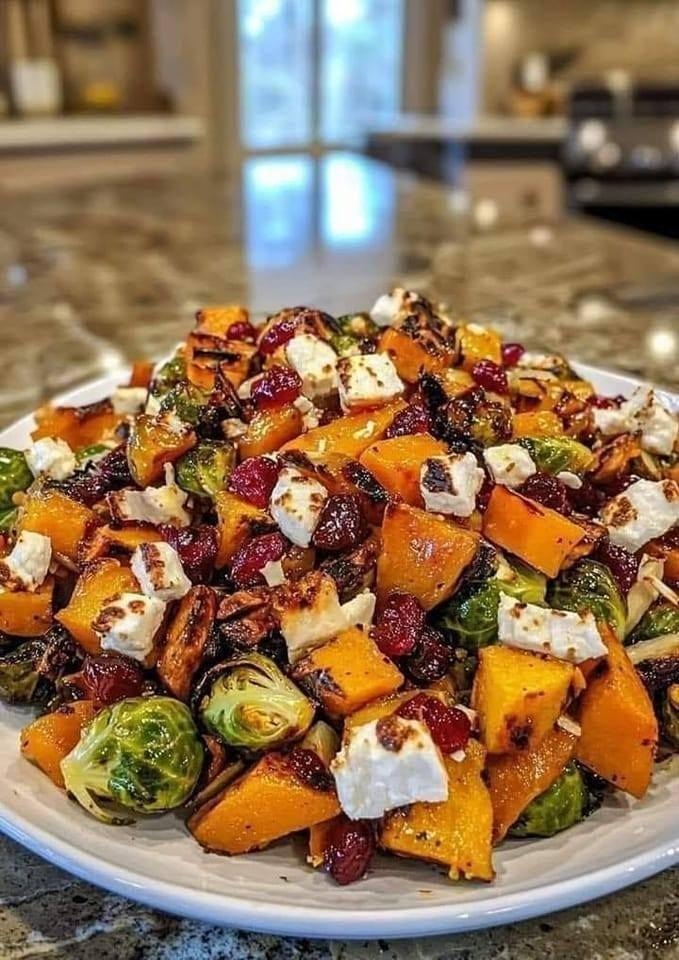
Cranberry-Glazed Roasted Butternut Squash

This Cranberry-Glazed Roasted Butternut Squash is the kind of autumn side dish that steals the show at the table. It’s warm, sweet, slightly tart, and caramelized in all the right places. The glaze is what makes it magical: a glossy cranberry reduction kissed with maple syrup, cinnamon, butter, and a hint of orange zest. The squash roasts until tender and golden, then gets coated in that ruby-red glaze that clings like a dream. Each bite brings balance—earthy richness from the squash, bright acidity from cranberries, and subtle warming spices that make this dish feel like a celebration of the season.

This recipe is perfect for Thanksgiving, cozy dinner nights, or anytime you want to bring a little beauty and comfort to your plate. And because it’s naturally vegetarian (even vegan if you swap the butter), it suits many tables beautifully.

Ingredients

For the Roasted Squash:

  • 1 large butternut squash (about 2.5–3 lbs)

  • 3 tablespoons olive oil

  • 1 teaspoon salt

  • ½ teaspoon black pepper

  • 1 teaspoon cinnamon

  • ½ teaspoon smoked paprika (optional but recommended)

For the Cranberry Glaze:

  • 1 cup fresh or frozen cranberries

  • ⅓ cup pure maple syrup (or honey)

  • 2 tablespoons butter (or 2 tbsp coconut oil for vegan)

  • 1 teaspoon vanilla extract

  • Zest of 1 small orange

  • ¼ cup water

  • Pinch of salt

Finishing Touches (Optional but beautiful):

  • Fresh thyme or sage leaves

  • Toasted pecans or walnuts

  • Extra orange zest for garnish

Instructions

Step 1: Prepare the Squash

Preheat your oven to 425°F (220°C). This higher heat is key to developing deep caramelization.

Peel your butternut squash using a vegetable peeler. Cut off both ends, slice the squash lengthwise, and scoop out the seeds with a spoon. Cut into cubes (about 1-inch pieces). The size matters; smaller cubes roast quicker and caramelize more.

Place the cubes on a parchment-lined baking sheet. Drizzle with olive oil, sprinkle with salt, pepper, cinnamon, and smoked paprika. Toss everything until evenly coated.

Spread the squash out so that no pieces are overlapping. Crowding the pan causes steaming instead of caramelizing, so if needed—use two pans.

Roast for 28–35 minutes, flipping halfway through. When done, the squash should be lightly browned and tender when pierced with a fork.

Step 2: Make the Cranberry Glaze

While the squash roasts, prepare the sauce.

In a small saucepan, combine the cranberries, maple syrup, butter, orange zest, water, vanilla, and a pinch of salt. Cook over medium heat, stirring occasionally.

As it simmers, the cranberries will burst and thicken the glaze. If it becomes too thick, add a tablespoon or two of water. Allow this to cook for 8–10 minutes, until the sauce is glossy and spoon-coating. Taste—add more syrup for sweetness or more orange zest for brightness.

If you prefer a smoother glaze, mash the cranberries with a fork or quickly blend. If you prefer rustic texture, leave it chunky.

Step 3: Combine and Serve

Once the squash is roasted, transfer it while still warm to a large bowl or serving dish. Pour the cranberry glaze over the top and gently fold to coat.

Sprinkle toasted pecans and fresh thyme for an elegant final flourish. A little extra orange zest ties the whole dish together beautifully.

Serve warm and enjoy the cozy harmony.

Flavor Notes

  • The squash brings a mellow sweetness that acts like a canvas.

  • The cranberry glaze adds tartness and vibrancy that prevents the dish from being overly heavy.

  • Maple syrup and cinnamon deepen the autumn warmth.

  • Orange zest awakens every flavor, adding brightness and freshness.

  • Optional nuts add a delicate crunch that enhances texture.

Every forkful gives contrast: soft vs. crisp, sweet vs. tangy, warm vs. bright.

Tips for Best Results

  • Choose a deep-orange squash: It will be sweeter and smoother in texture.

  • Don’t skip spacing on the pan: Roasting is all about airflow.

  • Make ahead: Roast the squash earlier in the day. Warm it and glaze just before serving.

  • For a holiday platter: Arrange squash, drizzle glaze, finish with herbs and pecans for a truly centerpiece-worthy side.

Perfect Pairings

This dish pairs exceptionally well with:

  • Roast chicken or turkey

  • Glazed ham

  • Herb-crusted pork loin

  • Creamy mashed potatoes

  • Warm dinner rolls

  • A crisp spinach + goat cheese salad

It also shines as a vegetarian main when served over quinoa or wild rice.

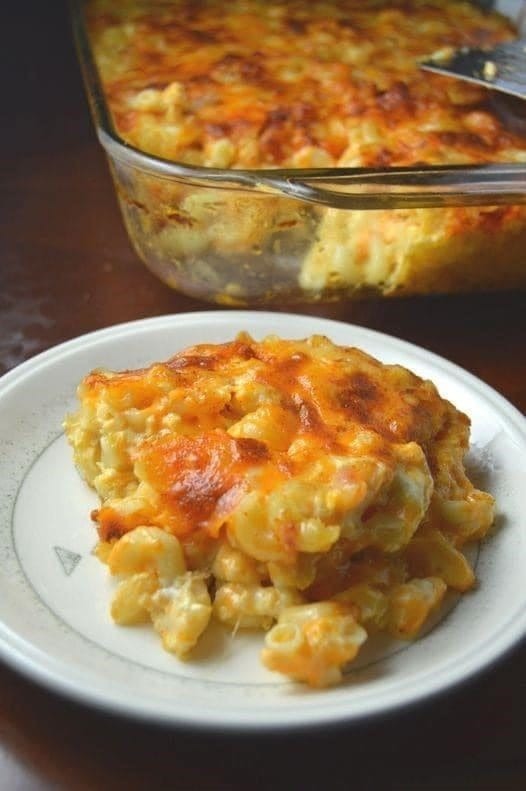
Good Ole Fashion Mac and Cheese

There are dishes that feel like a hug, warm and familiar, made with love and memory rather than measurement alone. Good ole fashion mac and cheese is one of those recipes—simple ingredients, slow cooking, and that unmistakable creamy, cheesy backbone that tells you everything’s going to be alright. This version is lovingly crafted in a way that feels like the best parts of Southern kitchens: slow, rich, deeply flavored, and made for sharing. No shortcuts, no thin watery cheese sauce, and absolutely no powdered cheese in sight. Just real, soulful mac and cheese.

What makes this version unique is the flavor-building steps—not just melting cheese and milk together, but layering cheeses, seasoning the béchamel with warm spices, and then finishing everything in the oven until the top gets kissed with golden crispness. The inside stays creamy, the edges get just the faintest chew, and the top forms that signature baked cheese crust everyone fights over. And we’re not just going with one or two cheeses. We’re building flavor with three: sharp cheddar for punch, Colby Jack for melt, and a bit of cream cheese for body and silkiness.

Ingredients

For the Pasta:

  • 1 pound elbow macaroni (or cavatappi for extra texture)

  • Salt for boiling water

For the Sauce:

  • 4 tablespoons butter

  • 4 tablespoons all-purpose flour

  • 3 cups whole milk (do not use skim)

  • 1 cup heavy cream

  • 8 ounces cream cheese, cut into chunks

  • 2 cups sharp cheddar cheese, freshly shredded

  • 1 cup Colby Jack cheese, freshly shredded

  • 1 teaspoon dry mustard powder

  • ½ teaspoon paprika

  • ½ teaspoon white or black pepper

  • 1 teaspoon salt (adjust to taste)

  • ½ teaspoon onion powder

  • ½ teaspoon garlic powder

Optional Topping:

  • ¾ cup shredded cheddar + Colby Jack mixed

  • ½ cup buttery cracker crumbs or panko tossed with 1 tablespoon melted butter

Instructions

  1. Cook the Pasta:
    Bring a large pot of salted water to a rolling boil. Add your pasta and cook just until al dente—you want it slightly firm since it will continue cooking in the oven. Drain and set aside, but do not rinse (rinsing removes the starch that helps the sauce cling).

  2. Make the Roux:
    In a large, heavy-bottomed pot or deep skillet, melt the butter over medium heat. Once melted, add the flour and whisk constantly. Let this cook for about 2 minutes, not letting it brown—just enough to remove the raw flour taste.

  3. Add the Milk and Cream:
    Slowly pour in the milk and heavy cream, whisking continuously to avoid lumps. Cook until the mixture thickens enough to coat the back of a spoon—this is your béchamel base.

  4. Add the Cheeses:
    Reduce heat to low and add the cream cheese first, stirring until fully melted. Then add your cheddar and Colby Jack a handful at a time. Stir until the sauce is smooth and velvety.

  5. Season It Right:
    Stir in mustard powder, paprika, salt, pepper, onion powder, and garlic powder. Taste the sauce now—this is where you build flavor. If it tastes good here, it will taste great in the dish.

  6. Combine Pasta and Sauce:
    Add your cooked macaroni into the cheese sauce, stirring gently to coat every piece.

  7. Prepare to Bake:
    Pour the mac and cheese into a buttered baking dish. Top with extra shredded cheese and buttery crumbs if you want that traditional golden crust.

  8. Bake:
    Bake at 350°F (175°C) for 25–30 minutes, or just until the top is lightly browned and bubbling.

  9. Rest Before Serving:
    Let it rest for 10 minutes before scooping—this helps the sauce set and cling perfectly to each bite.

Tips for a Truly Unique and Rich Mac and Cheese

  • Freshly shred your cheese. Pre-shredded cheese is coated in anti-caking agents that prevent smooth melting.

  • Don’t skip the mustard powder. It doesn’t taste like mustard—it just intensifies the cheese flavor.

  • Use whole milk and cream. Low-fat ingredients will not create the same rich texture.

  • Let it rest. This is where magic happens.

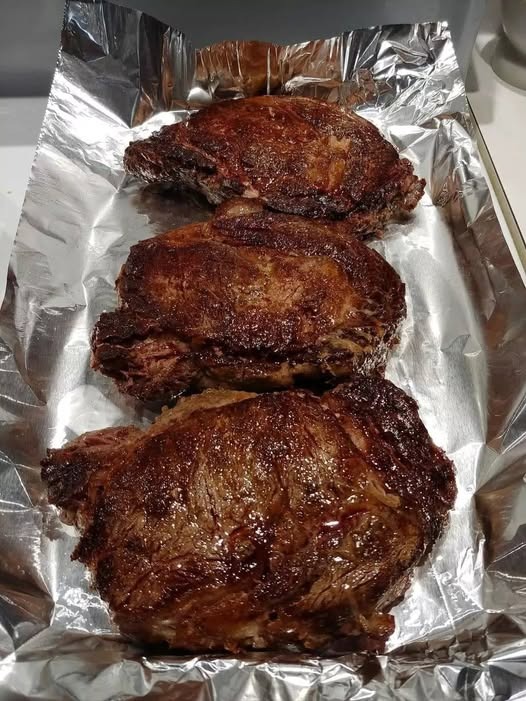
Ribeye steak

There’s something undeniably luxurious about a perfectly cooked ribeye steak. The deep marbling, the rich beef flavor, and the way it crisps on the outside while staying tender and juicy inside—it’s pure perfection. But instead of the usual salt-and-pepper pan fry, today’s recipe introduces a unique twist: a roasted garlic and herb crust that melts into the meat as it cooks, combined with a butter-basting technique that locks in every ounce of flavor. This technique transforms a good ribeye into a steakhouse-level masterpiece right in your kitchen.

Ingredients

For the Steak:

  • 1 ribeye steak, 1 ¼ to 1 ½ inches thick

  • 1 tbsp olive oil

  • Salt & black pepper, to taste

  • 1 tsp smoked paprika

  • ½ tsp garlic powder

  • ½ tsp onion powder

Garlic-Herb Butter Baste:

  • 3 tbsp unsalted butter

  • 4 garlic cloves, smashed

  • 2 sprigs fresh thyme

  • 1 sprig fresh rosemary

  • 1 bay leaf (optional)

Roasted Garlic Herb Crust:

  • 1 whole garlic bulb

  • 1 tbsp extra-virgin olive oil

  • 2 tbsp finely chopped parsley

  • 1 tbsp finely chopped chives (or green onion tops)

  • 1 tsp lemon zest

  • Pinch of coarse salt

  • Optional: 1 tsp parmesan cheese for added richness

Step 1: Roast the Garlic

This step builds flavor from the ground up—and the flavor will carry through the whole dish.

  1. Preheat your oven to 400°F (200°C).

  2. Slice off the very top of the garlic bulb (just enough to expose the cloves).

  3. Drizzle olive oil over the exposed surface and wrap the bulb tightly in foil.

  4. Bake for 35–40 minutes, or until the garlic is soft, fragrant, and caramel-colored.

Once the garlic is cool enough to handle, squeeze the cloves out of their skins into a small bowl. Mash until smooth.

Step 2: Make the Herb Crust

This is the “signature” part of the recipe—the flavor crown that sets your ribeye apart.

  1. Add the parsley, chives, lemon zest, salt, and optional parmesan to the roasted garlic mash.

  2. Mix into a paste.

  3. Set aside—this will be applied at the end so the herbs stay fresh and vibrant.

Step 3: Prepare the Steak

A great steak starts long before it hits the pan.

  1. Pat the ribeye dry with paper towels—dry meat gives the best crust.

  2. Rub lightly with olive oil.

  3. Season generously with salt, pepper, smoked paprika, garlic powder, and onion powder.

  4. Let the steak rest at room temperature for 20–30 minutes, so it cooks evenly.

Step 4: Sear the Steak

You will need a heavy pan—preferably cast iron—to achieve a crisp brown crust.

  1. Heat the pan over high heat until it is extremely hot—you should see a slight shimmer.

  2. Lay the ribeye into the pan carefully (you should hear a loud sizzle).

  3. Sear without moving it for 2–3 minutes.

  4. Flip and cook another 2–3 minutes on the other side.

Step 5: Butter Baste

This is where the magic happens.

  1. Reduce the heat to medium-low.

  2. Add the butter, smashed garlic cloves, thyme, rosemary, and bay leaf to the pan.

  3. As the butter melts, tilt the pan slightly and use a spoon to scoop and pour the butter over the steak repeatedly.

  4. Continue basting for 1–2 minutes.

For medium doneness, the internal temperature should be about 130–135°F (54–57°C) at this stage. Adjust cooking time based on preference.

Step 6: Rest and Crust

Resting is essential—never skip it.

  1. Transfer the steak to a plate and let it rest 5–10 minutes.

  2. Spread the roasted garlic herb mixture across the top while the steak is still warm so it melts slightly into the surface.

Serving Suggestions

Cut the ribeye into slices across the grain for maximum tenderness. Pair with:

  • Roasted baby potatoes with rosemary

  • Grilled asparagus with lemon

  • Creamy mashed potatoes

  • Sautéed mushrooms in garlic butter

A finishing sprinkle of flaky sea salt just before serving makes the flavor pop.

Why This Recipe Works

The beauty of this ribeye is in the layering of flavor:

  • Roasted garlic gives sweetness instead of harsh raw bite.

  • Fresh herbs add brightness that lifts the richness of the steak.

  • Lemon zest subtly cuts through the fat, keeping every bite balanced.

  • Butter basting ensures the meat stays moist and develops that signature golden crust.

The result is a ribeye that tastes expensive, artisanal, and unforgettable.

Perfect Boiled Eggs

Boiled eggs might seem like the simplest thing in the kitchen—but getting them perfect every time is a quiet art. Too soft, and the whites feel slippery and unset. Too hard, and the yolk becomes chalky and dull. The secret lies in timing, temperature, and a gentle method that respects the egg’s delicate nature. This unique boiled egg recipe focuses on texture, technique, and flavor enhancement, transforming something humble into something noticeably better.

Why This Recipe Is Different

Most people toss eggs into boiling water and hope for the best—but eggs benefit from controlled heat. When placed in boiling water cold, the shell often cracks due to thermal shock. Instead, this recipe starts with cold water, allowing everything to heat up gradually. This reduces cracking and leads to consistently tender whites and creamy yolks—not rubbery, not runny, but beautifully set.

We also add a surprising ingredient: salt and a splash of vinegar. The salt helps season the egg slightly and makes peeling easier. The vinegar helps loosen the thin membrane inside the shell, preventing eggs from sticking when you peel them.

Ingredients

  • 6 large eggs (room temperature if possible)

  • Water (enough to cover the eggs)

  • 1 teaspoon salt

  • 1 tablespoon white vinegar

Optional Flavor Enhancers

  • A knob of butter

  • Fresh cracked black pepper

  • Everything bagel seasoning

  • A pinch of smoked paprika

Step-by-Step Instructions

1. Prepare the Water

Place your eggs in a medium pot. Make sure they rest in a single layer—not stacked or touching too tightly. Cover with cold water, at least 1 inch above the eggs.
Add the salt and vinegar.

2. Heat Slowly

Turn the heat to medium-high and heat the pot uncovered.
Watch carefully—once the water reaches a gentle rolling boil, do not walk away.

3. Set Your Timer

The moment the water starts boiling, turn off the heat, cover the pot with a lid, and start your timer.

Here is your perfect timing guide:

Desired Yolk Time (after covering) Result
Soft-Boiled 6 minutes Soft but set white, warm jammy yolk
Medium-Boiled 8 minutes Firm whites, creamy custard-like yolk
Hard-Boiled 10-12 minutes Fully set yolk, no grey ring

For most everyday use, 8–9 minutes is spectacular.

4. Ice Bath

While the eggs sit, fill a bowl with ice water.
When your timer finishes, immediately scoop your eggs into the ice bath.
Let them rest 5 minutes. This stops the cooking and helps peeling.

5. Peel Like a Pro

Gently crack the wider end of the egg first—that’s where the air pocket is. Slide your thumb under the membrane and peel in smooth sheets. If you followed the vinegar and ice bath steps, it will be incredibly easy.

Serving Suggestions (Where This Recipe Truly Shines)

**1. Butter & Black Pepper Boiled Eggs

Slice a warm boiled egg in half, place on toast, drizzle melted butter, and finish with black pepper. This is simple luxury.

**2. Pickle-Style Snack Eggs

Sprinkle eggs with:

  • Apple cider vinegar

  • Sea salt

  • Chili flakes

Let sit for 3 minutes. Surprisingly addictive.

**3. Everything-Seasoned Eggs

Sprinkle Everything Bagel Seasoning on the peeled eggs, press lightly so it sticks. This adds crunch, garlic, and sesame flavor instantly.

**4. Smoky Breakfast Bowl

Slice eggs into:

  • Cooked rice or potatoes

  • A dab of butter

  • A pinch of smoked paprika
    Stir and enjoy something warm, comforting, and deeply satisfying.

Why This Method Works

  • Cold Water Start: Gentle temperature increase prevents cracking.

  • Turning Off Heat: Uses residual heat for perfect doneness control.

  • Ice Bath: Locks in texture and prevents chalky yolks.

  • Vinegar + Salt: Makes peeling smooth and frustration-free.

This is precision cooking made easy.

Storage Tips

  • Whole boiled eggs (unpeeled): up to 7 days in the fridge.

  • Peeled eggs: store in a sealed container with a damp paper towel for 3–5 days.

Never store eggs at room temperature once cooked.

Conclusion

This unique boiled egg recipe elevates a kitchen basic into a small daily pleasure. With gentle heat, a bit of care, and tiny seasoning touches, boiled eggs become creamy, tender, and richly flavored—not bland fuel, but comforting, nourishing food. Once you try this technique, it becomes second nature, and you’ll never return to haphazard boiling again. Each egg will peel perfectly, look beautiful, and taste delicious.

Mississippi Sin Dip

If there were ever a dip that could steal the spotlight at a gathering, game day, potluck, holiday spread, or cozy movie night—it’s the legendary Mississippi Sin Dip. Warm, creamy, cheesy, tangy, smoky, and baked inside a crusty bread loaf, this dip doesn’t just taste incredible; it becomes the centerpiece of the table. And while many versions of this recipe exist, today we’re making a unique, upgraded version that’s even richer in flavor, improved in texture, and beautifully balanced—without being overly salty or heavy.

Let’s dive into what makes this version truly special: we use two types of cheese for flavor depth, a little Worcestershire sauce for umami, finely chopped green onions for brightness, and diced ham for hearty satisfaction. Everything melts together into a creamy perfection that’s scooped straight out of warm, toasted bread pieces.

Why It’s Called “Mississippi Sin”

The “sin” comes from how indulgent this dip is. In Mississippi and surrounding Southern regions, dips like this evolved from tailgate culture—big flavors, easy sharing, minimal fuss. But to some, the richness almost feels wrong. The good kind of wrong.

Ingredients

The Dip Base:

  • 8 oz (1 cup) cream cheese, softened

  • 1 cup sour cream

  • 1 ½ cups shredded sharp cheddar cheese

  • ½ cup shredded mozzarella cheese (for creamy melt)

  • 1 cup diced ham (or cooked bacon, or a mix of both)

  • 3 green onions, finely chopped

  • 1 tsp Worcestershire sauce

  • ½ tsp garlic powder

  • ½ tsp onion powder

  • ½ tsp paprika

  • ¼ tsp black pepper

  • ¼ tsp red pepper flakes (optional for gentle heat)

  • Salt to taste (you may not need any depending on the ham)

Bread Bowl:

  • 1 large round bread loaf (sourdough or farmhouse-style boule works beautifully)

For Serving:

  • Cubes or slices of the removed bread

  • Crackers, pretzel chips, celery sticks, or pita wedges

Step-by-Step Instructions

1. Preheat and Prepare

Preheat your oven to 350°F (175°C).
Place the bread loaf on a clean cutting board.

2. Hollow Out the Bread Bowl

Using a sharp bread knife, carefully slice a circle out of the top of the loaf—like removing the top of a pumpkin.
Pull out some of the inner bread, breaking it into chunks.
Leave about an inch of bread wall all around so the bowl stays sturdy during baking.

Set the bread chunks aside—they will be used for dipping later.

3. Mix the Dip

In a large mixing bowl, combine:

  • Cream cheese

  • Sour cream

Stir until smooth and creamy (room-temperature cream cheese makes this easy).

Add:

  • Cheddar

  • Mozzarella

  • Diced ham

  • Green onions

  • Worcestershire

  • Garlic powder

  • Onion powder

  • Paprika

  • Black pepper

  • Red pepper flakes

Mix until everything is well-distributed.
Taste before adding salt—you may not need any.

4. Fill the Bread Bowl

Spoon the mixture into the hollowed bread loaf.
Smooth the top and place the loaf on a baking sheet lined with foil.

5. Wrap & Bake

Loosely wrap the bread loaf in foil.
Bake for 30 minutes to heat through.
Then, uncover the bread and bake another 10–12 minutes to brown the edges and toast the bread slightly.

6. Serve Hot

Place the hot dip-filled loaf onto a platter.
Arrange the bread chunks and any other dipping sides around it.
Guests can scoop directly from the bread bowl!

Tips for the Best Mississippi Sin Dip

  • Don’t skip green onions. They balance the richness.

  • Sharp cheddar is better than mild—it adds flavor instead of just cheese melt.

  • Taste before salting—ham is salty enough.

  • Use good bread—a flimsy loaf will collapse.

Flavor Variations (Make It Your Own)

Style Add This Flavor Result
Spicy Cajun 1 tsp Cajun seasoning + diced jalapeño Bold & lively
Smoky Bacon Replace ham with smoked bacon Deep, smoky richness
Crab Dip Twist Replace ham with lump crab + Old Bay Coastal & luxurious
Ranch Style 1 tbsp ranch seasoning mix Buttery, familiar comfort

What to Serve with It

  • Sliced baguette

  • Warm tortillas wedges

  • Toasted pita

  • Crunchy celery and carrot sticks

  • Crackers or pretzel crisps

The dip is rich—so pairing with something neutral or lightly salty is ideal.

How to Store & Reheat

If you have leftovers (rare!), scoop the remaining dip from the bread and store in a container for up to 4 days in the fridge.

Reheat in the microwave or bake in a small dish at 350°F until warm.

Why This Recipe Works

This version of Mississippi Sin Dip stands out because it focuses on balance:

  • The cream cheese and sour cream give luxurious creaminess.

  • The cheddar provides sharpness.

  • The mozzarella adds pull and stretch.

  • Ham offers savory depth.

  • Green onion lifts the entire mixture.

  • Worcestershire introduces subtle umami that ties everything together.

Nothing is overpowering. Everything supports everything else.

And the bread bowl? It turns serving into experience.
The outer crust stays firm while the inner sides soak just enough flavor to taste delicious—but never soggy.

It’s rustic. It’s cozy. It’s Southern hospitality in a warm, cheesy embrace.

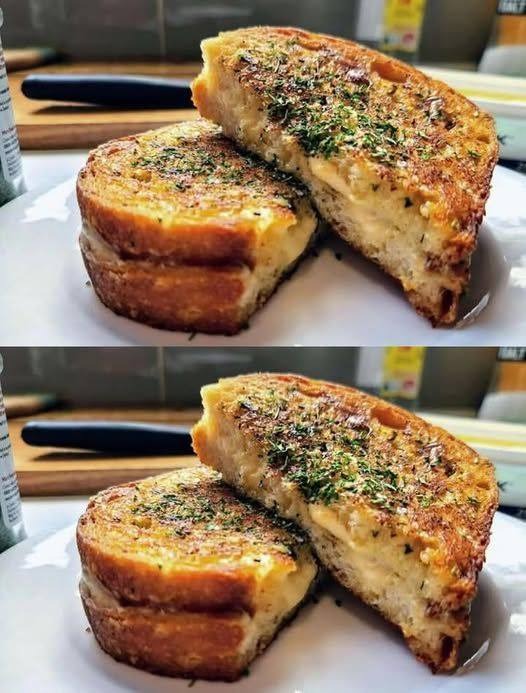
Harrison Ford’s 4-Ingredient Sandwich

Sometimes, the most unforgettable meals aren’t born from complicated cooking techniques, long ingredient lists, or hours spent in the kitchen. Instead, they come from simplicity—pure flavors, good bread, and instincts honed over time. Harrison Ford, the celebrated actor known for roles like Indiana Jones and Han Solo, has become somewhat of a quiet legend in the kitchen, too. Among the handful of bites he’s known for, one particular sandwich stands out—a four-ingredient masterpiece that proves the beauty of simplicity.

This sandwich became a minor sensation when it surfaced in interviews and behind-the-scenes moments. Ford himself has said that when he’s not working or flying planes, he enjoys cooking for his wife, Calista Flockhart. And his go-to, humble lunch? Surprisingly: A simple, toasty, earthy, tangy sandwich with zero fuss and big satisfaction.

Below is a unique recipe version inspired by the idea of that sandwich—expanded with aroma, storytelling, flavor balance, and gentle tips to elevate it from simple to remarkable. It’s the kind of sandwich you take a bite of and pause—not because it’s complicated, but because it just feels right.

The Four Ingredients

What sets this sandwich apart is how each ingredient does real work. There is no filler—every bite matters.

  1. Sourdough Bread
    Rustic, slightly tangy, chewy, and crisp when toasted. It’s hearty enough to support the filling without getting soggy.

  2. Thick-Sliced Roast Turkey
    Preferably deli-style or home-roasted. You want tender texture, savory depth, and a touch of salt.

  3. Mayonnaise
    Smooth, rich, and creamy—acting as the flavor bridge between bread and protein. The fat enhances everything.

  4. Prepared Dijon Mustard
    Sharp, bright, and slightly spicy—the spark that makes the whole sandwich come alive.

That’s it. No lettuce, no tomato, no cheese, no over-layered extras to distract. This sandwich is about balance and contrast—soft meets crisp, rich meets tangy, simple meets satisfying.

Ingredients (Serves 1)

  • 2 slices good-quality sourdough bread

  • 4–6 slices roast turkey breast

  • 1 tablespoon mayonnaise

  • 1 teaspoon Dijon mustard

Optional for subtle lift (not required but lovely):

  • A pinch of black pepper

  • A small drizzle of olive oil for toasting

  • A few leaves of fresh spinach if you want greens but no pressure

Directions

Step 1: Toast the Bread Just Right

Harrison Ford’s approach to food is unfussy. The bread shouldn’t be toasted until brittle or left soft and floppy. You want a warm, crisp edge with a tender center.

  • Heat a skillet over medium heat.

  • Place each slice of sourdough directly on the dry skillet (or lightly brush with olive oil if you prefer a deeper crunch).

  • Toast 2–3 minutes per side, or just until golden and fragrant.

You’ll know it’s ready when the kitchen smells like toasted wheat and warm comfort.

Step 2: Spread the Base

  • Spread mayonnaise on one slice of the warm bread.

  • Spread Dijon mustard on the other.

The warmth of the toast wakes up the flavors—the mayo melts slightly into the crumb while the mustard’s aroma blooms.

This step seems small, but temperature matters. Warm bread activates flavor.

Step 3: Layer the Turkey

Lay the turkey slices loosely, not pressed or flattened. Air pockets create tenderness instead of chewiness.

Think pillows of flavor, not compressed layers.

If your turkey slices are cold, warm them for 10 seconds in the skillet. Not browned—just kissed by heat. This makes them juicy.

Step 4: Close and Press

  • Place the mayo-topped bread over the turkey.

  • Press gently—not smashed, just united.

Hold the sandwich for three seconds as the warmth passes from your hand into the bread. There’s something grounding about it—simple food prepared with attention.

The First Bite Experience

When you take a bite, the first thing you notice is the crunch of the toasted sourdough.
Next comes the creamy richness of the mayo, the soft, savory turkey, and finally the sharp, bright kick of Dijon that cuts cleanly through everything, bringing clarity and balance.

It is simple.
It is perfect.
It is the way food should make you feel—comfortable, grounded, present.

Why It Works

This sandwich succeeds because:

Ingredient Flavor Role Texture Role
Sourdough Tangy & deep Crisp outside, soft inside
Turkey Savory & meaty Tender layers
Mayo Rich & smooth Softens bread edges
Dijon Sharp & bright Lightly biting finish

There is no competition in this sandwich—only cooperation.

Serving Suggestions

This sandwich pairs beautifully with:

  • A handful of kettle-cooked chips

  • A dill pickle spear

  • A glass of cold iced tea with lemon

  • A quiet porch moment, if possible

Tips to Elevate the Simple

  • Want smokiness? Add 2 drops of liquid smoke to the mayo.

  • Want earthiness? Add a crack of black pepper to the turkey.

  • Want indulgence? Toast the bread with butter instead of oil.

But never add too much—this sandwich is a lesson in knowing when to stop.

Southern Fried Salmon Patties

There’s something undeniably comforting about a classic Southern fried salmon patty. It’s the kind of dish that feels familiar even if you’ve never had it before—crispy on the outside, tender and savory on the inside, and full of warm, nostalgic flavor. Often made from pantry staples and served with simple sides like cornbread, coleslaw, or even just a slice of fresh tomato, salmon patties are the kind of meal that reminds you that good food doesn’t have to be complicated. What makes this version special is the balance of seasonings, fresh aromatics, and a method that locks in both texture and flavor. This unique approach keeps the patties moist, never dry, and ensures a beautifully crunchy crust every single time.

Ingredients

  • 2 cans (14–15 oz each) pink salmon, drained (or 1 lb cooked fresh salmon, flaked)

  • 1 small onion, finely diced

  • 1/3 cup finely diced green bell pepper (optional but recommended)

  • 2 tablespoons fresh parsley or green onions, chopped

  • 2 large eggs

  • 1/2 cup cornmeal

  • 1/3 cup flour (plus extra for dusting)

  • 1 teaspoon garlic powder

  • 1 teaspoon paprika

  • 1/2 teaspoon cayenne pepper (adjust for heat)

  • 1/2 teaspoon freshly cracked black pepper

  • 3/4 teaspoon salt

  • 1 teaspoon Worcestershire sauce

  • Juice of 1/2 a lemon

  • Oil for frying (vegetable, canola, or peanut oil)

Why These Ingredients Work

The key to a great salmon patty is balance—texture, flavor, and moisture. Canned salmon brings a naturally savory base, while the vegetables add freshness without watering the mix down. The combination of cornmeal and flour helps the patties form a sturdy crust that doesn’t crumble when cooking. The Worcestershire and lemon juice deepen the flavor, adding brightness and umami that make each bite pop. Seasonings are kept simple but effective, ensuring the salmon remains the star.

Preparation Steps

  1. Prepare the Salmon
    Drain the canned salmon well and remove any excess liquid. Transfer it to a mixing bowl and gently break it apart with a fork. You can remove the soft bones if desired, but many Southern cooks leave them in because they’re edible and add calcium. If using fresh salmon, simply flake it into bite-sized pieces.

  2. Add the Aromatics and Seasoning
    Stir in the diced onion, bell pepper, and parsley or green onions. Add the garlic powder, paprika, cayenne, salt, and black pepper. Mix just enough to distribute everything evenly.

  3. Bind the Patties
    Crack in the eggs, then add the cornmeal and flour. Pour in the Worcestershire sauce and the lemon juice. Gently fold everything together. The mixture should hold together but still feel moist; if it seems too sticky, add a tablespoon more flour at a time until it handles cleanly.

  4. Shape the Patties
    Scoop the mixture into portions (about 1/4 cup each) and form them into compact patties about 3/4-inch thick. Lightly dust the outside of each patty in flour—this is what makes the crust golden and crisp.

  5. Fry to Perfection
    Heat about 1/4 inch of oil in a large skillet over medium heat. The oil should shimmer but not smoke. Place patties into the skillet without overcrowding. Cook 3–4 minutes per side or until deeply golden brown and crisp. Flip gently to keep them intact.

  6. Drain and Serve
    Remove patties and let them drain on a wire rack or paper towels. Serve warm while the crust is still at its peak crunch.

Tips for Success

  • Do not overmix — this keeps the patties tender.

  • The oil should be hot enough to sizzle, but not scorch. Moderate heat is key.

  • If your patties break when flipping, let them cook longer to form a stronger crust before turning.

Serving Suggestions

Salmon patties fit beautifully on any Southern-style table. Enjoy them with:

  • Creamy mashed potatoes or cheese grits

  • Collard greens or sautéed cabbage

  • White rice with pan gravy

  • Cornbread and sliced tomatoes

  • A simple tartar sauce or comeback sauce

Storage and Reheating

Salmon patties store well, making them a smart make-ahead option. Keep them airtight in the refrigerator for up to 3 days or freeze up to 2 months. Reheat in a skillet or air fryer to restore their signature crispiness—never microwave if you want the crust back!

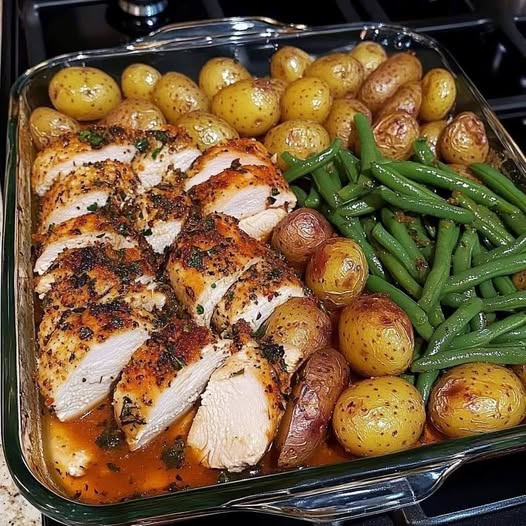
One-Pan Garlic Herb Chicken with Potatoes & Green Beans

There is something deeply comforting about a meal that comes together in a single pan: less cleanup, more flavor, and the simple joy of ingredients cooking in harmony. This One-Pan Garlic Herb Chicken with Potatoes & Green Beans is one of those dependable, cozy dishes you’ll want to make again and again. The chicken roasts with golden potatoes and tender green beans, all coated with a fragrant mixture of garlic, herbs, butter, and olive oil. The potatoes absorb the chicken drippings, the green beans roast into soft, flavorful strands, and the chicken emerges juicy with perfectly crisped edges. It’s the kind of meal that looks fancy but feels easy from start to finish.

Why This Recipe Works

The secret to making one-pan meals truly flavorful is ensuring everything has a chance to caramelize and pick up seasoning evenly. Instead of tossing everything onto the tray at once, the chicken and potatoes start roasting first. Green beans are added later, so they become tender but not mushy. The garlic-herb mixture coats every ingredient and creates a buttery, aromatic finishing glaze. The combination of olive oil with melted butter not only adds richness but also helps in browning for that roasted, golden finish we crave.

This recipe is delicious with bone-in, skin-on chicken thighs or drumsticks because the skin provides flavor and helps keep the meat juicy. However, boneless chicken breasts will work too—just reduce the cooking time so they don’t dry out.

Ingredients

For the Chicken & Vegetables:

  • 4–6 bone-in, skin-on chicken thighs (or drumsticks)

  • 1 lb (450g) baby potatoes, halved (or larger potatoes cut into chunks)

  • 12 oz (350g) fresh green beans, trimmed

  • 3 tbsp olive oil

  • Salt and freshly cracked black pepper, to taste

Garlic Herb Butter Mixture:

  • 4 tbsp unsalted butter, melted

  • 5 cloves garlic, minced

  • 1 ½ tsp dried oregano

  • 1 tsp dried thyme

  • 1 tsp dried rosemary

  • ½ tsp paprika

  • ½ tsp onion powder

  • 1 tbsp fresh lemon juice

  • Optional: 1 tsp honey (for a hint of caramelization)

  • Fresh parsley or dill, chopped (for garnish)

Instructions

  1. Preheat and Prepare:
    Preheat your oven to 400°F (200°C). Lightly grease a large baking sheet or roasting pan so nothing sticks.

  2. Season the Chicken:
    Pat the chicken dry with paper towels—moisture prevents browning. Season both sides generously with salt and black pepper. Set aside.

  3. Mix the Herb Butter:
    In a bowl, whisk together the melted butter, olive oil, minced garlic, oregano, thyme, rosemary, paprika, onion powder, lemon juice, and honey (if using). This blend should be aromatic and slightly thick. Taste for salt and adjust if needed.

  4. Coat the Ingredients:
    Place the halved potatoes in a mixing bowl and drizzle with about of the garlic herb mixture. Toss well. Arrange the potatoes onto the sheet pan in a single layer.
    Place the chicken on the pan as well, spreading it out so nothing overlaps. Brush or spoon another of the garlic herb mixture evenly over the chicken.

  5. Bake First Stage:
    Roast for 25 minutes, allowing the chicken to begin browning and the potatoes to soften and crisp.

  6. Add the Green Beans:
    Meanwhile, toss the green beans with the remaining garlic herb mixture. After the 25 minutes are up, remove the pan, scatter the green beans around the chicken and potatoes, and return to the oven.

  7. Finish Roasting:
    Roast everything for 15–20 more minutes, or until:

    • The chicken skin is golden and crisp,

    • The potatoes are easily pierced with a fork,

    • The green beans are tender but not soggy.
      If you want extra crisp skin, broil for 2–3 minutes at the end—just keep an eye on it.

  8. Serve:
    Sprinkle freshly chopped parsley or dill on top for a bright herbal finish. Serve hot right from the pan.

Tips for Success

  • Use fresh garlic, not jarred. Fresh makes a major flavor difference.

  • Don’t overcrowd the pan. Space equals crispness.

  • Add lemon zest if you want a more vibrant, citrusy lift.

  • Swap the herbs based on what you love—Italian seasoning or Herbs de Provence work beautifully.

Serving Suggestions

Serve with:

  • Warm crusty bread to soak up the pan juices

  • A simple side salad

  • Rice pilaf or couscous for extra comfort

This dish is also wonderful for meal prep. It reheats beautifully and the flavors deepen as they rest. For storage, allow it to cool and pack into airtight containers for up to 4 days.

Conclusion

This One-Pan Garlic Herb Chicken with Potatoes & Green Beans is more than a dinner—it’s an invitation to slow down and appreciate the beauty of simple, honest ingredients. It’s the kind of dish that warms the kitchen, fills the home with irresistible aroma, and brings comfort to the table. The flavors meld, the cleanup stays minimal, and every bite reminds you that the best meals do not need to be complicated to be unforgettable.

Mama Pound Cake

Mama’s Pound Cake – The Taste of Home in Every Slice

There are recipes that bring back memories the moment you catch their aroma—and Mama’s Pound Cake is one of them. Golden on the outside, soft and buttery inside, this old-fashioned cake has stood the test of time. It’s the kind of dessert that doesn’t need fancy frostings or fillings—just the warmth of love and a cup of tea. Every family seems to have their version, but Mama’s is the one that melts hearts and tastes like Sunday afternoons from childhood.


A Little History of the Pound Cake

The pound cake got its name centuries ago for its simple formula: a pound each of butter, sugar, eggs, and flour. This no-nonsense recipe was born out of practicality and tradition—easy to remember, rich in flavor, and made to serve large gatherings. Over time, home bakers like Mama refined the recipe, adding vanilla, milk, and a touch of salt to perfect the texture. What remains unchanged is its signature dense crumb and buttery richness that’s impossible to resist.


Ingredients for Mama’s Pound Cake

This recipe yields one large loaf or a standard bundt-sized cake—perfect for sharing or gifting.

You’ll need:

  • 1 cup (2 sticks) unsalted butter, softened

  • 2 cups granulated sugar

  • 4 large eggs, room temperature

  • 3 cups all-purpose flour

  • 1 teaspoon baking powder

  • ½ teaspoon salt

  • 1 cup whole milk (or buttermilk for extra richness)

  • 2 teaspoons pure vanilla extract

  • Optional: zest of one lemon or orange for a subtle citrus note


Step-by-Step: How Mama Made It

1. The Preparation Ritual

Mama always said, “A good cake starts with a calm heart and warm butter.” Preheat your oven to 325°F (160°C) and grease a loaf pan or bundt pan with butter, then lightly dust it with flour. This ensures your cake releases beautifully after baking.

2. Creaming the Magic

In a large mixing bowl, beat the softened butter until creamy—about 2 minutes. Gradually add the sugar, one spoonful at a time, beating until the mixture turns pale and fluffy. This process incorporates air, giving the pound cake its signature lightness despite its dense texture.

3. Adding the Eggs

Crack the eggs one by one, mixing well after each addition. Mama always used fresh farm eggs, and she’d say the key was patience—“Don’t rush the eggs, they hold the story together.”

4. Mixing the Dry Ingredients

In another bowl, whisk together the flour, baking powder, and salt. Slowly add the dry ingredients to the creamed mixture, alternating with the milk. Start and end with the flour. Mix on low speed until just combined. Overmixing can make the cake tough.

5. The Flavor Touch

Stir in the vanilla extract and citrus zest if you’re using it. The zest gives a hint of brightness that complements the buttery richness. Mama’s secret was sometimes adding a drop of almond extract for a nostalgic aroma that filled the house.

6. Into the Pan

Pour the batter into the prepared pan and smooth the top with a spatula. Tap the pan gently on the counter to remove any air bubbles—this helps the cake bake evenly.

7. The Bake

Bake for 70–80 minutes, or until a toothpick inserted in the center comes out clean. You’ll know it’s ready when the top is golden and the edges pull slightly away from the pan. The kitchen will fill with that buttery-sweet scent that feels like home.

8. Cooling and Serving

Let the cake rest in the pan for 10 minutes before turning it out onto a wire rack to cool completely. Resist cutting into it too soon—the texture becomes even more perfect as it sets.


Tips for the Perfect Pound Cake

  • Room Temperature Ingredients: Cold butter or eggs can cause the batter to curdle and create uneven texture.

  • Don’t Overbeat: After adding flour, mix gently to maintain tenderness.

  • Low and Slow Baking: The moderate oven temperature ensures even cooking and a fine crumb.

  • Flavor Variations: Add a swirl of chocolate, a drizzle of lemon glaze, or a spoonful of sour cream to tweak the texture and flavor.


Optional Toppings and Serving Ideas

While Mama’s Pound Cake shines on its own, you can dress it up for any occasion:

  • Simple Glaze: Mix powdered sugar with milk and drizzle it over the cooled cake for a touch of sweetness.

  • Berry Compote: Fresh strawberries or blueberries cooked down with sugar and lemon juice make a beautiful topping.

  • Whipped Cream or Ice Cream: For an indulgent dessert, serve a warm slice with a scoop of vanilla ice cream.

  • Toasted: Try toasting leftover slices and spreading a little butter or jam—it’s heavenly with morning coffee.


Why We Still Love Mama’s Pound Cake

There’s something about pound cake that feels timeless. It’s not just a dessert—it’s a memory keeper. Each slice carries stories of family gatherings, rainy-day baking sessions, and the comforting hum of the oven. Unlike trendy desserts that come and go, Mama’s Pound Cake is the one you’ll find at every celebration, wrapped in foil or resting on a glass cake stand, waiting patiently to be shared.

This cake also stores beautifully—wrap it tightly and it’ll stay moist for up to 5 days at room temperature, or freeze slices for future comfort. Some even say it tastes better the next day as the flavors settle and deepen.


Nutritional Information (per serving, approx. 1/12 of loaf):

  • Calories: 370

  • Fat: 18g

  • Saturated Fat: 11g

  • Cholesterol: 110mg

  • Carbohydrates: 48g

  • Sugar: 28g

  • Protein: 5g

  • Sodium: 200mg

(Note: These values can vary depending on the specific ingredients used.)


Final Thoughts

Mama’s Pound Cake isn’t just a recipe—it’s a reminder of how simple ingredients, handled with care, can create something extraordinary. It’s the perfect dessert for any season: fresh berries in summer, a dusting of powdered sugar in winter, or plain and proud year-round.

So, when life feels hectic, take a quiet afternoon, preheat your oven, and let this humble cake fill your kitchen with the scent of home. Because in every buttery crumb of Mama’s Pound Cake, there’s love—and that’s what makes it unforgettable.