Louisiana Seafood Gumbo

Louisiana seafood gumbo is more than just a dish; it’s storytelling in a pot. It traces its roots to a blend of African, French, Spanish, and Native American traditions—flavors slow-cooked and shared at kitchen tables for generations. What makes gumbo truly special is the holy trinity of Louisiana cooking (onion, bell pepper, celery), the dark roux that takes patience and a steady hand, and the rich broth full of seafood treasures from the Gulf. This recipe honors the old ways but gives a crisp, step-by-step guide so your gumbo comes out deeply flavorful, bold, and comforting.

Ingredients

For the Roux

  • ½ cup vegetable oil (or melted lard)

  • ½ cup all-purpose flour

For the Gumbo Base

  • 1 large onion, finely diced

  • 1 green bell pepper, diced

  • 2 celery stalks, diced

  • 4 garlic cloves, minced

  • 1 (14 oz) can crushed tomatoes

  • 6 cups seafood stock (or chicken stock if needed)

  • 2 bay leaves

  • 1 teaspoon dried thyme

  • 1½ teaspoons smoked paprika

  • 1 teaspoon ground black pepper

  • 1 teaspoon salt (adjust to taste)

  • ½ teaspoon cayenne (add more if you like heat)

  • 1 tablespoon Worcestershire sauce

  • 1 teaspoon hot sauce (optional but recommended)

Seafood

  • 1 lb shrimp, peeled and deveined

  • 1 lb crab legs or lump crab meat

  • 1 lb firm white fish (catfish, cod, or redfish), cut into chunks

  • ½ lb sliced andouille sausage (optional but adds deep flavor)

Final Touch

  • 1 cup sliced okra (fresh or frozen)

  • Fresh parsley or sliced green onion for garnish

  • Steamed white rice for serving

Step-By-Step Instructions

1. Make the Roux – The Foundation of Flavor

Set a large heavy pot or Dutch oven over medium-low heat. Add the oil and let it warm before sprinkling in the flour. Stir constantly—slow, even movements using a wooden spoon or heat-safe whisk. The color will shift gradually from pale beige to peanut butter to deep chocolate brown. This can take anywhere from 15 to 35 minutes depending on your heat. Do not rush. The darker the roux, the richer and earthier the final gumbo becomes. If it burns even slightly, start over—burned roux tastes bitter.

2. Sauté the Holy Trinity

Once the roux hits a deep brown, immediately add the onion, bell pepper, and celery. The vegetables will sizzle and release steam—this is when the gumbo becomes aromatic. Cook about 5 minutes until softened. Add the garlic and stir for another minute.

3. Build the Broth

Pour in the crushed tomatoes and stir to form a thick base. Slowly add your seafood stock, stirring so the roux fully dissolves. Add bay leaves, thyme, smoked paprika, black pepper, salt, cayenne, Worcestershire sauce, and hot sauce if using. Bring to a gentle simmer. Let this simmer uncovered for about 30 minutes to deepen the flavor.

4. Add the Okra and Sausage

Stir in the okra—it naturally thickens the gumbo and adds its signature Southern touch. If using andouille sausage, add it now so its smoky flavor infuses into the broth. Simmer 10 more minutes.

5. Add the Seafood – Gentle and Last

Seafood cooks quickly, so timing matters:

  • Add fish chunks first and cook 4 minutes.

  • Add shrimp and crab last, cooking only until the shrimp turn pink—about 3 minutes.

Taste and adjust seasoning—gumbo should have warmth, depth, and a slight brightness from spices.

Serving

Spoon a generous ladleful of gumbo into a bowl. Add a scoop of hot steamed rice in the center. Garnish with parsley or green onion. Serve with crusty bread or cornbread to mop up every drop.

What Makes This Recipe Unique

This gumbo stays loyal to Louisiana roots, yet emphasizes balance. The roux is dark enough to bring soul but not so smoky that it overpowers the seafood. The tomatoes add body without turning it into stew. Using both Worcestershire and smoked paprika introduces layers of savory depth. Adding the seafood last protects its sweetness—every bite should taste like the Gulf.

Where many gumbo recipes rely heavily on okra or file powder (sassafras leaf), this one uses okra lightly—and welcomes file powder at the table so people can thicken their bowls to their personal taste.

Tips for Perfection

Tip Why it Matters
Stir the roux constantly Prevents burning, maintains smooth texture
Use seafood stock Deepens ocean flavor rather than tasting flat
Add seafood last Keeps shrimp tender and fish flaky
Let gumbo rest before serving Flavors settle and blend beautifully

Storing & Reheating

Gumbo tastes even better the next day as flavors meld. Store in the refrigerator up to 3 days. Freeze without rice for up to 3 months.

Reheat low and slow to keep seafood tender.

Fried Green Tomatoes

There’s a certain magic in taking something unripe, something people normally walk past in the garden, and turning it into pure comfort food gold. Fried green tomatoes are a Southern treasure—crispy on the outside, tender and tangy on the inside, salty, warm, and surprisingly addictive. While they are most famously associated with Southern kitchens and old-fashioned family suppers, this recipe takes the familiar and adds a touch of bold seasoning and layered texture for a truly unforgettable result.

The secret to perfect fried green tomatoes lies in three main principles: choosing the right tomatoes, mastering the coating layers, and frying at just the right temperature so the crust stays crispy instead of soggy. With patience and good technique, these become more than just a side dish—they can be the star of a meal.

Ingredients

For the Tomatoes:

  • 4 large firm green tomatoes (not pink or ripening)

  • Salt, to draw out moisture

  • Freshly ground black pepper

Coating Mix:

  • 1 cup all-purpose flour

  • 1 teaspoon paprika

  • 1 teaspoon garlic powder

  • ½ teaspoon onion powder

  • ½ teaspoon chili powder (optional, adds a touch of heat)

  • 2 large eggs

  • ½ cup buttermilk (or regular milk with 1 tsp vinegar added)

  • 1½ cups cornmeal or fine yellow polenta

  • ½ cup panko breadcrumbs (for extra crunch)

For Frying:

  • Vegetable oil, peanut oil, or canola oil (for shallow frying)

  • Cast iron skillet or heavy-bottom pan

Optional Dipping Sauce:

  • ½ cup mayonnaise

  • 2 tablespoons sour cream or Greek yogurt

  • 1 teaspoon hot sauce

  • 1 teaspoon lemon juice

  • 1 teaspoon Cajun seasoning

Step-by-Step Instructions

1. Slice and Prep the Tomatoes

Wash the tomatoes and slice them into ¼ to ⅓ inch thick rounds. You don’t want them paper-thin—they should have enough structure to soften while frying without falling apart.

Lay the slices on paper towels or a clean kitchen towel. Sprinkle both sides with salt to help draw out excess water. This step prevents sogginess later. Let them sit for 10–15 minutes, then gently pat dry. Season lightly with black pepper.

2. Prepare the Coating Station

Set up three shallow bowls:

  • Bowl 1: Flour mixed with paprika, garlic powder, onion powder, and chili powder.

  • Bowl 2: Whisk eggs and buttermilk until smooth.

  • Bowl 3: Mix cornmeal and panko breadcrumbs together.

This triple-dip system is key to a crispy, layered crust that clings beautifully to the tomatoes.

3. Heat the Oil

Pour enough oil into your skillet to create a shallow fry—about ½ inch deep. Heat over medium heat to 350°F (175°C). If you don’t have a thermometer, sprinkle in a pinch of flour—if it sizzles immediately, the oil is ready.

4. Coat Each Slice

One at a time:

  • Dip tomato slice into the flour mixture. Shake off excess.

  • Dip into the egg mixture. Let excess drip.

  • Press into the cornmeal-panko mixture, making sure both sides are fully coated.

Place coated slices onto a tray until ready to fry.

5. Fry to Golden Perfection

Working in small batches, carefully place each slice into hot oil. Do not overcrowd the pan—this lowers the oil temperature and leads to soggy tomatoes.

Fry 2–3 minutes per side, until deep golden brown and crisp. Transfer to a rack or paper towel–lined plate to drain. Lightly sprinkle with salt while still hot.

6. Make the Dipping Sauce

Stir all sauce ingredients together until smooth. Adjust seasoning to taste.

Serving Suggestions

Fried green tomatoes shine as:

  • A side for grilled chicken or fish

  • A topping for burgers or BLTs

  • An appetizer with dipping sauce

  • A brunch addition alongside ham and biscuits

Try stacking them with mozzarella and fresh basil for a playful twist on caprese.

Tips for Success

  • Use firm, fully green tomatoes—even slight ripeness leads to mush.

  • Do not skip the drying step—moisture ruins crispness.

  • High enough oil heat is crucial—cold oil = greasy coating.

  • Use panko for that ultra-crunchy texture.

Why This Recipe Works

This version balances flavor, texture, and technique:

  • The three-step coating adds dimension and crunch.

  • The seasonings in the flour bring flavor all the way to the tomato surface—not just on the crust.

  • The use of cornmeal + panko ensures a crisp shell that doesn’t turn soggy.

The result? A golden, shatter-crisp exterior that breaks open to reveal warm, tangy tomato goodness.

A Final Thought

There’s something special about fried green tomatoes that feels like home—sun-warm gardens, front-porch rocking chairs, and slow summer afternoons. But you don’t need to live in the South to enjoy them. You just need a skillet, a few green tomatoes, and a bit of patience.

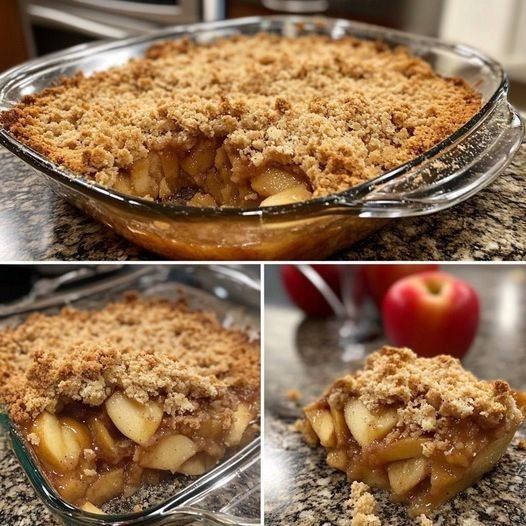
Apple Crisp

There’s something timeless about apple crisp—it’s cozy, aromatic, and deeply satisfying without needing much fuss. But this unique recipe takes the classic dessert up a notch by incorporating browned butter, a hint of cardamom, toasted oats, and a little splash of vanilla in the apple mixture itself. The result is a crisp that’s warm, buttery, lightly spiced, and layered with flavor—every bite is both crunchy and tender. Perfect for autumn evenings, holiday gatherings, or simply when you want dessert that tastes like a hug.

Why This Apple Crisp Is Special

While traditional apple crisp is wonderful, this version enhances depth and aroma in subtle ways:

  • Browned butter adds a nutty caramel richness.

  • Cardamom pairs beautifully with cinnamon without overpowering.

  • Toasting the oats creates a crisp topping that stays crunchy longer.

  • A little lemon + vanilla brightens the apples and keeps flavor balanced.

The result is elevated yet familiar—comforting, but with personality.

Ingredients

For the Apple Filling:

  • 6 medium apples (a mix of tart and sweet, such as Granny Smith + Honeycrisp)

  • 3 tablespoons lemon juice

  • ⅓ cup brown sugar

  • 2 tablespoons white sugar

  • 1 teaspoon vanilla extract

  • 1 teaspoon cinnamon

  • ¼ teaspoon cardamom (optional but recommended)

  • 2 tablespoons cornstarch or flour

  • Pinch of salt

For the Crisp Topping:

  • ½ cup unsalted butter (to brown)

  • 1 cup rolled oats

  • ¾ cup all-purpose flour

  • ⅔ cup brown sugar

  • ½ teaspoon cinnamon

  • ¼ teaspoon nutmeg

  • Pinch of ground ginger (optional)

  • ¼ teaspoon salt

Step-by-Step Instructions

1. Prepare the Apples

Peel and slice your apples into even, thin slices—about ¼ inch thick. The thickness matters: too thick, and the apples remain firm; too thin, and they get mushy. Place the apple slices in a mixing bowl and sprinkle with lemon juice to keep them from browning and to enhance flavor.

Add brown sugar, white sugar, cinnamon, cardamom, vanilla, cornstarch, and a pinch of salt. Gently toss until the apples are evenly coated and glossy. Let them rest while you make the topping—this allows their natural juices to begin releasing, creating a more syrupy filling.

2. Brown the Butter

In a small saucepan over medium heat, melt the butter. Let it simmer, stirring occasionally, until it foams and turns golden brown with a nutty aroma. This takes about 4–6 minutes. As soon as the butter browns, remove it from the heat so it doesn’t burn.

That deep caramel aroma? That’s the magic moment.

3. Toast the Oats

Right after browning the butter, toss your oats into a dry skillet and toast them over medium heat for 2–3 minutes. This step adds crunch and prevents soggy topping—one of the secrets of a perfect crisp.

4. Make the Crisp Topping

In a mixing bowl, combine toasted oats, flour, brown sugar, cinnamon, nutmeg, ginger, and salt. Pour the browned butter over everything and mix with a fork until it becomes sandy and crumbly. It should clump easily when pinched but not be wet like dough.

5. Assemble

Preheat your oven to 350°F (175°C).

Transfer the apples into a greased 9×9-inch baking dish or a cast-iron skillet. Spread them evenly, then sprinkle the crisp topping generously over the apples, ensuring full coverage—those golden edges and bubbly spots are what make a crisp irresistible.

6. Bake

Bake for 40–50 minutes, or until:

  • The topping is golden brown and crisp.

  • The apple juices are bubbling around the edges.

If the topping browns too quickly, loosely tent with foil.

Let the crisp cool for at least 10 minutes before serving—this rest allows the filling to thicken beautifully.

Serving Suggestions

Apple crisp is wonderful on its own, but unforgettable with:

  • A scoop of vanilla ice cream

  • Freshly whipped cream

  • A drizzle of warm caramel

If serving at breakfast, try it with:

  • A spoonful of Greek yogurt

  • A sprinkle of chopped walnuts

Tips for Success

  • Apple Variety Matters: Using both tart and sweet apples ensures balance. Granny Smith holds shape, while Honeycrisp or Fuji add juiciness.

  • Don’t Skip the Rest Time: Letting the crisp cool slightly ensures the filling sets instead of running.

  • Want it Extra Crisp? Add ¼ cup chopped pecans or almonds to the topping.

Make-Ahead & Storage

  • Make Ahead: Assemble separately (apples in one container, topping in another) up to 24 hours ahead. Combine just before baking.

  • Store: Refrigerate leftovers (covered) for up to 4 days.

  • Reheat: Warm at 300°F for 10–12 minutes to return the topping’s crunch.

Final Thoughts

This apple crisp captures everything we love about homemade desserts—warmth, fragrance, texture, and the joy of simple ingredients coming together in perfect harmony. Whether you’re serving it at a family dinner, taking it to a gathering, or enjoying it on a cozy evening, it’s a recipe that feels like home.

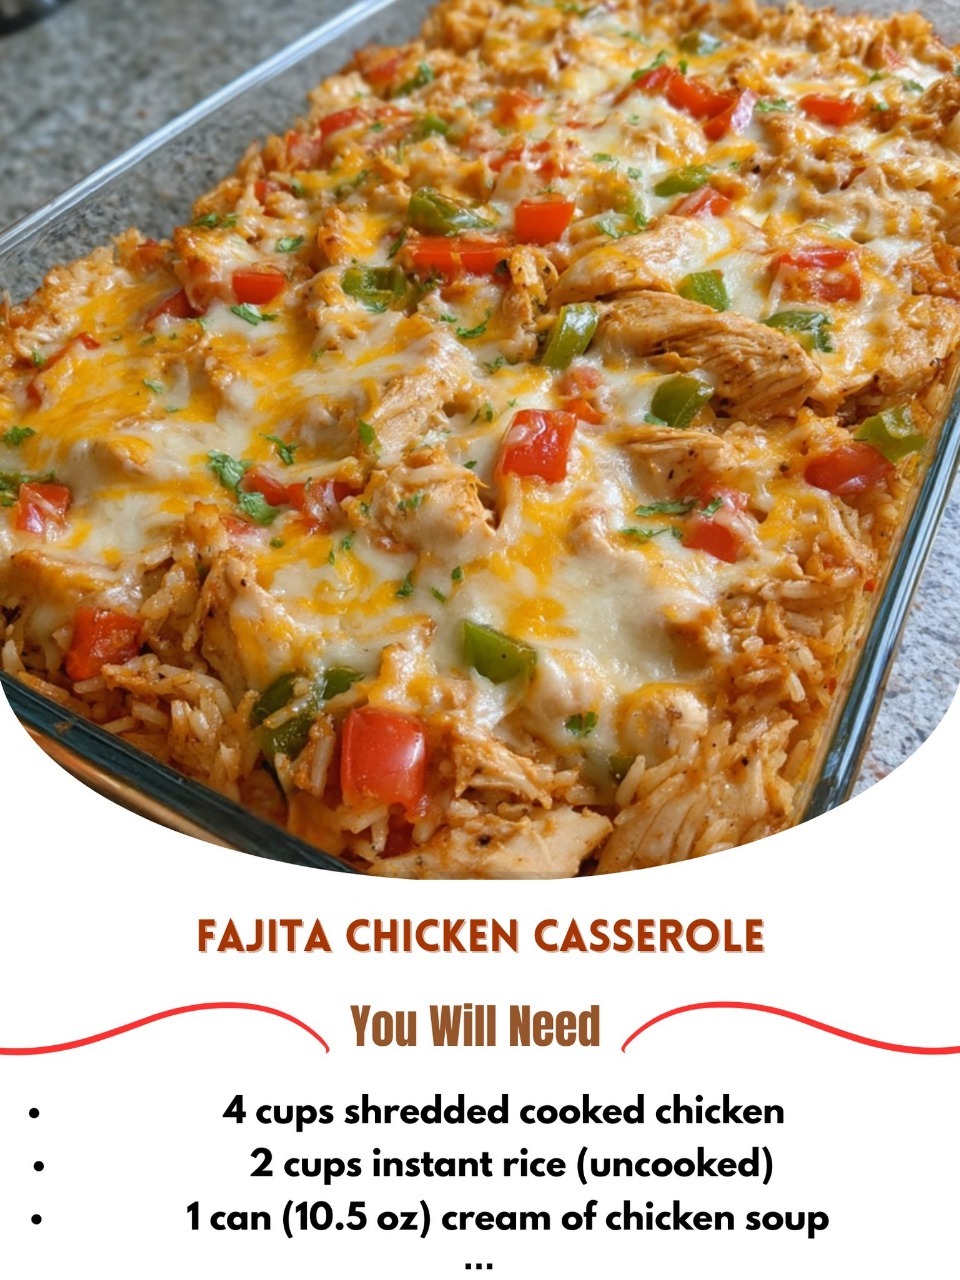
Fajita Chicken Casserole

There’s something undeniably comforting about a hearty casserole that bubbles with flavor, aroma, and warmth straight from the oven. This Fajita Chicken Casserole takes everything we love about sizzling fajitas—the smoky peppers, tender chicken, and bold seasoning—and bakes it into a creamy, cheesy dish that practically melts into the plate. It’s perfect for busy weeknights, meal prepping for the week, or feeding a table full of hungry loved ones. The best part? This casserole has layers of textures and flavors that work together effortlessly—juicy chicken, tender bell peppers, creamy sauce, and perfectly melted cheese—all tied together with cozy southwestern flair.

Why This Recipe Works

Unlike many casseroles that rely heavily on pasta or potatoes, this dish highlights the flavor of the chicken, seasoning, and vegetables. The combination of cream cheese and sour cream forms a silky sauce that coats every bite, while smoked paprika, chili powder, cumin, and garlic bring that classic fajita taste. You can use rotisserie chicken to make this ultra quick, or cook seasoned chicken breasts at home for an even fresher taste. The bell peppers offer sweetness and crunch, and the cheese brings everything together with a gooey finish. It’s indulgent, yet balanced, hearty but not heavy, and so satisfying.

Ingredients

For the Chicken & Seasoning:

  • 3 cups cooked chicken, shredded or chopped (rotisserie works perfectly)

  • 1 tbsp olive oil (if cooking fresh chicken)

  • 1 tbsp chili powder

  • 1 tsp smoked paprika

  • 1 tsp ground cumin

  • ½ tsp garlic powder

  • ½ tsp onion powder

  • ½ tsp dried oregano

  • ½ tsp salt

  • ¼ tsp black pepper

Vegetables & Sauce:

  • 1 tbsp butter

  • 1 medium onion, thinly sliced

  • 1 red bell pepper, sliced

  • 1 green bell pepper, sliced

  • 1 yellow bell pepper, sliced (optional but beautiful!)

  • 3 cloves garlic, minced

  • 8 oz cream cheese, softened

  • ½ cup sour cream

  • ½ cup chicken broth

  • Juice of 1 lime

Cheese & Toppings:

  • 1 ½ cups shredded Mexican blend cheese (or cheddar + Monterey Jack)

  • Chopped cilantro, to garnish

  • Sliced jalapeños (optional for heat)

  • Crushed tortilla chips or sliced green onions (optional for texture)

Instructions

  1. Prepare the Chicken:
    If using raw chicken, heat olive oil in a skillet over medium heat. Rub the chicken breasts with chili powder, cumin, paprika, garlic powder, onion powder, oregano, salt, and pepper. Cook for 6–8 minutes per side, or until fully cooked, then shred or chop. If using rotisserie chicken, simply toss it with the seasoning to coat evenly.

  2. Sauté the Veggies:
    In a large skillet, melt butter. Add sliced onions and bell peppers and cook for about 6–7 minutes, until softened and beginning to caramelize. Stir in minced garlic and cook for another 1 minute. Remove from heat.

  3. Make the Creamy Fajita Sauce:
    In a mixing bowl, combine cream cheese, sour cream, chicken broth, lime juice, and half of your shredded cheese. Mix until smooth and creamy. If the cream cheese is too firm, microwave it for 20 seconds to soften more.

  4. Assemble the Casserole:
    Preheat your oven to 375°F (190°C). In a baking dish (9×13 works well), layer the seasoned chicken and sautéed peppers. Pour your creamy sauce over everything and gently stir to distribute evenly. Sprinkle the remaining cheese on top.

  5. Bake:
    Place the casserole in the oven and bake for 20–25 minutes, or until the cheese is melted and bubbling at the edges.

  6. Finish & Serve:
    Remove from the oven and let rest for at least 5 minutes. Garnish with cilantro, jalapeños, green onions, or crushed tortilla chips for crunch.

Serving Suggestions

This casserole is incredibly versatile. Serve it:

  • Over steamed rice or Spanish rice for a full meal

  • Over cauliflower rice for a low-carb or keto-friendly version

  • With warm flour or corn tortillas for scoop-and-wrap bites

  • With a side of black beans, guacamole, or pico de gallo

Tips & Variations

  • Add heat: Stir in ½ tsp cayenne or chopped pickled jalapeños.

  • Make it creamier: Add extra sour cream or a bit of shredded mozzarella.

  • Make it heartier: Add cooked rice or black beans before baking.

  • Make it lighter: Use reduced-fat cream cheese and Greek yogurt in place of sour cream.

Why You’ll Make This Again and Again

This dish is beautifully balanced—each bite brings creamy richness, smoky warmth, sweet pepper notes, and a comforting cheese pull. It reheats wonderfully, freezes well, and adapts to whatever you have on hand. It’s the kind of meal that earns a permanent place in your kitchen rotation.

Garbage Bread (Loaded Stuffed Bread Roll)

Garbage Bread is one of those magical, crowd-pleasing creations that looks impressive, tastes indulgent, and is secretly incredibly easy to make. The name might make you laugh, but the idea is simple: take all your favorite comforting, flavorful ingredients—think seasoned ground beef, melty cheese, sautéed onions, pepperoni, bacon, or even leftover roast chicken—and roll them inside soft dough to bake into a golden, pull-apart loaf. It’s the ultimate “use what you have” meal. This recipe gives you a delicious base version, but consider it a template to make your own signature version every time.

Why It Works

Garbage Bread is basically a handheld meal. The dough becomes the wrapper, holding everything inside. As it bakes, the flavors meld beautifully—the cheese melts, the meat juices soak slightly into the bread, and everything becomes gooey and irresistible. It slices easily, making it great for parties, movie nights, game days, or a lazy “no forks needed” dinner.

Ingredients

For the Filling:

  • 1 lb (450g) ground beef

  • 1 small onion, finely chopped

  • 2 cloves garlic, minced

  • ½ tsp salt

  • ½ tsp black pepper

  • 1 tsp Italian seasoning

  • ½ cup chopped pepperoni (optional but delicious)

  • ½ cup cooked crumbled bacon (optional)

  • 1 cup shredded mozzarella cheese

  • 1 cup shredded cheddar cheese

  • ¼ cup pizza sauce or marinara

For the Dough:
You may use any of the following:

  • 1 store-bought refrigerated pizza dough or

  • 1 can crescent roll dough or

  • Homemade dough if you prefer

For the Brushed Crust:

  • 2 tbsp melted butter

  • ½ tsp garlic powder

  • ½ tsp dried parsley

Step-by-Step Instructions

  1. Prepare the Filling:
    Heat a large skillet over medium heat. Add the ground beef and chop it apart with a spoon as it browns. Add the chopped onion and garlic once the beef begins to color. Cook until the beef is completely browned and the onions are soft. Drain off excess grease so your bread does not become soggy.

  2. Season the Mixture:
    Sprinkle in salt, pepper, and Italian seasoning. Stir well and cook for an additional minute to let the flavors meld.

  3. Add the “Garbage” Ingredients:
    Stir in the chopped pepperoni and crumbled bacon, if using. Remove from heat and allow it to cool slightly. You do not want to add cheese to piping-hot meat or it may melt before rolling.

  4. Prepare the Dough:
    Roll out your dough on a lightly floured surface into a large rectangle. The shape doesn’t need to be perfect, but aim for around 12×16 inches. If using crescent dough, pinch seams together to form a solid sheet.

  5. Layer Your Fillings:
    Spread the pizza sauce in a thin layer across the dough. Then sprinkle the mozzarella and cheddar evenly. Finally, scatter the seasoned meat mixture across the surface. Make sure to leave an inch border around the edges.

  6. Roll the Bread:
    Starting from the long side, gently but firmly roll the dough into a log, tucking the filling inside as you go. Place seam-side down on a lined baking sheet. Fold and pinch the ends to seal completely.

  7. Bake It:
    Preheat your oven to 375°F (190°C). Stir together melted butter, garlic powder, and parsley. Brush this over the top of your bread roll. Bake for 25–30 minutes or until golden brown and fully cooked.

  8. Rest Before Cutting:
    Allow the bread to rest for 8–10 minutes before slicing. This makes the inside set and keeps the slices clean instead of messy.

Serving Suggestions

Serve warm, sliced into thick rounds with:

  • Extra marinara

  • Ranch dressing

  • Garlic butter

  • Spicy chipotle mayo

This bread is a game-day champion, a busy-night dinner saver, and a “wow” appetizer all at once.

Variations (Choose Your Personality!)

Flavor Theme Swap the Meat Swap the Cheese Add-Ins
Bacon Cheeseburger Ground beef + bacon Cheddar + American Diced pickles, caramelized onions
Buffalo Chicken Shredded chicken tossed in buffalo sauce Mozzarella + Blue cheese crumbles Green onions, ranch drizzle
Italian Sub Salami, ham, pepperoni Provolone Banana peppers, shredded lettuce (added after baking)
Taco Seasoned taco meat Pepper jack Black beans, jalapeños, drizzle sour cream when serving

Tips for Success

  • Drain the meat well – excess grease is your enemy.

  • Cool the filling slightly before rolling to avoid tearing.

  • Seal edges firmly so cheese doesn’t escape.

  • Let it rest after baking for clean slices.

What Makes This Version Unique

This particular recipe layers flavor thoughtfully instead of just tossing ingredients in. The seasoned beef, smoky pepperoni, and bacon give deep umami richness. The mozzarella ensures the classic stretchy pull, while cheddar adds sharpness. The garlic-butter crust finishing touch elevates the bread from “snack” to “special.”

Garbage Bread isn’t just a recipe—it’s an invitation to improvise, to use leftovers creatively, and to play with flavor. Once you master the technique, you’ll find yourself making it different every time—and loving every result.

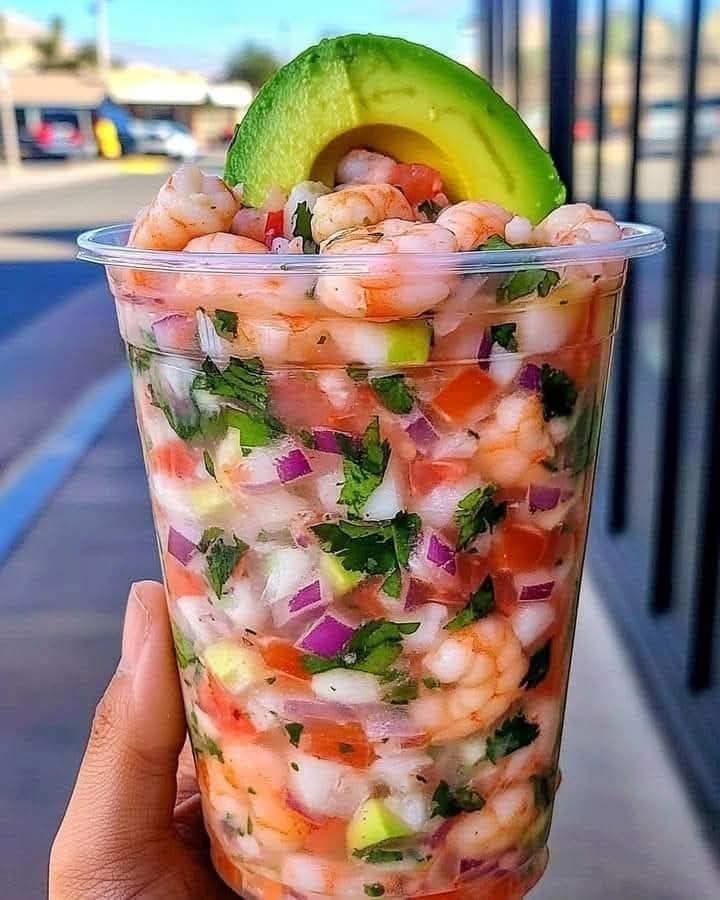
Mexican Shrimp Cocktail Recipe

Here we go — a unique, flavor-loaded Mexican Shrimp Cocktail recipe with a bright, chilled, spicy-tangy sauce that tastes like a sunny afternoon by the ocean. This version adds roasted peppers, a splash of orange juice, and a cilantro-lime “bright finish” that sets it apart.

Mexican Shrimp Cocktail (Cóctel de Camarones)

Serves: 4 to 6
Prep Time: 20 minutes
Chill Time: 30 minutes
Total Time: ~50 minutes

Ingredients

For the Shrimp:

  • 1 ½ lbs medium shrimp, peeled and deveined

  • 1 tsp sea salt

  • 1 tsp onion powder

  • 1 bay leaf

  • ½ lemon

For the Cocktail Sauce:

  • 1 ½ cups Clamato (or tomato juice if you want it milder)

  • ½ cup ketchup (for sweetness + body)

  • ½ cup fresh orange juice (this is the unique twist—adds brightness)

  • 3 tbsp fresh lime juice

  • 2 tbsp hot sauce (Valentina, Tapatío, or Cholula)

  • ½ tsp Worcestershire sauce

Vegetables & Add-ins:

  • 1 medium red onion, finely diced

  • 2 Roma tomatoes, finely diced

  • 1 medium English cucumber, diced small

  • 1 ripe avocado, diced

  • 1 small jalapeño or serrano, minced (seeds removed if mild)

  • ½ cup chopped fresh cilantro

  • 1 roasted red pepper, finely diced (adds smoky sweetness—unique!)

For Serving:

  • Lime wedges

  • Corn tortilla chips or saltine crackers

  • Tajín or chili salt for the rim of the glass (optional)

Instructions

Step 1: Cook the Shrimp

  1. Bring a pot of water to a gentle boil.

  2. Add salt, onion powder, bay leaf, and squeeze in the half lemon.

  3. Add shrimp and cook just until pink and opaque, about 1–2 minutes.

  4. Transfer immediately to an ice bath to stop cooking.

  5. Chop shrimp into bite-size pieces (or leave whole if preferred).

The key is to not overcook the shrimp—it should stay juicy and tender.

Step 2: Prepare the Cocktail Base

In a large bowl, whisk together:

  • Clamato

  • Ketchup

  • Orange juice

  • Lime juice

  • Hot sauce

  • Worcestershire

Taste — it should be tangy, a little sweet, lightly spicy.
Adjust:

  • More lime → brighter

  • More ketchup → sweeter & thicker

  • More hot sauce → spicier

Step 3: Add the Fresh Ingredients

Fold into the bowl:

  • Red onion

  • Tomatoes

  • Cucumber

  • Jalapeño

  • Cilantro

  • Roasted red pepper

Stir gently to coat everything.

Step 4: Add Shrimp & Avocado

Add the chopped shrimp and very gently add avocado last to prevent mashing.

Mix softly.

Step 5: Chill

Cover and refrigerate at least 30 minutes to allow flavors to mingle.
The longer it rests (up to 4 hours), the better the flavor synergy.

How to Serve (Traditional & FUN Presentation)

This cocktail is traditionally served chilled in tall glasses or goblets.

Optional but recommended:
Dip rim of glasses in lime juice → then Tajín or chili salt.

Fill glass with shrimp cocktail.
Top with extra cilantro, avocado cubes, or a squeeze of lime.

Serve with:

  • Corn tortilla chips (crunchy + salty)

  • Saltine crackers (classic Mexican style)

  • A cold beer or agua fresca 😉

Flavor Notes & What Makes This Version Unique

This recipe takes the traditional Mexican shrimp cocktail and elevates it in three distinctive ways:

Element Traditional This Unique Version
Citrus Usually just lime Orange + lime creates layered brightness
Pepper flavor Raw chile only Roasted pepper adds smoky sweetness
Texture Sometimes watery Ketchup + citrus ratio creates a silky, balanced broth

The result?
A cocktail that is refreshing yet deeply flavored, spicy but not harsh, and beautifully layered.

Make It Even More Impressive

If you want to take it over the top:

  • Add diced mango or pineapple for a sweet-tropical edge.

  • Swap shrimp for mixed seafood (shrimp + scallops + crab).

  • Add a splash of tequila to the sauce (party-approved 😄).

Storage

  • Keep chilled.

  • Best enjoyed within 24 hours (because of avocado and seafood).

  • If storing longer, add avocado only right before serving.

Final Touch

Before serving, always taste and adjust:

  • Lime wakes everything up.

  • Salt brings clarity.

  • Hot sauce controls the mood.

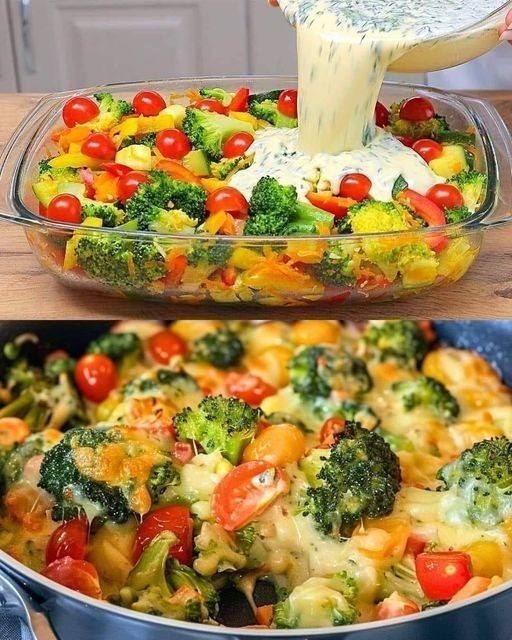
Creamy Garden Harvest Vegetable Casserole

A cozy, layered bake full of tender vegetables, creamy sauce, and a golden cheesy crumb topping.

This vegetable casserole is the kind of dish that warms your heart and fills your home with the comforting aroma of garlic, herbs, and browned butter. It’s a celebration of garden flavors—soft roasted squash, sweet carrots, earthy potatoes, bright broccoli, and caramelized onions, all tucked into a creamy, savory sauce and topped with a crisp golden crust. It’s perfect as a main dish with bread or as a hearty side alongside roasted chicken, baked fish, or a holiday table spread.

Servings: 6

Baking Time: 45 minutes

Skill Level: Easy

Ingredients

Vegetables

  • 2 medium potatoes, thinly sliced

  • 2 cups broccoli florets

  • 1 large carrot, thinly sliced

  • 1 small zucchini, thinly sliced

  • 1 cup sliced mushrooms (optional but wonderful)

  • 1 small onion, thinly sliced

  • 2 tablespoons olive oil

  • Salt & pepper to taste

Creamy Herb Sauce

  • 3 tablespoons butter

  • 3 tablespoons flour

  • 2 cups whole milk (or half milk + half cream for richer flavor)

  • 2 cloves garlic, minced

  • 1 teaspoon Dijon mustard

  • ½ teaspoon dried thyme

  • ½ teaspoon dried basil

  • ¼ teaspoon smoked paprika

  • Salt and black pepper to taste

Cheese & Topping

  • 1 cup shredded mozzarella or Monterey Jack

  • ½ cup grated parmesan

  • 1 cup breadcrumbs (panko recommended)

  • 2 tablespoons melted butter

Instructions

Step 1: Prepare the Vegetables

  1. Preheat your oven to 375°F (190°C).

  2. Toss the sliced potatoes, broccoli, carrots, zucchini, mushrooms, and onion with olive oil, a pinch of salt, and a little black pepper.

  3. Spread them on a baking tray and roast for 15 minutes.
    Roasting first intensifies flavor and prevents the vegetables from turning watery in the casserole.

Step 2: Make the Creamy Herb Sauce

  1. In a medium saucepan, melt the butter over medium heat.

  2. Add flour, whisking until smooth and lightly golden (about 1 minute).

  3. Slowly pour in the milk, whisking constantly until thick and velvety.

  4. Stir in garlic, Dijon mustard, thyme, basil, smoked paprika, and season generously with salt and pepper.

  5. Let the sauce simmer for 2 minutes, then remove from heat.

The mustard and smoked paprika give the sauce warmth and complexity—don’t skip them!

Step 3: Assemble the Casserole

  1. Lightly butter a 9×13 baking dish.

  2. Add the roasted vegetables and toss gently so they’re evenly mixed.

  3. Pour the creamy herb sauce over them, coating well.

  4. Sprinkle evenly with mozzarella and parmesan.

Step 4: Make the Golden Crumb Topping

  1. Stir together the breadcrumbs and melted butter until lightly moistened.

  2. Spread this mixture across the top of the casserole.
    This ensures a beautifully crunchy, golden-brown crust.

Step 5: Bake

  • Place in the oven for 30–35 minutes, or until:

    • The sauce is bubbling,

    • The cheese has melted,

    • The topping is crisp and golden brown.

Let rest 5 minutes before serving so the layers settle.

Serving Suggestions

  • As a main dish: Pair with warm garlic bread, a side salad, or buttered cornbread.

  • As a side: Serve next to roast chicken, grilled salmon, meatloaf, or baked ham.

  • For brunch: Add a few soft-poached eggs or crumble feta on top after baking.

Flavor Variations (Make It Your Own!)

Twist What to Add Flavor Result
Italian Style Add ½ cup ricotta & fresh basil Creamier & aromatic
Spicy Kick Add red pepper flakes & pepper jack cheese Warm, spicy finish
Mediterranean Add olives, artichokes & oregano Bright & savory
Protein Boost Add chickpeas, rotisserie chicken, or white beans More filling & hearty

Tips for Best Results

  • Slice vegetables thin so they cook evenly.

  • Pre-roasting prevents sogginess and deepens their flavor.

  • Avoid skipping the crumb topping—texture matters!

  • Leftovers are even better the next day because the flavors meld beautifully.

Why This Recipe Works

Unlike many casseroles that drown vegetables in heavy sauce or too much cheese, this recipe keeps the balance. The vegetables are the star—sweet, nutty, earthy—and the creamy sauce simply enhances them. The topping adds crunch, preventing the dish from feeling too soft or monotone in texture. Every bite has layers: warm vegetables, silky sauce, melty cheese, and crisp topping.

Crockpot Beef Tips & Noodles

There are certain dishes that feel like a warm hug at the end of a long day, and Crockpot Beef Tips & Noodles is absolutely one of them. This recipe turns simple ingredients into a meal that tastes like it simmered in a grandmother’s kitchen all afternoon. The rich, savory gravy coats every strand of tender noodles, and the beef becomes melt-in-your-mouth soft without requiring any special technique. It’s the kind of meal that fills your home with the aroma of comfort, bringing everyone to the table without being called twice.

What makes this recipe unique is the layering of flavors before the slow cooking even begins. Instead of tossing raw meat into the crockpot, we take a moment to sear the beef, allowing the natural sugars to caramelize and create depth. We then build a savory base with onions, garlic, Worcestershire sauce, beef broth, and just a hint of Dijon mustard. The mustard doesn’t stand out on its own—it simply wakes up the sauce and gives the gravy a round, full flavor. The crockpot does the rest of the work, transforming everything into a velvety, savory dream.

Ingredients

For the Beef Tips & Gravy:

  • 2 lbs beef stew meat, sirloin tips, or chuck pieces

  • 2 tbsp olive oil or butter

  • 1 medium onion, finely diced

  • 3 cloves garlic, minced

  • 3 cups beef broth

  • 3 tbsp Worcestershire sauce

  • 1 tbsp soy sauce

  • 1 tbsp Dijon mustard

  • 1 tsp dried thyme

  • 1 tsp smoked paprika

  • ½ tsp black pepper

  • Salt to taste (start with ½ tsp and adjust later)

  • 2 bay leaves

  • 3 tbsp cornstarch + 4 tbsp cold water (for slurry)

For Serving:

  • 12 oz egg noodles (extra wide preferred)

  • Fresh parsley (optional for garnish)

Step-by-Step Instructions

1. Brown the Beef (Don’t Skip This Part!)
Heat a large skillet over medium-high heat. Add the olive oil or butter, then add the beef pieces in batches, making sure not to overcrowd the pan. Sear the meat until browned on all sides. This step is key to flavor—it adds caramelization that will deepen the final taste.

2. Build the Flavor Base
Place the browned beef into your crockpot. Add the diced onion and minced garlic on top. In a separate bowl, whisk together the beef broth, Worcestershire sauce, soy sauce, Dijon mustard, thyme, smoked paprika, black pepper, and salt. Pour this mixture over the beef. Add the bay leaves.

3. Slow Cook to Tender Perfection
Cover and cook:

  • Low: 7–8 hours

  • High: 4–5 hours
    The beef should be incredibly tender and easy to break apart with a fork.

4. Thicken the Gravy
Remove the bay leaves. Mix the cornstarch and cold water together until smooth, then stir it into the crockpot. Turn heat to high and cook for 15–20 minutes, or until the gravy has thickened.

5. Cook the Noodles
Boil the egg noodles according to package instructions. Drain and lightly toss with a touch of butter so they don’t stick.

6. Serve and Enjoy
Plate the noodles and ladle the savory beef and gravy right over top. Garnish with chopped parsley if desired.

Why This Dish Works

Slow cooking does wonders for tougher cuts of meat. As the beef simmers gently in rich broth and seasonings, the connective tissues break down, transforming what would be chewy pieces into velvety bites that fall apart with the slightest pressure. The noodles act as the perfect delivery system for the gravy, absorbing just enough sauce without getting mushy.

The Worcestershire and soy sauce together create umami, the “savory” flavor that makes soups and gravies taste deeply satisfying. The Dijon mustard enhances flavor subtly without adding sharpness. Smoked paprika offers warmth, while thyme brings an herbal earthiness that makes the dish feel rustic and homemade.

Serving Ideas

  • Pair with buttered green beans, roasted carrots, or steamed broccoli.

  • Add a side of buttermilk biscuits or crusty bread to absorb the gravy.

  • For a richer experience, stir a splash of heavy cream into the gravy at the end.

Storage & Reheating

This dish stores beautifully, and some even say it tastes better the next day.

  • Refrigerate leftovers in an airtight container for 3–4 days.

  • Reheat gently on the stovetop or in the microwave.

  • If the gravy thickens too much, add a splash of broth to loosen it.

Crockpot Beef Tips & Noodles is one of those reliable, soul-soothing meals you’ll want to make again and again. It’s simple enough for a weeknight but rich enough to serve for Sunday dinner. Every bite is comforting, hearty, and deeply flavorful—the very definition of home-cooked love in a bowl. Enjoy! 🍲✨

Stuffed Cabbage Rolls

Stuffed cabbage rolls are one of those timeless dishes that feel like home, no matter where your home is. Every culture has a version of tender cabbage leaves wrapped around a savory filling—whether it’s Eastern European golabki, Middle Eastern malfouf, or Asian-style stuffed cabbage simmered in broth. This version carries the heart of the traditional dish but adds a few unique touches to the filling, sauce, and texture, creating a meal that is comforting, hearty, and absolutely memorable. The rolls come out soft, flavorful, and delicately seasoned, simmered low and slow in a tangy tomato sauce that thickens beautifully. Serve with mashed potatoes, buttered noodles, or just on their own with crusty bread to mop up the sauce.

Ingredients

For the Cabbage

  • 1 large head of green cabbage

  • Salt, for boiling water

For the Filling

  • 1 lb (450g) ground beef (or half beef, half ground pork for richer flavor)

  • 1 medium onion, finely diced

  • 3 cloves garlic, minced

  • 1 cup cooked rice (cooled; leftover rice works beautifully)

  • 1 egg

  • 2 tbsp tomato paste

  • 1 tbsp Worcestershire sauce

  • 1 tsp smoked paprika

  • ½ tsp ground allspice (the secret flavor note!)

  • 1 tsp dried thyme or oregano

  • Salt and black pepper to taste

For the Sauce

  • 2 tbsp butter

  • 1 tbsp olive oil

  • 1 medium onion, finely sliced

  • 2 cloves garlic, minced

  • 1 can (15 oz) crushed tomatoes

  • 1 cup beef broth

  • 1 tbsp brown sugar

  • 1 tbsp apple cider vinegar

  • Salt and pepper to taste

Step 1: Prepare the Cabbage

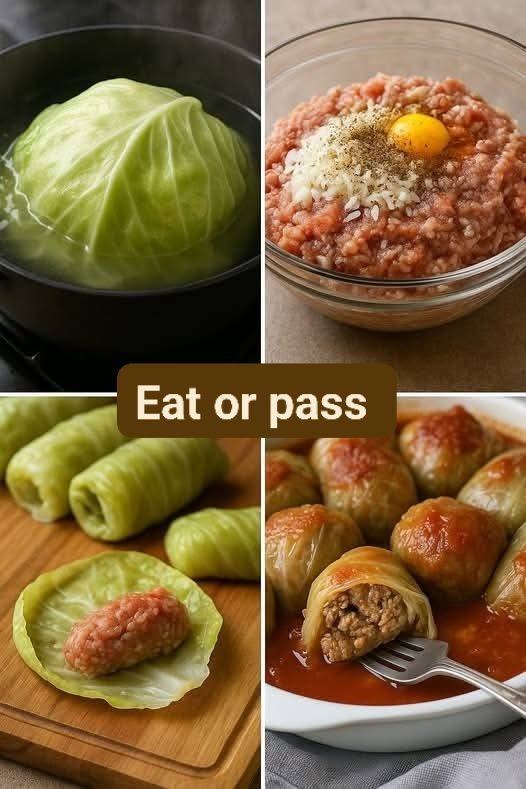
Bring a large pot of salted water to a boil. Using a sharp knife, carefully remove the core of the cabbage. Place the whole head into the boiling water and let it blanch for 2–3 minutes. As the leaves soften, gently peel them off one by one with tongs. Place softened leaves on a tray to cool. Continue until you have around 12–14 large leaves. Trim the thick vein at the base of each leaf to make rolling easier.

Tip: Don’t rush this. Slow blanching keeps the leaves pliable instead of ripping.

Step 2: Make the Filling

In a large bowl, combine the ground meat, diced onion, minced garlic, cooked rice, egg, tomato paste, Worcestershire sauce, smoked paprika, allspice, dried thyme, salt, and black pepper. Mix gently with clean hands—just enough to bring everything together. Overmixing makes the filling tough, and we want tender rolls with a soft bite.

The allspice is what makes this recipe unique—it adds a warm, slightly sweet aroma that elevates the beef and gives this dish depth.

Step 3: Form the Rolls

Lay a cabbage leaf flat. Place 2–3 tablespoons of filling near the base. Fold the bottom over the filling, tuck in the sides, and roll tightly—like a small burrito. Repeat with remaining leaves.

If you have leftover small leaves, line the bottom of your pot with them to act as a cushion while cooking.

Step 4: Make the Sauce

In a large deep skillet or heavy pot, heat butter and olive oil together. Add the sliced onion and cook until tender and lightly golden. Add garlic and cook 1 more minute. Stir in crushed tomatoes, beef broth, brown sugar, and apple cider vinegar. Simmer for 5 minutes. Taste and adjust seasoning—balancing sweet, tangy, and savory is key here.

Step 5: Cook the Rolls

Nestle the cabbage rolls seam-side down into the sauce. Spoon some sauce over the top. Cover with a lid and simmer gently on low heat for 1½ hours. The slow cooking allows flavors to develop and the cabbage to soften completely, becoming silky and tender.

If using the oven: Bake covered at 325°F (160°C) for the same amount of time.

Serving Suggestions

Serve the cabbage rolls warm, ladled generously with the tomato sauce. A sprinkle of fresh parsley adds a simple finishing touch. For sides:

  • Mashed potatoes are a classic pairing.

  • Buttered egg noodles make it homestyle cozy.

  • Crusty bread helps soak up that rich sauce.

If you want to brighten the meal, a simple salad of sliced cucumber with salt, pepper, and a splash of vinegar pairs wonderfully.

Why This Recipe Works

  • The blanched cabbage ensures tenderness without tearing.

  • The allspice adds warmth and depth to the filling.

  • The sauce balances savory, sweet, and tangy flavors, making every bite satisfying.

  • Slow simmering guarantees melt-in-your-mouth texture.

This recipe doesn’t try to reinvent stuffed cabbage—it simply enhances what makes it good: warmth, comfort, and flavor layered slowly together. Whether you’re cooking it for family dinner, meal prepping for the week, or serving guests who crave something deeply homey, this dish delivers heart and satisfaction.

Homemade Baileys Irish Cream

Homemade Baileys Irish Cream is one of life’s most indulgent kitchen luxuries. Smooth, velvety, and laced with the unmistakable warmth of Irish whiskey, it brings together chocolate, vanilla, and cream in a symphony of cozy flavors. Store-bought versions are delicious in their own right, but when made at home, Baileys takes on a richer and more personal character. The flavor becomes deeper, the sweetness more balanced, and the creaminess silkier. Best of all, you control every note—meaning you can adjust the sweetness, the strength, and even the flavor profile to suit your own taste.

This version uses real heavy cream, sweetened condensed milk, aromatic coffee, cocoa, and pure vanilla. A touch of almond extract adds a signature whisper of nuttiness that people recognize instantly—even if they can’t quite name it. And of course, we finish it with a generous pour of Irish whiskey. The result is luxurious, decadent, and far superior to many commercial alternatives.

One of the joys of making Baileys from scratch is how incredibly simple it is. There are no complicated techniques or special tools involved. You simply blend, bottle, and chill. You can make it in under ten minutes. And although it is delicious immediately after blending, it becomes even better after resting for at least a few hours. During this time, the flavors mellow and meld into a silky, uniform cream liqueur.

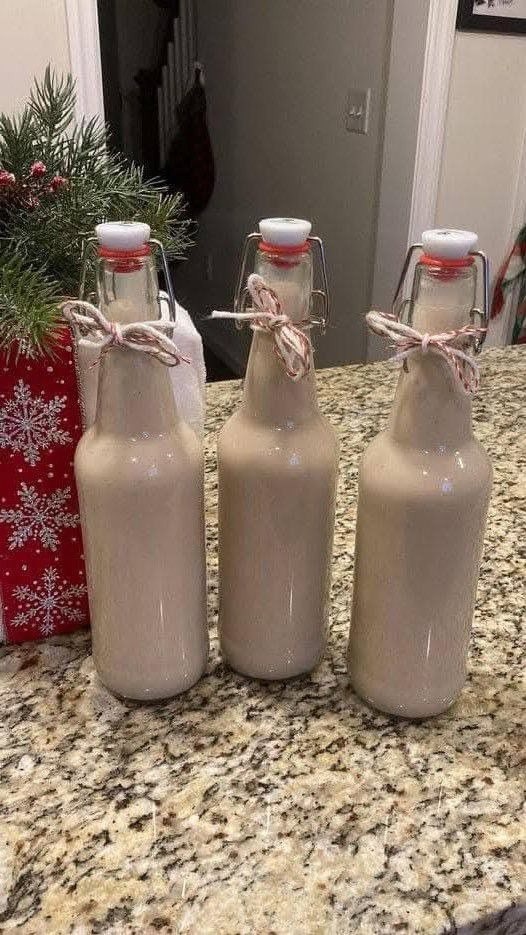
You can serve your homemade Baileys over ice, swirl it into coffee, drizzle it over vanilla ice cream, add it to milkshakes, bake it into cakes or brownies, or shake it into a cocktail with ice and a pinch of cinnamon. It also makes an exceptional holiday or housewarming gift—just bottle it in a glass jar, tie a ribbon, and include a handwritten tag.

Ingredients

  • 1 cup Irish whiskey (such as Jameson or Bushmills)

  • 1 cup heavy cream, cold

  • 1 (14 oz) can sweetened condensed milk

  • 2 tablespoons chocolate syrup or 1 tablespoon unsweetened cocoa powder

  • 1 teaspoon instant coffee granules (for depth and balance)

  • 1 teaspoon pure vanilla extract

  • 1/4 teaspoon almond extract (optional but highly recommended)

Instructions

  1. Start by dissolving the coffee:
    In a small bowl, combine the coffee granules with just a splash of warm water. Stir until fully dissolved. This prevents graininess later.

  2. Blend the base:
    In a blender or mixing bowl, combine the sweetened condensed milk, heavy cream, chocolate syrup (or cocoa), vanilla extract, and almond extract.

  3. Mix gently:
    Blend on low speed or mix by hand. Do not over-blend. Over-mixing cream can cause it to thicken or curdle. Slow and steady keeps it silky.

  4. Add the whiskey:
    Pour in the Irish whiskey and stir or blend briefly until incorporated. Taste and adjust:

    • Want it sweeter? Add a teaspoon of maple syrup or honey.

    • Want it stronger? Add 2–4 tablespoons more whiskey.

    • Want it chocolatier? Add another teaspoon cocoa or syrup.

  5. Bottle and chill:
    Transfer the mixture into a clean glass bottle or mason jar. Seal tightly and refrigerate at least 4 hours to allow the flavors to meld.

  6. Shake before serving:
    Because real cream is used, slight separation is normal. A quick shake restores its perfect texture.

Serving Suggestions

  • Serve over ice with a sprinkle of cocoa or cinnamon.

  • Pour into hot coffee for the best homemade Irish coffee ever.

  • Blend with ice cream and milk for a boozy milkshake.

  • Add to hot chocolate for a luxurious winter drink.

  • Drizzle over cakes or bread pudding as a decadent sauce.

Storage

Your homemade Baileys will keep for up to 4 weeks in the refrigerator if your cream is fresh. Always store it chilled and shake gently before each use.

Do not freeze—cream liqueurs don’t thaw well.

Tips for the Best Homemade Baileys

  • Use high-quality whiskey. The flavor stands out clearly in this liqueur.

  • Don’t over-blend the cream. Low speed is key.

  • Add flavors slowly. A few drops can drastically change the profile.

  • Let it rest. The flavor becomes smoother after several hours.

Flavor Variations

Variation Add This Result
Salted Caramel 2 tbsp caramel + pinch sea salt Rich and bold
Mocha Extra 1 tsp cocoa + pinch espresso powder Deep coffee-chocolate
Hazelnut Replace almond extract with hazelnut extract Nutty and luxurious
Peppermint Holiday 1–2 drops peppermint extract Festive and refreshing

=Homemade Baileys is comfort in a glass—soft, warming, and indulgently creamy. With just a few simple ingredients, you create something that feels special every time you pour it. Whether you’re gifting it, savoring it slowly over ice, stirring it into morning coffee on a snowy day, or celebrating with friends, it brings joy with every sip. Enjoy every drop—because you made it yourself.