Lemon Butter Pan-Seared Cod Recipe

There’s something effortlessly elegant about a perfectly pan-seared piece of fish. The golden crust, the tender flake, and the bright pop of lemony butter sauce—each bite feels like dining at a fine coastal restaurant. This Lemon Butter Pan-Seared Cod recipe brings that luxury right to your kitchen, with minimal effort and maximum flavor. Whether you’re preparing a weeknight dinner or impressing guests, this dish balances simplicity and sophistication beautifully.

Why You’ll Love This Recipe

Cod is a mild, flaky white fish that absorbs flavor like a sponge, making it the perfect canvas for lemon and butter. The quick pan-searing method ensures a crispy, caramelized exterior while keeping the inside moist and delicate. Combined with a silky lemon butter sauce and a touch of garlic, this recipe delivers a restaurant-quality meal in under 30 minutes.

Ingredients

For the Cod:

  • 4 cod fillets (about 6 oz each), skinless and boneless

  • 2 tablespoons olive oil

  • 2 tablespoons unsalted butter

  • Salt and black pepper, to taste

  • ½ teaspoon paprika (optional, for color)

For the Lemon Butter Sauce:

  • 3 tablespoons unsalted butter

  • 3 cloves garlic, minced

  • Juice of 1 large lemon (about 3 tablespoons)

  • 1 teaspoon lemon zest

  • ¼ cup chicken or vegetable broth (or dry white wine)

  • 2 tablespoons chopped fresh parsley

  • Lemon slices, for garnish

Instructions

1. Prepare the Cod

Pat the cod fillets dry with paper towels—this step is crucial for achieving that perfect golden crust. Season both sides generously with salt, pepper, and a light dusting of paprika. The seasoning not only enhances flavor but also gives the fish a beautiful golden hue once seared.

2. Sear the Cod

In a large skillet (preferably nonstick or stainless steel), heat olive oil and 2 tablespoons of butter over medium-high heat. Once the butter starts foaming, carefully lay the cod fillets in the pan. Avoid crowding them—cook in batches if needed.

Let the cod sear undisturbed for 3–4 minutes, until the edges start turning opaque and the underside forms a crisp golden crust. Gently flip the fillets using a thin spatula and cook for another 2–3 minutes on the other side, or until the fish flakes easily with a fork. Remove the fillets from the pan and set aside on a plate, tented loosely with foil.

3. Make the Lemon Butter Sauce

In the same skillet, reduce heat to medium and add 3 tablespoons of butter. Once melted, add the minced garlic and sauté for 30 seconds until fragrant. Pour in the chicken broth (or wine) and deglaze the pan, scraping up any browned bits from the bottom—these little bits are packed with flavor.

Stir in the lemon juice and zest, allowing the sauce to simmer for 2 minutes until slightly thickened. Taste and adjust seasoning with salt and pepper as needed. Finally, stir in chopped parsley for a burst of color and freshness.

4. Combine and Serve

Return the seared cod fillets to the skillet, spooning the warm lemon butter sauce over the top to coat them evenly. Let them rest in the sauce for a minute so they absorb all that rich, citrusy flavor.

Transfer the cod to serving plates, drizzle with extra sauce, and garnish with fresh lemon slices and a sprinkle of parsley.

Serving Suggestions

This Lemon Butter Pan-Seared Cod pairs wonderfully with a range of sides. Try serving it with:

  • Garlic mashed potatoes or buttery rice pilaf for a comforting touch.

  • Steamed asparagus, green beans, or roasted broccoli for a light, fresh balance.

  • Couscous or quinoa salad for a Mediterranean-inspired twist.
    You can even spoon the sauce over pasta or zucchini noodles for a lemony seafood pasta dish.

  • Tips for Success

  1. Dry the Fish Well: Excess moisture prevents browning, so always pat the cod completely dry before seasoning.

  2. Use Medium-High Heat: This ensures a crisp crust without overcooking the interior.

  3. Don’t Overcrowd the Pan: Cook in batches if necessary to allow even searing.

  4. Handle with Care: Cod is a delicate fish, so flip it gently using a fish spatula.

  5. Use Fresh Lemon Juice: Bottled lemon juice lacks the bright acidity that makes this sauce shine.

Variations

  • Herb Butter Cod: Add thyme, dill, or tarragon to the sauce for a fresh herbal note.

  • Spicy Lemon Cod: Sprinkle crushed red pepper flakes into the sauce for a hint of heat.

  • Creamy Lemon Cod: Stir in a splash of heavy cream or a spoonful of Greek yogurt at the end for a silky, rich twist.

  • Garlic Parmesan Cod: Sprinkle grated Parmesan on top just before serving for extra flavor and texture.

Storage and Reheating

Store leftover cod in an airtight container in the refrigerator for up to 2 days. Reheat gently in a skillet over low heat with a splash of broth or water to keep it moist—avoid the microwave, which can make the fish rubbery. The lemon butter sauce can also be stored separately and reheated on the stove before serving.

Final Thoughts

This Lemon Butter Pan-Seared Cod is the perfect example of how simple ingredients can create extraordinary results. With golden, flaky fish bathed in a velvety, tangy sauce, every bite feels light yet deeply satisfying. It’s a dish that celebrates the balance of richness and freshness—the buttery comfort paired with the brightness of lemon. Whether you’re making it for a cozy dinner at home or a special occasion, this recipe will never fail to impress.
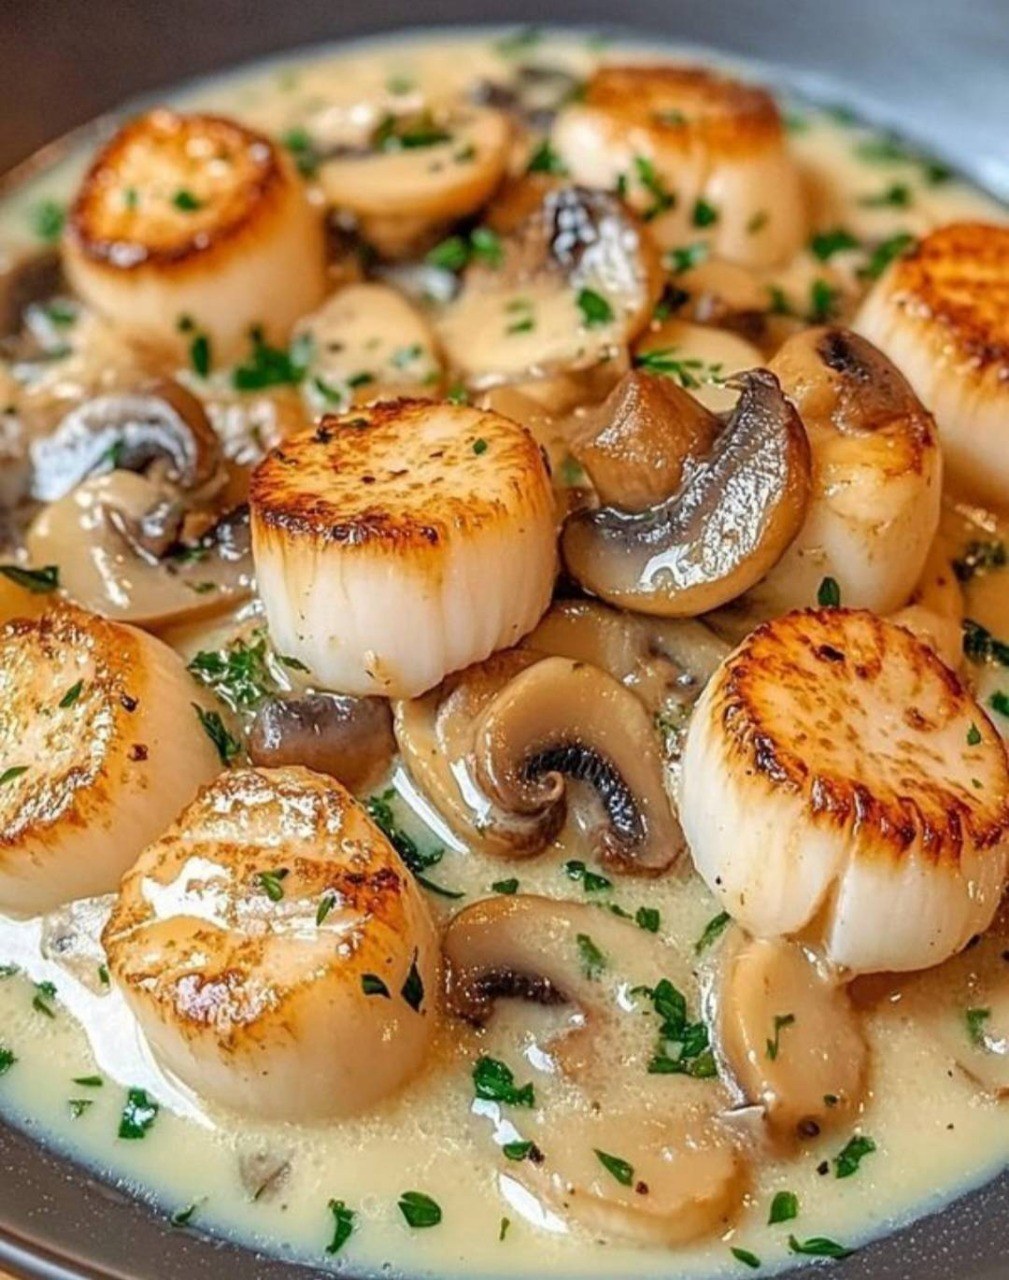
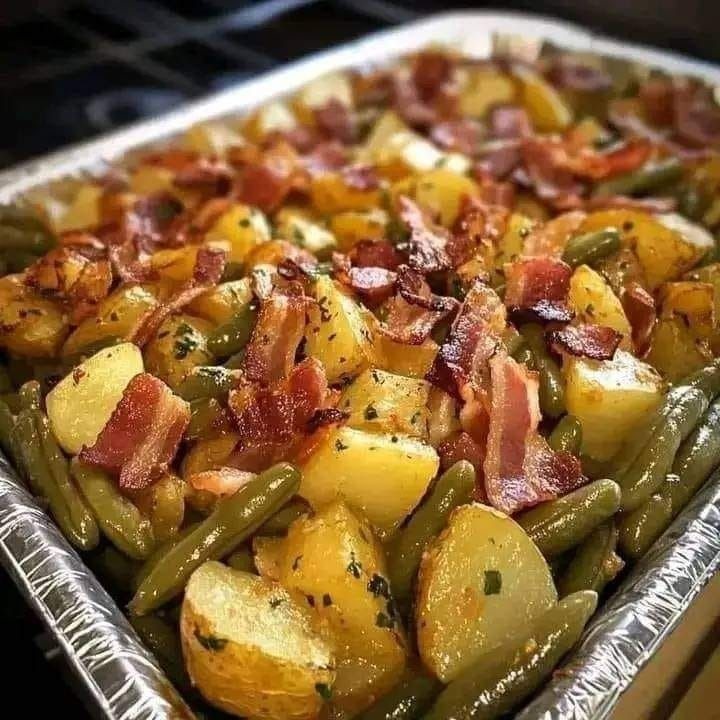
Gourmet Seafood Cassolette

A Seafood Cassolette is a French-inspired dish that transforms the treasures of the sea into a rich, creamy, and aromatic indulgence. Traditionally baked in small gratin dishes, this elegant meal is layered with tender seafood, bathed in a velvety wine-infused sauce, and topped with a golden crust of cheese or breadcrumbs. The word “cassolette” comes from “cassole,” meaning a small baking dish, and it perfectly captures the personal, comforting nature of this refined recipe. This gourmet version elevates simple seafood into a restaurant-worthy experience right in your kitchen.

Ingredients

For the seafood mix:

  • ½ lb (225 g) large shrimp, peeled and deveined

  • ½ lb (225 g) scallops, cleaned

  • ½ lb (225 g) firm white fish (such as cod or halibut), cubed

  • ½ lb (225 g) mussels or clams, cleaned and debearded

  • 2 tbsp butter

  • 1 tbsp olive oil

  • 2 cloves garlic, minced

  • 1 shallot, finely chopped

  • Salt and freshly ground black pepper, to taste

  • ¼ cup dry white wine

For the creamy sauce:

  • 3 tbsp unsalted butter

  • 3 tbsp all-purpose flour

  • 2 cups seafood stock (or fish broth)

  • ½ cup heavy cream

  • ½ cup dry white wine

  • 1 tsp Dijon mustard

  • ½ cup grated Gruyère or Parmesan cheese

  • 1 tbsp chopped fresh parsley

  • ½ tsp smoked paprika

  • A pinch of nutmeg

For the topping:

  • ¾ cup panko breadcrumbs

  • 2 tbsp melted butter

  • ¼ cup grated Parmesan cheese

  • Fresh herbs (parsley or chives) for garnish

Preparation Steps

1. Prepare the seafood base

Start by heating a large skillet over medium heat. Add 2 tablespoons of butter and 1 tablespoon of olive oil. Once the butter melts, sauté the chopped shallot and garlic until fragrant and translucent, about 2 minutes. Add the shrimp, scallops, and white fish, seasoning them lightly with salt and pepper. Cook for about 3–4 minutes, just until they begin to turn opaque. Pour in ¼ cup of white wine to deglaze the pan, scraping up the flavorful bits from the bottom. Add the mussels or clams, cover the skillet, and cook for 2–3 minutes until they open. Discard any that remain closed. Remove the seafood from the pan and set aside, reserving the liquid for later use.

2. Create the velvety sauce

In a medium saucepan, melt 3 tablespoons of butter over medium heat. Whisk in the flour to form a smooth roux, cooking it gently for about 2 minutes until it turns pale golden and nutty. Gradually whisk in the seafood stock and the reserved pan liquid, stirring constantly to prevent lumps. Add the wine, cream, and Dijon mustard, whisking until the sauce thickens to a luxurious, spoon-coating consistency. Season with salt, pepper, smoked paprika, and a pinch of nutmeg. Finally, stir in half of the grated Gruyère or Parmesan cheese until smooth and melted.

3. Combine seafood and sauce

Fold the cooked seafood gently into the sauce, ensuring each piece is well coated. Stir in the chopped parsley for a burst of freshness. Taste and adjust the seasoning—if you prefer a more robust flavor, a squeeze of lemon juice can add a subtle brightness that balances the richness of the cream and cheese.

4. Assemble the cassolette

Preheat your oven to 400°F (200°C). Lightly butter four to six small oven-safe ramekins or gratin dishes. Divide the seafood mixture evenly among them, filling each dish about three-quarters full.

In a small bowl, combine panko breadcrumbs, melted butter, and the remaining Parmesan cheese. Sprinkle this mixture generously over the top of each cassolette to create a crisp, golden crust.

5. Bake to perfection

Place the filled ramekins on a baking tray and bake for 12–15 minutes, or until the tops are bubbly and golden brown. If you want a deeper crust, switch the oven to broil mode for the last 2 minutes—watch closely to prevent burning.

6. Serve with flair

Remove the cassolettes from the oven and allow them to cool slightly before serving. Sprinkle with freshly chopped herbs and a light dusting of paprika for color. Serve warm with crusty baguette slices or buttery puff pastry twists to soak up the luscious sauce.

Tips for Perfection

  • Seafood balance: Aim for a mix of textures—shrimp and scallops for sweetness, firm fish for structure, and shellfish for depth.

  • Cheese choice: Gruyère offers a nutty richness, while Parmesan brings sharp umami flavor. You can even mix both for complexity.

  • Wine selection: A crisp, dry white wine like Sauvignon Blanc or Pinot Grigio complements the cream sauce beautifully.

  • Presentation: Serve each cassolette in its individual ramekin for an elegant, restaurant-style appearance.

Why This Recipe Works

The magic of a Gourmet Seafood Cassolette lies in its balance of flavors and textures. The seafood remains tender because it’s only lightly sautéed before being enveloped in a creamy, velvety sauce that infuses each bite with subtle layers of garlic, wine, and butter. The topping provides contrast—a crisp, golden crust that shatters delicately under the spoon, revealing the silky mixture beneath. Every mouthful feels luxurious, yet comforting—a marriage of French refinement and coastal simplicity.

Unlike many seafood bakes that rely heavily on cheese, this recipe keeps the focus on the natural sweetness of the ocean, enhanced rather than masked by the sauce. The Dijon mustard and wine lend acidity and brightness, while the nutmeg and paprika round out the creaminess with warmth and depth.

Serving Suggestions

Pair this dish with a side of buttered asparagus, garlic green beans, or a light mixed greens salad dressed in lemon vinaigrette. For drinks, a chilled glass of Chardonnay or Champagne makes a perfect match, highlighting the delicate richness of the seafood.

Final Thoughts

This Gourmet Seafood Cassolette is more than just a meal—it’s an experience. Each bite takes you on a journey to the French coast, where the air smells of salt and butter, and seafood is celebrated as art. Perfect for special occasions, date nights, or simply when you want to treat yourself to something extraordinary, this dish transforms your kitchen into a fine-dining haven. Whether served in rustic ramekins or elegant porcelain dishes, it promises comfort, sophistication, and the unforgettable taste of the sea.

Classic Baked Lasagna

There’s something timeless and comforting about a bubbling, golden pan of baked lasagna fresh from the oven. Layered with rich meat sauce, creamy béchamel or ricotta filling, and gooey melted cheese, it’s the kind of meal that feels like home. This Classic Baked Lasagna recipe brings together traditional Italian flavors in a hearty, satisfying dish that’s perfect for family dinners, celebrations, or simply indulging in a cozy night in. What makes this version unique is its balance—each layer carefully crafted to ensure harmony between sauce, pasta, and cheese.

Ingredients

For the Meat Sauce:

  • 2 tablespoons olive oil

  • 1 large onion, finely chopped

  • 4 cloves garlic, minced

  • 1 pound (450 g) ground beef

  • ½ pound (225 g) Italian sausage, removed from casing

  • 1 teaspoon salt

  • ½ teaspoon black pepper

  • 1 teaspoon dried basil

  • 1 teaspoon dried oregano

  • ½ teaspoon crushed red pepper flakes (optional for heat)

  • 1 (28-ounce) can crushed tomatoes

  • 1 (15-ounce) can tomato sauce

  • 2 tablespoons tomato paste

  • ½ teaspoon sugar

  • ¼ cup chopped fresh parsley

For the Cheese Filling:

  • 15 ounces (425 g) ricotta cheese

  • 1 large egg

  • 1 cup grated Parmesan cheese

  • 2 cups shredded mozzarella cheese (divided)

  • ¼ teaspoon nutmeg

  • 1 tablespoon chopped parsley

  • Salt and pepper to taste

For Assembly:

  • 12 lasagna noodles

  • 1 ½ cups shredded mozzarella (for topping)

  • Olive oil (for greasing)

Step 1: Preparing the Meat Sauce

Start by heating olive oil in a large skillet or saucepan over medium heat. Add the chopped onion and cook until translucent—about 5 minutes. Stir in minced garlic and cook for another minute until fragrant. Add the ground beef and Italian sausage, breaking them up with a wooden spoon as they brown. Season with salt, pepper, basil, oregano, and red pepper flakes for a subtle kick.

Once the meat is browned and crumbly, pour in the crushed tomatoes, tomato sauce, and tomato paste. Add sugar to balance the acidity of the tomatoes, then stir in the parsley. Reduce the heat to low and let the sauce simmer gently for 20–30 minutes, stirring occasionally. This allows the flavors to deepen and meld beautifully. The sauce should be thick but still spreadable—perfect for layering.

Step 2: Mixing the Cheese Filling

In a medium mixing bowl, combine the ricotta cheese, egg, grated Parmesan, 1 cup mozzarella, nutmeg, parsley, salt, and pepper. The egg acts as a binder, giving the cheese mixture a creamy, custard-like texture when baked. Nutmeg adds a hint of warmth that subtly enhances the ricotta’s flavor. Mix until smooth and creamy, then set aside.

Step 3: Cooking the Noodles

Bring a large pot of salted water to a boil. Add the lasagna noodles and cook them until just al dente—a minute or two less than the package directions. Overcooked noodles can fall apart during layering. Drain the noodles and lay them flat on a lightly oiled baking sheet to prevent sticking.

Tip: If you’re using oven-ready noodles, skip this step but ensure your sauce has a bit more liquid to help soften them while baking.

Step 4: Assembling the Lasagna

Preheat your oven to 375°F (190°C). Lightly grease a 9×13-inch baking dish with olive oil or nonstick spray.

  1. Layer One – Sauce: Spread a thin layer of meat sauce at the bottom of the dish. This prevents sticking and adds flavor from the very first bite.

  2. Layer Two – Noodles: Arrange 3–4 lasagna noodles evenly over the sauce.

  3. Layer Three – Cheese: Spread one-third of the ricotta mixture over the noodles, smoothing it out gently with a spatula.

  4. Layer Four – Sauce: Spoon a generous layer of meat sauce over the cheese, ensuring it covers all edges.

  5. Repeat the process until you have three layers of noodles, cheese, and sauce.

  6. Finish with a final layer of sauce and sprinkle the remaining mozzarella evenly across the top. Add an extra handful of Parmesan for extra richness if desired.

Step 5: Baking the Lasagna

Cover the baking dish with aluminum foil, tenting it slightly to prevent the cheese from sticking. Bake for 25 minutes, then remove the foil and bake for another 20 minutes or until the top is golden brown and bubbly. For a perfectly crisp top layer, switch to the broiler for 2–3 minutes at the end—just keep a close eye to avoid burning.

Once baked, remove the lasagna from the oven and let it rest for at least 15 minutes before slicing. This step is crucial—it allows the layers to set, making it easier to serve neat, beautiful squares.

Step 6: Serving & Garnishing

Garnish your lasagna with a sprinkle of fresh parsley or basil for a pop of color and freshness. Serve with warm garlic bread, a crisp green salad, or a glass of red wine like Chianti or Merlot to complete the experience.

Unique Touches & Tips

  • Depth of Flavor: Adding both ground beef and sausage creates a more complex, savory flavor profile that’s authentically Italian.

  • Creamy Contrast: A touch of nutmeg in the ricotta filling adds warmth and depth—an Italian chef’s secret trick.

  • Homemade Sauce: Simmering the sauce slowly helps it develop a rich, robust flavor that jarred sauces can’t replicate.

  • Resting Time: Always let your lasagna rest before cutting; this small patience pays off with perfect, structured slices.

Final Thoughts

This Classic Baked Lasagna isn’t just a recipe—it’s a tradition, a comfort, and a centerpiece for gatherings. Every forkful delivers a perfect balance of tender pasta, luscious cheese, and savory sauce that feels both indulgent and familiar. Whether made for Sunday dinner or a special celebration, this dish captures the essence of Italian comfort food in every layer. Once you try it, you’ll understand why lasagna remains one of the most beloved baked dishes in the world—a true culinary classic that never goes out of style.

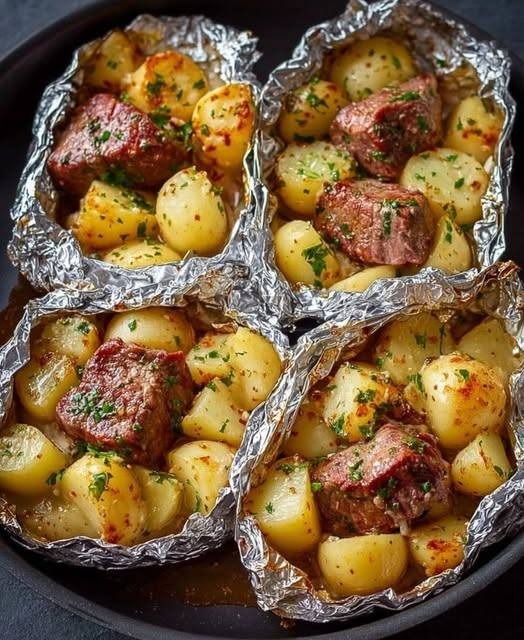
Garlic Butter Steak & Crispy Potatoes

There’s something truly satisfying about a sizzling pan filled with tender steak bites coated in garlic butter and paired with golden, crispy potatoes. This Garlic Butter Steak & Crispy Potatoes recipe is an irresistible combination of juicy, melt-in-your-mouth beef and perfectly seasoned potatoes that are crisp on the outside and soft within. It’s a meal that embodies everything we love about comfort food—rich flavor, simple ingredients, and the kind of aroma that fills your kitchen with warmth and excitement.

Ingredients

For the Steak:

  • 1½ pounds sirloin steak (or ribeye, cut into bite-sized cubes)

  • 1 teaspoon salt

  • ½ teaspoon black pepper

  • 1 teaspoon smoked paprika

  • 2 tablespoons olive oil

  • 3 tablespoons unsalted butter

  • 4 cloves garlic, minced

  • 1 tablespoon fresh rosemary, chopped (or 1 teaspoon dried)

  • 1 tablespoon fresh parsley, chopped (for garnish)

For the Crispy Potatoes:

  • 1½ pounds baby potatoes (Yukon gold or red potatoes work best)

  • 2 tablespoons olive oil

  • 1 teaspoon garlic powder

  • ½ teaspoon paprika

  • ½ teaspoon salt

  • ½ teaspoon black pepper

  • 2 tablespoons butter

  • Fresh thyme or parsley for garnish

Instructions

Step 1: Prepare the Potatoes

Start by washing your potatoes thoroughly. If using baby potatoes, you can halve them; for larger ones, cut them into small cubes so they crisp evenly. Place them in a pot of salted water and boil for about 8–10 minutes, just until fork-tender. Drain and let them steam dry for a few minutes—this step helps them crisp up beautifully when cooked.

Heat 2 tablespoons olive oil in a large skillet over medium-high heat. Once the oil shimmers, add the potatoes in a single layer. Season with garlic powder, paprika, salt, and pepper, and let them cook undisturbed for about 4–5 minutes until a golden crust forms on one side. Flip them occasionally to ensure even browning. Once crisp and golden, add 2 tablespoons of butter and a sprinkle of thyme or parsley. Stir until the butter melts and coats the potatoes with a rich aroma. Transfer to a plate and keep warm.

Step 2: Cook the Steak

Pat the steak cubes dry with a paper towel—moisture prevents searing. Season generously with salt, pepper, and smoked paprika. In the same skillet (no need to wash it; those leftover potato bits add flavor), heat 2 tablespoons olive oil over medium-high heat. When it begins to shimmer, add the steak cubes in a single layer. Don’t overcrowd the pan; cook in batches if necessary.

Let the steak sear without stirring for 2–3 minutes, allowing a deep brown crust to form. Flip and cook another 2–3 minutes for medium doneness. Adjust cooking time based on your preference. When the steak is nearly done, reduce the heat to medium and add 3 tablespoons of butter, minced garlic, and rosemary. Stir gently as the butter melts, spooning the garlicky mixture over the steak to coat it completely.

The aroma at this stage is divine—rich butter mingling with sizzling garlic and herbs creates a restaurant-worthy scent that’s impossible to resist.

Step 3: Combine & Serve

Once the steak is perfectly coated in garlic butter, return the crispy potatoes to the skillet. Toss everything together for about a minute to let the flavors mingle. Garnish with fresh parsley and an extra drizzle of melted butter if desired.

Serve immediately, straight from the pan for a rustic presentation, or plate it elegantly with the potatoes forming a bed beneath the buttery steak bites.

Tips for the Best Results

  1. Choose the right cut: Sirloin offers the perfect balance of tenderness and flavor, but ribeye or New York strip works beautifully for a richer taste.

  2. Don’t overcrowd the pan: Overcrowding causes steaming instead of searing, which prevents that crispy, golden crust.

  3. Use fresh garlic and herbs: They elevate the flavor beyond comparison to dried alternatives.

  4. Rest before serving: Letting the steak rest for 5 minutes before serving helps redistribute its juices for a tender, flavorful bite.

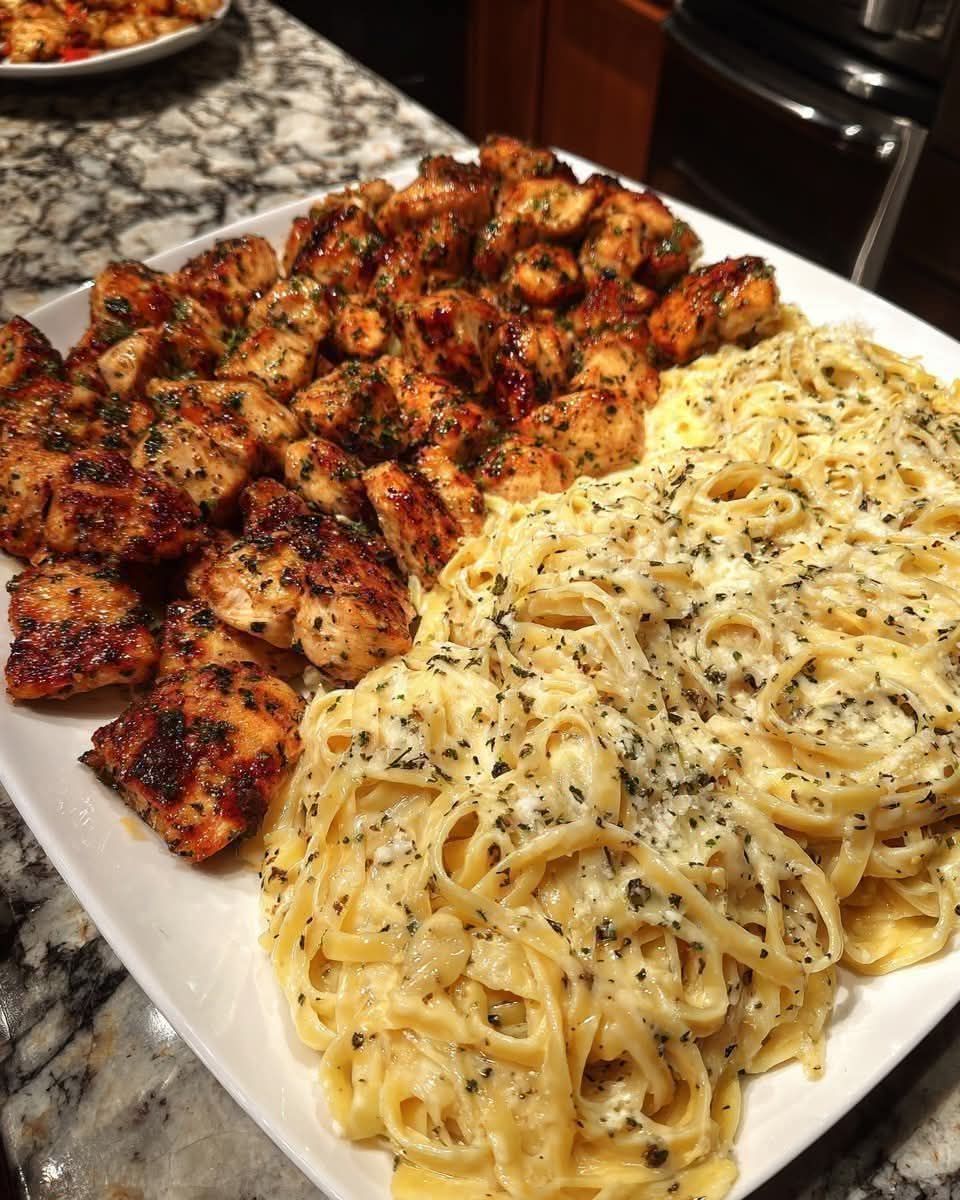
Creamy Garlic Butter Chicken & Linguine in Alfredo Sauce

If comfort had a flavor, it would taste exactly like this Creamy Garlic Butter Chicken & Linguine in Alfredo Sauce. Tender golden chicken breasts are bathed in a luscious garlic butter sauce, tossed with silky linguine, and coated in rich Alfredo cream that clings lovingly to every strand. This dish is indulgent, restaurant-worthy, and surprisingly simple to create at home. Perfect for date nights, family dinners, or when you simply crave something irresistibly creamy and garlicky.

Ingredients

For the Chicken:

  • 2 large chicken breasts, halved horizontally (to make 4 cutlets)

  • Salt and black pepper, to taste

  • 1 teaspoon garlic powder

  • ½ teaspoon paprika

  • 2 tablespoons olive oil

  • 2 tablespoons unsalted butter

For the Alfredo Sauce:

  • 3 tablespoons unsalted butter

  • 5 cloves garlic, finely minced

  • 1 ½ cups heavy cream

  • 1 cup freshly grated Parmesan cheese

  • ½ cup chicken broth

  • ½ teaspoon Italian seasoning

  • ¼ teaspoon crushed red pepper flakes (optional for a little heat)

  • Salt and pepper, to taste

For the Pasta:

  • 12 ounces linguine

  • 2 tablespoons butter (for tossing)

  • Fresh parsley and extra Parmesan, for garnish

Step-by-Step Instructions

Step 1: Prepare the Chicken

  1. Season generously.
    Pat the chicken breasts dry and season both sides with salt, pepper, garlic powder, and paprika. This creates a flavorful crust when seared.

  2. Sear to golden perfection.
    In a large skillet, heat olive oil and butter over medium-high heat. When hot and shimmering, add the chicken cutlets. Cook for 4–5 minutes per side, or until golden brown and cooked through. Remove from the skillet and set aside on a warm plate.

  3. Scrape up the flavor bits.
    Don’t clean the pan — the little browned bits at the bottom (called fond) are flavor gold. They’ll enrich the sauce beautifully.

Step 2: Create the Garlic Butter Alfredo Sauce

  1. Sauté the garlic.
    In the same pan, melt 3 tablespoons of butter over medium heat. Add minced garlic and sauté for about 30 seconds until fragrant. Be careful not to burn it — garlic turns bitter quickly.

  2. Add liquids.
    Pour in the chicken broth and heavy cream, stirring to combine. Use a wooden spoon to scrape up any browned bits from the pan for maximum flavor.

  3. Simmer and season.
    Add Italian seasoning, crushed red pepper flakes, and a pinch of salt and pepper. Let the sauce simmer gently for 4–5 minutes until slightly thickened.

  4. Add the cheese.
    Reduce the heat to low and gradually whisk in the Parmesan cheese until smooth and creamy. The sauce should coat the back of a spoon — rich, velvety, and full of garlic-butter aroma.

Step 3: Cook the Linguine

  1. Boil the pasta.
    While the sauce simmers, cook linguine in salted boiling water according to package instructions until al dente. Reserve ½ cup of the pasta water before draining.

  2. Toss with butter.
    Drain the linguine and toss immediately with 2 tablespoons of butter to prevent sticking and add extra flavor.

Step 4: Combine Everything

  1. Return chicken to the skillet.
    Slice the seared chicken into strips and add it back to the Alfredo sauce. Simmer for 2–3 minutes, allowing the flavors to mingle and the chicken to absorb the creamy sauce.

  2. Add the pasta.
    Gently toss the cooked linguine into the sauce until everything is well coated. If the sauce feels too thick, add a splash of the reserved pasta water until it reaches your desired consistency.

  3. Finish with flair.
    Sprinkle freshly chopped parsley and an extra dusting of Parmesan cheese on top for color and richness.

Chef’s Tips for Perfection

  • Use fresh Parmesan only. Pre-grated varieties often contain anti-caking agents that prevent smooth melting. Freshly grated Parmesan gives a velvety texture.

  • Don’t rush the sauce. Allowing the cream and cheese to meld slowly over low heat ensures a silky finish.

  • Balance the salt. Parmesan adds saltiness, so season gradually and taste as you go.

  • Add vegetables (optional). For variety, you can toss in sautéed spinach, sun-dried tomatoes, or mushrooms for extra flavor and texture.

Serving Suggestions

Serve this dish in wide, shallow bowls so the creamy sauce can pool around the pasta. Pair it with:

  • A side of garlic bread or warm sourdough baguette to soak up the extra sauce.

  • A crisp Caesar salad or roasted asparagus for a fresh contrast.

  • A glass of chilled white wine, like Chardonnay or Pinot Grigio, to complement the buttery richness.

Why This Recipe Works

What sets this recipe apart is its balance. The garlic butter adds a savory, nutty note that deepens the Alfredo’s creaminess. The seared chicken provides satisfying texture and protein, while linguine — with its smooth, flat shape — perfectly catches the sauce in every bite. Each component enhances the other, creating a harmony of flavors that’s both familiar and indulgently new.

It’s the kind of meal that makes you pause after the first bite — a comforting sigh, a smile, and the quiet realization that you’ve just made something truly special in your own kitchen.

Final Thoughts

Creamy Garlic Butter Chicken & Linguine in Alfredo Sauce is more than just dinner — it’s an experience of flavors that comfort and excite at the same time. Every bite is a blend of silky pasta, rich cream, and the warmth of garlic butter that lingers pleasantly on your palate. Whether you’re cooking to impress or to treat yourself, this recipe turns an ordinary evening into a gourmet affair

Mini Bacon Cheddar Cheese Balls

When it comes to party appetizers, game-day snacks, or an easy make-ahead treat for guests, Mini Bacon Cheddar Cheese Balls always steal the show. These little bites pack all the creamy, smoky, cheesy goodness of a traditional cheese ball—just in a perfectly portioned, poppable size. Every bite bursts with tangy cream cheese, sharp cheddar, and crispy bacon, rolled into a crunchy coating that’s both elegant and irresistible. What makes this recipe truly unique is the balance of textures and flavors: creamy and savory inside, crisp and nutty outside, with a whisper of spice that keeps you coming back for more.

The Inspiration Behind the Recipe

Cheese balls have been a beloved American party staple since the 1940s. The original was a massive orb of cheese rolled in nuts, served with crackers for spreading. But over time, people craved something easier to serve and eat—something with that same nostalgic charm but a more modern presentation. That’s where these mini versions come in. Each one is a miniature masterpiece—bite-sized, beautiful, and bursting with flavor. Perfect for holidays, potlucks, or cozy nights in, these mini cheese balls prove that good things really do come in small packages.

Ingredients You’ll Need

For the cheese mixture:

  • 8 oz (225 g) cream cheese, softened

  • 1 ½ cups sharp cheddar cheese, freshly shredded

  • 6 slices of bacon, cooked until crisp and finely crumbled

  • 2 tablespoons green onions, finely chopped

  • 1 teaspoon Worcestershire sauce

  • ½ teaspoon garlic powder

  • ½ teaspoon smoked paprika

  • ¼ teaspoon black pepper

  • ¼ teaspoon cayenne pepper (optional, for a kick)

For the coating:

  • 4 slices bacon, cooked crisp and finely chopped

  • ½ cup toasted pecans or crushed roasted almonds

  • 2 tablespoons fresh parsley, minced

Optional garnishes:

  • Pretzel sticks, mini skewers, or toothpicks for serving

  • Extra chopped green onions for a pop of color

Step-by-Step Preparation

Step 1: Prepare the Bacon

Cook all your bacon slices until crispy, either on the stovetop or in the oven. Let them cool completely before crumbling. The key here is to get them crunchy, not chewy—this ensures each cheese ball gets that perfect smoky crispness. Divide the bacon: half will go into the cheese mixture, and half will be used for the outer coating.

Step 2: Make the Cheese Mixture

In a medium mixing bowl, beat the softened cream cheese until smooth and creamy. This step is crucial for achieving a silky base that will easily mix with the other ingredients. Add in the shredded cheddar cheese, half of the crumbled bacon, green onions, Worcestershire sauce, garlic powder, paprika, pepper, and cayenne (if using). Mix well until everything is evenly incorporated. The mixture should be thick, rich, and speckled with bits of bacon and cheese.

Step 3: Chill the Mixture

Cover the bowl and refrigerate the mixture for about 30 minutes. Chilling makes it easier to shape into small balls without sticking to your hands. If you skip this step, the mixture might be too soft to roll properly.

Step 4: Shape the Mini Cheese Balls

Once chilled, use a small cookie scoop or a teaspoon to portion the mixture. Roll each portion between your palms into a smooth, bite-sized ball. You should get about 20 to 24 mini cheese balls, depending on the size.

Step 5: Coat the Cheese Balls

In a shallow dish, combine the remaining bacon, toasted pecans (or almonds), and chopped parsley. Roll each cheese ball in the coating mixture until it’s evenly covered. The combination of bacon and nuts gives these cheese balls a satisfying crunch, while the parsley adds freshness and color.

Step 6: Chill Again Before Serving

Place the coated cheese balls on a parchment-lined tray and refrigerate for another 30 minutes. This helps them firm up and allows the flavors to meld together beautifully.

Serving Suggestions

Right before serving, insert a pretzel stick or toothpick into the top of each cheese ball for easy grabbing. Arrange them on a platter with crackers, celery sticks, or slices of apple for contrast. These make for an elegant party display and can even be served as part of a charcuterie board alongside cured meats and fruit preserves.

For a rustic twist, serve them warm by letting them sit at room temperature for about 15 minutes—the cheeses soften slightly, making them extra creamy and indulgent.

Flavor Variations to Try

  • Spicy Jalapeño Kick: Add 1 finely chopped jalapeño to the cheese mixture for a bolder, spicy bite.

  • Ranch-Style: Mix in 1 tablespoon of ranch seasoning and swap green onions for chives.

  • Everything Bagel Coating: Roll the cheese balls in everything bagel seasoning for an extra crunch and flavor explosion.

  • Sweet and Savory Twist: Add a touch of honey or maple syrup to the cheese mixture and coat with chopped candied pecans.

Each variation brings its own personality to the recipe, allowing you to customize these cheese balls for any occasion.

Storage and Make-Ahead Tips

These mini bacon cheddar cheese balls are perfect for prepping ahead. Store them in an airtight container in the refrigerator for up to 5 days. If you’re planning for a big event, you can also freeze them (before coating) for up to 2 months. When ready to serve, simply thaw in the fridge overnight and roll in the coating right before the event.

Why This Recipe Works

What sets this recipe apart is its balance of flavor and texture. The tangy cream cheese base mellows the sharp cheddar, while the smoky bacon adds depth and saltiness. The toasted nuts offer a satisfying crunch, contrasting perfectly with the creamy interior. A hint of Worcestershire and paprika ties it all together, giving these little bites a gourmet edge. They’re rich yet balanced, comforting yet sophisticated—a true crowd-pleaser.

Final Thoughts

These Mini Bacon Cheddar Cheese Balls are proof that appetizers don’t have to be complicated to be delicious. They deliver the perfect blend of cheesy richness, smoky bacon flavor, and nutty crunch—all in one bite. Whether you’re hosting a holiday party, watching the big game, or just craving a savory snack, this recipe is sure to impress.

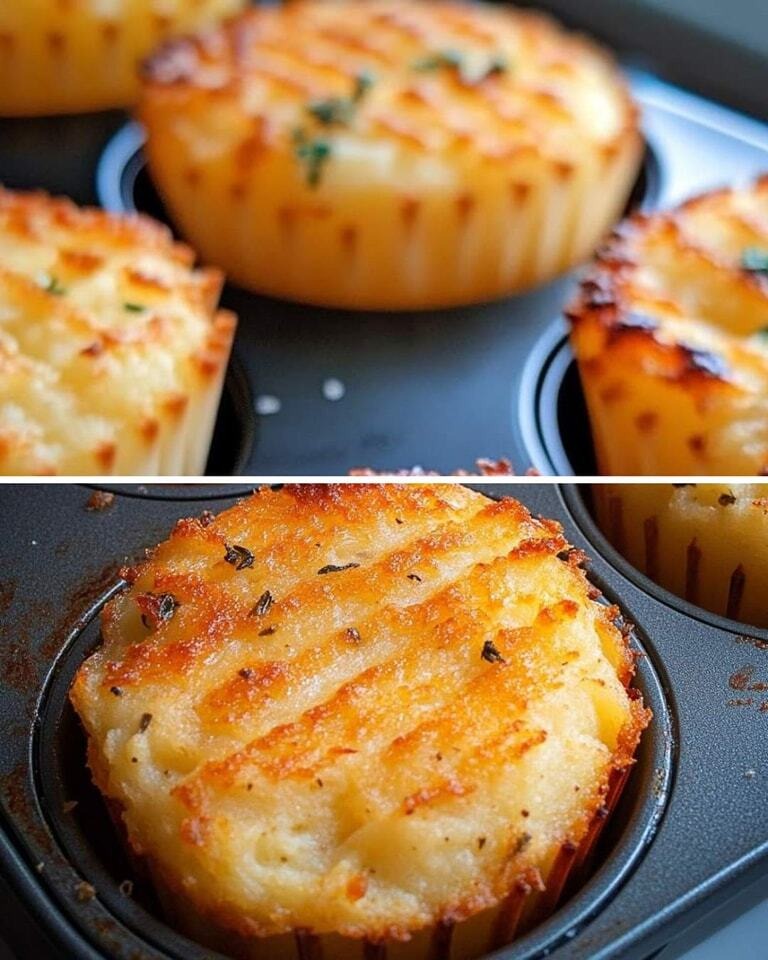
Mashed Potato Muffins

Mashed potatoes have always been a beloved comfort food — creamy, buttery, and warm, the kind of side dish that feels like a hug on a plate. But what if you could take that same comforting flavor and turn it into something portable, crispy on the outside, fluffy on the inside, and perfect for breakfast, brunch, or a quick snack? That’s where Mashed Potato Muffins come in. This creative twist on leftover mashed potatoes transforms a simple side into golden, savory, and irresistibly cheesy little delights baked to perfection in a muffin tin.

This recipe isn’t just about repurposing leftovers — it’s about reinventing them. These muffins combine classic mashed potatoes with eggs, cheese, herbs, and a few pantry staples to create something hearty, satisfying, and surprisingly elegant. Whether you’re looking for a make-ahead breakfast idea, a fun side dish, or a unique way to use up leftover potatoes after a big dinner, these mashed potato muffins will quickly earn a place in your recipe collection.

Ingredients

  • 2 cups cold mashed potatoes (leftover or freshly made, well seasoned)

  • 2 large eggs

  • ½ cup shredded cheddar cheese (or a mix of mozzarella and parmesan)

  • ¼ cup sour cream or Greek yogurt

  • 2 tablespoons butter, melted

  • ¼ cup milk (to loosen the potatoes if too thick)

  • ¼ cup chopped green onions or chives

  • ½ teaspoon garlic powder

  • ½ teaspoon onion powder

  • ¼ teaspoon paprika (optional for color and flavor)

  • Salt and black pepper, to taste

  • Nonstick spray or butter, for greasing the muffin tin

Optional Add-ins:

  • Cooked bacon bits or ham pieces

  • Finely chopped broccoli, spinach, or bell pepper

  • A sprinkle of grated parmesan on top for extra crispness

Instructions

  1. Preheat and Prepare
    Preheat your oven to 375°F (190°C). Lightly grease a 12-cup muffin tin with nonstick spray or melted butter. You can also line the cups with parchment muffin liners if desired, but greasing gives a crispier edge.

  2. Mix the Wet Ingredients
    In a large mixing bowl, whisk together the eggs, sour cream (or Greek yogurt), and melted butter until smooth and creamy. This base will add richness and help bind the muffins together.

  3. Add the Mashed Potatoes
    Stir in your mashed potatoes. If your mashed potatoes are very stiff or dense (especially if they’ve been refrigerated), mix in a splash or two of milk until they loosen up slightly. The mixture should be thick but spreadable — similar to a heavy cake batter.

  4. Incorporate the Flavor
    Add in the shredded cheese, green onions, garlic powder, onion powder, paprika, salt, and pepper. Stir everything until evenly combined. The cheese will melt beautifully during baking, giving the muffins a creamy interior and a golden crust.

  5. Customize Your Muffins
    At this stage, feel free to fold in any add-ins — crispy bacon bits, diced ham, sautéed vegetables, or even a handful of spinach for a nutritious touch. The possibilities are endless and can match your mood or leftovers.

  6. Scoop and Smooth
    Using a spoon or cookie scoop, divide the mixture evenly among the prepared muffin cups. Fill each cup nearly to the top for full, rounded muffins. Smooth the tops with the back of a spoon.

  7. Top for Texture
    For a gourmet finish, sprinkle a pinch of extra shredded cheese or grated parmesan on top of each muffin before baking. This creates a delightful crispy crust.

  8. Bake to Golden Perfection
    Place the muffin tin in the preheated oven and bake for 25–30 minutes, or until the tops are puffed and lightly golden brown. The muffins should feel firm to the touch and pull away slightly from the sides of the pan.

  9. Cool and Serve
    Let the muffins cool in the pan for about 5 minutes before transferring them to a wire rack. Serve warm — that’s when they’re at their best, with the cheese still gooey inside and the edges perfectly crisp.

Serving Ideas

  • Breakfast Treat: Serve warm with scrambled eggs and a dollop of sour cream or salsa on top.

  • Lunch or Snack: Pair with a green salad or soup for a satisfying meal.

  • Dinner Side Dish: They make a wonderful accompaniment to roasted chicken, steak, or grilled vegetables.

  • On-the-Go Snack: These muffins hold up well at room temperature — ideal for lunchboxes or road trips.

Storage and Reheating Tips

  • Refrigeration: Store leftovers in an airtight container in the refrigerator for up to 4 days.

  • Freezing: Freeze cooled muffins in a single layer on a baking sheet, then transfer to a freezer bag. They’ll keep well for 2 months.

  • Reheating: Reheat in the oven or air fryer at 350°F (175°C) for 8–10 minutes to restore crispness, or microwave for about 30 seconds if you’re in a hurry.

Why You’ll Love This Recipe

  1. A Second Life for Leftovers: It’s the perfect way to transform extra mashed potatoes into something exciting and new.

  2. Customizable: You can make them vegetarian, meaty, cheesy, or even spicy — each variation is delicious.

  3. Kid-Friendly: Kids love the muffin shape, and it’s a fun way to sneak in veggies.

  4. Portable: Great for breakfast meal prep or lunchbox snacks.

  5. Simple Ingredients, Big Flavor: Everything you need is likely already in your fridge or pantry.

Final Thoughts

Mashed Potato Muffins combine the nostalgia of homemade mashed potatoes with the joy of baked comfort food. They’re crispy on the edges, soft and creamy in the middle, and bursting with flavor from cheese and herbs. This recipe celebrates resourcefulness — turning something ordinary into something extraordinary.

Angel Biscuits

Angel Biscuits are the softest, fluffiest, most tender biscuits you’ll ever bake—earning their name because they’re as light as angels’ wings. This Southern classic combines the best of both worlds: the buttery, flaky layers of a traditional biscuit and the airy rise of a yeast roll. The result is a golden, pillowy bread that practically melts in your mouth. Whether served for breakfast with honey, at dinner beside fried chicken, or as the base for strawberry shortcake, Angel Biscuits are pure comfort food.

What makes these biscuits unique is the combination of three leavening agents—yeast, baking soda, and baking powder. The yeast gives them a soft, fluffy texture, while the baking powder and soda provide that signature biscuit rise and tang. The dough can also be made ahead of time and stored in the refrigerator for several days, which makes it perfect for busy mornings or entertaining guests.

Ingredients

  • 1 packet (2¼ tsp) active dry yeast

  • ¼ cup warm water (about 110°F)

  • 2 tablespoons sugar

  • 5 cups all-purpose flour

  • 1 teaspoon baking soda

  • 3 teaspoons baking powder

  • 1 teaspoon salt

  • ½ cup cold unsalted butter, cut into cubes

  • ½ cup cold shortening (or lard)

  • 2 cups buttermilk, cold

  • 2 tablespoons melted butter (for brushing)

Step 1: Activate the Yeast

In a small bowl, dissolve the yeast and sugar in warm water. Let it sit for 5 to 10 minutes until it becomes foamy and bubbly. This step is essential—if your yeast doesn’t foam, it means it’s expired or the water was too hot or cold. The bubbling mixture will give your biscuits that subtle yeasty lift that sets Angel Biscuits apart from traditional ones.

Step 2: Mix the Dry Ingredients

In a large mixing bowl, whisk together flour, baking soda, baking powder, and salt. This combination ensures even distribution of leavening and flavor throughout the dough. Angel Biscuits rely on a delicate balance—too much leavening and they can taste bitter, too little and they won’t rise properly.

Step 3: Cut in the Fats

Add the cold butter and shortening to the flour mixture. Use a pastry cutter or your fingertips to cut the fats into the flour until the mixture resembles coarse crumbs. The cold fat creates tiny steam pockets as the biscuits bake, giving them those beautiful flaky layers. Mixing by hand keeps the dough from becoming overworked, which is key to a tender biscuit texture.

Step 4: Add the Wet Ingredients

Pour in the activated yeast mixture and the cold buttermilk. Gently stir just until the dough comes together. It should be soft and slightly sticky—avoid overmixing, as that can make the biscuits tough. If the dough feels too wet, sprinkle a bit more flour; if it’s too dry, add a splash of buttermilk.

Step 5: Rest the Dough

Here’s where Angel Biscuits earn their name. Cover the dough with plastic wrap and let it rest for 1 to 2 hours at room temperature, or refrigerate overnight. This resting time allows the yeast to develop flavor and make the biscuits light and airy. If you’re planning ahead, the dough can be stored in the fridge for up to 5 days—ready to bake anytime you crave warm biscuits.

Step 6: Roll and Cut

Preheat your oven to 400°F (200°C). Turn the dough out onto a lightly floured surface and roll it to about ½-inch thickness. Use a biscuit cutter or a round glass to cut out your biscuits. Press straight down—don’t twist the cutter—or you’ll seal the edges and prevent them from rising properly. Gather the scraps, gently press them together, and cut out more biscuits.

Step 7: Bake to Golden Perfection

Place the biscuits on a parchment-lined baking sheet, close enough so their sides touch slightly. This helps them rise higher as they bake. Let them sit for about 10 minutes while the oven finishes preheating—this gives the yeast a final boost. Bake for 12–15 minutes, or until the tops are golden brown and the centers are fluffy.

When you pull them from the oven, immediately brush the tops with melted butter for that irresistible sheen and extra flavor. The butter seeps into the warm layers, making them tender and fragrant.

Serving Suggestions

Angel Biscuits are endlessly versatile. For breakfast, serve them warm with honey butter, jam, or sausage gravy. At lunch, use them for mini sandwiches filled with ham and cheddar or fried chicken sliders. For dinner, they pair perfectly with soups, stews, or roasted meats. You can even transform them into a dessert by topping them with whipped cream and fresh strawberries.

These biscuits also freeze beautifully. Once baked and cooled, place them in a freezer-safe bag. To reheat, wrap in foil and warm in a 300°F oven for about 10 minutes.

Tips for Perfect Angel Biscuits

  1. Keep everything cold. Cold butter, shortening, and buttermilk are the secret to flakiness.

  2. Don’t overwork the dough. Gentle handling keeps the biscuits light and tender.

  3. Let them rest. Even a short rest before baking gives the yeast time to work its magic.

  4. Bake close together. Touching sides encourage upward rise instead of spreading out.

  5. Brush with butter twice. Once before baking for color, and again after for flavor and shine.

The Story Behind Angel Biscuits

Angel Biscuits have deep roots in the American South, where resourceful cooks combined yeast dough and biscuit dough to ensure consistent results. In days before modern ovens, this hybrid dough guaranteed success—if the yeast failed, the baking powder would still give lift. The name “Angel Biscuits” likely came from their ethereal texture and golden color, as if kissed by heaven itself.

They became a cherished recipe in Southern households, passed from grandmother to grandchild, each adding a personal twist—extra butter, a touch of sugar, or a dash of cream. Today, they remain a beloved comfort food, simple yet elegant enough for holidays or Sunday dinners.

Conclusion

Angel Biscuits are the epitome of baking bliss—soft, flaky, buttery, and lightly sweet with a whisper of yeast flavor. They’re forgiving to make, store well, and elevate any meal from ordinary to heavenly. Each bite captures the essence of home cooking: warmth, love, and a touch of Southern charm.

When you pull a pan of golden Angel Biscuits from the oven, the kitchen fills with a smell so inviting, it’s impossible not to smile. These are the biscuits that bring people together—fluffy clouds of comfort that truly live up to their name.

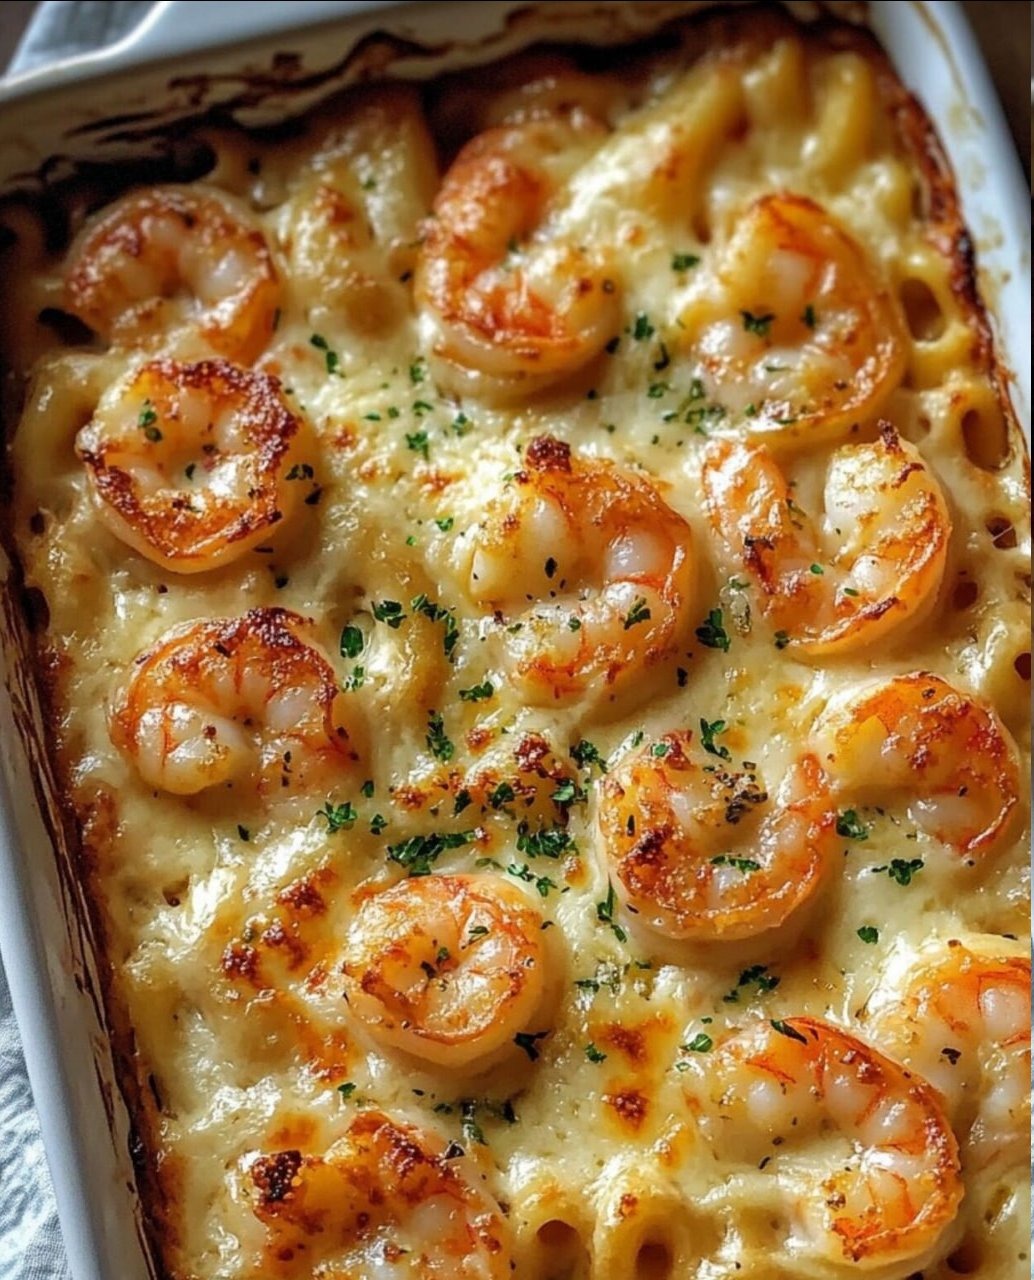
Shrimp Scampi Bake

Shrimp Scampi Bake is a dish that perfectly bridges the gap between comfort food and coastal cuisine. This recipe transforms a classic shrimp scampi into a baked masterpiece—golden, bubbling, and fragrant with garlic, lemon, butter, and herbs. Each bite is luxurious yet simple, offering tender shrimp soaked in a velvety, garlicky butter sauce beneath a crisp, golden breadcrumb topping. Whether you serve it over pasta, rice, or with crusty bread, this Shrimp Scampi Bake will quickly become a favorite centerpiece for family dinners or special gatherings.

Ingredients

For the Shrimp Mixture:

  • 1 ½ pounds large raw shrimp, peeled and deveined

  • 1 teaspoon salt

  • ½ teaspoon black pepper

  • ½ teaspoon crushed red pepper flakes (optional, for a mild heat)

  • 4 cloves garlic, finely minced

  • 2 tablespoons fresh parsley, finely chopped

  • 2 tablespoons lemon juice (freshly squeezed)

  • 1 teaspoon lemon zest

  • ½ cup unsalted butter, melted

  • ¼ cup dry white wine (or chicken broth for non-alcoholic version)

For the Topping:

  • 1 cup Panko breadcrumbs

  • ¼ cup grated Parmesan cheese

  • 2 tablespoons melted butter

  • 1 tablespoon olive oil

  • 1 tablespoon fresh parsley, finely chopped

  • A pinch of paprika for color

Optional for Serving:

  • Cooked linguine, angel hair pasta, or steamed jasmine rice

  • Extra lemon wedges

  • Freshly grated Parmesan

Instructions

Step 1: Preheat and Prepare
Start by preheating your oven to 400°F (200°C). Lightly grease a 9×13-inch baking dish or a medium-sized casserole dish with butter or nonstick spray. This ensures your shrimp doesn’t stick and gives the edges that delicious golden crust.

Step 2: Season the Shrimp
In a large bowl, combine the peeled and deveined shrimp with salt, pepper, red pepper flakes, minced garlic, lemon zest, lemon juice, and parsley. Drizzle in the melted butter and white wine (or broth), then toss gently until the shrimp are evenly coated. The combination of butter and citrus creates a base that’s both rich and refreshing.

Step 3: Arrange in Baking Dish
Spread the shrimp evenly across your prepared baking dish in a single layer. Pour any remaining butter mixture from the bowl over the shrimp—this sauce will mingle with the topping and create that irresistible, buttery scampi flavor once baked.

Step 4: Make the Crunchy Topping
In a small bowl, mix the Panko breadcrumbs, Parmesan cheese, melted butter, olive oil, and parsley. The butter and oil help the breadcrumbs toast beautifully in the oven, while the Parmesan adds a nutty, savory element that balances the bright lemon flavor. Sprinkle this mixture evenly over the shrimp. Finish with a light dusting of paprika for color and a subtle smoky undertone.

Step 5: Bake to Perfection
Place the dish in your preheated oven and bake for 12–15 minutes, or until the shrimp turn pink and opaque and the topping is golden brown. Be careful not to overbake—shrimp cook quickly, and overcooked shrimp can become rubbery. If you want an extra-crispy topping, turn on the broiler for 1–2 minutes at the end, keeping a close eye on it to avoid burning.

Step 6: Serve and Enjoy
Remove from the oven and let it rest for about 3–4 minutes. This short resting time allows the buttery sauce to settle at the bottom and soak into the shrimp. Garnish with a sprinkle of fresh parsley and serve immediately with your favorite side.

Serving Suggestions

This Shrimp Scampi Bake is delightfully versatile. For a hearty meal, serve it over buttery linguine or angel hair pasta, allowing the garlic-lemon sauce to coat each strand. If you prefer something lighter, spoon it over steamed jasmine rice or cauliflower rice for a low-carb twist. For a rustic touch, pair it with toasted sourdough or garlic bread—perfect for soaking up every drop of that golden sauce.

A crisp green salad with a lemon vinaigrette or a side of roasted asparagus complements the richness beautifully. To elevate the meal, serve it with a chilled glass of white wine—a Sauvignon Blanc or Chardonnay pairs wonderfully with the buttery garlic notes.

Why This Recipe Is Unique

What makes this Shrimp Scampi Bake stand out is its layered texture and flavor balance. Traditional scampi is often cooked quickly in a skillet, but this baked version deepens the flavor and allows the shrimp to gently bathe in its own buttery, garlicky juices while developing a crisp crust on top. The Panko-Parmesan topping brings an addictive crunch that contrasts perfectly with the tender shrimp beneath.

Another standout element is the lemon-forward butter sauce, which stays light despite the richness of the butter. The fresh lemon zest and juice prevent the dish from feeling heavy, while the white wine (or broth) enhances the savory depth. You also get flexibility—adjust the garlic for intensity, or add a pinch of cayenne for extra heat.

This dish also reheats beautifully, maintaining its texture and flavor when warmed gently in the oven or air fryer. It’s ideal for make-ahead dinners, entertaining, or impressing guests with minimal effort.

Chef’s Tips for Success

  1. Use raw shrimp only. Pre-cooked shrimp will dry out in the oven.

  2. Fresh garlic over jarred. The aroma and flavor difference are dramatic—fresh garlic gives that signature scampi punch.

  3. Do not skip the lemon zest. It adds brightness that cuts through the richness of the butter.

  4. Watch the bake time carefully. Shrimp go from perfect to overdone in a minute, so pull them out as soon as they’re pink and firm.

  5. Add a hint of luxury. Sprinkle with a few red pepper flakes or drizzle with truffle oil before serving for an elevated touch.

Old-Fashioned Custard Pie

There is something remarkably comforting about a custard pie. It’s simple—no wild ingredients, no elaborate steps—but the flavor is elegant and deeply nostalgic. The smooth and silky filling, infused with gentle notes of vanilla and nutmeg, nestled into a buttery, flaky crust… it’s the kind of dessert your grandmother would pull out of the oven and let cool on a windowsill. This Old-Fashioned Custard Pie honors that tradition, capturing the essence of home kitchens, Sunday suppers, and porch gatherings in one humble slice.

This recipe doesn’t rely on shortcuts—no boxed pudding, no artificial flavorings. Instead, it uses carefully whisked eggs, real milk and cream, pure vanilla, and just enough sugar to enhance rather than overpower. It’s custard the way it’s meant to be: delicate, soft, and lightly sweet.

Ingredients

For the crust (you may also use store-bought):

  • 1 ¼ cups all-purpose flour

  • ½ teaspoon fine salt

  • 1 tablespoon granulated sugar

  • 8 tablespoons (1 stick) cold unsalted butter, cut into cubes

  • 3–5 tablespoons ice water

For the custard filling:

  • 4 large eggs

  • ¾ cup granulated sugar

  • 2 cups whole milk (room temperature is best)

  • ½ cup heavy cream

  • 2 teaspoons pure vanilla extract

  • ¼ teaspoon fine salt

  • Freshly grated nutmeg (or ground nutmeg), to taste

Directions

Step 1: Make the Pie Crust

  1. In a mixing bowl, whisk together the flour, salt, and sugar.

  2. Add the cold butter cubes. Using your fingertips or a pastry blender, cut the butter into the flour until the mixture resembles coarse crumbs with pea-sized bits of butter still visible.

  3. Add ice water, one tablespoon at a time, gently tossing until the dough begins to hold together. It should not be sticky.

  4. Form the dough into a disk, wrap in plastic wrap, and chill at least 30 minutes.

  5. Once chilled, roll the dough out on a floured surface and transfer to a 9-inch pie dish.

  6. Trim and crimp edges. Chill again while you prepare the custard filling. (Cold crust = flaky crust.)

Step 2: Mix the Custard

  1. In a bowl, whisk the eggs until smooth—this helps the custard set evenly.

  2. Add sugar, milk, cream, vanilla, and salt. Whisk until everything is well combined but do not whip in extra air.

  3. Let the mixture rest 5 minutes to allow bubbles to dissipate—this ensures a silky texture.

Step 3: Bake

  1. Preheat oven to 350°F (175°C).

  2. Gently pour the custard filling into your chilled crust.

  3. Lightly sprinkle nutmeg over the surface. Don’t be shy—nutmeg is the soulful signature of a true old-fashioned custard pie.

  4. Bake 40–55 minutes, depending on your oven, until the edges are set but the center still trembles slightly when you jiggle the pie.

  5. Turn off the oven and crack the door. Let the pie cool inside for 10 minutes to prevent cracking.

  6. Transfer to a rack and allow the pie to cool completely before slicing—this step is key for proper texture.

Serving Suggestions

  • Serve chilled for a firmer, pudding-like texture.

  • Serve slightly warm for a delicate and custard-soft slice.

  • Top with:

    • Fresh berries

    • A dusting of powdered sugar

    • Whipped cream lightly sweetened with honey

Honestly, it’s also perfect plain—just how it was made generations ago.

What Makes This Custard Pie Old-Fashioned?

Old-fashioned custard pies use milk and eggs as the thickener, not cornstarch or gelatin. The filling sets gently in the oven. This method creates a custard that is soft, almost creamy, rather than stiff or gelatinous. The flavor is milk-forward, pure, and subtly sweet—meant to be savored slowly.

The role of nutmeg is also traditional. While cinnamon and spices are popular in modern desserts, nutmeg was historically the spice for creamy custards—it adds a warm, aromatic finish that feels familiar and comforting.

Tips for Success

Tip Why It Matters
Use room temperature milk and eggs Prevents the custard from curdling or separating
Chill the pie crust before filling Ensures a crisp, flaky crust
Don’t overbake Overbaking causes rubbery custard and cracks
Let cool fully before slicing Helps the custard set into smooth, clean slices

A Touch of Story and Tradition

This pie is the kind that would appear during church suppers, family reunions, and Sunday tables. It wasn’t flashy, but it was dependable—the kind of dessert that said, we may not have a lot, but we have enough, and we share it gladly. The aroma of vanilla and nutmeg drifting through the house signaled comfort, contentment, and care.

Today, when everything moves too quickly, baking a custard pie feels like slowing the world down. It’s a quiet, tender ritual.