Garlic Butter Steak Bites

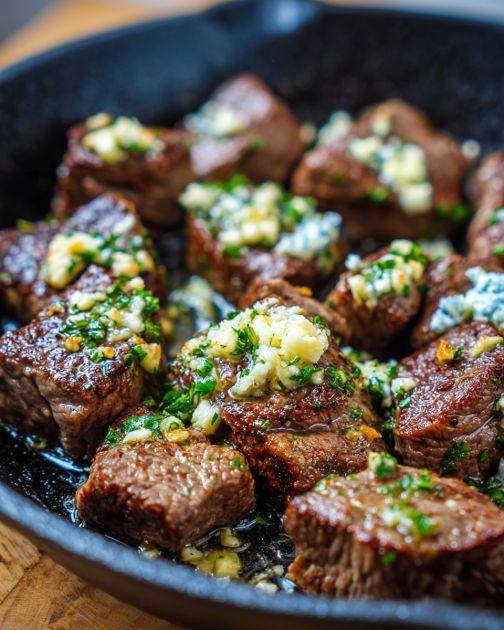
There are recipes that simply feed you, and then there are recipes that make you feel like you’ve stepped into a cozy steakhouse where sizzling aromas wrap around you like a warm blanket. Garlic Butter Steak Bites belong to the second category — small golden-seared chunks of beef, drenched in melted butter, kissed with garlic, and finished with herbs that make the whole dish come alive. This version is unique because it layers flavor from the inside out, turning every bite into a savory, buttery explosion. Whether you’re cooking for guests or treating yourself to a quick weeknight indulgence, these steak bites deliver restaurant-quality satisfaction with surprisingly little effort.

Why This Recipe Stands Out

Unlike the usual one-step garlic butter steak bite recipes, this one uses a two-stage flavor infusion. First, the beef is marinated in a simple umami-packed mixture that tenderizes and seasons it from within. Then, during cooking, the butter sauce is built slowly so every piece of steak gets coated in a glossy, garlicky finish. The result? Steak bites that are more flavorful, juicier, and more aromatic than any quick version.

Ingredients

For the Steak Bites

  • 1 ½ lbs sirloin, ribeye, or New York strip, cut into 1-inch cubes

  • 1 tablespoon soy sauce

  • 1 teaspoon Worcestershire sauce

  • 1 tablespoon olive oil

  • ¾ teaspoon salt

  • ½ teaspoon black pepper

  • ½ teaspoon smoked paprika

  • ¼ teaspoon garlic powder

For the Garlic Butter

  • 4 tablespoons unsalted butter

  • 5 garlic cloves, finely minced

  • 1 tablespoon fresh parsley, chopped

  • ½ teaspoon red pepper flakes (optional)

  • 1 teaspoon lemon juice (optional for brightness)

Instructions

1. Marinate for Depth (Unique Step!)

Place your steak cubes in a bowl and drizzle in soy sauce, Worcestershire sauce, olive oil, salt, pepper, smoked paprika, and garlic powder. Toss well until the meat is evenly coated.

Let the steak rest for 15–20 minutes. This quick marinade gently seasons the beef and enhances browning, giving you deeper flavor from the very start.

2. Preheat Your Pan for a Perfect Sear

Heat a heavy skillet — cast iron is best — over high heat for 3–4 minutes. You want it screaming hot.
A properly heated pan ensures:

  • caramelized crust

  • juicy interior

  • steakhouse-style aroma

Add just a thin film of oil once the pan is hot.

3. Sear the Steak Bites in Small Batches

Add the marinated steak bites in a single layer, leaving space between each piece. If the pan is crowded, the beef will steam instead of sear.

Cook for 1–2 minutes per side, turning with tongs. You want deep brown edges but a tender center. Remove the cooked pieces to a plate and repeat until all the steak is done.

This step alone makes your kitchen smell like a premium grill.

4. Build the Garlic Butter

Lower the heat to medium and add the butter to the same pan. As it melts, scrape up the browned bits — this is where the magic flavor lives.

Stir in the minced garlic. Let it cook for 30 seconds, just until fragrant.
Do not brown the garlic — you want it soft, mellow, and buttery.

Add red pepper flakes and lemon juice if using.

5. Combine and Finish

Return all the steak bites to the pan and toss them in the garlic butter until glossy and fully coated. Let them warm together for about one minute.

Sprinkle with chopped parsley.

Serving Ideas

1. Steakhouse Style

Serve with mashed potatoes, roasted vegetables, or a simple Caesar salad.

2. As a Party Appetizer

Pile the steak bites onto a platter with toothpicks. They disappear fast.

3. Over Rice or Pasta

A drizzle of extra butter sauce turns it into a complete comforting bowl.

4. With Bread

Dip crusty bread into the leftover garlic butter — you won’t regret it.

Tips for the Best Steak Bites

  • Use well-marbled steak for tenderness. Ribeye gives the richest flavor.

  • Cut pieces evenly so they cook at the same rate.

  • Don’t overcook — medium-rare to medium gives the juiciest results.

  • Let the pan get extremely hot before adding the meat.

  • Add garlic only at the end to avoid burning.

Final Thoughts

This unique Garlic Butter Steak Bites recipe is simple yet remarkably flavorful because every step builds intensity. The quick marinade boosts the meat from within, the hot sear creates an irresistible crust, and the silky garlic butter ties everything together. It’s one of those dishes that feels luxurious without being complicated, making it perfect for both busy nights and special occasions.


Asparagus casserole

Asparagus casserole is one of those timeless comfort dishes that brings together fresh vegetables, rich creaminess, and irresistible flavor in every bite. Whether you’re preparing it for a family dinner, a holiday table, a potluck, or simply craving something warm and satisfying, this classic casserole delivers beautifully. What makes it even more appealing is how easy it is to prepare—requiring simple ingredients, basic techniques, and very little time. Below is a detailed guide to making the perfect asparagus casserole, along with tips, variations, and serving ideas.


Why Asparagus Casserole?

Asparagus is a spring vegetable known for its delicate flavor, tenderness, and excellent nutritional profile. Packed with vitamins A, C, K, and folate, it brings a bright, fresh taste that pairs incredibly well with creamy sauces and melted cheese. Turning asparagus into a casserole brings out its comforting side—giving it richness, body, and indulgence while keeping things wholesome and flavorful.


Ingredients You’ll Need

  • Fresh asparagus (about 2 pounds), trimmed and cut into 2-inch pieces

  • Cream of mushroom soup (1 can, or homemade if preferred)

  • Milk or half-and-half (½ cup)

  • Shredded cheddar cheese (1 ½ cups, divided)

  • Grated Parmesan (¼ cup)

  • Garlic powder (½ teaspoon)

  • Onion powder (½ teaspoon)

  • Salt and black pepper (to taste)

  • Breadcrumbs or crushed Ritz crackers (1 cup)

  • Butter (2 tablespoons, melted)

These pantry-friendly ingredients come together to form a creamy, cheesy base that wraps every piece of asparagus in luscious flavor. The buttery breadcrumb topping adds the perfect contrast—crispy, golden, and irresistible.


Step-by-Step Instructions

1. Prepare the Asparagus

Begin by washing the asparagus thoroughly and trimming off the tough woody ends. Cut the spears into 2-inch pieces. To ensure perfect texture, blanch the asparagus: boil them for 2–3 minutes until they turn bright green, then shock them in ice water. This preserves both color and crisp tenderness, preventing the vegetable from becoming mushy when baked.

2. Make the Creamy Sauce

In a mixing bowl, whisk together the cream of mushroom soup, milk, garlic powder, onion powder, black pepper, and salt. Stir in about 1 cup of shredded cheddar cheese. This creates a velvety sauce that clings beautifully to the asparagus and forms the base of your casserole.

3. Assemble the Casserole

In a greased baking dish, combine the blanched asparagus with the creamy mixture. Toss gently to coat every piece evenly. Sprinkle the remaining cheddar cheese over the top for extra richness.

4. Add the Crispy Topping

Mix the breadcrumbs or crushed crackers with melted butter and grated Parmesan. These ingredients create a crunchy, golden topping that contrasts wonderfully with the creamy interior. Scatter the mixture evenly over the casserole.

5. Bake to Perfection

Bake in a preheated 350°F (175°C) oven for 25–30 minutes, or until the topping is crisp, golden brown, and the casserole is bubbling around the edges.


Tips for the Best Asparagus Casserole

  • Use fresh, firm asparagus: Thicker spears work especially well because they hold up during baking.

  • Don’t skip blanching: This step helps maintain great texture.

  • Add extra cheese: For a richer casserole, add Monterey Jack or mozzarella.

  • Make it lighter: Use low-fat milk and reduce cheese if you prefer a healthier version.

  • Make it gluten-free: Substitute crushed gluten-free crackers or almond flour for the topping.


Delicious Variations

  • Asparagus & Mushroom: Sauté sliced mushrooms and add them to the mix.

  • Chicken Asparagus Casserole: Stir in cooked shredded chicken for extra protein.

  • Asparagus & Bacon: Add crispy bacon pieces for a smoky, savory touch.

  • Asparagus & Rice: Add cooked rice to make it a complete one-dish meal.


Serving Suggestions

Asparagus casserole pairs well with roasted chicken, baked fish, grilled steak, or a simple loaf of crusty bread. It also shines on a holiday table alongside ham, turkey, or lamb. Serve it warm, allowing the cheesy, creamy flavors to shine.


Final Thoughts

This asparagus casserole is comfort food at its finest—simple, creamy, flavorful, and deeply satisfying. With minimal ingredients and easy preparation, it’s the perfect dish for busy weeknights, special occasions, or anytime you crave a wholesome homemade meal. Whether you enjoy it as a side dish or a main course, this casserole brings warmth and classic goodness to every table. Enjoy!

diabetic Sugar free lemon cake with vanilla glaze No calories! Only 3 ingredients! Low calorie

When you’re living with diabetes or simply trying to manage your sugar intake, finding a dessert that tastes bright, fresh, and indulgent—without the sugar crash—can feel impossible. That’s exactly why this Sugar-Free Lemon Cake with Vanilla Glaze is such a gem. It uses only 3 main ingredients, comes together in minutes, and lets you enjoy a soft, fragrant lemon cake that feels like a treat without spiking blood sugar. The vanilla glaze adds the perfect sweet finish, yet stays completely sugar-free.

This cake is light, fluffy, wonderfully citrusy, and surprisingly low in calories. It’s ideal for tea time, after dinner, or keeping in the fridge for a guilt-free snack. Best of all: you don’t need baking experience or complicated tools. This is one of the simplest diabetic-friendly desserts you can make.


Why This Cake Works for Diabetics

Traditional lemon cakes rely on sugar, flour, and butter—all ingredients that increase calories and spike glucose. This version is different:

1. No Added Sugar

The sweetness comes from a diabetic-friendly sweetener such as:

  • Stevia

  • Erythritol

  • Monk fruit sweetener
    These sweeteners don’t raise blood sugar and contain little to no calories.

2. Minimal Ingredients

With only 3 main ingredients, you avoid heavy fats, refined sugars, and calorie-dense additives. The recipe focuses on flavor through lemon and vanilla.

3. Low Calories

Since the base is made mostly from eggs, lemon, and sweetener (plus optional almond flour or yogurt for structure), the cake ends up incredibly light.


INGREDIENTS (Only 3 Main Ingredients!)

Main Cake Ingredients

  1. Eggs – 4 large
    (They create structure and fluffiness.)

  2. Lemon – 2 large (zest + juice)
    (Provides bright flavor without adding sugar.)

  3. Sweetener – ½ cup granulated erythritol, stevia blend, or monk fruit
    (Adjust to taste.)

Optional Supporting Ingredients (choose 1 for texture)

These do not break the low-calorie, diabetic-friendly profile:

  • 2 tbsp almond flour – for a more cake-like crumb

  • 2 tbsp Greek yogurt – for softness

  • 1 tbsp cornstarch – keeps the cake airy
    You only need one, but you may use none if you prefer an ultra-light soufflé-style cake.


VANILLA GLAZE (Sugar-Free)

  • 2 tbsp sugar-free powdered sweetener

  • 1 tsp vanilla extract

  • 1–2 tsp lemon juice or water

Mix to a smooth, pourable glaze.


STEP-BY-STEP INSTRUCTIONS

1. Prepare the Eggs

Separate the egg whites and yolks into two bowls.
Beat the egg whites until stiff peaks form. This step is crucial—it makes your cake rise without flour or baking powder.

2. Mix the Yolks

To the bowl of egg yolks, add:

  • Lemon zest

  • Lemon juice

  • Sweetener

Whisk until the mixture becomes pale and creamy. If you’re using almond flour, yogurt, or cornstarch, add it here.

3. Fold the Batter

Gently fold the beaten egg whites into the yolk mixture.
Use slow, upward motions so the batter stays airy. This is what keeps the cake soft and fluffy.

4. Bake

Pour the batter into a lined loaf pan or round pan.
Bake at 160°C (320°F) for 25–30 minutes, or until lightly golden and set.

5. Add Vanilla Glaze

When the cake cools, drizzle the sugar-free vanilla glaze over the top.
It adds sweetness and a bakery-style finish—without sugar.


TEXTURE & FLAVOR

Despite being nearly calorie-free, this cake tastes wonderfully bright:

  • The lemon gives freshness and tang.

  • The egg base makes it airy, sponge-like, and naturally moist.

  • The vanilla glaze brings a classic sweet aroma that balances the citrus.

It’s not a heavy, buttery cake—it’s light, delicate, uplifting, and perfect for people avoiding sugar.


LOW-CALORIE PROFILE (Approximate)

  • Per slice: 35–55 calories (depending on optional ingredient used)

  • Sugar: 0g added sugar

  • Carbs: Very low

  • Fat: Minimal

It’s an excellent dessert for weight loss, diabetes management, or anyone wanting a guilt-free treat.


TIPS FOR THE BEST RESULT

Use Fresh Lemons

Bottled lemon juice won’t give the same aroma. Zest is essential for the strongest flavor.

Do Not Overmix

After adding egg whites, mix gently. Overmixing destroys the air and creates a dense cake.

Let It Cool

The cake sets as it cools. Cutting too early may make it fall apart.

Adjust Sweetness

Taste the batter before baking—diabetic sweeteners vary in strength.


VARIATIONS

1. Lemon-Blueberry Version

Add a handful of fresh or frozen blueberries to the batter.
Still diabetic-friendly and low-calorie.

2. Lemon Coconut

Sprinkle a teaspoon of unsweetened shredded coconut before baking.

3. Almond-Lemon Cake

Add 2–3 tablespoons almond flour for a nutty aroma and richer body.

4. Lemon-Vanilla Cloud Cake

Skip all optional ingredients and leave it purely egg-based for an ultra-light dessert.


HOW TO STORE IT

This cake stays best when chilled.

  • Refrigerator: Up to 4 days

  • Freezer: Up to 1 month (slice first for easy thawing)

The flavor actually improves after a day!


SERVING SUGGESTIONS

  • With sugar-free whipped cream

  • With a cup of green tea or herbal tea

  • As a light breakfast or evening snack

  • With fresh raspberries or strawberries

  • With extra lemon zest on top for brightness

Because it’s low-calorie and sugar-free, you can enjoy a slice anytime without worrying about spikes or heaviness.


FINAL THOUGHTS

This Diabetic Sugar-Free Lemon Cake with Vanilla Glaze is proof that healthy desserts don’t have to be boring. With only three main ingredients, you can create a fresh, vibrant, low-calorie cake that feels indulgent yet stays fully diabetic-friendly.

Whether you’re trying to lose weight, manage diabetes, or simply want a no-guilt dessert, this simple recipe delivers big flavor with minimal ingredients. Bright lemon, sweet vanilla, and a fluffy cake base come together to create a treat you’ll want to make again and again.

Dalgona coffee drink

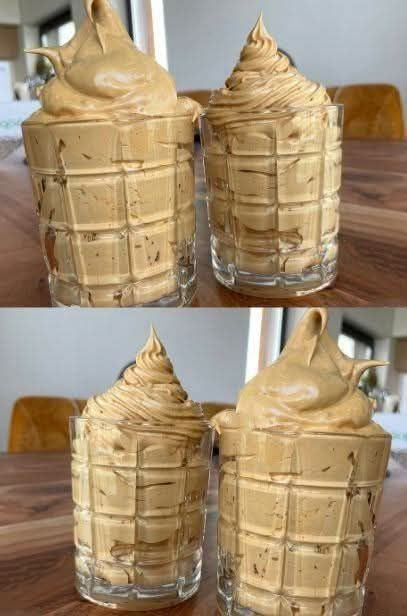
If there’s one drink that managed to capture global attention in record time, it’s Dalgona Coffee—a velvety, cloud-like whipped coffee sitting beautifully on top of cold or warm milk. With its caramel color, fluffy texture, and simple ingredients, this drink became a worldwide sensation, especially during times when people were stuck indoors and looking for something fun, comforting, and café-style to make at home. But beyond its viral fame, Dalgona Coffee is a delightful combination of flavor and texture that appeals to both coffee lovers and dessert drink fans.

In this detailed guide, you’ll learn the origin of dalgona coffee, why it whips so uniquely, and exactly how to make the perfect cup at home—plus fun variations to elevate your drink even more.


What Is Dalgona Coffee?

Dalgona coffee is a Korean-inspired drink named after dalgona, a traditional Korean sugar candy that has a light, honeycomb-like texture and a sweet caramel taste. While the drink doesn’t contain actual dalgona candy, the whipped coffee foam resembles the look and flavor of the classic treat.

The drink consists of two components:

  1. A thick, whipped coffee mixture made from equal parts instant coffee, sugar, and hot water

  2. Hot or cold milk of your choice

The magic lies in how these three simple ingredients can transform into a luscious, mousse-like topping that floats beautifully on milk, creating a visually stunning layered drink.


Why Does Dalgona Coffee Whip So Well?

The secret lies in instant coffee. Unlike ground coffee, instant coffee is made from dehydrated brewed coffee, which contains stabilizers and proteins that help trap air when whipped. Combined with sugar, it turns into a stable foam—similar to meringue but without eggs.

This is why standard ground coffee will not whip. Instant coffee is essential for creating that signature fluffy, cloud-like topping.


Ingredients You Need

You only need a few pantry staples to make this café-worthy drink:

  • 2 tablespoons instant coffee

  • 2 tablespoons sugar (white sugar works best for stability)

  • 2 tablespoons hot water

  • 1 cup milk, hot or cold

  • Ice cubes (optional, for iced dalgona coffee)

  • Cocoa powder or chocolate syrup (optional topping)

This 1:1:1 ratio ensures the foam whips quickly and holds its shape.


How to Make the Perfect Dalgona Coffee

Step 1: Combine the Ingredients

In a mixing bowl, add:

  • Instant coffee

  • Sugar

  • Hot water

Use a medium-sized bowl to allow enough space for whipping air into the mixture.

Step 2: Whip Until Fluffy

You can use a:

  • Hand whisk

  • Electric hand mixer

  • Stand mixer

If whisking by hand, it takes about 3–5 minutes of vigorous whipping. An electric mixer brings it together in less than a minute.

Whip until the mixture becomes:

  • Thick

  • Silky

  • Light brown

  • Holding firm peaks

It should look like coffee mousse or caramel frosting.

Step 3: Prepare the Milk Base

Fill a glass with:

  • Cold milk and ice for a refreshing iced version
    or

  • Hot milk for a warm, cozy drink

Both versions taste delicious, though iced dalgona coffee is the most commonly enjoyed.

Step 4: Scoop and Swirl

Using a spoon or spatula, scoop the whipped coffee mixture on top of the milk. Spread or swirl it into a beautiful dome.

To enjoy, stir the whipped coffee into the milk until it becomes creamy and well-blended.


What Does Dalgona Coffee Taste Like?

Dalgona coffee is:

  • Smooth

  • Creamy

  • Sweet with a pleasant bitterness

  • Rich in coffee flavor

The foam itself is strong and bold, almost like espresso-flavored whipped cream. Once mixed with milk, the drink becomes balanced, sweet, and velvety—like a dessert coffee.


Pro Tips for the Best Whipped Coffee

  • Use hot water: It helps dissolve coffee and sugar for a better whip.

  • White sugar works best: Brown sugar can be used but may affect stability.

  • Use cold milk for contrast: The foam sits beautifully on iced milk.

  • Whip well: Soft peaks may collapse; go for stiff peaks.

  • Serve immediately: The foam stays stable for a while but is best enjoyed fresh.


Fun Variations to Try

1. Chocolate Dalgona Mocha

Stir 1 teaspoon cocoa powder into the coffee mixture before whipping. Serve over chocolate milk for an indulgent mocha twist.

2. Caramel Dalgona Latte

Drizzle caramel sauce around the glass and add a spoonful into the milk before topping with whipped coffee.

3. Dalgona Cinnamon Latte

Add ¼ teaspoon cinnamon to the coffee mixture or sprinkle it on top for a warm, aromatic version.

4. Matcha Dalgona (Green Tea)

Whip the coffee separately, but prepare the milk using a matcha latte base for a stunning two-tone drink.

5. Sugar-Free Dalgona Coffee

Use a sugar substitute like erythritol, but note that the foam may be softer unless you use a stabilizing sweetener.


Is Dalgona Coffee Healthy?

In moderation, yes. It contains:

  • A moderate amount of caffeine

  • A standard serving of milk

  • About 2 tablespoons of sugar (which you can reduce if desired)

Using low-fat milk or plant-based milk like almond or oat milk can make it lighter.


Final Thoughts

Dalgona Coffee is more than just a viral trend—it’s a comforting, café-style drink that anyone can make with just three simple ingredients. Its creamy texture, rich coffee flavor, and beautiful presentation make it a perfect drink for mornings, afternoons, or even as a sweet treat after dinner. Whether you enjoy it hot or cold, traditional or flavored, this whipped coffee will always feel special and satisfying.

9 Signs of Diabetes That Appear at Night

Diabetes is often called a “silent condition” because many of its early symptoms develop slowly and subtly. For many people, the first noticeable signs actually show up at night. When the body struggles to regulate blood sugar, nighttime becomes especially challenging because hormones shift, metabolism slows, and long periods pass without eating. If you consistently experience certain symptoms after sundown or while sleeping, they could be red flags pointing toward diabetes or prediabetes. Here are nine important nighttime signs you should never ignore.


1. Frequent Nighttime Urination (Nocturia)

One of the most common nighttime signs of diabetes is waking up multiple times to urinate. When blood sugar is high, the kidneys work overtime to filter excess glucose from the bloodstream. This pulls more water into the urine, increasing its volume. If you find yourself waking up two, three, or more times each night to use the bathroom, despite drinking your normal amount of fluids, it may be related to blood sugar imbalance. Nocturia is disruptive, exhausting, and often the first symptom people notice.


2. Excessive Thirst at Night

Frequent urination leads to another hallmark symptom: intense thirst. High blood sugar dehydrates the body, causing you to crave water, juice, or other fluids after dark. Some people even keep a water bottle by the bed because their mouth feels dry all night. If your thirst doesn’t match your daytime activity or temperature, or if it wakes you up repeatedly, it’s worth paying attention.


3. Night Sweats

Sweating at night can be a sign of fluctuating blood sugar levels, especially if you wake up drenched. Low blood sugar (hypoglycemia) can trigger a stress response where the body releases adrenaline, leading to clammy skin, rapid heartbeat, and sudden sweating. This is especially common in people with Type 2 diabetes who take medication that can lower blood sugar too much — but it can also happen during early stages of blood sugar dysregulation.


4. Trouble Falling or Staying Asleep

High blood sugar can make you feel wired, uneasy, or restless. Low blood sugar, on the other hand, causes your body to release hormones that interfere with restful sleep. Many people with undiagnosed diabetes report waking up frequently, tossing and turning, or feeling unrested in the morning no matter how long they sleep. Poor sleep itself raises blood sugar, creating a frustrating cycle.


5. Tingling, Numbness, or Burning in the Feet

This symptom, often worse at night, can be a sign of diabetic neuropathy — nerve damage caused by prolonged high blood sugar. You may feel burning sensations, pins and needles, or numbness in your feet and legs. Since you’re lying still at night, these sensations become more noticeable. Even in early stages of diabetes, nerves can become irritated when sugar levels remain elevated for long periods.


6. Increased Hunger at Night

Feeling extremely hungry late at night, even after eating a normal dinner, may be linked to poor glucose regulation. When the body cannot use sugar properly for energy, it sends false hunger signals. Nighttime hunger may also be your body’s response to falling blood sugar levels, pushing you to eat something to stabilize it. This constant cycle of hunger and snacking can worsen blood sugar issues over time.


7. Dry Mouth or Sticky Saliva

High glucose levels reduce saliva production, which can cause your mouth to feel unusually dry after dark. Many people notice they wake up with cracked lips, a sore throat, or a sticky film inside the mouth. Saliva is essential for protecting teeth and gums, so persistent nighttime dry mouth can also lead to dental issues such as cavities and gum disease.


8. Blurry Vision at Night

Fluctuating blood sugar affects the fluid balance in the eyes, temporarily altering the shape of the lens. Because your body is fasting while you sleep, glucose levels can swing up or down more dramatically, leading to blurry vision when you wake up or when you try to fall asleep. If night vision suddenly becomes unstable, diabetes could be the underlying cause.


9. Unexplained Fatigue Upon Waking

Even after a full night’s rest, diabetes can leave you feeling exhausted in the morning. When blood sugar is too high, the body struggles to convert glucose into usable energy. This means your cells remain “starved” despite plenty of sugar in the bloodstream. Additionally, sleep interruptions from thirst, urination, or night sweats worsen fatigue.


When to See a Doctor

Experiencing one of these symptoms occasionally isn’t unusual, but consistent nighttime symptoms should not be ignored. Early detection of diabetes can prevent serious complications and help you manage your health more effectively. A simple blood test — fasting glucose, HbA1c, or an oral glucose tolerance test — can give clear answers.

Quick & Easy Frozen Fruit Salad

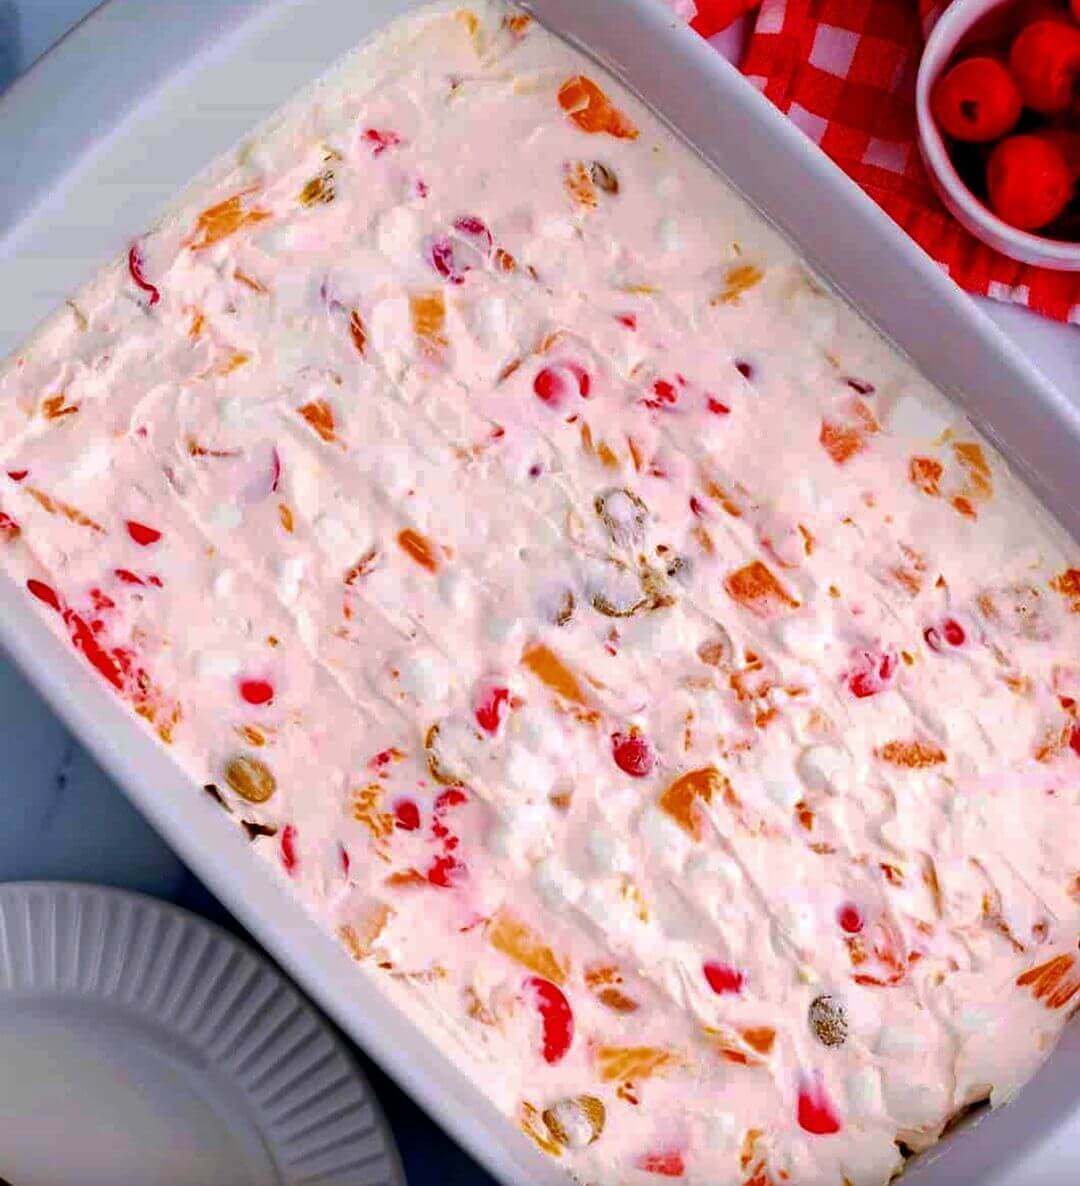
A light, dreamy dessert that combines frozen fruit, creamy dressing, and a delightful chill—this frozen fruit salad is a classic for a reason. It’s unbelievably easy to make, refreshing enough for warm weather, and indulgent enough for celebrations. Whether you want a make-ahead dessert for guests or a sweet treat to keep in the freezer, this recipe delivers every time.


Why You’ll Love This Frozen Fruit Salad

Frozen fruit salad has been around for decades, often appearing on holiday tables, potlucks, or church gatherings. What makes it timeless?

  • Minimal ingredients – You need only a handful of everyday items.

  • No baking or cooking – Just mix, freeze, and enjoy.

  • Make-ahead friendly – Keep it in the freezer up to a week.

  • Perfect texture – Creamy, slightly icy, fruity, and refreshing.

It tastes like a blend of ice cream and fruit cocktail—the perfect balance of sweetness and coolness.


Ingredients You’ll Need

This recipe is flexible, but here’s the classic, crowd-pleasing version:

  • 2 cups frozen strawberries, roughly chopped

  • 1 cup frozen pineapple chunks

  • 1 cup frozen peaches or mango

  • 1 cup mini marshmallows

  • 1 cup whipped cream (homemade or Cool Whip)

  • ½ cup cream cheese, softened

  • ¼ cup sweetened condensed milk

  • ¼ cup chopped pecans or walnuts (optional)

  • ½ cup shredded coconut (optional but delicious)

  • 1–2 tablespoons lemon juice for brightness

You can also use fresh fruit, but frozen holds its shape much better when mixed and frozen again.


How to Make Quick & Easy Frozen Fruit Salad

1. Prepare the Fruit

If your fruit chunks are too large, chop them into bite-sized pieces. You want a mix that freezes well but still gives texture. Place all fruit in a large bowl. If the fruit is heavily frosted, give it a quick rinse under cold water and pat dry.

2. Make the Creamy Base

In a separate bowl, beat together:

  • Cream cheese

  • Sweetened condensed milk

  • Lemon juice

Mix until smooth and creamy. This creamy base adds richness and keeps the salad from freezing rock-solid.

3. Fold in the Whipped Cream

Gently fold whipped cream into the mixture. This step introduces air, keeping the salad light and ice-cream-like.

4. Add Remaining Ingredients

Stir in:

  • Marshmallows

  • Coconut

  • Nuts (if using)

  • The frozen fruit

Fold carefully so the fruit stays intact.

5. Freeze the Mixture

Transfer the mixture to:

  • A loaf pan

  • A casserole dish

  • Muffin cups for individual portions

  • Or a freezer-safe container

Spread evenly and cover tightly with plastic wrap or a lid. Freeze for at least 4 hours, preferably overnight.


Serving the Frozen Fruit Salad

This dessert is best served slightly softened—take it out of the freezer 10–15 minutes before serving so it’s creamy and scoopable.

You can:

  • Scoop it like ice cream

  • Slice it into squares

  • Serve it in parfait glasses

  • Garnish with fresh fruit or mint

Every bite gives you creamy sweetness with bursts of refreshing fruit.


Tips for the Best Frozen Fruit Salad

1. Don’t Skip the Whipped Cream

It keeps the texture soft and mousse-like instead of icy.

2. Swap Fruits Easily

Try adding:

  • Blueberries

  • Raspberries

  • Bananas (freeze them first)

  • Grapes (halved)

  • Kiwi (only partially freeze to avoid mushiness)

3. Want It Healthier?

Use:

  • Greek yogurt instead of cream cheese

  • Honey instead of condensed milk

  • Fresh fruit instead of sweetened frozen fruit

4. Make It Extra Fancy

Drizzle with strawberry syrup or sprinkle crushed cookies on top before freezing.

5. Avoid Watery Texture

Rinse frozen fruit lightly and pat dry so excess ice doesn’t dilute the cream.


Storage Instructions

Frozen fruit salad stays delicious for up to 1 week in the freezer. Keep it airtight to prevent freezer burn. If storing in small cups, wrap each one for easy grab-and-go treats.


Variations You’ll Love

1. Pink Frozen Fruit Salad

Add maraschino cherries and a splash of the juice. It becomes a vintage-style pink dessert.

2. Tropical Frozen Salad

Use pineapple, mango, coconut, and add a squeeze of lime.

3. Berry Blast Salad

Combine strawberries, blueberries, and raspberries for a bright, tart version.

4. Kid-Friendly Rainbow Cups

Use colorful fruit and mini marshmallows—freeze in silicone muffin cups for individual servings.


Final Thoughts

Quick & Easy Frozen Fruit Salad is one of those timeless recipes that feels special without requiring effort. With just a few simple ingredients and a bit of chilling time, you get a refreshing, creamy dessert perfect for gatherings or everyday cravings. It’s cold, fruity, sweet, and satisfying—everything a perfect frozen treat should be.

Spaghetti Aglio e Olio

There are dishes that impress with complexity—and then there are dishes like Spaghetti Aglio e Olio, which captivate with simplicity. Originating in Naples, this classic Italian pasta is built on just a handful of pantry staples: spaghetti, garlic, olive oil, chili, and parsley. Yet when prepared correctly, it becomes a masterpiece—shimmering strands of pasta infused with garlicky richness, soft heat, and a whisper of herbs. This unique version goes a step further, layering aromatic techniques, infused oil, and texture for a deeper, more luxurious flavor. It’s the kind of dish that proves simple food can be truly spectacular.

Why This Version Is Unique

This recipe builds flavor using three special techniques:

1. Garlic Three Ways

Instead of simply sautéing garlic, we use:

  • Thin-sliced garlic for golden crispiness

  • Minced garlic for body

  • Garlic-infused oil for deep flavor without bitterness

2. Chili Heat with Depth

A combination of dried chili flakes and a whole chili toasted in oil gives a layered heat—warm, not overpowering.

3. Finishing Magic

A splash of starchy pasta water, a squeeze of lemon, and a tiny pat of butter transform the sauce into a glossy, velvety coating that clings beautifully to the noodles.

Ingredients (4 servings)

  • 400g (14 oz) spaghetti

  • 6 tablespoons extra-virgin olive oil

  • 6 cloves garlic, sliced thin

  • 2 cloves garlic, minced

  • 1 whole red chili (or ½ teaspoon red chili flakes)

  • ½ teaspoon chili flakes for later

  • ½ cup fresh parsley, finely chopped

  • Zest of one lemon

  • 1 tablespoon fresh lemon juice

  • 1 tablespoon unsalted butter (optional but recommended)

  • Salt, to taste

  • Freshly cracked black pepper

  • Optional toppings: parmesan, toasted breadcrumbs, sautéed shrimpHow to Make This Unique Aglio e Olio

Step 1: Build the Garlic-Infused Oil

Pour the olive oil into a wide skillet and warm it on low heat. Add:

  • The whole red chili

  • The thinly sliced garlic

Let it gently bubble—never brown too quickly. The goal is slow infusion.
After 5–7 minutes, the garlic should turn light golden, not dark.

Remove the whole chili and set aside. It has already flavored the oil.

Step 2: Create Flavor Layers

Add the minced garlic and chili flakes to the pan.
Cook just 30 seconds, until fragrant.
This gives the sauce a deeper, more rounded garlic note.

Turn off the heat. Let the mixture rest—it will mellow beautifully.

Step 3: Cook the Pasta

Salt a large pot of water generously—like seawater.

Add the spaghetti and cook until just shy of al dente, about 1 minute less than package instructions.

Before draining, scoop 1 cup of starchy pasta water.

Drain the spaghetti but do not rinse.

Step 4: Marry Pasta and Sauce

Return your skillet to low heat.

Add the spaghetti directly into the garlic-oil mixture.
Pour in ½ cup of the reserved pasta water, stirring quickly.

The starch will help emulsify the olive oil, creating a silky sauce that coats each strand.

Add:

  • Lemon zest

  • Lemon juice

  • Butter (optional but magical)

Toss until glossy. If needed, add a splash more pasta water.

Step 5: Finish with Freshness

Turn off the heat and fold in the chopped parsley.

Taste and adjust:

  • More chili for extra heat

  • More lemon for brightness

  • More salt or pepper for balance

Chef’s Tips for Perfect Aglio e Olio

1. Don’t brown the garlic too much

Dark brown garlic tastes bitter. Aim for soft gold.

2. Use good olive oil

It’s the star of this dish.
Choose extra-virgin, fruity, and aromatic.

3. Emulsify, don’t drown

Adding pasta water creates a creamy effect without any cream.

4. Add texture

Try sprinkling toasted breadcrumbs for crunch.

5. Make it a full meal

Add shrimp, grilled chicken, or sautéed mushrooms for protein.

What Makes This “Comfort Food”?

Despite its simplicity, this dish feels like a warm hug.
It’s the aroma of garlic hitting hot oil…
the glossy noodles coated in silky olive oil…
the soft heat that lingers just enough…
the brightness from lemon and parsley that lifts every bite.

It’s budget-friendly, fast, and forgiving—and still elegant enough to serve guests.
The kind of meal you make on a busy weeknight, or when you crave something soothing, familiar, and deeply satisfyinServing Suggestions

Pair your Spaghetti Aglio e Olio with:

  • A crisp green salad with lemon vinaigrette

  • Garlic bread or fresh sourdough

  • A side of roasted vegetables

  • Grilled shrimp or crispy chicken cutlets

For extra indulgence, top with parmesan or pecorino—even though it’s not traditional, it’s delicious.

Final Thoughts

This unique, elevated Spaghetti Aglio e Olio recipe turns simple pantry ingredients into a dish that tastes beautifully refined. With layered garlic flavor, silky emulsified sauce, and the brightness of fresh herbs and lemon, it’s a masterpiece of minimalism—proof that you don’t need complicated ingredients to create unforgettable food.

Discover the power of this miracle fruit to lower blood sugar

Every once in a while, nature presents us with a gift so perfectly designed for human health that ancient traditions celebrate it for centuries. One such treasure is Jamun, the deep-purple, sweet-tart fruit known across Asia for its remarkable ability to support healthy blood sugar levels. In Ayurveda, it’s hailed as a “diabetic healer.” In folk medicine, it’s a daily remedy. And in modern nutrition, it’s recognized for its rich antioxidants, low glycemic index, and unique compounds that help manage glucose naturally.

Today, you’ll discover not just the science-backed benefits of this miracle fruit but also a unique, delicious, and powerful Jamun Blood Sugar–Balancing Smoothie Bowl that you can make in minutes.

Why Jamun Is Considered a Miracle Fruit

Jamun stands apart because it supports the body on multiple levels:

1. Helps Maintain Healthy Blood Sugar Levels

Jamun contains jamboline and jambosine, rare alkaloids believed to slow down the conversion of starch into sugar. This helps prevent sudden spikes and keeps your energy steady throughout the day.

2. Low Glycemic Index

With a GI of around 30–40, Jamun is one of the safest fruits for people monitoring their sugar intake. It enters the bloodstream slowly and helps curb cravings.

3. Rich in Antioxidants

Its dark purple skin is loaded with anthocyanins, which help reduce inflammation — an important factor in metabolic health.

4. Supports Digestion and Gut Health

Jamun contains natural fiber to support digestion and promote a healthy gut microbiome, which influences blood sugar stability.

5. The Seeds Are Powerful Too

Jamun seed powder is a traditional remedy for blood sugar balance, thanks to its natural plant insulin–like properties.

Unique Recipe: Jamun Blood Sugar–Balancing Smoothie Bowl

This recipe is crafted to help you support blood sugar naturally, improve digestion, and enjoy a refreshing, antioxidant-packed breakfast or snack. Every ingredient is chosen for its ability to enhance metabolic health while delivering delicious flavor.

 Ingredients (Serves 1–2)

Base Smoothie:

  • 1 cup fresh or frozen Jamun (seeds removed)

  • ½ cup Greek yogurt or unsweetened yogurt

  • ½ cup coconut milk or almond milk

  • 1 tablespoon chia seeds

  • 1 teaspoon flaxseed powder

  • ½ teaspoon cinnamon powder (supports blood sugar)

  • 1 teaspoon honey or stevia (optional for sweetness)

  • 4–5 ice cubes

Blood Sugar–Friendly Toppings:

  • 1 tablespoon chopped almonds

  • 1 tablespoon pumpkin seeds

  • 2 tablespoons fresh mixed berries (optional)

  • 1 teaspoon jamun seed powder (optional but powerful)

How to Prepare It

Step 1: Prep the Jamun

If using fresh Jamun, wash them thoroughly and remove the seeds. If frozen, thaw them slightly. The fruit’s vibrant purple color gives your smoothie bowl a stunning jewel-like glow.

Step 2: Blend the Base

In a blender, combine the Jamun, yogurt, coconut milk, chia seeds, flaxseed powder, cinnamon, and sweetener (if needed). Add the ice. Blend until smooth and creamy.
The mixture should be thick — thicker than a smoothie but softer than ice cream.

Step 3: Pour and Level

Transfer the smoothie into a shallow bowl. Smooth out the top with a spoon.

Step 4: Add the Toppings

Decorate your bowl with almonds, pumpkin seeds, berries, and jamun seed powder.
These toppings add crunch, healthy fats, and additional blood sugar support.

Step 5: Enjoy Slowly

Take your time savoring each spoonful. Eating slowly supports better digestion and improved glucose response.

Why This Recipe Works So Well

This recipe is not just delicious — it is intentionally crafted to help stabilize your blood sugar throughout the day:

• Jamun:

The hero of the dish, providing natural blood sugar–balancing compounds and antioxidants.

• Chia Seeds:

High in soluble fiber, they slow the absorption of sugar and support gut health.

• Flaxseed:

Rich in lignans and omega-3s that support inflammation control and metabolic balance.

• Cinnamon:

Known for improving insulin sensitivity and helping the body use glucose more effectively.

• Nuts & Seeds Toppings:

Add healthy fats and protein, ensuring the meal is low-glycemic and sustaining.

• Yogurt:

Adds probiotics to improve digestion — a key factor in long-term metabolic health.

Together, these ingredients create a bowl that is satisfying, nourishing, and designed to help keep your blood sugar stable.

Daily Benefits You May Notice

Within just a few days of enjoying this Jamun smoothie bowl, many people notice:

  • Improved energy

  • Fewer cravings

  • Reduced bloating

  • Better digestion

  • More stable appetite

  • A lighter, refreshed feeling

And when eaten regularly as part of a balanced lifestyle, Jamun can be an amazing support for long-term metabolic wellness.

Tips for Best Results

  • Eat this bowl in the morning for the biggest blood sugar benefit.

  • Pair with a glass of water for improved digestion.

  • Add jamun seed powder 3–4 times a week for extra support.

  • Keep the fruit portions controlled — quality matters more than quantity.

 Final Thoughts

Jamun is truly a miracle fruit — a natural, powerful tool for supporting blood sugar, digestion, and overall well-being. This unique recipe blends ancient wisdom with modern nutrition to produce a nourishing bowl that’s as healing as it is delicious. Try it for breakfast, an afternoon pick-me-up, or a refreshing metabolic boost whenever your body needs it most.

“I’ve Never Cooked Sausages This Way Before, But It’s Truly Transformative”

Sometimes a recipe comes along that completely shifts the way you look at a familiar ingredient. Sausages are usually pan-fried, grilled, or baked… but this method turns them into something unbelievably tender, flavorful, and restaurant-worthy with almost zero effort. The magic lies in slow roasting them in a glossy caramelized onion–mustard glaze that transforms ordinary sausages into a sticky, savory, sweet, melt-in-your-mouth dish that requires no special skills—just trust in the process.

This recipe combines slow heat, aromatics, and a bold sauce to elevate sausage from an everyday protein into a show-stopping main dish. Once you make sausages this way, you may never go back to basic frying again.

Sticky Caramelized Onion & Mustard Glazed Sausages

A Unique, Transformative Sausage Recipe

Ingredients

  • 6 beef, chicken, or spicy sausages

  • 2 large onions, thinly sliced

  • 3 tbsp butter or ghee

  • 3 cloves garlic, minced

  • 2 tbsp Dijon mustard

  • 1 tbsp wholegrain mustard (optional but amazing)

  • 3 tbsp brown sugar or honey

  • 2 tbsp soy sauce

  • 1 tbsp Worcestershire sauce

  • ¼ cup water or chicken broth

  • ½ tsp black pepper

  • Fresh thyme or rosemary (optional)

Why This Method Is Transformative

Instead of browning the sausages on high heat, we let them slow-cook in their sauce, absorbing every layer of flavor. As the onions caramelize and the butter melts into the mustard glaze, the sausages become coated in a sticky, glossy finish that’s both sweet and savory. The longer they roast, the deeper and richer the flavor becomes.

The result?
Ultra-juicy sausages in a thick, aromatic glaze that tastes like it took hours of chef-level skill—without the work.

Instructions

1. Preheat & Prepare

Preheat your oven to 170°C (340°F).
Grease a medium baking dish lightly with butter or oil.

2. Build the Flavor Base

Spread the sliced onions in the dish.
Dot them with butter and sprinkle the minced garlic across the top.

3. Mix the Transformative Glaze

In a small bowl, whisk together:

  • Dijon mustard

  • Wholegrain mustard

  • Brown sugar or honey

  • Soy sauce

  • Worcestershire

  • Water/broth

  • Black pepper

This mixture should smell tangy, sweet, and slightly sharp.

4. Add the Sausages

Lay the sausages on top of the onions.

Pour the glaze evenly over everything, letting it pool around the edges.

Add a few sprigs of thyme or rosemary if you’re using them.

5. Slow Roast

Cover with foil.

Bake for 30 minutes, then remove the foil.

Gently turn the sausages to coat them in the thickening glaze.

Return to the oven uncovered for another 30–35 minutes, turning once more until the sausages are:

  • deeply golden

  • glossy

  • coated in sticky caramelized onions

The glaze will reduce into a beautiful syrupy sauce.

6. Serve

Serve hot with:

  • mashed potatoes

  • rice

  • crusty bread

  • roasted vegetables

  • buttered noodles

Drizzle extra glaze and onions over the top—don’t waste a drop.

Why You’ll Love This Recipe

✔ Zero frying splatter
✔ No babysitting the pan
✔ Sausages turn unbelievably juicy
✔ Onions melt into a sweet, savory jam
✔ Sauce tastes like gourmet pub food

Slow Cooker Amish Honey-Glazed Carrots

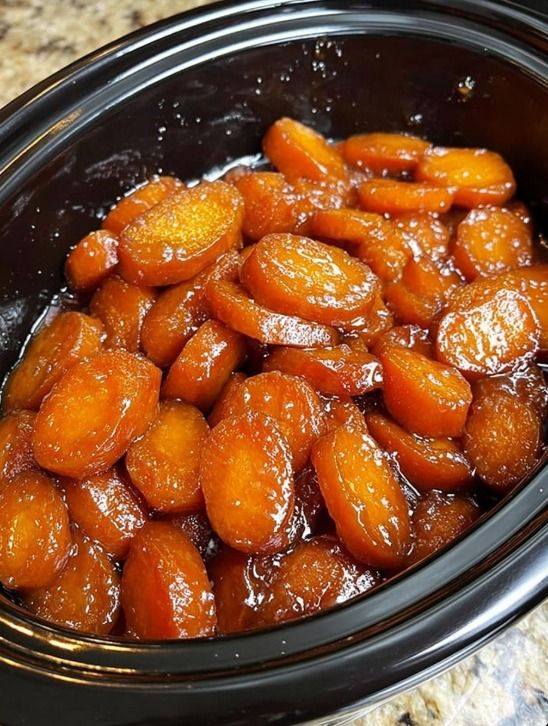
There’s something deeply comforting about the simplicity of Amish cooking — the way just a few fresh ingredients, handled with patience, can turn into something unforgettable. These Slow Cooker Amish Honey-Glazed Carrots are exactly that kind of dish. Warm, buttery, glossy, sweet-but-not-too-sweet, and infused with flavors that taste like home, this recipe transforms an ordinary vegetable into a bowl of old-fashioned comfort. It is the kind of side dish that fits beside roasted chicken, glazed ham, pot roast, grilled chops, or even a Thanksgiving spread, yet it shines beautifully all on its own.

One of the secrets of Amish kitchens is allowing time to do the work. Instead of rushing the process, they let ingredients melt, meld, and mellow. The slow cooker embodies this philosophy perfectly. Carrots, already naturally sweet, soften gently in a bath of butter, honey, and warm spices until they turn into silky, tender bites coated in a glossy glaze that clings to every curve. The result: a dish that tastes like something your grandmother would have lovingly simmered on the stove all afternoon.

Below is the full recipe, with step-by-step guidance, tips, and warm Amish-inspired touches to make your carrots truly delicious.

Ingredients

Serves 6–8

  • 2 pounds carrots, peeled and sliced into thick rounds (or use baby carrots)

  • 4 tablespoons butter (unsalted preferred)

  • 1/3 cup honey

  • 2 tablespoons brown sugar (adds depth and a rustic caramel note)

  • 1 teaspoon vanilla extract (classic Amish flavor enhancer)

  • 1 teaspoon salt

  • ½ teaspoon ground cinnamon

  • ¼ teaspoon ground nutmeg

  • ¼ teaspoon black pepper

  • 1 tablespoon cornstarch + 1 tablespoon water (optional, for thickening glaze)

  • Fresh parsley, chopped (optional for serving)

Instructions

1. Prepare Your Carrots

Wash, peel, and cut your carrots into thick, even slices. If using baby carrots, rinse and drain them well so they don’t carry excess moisture into the slow cooker. Carrots cook down beautifully, so keeping them thick ensures they become tender without turning mushy.

2. Make the Amish Honey-Butter Mixture

In a small saucepan (or microwave-safe bowl), melt the butter. Whisk in the honey, brown sugar, vanilla, cinnamon, nutmeg, salt, and black pepper. This mixture should be smooth, fragrant, and warm. The vanilla brings a nostalgic, old-fashioned flavor that mimics many Amish dessert glazes.

3. Load the Slow Cooker

Add all the carrots into a lightly greased slow cooker. Pour the honey-butter mixture over them and toss to coat. Make sure every piece is touched by the glaze.

4. Slow Cook to Tender Perfection

Cook on LOW for 4–5 hours or HIGH for 2–3 hours.
Stir once halfway through if possible, but not required.

Your kitchen will fill with the aroma of warm honey and butter — the kind of scent that makes neighbors wonder what delicious thing you’re making.

5. Thicken the Glaze (Optional but Recommended)

If you prefer your glaze thicker and more syrupy:

  • In a small bowl, mix cornstarch and water.

  • Pour into the slow cooker during the last 15 minutes.

  • Give a gentle stir and let the glaze tighten.

This step helps the glaze cling to the carrots beautifully.

6. Serve Warm

Transfer to a serving dish, spooning plenty of glaze on top. Sprinkle with fresh parsley for a pop of color if desired.

Why This Recipe Works (The Amish Secrets)

1. Butter + Honey = Classic Amish Sweetness

Amish cooking often pairs natural sweeteners with fat. Butter smooths the sharp sweetness of honey, giving the carrots a mellow, velvety finish.

2. Vanilla Adds Homey Warmth

Though subtle, vanilla extract deepens the flavor and creates a creamy sweetness that tastes almost like dessert.

3. Gentle Slow Cooking

Instead of boiling away nutrients, slow cooking keeps the carrots’ natural sugars intact and blends them with the glaze.

4. The Perfect Spice Blend

Cinnamon and nutmeg are used sparingly — just enough to whisper autumn comfort rather than dominate.

Serving Ideas

These honey-glazed carrots pair beautifully with:

  • Roast chicken or turkey

  • Slow-cooked beef roast

  • Meatloaf

  • Pork chops or glazed ham

  • Mashed potatoes

  • Herb rice or buttered noodles

They’re also wonderful as a potluck side dish because they transport well and stay warm for a long time in the slow cooker.

Tips for Even Better Honey-Glazed Carrots

✨ Use fresh, firm carrots
Older carrots get woody in the center and won’t soften evenly.

✨ Add a splash of orange juice
If you want a citrusy Amish-church-supper twist, mix 2 tablespoons orange juice into the glaze.

✨ Use maple syrup instead of honey
If you prefer a deeper, smokier sweetness.

✨ Don’t skip the vanilla
It’s the old-fashioned touch that makes these carrots taste special.

✨ Double the sauce
If you like your carrots very saucy, simply increase the glaze ingredients by 50%.

 Final Thoughts

This Slow Cooker Amish Honey-Glazed Carrot recipe is more than just a side dish — it brings comfort, nostalgia, and warmth to the table. Every forkful tastes like something lovingly prepared in a country kitchen where time slows down and flavors develop naturally. It’s sweet, buttery, comforting, and beautifully simple — exactly what Amish cooking is all about.