Baked cottage cheese eggs

If you’ve been searching for a breakfast recipe that feels indulgent but nourishes the body with clean protein, warm comfort, and irresistible flavor, these Baked Cottage Cheese Eggs deliver all that and more. This dish transforms simple staples—eggs and cottage cheese—into a luxurious, soufflé-like bake with golden edges, a cloud-soft center, and layers of herbs and savory richness. It’s the kind of meal that looks fancy but is incredibly easy to make, and once you taste it, it becomes a weekly ritual.

Cottage cheese is the quiet hero here: when baked with eggs, it melts into a creamy, almost ricotta-like texture that lifts the entire dish with moisture and tenderness. Add aromatic herbs, bubbly cheese, and a hint of spice, and you have a unique recipe that feels gourmet yet comforting. Whether you tuck into it straight from the oven with toast or pair it with a crisp salad, every forkful feels comforting and satisfying.

Ingredients

Base

  • 4 large eggs

  • 1 cup cottage cheese (full-fat for best creaminess)

  • 2 tbsp milk or cream

  • 1 tbsp olive oil or melted butter

  • Salt and black pepper, to taste

Flavor Boosters

  • 1 small garlic clove, grated

  • 2 tbsp chopped green onions

  • 1 tbsp chopped fresh parsley or cilantro

  • ½ tsp smoked paprika

  • ¼ tsp red chili flakes (optional)

Cheesy Topping

  • ¼ cup shredded mozzarella

  • 2 tbsp grated parmesan

Optional Add-Ins

  • Chopped spinach

  • Diced tomatoes

  • Cooked chicken bits

  • Sautéed mushrooms

  • Jalapeños for a spicy version

Instructions

1. Prep the Oven

Preheat your oven to 375°F (190°C). Grease a small baking dish or two individual ramekins with olive oil or butter.

2. Blend the Egg Mixture

In a mixing bowl, whisk the eggs until smooth. Add cottage cheese, milk, olive oil, salt, pepper, garlic, and smoked paprika. Mix until combined.
Tip: You can lightly blend the mixture if you want a super-smooth custard texture.

3. Fold In Freshness

Stir in green onions, parsley, and chili flakes. Add any optional ingredients if you want a fuller meal.

4. Pour + Add Cheese

Pour the mixture into your dish. Sprinkle mozzarella and parmesan evenly on top.

5. Bake to Perfection

Bake for 22–28 minutes, depending on the size of your dish.

  • The top should be golden

  • The center should be set but slightly jiggly

  • Edges will puff up beautifully

6. Rest + Serve

Let it rest for 5 minutes so it firms up. Serve warm with toast, avocado, or a fresh salad.

Why This Recipe Is UNIQUE

✔ Cottage cheese creates a creamy, soufflé-like texture without heavy cream
✔ The blend of smoked paprika, green onions, and parmesan adds depth and complexity
✔ Foolproof and customizable — make it spicy, veggie-packed, or extra cheesy
✔ High-protein, low-carb, and incredibly satisfying

Serving Ideas

  • Drizzle with hot honey for a sweet-spicy twist

  • Serve with toasted sourdough for crunch

  • Add a dollop of yogurt + herbs on top

  • Pair with roasted tomatoes or sautéed asparagus

Cheesy Chicken Hashbrown Casserole

f there is one dish that defines pure comfort in a baking dish, it’s a Cheesy Chicken Hashbrown Casserole. This recipe brings together tender shredded chicken, golden hashbrowns, rich cream sauce, and layers of melty cheese that create magic with every bite. What makes this version truly UNIQE is the way it builds flavor from the ground up—starting with a savory homemade cream mixture, then layering textures so each scoop delivers crispy edges, creamy centers, and deeply satisfying warmth. Whether you’re hosting a casual dinner, feeding a crowd, or simply craving something indulgent, this casserole stands tall as the ultimate cozy meal.

Why This Recipe Works

Most hashbrown casseroles rely on canned soups and shortcuts. But this version uses a quick homemade creamy base made with butter, garlic, chicken broth, and sour cream—giving the dish a depth of flavor that tastes like it simmered all day. Then we add perfectly seasoned chicken, shredded cheddar, and a secret ingredient: smoked paprika, which adds warmth and color without overpowering the dish. The result? A casserole that is nostalgic, luxurious, and incredibly addictive.

 Ingredients

For the Casserole Base

  • 4 cups cooked chicken (shredded or finely chopped)

  • 1 (32-oz) bag frozen hashbrowns (thawed)

  • 2 cups shredded cheddar cheese (sharp or medium)

  • 1 cup mozzarella cheese

  • 1 medium onion, finely diced

  • 1 cup sour cream

  • ½ cup chicken broth

  • 4 tbsp butter

  • 3 cloves garlic, minced

  • 1 tsp smoked paprika

  • ½ tsp onion powder

  • ½ tsp garlic powder

  • 1 tsp salt

  • ½ tsp black pepper

  • ½ tsp dried thyme (optional but delicious)

For the Topping

  • 1 cup crushed cornflakes or crushed Ritz crackers

  • 2 tbsp melted butter

  • ½ cup cheddar cheese

 Step-by-Step Instructions

STEP 1: Prepare the Creamy Homemade Sauce

In a medium saucepan, melt 4 tablespoons of butter over medium heat. Add the diced onion and sauté for 3–4 minutes until soft and fragrant. Stir in the minced garlic and cook just until it becomes golden—this step creates the flavorful backbone of the casserole.

Pour in ½ cup chicken broth, and let it gently bubble. Remove from heat and whisk in the sour cream until the mixture is smooth and luxurious. Add the smoked paprika, garlic powder, onion powder, salt, pepper, and thyme. This creamy base replaces canned soups and gives the casserole its signature UNIQE flavor.

STEP 2: Mix the Main Ingredients

In a large mixing bowl, combine:

  • thawed hashbrowns

  • shredded chicken

  • cheddar cheese

  • mozzarella

Pour the warm cream mixture over the ingredients and mix gently. The goal is to fold everything together without breaking down the hashbrowns too much. The mixture should be rich, cheesy, and fully coated.

STEP 3: Transfer to a Baking Dish

Lightly grease a 9×13 inch casserole dish. Spread the mixture evenly, making sure the chicken and cheese are distributed from corner to corner—this ensures every serving is equally satisfying.

STEP 4: Add the Buttery Crumb Topping

Mix crushed cornflakes or Ritz crackers with 2 tablespoons melted butter and ½ cup cheddar cheese. Sprinkle this topping evenly over the casserole. This creates that irresistible golden crust that crackles lightly with every bite.

STEP 5: Bake to Perfection

Bake at 375°F (190°C) for 40–45 minutes or until:

  • the edges are bubbling

  • the top is beautifully golden

  • the inside is hot and melty

Let the casserole rest for 10 minutes before serving. This helps everything set and makes scooping easier.

 What Makes This Recipe UNIQE

This casserole isn’t just cheesy—it’s layered with flavor from every direction:

1. Freshly Made Cream Sauce

Instead of canned condensed soup, this recipe uses a homemade creamy blend that adds richness without heaviness.

2. Double Cheese Blend

Cheddar brings sharpness, while mozzarella adds stretch and gooey perfection.

3. Smoked Paprika Magic

A small amount transforms the whole dish, giving it warmth and depth.

4. Crunchy Topping

The buttery cracker or cornflake topping adds texture that elevates every spoonful.

5. Shredded Chicken

Using cooked shredded chicken—not cubes—makes the casserole soft, comforting, and easy to eat.

Serving Suggestions

Pair your Cheesy Chicken Hashbrown Casserole with:

  • a crisp green salad

  • roasted broccoli or green beans

  • garlic butter dinner rolls

  • spicy pickles or jalapeño slices for contrast

It’s also amazing the next day—just warm in the oven to restore the crisp top.

Variations to Try

  • Buffalo Style: Add ½ cup buffalo sauce and top with blue cheese crumbles.

  • Jalapeño Popper: Stir in 1 cup diced jalapeños and 4 ounces cream cheese.

  • BBQ Chicken: Swap broth for BBQ sauce and add smoked gouda.

  • Veggie Loaded: Add peas, corn, or sautéed bell peppers.

 Final Thoughts

This Cheesy Chicken Hashbrown Casserole is everything comfort food should be—creamy, cheesy, hearty, and deeply satisfying. The homemade sauce brings a UNIQE twist that lifts it far above the usual versions, while the golden topping adds the perfect contrast. Make it for weeknight dinners, potlucks, celebrations, or cozy weekends. Every time, it delivers warmth and joy in every bite.

I Chew Cloves And Say Goodbye to 10 Years of Diabetes.. I’ll Give You The Recipe

For centuries, cloves have held a respected place in traditional medicine. Their intense aroma, warm spice, and remarkable healing properties have made them treasured throughout Asia, the Middle East, and Africa. While cloves cannot “cure” diabetes, modern research shows that they contain compounds such as eugenol, vitamins, and antioxidants that may help support the body in managing inflammation, digestion, and healthy blood glucose responses. When combined with a balanced diet and medical guidance, cloves become a powerful ally in a wellness routine.

This unique recipe taps into the potency of whole cloves, extracting their beneficial oils in a gentle and delicious way. Many people feel more energetic, less bloated, and enjoy more stable hunger patterns when adding clove drinks to their mornings. Let’s explore the benefits and then prepare a simple, soothing, and revitalizing Clove Wellness Drink that you can make at home.

Why Cloves Are Beloved in Natural Wellness

Cloves are the dried flower buds of the Syzygium aromaticum tree. They contain several active components that make them incredibly valuable:

1. Natural Antioxidant Support

Cloves are among the richest spices in antioxidants, which help neutralize damaging free radicals in the bloodstream. This helps support overall health and may contribute to better metabolic stability.

2. May Help Maintain Healthy Blood Sugar Response

Studies have shown that certain compounds in cloves may support the body’s natural response to carbohydrates. This means cloves may help your body process sugars more efficiently, making them a smart addition to a metabolism-friendly lifestyle.

3. Anti-Inflammatory Powerhouse

Chronic inflammation is linked to many metabolic conditions. The eugenol in cloves helps calm internal inflammation, supporting better digestive and cellular health.

4. Digestive Support

Cloves are famous for reducing bloating, gas, and indigestion. Starting your morning with a clove drink can prepare your digestive tract for the day.

5. Natural Antimicrobial Properties

Cloves help promote a healthy gut environment by naturally reducing harmful bacteria.

THE RECIPE: The “Morning Clove Wellness Drink”

A simple, aromatic, health-promoting drink you can sip daily.

Ingredients

  • 6–8 whole cloves

  • 1 cup water (250 ml)

  • ½ teaspoon fresh lemon juice (optional but recommended)

  • ½ teaspoon raw honey (optional — avoid if you need strict sugar control)

  • A pinch of cinnamon or ginger (optional for extra support)

How to Make It

Step 1 — Activate the Cloves

Place your whole cloves in a small pot. Lightly crush them with the back of a spoon. Crushing releases the aromatic essential oils, boosting the drink’s potency.

Step 2 — Simmer Gently

Pour one cup of water into the pot and bring it to a soft boil.
Reduce the heat and let the cloves simmer gently for 5–7 minutes.
This slow extraction pulls out beneficial compounds without burning or overpowering the flavor.

Step 3 — Strain and Enhance

Strain the liquid into your favorite mug.
Now you can enhance the drink with:

  • A squeeze of lemon for vitamin C

  • A pinch of cinnamon for metabolic support

  • A touch of raw honey for flavor (optional)

Step 4 — Sip Slowly

Enjoy the drink warm, ideally on an empty stomach in the morning.
This helps your body absorb the beneficial oils more efficiently.

How to Use It in Your Routine

For the best results, drink this clove infusion 4–5 times per week.
You may notice:

  • Reduced bloating

  • More stable appetite

  • Better digestion

  • A cleaner, lighter feeling throughout the day

Always pair natural remedies with:

  • Healthy eating

  • Medical advice

  • Proper hydration

  • Regular movement

Advanced Version: “Clove Chew & Sip Method”

If you enjoy chewing cloves, here’s a boosted method many people use:

Step 1: Chew 1–2 cloves in the morning.

This releases eugenol directly into your bloodstream through saliva.

Step 2: Follow immediately with the Clove Wellness Drink above.

This creates a two-stage absorption process — fast and slow — maximizing the spice’s natural benefits.

Do not chew more than 2 cloves at a time, as too much can irritate your mouth or stomach.

Safety Notes (Very Important)

  • Cloves cannot replace diabetes medication.

  • Don’t consume cloves in excess — moderation is key.

  • People with stomach ulcers should avoid chewing raw cloves.

  • Always consult your doctor before adding strong natural remedies if you have medical conditions.

Final Thought

Cloves are a tiny spice with massive power. While they are not a magical cure, they are a wonderful and natural way to support your body’s wellness journey. When enjoyed regularly, this warm, comforting drink can help you feel more balanced, energized, and refreshed — and serve as a beautiful reminder of how nature nurtures us.

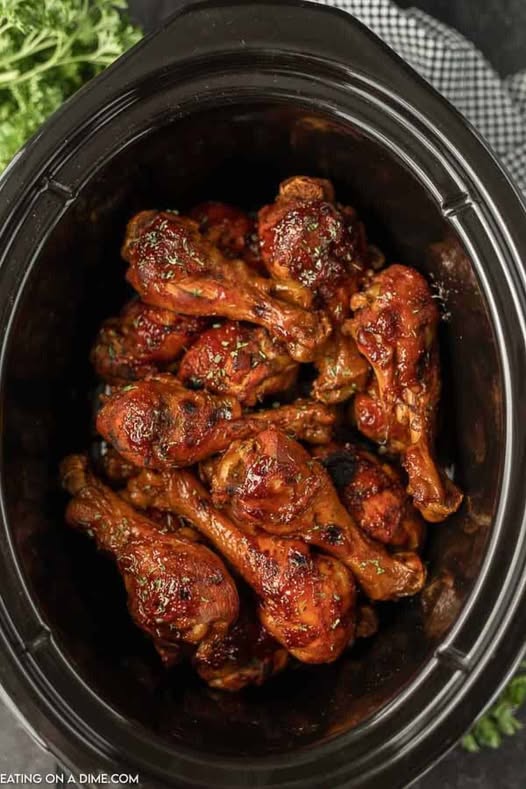
Crock Pot Chicken

When it comes to comfort food that is effortless, nourishing, and irresistibly flavorful, few dishes compare to Crock Pot chicken. The slow cooker has earned its place as an indispensable kitchen tool because of one key advantage: it lets you create delicious meals with minimal effort. Whether you are a busy parent, someone who loves hands-off cooking, or simply want a meal that fills the home with mouthwatering aromas, Crock Pot chicken delivers every single time.

What makes Crock Pot chicken so special is the way the slow cooker works. Low and steady heat breaks down the fibers in the chicken, making it tender, juicy, and infused with whatever spices, herbs, or sauces you add. Instead of standing by the stove stirring and checking temperatures, you simply assemble the ingredients, set the timer, and walk away. Hours later, you return to a fully cooked meal that tastes like it took all day—because it did, but without any effort from you.

In this article, we’ll explore why Crock Pot chicken is a beloved go-to dish, the benefits of slow cooking, how to choose the best ingredients, and of course, a delicious recipe you can use as your new weekly staple.


Why Crock Pot Chicken Works So Well

1. Perfect Texture Every Time

Chicken—especially breasts—can dry out quickly when cooked at high heat. But in a Crock Pot, the gentle environment keeps moisture locked in. Instead of tough or stringy meat, you get:

  • Tender, fall-apart chicken

  • Juicy texture without overcooking

  • Meat that easily shreds or slices

This makes it ideal for everything from tacos to casseroles to soups.

2. Incredible Flavor Absorption

Slow cooking gives seasonings enough time to fully penetrate the chicken. Garlic becomes mellow and sweet, herbs release their oils, and sauces turn thicker, richer, and more savory. Even simple ingredients create big flavor.

3. Convenience and Time Savings

One of the biggest advantages is the hands-off nature. You can:

  • Add everything to the pot in the morning

  • Let it cook during work or errands

  • Return home to a ready-to-serve meal

There is no babysitting, flipping, or constant checking. It’s the easiest way to create a home-cooked dinner on busy days.

4. Budget-Friendly and Versatile

Chicken is affordable and pairs well with almost anything. You can use:

  • Chicken breasts

  • Chicken thighs (extra juicy!)

  • Drumsticks

  • A whole chicken

Plus, leftovers reheat perfectly and can be repurposed into salads, wraps, sandwiches, and rice bowls.


Choosing the Best Ingredients

Great Crock Pot chicken starts with choosing the right flavor components. Here’s how to build the perfect dish.

1. Chicken Cuts

Chicken thighs are considered the gold standard for slow cooking. They stay moist, remain flavorful, and resist drying out.

Chicken breasts also work well, but benefit from added moisture like broth, cream, or sauce.

Whole chicken becomes incredibly tender and can be seasoned in endless ways.

2. Aromatics

These build the foundation of flavor. Ideal picks include:

  • Garlic

  • Onion

  • Celery

  • Carrots

  • Bay leaves

Aromatics turn simple ingredients into rich, comforting meals.

3. Liquid Options

You always need at least a small amount of liquid to prevent sticking and enhance tenderness. Common choices include:

  • Chicken broth

  • Tomato sauce

  • Coconut milk

  • Cream soups

  • Lemon juice

  • BBQ sauce

Each liquid creates a different flavor profile.

4. Seasonings and Herbs

To give the chicken a robust taste, use:

  • Paprika

  • Black pepper

  • Italian seasoning

  • Thyme

  • Rosemary

  • Chili flakes

  • Cumin

Fresh herbs add brightness at the end, while dried herbs infuse deep flavor during the long cook.


A High-Quality, Foolproof Crock Pot Chicken Recipe

Below is a rich, aromatic, and savory Crock Pot chicken recipe that transforms simple ingredients into a restaurant-level meal.

Ingredients

  • 4 chicken breasts or 6 chicken thighs

  • 1 large onion, sliced

  • 4 garlic cloves, minced

  • 1 cup chicken broth

  • 1 tablespoon olive oil

  • 1 teaspoon paprika

  • 1 teaspoon salt

  • ½ teaspoon black pepper

  • 1 teaspoon dried thyme or Italian seasoning

  • 1 tablespoon lemon juice

  • ½ cup heavy cream or coconut milk (optional for a creamy finish)

  • 1 tablespoon cornstarch (optional for thickening sauce)

  • Fresh parsley for garnish


Step-by-Step Instructions

Step 1: Prepare the Chicken

Season the chicken on all sides with salt, pepper, paprika, and thyme. This ensures the meat absorbs flavor from the very beginning. If you have time, sear the chicken in a skillet with a little olive oil for 3–4 minutes per side. This step is optional but enhances flavor.

Step 2: Layer the Aromatics

Place sliced onions and minced garlic on the bottom of the Crock Pot. This creates a natural buffer, prevents burning, and builds a deep base of flavor.

Step 3: Add the Chicken and Broth

Place the chicken on top of the onions. Pour chicken broth and lemon juice over the meat. This moisture keeps the chicken juicy as it cooks.

Step 4: Slow Cook to Perfection

  • Cook on low for 6–7 hours

  • OR on high for 3–4 hours

Slow cooking on low heat yields the most tender and flavorful results.

Step 5: Make the Sauce (Optional)

If you prefer creamy Crock Pot chicken:

  1. Remove the cooked chicken.

  2. Add cream or coconut milk to the slow cooker.

  3. Mix 1 tablespoon of cornstarch with 2 tablespoons of water, then stir it in.

  4. Let the sauce warm for 10–15 minutes on high until thickened.

  5. Add the chicken back in.

Step 6: Serve and Enjoy

Garnish with fresh parsley and serve hot.


Best Ways to Serve Crock Pot Chicken

This dish is incredibly versatile. Try serving it with:

  • Mashed potatoes

  • Buttered rice

  • Pasta

  • Roasted vegetables

  • Steamed greens

  • Fresh bread or dinner rolls

Shredded Crock Pot chicken also works beautifully in:

  • Tacos

  • Quesadillas

  • Sandwiches

  • Burrito bowls

  • Salads


Tips for Even Better Results

  • Don’t lift the lid while cooking. Each lift adds 20–30 minutes to the cook time.

  • Use thighs for maximum juiciness. They stay moist even after long cooking.

  • Avoid adding too much liquid. Slow cookers trap moisture; 1 cup is often enough.

  • Add dairy at the end. Cream can curdle if cooked for too long.

  • Season generously. Flavors mellow out during slow cooking.


Final Thoughts

Crock Pot chicken is one of the most reliable, versatile, and satisfying meals you can make. It transforms everyday ingredients into a rich, comforting dinner with almost no effort. Whether you’re feeding a family, preparing meals for the week, or simply craving a cozy home-cooked dish, this slow-cooked chicken recipe is a guaranteed favorite.


7 EARLY SIGNS of ALZHEIMER’S DISEASE that you SHOULD NEVER IGNORE

7 EARLY SIGNS OF ALZHEIMER’S DISEASE THAT YOU SHOULD NEVER IGNORE

Alzheimer’s disease is often called the “silent thief of memory” because it progresses quietly, long before its symptoms become obvious. Many people mistakenly assume that early forgetfulness or slight confusion is just a normal part of aging. While occasional memory lapses can be harmless, persistent or worsening cognitive changes may signal something more serious. Recognizing the early signs of Alzheimer’s disease is crucial because early diagnosis can help slow progression, improve quality of life, and allow timely planning for care.

Below are the 7 early warning signs of Alzheimer’s disease that you should never ignore, along with explanations of why they happen and what to do if you notice them.


1. Persistent Memory Loss That Disrupts Daily Life

Forgetting a recent event occasionally is normal—but Alzheimer’s memory loss is different. People begin to forget information they recently learned, important dates, conversations, or appointments. They may ask the same questions repeatedly or rely heavily on memory aids like notes or alarms.

What makes this sign concerning is that the memory loss progressively worsens. The brain regions responsible for forming new memories—particularly the hippocampus—are among the first affected in Alzheimer’s disease. When these neurons start to deteriorate, new information simply doesn’t “stick.”

Examples of concerning memory loss:

  • Forgetting something that was just explained

  • Misplacing items and never finding them again

  • Not remembering important life events or commitments

When memory lapses grow frequent enough to affect work, relationships, or daily tasks, professional evaluation is essential.


2. Difficulty Solving Problems or Making Plans

Another early indicator is struggling with tasks that require concentration, planning, or problem-solving. A person who once managed finances or cooked complicated meals may suddenly struggle to follow a recipe or balance a checkbook. This happens because Alzheimer’s begins to disrupt the brain’s executive functioning centers, which control logical thinking and organization.

Examples:

  • Making frequent errors in financial calculations

  • Taking much longer to complete familiar tasks

  • Difficulty following step-by-step instructions

The challenge here isn’t just forgetfulness—it’s the loss of the ability to think through a problem logically and complete tasks independently.


3. Confusion About Time, Dates, or Familiar Places

A common warning sign is losing track of time, season, or the sequence of events. People may forget where they are, how they got there, or what day it is. In more subtle early stages, they might miss appointments, mix up dates, or feel disoriented in places they know well.

This confusion occurs because Alzheimer’s damages the brain’s ability to process temporal and spatial information.

Look for early red flags such as:

  • Asking repeatedly what day it is

  • Becoming lost while driving familiar routes

  • Feeling disoriented in crowded or unfamiliar areas

Disorientation is not just inconvenient—it can be dangerous, especially for seniors who live alone.


4. Trouble Completing Familiar Tasks

Tasks that were once automatic—like using a phone, driving to the grocery store, or remembering the rules of a favorite game—may suddenly become difficult. Alzheimer’s gradually affects the brain areas responsible for learned behaviors and procedural memory.

People may start skipping steps, forgetting how to operate appliances, or abandoning tasks halfway because they can’t figure out what to do next.

Examples:

  • Forgetting how to use household tools or electronic devices

  • Needing repeated reminders for daily routines

  • Struggling to cook dishes they’ve prepared for years

If familiar tasks begin to feel overwhelmingly confusing, this is a significant warning sign.


5. Language Difficulties: Trouble Finding Words or Following Conversations

Almost everyone forgets a word occasionally. However, people with early Alzheimer’s frequently struggle to find the right words, follow conversations, or express their thoughts clearly. They may stop mid-sentence because they don’t know how to continue or replace words with incorrect ones.

This occurs because Alzheimer’s attacks the language-processing centers of the brain.

Common signs include:

  • Calling objects by the wrong name (“hand clock” instead of “watch”)

  • Repeating themselves often

  • Losing track of conversations

  • Avoiding social interactions out of embarrassment

Over time, communication becomes increasingly challenging, affecting relationships and social confidence.


6. Poor Judgment or Difficulty Making Decisions

Alzheimer’s often affects a person’s ability to make sound decisions or assess risks. They may fall for scams, give away large sums of money, dress inappropriately for the weather, or neglect basic self-care.

This happens because the frontal lobe—which manages reasoning, judgment, and impulse control—begins to deteriorate early in the disease.

Warning signs include:

  • Spending money recklessly

  • Wearing summer clothing in winter

  • Neglecting hygiene or grooming

  • Leaving doors unlocked or appliances on

Poor judgment is often one of the most concerning early signs because it can lead to dangerous situations.


7. Changes in Mood, Personality, or Social Behavior

Alzheimer’s doesn’t just affect memory—it also impacts mood and personality. A person may suddenly become anxious, irritable, suspicious, or depressed. They may lose interest in hobbies, withdraw from social interactions, or feel overwhelmed in situations that used to feel easy.

These changes happen because Alzheimer’s disrupts the brain’s emotional regulation centers and affects how a person perceives their environment.

Common behavioral changes:

  • Increased anxiety or fearfulness

  • Avoiding social gatherings

  • Growing irritated or frustrated easily

  • Showing signs of apathy or loss of motivation

Often, family members notice these emotional changes before memory problems become obvious.


When to Seek Help

If you or a loved one experiences several of these symptoms consistently, it’s important to seek medical evaluation. Early diagnosis offers significant benefits:

  • More time to plan for the future

  • Access to treatments that may slow progression

  • Opportunity to improve lifestyle habits that protect brain health

  • Support for caregivers and family members

Doctors may use cognitive assessments, neurological exams, blood tests, or brain imaging to determine whether symptoms are due to Alzheimer’s or another treatable condition such as vitamin deficiencies, thyroid problems, or depression.

Crispy Bacon: The Ultimate Method for Shatter-Crunch Strips

There are recipes you try once, enjoy, and move on from—and then there are those rare, unforgettable kitchen revelations that change everything. This Crispy Bacon recipe belongs solidly in the second category. Forget splattering grease on the stovetop, uneven browning, curled-up strips that never crisp quite right, or the disappointment of either underdone or burnt edges. This method creates bacon that is evenly cooked, glassy-crisp, and melt-in-your-mouth delicious every single time.

What makes it truly special is the combination of technique and secret flavor boosters—not overpowering seasonings, but subtle touches that elevate the bacon’s natural smoky richness. This is more than breakfast; it’s a sensory experience. Every bite snaps cleanly, the fat turns into a golden, delicate lace, and the aroma fills the kitchen with a promise of culinary bliss. Let’s dive into the method that will make you the bacon master in your home.

Ingredients

  • 1 pound thick-cut smoked bacon

  • 1 tablespoon brown sugar (optional but magical)

  • 1 teaspoon black pepper, freshly cracked

  • ½ teaspoon smoked paprika

  • ½ teaspoon maple syrup or honey (optional glaze)

  • Parchment paper or foil

The Unique Method That Changes Everything

1. Start With a Cold Oven — The Secret to Even Cooking

Most people preheat their oven before sliding in the bacon, but that’s where they go wrong. Starting with a cold oven allows the fat to slowly render out, preventing the bacon from burning while giving every strip the chance to crisp evenly. It is this slow incline of heat that produces the shatter-crisp you dream about.

2. Line the Tray Right—This Matters

Line a baking sheet with parchment paper or heavy-duty aluminum foil. Parchment gives you the crispiest result, while foil makes cleanup effortless. Spread your bacon strips in a single layer, edges barely touching but not overlapping. Overlapping will steam the bacon, which is the opposite of what you want.

3. The Flavor Boosters

This is where the recipe becomes uniquely yours. Bacon is already flavorful, but a whisper of sweetness and smoky heat can elevate it without taking away from its core flavor.

Sprinkle the bacon lightly with:

  • Brown sugar

  • Black pepper

  • Smoked paprika

The brown sugar melts into a caramelized crust, pepper adds sharpness, and paprika deepens the smokiness. You can leave them off if you want classic bacon, but once you try it this way, plain bacon may never taste the same again.

4. Slow Rise, High Finish

Place the tray in the cold oven, then set the temperature to 400°F (205°C).

As the oven warms, the bacon fat begins to liquify and render. The strips stay flat, the edges don’t curl, and by the time the oven hits full temperature, your bacon is halfway to perfect.

Bake for 18–25 minutes, depending on thickness and preferred crisp level.

  • For soft-crisp: 18–20 minutes

  • For fully crisp, shatter-thin bacon: 24–25 minutes

Check near the end—the transformation from perfect to burnt happens fast.

5. The Final Touch—A Hint of Glaze

As soon as the bacon comes out of the oven, drizzle it with ½ teaspoon maple syrup or honey, spreading it gently with a pastry brush. This creates a glossy finish and adds the slightest stickiness that makes each bite more addictive.

If you prefer pure savory, skip the glaze. But if you enjoy sweet-heat bacon, this final brush turns it into something worthy of a gourmet brunch.

6. Drain Properly for Maximum Crisp

Transfer each strip to a cooling rack or paper towel–lined plate. This final step is CRITICAL. If the bacon cools in its own fat, it softens. Let it sit 2–3 minutes, and it will harden into perfect crisp strips.

Why This Method Works

Even Heat = Even Crisp

The cold-oven technique ensures the fat melts slowly instead of shocking the bacon with sudden heat. This prevents scorching and curling.

Caramelization Enhances Flavor

A minimal amount of brown sugar doesn’t make the bacon sweet—it deepens the savory notes, creating a rich mahogany crust. Combined with pepper and paprika, it’s a balanced flavor explosion.

Oven Space = Perfect Texture

Stovetop bacon often cooks unevenly because the pan heats inconsistently. The oven surrounds each strip with uniform heat, allowing every inch to crisp identically.

No Splatter, No Mess

Perhaps the unspoken joy of oven-baked bacon is the absence of burns, grease explosions, and cleanup hassles.

Serving Ideas (Prepare to Impress)

  • Crumble over creamy mashed potatoes
    Adds salty crunch and smoky depth.

  • Layer into breakfast sandwiches or burgers
    This bacon holds its crispness even after resting.

  • Dip in chocolate for a gourmet sweet snack
    Yes—chocolate-coated bacon exists and it is decadent.

  • Add to salads for next-level texture
    Caesar salad becomes irresistible.

  • Serve alongside pancakes or waffles
    The glaze pairs beautifully with maple syrup.

Final Thoughts

Crispy bacon may seem simple, but when made with care, it becomes a transformative dish. This recipe’s slow-rise technique, subtle flavoring, and perfect oven timing bring out the very best in every strip. Whether you’re preparing a weekend brunch, elevating a dinner dish, or simply craving a salty, crunchy indulgence, these bacon strips turn an ordinary moment into something unforgettable.

Ultimate Pepper Steak

There are dishes that make you feel warm and satisfied, and then there are dishes that make you feel like a true chef even when you barely lifted a finger. Ultimate Pepper Steak belongs to the second category. It tastes like something you’d order at a high-end Asian restaurant—fork-tender strips of beef, glossy pepper-rich sauce, and vibrant vegetables that stay crisp-soft instead of limp. Yet the beauty of this dish is that you can create it in one skillet at home, with ingredients you probably already have. It’s bold, aromatic, savory, lightly sweet, and just the right amount of peppery. Every bite feels fresh, fast, and deeply comforting.

This recipe turns classic pepper steak into a full-flavored masterpiece by using a special marinade, a silky sauce, and a unique technique that guarantees the beef stays tender. If your past attempts at pepper steak have come out chewy or bland, get ready—this version will change everything.

 Ingredients

For the Beef Marinade

  • 1 lb (450g) flank steak or sirloin, thinly sliced against the grain

  • 1 tbsp soy sauce

  • 1 tbsp oyster sauce

  • 1 tsp black pepper

  • 1 tbsp cornstarch

  • 1 tbsp water

  • 1 tsp oil (to lock in moisture)

For the Pepper Steak

  • 2 tbsp vegetable oil

  • 1 large onion, sliced

  • 1 green bell pepper, sliced

  • 1 red bell pepper, sliced

  • 1 tbsp minced garlic

  • 1 tsp grated ginger

  • ½ tsp crushed red pepper (optional)

For the Ultimate Sauce

  • ¼ cup soy sauce

  • 2 tbsp oyster sauce

  • 1 tbsp hoisin sauce

  • 1 tbsp brown sugar

  • 1 tsp toasted sesame oil

  • 1 tsp black pepper

  • 1 cup beef broth

  • 1 tbsp cornstarch + 2 tbsp water (slurry)

 Why This Pepper Steak Is Different

Most pepper steak recipes rely purely on sautéing, which often turns the beef tough. This version uses a velveting technique—a Chinese restaurant secret. The cornstarch and marinade coat each slice, sealing in moisture and creating that tender, almost silky finish. The sauce is built with layers of umami: soy for salt, oyster sauce for depth, hoisin for balance, and beef broth for richness. And the final touch—freshly cracked black pepper—turns it into a pepper-lover’s dream without overpowering the dish.

 Step-by-Step Instructions

1. Marinate and Velvet the Beef (10 minutes)

In a bowl, toss the sliced beef with soy sauce, oyster sauce, black pepper, cornstarch, water, and oil. Mix until every piece is coated in a glossy layer. Let it rest for 10 minutes.
This step tenderizes the meat and gives it that restaurant-style texture you’re after.

2. Sear the Beef

Heat 1 tablespoon of oil in a large skillet or wok over medium-high heat. Add the beef in a single layer. Do not overcrowd—cook in batches if needed.
Sear 1-2 minutes per side until browned but not fully cooked. Remove and set aside.

3. Sauté the Vegetables

Add the remaining oil. Toss in onions and peppers and cook 3–4 minutes until softened but not mushy. Add garlic, ginger, and red pepper flakes. Cook 30 seconds until fragrant.

4. Build the Sauce

In a bowl, whisk soy sauce, oyster sauce, hoisin, brown sugar, sesame oil, black pepper, and beef broth. Pour the mixture into the skillet, scraping up all the browned bits. Bring to a simmer.

5. Thicken the Sauce

Stir in the cornstarch slurry. The sauce will thicken into a glossy glaze within a minute.

6. Return the Beef to the Skillet

Add the beef back into the pan, tossing to coat in the sauce. Cook 1–2 minutes until beef is tender and fully cooked. Taste and adjust black pepper for extra punch.

 How to Serve the Ultimate Pepper Steak

This dish pairs beautifully with:

  • Steaming hot jasmine rice

  • Garlic fried rice

  • Stir-fried noodles

  • Cauliflower rice for a lighter option

  • Buttered mashed potatoes (surprisingly amazing!)

Finish with a sprinkle of sesame seeds or green onions for freshness.

 Tips for Perfect Pepper Steak Every Time

Cutting the Beef Correctly

Always slice against the grain. This shortens the muscle fibers and prevents chewy meat.

High Heat = Better Flavor

Pepper steak needs quick cooking over high heat. Low heat will steam the vegetables instead of searing them.

Use Freshly Cracked Pepper

It makes a huge difference—much more aroma and intensity than pre-ground pepper.

Don’t Skip the Slurry

This thickens the sauce so it coats the beef instead of being watery.

Add a Twist

Try these optional additions:

  • Mushrooms

  • Broccoli

  • Snap peas

  • Pineapple chunks for sweet-sour balance

  • Chili oil for heat

 Final Thoughts

This Ultimate Pepper Steak recipe is proof that you don’t need complicated ingredients or hours in the kitchen to create something unforgettable. Every bite is a blend of tender beef, vibrant peppers, deep umami richness, and a bold peppery kick. It’s fast enough for a weeknight dinner but impressive enough for guests. It stores well, reheats beautifully, and tastes even better the next day as the flavors mingle.

Cheesy Ground Beef Spaghetti Skillet

If there were ever a dish that perfectly captured the soul of simple home cooking, it would be the Cheesy Ground Beef Spaghetti Skillet. It’s the meal you make when you don’t want the fuss of boiling multiple pots, waiting for sauces to simmer for hours, or washing a mountain of dishes. This skillet brings everything together—tender spaghetti, hearty ground beef, savory tomato richness, melty cheese, and aromatic herbs—into one gloriously bubbling pan of comfort. What makes this recipe unique is not just its simplicity, but the flavor-building technique that transforms basic ingredients into something bold, cozy, and crave-worthy.

Why This Skillet Recipe Works

In traditional spaghetti, the pasta cooks separately. But when you simmer dry spaghetti right in the sauce—like we do here—it absorbs every drop of beefy, garlicky, herby goodness. The noodles don’t just sit under the sauce; they become part of the sauce. Add to that a layer of gooey, stretchy melted cheese, and you have a dish that’s almost like a cross between spaghetti, lasagna, and a hearty casserole—but ready in a fraction of the time.

This recipe is perfect for busy nights, picky eaters, hungry families, or anyone who needs something satisfying without overwhelming the kitchen.

Ingredients

For the Meat & Sauce

  • 1 lb (450 g) ground beef

  • 1 medium onion, finely diced

  • 4 cloves garlic, minced

  • 1 tsp smoked paprika

  • 1 tsp Italian seasoning

  • ½ tsp dried oregano

  • ½ tsp crushed red pepper flakes (optional for heat)

  • Salt and black pepper, to taste

  • 1 tbsp tomato paste

  • 1 can (14 oz) crushed tomatoes

  • 3 cups beef broth (or water + 1 bouillon cube)

  • 1 tbsp Worcestershire sauce

For the Pasta

  • 8 oz (half a box) spaghetti, broken in half

For the Cheesy Finish

  • 1 cup shredded mozzarella

  • ½ cup shredded cheddar

  • ¼ cup grated Parmesan

  • Fresh parsley for garnish

Instructions

Step 1: Brown the Beef and Build the Base

Heat a large, deep skillet over medium-high heat. Add the ground beef and begin breaking it apart with a spoon or spatula. After a few minutes, when it starts to brown, add the diced onion. Cook until the beef is no longer pink and the onions turn soft and translucent. Drain excess fat if needed.

Add the minced garlic and cook for 30 seconds until fragrant. Now sprinkle in smoked paprika, Italian seasoning, oregano, crushed red pepper flakes, salt, and pepper. Stir well. These spices lay the foundation for the deep, comforting flavor that makes this recipe special.

Stir in the tomato paste and let it cook for one minute—it caramelizes slightly, giving the sauce richness.

Step 2: Create the Sauce

Pour in the crushed tomatoes, Worcestershire sauce, and beef broth. Stir everything together. Bring the mixture to a gentle boil. This sauce should be loose at this stage, since the spaghetti will absorb a lot of liquid as it cooks.

Step 3: Add the Spaghetti

Reduce the heat to medium. Add the broken spaghetti directly into the skillet, stirring and pushing the noodles down so they’re mostly submerged. They don’t need to be fully covered—steam will do the rest.

Let the spaghetti simmer for 12–15 minutes, stirring occasionally to prevent sticking. As the pasta cooks, the sauce thickens and becomes glossy, clinging beautifully to each strand.

This step is where the magic happens—the noodles soak up all the savory flavors, creating a unified, rich, hearty dish.

Step 4: Cheese Blanket Time

When the spaghetti is tender and most liquid has been absorbed, turn off the heat. Sprinkle mozzarella and cheddar evenly over the top, followed by a shower of Parmesan.

Cover the skillet with a lid and let the cheese melt for 3–5 minutes, creating a bubbling, gooey blanket across the surface. If you want a browned top, place the skillet under the broiler for 2 minutes.

Step 5: Garnish and Serve

Sprinkle chopped fresh parsley for brightness. Serve hot, right from the skillet, and watch it disappear faster than you made it.

Tips for the Best Cheesy Spaghetti Skillet

1. Brown the beef well.
Don’t rush this step—color equals flavor.

2. Don’t skip tomato paste.
It adds concentrated tomato richness and depth.

3. Adjust liquid as needed.
If the sauce thickens too quickly before the spaghetti softens, add a splash more broth.

4. Try different cheeses.
Mozzarella gives stretch, cheddar gives sharpness, and Parmesan adds savoriness.

5. Make it spicy.
Add extra chili flakes or diced jalapeños for heat lovers.

Variations to Make It Your Own

  • Creamy Version: Stir in ½ cup heavy cream or 4 oz cream cheese before adding the shredded cheese.

  • Veggie Boost: Add mushrooms, bell peppers, spinach, or diced zucchini.

  • Mexican Twist: Use taco seasoning, diced tomatoes with green chilies, and pepper jack cheese.

  • Cheeseburger Style: Add mustard, pickles, and use cheddar only.

Why You’ll Make This Again and Again

This dish checks all the boxes:
✔ One pan
✔ Easy cleanup
✔ Budget-friendly
✔ Family-approved
✔ Leftovers taste even better
✔ Ready in under 30 minutes

Every bite delivers the perfect balance of tender pasta, savory beef, tangy tomato, and molten cheese. It feels nostalgic but fresh, simple but indulgent, fast but comforting.

This Cheesy Ground Beef Spaghetti Skillet is the kind of recipe that becomes a weeknight staple, a go-to on cold evenings, and a favorite for anyone who loves the magic of cheese, pasta, and beef coming together in the coziest possible way.

Beef Liver with Onions

There are some dishes that travel across generations carrying comfort, nourishment, and familiarity. Beef Liver with Onions is one of those timeless meals—simple, rustic, and deeply satisfying. Yet in many homes, liver is misunderstood, forgotten, or pushed aside due to its strong flavor. But when prepared with intention, soaked properly, seasoned boldly, and cooked with care, beef liver transforms into a melt-in-your-mouth delicacy that is both nutritious and irresistibly delicious. This recipe reimagines the classic meal with a few clever enhancements that elevate the dish to restaurant quality while keeping its soul intact.

Why This Recipe Works

Liver is naturally rich, earthy, and slightly metallic. To balance this, the onions are cooked low and slow until they turn golden and sweet, creating the perfect contrast. A quick soak in milk softens liver’s strong notes without stripping its flavor. A quick sear—just enough to brown the outside while keeping the inside tender—guarantees a silky texture. Finally, a rich pan gravy ties everything together. What you get is a meal that feels nostalgic yet elevated, hearty yet refined.

Ingredients

For the Liver

  • 1 lb (450g) beef liver, sliced ½ inch thick

  • 1–1½ cups whole milk (for soaking)

  • 1 tsp salt

  • ½ tsp black pepper

  • ½ tsp paprika

  • ¼ tsp garlic powder

  • ¼ tsp onion powder

  • ¼ cup all-purpose flour (for dredging)

  • 2 tbsp butter

  • 2 tbsp olive oil

For the Caramelized Onions

  • 2 large onions, thinly sliced

  • 2 tbsp butter

  • Pinch of salt

  • 1 tsp brown sugar (optional but enhances flavor)

For the Pan Gravy

  • 1 tbsp flour (from the dredging bowl)

  • 1 cup beef broth

  • ½ tbsp Worcestershire sauce

  • Salt and pepper to taste

Step-by-Step Instructions

1. Prepare the Liver

The secret to mild, tender liver is soaking. Place the liver slices in a bowl and cover them completely with milk. Let them soak for 30–45 minutes. This simple step draws out bitterness and makes the cooked liver incredibly soft.

After soaking, pat the liver dry and season both sides with salt, pepper, paprika, garlic powder, and onion powder.

Lightly dredge in flour, shaking off excess. This creates a thin coating that helps the liver brown beautifully and gives you a richer gravy later.

2. Caramelize the Onions

In a large skillet, heat butter over medium-low heat. Add the sliced onions, sprinkle a pinch of salt, and let them cook gently. The goal is slow caramelization—not browning, but soft, sweet, golden ribbons of onion. Stir occasionally and cook for 15–20 minutes.

If you want deeper sweetness, add 1 teaspoon of brown sugar. Once the onions are soft and golden, transfer them to a plate and set aside.

3. Cook the Liver

In the same pan, increase the heat to medium and add butter plus olive oil. Place the liver slices into the hot skillet.

Cook for 2–3 minutes per side—no more. Liver becomes tough and grainy if overcooked. You want the inside just slightly pink for the softest texture.

When done, remove the liver and place it on a warm plate. Cover loosely with foil to rest.

4. Make the Pan Gravy

Reduce heat to medium-low. Using the same skillet with all its tasty drippings, sprinkle about 1 tablespoon of leftover dredging flour into the pan. Whisk it for a minute to cook out the raw taste.

Slowly pour in the beef broth while whisking. Add Worcestershire sauce and keep stirring until it becomes silky and slightly thickened.

Taste and adjust seasoning—sometimes a pinch more pepper brings everything together.

5. Assemble the Dish

Return the caramelized onions to the skillet, allowing them to soak up the gravy. Then nestle the liver slices on top and spoon gravy over them.

Let everything simmer for 1–2 minutes—just enough for flavors to marry.

Serve immediately.

Serving Suggestions

Beef Liver with Onions pairs beautifully with:

  • Creamy mashed potatoes

  • Buttered egg noodles

  • Garlic rice

  • Toasted sourdough

  • Steamed vegetables

  • A tangy cucumber salad

For an old-fashioned homestyle feel, serve with mashed potatoes and spoon extra onion gravy right over the top.

Tips for the BEST Liver

  • Don’t skip the milk soak—it dramatically improves flavor and texture.

  • Use fresh liver, not frozen, if possible.

  • Avoid overcooking—liver becomes tough very quickly.

  • Cook onions longer than you think—their sweetness is the perfect match for liver’s richness.

  • Add a splash of balsamic to the onions for extra caramel flavor (optional upgrade).

Why People Still Love This Dish

This recipe captures the heart of comfort cooking—simple ingredients, humble origins, and big flavor. Liver is one of the most nutrient-dense foods you can eat, filled with iron, vitamin A, B vitamins, folate, and minerals. Many families grew up eating it for strength and nourishment. Today, it remains a wholesome, old-school dish that brings a sense of warmth and tradition to the table.

With this version, you get the classic flavor you remember—only smoother, richer, and more refined. It’s a dish that surprises even those who “don’t like liver,” proving that good technique can transform ingredients into something genuinely delicious.

If You Often Drool While Sleeping, Check for These 6 Diseases

Most people think drooling during sleep is just an embarrassing habit—something to laugh off, wipe away, and ignore. But what if your pillow stains are actually trying to tell you something? What if nighttime drooling is your body’s silent alarm bell for deeper health issues? Consider this your 800-word health “recipe,” blending science, symptoms, and solutions to help you uncover the truth behind excessive salivation while you sleep.

Below is the unique step-by-step recipe to understand why it happens, what hidden conditions may be behind it, and how to take back control of your nights.

 INGREDIENTS FOR THIS HEALTH RECIPE

To understand why you drool while sleeping, gather the following:

  • 1 spoon of body awareness

  • 2 cups of observation

  • A sprinkle of medical insight

  • A handful of willingness to change habits

  • Optional: a visit to a doctor for confirmation

Mix all of these together, and you’ll have a clearer picture of what your nighttime drooling really means.

 STEP 1: Understanding Why Drooling Happens

Drooling occurs when excess saliva escapes your mouth because the muscles in your face and throat relax during sleep. Some drooling is normal—especially in deep sleep—but excessive drooling, known medically as sialorrhea, is a red flag.

Before jumping to conclusions, check your nighttime breathing, sleeping position, and oral hygiene. If drooling happens frequently, suddenly, or worsens, then it’s time to examine deeper causes.

Let’s explore the 6 diseases and conditions commonly linked to nighttime drooling.

 1. Sinus Infection or Chronic Allergies

If your nose is blocked, your mouth opens automatically to help you breathe. This mouth-breathing leads to excessive drooling because saliva has no barrier to keep it inside.

Signs you might have this condition:

  • Postnasal drip

  • Congestion

  • Sneezing

  • Morning sore throat

  • Bad breath

Health Fix (Recipe Step):

Add warm steam inhalation, antihistamines, saline sprays, and better air filtration to your daily routine. If these don’t help, chronic sinusitis may require a doctor’s care.

 2. Gastroesophageal Reflux Disease (GERD)

GERD is more than just heartburn—it can cause a reflex known as water brash, where your mouth produces extra saliva to neutralize stomach acid.

Signs to watch:

  • Burning chest or throat

  • Bitter taste

  • Burping or bloating

  • Coughing at night

Health Fix:

Avoid eating late at night, limit acidic foods, elevate your head during sleep, and consider antacids. Persistent symptoms may require long-term management.

 3. Obstructive Sleep Apnea

This sleep disorder occurs when your airway partially or completely collapses during sleep. Many people with sleep apnea wake up drooling because they struggle to breathe through the nose and sleep with their mouths open.

Warning signs:

  • Loud snoring

  • Waking up tired

  • Morning headaches

  • Episodes where breathing pauses (someone else may notice)

Health Fix:

A sleep study can confirm the diagnosis. CPAP therapy, weight management, and improved sleeping posture can dramatically reduce drooling.

 4. Neurological Disorders

Conditions affecting the brain and nerves can impact muscle control around the mouth, causing drooling. This includes:

  • Parkinson’s disease

  • Multiple sclerosis

  • Cerebral palsy

  • Stroke aftermath

  • ALS

Warning signs vary but may include:

  • Difficulty swallowing

  • Weak facial muscles

  • Slurred speech

  • Tremors or muscle stiffness

Health Fix:

Early medical evaluation is crucial. Therapies may include muscle-strengthening exercises, medications, or specialized treatments.

 5. Gastrointestinal Parasites

This one surprises many people. Parasites like worms can cause salivation changes, appetite issues, and nighttime discomfort, leading to drooling.

Signs you might have them:

  • Stomach pain

  • Itching at night

  • Nausea

  • Digestive disturbances

Health Fix:

A stool test is recommended. Deworming medication—simple and effective—can quickly improve symptoms in confirmed cases.

 6. Tonsillitis or Enlarged Tonsils

When your tonsils become swollen, especially in children and young adults, saliva flow increases and swallowing becomes uncomfortable. As a result, saliva spills out during sleep.

Signs include:

  • Sore throat

  • Difficulty swallowing

  • Fever

  • Bad taste in mouth

Health Fix:

Warm saltwater gargles, hydration, throat lozenges, and sometimes antibiotics. Chronic tonsil problems may require surgical removal.

 THE FINAL PLATE: When Drooling Means Something More

Drooling during sleep is not always dangerous, but when it becomes frequent, heavy, or sudden, it should not be ignored. Think of your saliva as a messenger—softly hinting that something is out of balance. The body rarely sends signals without reason.

If you notice:

  • A soaked pillow

  • New or worsening drooling

  • Accompanying symptoms

  • Difficulty swallowing

  • Breathing problems

  • Changes in speech or movement

Then your body is asking for attention.

 BONUS RECIPE: How to Reduce Nighttime Drooling Naturally

Add these “ingredients” to your nightly routine:

  • Sleep on your back instead of your side

  • Use a firmer pillow to keep your head elevated

  • Avoid heavy meals before bed

  • Stay hydrated

  • Keep nasal passages clear

  • Practice jaw-strengthening exercises

These simple habits can make a remarkable difference, especially when combined with medical guidance.

 CONCLUSION: Listen to Your Pillow

Drooling while sleeping may feel minor, but in this 800-word health recipe, we’ve uncovered how it can be a clue to something bigger—whether it’s allergies, tonsil issues, reflux, or neurological conditions.