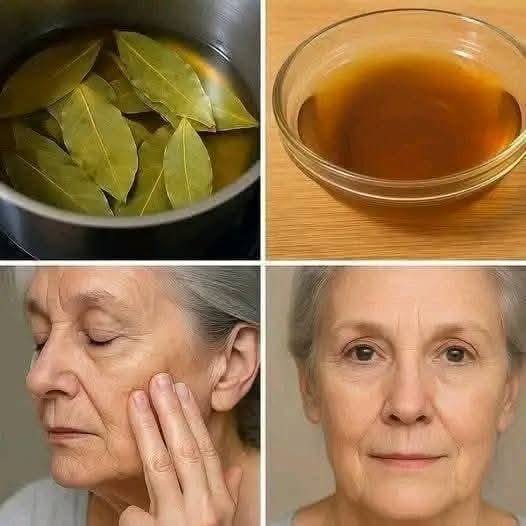
DIY Bay Leaf Skin Treatment

If you’ve ever opened a jar of bay leaves and inhaled that warm, woodsy aroma, you already know this ancient spice carries something special. But what most people don’t realize is that bay leaves—traditionally used in soups, stews, and biryanis—have been quietly treasured for centuries as a secret beauty ingredient. Their natural antibacterial, anti-inflammatory, and antioxidant compounds make them a gentle yet effective skin enhancer. Today, you’re about to transform this humble kitchen leaf into a luxurious spa-grade skin treatment made entirely at home.

This DIY Bay Leaf Skin Treatment is designed to brighten dull skin, soothe irritation, tighten pores, and leave your face with a fresh, velvety glow. With only a handful of natural ingredients, you can create a remedy that feels ancient, powerful, and surprisingly luxurious.

Why Bay Leaves Are Amazing for Skin

Bay leaves contain powerful plant compounds such as cineole, eugenol, and linalool—the same aromatic oils responsible for their strong fragrance also help combat breakouts, reduce redness, and promote clearer, healthier-looking skin.
Their antioxidants help protect against early aging, while their gentle astringent properties tighten and refresh tired skin.

This treatment is especially great for:

  • Oily or combination skin

  • Acne-prone skin

  • Dull, uneven complexion

  • Mild irritation or redness

  • Large, clogged pores

It’s a natural, plant-powered reset for your face.

DIY BAY LEAF SKIN TREATMENT (UNIQUE RECIPE)

Ingredients

  • 10 fresh or dried bay leaves

  • 1 cup distilled water

  • 1 tablespoon aloe vera gel (fresh or pure store-bought)

  • ½ teaspoon honey (optional for hydration)

  • 1 teaspoon rice water or rose water (optional for brightening)

  • 2–3 drops tea tree or lavender essential oil (optional, for acne or calming)

Step 1: Create the Bay Leaf Infusion

This is the heart of the treatment—the concentrated bay leaf liquid that carries all the plant’s skin-benefiting compounds.

  1. Add the bay leaves to a small saucepan.

  2. Pour in the distilled water and bring to a gentle boil.

  3. Lower the heat and let it simmer for 7–10 minutes.

  4. You’ll notice the water turns a soft olive or golden color.

  5. Remove from heat and let the mixture cool completely.

  6. Strain out the leaves, keeping only the fragrant liquid.

This infusion alone is wonderful as a facial toner—but we’re taking it further to create a luxurious treatment.

Step 2: Transform It Into a Skin Treatment

Once your bay leaf infusion has cooled:

  1. Pour it into a clean bowl.

  2. Stir in the aloe vera gel, whisking to help it blend smoothly.

  3. Add the honey for hydration and natural antibacterial benefits.

  4. Mix in the rice water or rose water to brighten and soothe.

  5. Add essential oils only if your skin tolerates them well.

The texture should be lightweight—slightly thicker than tea but thinner than gel.

Step 3: How to Use the Treatment

As a Daily Toner (Most Popular Way):

  • Pour into a spray bottle.

  • Mist over clean skin morning or night.

  • Let it air-dry or gently pat in.

Great for oil control, pore tightening, and refreshing the skin throughout the day.

As a Hydrating Gel Mask:

  • Apply a generous layer to your face.

  • Leave on for 10–15 minutes.

  • Rinse with cool water.

This is wonderful when your skin feels irritated, tired, or overheated.

As a Spot Treatment for Acne:

  • Dip a cotton swab in the mixture.

  • Apply directly onto pimples or inflamed spots.

  • Leave on overnight.

The natural antibacterial properties of bay leaf work quietly while you sleep.

Storage Tips

  • Store the mixture in a clean airtight glass jar.

  • Keep refrigerated for freshness.

  • Lasts 5–6 days if prepared with aloe and honey.

  • If using the infusion alone, it can last up to 2 weeks.

Why This Treatment Works So Well

This unique recipe blends multiple skin-friendly elements:

✔ Bay Leaf

Reduces acne, tightens pores, tones skin, controls oil.

✔ Aloe Vera

Calms inflammation, heals irritation, adds moisture.

✔ Honey

Nourishes, repairs, and hydrates dry or damaged skin.

✔ Rice Water / Rose Water

Brightens and smooths complexion.

✔ Essential Oils

Enhance antibacterial and calming effects.

Together, they create a treatment that feels like a mini herbal facial every time you use it.

Final Thoughts

Your skin deserves ingredients that are simple, powerful, and rooted in nature. This DIY Bay Leaf Skin Treatment is not just a remedy—it’s a ritual. Every time you apply it, you’re giving your skin a drink of clarity, calmness, and radiance. Enjoy the transformation as your skin becomes smoother, fresher, and more luminous with each use.
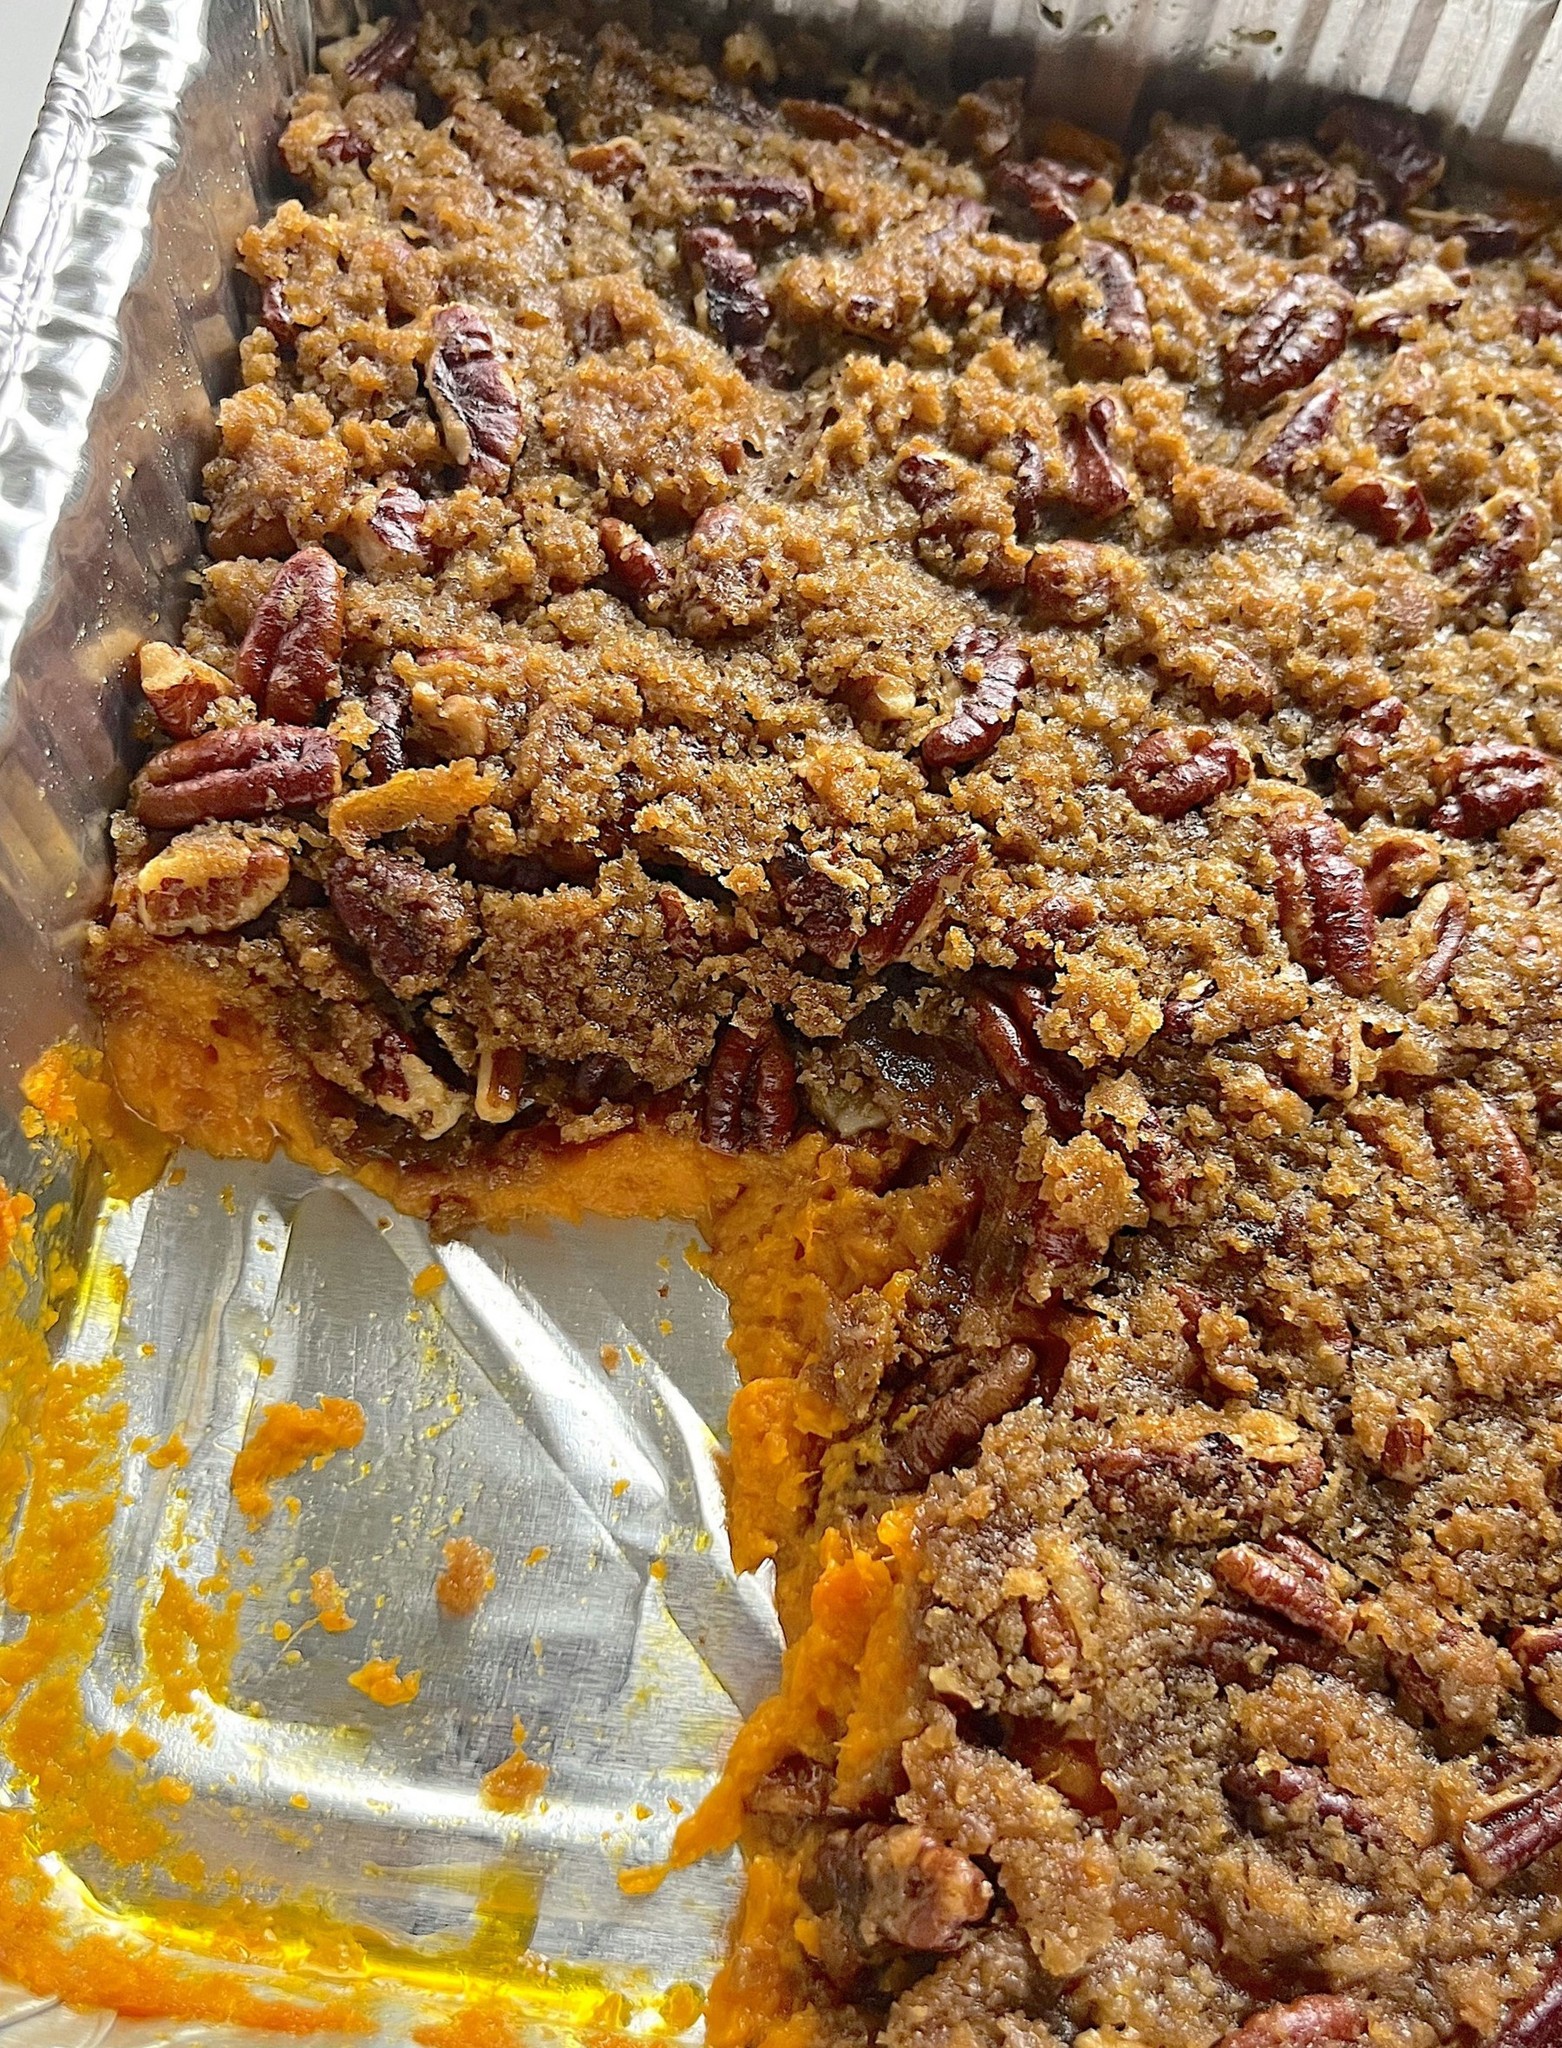

Southern Sweet Potato Casserole

Southern Sweet Potato Casserole is more than a side dish—it’s a warm hug baked in a dish, the kind of recipe that brings families together at holiday tables, Sunday suppers, and potlucks where every bite carries tradition. But this version takes the beloved classic a step further, adding depth, creaminess, and a touch of rustic charm that makes it feel brand new while keeping the nostalgic heart of the original.

This recipe blends velvety sweet potatoes with warming spices, brown butter, and a pecan crumble topping that crackles with every forkful. It’s sweet, savory, comforting, and luxurious all at once. If you’ve ever wanted a casserole that tastes like the South in every spoonful, this is it—rich, caramel-kissed, and unforgettable.

Ingredients

For the Sweet Potato Base:

  • 4 large sweet potatoes

  • 4 tbsp unsalted butter, browned

  • ½ cup granulated sugar

  • ½ cup light brown sugar

  • ½ cup whole milk (or evaporated milk for extra creaminess)

  • 2 large eggs

  • 1 tbsp vanilla extract

  • 1 tsp ground cinnamon

  • ½ tsp nutmeg

  • ¼ tsp ground cloves

  • Pinch of salt

For the Pecan Crumble Topping:

  • 1 cup chopped pecans

  • ½ cup all-purpose flour

  • ½ cup packed brown sugar

  • 5 tbsp melted butter

  • ½ tsp cinnamon

  • Optional: 1 cup mini marshmallows (for a half-and-half topping)

Instructions

1. Prepare the Sweet Potatoes

Start by baking the sweet potatoes instead of boiling them. This step is key to the deep caramel-like flavor and creamy texture that sets this casserole apart. Preheat your oven to 400°F (200°C). Wash the sweet potatoes, prick them with a fork, and place them on a lined baking sheet. Bake for 50–60 minutes, or until they collapse and ooze sweet syrup. This natural caramelization is what gives the dish its signature Southern depth.

Once baked, let them cool slightly. Slice open the skins and scoop the warm, soft flesh into a large mixing bowl.

2. Brown the Butter – The Secret Flavor Boost

While the potatoes cool, melt the butter in a skillet over medium heat until it foams and turns golden with a nutty aroma. Browned butter adds an unmatched richness—like toffee and toasted nuts wrapped in one flavor. Pour it directly into the warm sweet potatoes so the heat absorbs the aroma.

3. Mix the Base

Use a hand mixer or sturdy whisk to mash the potatoes until smooth. Add both sugars, milk, eggs, vanilla, cinnamon, nutmeg, cloves, and salt. Mix until silky. The mixture should be loose but not runny, sweet but balanced with spices.

Taste it—yes, taste it. This is the heartbeat of the casserole. It should taste like warm, spicy pie filling.

Pour the mixture into a buttered baking dish and smooth the top.

4. Make the Southern Pecan Crumble

In a separate bowl, combine the pecans, flour, brown sugar, cinnamon, and melted butter. Stir until it forms a coarse, buttery crumble.

This topping is intentionally rustic—some large chunks, some sandy crumbs. It bakes into a crispy, caramelized layer that pairs perfectly with the soft, creamy sweet potato interior.

If you want a half-marshmallow, half-crumble topping (a Southern favorite), simply cover one side of the dish with pecan crumble and reserve the other half for marshmallows to add later.

5. Bake the Casserole

Preheat the oven to 350°F (175°C). Bake for 30–35 minutes, or until the edges bubble and the topping turns golden and crisp.

If using marshmallows, scatter them on top during the last 10 minutes of baking so they melt and toast without burning.

Let the casserole rest for at least 10 minutes before serving. This helps it set and makes each scoop hold its shape—beautiful layers of orange velvet and golden crumble.

A Southern Story Behind the Flavor (Unique Touch)

Every Southern cook has their twist on sweet potato casserole, and this recipe embraces the kind of innovation passed down through generations. The browned butter adds richness reminiscent of old farmhouse kitchens where nothing went to waste—not even the flavor of deeply toasted butter. Baking the sweet potatoes instead of boiling them imitates the slow-roasted method used in wood-fired ovens, which coaxed sweetness out naturally long before sugar was abundant.

The crumble topping pays tribute to pecan orchards stretching across the South, where fresh nuts lend both texture and warmth to desserts and casseroles alike. Marshmallows are a newer twist, introduced when Southern cooks began blending comfort food with festive flair. Together, they create a dish that feels timeless yet undeniably special.

This casserole tells a story: one of family gatherings, harvest seasons, warm kitchens, and the comfort of a good meal shared with people you love. It’s a reminder that the simplest ingredients—sweet potatoes, butter, spices, and pecans—can become extraordinary with a little care and a touch of creativity.

Serving Suggestions

  • Serve it alongside roasted turkey, fried chicken, or baked ham for a classic Southern spread.

  • Pair with cornbread, green beans, or collard greens to complete a comforting meal.

  • For dessert-style enjoyment, add an extra handful of pecans to the topping and drizzle a bit of maple syrup before serving.

Final Thoughts

This unique Southern Sweet Potato Casserole is a masterpiece of flavor and tradition—a dish that captures everything warm, comforting, and delicious about Southern cooking. With velvety sweet potatoes, browned butter, and a crunchy pecan crumble, it’s a recipe meant to be shared, remembered, and requested again and again.

French Onion Chicken Bake

If you’ve ever wished your favorite bowl of French onion soup could magically transform into a hearty, soul-warming chicken dinner, this French Onion Chicken Bake is exactly the dish you’ve been dreaming of. It combines tender, juicy chicken breasts with a mountain of slowly caramelized onions, a rich broth-butter sauce, and a bubbling blanket of melted cheese that turns into golden perfection in the oven. This isn’t just dinner—it’s luxury in a baking dish. And unlike many complicated French-style recipes, this one keeps things simple, comforting, and deeply flavorful with ingredients you probably already have on hand.

What makes this recipe unique is the way the onions are treated. Instead of rushing them, you let them slowly soften and darken in butter until they turn into a jammy, golden-brown tangle that becomes the star of the dish. Their natural sweetness pairs beautifully with savory chicken, thyme, garlic, and beef broth, making every bite taste like a gourmet creation that took hours—when in reality, it’s surprisingly effortless. It’s the kind of meal that turns an ordinary weeknight into something memorable.

Another secret to this recipe’s richness is the broth reduction. After caramelizing the onions, you simmer them with beef broth and a splash of Worcestershire sauce to create a deep, almost gravy-like sauce. When baked with the chicken, this mixture infuses the meat from the inside out, keeping it moist and bursting with flavor. Cover it all with a generous amount of mozzarella and gruyère (or Swiss) cheese, and the result is a bubbling, melty top layer that mirrors the iconic cheese crust on a bowl of French onion soup.

Serve it with mashed potatoes, crusty bread, rice, or buttered noodles—anything capable of soaking up that irresistible onion gravy. Now let’s dive into the full, step-by-step masterpiece.

 Ingredients (Serves 4)

For the Chicken:

  • 4 boneless, skinless chicken breasts

  • 1 tsp salt

  • ½ tsp black pepper

  • 1 tsp paprika

  • 1 tsp garlic powder

  • 1 tbsp olive oil

For the Onion Sauce:

  • 3 large yellow onions, thinly sliced

  • 3 tbsp butter

  • 1 tbsp olive oil

  • 3 cloves garlic, minced

  • 1 tsp dried thyme (or 2 tsp fresh)

  • 1 tbsp Worcestershire sauce

  • 1 cup beef broth

  • ½ cup heavy cream (optional for extra richness)

For Baking:

  • 1 cup shredded mozzarella

  • 1 cup shredded gruyère or Swiss cheese

  • Fresh parsley for garnish

Instructions

1. Prepare the Chicken

Start by patting the chicken breasts dry—this helps them brown beautifully and prevents steaming. Season both sides with salt, pepper, paprika, and garlic powder. Heat 1 tablespoon of olive oil in a skillet over medium-high heat and sear the chicken for 2–3 minutes per side, just until lightly golden. The goal isn’t to fully cook them; you simply want color and flavor. Remove the chicken and set aside.

2. Caramelize the Onions (The Most Important Step)

In the same skillet, melt the butter along with 1 tablespoon of olive oil. Add all the sliced onions and stir well to coat them in fat. Cook over medium heat for 12–15 minutes, stirring often, until they begin softening and turning golden. Add the garlic and thyme, then continue cooking until the onions turn a rich caramel color. This slow process unlocks the deep sweetness needed for the dish’s signature flavor.

3. Build the Flavorful French Onion Sauce

Pour in the Worcestershire sauce and beef broth. Stir well, scraping up any browned bits from the pan—those bits carry huge flavor. Allow the mixture to simmer for 5–7 minutes until slightly reduced. For a creamier sauce, stir in the heavy cream and simmer another 2 minutes. The onions should be silky and coated in a glossy, savory glaze.

4. Assemble the Bake

Preheat your oven to 375°F (190°C).
Spread half of the onions in the bottom of a baking dish. Arrange the seared chicken breasts on top. Spoon the remaining onions over the chicken, making sure every piece is smothered. Pour any remaining broth mixture over everything.

5. Add the Cheese (The French Onion Finish)

Sprinkle mozzarella evenly over the top. Follow with the gruyère or Swiss cheese—this is what gives the dish that iconic French onion soup flavor. The cheese should fully blanket the chicken and onions.

6. Bake to Perfection

Bake for 20–25 minutes, or until the chicken is fully cooked (internal temperature of 165°F / 74°C) and the cheese is melted, bubbly, and slightly browned. If you want a deeper golden crust, broil for 1–2 minutes at the end.

 Why This Recipe Works So Well

This unique French Onion Chicken Bake stands out because it blends comfort food familiarity with gourmet depth. Caramelized onions naturally create a sweet, savory base that replaces heavy sauces or complicated seasonings. The chicken cooks gently in the onion broth, keeping it moist without the need for marinating. The cheese not only adds richness but also gives the dish a satisfying top layer that makes it look restaurant-worthy.

It’s a dish that feels cozy and indulgent but doesn’t require difficult techniques or exotic ingredients. Every step is simple, yet the flavors build into something truly special.

 Serving Suggestions

  • Spoon over mashed potatoes for a creamy, dreamy pairing.

  • Serve with rice or buttered noodles to soak up the juices.

  • Pair with crusty garlic bread for a true French onion soup vibe.

  • Add a simple green salad to balance the richness.

Creamy Paprika Steak Shells

If you love thick, velvety sauces and tender steak bites coated in smoky paprika, this dish will become your new obsession. It delivers all the satisfaction of a creamy Alfredo but with a deeper, warmer flavor thanks to sweet paprika, garlic, and seared beef. The pasta shells catch the sauce perfectly, giving you a little cup of flavor in every bite.

 Ingredients (4 servings)

For the Steak

  • 1 lb sirloin or ribeye, cut into small bites

  • 1 tsp paprika

  • ½ tsp smoked paprika

  • ½ tsp garlic powder

  • Salt & pepper to taste

  • 1 tbsp olive oil

  • 1 tbsp butter

For the Creamy Paprika Sauce

  • 2 tbsp butter

  • 1 small onion, finely diced

  • 4 cloves garlic, minced

  • 1 ½ tbsp paprika

  • ½ tsp smoked paprika

  • 2 cups beef broth

  • 1 cup heavy cream

  • 1 cup shredded Parmesan

  • 8 oz medium pasta shells

  • 1 tbsp tomato paste (optional but amazing!)

  • Salt, pepper, and red pepper flakes to taste

  • Fresh parsley for garnish

 Instructions

1. Season & Sear the Steak

  1. Pat the steak bites dry.

  2. Toss with paprika, smoked paprika, garlic powder, salt, and pepper.

  3. Heat olive oil + butter in a large pan.

  4. Sear steak bites on high heat until browned but still tender inside (about 2–3 mins).

  5. Remove and set aside.

2. Build the Creamy Paprika Base

  1. In the same pan, melt 2 tbsp butter.

  2. Add onion and sauté until soft.

  3. Add garlic and tomato paste; cook 1 minute.

  4. Stir in paprika and smoked paprika—this wakes up the flavor.

  5. Pour in beef broth and bring to a simmer.

3. Add Pasta & Make It One-Pot Creamy

  1. Add the pasta shells directly into the broth mixture.

  2. Cover and cook 9–12 minutes, stirring occasionally until the shells are tender.

  3. Pour in heavy cream and simmer until thickened.

  4. Add Parmesan and stir until silky smooth.

4. Bring It All Together

  1. Add steak back into the sauce.

  2. Simmer 1–2 minutes so everything marries beautifully.

  3. Season with salt, pepper, and red pepper flakes.

5. Serve

Garnish with fresh parsley and an extra pinch of smoked paprika.

 Why This Dish Is Special

✔ Steakhouse flavor in a one-pot pasta
✔ Creamy but with smoky depth from paprika
✔ Shells capture the sauce in every nook
✔ Quick—done in under 30 minutes
✔ Comfort food heaven

Chef’s Tip

For extra luxury: stir in 1 tbsp cream cheese before adding the steak. It makes the sauce unbelievably smooth!

1 Vitamin to Stop Proteinuria and Repair Kidneys: Could Vitamin D Be Your Secret Weapon?

Proteinuria—when your kidneys leak protein into the urine—is often the earliest whisper your body sends before trouble arrives. Many people overlook it because the symptoms are subtle: foamy urine, mild swelling, maybe fatigue. But behind the scenes, your kidneys are signaling for help.
And surprisingly, one vitamin may be a powerful ally: Vitamin D.

This “sunshine vitamin,” famous for bone health, has an extraordinary ability to support kidney function, reduce inflammation, strengthen filtration, and even help regulate the immune system. Today’s unique recipe blends powerful ingredients into a daily drink designed to optimize Vitamin D absorption, support your kidneys, and encourage normal protein levels—naturally and deliciously.

Why Vitamin D Could Be Your Secret Kidney Weapon

Modern research suggests Vitamin D plays a key role in:

  • Reducing proteinuria by calming inflammation in the glomeruli

  • Improving filtration function

  • Supporting electrolyte balance

  • Protecting kidney tubules from damage

  • Regulating blood pressure, a major contributor to kidney stress

  • Enhancing immune response in autoimmune-related proteinuria

But here’s the trick: Vitamin D works best when your body absorbs it efficiently. And absorption increases significantly when paired with healthy fats and certain nutrients.
That’s where this unique kidney-supporting wellness recipe comes in.

Vitamin D Kidney-Healing Sunshine Elixir (Unique Recipe)

A daily ritual drink designed to naturally support kidney health and maximize Vitamin D absorption.

Ingredients

  • 1 tablespoon extra-virgin olive oil (boosts Vitamin D absorption)

  • 1 cup warm water

  • Juice of ½ fresh lemon (alkalizing + rich in antioxidants)

  • 1 teaspoon raw honey (anti-inflammatory)

  • A pinch of turmeric (kidney-protective curcumin)

  • Optional: 1 tablespoon chia seeds (help reduce inflammation + add healthy fats)

  • Vitamin D supplement (as advised by your doctor—most people benefit from D₃)

Instructions

  1. Warm the Water
    Heat water until it’s comfortably warm, not hot—this helps activate honey and turmeric without destroying nutrients.

  2. Whisk in the Olive Oil
    Stir vigorously until the oil forms tiny droplets. These fats prepare your digestive system to absorb Vitamin D more effectively.

  3. Add Lemon Juice and Honey
    Squeeze in the lemon, drizzle in honey, and stir until the mixture becomes golden, fragrant, and smooth.

  4. Sprinkle Turmeric
    Add just a small pinch—a little goes a long way. Stir well.

  5. Optional: Add Chia Seeds
    Let them soak for 5 minutes if you prefer a thicker, more nourishing texture.

  6. Take Your Vitamin D
    Enjoy the drink with your Vitamin D supplement for enhanced absorption.

How to Use

Drink this elixir once every morning, preferably with sunlight exposure (10–20 minutes). Sunlight activates the Vitamin D pathway, while the drink enhances nutrient utilization and kidney support.

Why This Recipe Works

✔ Olive oil

Healthy fats are essential for Vitamin D uptake, and they help reduce kidney inflammation.

✔ Lemon

Rich in citrate, lemon supports filtration and prevents kidney stone formation.

✔ Turmeric

Curcumin is shown to protect kidney tissue against oxidative stress.

✔ Honey

A gentle anti-inflammatory that helps soothe the urinary tract.

✔ Chia seeds

Contain omega fats that calm inflammation and support kidney repair.

Extra Kidney-Saving Tips

  • Get 15 minutes of morning sunlight daily

  • Avoid excessive salt to lower kidney stress

  • Drink plenty of water to flush the kidneys

  • Eat antioxidant-rich foods: berries, apples, leafy greens

  • Limit NSAIDs (ibuprofen, etc.) which can worsen proteinuria

Final Word

While Vitamin D is not a magic cure, it may very well be the missing piece your kidneys crave. Combined with the right nutrients, sunlight, and lifestyle habits, it can help reduce proteinuria and support natural kidney repair.

This unique elixir becomes more than a drink—it becomes a simple daily ritual dedicated to healing, strength, and protection.

Perfect Grilled Cheese with Harrison Ford’s Twist

There’s something beautifully cinematic about a grilled cheese sandwich. It’s the comfort of childhood, the sizzle of nostalgia, and the kind of food that tastes best when life slows down for a moment. Now imagine that same grilled cheese—but with Harrison Ford’s down-to-earth twist. Think rustic simplicity, rugged flavor, and the kind of sandwich he might make on a quiet morning at his ranch, wearing a flannel shirt, with the sun rising behind the mountains.

This recipe takes the classic golden, buttery grilled cheese and elevates it with smoky, earthy notes and a touch of boldness—just like Ford’s iconic on-screen presence. Ready? Let’s bring the magic to your kitchen.

Ingredients (Serves 1–2)

  • 2 thick slices country sourdough bread or rustic farmhouse bread

  • 2 tbsp salted butter, softened

  • 1 tbsp mayonnaise (for the signature Ford twist!)

  • 2 slices sharp cheddar cheese

  • 1 slice smoked gouda (adds depth and smokiness)

  • 1 slice provolone (melts beautifully)

  • 1 tsp whole-grain mustard

  • 1 tsp caramelized onions (optional but highly recommended)

  • A pinch of black pepper

  • A tiny pinch of smoked paprika (the smoky Harrison vibe)

Why Harrison Ford’s Twist Works

Harrison Ford is famously private, rugged, and a man who appreciates the basics. His twist? He uses mayonnaise on the outside of the bread instead of butter for an ultra-crispy crust. The mayo browns evenly, giving the sandwich a golden, restaurant-quality finish—no burning, no sogginess, just perfect crunch.

Instructions

1. Prepare the Bread

Spread a thin layer of mayonnaise on the outside of each slice of bread.
Spread butter on the inside surfaces for flavor and richness.

2. Build the Flavor Layers

On one buttered side, add:

  • Sharp cheddar

  • Smoked gouda

  • Provolone

Then sprinkle a little black pepper and smoked paprika for depth.
If using caramelized onions, spread a teaspoon over the cheese.
Dot a little whole-grain mustard for that subtle bite and warmth.

3. Grill It Low and Slow

Heat a skillet over medium-low heat.
Place the sandwich in the pan and cook until the bottom is deeply golden—about 3–4 minutes.

Flip gently and cook another 3–4 minutes.
The mayo ensures the bread crisps evenly without burning, allowing the cheese inside to melt fully.

4. Press for Perfection

Use a spatula to gently press the sandwich while cooking.
This helps fuse the cheeses into one irresistible, gooey layer.

5. Rest, Slice & Serve

Let the sandwich rest for 1 minute before cutting—this keeps the cheese from spilling out too quickly.
Slice diagonally (the only acceptable grilled-cheese cut!), plate, and enjoy.

Serving Ideas Inspired by Harrison Ford

  • Serve with tomato basil soup—simple and classic.

  • Pair with crispy fries, because why not?

  • Add a side of pickles for that satisfying crunch contrast.

  • Serve with black coffee or iced tea—uncomplicated and timeless.

What Makes This Recipe UNIQE?

This grilled cheese is a fusion of homey comfort, movie-level personality, and gourmet flavor. The trio of cheeses, the smoky hint, the rustic sourdough, and the mayo-crisp technique make this the kind of grilled cheese that feels both familiar and unforgettable.

It’s simple enough for everyday cooking but bold enough to taste like something straight out of a Hollywood legend’s kitchen.

The Fruit That Aids Digestion, Is Rich in Vitamin C, and Has a Natural Laxative Effect

Papaya has long been celebrated as one of nature’s most powerful healing fruits. Packed with digestive enzymes, high in vitamin C, and known for its natural laxative properties, this vibrant orange fruit has earned its place in cultures around the world as a gentle yet effective remedy for digestive discomfort. Whether you’re struggling with bloating, sluggish digestion, or simply want a nutrient-dense breakfast that makes you feel light and energized, papaya is a fruit your body will absolutely thank you for.

What makes papaya special is its enzyme papain, which helps break down proteins more efficiently. This means your stomach doesn’t have to work as hard, making digestion smoother. The fruit is also rich in water and fiber, which naturally help cleanse the digestive tract, prevent constipation, and promote regularity. Add to that a generous dose of vitamin C—far more than in many citrus fruits—and papaya becomes a triple-threat for gut health, immunity, and overall vitality.

Below is a unique, refreshing recipe designed to harness papaya’s digestive power while delivering a delicious and satisfying experience. It’s light enough for breakfast, nourishing enough for a snack, and soothing enough when your stomach needs a reset.

Papaya Digestive Bliss Bowl — Unique Recipe

Ingredients

  • 2 cups ripe papaya, cubed

  • ½ cup plain Greek yogurt (or coconut yogurt for dairy-free)

  • 1 tbsp chia seeds

  • 1 tbsp honey or pure maple syrup

  • ¼ tsp fresh grated ginger (boosts digestion)

  • Juice of ½ lime

  • 3 tbsp granola (optional, for crunch)

  • 1 tbsp pumpkin seeds

  • A small pinch of cinnamon

  • 4–5 fresh mint leaves, chopped

Instructions

  1. Prep the papaya
    Peel, deseed, and cube the papaya. Make sure it’s fully ripe; this is when the enzymes are strongest and the flavor sweetest.

  2. Blend part of the papaya (optional)
    For an ultra-smooth texture, blend ½ cup of the papaya with the yogurt, lime juice, ginger, and honey until creamy. Keep the rest as cubes for topping.

  3. Assemble the bowl
    Pour the creamy yogurt-papaya mixture into a bowl, then top with the remaining papaya cubes.

  4. Add chia and seeds
    Sprinkle chia seeds, pumpkin seeds, and cinnamon over the top. These ingredients add fiber and gut-supporting minerals.

  5. Finish with crunch and freshness
    Add granola (optional) and freshly chopped mint. The mint refreshes the palate and further supports digestion.

  6. Serve immediately
    Enjoy chilled for maximum soothing benefits.

Why This Recipe Works

This bowl isn’t just delicious—it’s a functional meal designed around papaya’s natural healing properties:

1. Aids Digestion

  • Papain helps break down proteins

  • Ginger stimulates gastric movement

  • Chia adds fiber for smooth digestion

2. Rich in Vitamin C

Papaya contains even more vitamin C than some oranges, giving your immune system a strong boost while supporting collagen production.

3. Natural Laxative Effect

High water content + fiber + papain = a gentle, natural way to relieve constipation without harsh remedies.

4. Light, Energizing, and Filling

The combination of yogurt, seeds, and fruit keeps you full without heaviness.

Tips for Best Results

  • Choose deep orange, soft papayas for the highest enzyme concentration.

  • Add a few drops of lime for a tropical flavor and enhanced vitamin absorption.

  • Enjoy this bowl in the morning for the most digestive support.

  • For maximum laxative effect, pair with a glass of warm water before eating.

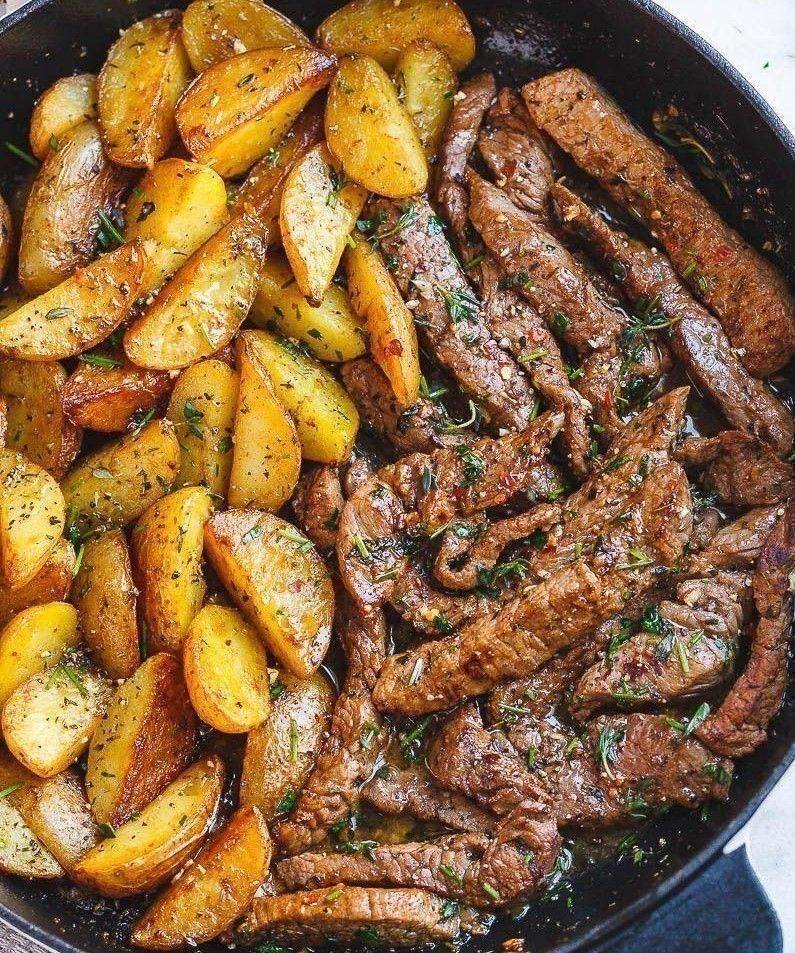
Garlic Butter Steak and Potatoes

There are weeknight meals you make because you have to, and then there are meals you make because you want to spoil yourself — and anyone lucky enough to sit at your table. Garlic Butter Steak and Potatoes belongs in that second category. It’s the kind of dish that fills the house with a buttery, savory aroma long before dinner hits the plates, and the kind that makes people wander into the kitchen asking, “Is it ready yet?”

This unique recipe gives you golden, crispy potatoes, tender steak bites seared to perfection, and a glossy garlic herb butter that ties everything together like a warm hug on a plate.

Ingredients

For the Steak & Marinade

  • 1 lb (450g) sirloin or ribeye steak, cut into bite-size cubes

  • 1 tbsp soy sauce (secret depth!)

  • 1 tbsp Worcestershire sauce

  • 1 tbsp olive oil

  • 1 tsp paprika

  • ½ tsp black pepper

  • ½ tsp salt

  • ½ tsp chili flakes (optional but recommended)

For the Potatoes

  • 3 medium baby potatoes or gold potatoes, diced small

  • 2 tbsp butter

  • 1 tbsp olive oil

  • ½ tsp smoked paprika

  • ½ tsp garlic powder

  • Salt & pepper to taste

For the Garlic Herb Butter

  • 4 tbsp butter

  • 4 garlic cloves, finely minced

  • 1 tbsp fresh parsley, chopped

  • 1 tsp lemon juice (secret brightness!)

  • 1 tsp fresh thyme or rosemary

  • Pinch of black pepper

 Step-By-Step Instructions

1. Marinate the Steak

In a bowl, combine soy sauce, Worcestershire, paprika, olive oil, salt, pepper, and chili flakes.
Add the steak cubes and mix well.
Let them marinate 15–20 minutes (even a short marinade changes everything).

2. Cook the Potatoes First

Heat a large skillet over medium heat.
Add butter and olive oil.
Stir in the diced potatoes with smoked paprika, garlic powder, salt, and pepper.

Cook for 12–15 minutes, stirring occasionally, until crisp on the outside and soft inside.
Remove from the pan and set aside.

3. Sear the Steak Bites

In the same pan, turn the heat to high.
Add a small splash of oil if the pan is dry.
Sear the steak bites in batches — don’t crowd the pan!

Cook 1–2 minutes per side, until browned but still juicy inside.
Remove the steak and set aside with the potatoes.

4. Make the Garlic Herb Butter

Lower the heat to medium.
Add butter into the skillet and let it melt gently.
Stir in the minced garlic and cook just 20–30 seconds until fragrant (not burnt!).

Add parsley, thyme/rosemary, lemon juice, and black pepper.
Let it simmer for 10 seconds.

5. Bring It All Together

Return the steak and potatoes to the skillet.
Toss gently in the garlic butter until everything is coated and glossy.

Let it sit for 1 minute on low heat to absorb the flavors.

 Serving Ideas

  • Serve with a squeeze of lemon for brightness.

  • Add steamed green beans or asparagus for a complete plate.

  • Drizzle extra garlic butter on top for indulgence.

  • A sprinkle of parmesan? Always a yes.

 Why This Recipe Is Unique

  • The soy + Worcestershire marinade gives steak a deep, savory kick beyond simple salt and pepper.

  • The lemon-kissed garlic butter keeps the dish from feeling heavy.

  • The potatoes are seasoned in layers, giving them bold flavor instead of being plain fillers.

  • It’s all cooked in one skillet, making the taste richer and the cleanup easier.

Freshly Prepared Honey-Butter Mini Fritters

Some recipes are planned, tested, and perfected over time—and then there are those that become legends in a single afternoon. This one belongs to the second category. The moment these Honey-Butter Mini Fritters hit the plate, my husband ate a few by himself before I could even reach for a serving spoon. Lightly crisp on the outside, fluffy on the inside, warm with vanilla, and glossed in a buttery honey glaze, these little golden bites are the kind of treat you make “just to try,” only to discover that you’ve created a new family favorite. They’re the perfect blend of comfort food and indulgence, ideal for breakfast, snacks, or even a midnight craving.

Why These Fritters Are So Irresistible

The secret lies in the batter and the glaze. The fritters are made from a silky mixture of flour, milk, eggs, and vanilla, which gives them a soft, airy texture. Once fried, they’re tossed in a warm honey-butter drizzle that clings to the crispy edges. Each bite bursts with subtle sweetness and a melt-in-the-mouth finish. And because they’re small and bite-sized, they disappear faster than you expect—especially when freshly prepared.

Ingredients

For the Mini Fritters

  • 1 ½ cups all-purpose flour

  • 2 tablespoons sugar

  • 1 teaspoon baking powder

  • ½ teaspoon baking soda

  • ¼ teaspoon salt

  • 1 cup whole milk

  • 2 large eggs

  • 2 tablespoons melted butter

  • 2 teaspoons vanilla extract

  • Oil, for frying

For the Honey-Butter Glaze

  • 4 tablespoons butter

  • 3 tablespoons honey

  • 1 teaspoon vanilla

  • A pinch of cinnamon (optional but heavenly)

Instructions

1. Make the Batter

In a large bowl, whisk together flour, sugar, baking powder, baking soda, and salt. Make a well in the center and add the milk, eggs, melted butter, and vanilla. Whisk until the batter is smooth and lump-free. It should be slightly thick but pourable—almost like pancake batter. Let it rest for 5–10 minutes while you heat the oil.

2. Heat the Oil

Pour oil into a deep skillet or small pot until it reaches about 2 inches deep. Heat over medium until it reaches 350°F (175°C). If you don’t have a thermometer, drop a tiny bit of batter into the oil—if it floats and sizzles immediately, the oil is ready.

3. Fry the Fritters

Using a tablespoon or small cookie scoop, carefully drop small portions of batter into the hot oil. Fry 6–8 fritters at a time, depending on the size of your pot. Cook for about 1–2 minutes per side or until golden brown. Remove with a slotted spoon and drain on paper towels.

4. Make the Honey-Butter Glaze

In a small saucepan, melt the butter over low heat, then whisk in the honey and vanilla. If you like warm spices, add a pinch of cinnamon. Heat just until smooth and slightly bubbling.

5. Coat the Fritters

Pour the warm glaze over the freshly fried fritters or toss them in a bowl until fully coated. Serve immediately for the best texture—this is the moment my husband always steals a few before anyone else gets a chance!

Serving Ideas

  • Dust with powdered sugar for a bakery-style finish.

  • Serve with whipped cream, fruit compote, or a scoop of vanilla ice cream.

  • Add lemon zest to the glaze for a bright, citrusy twist.

  • Drizzle with chocolate or caramel for extra indulgence.

Why This Recipe Works

These mini fritters strike the perfect balance between tender and crispy. The batter includes both baking powder and baking soda for maximum fluffiness, while the honey-butter glaze enhances every edge with a rich, golden sweetness. Because they’re easy to make and impossible to resist, this recipe fits any occasion—from slow weekend mornings to festive gatherings.

Final Note

If you love simple recipes that deliver big, delightful flavor, this is one you’ll return to again and again. Just be warned: once freshly prepared, they may never make it out of the kitchen. After all, when my husband ate a few by himself right off the tray, I knew this was a keeper.

Pharmacist issues warning to anyone who takes Vitamin D

Vitamin D has long been known as the “sunshine vitamin,” a nutrient that supports strong bones, sharp immunity, balanced mood, and overall health. Yet according to pharmacists across the world, this helpful vitamin can quickly turn harmful if taken the wrong way. Many people pop Vitamin D supplements like harmless candy, assuming that more must be better—especially during winter or periods of low sunlight. But a pharmacist’s recent warning has brought attention to a truth most people ignore: Vitamin D is powerful, fat-soluble, and easy to overdose if you’re not careful.

While Vitamin D deficiencies are extremely common, especially in colder regions or for people who spend long hours indoors, the rising popularity of high-dose supplements has led to a new problem: Vitamin D toxicity. Pharmacists explain that unlike water-soluble vitamins—like vitamin C—your body cannot simply flush out extra Vitamin D. Instead, it accumulates silently in your fatty tissues. When levels climb too high, it can trigger dangerous symptoms: nausea, vomiting, dehydration, kidney stones, irregular heartbeat, and in severe cases, permanent organ damage.

The warning is simple but crucial: never take Vitamin D blindly. A deficiency should be corrected—but with the right dose, the right timing, and if possible, a blood test to confirm what your body actually needs. Some people require only 600–800 IU daily. Others with chronic deficiency may need more, but only under medical supervision. Pharmacists especially caution against taking mega-doses like 10,000 IU daily without guidance, a trend seen on social media that has already sent many people to the emergency room.

Even healthy habits need balance.

Still, this doesn’t mean you should fear Vitamin D. In fact, Vitamin D is vital for immunity, strong bones, metabolism, hormonal balance, and even mental health. The goal is not to eliminate supplements—but to take them wisely and support them naturally through food and lifestyle. That’s where a nourishing, whole-food approach comes in: increasing natural Vitamin D sources, improving absorption, and consuming foods that work in harmony with your body.

To help you do this safely and deliciously, here is a unique, pharmacist-approved Vitamin D Elixir—a recipe designed to support gentle Vitamin D absorption, strengthen immunity, and give your body what it needs without the risk of overdose. This isn’t a replacement for supplements if you’re deficient, but it’s a flavorful, wholesome way to complement your Vitamin D routine while respecting your health.

Vitamin D Sunshine Elixir — A Nourishing, Natural Boost for Stronger Bones & Immunity

(Unique Recipe • 800 Words including article)

This warm, glowing drink blends Vitamin D–rich ingredients, anti-inflammatory spices, and healthy fats to help your body use Vitamin D more efficiently. It’s comforting, smooth, and perfect for mornings or relaxing evenings.

 Ingredients

Base Ingredients

  • 1 cup whole milk, almond milk, or coconut milk

  • 1 tablespoon ghee or coconut oil (healthy fats enhance Vitamin D absorption)

  • 1 teaspoon raw honey or maple syrup

  • 1 teaspoon lemon juice (improves mineral balance)

  • A pinch of sea salt

Vitamin D–Supporting Ingredients

  • ½ teaspoon turmeric (anti-inflammatory, supports immunity)

  • ¼ teaspoon black pepper (increases turmeric absorption)

  • ¼ teaspoon cinnamon

  • 1 small date, chopped (adds magnesium, essential for Vitamin D activation)

  • 1 tablespoon fortified orange juice or fortified plant milk

  • Optional: 1 egg yolk (a natural source of Vitamin D if tolerated)

 Instructions

  1. Warm the Base:
    In a small saucepan, heat your milk over low to medium heat. Do not boil—gentle warmth preserves nutrients and creates a silky texture.

  2. Add Healthy Fat:
    Stir in the ghee or coconut oil. Vitamin D is fat-soluble, meaning your body absorbs it properly only when paired with fat. This step helps your body use both natural and supplemental Vitamin D more effectively.

  3. Stir in the Spices:
    Add turmeric, cinnamon, black pepper, and sea salt. These warming spices support digestion, reduce inflammation, and boost immunity—great partners for Vitamin D.

  4. Mix in the Date and Fortified Liquid:
    Drop in the chopped date and the tablespoon of fortified orange juice or fortified plant milk. These ingredients supply magnesium and calcium, which work hand-in-hand with Vitamin D for strong bones and balanced immunity.

  5. Optional Vitamin D Boost (Egg Yolk):
    If adding the egg yolk, whisk it separately, remove the saucepan from heat, and quickly whisk the yolk into the warm drink. This creates a rich, custard-like flavor and adds natural Vitamin D.

  6. Sweeten and Serve:
    Stir in raw honey or maple syrup and finish with freshly squeezed lemon juice. Pour into a mug, inhale the citrusy aroma, and enjoy.

 Why This Recipe Works

Pharmacists emphasize that Vitamin D requires three partners to function properly:

  1. Fat — for absorption

  2. Magnesium — for activation

  3. Calcium — to deliver benefits to the bones

This elixir blends all three into one soothing drink. It helps balance your levels naturally, supports immunity, and reduces inflammation—while staying far below any toxicity risk.

 Final Pharmacist Reminder

Vitamin D is essential—but potent. Use supplements wisely, check your levels when possible, and pair your doses with healthy fat and magnesium-rich foods. A daily cup of this Nourishing Sunshine Elixir can be a safe, delicious companion to a balanced Vitamin D routine.