Ground Beef Casserole

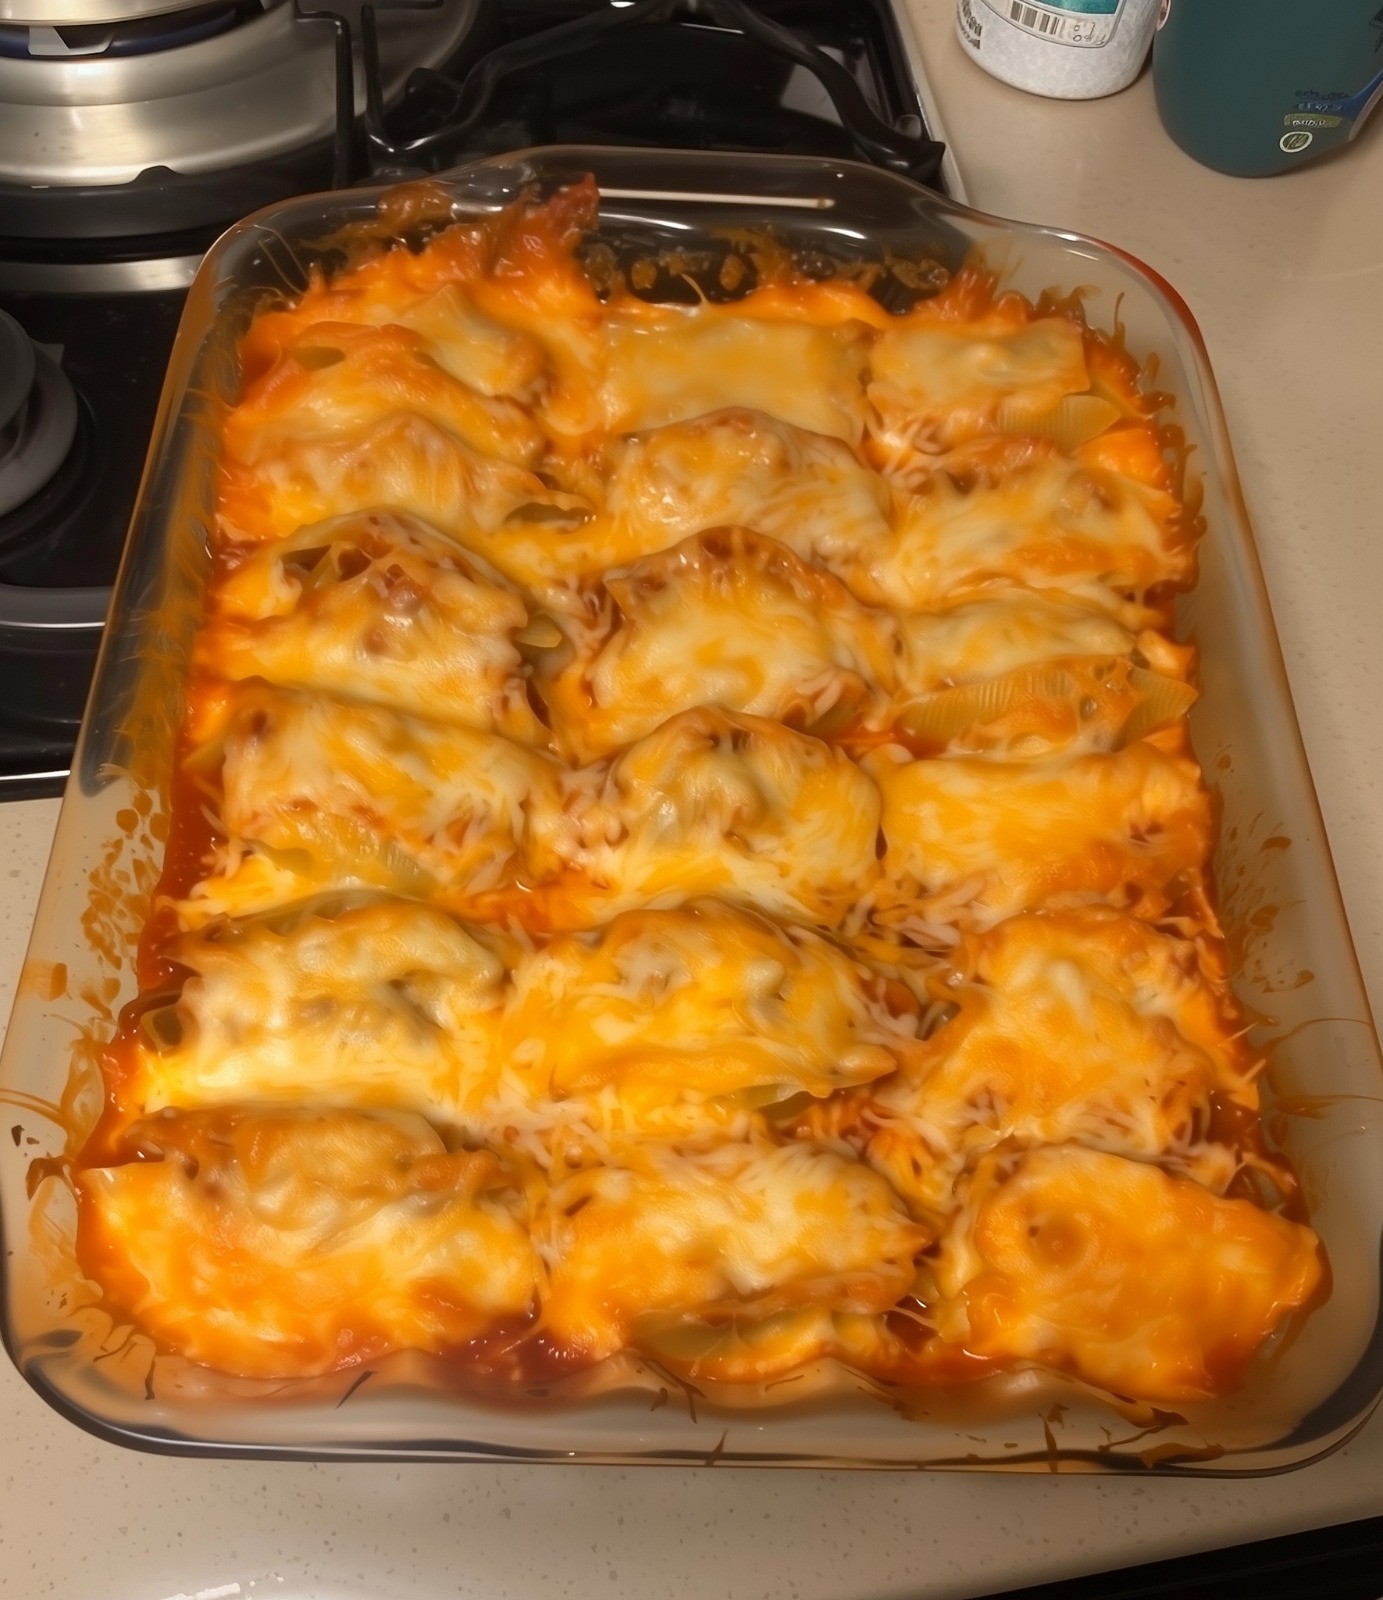
If you’re craving a comforting ground beef casserole that feels familiar yet refreshingly different, this Harvest Skillet Ground Beef Casserole delivers exactly that. It combines savory beef, roasted vegetables, subtle herbs, and a creamy, lightly cheesy topping that bakes into a deeply satisfying one-dish meal. This isn’t your typical tomato-heavy or pasta-based casserole. Instead, it leans into earthy flavors, gentle sweetness from vegetables, and a rich but balanced sauce that keeps every bite interesting.

This recipe was designed for home cooks who love comfort food but want something just a little unexpected—perfect for weeknights, cozy weekends, or leftovers that taste even better the next day.

Ingredients

For the Beef Base

  • 1½ pounds ground beef (80/20 works best)

  • 1 tablespoon olive oil

  • 1 medium yellow onion, finely diced

  • 3 cloves garlic, minced

  • 1 teaspoon smoked paprika

  • ½ teaspoon dried thyme

  • ½ teaspoon ground black pepper

  • 1 teaspoon salt (adjust to taste)

  • 1 tablespoon Worcestershire sauce

For the Vegetable Layer

  • 1 cup diced carrots

  • 1 cup diced zucchini

  • 1 cup chopped mushrooms

  • ½ cup frozen corn kernels

  • 1 tablespoon butter

For the Creamy Binding Sauce

  • 3 tablespoons all-purpose flour

  • 2 cups whole milk

  • ½ cup beef broth

  • 1 teaspoon Dijon mustard

  • ½ teaspoon onion powder

  • ¼ teaspoon nutmeg

For the Topping

  • 1½ cups shredded sharp white cheddar

  • ½ cup shredded mozzarella

  • ¾ cup seasoned breadcrumbs or crushed crackers

  • 2 tablespoons melted butter

  • 2 tablespoons chopped fresh parsley (optional)

Instructions

1. Prepare the Beef Mixture
Preheat your oven to 375°F (190°C). Heat olive oil in a large skillet over medium-high heat. Add the ground beef and cook until browned, breaking it apart as it cooks. Once no pink remains, drain excess fat if needed. Add the diced onion and cook for 3–4 minutes until softened. Stir in garlic, smoked paprika, thyme, salt, pepper, and Worcestershire sauce. Let the mixture simmer gently for 2 minutes so the flavors meld. Remove from heat and set aside.

2. Sauté the Vegetables
In the same skillet, melt butter over medium heat. Add carrots and cook for 3 minutes to soften slightly. Stir in zucchini, mushrooms, and corn. Cook for another 4–5 minutes until vegetables are tender but not mushy. Season lightly with salt and pepper. Combine the vegetables with the cooked beef mixture and stir well.

3. Make the Creamy Sauce
In a small saucepan, melt 2 tablespoons of butter over medium heat. Whisk in flour and cook for 1 minute to remove the raw taste. Slowly whisk in milk and beef broth, stirring constantly to prevent lumps. Add Dijon mustard, onion powder, and nutmeg. Simmer gently until thickened, about 4–5 minutes. Remove from heat.

4. Assemble the Casserole
Lightly grease a 9×13-inch baking dish. Spread the beef and vegetable mixture evenly in the dish. Pour the creamy sauce over the top and gently fold it in so everything is lightly coated. Sprinkle shredded cheddar and mozzarella evenly across the surface.

5. Add the Crunchy Topping
In a small bowl, mix breadcrumbs with melted butter. Sprinkle evenly over the cheese layer. This topping adds a golden, crisp contrast to the creamy interior.

6. Bake
Place the casserole in the oven and bake uncovered for 30–35 minutes, or until bubbly and golden brown on top. If you want extra browning, broil for 2–3 minutes at the end—just watch carefully.

7. Rest and Serve
Let the casserole rest for 10 minutes before serving. This allows it to set and makes serving easier. Garnish with chopped parsley if desired.

Why This Casserole Is Different

What makes this ground beef casserole unique is its balance. Instead of relying on heavy tomato sauces or excessive cheese, it builds flavor through seasoning, sautéed vegetables, and a gently spiced cream sauce. The nutmeg and Dijon may seem subtle, but they elevate the dish and add depth without overpowering it.

The vegetable blend brings color, texture, and nutrition, while the breadcrumb topping adds a satisfying crunch that contrasts beautifully with the creamy filling.

Serving Suggestions and Variations

Serve this casserole with a simple green salad or roasted green beans for a complete meal. For variation, you can substitute ground turkey, add roasted sweet potatoes, or swap cheddar for Gruyère. It also freezes well, making it ideal for meal prep.

Grandma’s Christmas Candy

Grandma never measured Christmas by the calendar. She measured it by the smell of sugar melting on the stove and the soft crackle of snow against the kitchen window. Long before the tree was decorated or the carols began, Grandma’s Christmas Candy announced the season. No one outside the family had the recipe, and even inside the family it was more legend than instruction—written partly in pencil on a stained index card and partly in Grandma’s memory.

This candy wasn’t just dessert. It was tradition, comfort, and celebration wrapped into glossy, jewel-colored pieces that sparkled like ornaments on a plate.

The Story Behind the Candy

Grandma said the recipe came from her mother, who learned it during hard winters when sweets were scarce and creativity was necessary. “Candy tastes better when it’s made with patience,” Grandma always said, stirring slowly, never rushing. She believed the candy absorbed the mood of the kitchen, which is why laughter was required and arguing strictly forbidden while it cooked.

Every December morning, Grandma tied on her faded red apron and lined the counter with wax paper. The radio hummed softly, and the kettle sang while snow piled up outside. That was when Christmas officially began.

Ingredients (As Grandma Made Them)

This recipe is unique not because of rare ingredients, but because of how they come together.

  • 2 cups granulated sugar

  • ½ cup heavy cream

  • ¼ cup unsalted butter

  • 2 tablespoons light corn syrup

  • 1 teaspoon vanilla extract

  • ¼ teaspoon salt

  • ½ cup chopped toasted pecans or walnuts

  • ¼ cup dried cherries or cranberries, finely chopped

  • Zest of one orange

  • A pinch of cinnamon

  • A pinch of nutmeg

Grandma’s Secret Ingredient: One teaspoon of honey, added at the very end “for warmth,” she said.

How Grandma Made It

Grandma used her heaviest saucepan—the one with the dented side and the loose handle. She said thin pans made impatient candy.

  1. Start Slow
    She combined the sugar, cream, butter, and corn syrup in the pan over low heat. No stirring yet—just gentle melting. “Let them get acquainted,” she’d say.

  2. The Stirring Rule
    Once everything melted into a smooth, pale mixture, she stirred with a wooden spoon in slow figure-eights. Never fast. Never stopped. She stirred until the mixture thickened and turned the color of warm caramel.

  3. The Candy Test
    Grandma never used a thermometer. Instead, she dropped a tiny spoonful into cold water. If it formed a soft ball that held its shape but still felt silky, it was ready. If not, she stirred and tested again, humming the whole time.

  4. Adding the Magic
    She removed the pan from heat and quickly stirred in vanilla, salt, cinnamon, nutmeg, orange zest, nuts, dried fruit, and finally the honey. The scent filled the kitchen instantly—sweet, citrusy, buttery, and unmistakably Christmas.

  5. Shaping the Candy
    Using two spoons, Grandma dropped small mounds onto wax paper. Each piece was imperfect, slightly different, and all the better for it. Sometimes she pressed a single nut or cherry piece on top “so people know what they’re getting.”

  6. Waiting (The Hardest Part)
    The candies needed at least an hour to set. Grandma said touching them too soon would “offend the sugar.” Children learned patience quickly.

Why This Candy Is Special

Grandma’s Christmas Candy is soft but not sticky, rich but not heavy. The nuts add crunch, the fruit adds brightness, and the orange zest lifts everything like a Christmas bell. The honey doesn’t announce itself—it simply leaves warmth behind, the kind you feel rather than taste.

No two batches are ever exactly the same. Some years the candy is darker, some years lighter. Some years there are more cherries than nuts. Grandma said that was proof it was alive.

How to Serve It

Grandma arranged the candies on a glass platter that only came out in December. She sprinkled powdered sugar lightly over the top, “like fresh snow,” and set the plate in the center of the table. Guests were allowed to take one at first, then more later. The candy was meant to be savored, not rushed.

She wrapped leftovers in wax paper and tucked them into tins, which appeared unexpectedly in neighbors’ mailboxes, coat pockets, and church bags.

A Final Note from Grandma

“Recipes don’t make candy special,” Grandma said. “People do.”

So when you make this candy, slow down. Play music. Let the kitchen get warm. Think about someone you love while you stir. That, more than anything, is what makes Grandma’s Christmas Candy truly unique.

5 Things You Should Never Put in the Washing Machine

The washing machine is one of the most useful appliances in any home. With the push of a button, it saves time, effort, and energy. However, not everything belongs inside it. Some items can be damaged beyond repair, while others may harm your washing machine itself. Knowing what not to wash in the machine is just as important as knowing how to use it properly. Below are five things you should never put in the washing machine, along with clear explanations and safer alternatives.

1. Shoes with Delicate Structure or Special Materials

While some sneakers are labeled as machine-washable, many shoes are not. Leather shoes, suede footwear, high heels, and shoes with glued components should never go in the washing machine. The intense spinning and water exposure can cause leather to crack, suede to stiffen, and glue to weaken, leading to permanent damage.

Even athletic shoes can suffer if washed too often. The washing machine can warp the shape, ruin cushioning, and cause soles to separate. In addition, shoes banging around inside the drum may damage the machine itself.

Safer alternative:
Clean shoes by hand using a soft brush, mild soap, and lukewarm water. For athletic shoes, remove the laces and insoles and clean them separately. Air-dry only—never use high heat.

2. Clothing with Excessive Zippers, Metal, or Embellishments

Garments decorated with metal studs, heavy zippers, sequins, beads, or embroidery can be destructive in the washing machine. These items can snag on other clothes, causing tears and stretching. At the same time, the metal parts can scratch the drum of the washing machine, shortening its lifespan.

Bras with underwire are especially risky. Loose wires can come out during washing and get stuck inside the machine’s internal components, leading to costly repairs.

Safer alternative:
Hand wash embellished clothing or use a professional dry cleaner. If machine washing is unavoidable, place items in a mesh laundry bag, fasten all zippers, and use a gentle cycle—but even this is not risk-free.

3. Memory Foam and Foam-Based Items

Memory foam pillows, mattress toppers, and foam cushions should never be placed in the washing machine. When saturated with water, memory foam becomes extremely heavy and fragile. The agitation and spinning can cause it to tear apart or lose its shape completely.

Additionally, foam absorbs water deeply and takes a very long time to dry. Trapped moisture can lead to mold, mildew, and unpleasant odors that are difficult to remove.

Safer alternative:
Spot clean foam items using a damp cloth and mild detergent. For odors, sprinkle baking soda over the surface, let it sit for a few hours, then vacuum it off. Always allow foam to air-dry completely in a well-ventilated area.

4. Items Covered in Pet Hair or Sand

Blankets, rugs, or clothing heavily covered in pet hair or sand should not go straight into the washing machine. Pet hair can clump together, clog the machine’s drainage system, and stick to the drum even after the wash cycle is finished. Sand and grit, on the other hand, act like tiny abrasives that can scratch the interior of the machine.

Over time, these issues reduce washing efficiency and may cause mechanical problems.

Safer alternative:
Before washing, remove as much pet hair as possible using a lint roller, rubber brush, or vacuum. Shake out sandy items outdoors thoroughly. Once most debris is removed, washing becomes safer and more effective.

5. Delicate Fabrics Like Silk, Wool, and Lace (Unless Labeled Machine-Safe)

Silk, wool, cashmere, and lace are some of the most delicate fabrics, and washing machines can be too harsh for them. Heat, agitation, and regular detergent can cause shrinking, fading, stretching, or tearing. Wool items are especially vulnerable to felting, where fibers mat together and permanently change texture and size.

Even if an item looks sturdy, always check the care label before washing.

Safer alternative:
Hand wash delicate fabrics using cold water and a detergent designed for gentle materials. Lightly press out excess water—never wring. Lay flat to dry or hang carefully to maintain shape. When in doubt, dry cleaning is the safest option.

Final Thoughts

Your washing machine is powerful, but it’s not meant for everything. Putting the wrong items inside can ruin your belongings and lead to expensive appliance repairs. By understanding which items require special care—such as delicate fabrics, foam materials, embellished clothing, certain shoes, and debris-covered items—you can extend the life of both your clothes and your washing machine.

Boiling Eggshells for Various Uses

Eggshells are often tossed away without a second thought, but these humble kitchen scraps are incredibly valuable. From strengthening your garden soil to providing calcium for your body and even helping in household cleaning, boiled eggshells can be transformed into useful, natural resources. This “recipe” will show you exactly how to prepare boiled eggshells safely and how to use them in multiple ways.

Ingredients

  • Eggshells from 6–12 eggs

  • Clean water (enough to fully submerge shells)

Preparation Steps

Step 1: Rinse the Eggshells

Start by collecting eggshells after cooking or baking. Rinse them thoroughly under running water to remove any egg white residue. This is important because leftover egg white can cause odor or bacteria growth. Make sure both the inside membrane and the outer shell are clean.

Step 2: Place the Eggshells in a Pot

Add the cleaned shells to a cooking pot. Spread them evenly so they are not stacked too tightly.

Step 3: Add Water

Pour in enough water to completely cover the eggshells. The shells should be fully submerged.

Step 4: Bring to a Boil

Place the pot on medium heat and bring the water to a rolling boil. Let the shells boil for 10–15 minutes. This helps kill bacteria, sterilizes the shells, and makes them safe for reuse.

Step 5: Let Them Cool

Turn off the heat and allow the shells to cool in the water for another 10 minutes.

Step 6: Drain and Dry

Drain the water using a strainer. Spread the shells on a tray or plate and let them air-dry completely. Dry shells are easier to crush and store.

Now Your Boiled Eggshells Are Ready to Use

Once boiled and dried, eggshells can be used in many beneficial ways. Below are the most popular and practical applications.

1. Garden Fertilizer

Eggshells are rich in calcium carbonate, which strengthens plant cell walls and improves soil quality.

How to Use

Crush the dried shells into small pieces or powder. Sprinkle around the base of plants or mix into the soil.

Benefits

  • Improves plant growth

  • Prevents blossom end rot in tomatoes and peppers

  • Makes soil healthier and less acidic

2. Homemade Calcium Supplement

Eggshells are a natural source of calcium for humans when prepared correctly.

How to Use

After boiling and drying, grind the shells into a very fine powder. Store in an airtight jar. Add a pinch to smoothies, soups, or water.

Benefits

  • Strengthens bones and teeth

  • Supports joint health

  • Provides essential calcium naturally

Tip: Only use eggshells from trusted, clean eggs and always boil them first.

3. Natural Pest Control

Eggshell fragments can help keep pests like slugs and snails away from your plants.

How to Use

Crush shells into rough, jagged pieces and scatter around plant stems.

Benefits

  • Prevents crawling insects and pests

  • Non-toxic and environmentally safe

4. Compost Booster

Eggshells add minerals to compost, enriching it for future soil use.

How to Use

Add crushed shells directly to your compost bin.

Benefits

  • Speeds up compost breakdown

  • Improves nutrient content

5. Cleaning Scrub

Boiled eggshells can be used as a gentle abrasive cleaner.

How to Use

Grind shells and mix with a little baking soda. Use the mixture to scrub pots, pans, and sinks.

Benefits

  • Removes tough stains

  • Safe and chemical-free

6. Coffee and Tea Enhancer

Eggshells help neutralize bitterness in coffee and tea.

How to Use

Add a small piece of boiled eggshell to your coffee grounds or tea leaves while brewing.

Benefits

  • Reduces bitterness

  • Improves taste naturally

7. Animal Feed Supplement

Pets like chickens, birds, and some livestock benefit from the calcium in eggshells.

How to Use

Grind shells into powder and mix with their regular feed.

Benefits

  • Strengthens bones and shells (for chickens)

  • Supports healthy growth

Storage Tips

  • Keep dried eggshells in an airtight container

  • Store in a cool, dry place

  • Use within a few months for best results

Helpful Notes

  • Always boil shells before use to remove bacteria

  • Dry them completely before crushing

  • Use organic eggshells when possible

  • Never use dirty or unwashed shells

Final Thoughts

Boiling eggshells turns what is normally kitchen waste into something incredibly useful. Whether you want to grow stronger plants, improve your health, or clean naturally, this simple method gives you a sustainable and cost-effective solution.

Instead of throwing eggshells away, boil them and reuse them for powerful everyday benefits. Once you start using eggshells this way, you’ll never look at them as waste again — they become a natural, multi-purpose resource right from your kitchen.

Taco Stuffed Shells: The Genius Fusion Dinner That’s Taking Over Family Night

If tacos and baked pasta had a love child, this would be it. Taco Stuffed Shells are the kind of dinner that makes everyone wander into the kitchen asking, “What smells so good?” It combines the cozy satisfaction of jumbo pasta shells with the bold, spiced flavors of a classic taco filling. This dish is vibrant, cheesy, and perfect for feeding a crowd — or for having leftovers that taste even better the next day.

It’s a weeknight hero, a potluck champion, and a guaranteed hit at any family table.

Ingredients

For the Shells

  • 18–20 jumbo pasta shells

  • Salted water for boiling

For the Taco Filling

  • 1 lb (450 g) ground beef

  • 1 small onion, finely diced

  • 2 cloves garlic, minced

  • 1 packet taco seasoning (or homemade blend)

  • ½ cup water

  • 1 cup salsa

  • 1 cup black beans, rinsed and drained

  • 1 cup corn kernels (fresh, frozen, or canned)

  • 1 cup shredded cheddar cheese

  • ½ cup shredded Monterey Jack or mozzarella

For the Creamy Taco Sauce

  • 1 cup sour cream

  • ½ cup salsa

  • 1 tsp chili powder

  • 1 tsp cumin

  • ½ tsp garlic powder

  • Salt and pepper to taste

For Topping

  • 1½ cups shredded Mexican-blend cheese

  • Chopped cilantro or green onions

  • Optional: sliced jalapeños or diced tomatoes

Instructions

1. Cook the Shells

Bring a large pot of salted water to a boil. Add the jumbo shells and cook until al dente (about 1 minute less than package instructions). Drain and rinse gently with cool water so they don’t stick. Lay them out on a tray to prevent tearing.

2. Prepare the Taco Filling

In a large skillet over medium heat, cook the ground beef with the diced onion until the beef is browned and the onion is soft. Add the garlic and cook for 30 seconds.

Stir in the taco seasoning and water. Let it simmer for 2–3 minutes until thick and fragrant.

Fold in the salsa, black beans, and corn. Cook for another 2 minutes, then remove from heat. Stir in the shredded cheddar and Monterey Jack until the mixture becomes cheesy and cohesive.

3. Make the Creamy Taco Sauce

In a small bowl, whisk together the sour cream, salsa, chili powder, cumin, garlic powder, salt, and pepper. This sauce brings balance — cooling the heat and adding a creamy tang that makes the shells irresistible.

4. Stuff the Shells

Preheat your oven to 375°F (190°C). Lightly grease a baking dish.

Fill each cooked shell with a generous spoonful of the taco mixture and arrange them snugly in the dish, open side up.

5. Add Sauce and Cheese

Pour the creamy taco sauce evenly over the stuffed shells. Sprinkle the shredded Mexican-blend cheese on top.

6. Bake

Cover loosely with foil and bake for 20 minutes. Remove the foil and bake for another 10 minutes until the cheese is bubbly and golden.

7. Garnish and Serve

Top with fresh cilantro or green onions, and add jalapeños or diced tomatoes for extra color and kick. Serve hot.

Why This Recipe Works

Taco Stuffed Shells are the perfect mash-up of Tex-Mex spice and Italian comfort. The pasta shells act like little taco boats, holding all that flavorful meat and melty cheese. The salsa and beans add freshness and body, while the creamy topping keeps everything moist and satisfying.

It’s also incredibly adaptable:

  • Swap beef for ground chicken or turkey for a lighter version.

  • Add cream cheese to the filling for an ultra-rich texture.

  • Make it vegetarian by using seasoned lentils or sautéed mushrooms.

  • For heat lovers, mix in chipotle peppers or extra jalapeños.

Serving Ideas

This dish stands strong on its own, but pairing it with a few sides makes it a full fiesta:

  • Mexican rice or cilantro lime rice

  • Avocado salad or guacamole

  • Garlic bread or cheesy quesadillas

  • A crisp corn and tomato salad

And if you love dipping sauces, try serving it with extra salsa, sour cream, or a drizzle of hot sauce.

Storage and Make-Ahead Tips

  • Refrigerate leftovers for up to 3 days.

  • Reheat in the oven at 350°F (175°C) for best texture.

  • You can also assemble the shells ahead of time and refrigerate, then bake when ready.

  • Freeze baked shells in portions — they reheat beautifully for quick dinners later.

The Final Bite

Taco Stuffed Shells are more than just a meal — they’re a celebration of bold flavors and cozy family dinners. It’s the kind of dish that brings everyone together, whether it’s taco night, pasta night, or something in between.

Creamed Chipped Beef on Toast

Creamed Chipped Beef on Toast is one of those timeless comfort foods that carries a sense of nostalgia with every bite. Often affectionately known as “SOS,” this dish has humble roots, yet its creamy, savory flavor has kept it on breakfast and supper tables for generations. Simple ingredients come together to create something deeply satisfying: tender bits of dried beef folded into a rich white sauce and spooned generously over crisp, buttery toast. This version elevates the classic with a few thoughtful touches while staying true to its comforting soul.

Why This Dish Endures

What makes creamed chipped beef so beloved is its balance of flavors and textures. The saltiness of the beef contrasts beautifully with the mild, velvety sauce, while the toast provides structure and crunch. It’s inexpensive, filling, and easy to prepare, making it ideal for busy mornings, lazy weekends, or even a quick dinner. Though traditionally straightforward, small adjustments can transform it from basic to memorable.

Ingredients You’ll Need

  • 4 ounces dried chipped beef

  • 3 tablespoons unsalted butter

  • 3 tablespoons all-purpose flour

  • 2½ cups whole milk (warm)

  • Freshly ground black pepper, to taste

  • A pinch of nutmeg (optional but recommended)

  • 4–6 slices of bread (white, sourdough, or country-style)

  • Optional garnish: chopped parsley or chives

Preparing the Beef

Dried chipped beef is quite salty by nature. To control the saltiness, rinse the beef briefly under cool water, then pat it dry with paper towels. Slice or tear it into bite-sized pieces. This step ensures the dish is savory rather than overwhelming and allows the cream sauce to shine.

Making the Cream Sauce

In a medium skillet or saucepan over medium heat, melt the butter until it foams gently. Sprinkle in the flour, whisking constantly to form a smooth paste, known as a roux. Cook the roux for about one minute—just long enough to remove the raw flour taste but not so long that it browns.

Gradually pour in the warm milk while whisking continuously. Adding the milk slowly prevents lumps and helps build a silky texture. Continue whisking as the sauce thickens, which should take about 3–5 minutes. The sauce should coat the back of a spoon and appear glossy and smooth.

Bringing It All Together

Once the sauce has thickened, add the chipped beef to the pan. Stir gently to distribute it evenly. Season with freshly ground black pepper and a tiny pinch of nutmeg if using. Nutmeg may seem unexpected, but it subtly enhances the creaminess without standing out.

Lower the heat and let the mixture simmer for another 2–3 minutes, allowing the flavors to meld. Taste and adjust seasoning if needed—additional salt is rarely necessary because of the beef.

Toasting the Bread

While the sauce simmers, toast the bread slices until golden and crisp. You can butter them lightly for extra richness or leave them plain to balance the creamy topping. Arrange the toast on plates or a serving platter.

Serving Suggestions

Spoon the hot creamed chipped beef generously over the toast. Garnish with chopped parsley or chives for a touch of color and freshness. Serve immediately while the sauce is warm and luscious.

This dish pairs wonderfully with simple sides. A fried or poached egg on top turns it into a hearty breakfast. For lunch or dinner, serve alongside steamed green beans, sautéed spinach, or a crisp side salad to balance the richness.

Tips for the Best Results

  • Milk temperature matters: Warm milk blends more smoothly into the roux and reduces the risk of lumps.

  • Consistency control: If the sauce becomes too thick, add a splash of milk. If it’s too thin, let it simmer a bit longer.

  • Texture upgrade: For a slightly chunkier version, add a spoonful of cream cheese or a splash of heavy cream at the end.

  • Flavor twist: A dash of Worcestershire sauce or Dijon mustard can add depth without overpowering the classic taste.

A Dish with Heart

Creamed Chipped Beef on Toast is more than just a recipe—it’s a reminder that simple food can be deeply comforting. Whether you grew up eating it or are trying it for the first time, this dish delivers warmth, satisfaction, and timeless appeal. With its creamy sauce, savory beef, and crisp toast, it proves that even the most modest ingredients can create something truly memorable when prepared with care.

Classic Chocolate Cake

A classic chocolate cake should feel like a celebration of simplicity: moist crumb, deep cocoa flavor, and a richness that lingers without overwhelming. This recipe honors tradition while adding a few thoughtful techniques that elevate the final result. It’s the kind of cake you bake for birthdays, holidays, or quiet weekends when you want something truly satisfying. No shortcuts, no boxed mixes—just real ingredients and careful balance.

Why This Recipe Is Different

What makes this chocolate cake unique is its method. Instead of relying solely on butter or oil, this recipe uses a blend of butter for flavor and neutral oil for moisture. Bloomed cocoa powder intensifies the chocolate taste, while a touch of brewed coffee deepens the flavor without making the cake taste like coffee. The result is a cake that stays moist for days and tastes even better the next morning.

Ingredients

For the Chocolate Cake

  • 1¾ cups (220 g) all-purpose flour

  • ¾ cup (75 g) unsweetened cocoa powder (natural or Dutch-processed)

  • 1½ cups (300 g) granulated sugar

  • ½ cup (100 g) light brown sugar, packed

  • 1½ teaspoons baking powder

  • 1½ teaspoons baking soda

  • 1 teaspoon fine sea salt

  • 2 large eggs, room temperature

  • ½ cup (120 ml) vegetable oil

  • ¼ cup (60 g) unsalted butter, melted and slightly cooled

  • 1 cup (240 ml) buttermilk, room temperature

  • 1 cup (240 ml) hot brewed coffee or hot water

  • 2 teaspoons vanilla extract

For the Classic Chocolate Frosting

  • ¾ cup (170 g) unsalted butter, softened

  • ⅔ cup (65 g) unsweetened cocoa powder

  • 3 cups (360 g) powdered sugar, sifted

  • ⅓ cup (80 ml) heavy cream or whole milk

  • 1 teaspoon vanilla extract

  • Pinch of salt

Instructions

Step 1: Prepare the Pans and Oven

Preheat your oven to 350°F (175°C). Grease two 8-inch round cake pans and line the bottoms with parchment paper. Lightly dust the sides with cocoa powder instead of flour—this keeps the exterior dark and clean.

Step 2: Bloom the Cocoa

Place the cocoa powder in a heatproof bowl and pour the hot coffee over it. Whisk until smooth and glossy. This step “blooms” the cocoa, unlocking deeper chocolate notes. Set aside to cool slightly.

Step 3: Mix the Dry Ingredients

In a large bowl, whisk together the flour, sugars, baking powder, baking soda, and salt. Make sure there are no lumps, especially from the brown sugar.

Step 4: Combine the Wet Ingredients

In another bowl, whisk the eggs until slightly frothy. Add the oil, melted butter, buttermilk, vanilla extract, and the bloomed cocoa mixture. Whisk until fully combined.

Step 5: Bring It All Together

Pour the wet ingredients into the dry ingredients. Gently whisk until just combined. The batter will be thin—this is exactly what you want. Overmixing will make the cake dense, so stop as soon as the flour disappears.

Step 6: Bake

Divide the batter evenly between the prepared pans. Bake for 30–35 minutes, or until a toothpick inserted in the center comes out with a few moist crumbs. Let the cakes cool in the pans for 10 minutes, then turn them out onto a wire rack to cool completely.

Making the Frosting

Beat the softened butter on medium speed until pale and creamy. Add the cocoa powder and beat again until smooth. Gradually add the powdered sugar, alternating with the cream, beating well after each addition. Finish with vanilla extract and a pinch of salt. The frosting should be fluffy, spreadable, and deeply chocolatey.

Assembly

Place one cake layer on a serving plate. Spread a generous layer of frosting on top, reaching all the way to the edges. Place the second layer on top and frost the top and sides. For a classic finish, use a spatula to create soft swirls, or keep it rustic and simple.

Tips for the Perfect Chocolate Cake

  • Room temperature ingredients blend more smoothly and create a better texture.

  • Do not skip the coffee—it enhances chocolate flavor without being noticeable.

  • Store properly: Cover the cake and keep it at room temperature for up to two days, or refrigerate for up to five.

  • Flavor variation: Add a teaspoon of cinnamon or espresso powder for subtle complexity.

Final Thoughts

This classic chocolate cake is proof that tradition doesn’t have to be boring. With its tender crumb, rich frosting, and deeply satisfying flavor, it’s a recipe you’ll return to again and again. Whether served plain with a glass of milk or dressed up for a special occasion, it delivers comfort, nostalgia, and just enough elegance to feel truly special. 🍫🍰

Foil packet party

A foil packet party is more than a meal—it’s an experience. Whether you’re hosting friends in the backyard, cooking at a campsite, or simplifying a busy weeknight dinner, foil packets deliver bold flavor with minimal cleanup. Everyone gets their own personalized packet, sealed tight to trap juices and aromas, creating tender proteins and perfectly cooked vegetables every single time. This unique foil packet party recipe is designed to be festive, flexible, and foolproof—perfect for feeding a crowd while letting each guest customize their plate.


Why a Foil Packet Party Works

Foil packet cooking is all about smart simplicity. The foil acts like a mini oven, steaming and roasting food at the same time. Flavors mingle, marinades intensify, and nothing dries out. Best of all, there’s no pile of dirty pans afterward. You can cook these packets on a grill, over a fire pit, or in the oven—making them ideal for parties in any season.

This recipe centers around a build-your-own foil packet bar, featuring one signature combination that everyone loves, plus optional swaps to keep things exciting.

The Star Combination: Garlic Butter Steak & Veggie Foil Packets

Ingredients (Serves 4–6)

Proteins

  • 900 g (2 lb) sirloin steak, cut into bite-size cubes
    (Chicken thighs, shrimp, or sausage work beautifully too)

Vegetables

  • 4 medium potatoes, thinly sliced

  • 2 bell peppers, sliced

  • 1 large red onion, sliced

  • 200 g (7 oz) mushrooms, halved

  • 2 cups green beans or zucchini slices

Garlic Butter Sauce

  • 6 tbsp unsalted butter, melted

  • 4 cloves garlic, minced

  • 1 tbsp olive oil

  • 1 tsp smoked paprika

  • 1 tsp dried thyme

  • ½ tsp black pepper

  • Salt to taste

  • Optional: chili flakes or a squeeze of lemon

Optional Toppings

  • Fresh parsley or chives

  • Grated Parmesan

  • Shredded mozzarella or cheddar

How to Set Up Your Foil Packet Party

  1. Prep the Station
    Lay out a long table with bowls of chopped proteins, vegetables, sauces, and seasonings. Pre-cut everything so guests can build their packets quickly.

  2. Foil Basics
    Use heavy-duty aluminum foil. Each packet should be about 40–45 cm (16–18 inches) long. Double-layer if cooking over an open flame.

  3. Build the Packet

    • Start with potatoes (they take the longest to cook).

    • Add vegetables.

    • Top with steak cubes.

    • Drizzle generously with garlic butter sauce.

    • Season lightly with salt and pepper.

  4. Seal Like a Pro
    Bring the long sides together, fold tightly, then fold in the ends to form a sealed pouch. Leave a little air inside for steam circulation.

Cooking Instructions

On the Grill:

  • Preheat to medium-high heat.

  • Place packets seam-side up.

  • Cook for 18–22 minutes, turning once.

In the Oven:

  • Preheat to 200°C (400°F).

  • Place packets on a baking tray.

  • Bake for 25–30 minutes.

Over a Campfire:

  • Nestle packets into hot coals (not direct flames).

  • Cook for 20–25 minutes, turning carefully.

Let packets rest for 3–5 minutes before opening—steam will be hot.

Make It a True Party: Flavor Variations

One of the best parts of a foil packet party is variety. Offer these easy theme options:

Mediterranean Style
Chicken, cherry tomatoes, olives, red onion, oregano, olive oil, and a crumble of feta after cooking.

Tex-Mex Fiesta
Sliced beef or chicken, bell peppers, onions, corn, taco seasoning, and a sprinkle of cheese. Serve with salsa and sour cream.

Lemon Herb Salmon
Salmon fillets, asparagus, lemon slices, dill, garlic, and butter—light, elegant, and fast-cooking.

Vegetarian Delight
Sweet potatoes, broccoli, mushrooms, chickpeas, olive oil, garlic, and cumin. Finish with tahini sauce or yogurt.

Serving Ideas

Open packets right at the table for dramatic effect, or slide contents onto plates. Pair with crusty bread, a fresh salad, or grilled corn on the cob. For drinks, keep it simple: iced tea, lemonade, or sparkling water with citrus.

Tips for Success

  • Slice potatoes thin so they cook evenly.

  • Don’t overload packets—crowding leads to uneven cooking.

  • Always label packets if guests customize heavily.

  • Keep extra foil on hand for quick replacements.

Final Thoughts

A foil packet party turns cooking into a social event—interactive, relaxed, and delicious. With endless combinations and almost zero cleanup, it’s the kind of meal that feels special without being stressful. Once you host one, it’s guaranteed to become a go-to favorite for gatherings big and small.

The Purpose of Small Hallway Sinks: Why These Tiny Fixtures Make a Big Difference

At first glance, a small sink tucked into a hallway can seem unusual. It’s not part of a full bathroom, it’s not in the kitchen, and it often appears too modest to serve a major role. Yet hallway sinks—sometimes called cloakroom sinks, powder sinks, or auxiliary washbasins—have a long history and a surprisingly practical purpose. Far from being a design afterthought, these compact fixtures combine hygiene, convenience, and style in a way that fits modern living perfectly.

A Tradition Rooted in Practicality

The idea of a hallway sink isn’t new. In older European homes, especially in townhouses and apartments, a small washbasin near the entrance was common. Before central heating and indoor plumbing became widespread, people wanted a place to wash their hands quickly after coming in from outside—without walking through the entire home. Mud, dust, and street grime were part of daily life, and a hallway sink offered an immediate solution.

Today, while lifestyles have changed, the need for convenience remains. Shoes, bags, pets, groceries, and daily errands still bring dirt and germs indoors. A hallway sink quietly solves this problem before it spreads through the house.

Hygiene at the Front Line

One of the most important purposes of a small hallway sink is hygiene. It acts as a first line of defense against germs. When you come home, especially from work, school, or public transport, you can wash your hands instantly. There’s no need to touch door handles, furniture, or light switches before cleaning up.

This function became especially appreciated in recent years, as awareness of hand hygiene increased worldwide. A hallway sink encourages frequent handwashing, not just for residents but also for guests. It subtly communicates cleanliness without saying a word.

Perfect for Guests and Entertaining

When entertaining, a hallway sink is a quiet hero. Guests don’t need to wander through private areas of the home to freshen up. A small sink near the entrance or living area provides easy access and maintains privacy for bedrooms and main bathrooms.

This is especially useful in homes with a single full bathroom. Instead of constant traffic through personal spaces, guests can wash their hands comfortably and discreetly. It’s a small touch that significantly improves the hosting experience.

Space-Saving by Design

Modern homes often prioritize efficiency. Not every space can accommodate a full bathroom, but many hallways, stair landings, or entryways have just enough room for a compact sink. These sinks are specifically designed to fit tight spaces, with shallow basins, narrow widths, and wall-mounted or corner installations.

Because they don’t require a shower or toilet, hallway sinks use minimal plumbing and floor space. This makes them ideal for apartments, townhouses, and renovated older homes where expanding a bathroom isn’t practical.

A Boost to Daily Convenience

Beyond handwashing, hallway sinks serve many small but valuable daily functions. Parents can quickly wash a child’s hands after outdoor play. Pet owners can rinse muddy paws or clean a leash. Gardeners can wash up without tracking soil through the house. Even quick tasks like rinsing keys, wiping spills, or cleaning glasses become easier.

These moments may seem minor, but over time they add up to a smoother, more organized daily routine.

A Smart Design Statement

Small hallway sinks aren’t just practical—they can also be stylish. Because they’re compact, homeowners often choose bold or elegant designs: sculptural basins, brushed brass faucets, patterned tiles, or floating vanities. In a space that might otherwise feel plain, a sink becomes a focal point.

Designers frequently use hallway sinks to add personality to transitional spaces. A well-chosen mirror, lighting, and sink combination can transform a narrow hallway into something memorable and inviting.

Increasing Property Value

From a real estate perspective, hallway sinks can add appeal. Buyers often appreciate extra washbasins, especially in homes where bathroom access is limited. A sink without a toilet still counts as a functional upgrade, signaling thoughtful planning and convenience.

While it may not add as much value as a full bathroom, it can make a home feel more complete, practical, and well-designed—qualities that influence buying decisions.

Supporting Accessibility and Aging in Place

For households with elderly residents or individuals with mobility challenges, a hallway sink can be especially helpful. It reduces the distance needed to walk for basic hygiene and can be installed at an accessible height. Combined with lever-style faucets and clear floor space, it supports safer, more independent living.

This makes hallway sinks not just a design choice, but a forward-thinking solution for long-term comfort.

Small Sink, Big Purpose

In the end, the purpose of a small hallway sink goes far beyond its size. It represents thoughtful living—cleanliness without inconvenience, style without excess, and function without wasted space. It quietly improves hygiene, enhances guest comfort, supports daily routines, and adds character to the home.

Have you noticed small white spots on your arms or legs… and you don’t know what they are

Have you ever looked down at your arms or legs and noticed small white spots that weren’t there before? They can appear suddenly, stand out more in sunlight, and leave you wondering if something is wrong with your skin. Many people experience this at some point in their lives, and while these spots are usually harmless, understanding what they are can bring peace of mind and help you care for your skin more effectively.

What Are These Small White Spots?

Small white spots on the arms or legs are often related to changes in skin pigmentation. Your skin gets its color from a pigment called melanin, which is produced by specialized cells known as melanocytes. When melanin production decreases or becomes uneven in certain areas, lighter patches or spots can appear.

One of the most common causes is Idiopathic Guttate Hypomelanosis (IGH). This condition typically shows up as tiny, round or oval white spots, most often on sun-exposed areas like the forearms, shins, and calves. IGH is more common as people age, but younger individuals can notice it too, especially if they spend a lot of time in the sun.

Sun Exposure and Skin Aging

Long-term sun exposure plays a major role in many skin changes, including white spots. Ultraviolet (UV) rays can gradually damage melanocytes, reducing their ability to produce melanin evenly. Over time, this damage becomes visible as pale spots that don’t tan like the surrounding skin.

This is why these spots are often more noticeable in summer or after sun exposure. As the surrounding skin darkens, the white areas remain light, creating a stronger contrast.

Other Possible Causes

While IGH is common, it’s not the only reason white spots can appear:

  • Post-inflammatory hypopigmentation: After a rash, insect bite, burn, or skin injury heals, the affected area may temporarily lose pigment, leaving a lighter patch.

  • Fungal infections: Certain superficial fungal conditions can interfere with normal pigmentation, often causing light spots that may be slightly scaly.

  • Vitamin and mineral deficiencies: In some cases, low levels of nutrients like vitamin B12, calcium, or vitamin D may be associated with changes in skin pigmentation.

  • Vitiligo: This condition causes more noticeable and expanding white patches due to loss of melanocytes. Unlike small, scattered dots, vitiligo patches are usually larger and more defined.

Are These Spots Dangerous?

In most cases, small white spots on the arms or legs are not dangerous and do not indicate a serious health problem. Conditions like IGH are considered cosmetic rather than medical. They don’t itch, hurt, or turn into skin cancer.

However, any sudden, rapidly spreading, or unusual skin changes should be evaluated by a healthcare professional to rule out underlying conditions.

Can You Get Rid of Them?

There is no guaranteed way to completely eliminate white spots, but several approaches may help improve their appearance:

  • Sun protection: Using sunscreen daily can prevent further contrast between pigmented and non-pigmented skin and reduce new spots from forming.

  • Moisturizing regularly: Healthy, well-hydrated skin often looks more even in tone.

  • Topical treatments: Dermatologists may recommend retinoids, mild steroids, or other creams to encourage cell turnover and pigment balance.

  • Cosmetic procedures: Treatments like microdermabrasion, chemical peels, or laser therapy may help in some cases, under professional guidance.

A Simple Skin-Supporting Routine (Natural Approach)

While not a medical treatment, supporting your skin from the inside and outside can make a visible difference over time:

  • Drink plenty of water daily to maintain skin hydration

  • Eat a balanced diet rich in fruits, vegetables, healthy fats, and proteins

  • Include foods with antioxidants, such as berries, leafy greens, and nuts

  • Protect your skin from harsh sun exposure, especially during peak hours

  • Use gentle skincare products and avoid excessive scrubbing

This “skin care recipe” isn’t about quick fixes but about consistency and prevention. Over time, these habits can help your skin look healthier and more even-toned.

When to See a Doctor

You should consider seeing a dermatologist if:

  • The spots are spreading quickly

  • They are accompanied by itching, pain, or scaling

  • The patches are large or sharply defined

  • You notice pigment loss in other areas like the face or hands

A professional evaluation can provide reassurance and personalized advice.

The Bottom Line

Small white spots on the arms or legs are very common and usually harmless. They are often linked to sun exposure, natural aging, or minor changes in pigmentation. While they can’t always be prevented or erased, proper skin care, sun protection, and healthy lifestyle choices can minimize their appearance and keep your skin looking its best.

Understanding your skin is the first step toward caring for it. Most of the time, these tiny white spots are simply a reminder of how your skin responds to time, sunlight, and life itself.