Could One Simple Daily Juice Support Healthy Blood Pressure and Better Circulation? A Unique, Everyday Recipe

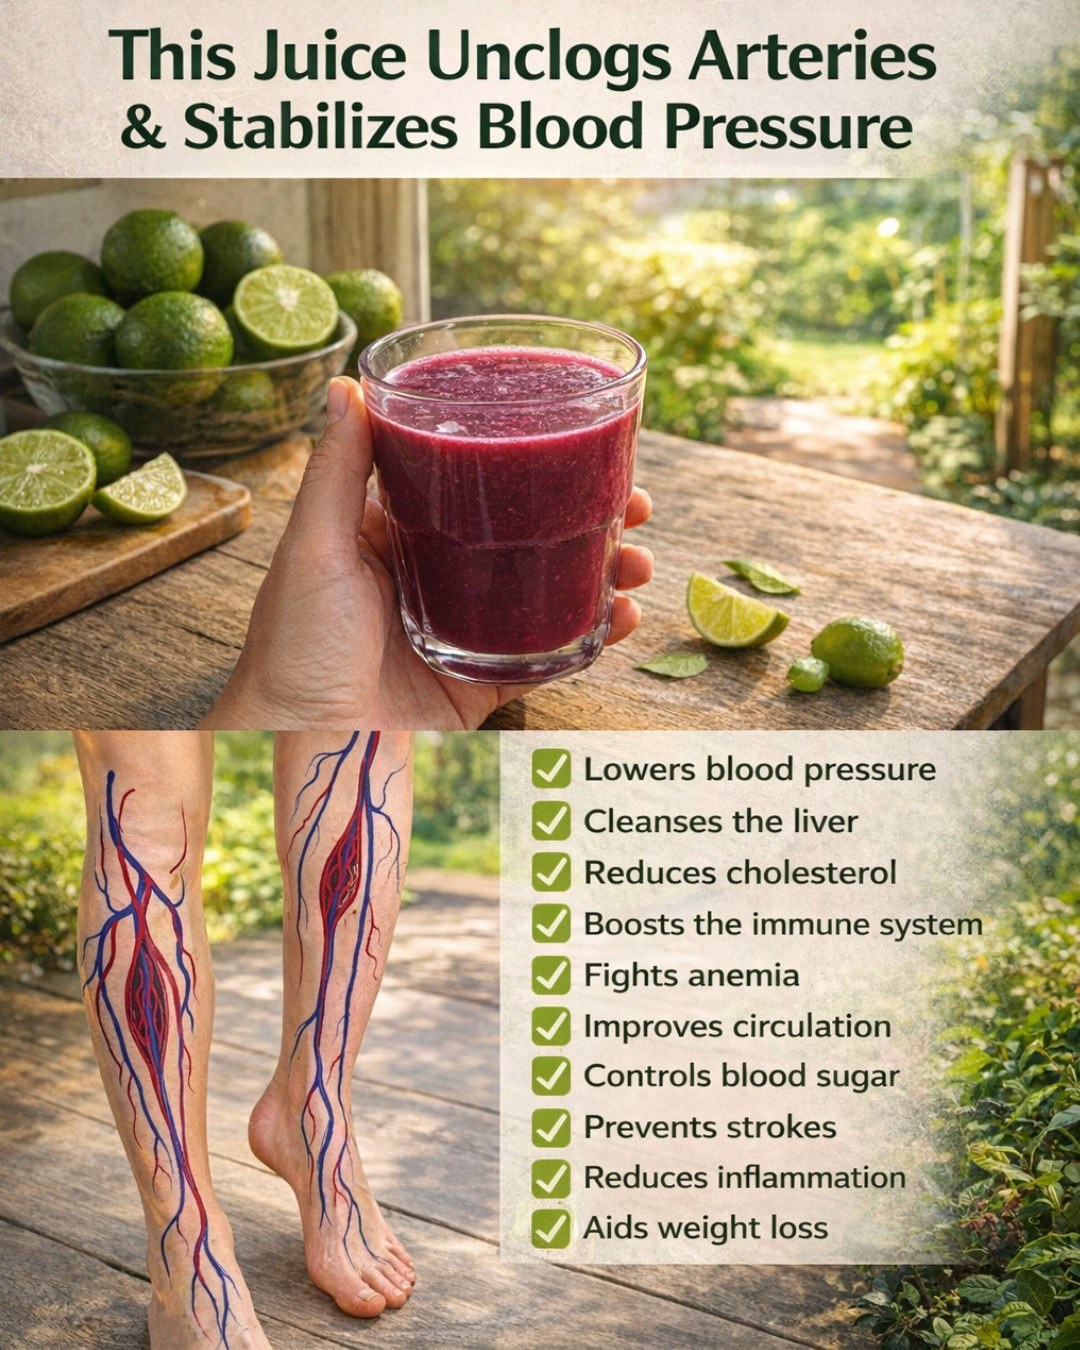
Many people looking to support healthy blood pressure and circulation assume they need complicated supplements or drastic diet changes. In reality, small, consistent habits often make the biggest difference. One such habit is a thoughtfully designed daily juice made from whole, nutrient-dense ingredients. While no single drink can replace medical care or guarantee results, a well-balanced juice can gently support the body’s natural systems when paired with a healthy lifestyle.

Below is a unique, easy-to-make juice recipe created specifically with circulation and blood pressure support in mind. It focuses on hydration, natural nitrates, potassium-rich produce, antioxidants, and anti-inflammatory compounds, all working together in a simple daily ritual.

Why Juice Can Play a Supportive Role

Blood pressure and circulation are influenced by many factors, including hydration, mineral balance, inflammation levels, and blood vessel flexibility. Whole fruits and vegetables contain naturally occurring compounds that help the body regulate these processes.

A carefully crafted juice may help by:

  • Supporting nitric oxide production, which helps blood vessels relax

  • Providing potassium to balance sodium levels

  • Delivering antioxidants that protect blood vessel walls

  • Improving hydration, which supports smoother blood flow

The key is balance, not sugar-heavy fruit blends or extreme cleanses.

The Daily Circulation Support Juice (Unique Recipe)

Ingredients (1 serving):

  • 1 medium beet (raw, peeled)

  • 1 small cucumber

  • 1 green apple

  • 1 cup fresh spinach

  • 1 celery stalk

  • Juice of ½ lemon

  • ½ inch fresh ginger root

  • 1 cup cold water (or coconut water for added potassium)

Why These Ingredients Were Chosen

Beet:
Beets are naturally rich in dietary nitrates, which the body converts into nitric oxide. This compound supports relaxed blood vessels and healthy circulation. Beets also contain betalains, antioxidants that help reduce oxidative stress.

Cucumber:
Cucumber is highly hydrating and contains potassium and magnesium. Proper hydration supports blood volume balance and circulation without overloading calories or sugar.

Green Apple:
Green apples add mild sweetness while providing polyphenols and soluble fiber. These compounds support heart health without causing sharp blood sugar spikes.

Spinach:
Spinach is rich in potassium, magnesium, and plant-based nitrates. It also provides folate, which plays a role in cardiovascular function.

Celery:
Celery contains natural compounds that may help relax blood vessel walls. It is also low in sugar and adds a refreshing, savory note to the juice.

Lemon Juice:
Lemon adds vitamin C and enhances antioxidant absorption. Its acidity also balances flavors and supports digestion.

Ginger:
Ginger is well known for its anti-inflammatory and circulation-supporting properties. It may help improve blood flow by supporting healthy vessel function.

Water or Coconut Water:
Water ensures proper hydration, while coconut water adds extra potassium if needed, supporting electrolyte balance.

How to Prepare

  1. Wash all produce thoroughly.

  2. Chop ingredients into blender- or juicer-friendly pieces.

  3. Add everything to a blender or juicer.

  4. Blend until smooth. If using a blender, strain if desired.

  5. Drink immediately for maximum nutrient retention.

When and How to Drink It

For most people, this juice works best:

  • In the morning on an empty stomach

  • Or mid-morning between meals

Drinking it consistently, rather than occasionally, is what makes it supportive. Aim for 3 to 5 times per week, not necessarily every single day.

Lifestyle Tips to Enhance the Benefits

This juice works best as part of a bigger picture. Consider pairing it with:

  • Regular walking or light exercise

  • Reduced intake of heavily processed foods

  • Mindful sodium consumption

  • Stress management practices like breathing or stretching

The juice supports your system, but your daily habits guide the results.

Important Notes on Safety

This juice is made from common foods, but a few considerations are important:

  • If you are on blood pressure medication, consult a healthcare professional before making dietary changes

  • Beets can temporarily tint urine or stools, which is normal

  • Start with smaller portions if you are new to raw vegetable juices

This recipe is supportive, not a treatment or cure.

Final Thoughts

So, could one simple daily juice support healthy blood pressure and better circulation? On its own, it is not a miracle. But as a consistent habit, this unique blend can gently nourish the body with hydration, minerals, antioxidants, and plant compounds that naturally support vascular health.

10 Signs You’re Not Drinking Enough Water – Stay Hydrated

Water is the foundation of life, yet many people underestimate how important proper hydration really is. Your body is made up of about 60 percent water, and nearly every system depends on it to function well. From regulating temperature to supporting digestion and brain function, water plays a vital role. When you do not drink enough, your body sends warning signals that are easy to overlook or misinterpret. Here are ten common signs you may not be drinking enough water, and why staying hydrated is essential for your overall well-being.

1. Constant Thirst
Thirst is the most obvious sign of dehydration, yet many people ignore it. When your body is low on fluids, it triggers thirst to encourage you to drink. If you frequently feel thirsty, it likely means you are already mildly dehydrated. Ideally, you should drink water regularly throughout the day rather than waiting until thirst becomes intense.

2. Dark Yellow Urine
Your urine color is one of the simplest ways to check hydration levels. Pale yellow or clear urine usually indicates good hydration, while dark yellow or amber-colored urine suggests you need more water. If you notice a strong odor as well, it is another sign your body is conserving fluids.

3. Fatigue and Low Energy
Feeling tired even after adequate sleep can be linked to dehydration. Water helps transport oxygen and nutrients to your cells. When you are dehydrated, this process becomes less efficient, leading to feelings of sluggishness, weakness, and low energy throughout the day.

4. Headaches and Dizziness
Dehydration can cause the brain to temporarily shrink due to fluid loss, which may lead to headaches or dizziness. If you often experience headaches that improve after drinking water, dehydration could be the underlying cause. Even mild dehydration can affect concentration and mental clarity.

5. Dry Skin and Lips
Your skin is the largest organ in your body and requires water to stay healthy. Dry, flaky skin or cracked lips may indicate that you are not drinking enough water. While moisturizers help externally, proper hydration works from within to maintain skin elasticity and softness.

6. Digestive Problems
Water is essential for digestion. It helps break down food and supports smooth bowel movements. Not drinking enough water can lead to constipation, bloating, or stomach discomfort. Adequate hydration keeps your digestive system running efficiently and reduces strain on your gut.

7. Increased Hunger or Sugar Cravings
Sometimes your body confuses thirst with hunger. If you find yourself snacking frequently or craving sugary foods, it may be your body’s way of asking for water. Drinking a glass of water before reaching for a snack can help you determine whether you are truly hungry or just dehydrated.

8. Muscle Cramps and Joint Discomfort
Water helps lubricate joints and maintain electrolyte balance. When you are dehydrated, muscles may cramp more easily, especially during or after physical activity. Joint stiffness or discomfort can also worsen when your body lacks adequate fluids.

9. Bad Breath
Saliva has antibacterial properties that help keep your mouth clean. Dehydration reduces saliva production, allowing bacteria to grow and cause bad breath. Drinking enough water helps flush out food particles and supports oral health naturally.

10. Difficulty Focusing and Mood Changes
Even mild dehydration can affect your mood and cognitive function. You may feel irritable, anxious, or have trouble focusing on tasks. Your brain relies heavily on proper hydration to function optimally, so drinking enough water can improve mental clarity and emotional balance.

How to Stay Properly Hydrated
Staying hydrated does not have to be complicated. Carry a reusable water bottle, sip water regularly, and increase intake during hot weather or physical activity. Eating water-rich foods such as fruits and vegetables can also help meet your hydration needs. While individual needs vary, listening to your body and paying attention to these signs can guide you.

Conclusion
Your body constantly communicates its needs, and dehydration is one of the most common yet overlooked issues. By recognizing these ten signs and making hydration a daily priority, you can improve your energy levels, digestion, skin health, and overall well-being. Drinking enough water is a simple habit that delivers powerful benefits. Stay hydrated, and your body will thank you.

Lemon 7-Up Cake: Ultra-Moist Citrus Bundt Cake with Classic Southern Flavor

There’s something timeless about a Lemon 7-Up Cake. It’s the kind of cake that shows up at Sunday dinners, church potlucks, and family gatherings — always stealing the spotlight with its tender crumb, refreshing citrus flavor, and buttery richness. This cake gets its legendary moisture and lift from a surprising ingredient: 7-Up soda. The carbonation creates an airy texture, while the lemon-lime flavor enhances the fresh citrus notes, making every bite bright, soft, and unforgettable.

This is the perfect cake for anyone who loves old-fashioned baking with a modern twist. The combination of real butter, fresh lemon juice, and soda produces a cake that’s moist enough to melt in your mouth, yet sturdy enough to slice beautifully. Finished with a tangy lemon glaze, this cake feels both comforting and elegant — ideal for holidays, tea time, or any occasion that calls for something sweet and special.

Ingredients

For the Cake:

  • 1½ cups unsalted butter, softened

  • 3 cups granulated sugar

  • 5 large eggs, room temperature

  • 3 cups all-purpose flour

  • ½ teaspoon baking powder

  • ½ teaspoon salt

  • 1 tablespoon lemon zest

  • 2 tablespoons fresh lemon juice

  • 1 teaspoon vanilla extract

  • 1 cup 7-Up soda (room temperature)

For the Lemon Glaze:

  • 1 cup powdered sugar

  • 2 tablespoons fresh lemon juice

  • 1 tablespoon milk

  • ½ teaspoon lemon zest

Instructions

1. Prepare the Bundt Pan

Preheat your oven to 325°F (165°C). Generously grease a 10-inch bundt pan with butter or baking spray, making sure to coat every curve. Dust lightly with flour and tap out the excess. This step ensures the cake releases perfectly after baking.

2. Cream the Butter and Sugar

In a large mixing bowl, beat the softened butter until light and fluffy. Gradually add the sugar, beating for 5–7 minutes. The mixture should become pale and airy. Proper creaming creates the cake’s soft texture and rich flavor.

3. Add the Eggs

Add the eggs one at a time, mixing well after each addition. This keeps the batter smooth and prevents curdling. The eggs give structure and contribute to the cake’s delicate crumb.

4. Combine Dry Ingredients

In a separate bowl, whisk together the flour, baking powder, and salt. Slowly add this dry mixture to the butter mixture, alternating with the 7-Up soda. Start and end with the flour. Mix gently to keep the batter light and avoid overworking it.

5. Add Flavorings

Stir in the lemon zest, lemon juice, and vanilla extract. The fresh lemon gives the cake its vibrant citrus aroma and flavor.

6. Pour and Bake

Pour the batter evenly into the prepared bundt pan. Smooth the top with a spatula. Bake for 75–85 minutes, or until a toothpick inserted into the center comes out clean. The cake should have a golden crust and a soft, moist interior.

7. Cool the Cake

Let the cake cool in the pan for 15 minutes, then carefully invert it onto a wire rack. Allow it to cool completely before glazing.

Make the Lemon Glaze

In a small bowl, whisk together powdered sugar, lemon juice, milk, and lemon zest until smooth. Drizzle the glaze over the cooled cake, letting it run down the sides for a beautiful finish. The glaze adds a tangy brightness that balances the cake’s sweetness.

Serving Suggestions

Serve slices of this Lemon 7-Up Cake with:

  • Fresh berries and whipped cream

  • A scoop of vanilla ice cream

  • A warm cup of tea or coffee

Its moist, buttery texture makes it perfect as both a dessert and an afternoon treat.

Storage Tips

  • Store covered at room temperature for up to 3 days.

  • Refrigerate for up to 1 week for longer freshness.

  • Freeze slices wrapped tightly for up to 3 months.

Why This Cake is So Special

Read more

Old Fashioned Fudge

There’s something truly magical about old fashioned fudge. It’s not just candy — it’s a memory, a tradition, and a taste of pure comfort. The smooth, creamy texture, the deep chocolate flavor, and that melt-in-your-mouth sweetness make it one of the most beloved desserts of all time. Unlike modern shortcuts that rely on marshmallow fluff or condensed milk, this classic version uses simple pantry staples and the traditional boiling-and-beating method. The result is a fudge that tastes exactly like the kind your grandmother used to make for special occasions or holiday gatherings.

This recipe gives you that authentic old-world flavor and texture, with clear steps to ensure success even if you’ve never made fudge from scratch before.

Why This Recipe Is Special

Old fashioned fudge is all about technique. It’s made with real butter, sugar, cocoa, and milk — and it depends on careful cooking to the right temperature, followed by patient beating until it thickens and sets. The reward is a dense, silky fudge that feels luxurious and tastes far richer than store-bought candy. Once you master this recipe, you’ll never go back to packaged fudge again.

Ingredients

To make this classic treat, you’ll need:

• 2 cups granulated sugar
• ½ cup unsweetened cocoa powder
• 1 cup whole milk
• 4 tablespoons butter
• 1 teaspoon vanilla extract
• A pinch of salt

Optional additions:
• ½ cup chopped walnuts or pecans
• A sprinkle of sea salt for topping

Step-by-Step Instructions

1. Prepare Your Pan
Line an 8×8-inch square pan with parchment paper or lightly butter it. This will make it easy to lift out the fudge once it sets.

2. Mix the Dry Ingredients
In a medium saucepan, combine the sugar, cocoa powder, and salt. Stir well so the cocoa is evenly distributed — this prevents lumps later.

3. Add the Milk
Pour in the milk and stir gently over medium heat until the mixture is smooth and begins to warm. Keep stirring to avoid scorching the bottom.

4. Bring to a Boil
Once the mixture starts bubbling, add the butter. Let it melt, then stop stirring and allow the fudge to boil. Clip a candy thermometer to the side of the pan and cook until the temperature reaches 234°F (112°C) — this is the “soft-ball stage.”

Tip: If you don’t have a thermometer, drop a small spoonful into cold water. It should form a soft, flexible ball that flattens when pressed.

5. Let It Cool
Remove the pan from heat and allow the mixture to cool undisturbed until it reaches about 110°F (43°C). This step is essential — stirring too early can ruin the texture.

6. Add Vanilla
Stir in the vanilla extract. At this point, you can also add nuts if you like.

7. Beat the Fudge
Using a wooden spoon, beat the mixture vigorously. It will gradually thicken and lose its glossy shine. This takes about 8–10 minutes. Once it becomes creamy and starts to hold its shape, stop beating.

8. Pour and Set
Quickly pour the fudge into your prepared pan and smooth the top. Let it sit at room temperature for 2–3 hours, or refrigerate for 1 hour, until firm.

9. Cut and Enjoy
Lift the fudge out of the pan and cut into squares. Store in an airtight container for up to one week.

What Makes the Texture Perfect

The secret to old fashioned fudge is reaching the correct temperature and beating it at the right time. Cooking too little results in soft, sticky fudge, while cooking too long gives you crumbly candy. Beating transforms the sugar crystals into that iconic creamy texture — the more you beat, the smoother the fudge becomes.

Flavor Variations

You can easily personalize this fudge by adding:

• A teaspoon of espresso powder for deeper chocolate flavor
• A swirl of peanut butter for a rich twist
• A dash of cinnamon for warmth
• Crushed biscuits or toffee bits for crunch

Each variation keeps the classic base while giving it your own signature style.

Serving Ideas

Old fashioned fudge is perfect for:

• Holiday gift boxes
• Dessert trays
• Afternoon tea or coffee
• Celebrations and family gatherings

It pairs beautifully with a cup of strong coffee or warm milk, making it the ultimate comfort treat.

A Little History

Fudge has been around for over a century. The earliest known recipes date back to the late 1800s, when it was made by hand and sold at local fairs and candy shops. Its name likely comes from the word “fudged,” referring to a mistake while making caramel that turned into this deliciously creamy candy. Over time, fudge became a symbol of homemade love and craftsmanship.

Final Thoughts

Making old fashioned fudge isn’t just about creating candy — it’s about keeping a tradition alive. The process may seem detailed, but once you try it, you’ll see how rewarding it is. Each bite brings the deep, comforting taste of real chocolate and the pride of making something from scratch.

Pineapple Coconut Dream Cake

This Pineapple Coconut Dream Cake is the ultimate tropical dessert. It combines the sweetness of pineapple with the nutty richness of coconut, creating a cake that feels like a vacation in every bite. The texture is incredibly moist thanks to crushed pineapple folded right into the batter, and the creamy coconut frosting takes it over the top. Whether you’re baking for a family gathering, Eid celebration, or simply to treat yourself, this cake will quickly become a favorite.

Ingredients

For the Cake:

  • 2½ cups all-purpose flour

  • 2 tsp baking powder

  • ½ tsp baking soda

  • ½ tsp salt

  • 1 cup unsalted butter, softened

  • 1¾ cups granulated sugar

  • 4 large eggs

  • 1 cup canned crushed pineapple (with juice)

  • 1 cup coconut milk

  • 1 tsp vanilla extract

  • ½ tsp coconut extract (optional)

  • 1 cup sweetened shredded coconut

For the Coconut Cream Frosting:

  • 1 cup unsalted butter, softened

  • 4 cups powdered sugar

  • ½ cup coconut milk

  • 1 tsp vanilla extract

  • ½ tsp coconut extract

  • 1½ cups shredded coconut for garnish

Instructions

Step 1: Prepare the Cake Batter

Preheat your oven to 350°F (175°C). Grease and flour two 9-inch round cake pans. In a large bowl, whisk together the flour, baking powder, baking soda, and salt. This ensures the cake rises evenly and gives a light, fluffy crumb.

In another bowl, cream the butter and sugar together until pale and fluffy. This step adds air to the batter, making the cake soft and tender. Beat in the eggs one at a time, mixing well after each addition. Stir in the vanilla and coconut extracts.

Next, mix in the crushed pineapple with its juice. The pineapple keeps the cake extra moist and adds a natural sweetness and tangy flavor. Alternate adding the dry flour mixture and the coconut milk into the batter, mixing gently after each addition. Fold in the shredded coconut.

Step 2: Bake the Cake

Divide the batter evenly between the prepared cake pans. Smooth the tops with a spatula and bake for 28–32 minutes, or until a toothpick inserted into the center comes out clean. Let the cakes cool completely before frosting.

Make the Coconut Cream Frosting

In a mixing bowl, beat the butter until creamy. Gradually add powdered sugar and continue beating until light and fluffy. Add coconut milk, vanilla extract, and coconut extract. Beat until the frosting becomes smooth and spreadable. If it feels too thick, add a tablespoon of coconut milk at a time.

Assemble the Cake

Place one cake layer on a serving plate. Spread a thick layer of coconut frosting on top. Add the second cake layer and frost the entire cake, smoothing it evenly. Sprinkle shredded coconut over the top and sides for a dreamy finish. For extra flair, garnish with pineapple slices or toasted coconut flakes.

Serving Suggestions

Chill the cake for about 20 minutes before slicing to allow the frosting to set. This cake pairs beautifully with tea, coffee, or even fresh mango juice. The tropical pineapple-coconut flavor makes it refreshing yet indulgent.

Tips for the Perfect Dream Cake

  • Use full-fat coconut milk for the richest flavor.

  • Do not drain the pineapple — the juice is what makes the cake moist.

  • Toast some coconut flakes for garnish if you want a slightly nutty crunch.

  • Store leftovers in the refrigerator for up to 4 days.

Why You’ll Love This Cake

This Pineapple Coconut Dream Cake is soft, fluffy, and full of tropical charm. It’s not overly sweet, yet it feels luxurious and special. The pineapple keeps it juicy, and the coconut frosting melts into every layer, creating the perfect balance of sweetness and texture.

Spread canned peaches and these 3 ingredients in slow cooker for a warm dessert people scrape the spoon

This dessert is the definition of easy meets irresistible. With only three extra ingredients plus canned peaches, you’ll get a soft, cake-like cobbler that forms its own golden topping and syrupy peach layer underneath. The slow cooker does all the magic, so you can “set it and forget it.”

Why This Recipe Works

Canned peaches are already sweet and tender, so they’re perfect for slow cooking. When combined with cake mix, butter, and cinnamon sugar, they create a rich, caramelized base that slowly bubbles and thickens into a soft cobbler-like dessert.

The cake mix absorbs the peach juices, the butter melts into the mixture, and the cinnamon adds warmth and aroma. The result is a fluffy, spoonable peach cake with crispy edges and a thick, syrupy bottom.

This is one of those desserts that tastes like it took hours of effort — but it’s unbelievably simple.

Ingredients

You only need four ingredients total:

  • 1 large can (28–30 oz) sliced peaches in syrup (don’t drain)

  • 1 box yellow cake mix (about 15–16 oz)

  • ½ cup (1 stick) unsalted butter, sliced thin

  • ¼ cup cinnamon sugar (or mix 2 tbsp sugar + 1 tsp cinnamon)

That’s it. No eggs. No milk. No mixing bowls. No stress.

Instructions

Step 1: Prepare the slow cooker
Lightly grease the inside of your slow cooker with butter or cooking spray. This prevents sticking and helps the edges brown nicely.

Step 2: Add the peaches
Pour the entire can of peaches (including the syrup) into the bottom of the slow cooker. Spread them evenly so the fruit is distributed across the base.

Step 3: Sprinkle the cake mix
Open the box of yellow cake mix and sprinkle the dry mix evenly over the peaches. Do not stir — this is what creates the layered effect.

Step 4: Add the butter
Place the thin slices of butter on top of the cake mix, spacing them out to cover most of the surface. As the butter melts, it soaks into the cake and creates that rich cobbler topping.

Step 5: Sprinkle cinnamon sugar
Dust the cinnamon sugar over everything for warmth, sweetness, and a beautiful golden color.

Step 6: Cook
Cover and cook on LOW for 3–4 hours or HIGH for 2 hours. The dessert is ready when the top looks set and lightly browned and the edges are bubbling.

What You’ll See

As it cooks, the peaches will release syrup, which rises through the cake mix and butter. The top forms a tender, golden crust, while underneath becomes a thick, jammy peach filling.

When you scoop it, you’ll get a fluffy cake layer on top and juicy peaches below — just like a cobbler, but softer and more spoonable.

Serving Suggestions

Serve this dessert warm, straight from the slow cooker. It pairs beautifully with:

  • Vanilla ice cream

  • Whipped cream

  • A drizzle of caramel sauce

  • A sprinkle of chopped nuts

For an extra special touch, add a pinch of sea salt on top — it enhances the sweetness and makes the flavors pop.

Flavor Variations

You can customize this basic recipe easily:

Peach and Berry Blend:
Add a handful of frozen blueberries or strawberries before sprinkling the cake mix.

Peach Caramel Swirl:
Drizzle caramel sauce over the cake mix before adding the butter.

Peach Almond Delight:
Add ½ teaspoon almond extract to the peaches for a nutty, bakery-style flavor.

Spiced Peach Cobbler:
Add nutmeg, cloves, or ginger along with the cinnamon sugar for a deeper, autumn-inspired taste.

Make It Less Sweet

If you prefer a lighter dessert:

  • Use peaches packed in juice instead of syrup

  • Reduce the butter to ¼ cup

  • Use a spice cake mix for more warmth and less sugar

Storage and Reheating

Store leftovers in an airtight container in the refrigerator for up to 3 days.

To reheat, microwave individual portions for 30–40 seconds or warm it gently in a saucepan. It becomes even more flavorful the next day.

Perfect for Any Occasion

This slow cooker peach dessert is ideal for:

  • Family dinners

  • Potlucks

  • Holiday gatherings

  • Weeknight sweet cravings

It’s comforting, nostalgic, and incredibly easy — the kind of dessert that feels homemade and heartfelt.

Final Thoughts

With just canned peaches, cake mix, butter, and cinnamon sugar, you get a warm, indulgent dessert that tastes like a cross between cobbler and pudding cake. It’s soft, gooey, and rich — the kind of treat that disappears quickly and leaves everyone asking for seconds.

Crockpot Cream Cheese Chicken – The Ultimate Dump-and-Cook Comfort Meal

When you want a dinner that feels indulgent yet requires almost no effort, this creamy crockpot chicken recipe is the answer. It’s one of those magical “set it and forget it” meals where the crockpot does all the work. You simply place the raw chicken breasts inside, layer cream cheese on top, add a few pantry staples, and let slow cooking transform it into a luscious, savory, melt-in-your-mouth meal.

This dish creates a thick, velvety sauce that pairs beautifully with rice, mashed potatoes, pasta, or even crusty bread. The cream cheese slowly melts into the chicken juices, forming a naturally rich gravy that coats every bite.

Ingredients

  • 4 large raw chicken breasts

  • 2 blocks (8 oz each) cream cheese

  • 1 packet ranch seasoning mix

  • 1 teaspoon garlic powder

  • 1 teaspoon onion powder

  • ½ teaspoon black pepper

  • ½ teaspoon paprika

  • 1 cup chicken broth

  • ½ cup grated parmesan cheese

  • 1 tablespoon butter

  • 1 tablespoon olive oil

  • Optional: chopped parsley for garnish

Instructions

Step 1 – Prepare the Crockpot

Drizzle the olive oil and butter at the bottom of the crockpot. This prevents sticking and adds extra flavor.

Step 2 – Add the Chicken

Lay the raw chicken breasts flat at the bottom of the crockpot. No need to pre-cook or season separately — everything happens right inside the pot.

Step 3 – Season

Sprinkle the ranch seasoning packet evenly over the chicken. Add garlic powder, onion powder, paprika, and black pepper for a balanced savory taste.

Step 4 – Add Cream Cheese Blocks

Place both blocks of cream cheese directly on top of the chicken breasts. Do not mix or spread — they will melt down naturally during cooking.

Step 5 – Pour the Broth

Slowly pour the chicken broth along the sides of the crockpot to avoid washing off the seasoning.

Step 6 – Cook

Cover and cook on:

  • Low for 6–7 hours, or

  • High for 3–4 hours

The chicken should be fork-tender and easy to shred when done.

Step 7 – Finish the Sauce

Once fully cooked, shred the chicken directly inside the crockpot using two forks. Stir everything together so the melted cream cheese blends with the broth and chicken juices into a thick, creamy sauce.

Sprinkle in the parmesan cheese and stir until smooth.

Serving Suggestions

This creamy chicken is incredibly versatile. Serve it over:

  • Steamed rice

  • Mashed potatoes

  • Buttered noodles

  • Pasta shells

  • Toasted bread or biscuits

It also makes an amazing filling for wraps or sandwiches.

Flavor Variations

If you love experimenting, here are some delicious ways to customize this dish:

Spicy Kick

Add a teaspoon of crushed red pepper or diced jalapeños.

Cheesy Upgrade

Stir in shredded mozzarella or cheddar at the end for extra richness.

Veggie Boost

Add mushrooms, spinach, or broccoli halfway through cooking for a balanced meal.

Mexican Style

Replace ranch seasoning with taco seasoning and add corn and black beans.

Why This Recipe Works

The magic lies in the slow melting of cream cheese. As the chicken cooks, it releases natural juices that combine with the cream cheese and seasoning, forming a silky sauce. Because the chicken cooks directly in this mixture, it becomes incredibly moist and flavorful.

This is a perfect example of “minimal ingredients, maximum comfort.”

Tips for Perfect Crockpot Cream Cheese Chicken

  • Always use full-fat cream cheese for the creamiest texture.

  • Do not over-stir before cooking — let the crockpot work naturally.

  • If sauce is too thick at the end, add a splash of broth or milk.

  • For extra flavor, sear the chicken in a pan before adding (optional).

Chicken Fillets Stuffed with Feta and Mozzarella

Tender, juicy chicken fillets filled with a creamy blend of feta and mozzarella cheese, seasoned with herbs and garlic, then seared and baked to perfection. This dish is elegant enough for guests, yet simple enough for a weeknight meal. The salty tang of feta balances beautifully with the gooey richness of mozzarella, creating an irresistible bite every time.

Ingredients

For the chicken:

  • 4 large boneless, skinless chicken breasts (or fillets)

  • 1 teaspoon salt

  • 1 teaspoon black pepper

  • 1 teaspoon paprika

  • 1 teaspoon garlic powder

  • 2 tablespoons olive oil

For the filling:

  • 150 g feta cheese, crumbled

  • 150 g shredded mozzarella cheese

  • 2 cloves garlic, minced

  • 1 tablespoon chopped fresh parsley

  • 1 teaspoon dried oregano

  • ½ teaspoon chili flakes (optional for heat)

  • 2 tablespoons cream cheese (for extra creaminess)

For the coating & sauce:

  • 2 tablespoons butter

  • 1 tablespoon olive oil

  • 1 small onion, finely chopped

  • 2 cloves garlic, minced

  • 1 cup heavy cream

  • ½ teaspoon salt

  • ½ teaspoon black pepper

  • ½ teaspoon Italian seasoning

  • ½ cup grated parmesan cheese

  • Extra parsley for garnish

Preparation

1. Prepare the Chicken

Lay the chicken breasts on a cutting board. Using a sharp knife, carefully slice each breast horizontally to create a pocket — do not cut all the way through. This pocket will hold the cheesy filling.

Season the chicken inside and out with salt, black pepper, paprika, and garlic powder. Let it rest for 10 minutes so the seasoning absorbs.

2. Make the Filling

In a mixing bowl, combine:

  • Crumbled feta

  • Mozzarella cheese

  • Cream cheese

  • Garlic

  • Parsley

  • Oregano

  • Chili flakes

Mix well until you have a thick, creamy cheese mixture. This filling should be rich but not runny.

3. Stuff the Chicken

Divide the cheese mixture evenly among the chicken fillets. Fill each pocket generously, then secure the opening using toothpicks so the filling stays inside during cooking.

4. Sear the Chicken

Heat olive oil and butter in a skillet over medium heat. Once hot, add the stuffed chicken fillets. Sear for 3–4 minutes per side until golden brown. This step locks in juices and gives the chicken a beautiful crust.

Transfer the seared chicken to a baking dish.

5. Prepare the Creamy Sauce

In the same skillet, add a little more olive oil if needed. Sauté the chopped onion until soft and translucent. Add garlic and cook for 30 seconds until fragrant.

Pour in the heavy cream and season with salt, pepper, and Italian seasoning. Let it simmer for 2–3 minutes, then stir in parmesan cheese until the sauce thickens into a creamy consistency.

6. Bake the Chicken

Pour the sauce over the chicken in the baking dish. Cover with foil and bake at 180°C (350°F) for 25–30 minutes or until the chicken is cooked through and juicy inside.

Remove foil for the last 5 minutes for a slightly browned top.

Serving

Serve this cheesy stuffed chicken hot, garnished with fresh parsley. It pairs wonderfully with:

  • Garlic mashed potatoes

  • Buttered rice

  • Roasted vegetables

  • A fresh green salad

Flavor Tips

  • Add chopped spinach or sun-dried tomatoes to the filling for extra depth.

  • For crispier texture, coat the chicken lightly in breadcrumbs before searing.

  • Use smoked paprika for a richer, deeper flavor.

Why This Recipe Works

The feta adds a bold, tangy sharpness that cuts through the creaminess of mozzarella and sauce. The chicken stays tender and moist, thanks to the initial sear and final baking in cream. The herbs and garlic elevate the filling so it tastes gourmet rather than plain.

This recipe transforms simple chicken breasts into a restaurant-quality stuffed dish that feels luxurious without requiring complicated steps.

Atlantic Beach Pie

Atlantic Beach Pie isn’t just dessert — it’s a little slice of seaside nostalgia. Born on the windswept shores of North Carolina, this pie captures the spirit of the coast: salty air, bright sunshine, and the satisfying contrast between sweet indulgence and a hint of savory charm. Locals say it was once prescribed by doctors as a cure for anything that ailed you — heartbreak, fatigue, or even just a craving for something unforgettable.

This version keeps the soul of the classic but adds a refined twist for deeper flavor, smoother texture, and a perfect balance of tangy citrus and buttery saltiness. Imagine biting into a crisp, golden cracker crust that gives way to a luscious lemon filling — silky, vibrant, and kissed with vanilla — all crowned with clouds of lightly sweetened whipped cream. It’s the pie that makes you feel like you’re sitting on a breezy porch, watching the waves roll in.

Let’s bring that coastal magic right into your kitchen.

Ingredients

For the Saltine Cracker Crust

  • 1½ sleeves of salted saltine crackers (about 45 crackers)

  • ¾ cup unsalted butter, melted

  • ¼ cup granulated sugar

  • 1 teaspoon finely grated lemon zest

For the Creamy Lemon Filling

  • 1 can (14 oz) sweetened condensed milk

  • 4 large egg yolks

  • ½ cup freshly squeezed lemon juice

  • 1 tablespoon lime juice (for brightness)

  • 1 teaspoon pure vanilla extract

  • ¼ teaspoon fine sea salt

For the Whipped Cream Topping

  • 1½ cups cold heavy whipping cream

  • 3 tablespoons powdered sugar

  • ½ teaspoon vanilla extract

Optional Garnish

  • Extra lemon zest or a thin lemon slice twist

Instructions

1. Create the Coastal Cracker Crust

Preheat your oven to 350°F (175°C). Crush the saltine crackers by hand or pulse them in a food processor until you have coarse crumbs. Don’t pulverize them — you want texture.

In a bowl, combine the crumbs with melted butter, sugar, and lemon zest. The zest gives the crust a faint citrus fragrance that beautifully echoes the filling. Stir until the mixture looks like wet sand.

Press this mixture firmly into a 9-inch pie dish, covering the bottom and sides evenly. Use the back of a spoon or a flat-bottomed glass to compact it well.

Bake for 12–15 minutes, until lightly golden and fragrant. Let the crust cool while you prepare the filling.

2. Whisk the Silky Citrus Filling

In a medium mixing bowl, whisk together the sweetened condensed milk and egg yolks until smooth and pale. Slowly add the lemon juice, lime juice, vanilla extract, and salt. Whisk gently until the mixture thickens slightly.

Pour this sunny, creamy filling into the cooled crust. It should settle smoothly and evenly.

Bake for 15 minutes, just until the center is set but still has a slight jiggle. Remove and let cool completely on a rack, then refrigerate for at least 4 hours (overnight is best) so the filling can firm up into its signature silky texture.

3. Whip the Topping Like Ocean Foam

In a chilled bowl, whip the cold cream with powdered sugar and vanilla until soft, pillowy peaks form. You want it airy, not stiff — like fresh sea foam.

Spread or pipe the whipped cream generously over the chilled pie.

For a finishing touch, sprinkle lemon zest over the top or add a small curl of citrus peel.

The Final Slice

When you cut into your Atlantic Beach Pie, the crust should offer a delicate crunch before melting into the creamy citrus filling. The contrast between salty and sweet is what makes this pie legendary — it’s bright without being sharp, rich without being heavy, and utterly refreshing.

Serve chilled for the best flavor. Each bite feels like sunshine and sea breeze wrapped into one unforgettable dessert.

Tips for the Perfect Atlantic Beach Pie

  • Use real citrus juice — bottled juice can taste flat.

  • Let the crust cool fully before adding the filling so it doesn’t soften.

  • Chill thoroughly to allow the custard to set beautifully.

  • Add a teaspoon of orange zest to the crust for a subtle layered citrus flavor.

Baked sweet potato

Baked sweet potatoes are one of the most satisfying dishes you can make with minimal effort. They’re naturally sweet, tender, and full of nutrients, but when prepared properly, they become something truly extraordinary. This recipe takes the humble sweet potato and transforms it into a warm, savory-sweet masterpiece with a garlic butter glaze, aromatic herbs, and a creamy topping that melts into every bite. Whether you serve it as a comforting side or a filling main, this loaded baked sweet potato is guaranteed to impress.

Ingredients

For the sweet potatoes:

  • 4 large sweet potatoes (similar size)

  • 2 tablespoons olive oil

  • 1 teaspoon sea salt

  • ½ teaspoon black pepper

  • 1 teaspoon smoked paprika

For the garlic butter herb glaze:

  • 3 tablespoons butter (or ghee)

  • 3 garlic cloves, minced

  • 1 teaspoon dried thyme

  • 1 teaspoon dried rosemary

  • ½ teaspoon chili flakes (optional)

  • 1 tablespoon honey or maple syrup

For the creamy topping:

  • ½ cup sour cream or Greek yogurt

  • ¼ cup cream cheese, softened

  • 2 tablespoons fresh chopped parsley or chives

  • ½ teaspoon garlic powder

  • Pinch of salt

Optional toppings:

  • Crumbled feta or cheddar cheese

  • Toasted nuts or seeds

  • Caramelized onions

  • Cooked bacon bits

  • A drizzle of extra honey or butter

Instructions

1. Preheat and Prepare

Preheat your oven to 220°C (425°F). Wash the sweet potatoes thoroughly and pat them dry. Prick each potato a few times with a fork to allow steam to escape during baking.

Rub each sweet potato with olive oil, then sprinkle with sea salt, black pepper, and smoked paprika. Place them on a baking tray lined with parchment paper.

2. Bake Until Perfectly Tender

Bake for 45–60 minutes, depending on their size. They’re done when the skin looks slightly crisp and a knife slides easily through the center.

Tip: For extra caramelized flavor, rotate them halfway through baking.

3. Make the Garlic Butter Herb Glaze

While the potatoes are baking, melt the butter in a small pan over low heat. Add minced garlic and cook gently for about 1 minute until fragrant.

Stir in thyme, rosemary, chili flakes, and honey or maple syrup. Let the mixture simmer for another 2–3 minutes until the butter becomes aromatic and golden.

Turn off the heat and set aside.

4. Prepare the Creamy Topping

In a small bowl, mix sour cream (or yogurt), cream cheese, garlic powder, salt, and fresh herbs. Whisk until smooth and fluffy. Chill until ready to use.

5. Glaze the Sweet Potatoes

Once the sweet potatoes are fully baked, remove them from the oven. Cut a slit lengthwise in each potato and gently fluff the inside with a fork.

Brush the warm garlic butter glaze generously over the top and let it soak into the potato.

6. Add the Creamy Layer

Spoon the creamy topping directly into the slit of each sweet potato. The warmth of the potato will soften the topping, creating a silky, rich texture that complements the sweetness perfectly.

7. Finish with Optional Toppings

Top with your choice of cheese, nuts, caramelized onions, or bacon bits. For a final touch, drizzle a little extra honey or melted butter over the top.

Serving Suggestions

Serve these baked sweet potatoes alongside grilled chicken, steak, or roasted vegetables. They also work beautifully as a vegetarian main dish with a fresh salad on the side. The balance of sweet, savory, creamy, and herby flavors makes this recipe comforting yet elevated.

Flavor Variations

  • Spicy Version: Add cayenne pepper to the glaze for a kick.

  • Cheesy Delight: Mix shredded cheddar into the creamy topping.

  • Mediterranean Style: Use feta cheese and olives on top.

  • Sweet Treat: Replace herbs with cinnamon and add whipped cream for dessert.

Why This Recipe Works

Sweet potatoes naturally caramelize when baked at high heat, giving them a deep, rich sweetness. The garlic butter herb glaze enhances their flavor without overpowering it, while the creamy topping provides a smooth, tangy contrast that makes every bite satisfying. The optional toppings let you customize the dish to your taste.