This Plant Is Everywhere, Yet Few Know Its Powerful Traditional Uses for Blood Sugar, Blood Pressure, and Cellular Health

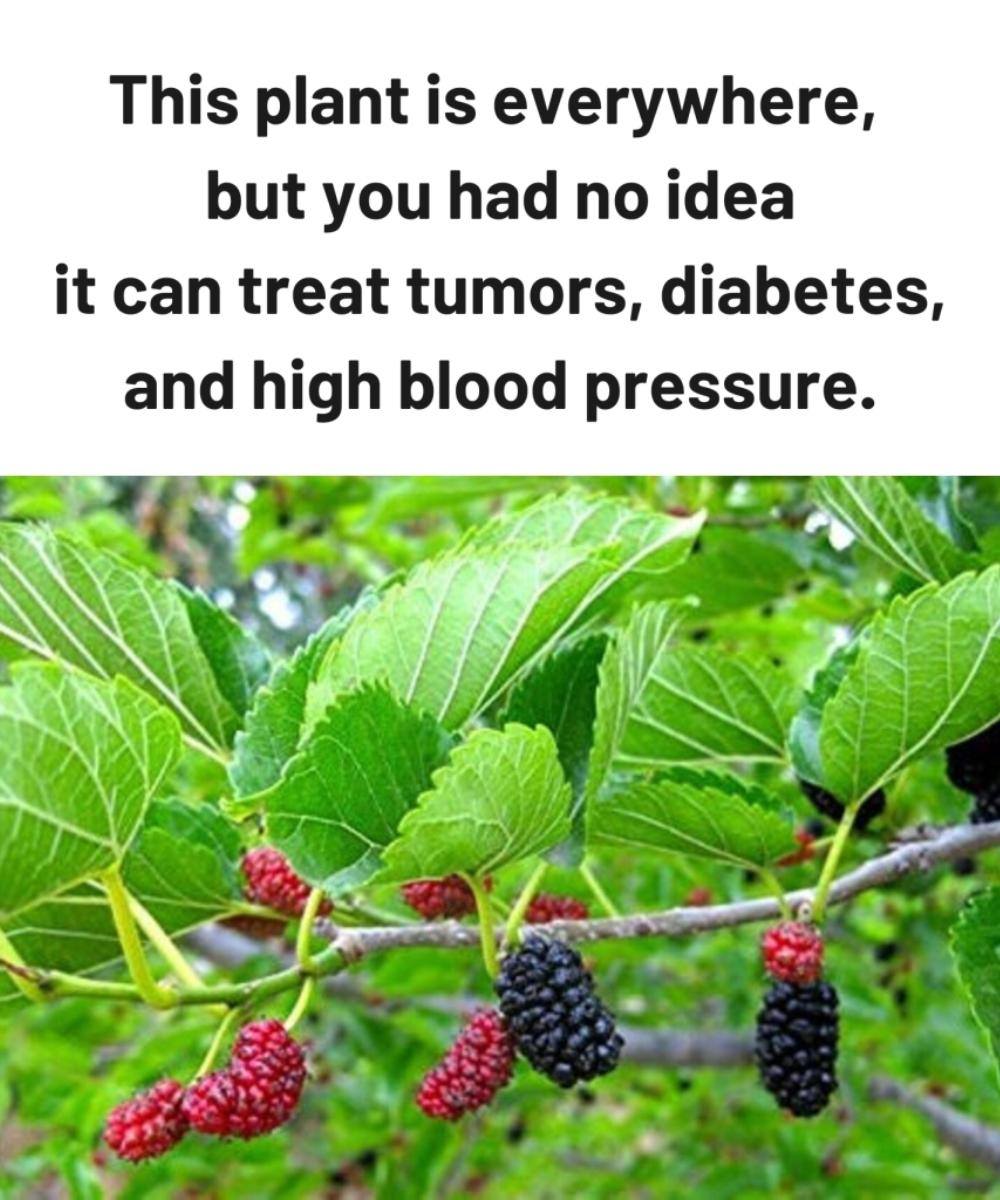
It grows quietly along roadsides, in backyards, and between garden rows. Many people pull it out and toss it away without a second thought. Yet for centuries, traditional healers across Asia, Africa, and parts of Europe have valued this humble plant for its remarkable wellness-supporting properties. Known commonly as plantain leaf (Plantago major), this resilient green has long been used in folk traditions to support metabolic balance, circulation, and overall vitality.

While modern medicine does not classify plantain leaf as a treatment or cure for tumors, diabetes, or high blood pressure, researchers have shown growing interest in its bioactive compounds, antioxidants, and soothing effects on the body. When used as part of a balanced lifestyle, plantain leaf has earned its reputation as a quiet herbal ally.

Why Traditional Cultures Valued This “Common” Plant

Plantain leaf is rich in:

  • Flavonoids that help neutralize oxidative stress

  • Iridoid glycosides, known for their soothing properties

  • Mucilage, a gel-like fiber that supports digestion

  • Potassium and minerals associated with fluid balance

In traditional systems, oxidative stress and inflammation were believed to weaken the body’s natural defenses. Plantain leaf teas and infusions were often prepared to support internal balance, especially in people experiencing fatigue, poor digestion, or circulation concerns.

Plantain Leaf and Blood Sugar Balance (Traditional View)

Folk practitioners often turned to plantain leaf when supporting people with sugar-heavy diets. The plant’s fiber content and calming compounds were believed to help slow digestion and promote steadier energy levels. While it does not replace medical treatment for diabetes, some modern studies suggest plantain leaf may help support healthy glucose metabolism when combined with proper diet and medical guidance.

Circulation and Blood Pressure Support

Traditional use also linked plantain leaf to circulation and fluid regulation. Its potassium content and mild diuretic reputation made it popular in herbal blends designed to support healthy blood pressure ranges. Again, this is supportive, not curative, and anyone with hypertension should follow their doctor’s advice first.

Interest in Cellular Health

In folklore, plantain leaf was often described as a “cleanser.” Today, scientists attribute this reputation to its antioxidant compounds, which help protect cells from oxidative damage. This is why the plant sometimes appears in discussions around cellular health and resilience, though it should never be viewed as a cancer treatment.

Traditional Plantain Leaf Tea Recipe (Wellness Use)

This gentle tea is one of the most common ways plantain leaf has been traditionally consumed.

Ingredients

  • 1 tablespoon dried plantain leaves (or 3–4 fresh, well-washed leaves)

  • 1½ cups clean water

  • Optional: a slice of ginger or a squeeze of lemon

Instructions

  1. Bring the water to a gentle boil.

  2. Add the plantain leaves and reduce heat.

  3. Simmer for 10–15 minutes.

  4. Strain and let cool slightly.

  5. Add ginger or lemon if desired.

Drink once daily, preferably after a meal.

Taste & Experience

The flavor is mild, slightly earthy, and soothing. Many people describe a calming sensation in the stomach and a feeling of lightness after drinking.

Important Safety Notes

  • Plantain leaf is not a replacement for medical treatment.

  • If you are pregnant, on medication, or managing chronic illness, consult a healthcare professional before use.

  • Always correctly identify wild plants or purchase from a trusted herbal supplier.

Why This Plant Still Matters Today

In a world obsessed with rare superfoods, plantain leaf reminds us that some of nature’s most fascinating plants grow right under our feet. Its long history of traditional use, combined with modern scientific curiosity, makes it a plant worth respecting—not as a miracle cure, but as a gentle supporter of overall wellness.

Garlic: The Ancient Superfood for Modern Health

For thousands of years, garlic has been more than just a kitchen staple. Revered by ancient civilizations and validated by modern science, this humble bulb has earned its reputation as one of the world’s most powerful natural superfoods. From boosting immunity to supporting heart health, garlic bridges the wisdom of the past with the needs of today’s fast-paced, health-conscious world.

A Brief History of Garlic as Medicine

Garlic’s story begins over 5,000 years ago. Ancient Egyptians fed it to laborers to increase strength and endurance, while Greek athletes consumed it before competitions for stamina. In traditional Chinese and Ayurvedic medicine, garlic was prized for improving digestion, circulation, and overall vitality. Even during the Middle Ages, garlic was used to ward off infections and was believed to protect against plagues. Long before laboratories existed, people instinctively understood garlic’s healing potential.

The Science Behind Garlic’s Power

Modern research has revealed that garlic’s benefits come largely from a sulfur compound called allicin, which forms when garlic is chopped or crushed. Allicin is responsible for garlic’s pungent aroma—and many of its health-promoting properties. Garlic also contains antioxidants, vitamins C and B6, manganese, and trace minerals that contribute to its impressive nutritional profile.

Immune System Support

One of garlic’s most celebrated benefits is its ability to support the immune system. Regular consumption of garlic may help the body defend itself against common illnesses by enhancing immune cell activity. Its natural antimicrobial properties have been studied for their potential to combat bacteria, viruses, and fungi, making garlic a popular choice during cold and flu season. While it’s not a cure, adding garlic to your diet can be a simple, flavorful way to support overall immune resilience.

Heart and Circulatory Health

Garlic has long been associated with heart health, and modern studies continue to explore this connection. Garlic may help maintain healthy cholesterol levels and support normal blood pressure when consumed as part of a balanced diet. Its compounds are thought to improve blood vessel function and circulation, which is essential for delivering oxygen and nutrients throughout the body. For those looking to care for their heart naturally, garlic remains a trusted ally.

Anti-Inflammatory and Antioxidant Benefits

Chronic inflammation and oxidative stress are linked to many modern health challenges. Garlic contains antioxidants that help neutralize free radicals, protecting cells from damage. Its anti-inflammatory properties may also support joint comfort and overall mobility, making it especially valuable as we age. This combination of antioxidants and anti-inflammatory compounds is one reason garlic continues to attract scientific interest.

Digestive and Gut Health

In traditional medicine, garlic was often used to stimulate digestion. Today, it’s recognized for supporting gut health by promoting a balanced microbiome. Garlic contains prebiotic fibers that nourish beneficial gut bacteria, which play a key role in digestion, immunity, and even mood regulation. A healthy gut is the foundation of overall wellness, and garlic contributes naturally to this balance.

Garlic and Modern Lifestyles

In an era dominated by processed foods and stress, garlic offers a natural counterbalance. It’s inexpensive, widely available, and easy to incorporate into everyday meals. Whether sautéed with vegetables, added to soups, blended into sauces, or consumed raw in small amounts, garlic enhances both flavor and nutrition. Many people also choose aged garlic or garlic supplements for convenience, though whole garlic remains the most traditional option.

How to Use Garlic for Maximum Benefit

To get the most out of garlic, preparation matters. Crushing or chopping garlic and letting it rest for about 10 minutes before cooking allows allicin to fully develop. Gentle cooking preserves more of its beneficial compounds compared to high heat. For those sensitive to raw garlic, lightly cooked versions still offer valuable benefits without overwhelming the digestive system.

A Few Words of Caution

While garlic is generally safe for most people, moderation is key. Large amounts may cause digestive discomfort in some individuals, and garlic can interact with certain medications, especially blood thinners. As with any dietary change, it’s wise to listen to your body and consult a healthcare professional if you have specific concerns.

Timeless Wisdom in a Modern World

Garlic’s enduring popularity is no accident. From ancient healers to modern nutritionists, generations have recognized its unique ability to support health naturally. In a world constantly searching for the next superfood, garlic reminds us that some of the most powerful remedies have been with us all along. Simple, flavorful, and deeply nourishing, garlic truly earns its title as an ancient superfood for modern health.

MIRACLE COFFEE prevents dementia, heart attack and stroke, joint arthrosis

The phrase “miracle coffee” doesn’t mean a magic cure or a replacement for medical care. What it does mean is a thoughtfully crafted, nutrient-rich coffee blend inspired by traditional ingredients that have long been associated with supporting brain function, cardiovascular wellness, and joint comfort. When enjoyed consistently as part of a balanced lifestyle, this comforting cup can become a powerful daily ritual—one that nourishes the body, sharpens the mind, and warms the soul.

This recipe brings together coffee with anti-inflammatory spices and healthy fats that modern research often links to better circulation, cognitive support, and joint lubrication. Let’s explore why this blend has gained so much attention—and how to make it safely and deliciously at home.

Why This “Miracle Coffee” Is So Popular

Coffee itself is already rich in polyphenols and antioxidants, which help combat oxidative stress—a key factor linked to aging, cognitive decline, heart disease, and joint degeneration. But when coffee is paired with the right additions, its benefits may be amplified.

This recipe focuses on four supportive goals:

  • Brain & memory support (important for healthy aging)

  • Heart & circulation support

  • Joint comfort & flexibility

  • Reduced inflammation throughout the body

No exaggerated promises—just smart, nourishing ingredients working together.

Key Ingredients & Their Traditional Benefits

1. High-Quality Black Coffee

Coffee is rich in antioxidants such as chlorogenic acid, which supports blood vessel health and helps neutralize free radicals that can damage brain cells over time. Moderate coffee intake has been associated in many studies with better alertness, improved focus, and long-term cognitive support.

2. Cinnamon

Cinnamon is widely used for its warming, circulation-supporting properties. Traditionally, it has been valued for helping regulate blood sugar levels and supporting blood flow—both critical factors for heart and brain health.

3. Turmeric

Turmeric contains curcumin, a compound known for its anti-inflammatory properties. Inflammation plays a major role in joint arthrosis and cardiovascular stress. Turmeric is often used in traditional wellness practices to support joint comfort and mobility.

4. Black Pepper

A pinch of black pepper significantly improves curcumin absorption from turmeric, making this small addition surprisingly powerful.

5. Healthy Fat (Coconut Oil or Grass-Fed Butter)

Healthy fats help the body absorb fat-soluble compounds like curcumin and support brain function. Medium-chain triglycerides (MCTs) from coconut oil are often associated with mental clarity and sustained energy.

The Miracle Coffee Recipe

Ingredients (1 serving)

  • 1 cup freshly brewed black coffee

  • ¼ teaspoon ground cinnamon

  • ¼ teaspoon turmeric powder

  • Pinch of black pepper

  • 1 teaspoon coconut oil or grass-fed butter

  • Optional: ½ teaspoon raw honey or maple syrup

Instructions

  1. Brew your coffee using filtered water and high-quality beans.

  2. While the coffee is hot, add cinnamon, turmeric, and black pepper.

  3. Add coconut oil or butter.

  4. Blend for 15–20 seconds (or whisk vigorously) until frothy.

  5. Sweeten lightly if desired.

  6. Sip slowly and enjoy the warmth.

How This Coffee Supports the Body

🧠 Brain & Memory Support

Antioxidants in coffee combined with anti-inflammatory spices may help protect neurons from oxidative stress. Healthy fats provide fuel for brain cells, supporting focus and mental clarity—especially in the morning.

❤️ Heart & Circulation Support

Cinnamon and turmeric are traditionally associated with improved blood flow. Good circulation supports oxygen delivery to the brain and heart, which is essential for reducing long-term cardiovascular strain.

🦴 Joint Comfort & Mobility

Joint arthrosis is closely linked to chronic inflammation. Turmeric’s natural compounds, supported by black pepper and healthy fats, may help calm inflammatory processes that affect joint stiffness and discomfort.

How Often Should You Drink It?

  • Best time: Morning or early afternoon

  • Frequency: 1 cup per day is enough

  • Consistency matters more than quantity

This is a supportive wellness drink, not a treatment. Pair it with movement, hydration, whole foods, and proper medical care.

Important Safety Notes

  • If you are pregnant, on blood-thinning medication, or managing chronic conditions, consult your healthcare provider before consuming turmeric daily.

  • Avoid excessive coffee intake—moderation is key.

  • This recipe supports wellness but does not prevent, treat, or cure disease.

Final Thoughts

This “Miracle Coffee” isn’t about hype—it’s about intention. A daily cup made with care, quality ingredients, and mindful enjoyment can support your brain, heart, and joints over time. Think of it as a small daily investment in long-term wellness.

Oven-Baked Glazed Honey Garlic Sausages

Few dishes manage to hit every craving at once, but Oven-Baked Glazed Honey Garlic Sausages do exactly that. They’re sweet yet savory, sticky yet juicy, and packed with bold flavor while remaining incredibly easy to prepare. This recipe is perfect for busy weeknights, casual gatherings, or when you want something comforting that doesn’t require standing over the stove.

What makes this dish truly special is the glaze. Honey brings a deep, caramel-like sweetness, garlic adds warmth and aroma, and a few supporting ingredients create balance and depth. As the sausages bake in the oven, the glaze thickens, bubbles, and clings to every curve, forming a glossy coating that tastes as good as it looks.

This is the kind of recipe that fills your kitchen with mouthwatering smells and has everyone asking, “Is it ready yet?”

Why Oven-Baking Works So Well

Oven-baking sausages is one of the best methods for even cooking. The heat surrounds the sausages, allowing them to cook through gently while still developing color. When combined with a glaze, the oven becomes even more powerful—slowly reducing the sauce and turning it into a sticky, flavorful coating without burning.

Unlike pan-frying, this method is hands-off. You simply turn the sausages once or twice, spoon over the glaze, and let the oven do the rest. The result is sausages that are juicy inside, caramelized outside, and coated in a rich honey garlic sauce.

Ingredients You’ll Need

This recipe uses simple pantry ingredients that come together beautifully:

  • Sausages (pork, chicken, or beef work well)

  • Honey, for natural sweetness and shine

  • Garlic, freshly minced for the best flavor

  • Soy sauce, adding salty depth and umami

  • Ketchup, for mild tang and body

  • Dijon or whole-grain mustard, optional but recommended

  • Olive oil or butter, for richness

  • Black pepper, for subtle heat

  • Chili flakes, optional for a gentle kick

These ingredients create a glaze that is bold but balanced, sweet but not overpowering.

Step-by-Step Instructions

1. Preheat the Oven

Preheat your oven to 200°C (400°F). Lightly grease a baking dish or line it with parchment paper to prevent sticking and make cleanup easy.

2. Prepare the Glaze

In a small bowl, whisk together honey, minced garlic, soy sauce, ketchup, mustard, olive oil (or melted butter), black pepper, and chili flakes if using. The mixture should be smooth and glossy.

3. Arrange the Sausages

Place the sausages in a single layer in the baking dish. Make sure they are not overcrowded so they roast evenly.

4. Add the Glaze

Pour half of the honey garlic glaze over the sausages, turning them gently to coat. Reserve the remaining glaze for later.

5. Bake and Turn

Bake uncovered for 20 minutes, then remove the dish from the oven. Turn the sausages and spoon some of the pan sauce over them.

6. Glaze Again

Pour the remaining glaze over the sausages and return them to the oven.

7. Finish Baking

Bake for another 15–20 minutes, turning once more if needed, until the sausages are deeply golden and the glaze is thick and sticky.

8. Rest and Serve

Let the sausages rest for a few minutes before serving. This allows the glaze to set and the juices to redistribute.

Flavor Tips for Perfect Results

  • Use fresh garlic for the most aromatic and bold flavor.

  • If the glaze thickens too quickly, add a tablespoon of water to loosen it.

  • For extra caramelization, switch the oven to broil/grill for the last 2–3 minutes—watch carefully to avoid burning.

  • Thicker sausages may need an extra 5 minutes of baking time.

Serving Ideas

These honey garlic sausages are incredibly versatile:

  • Serve over steamed rice with extra glaze drizzled on top

  • Pair with roasted potatoes or mashed potatoes

  • Add to soft rolls for sticky sausage sandwiches

  • Slice and toss into noodles or stir-fried vegetables

  • Serve as a party appetizer with toothpicks

A sprinkle of chopped parsley or sesame seeds adds a nice finishing touch.

Variations to Try

  • Spicy Honey Garlic: Add hot sauce or extra chili flakes

  • Asian-Inspired: Add a splash of rice vinegar and grated ginger

  • Smoky Version: Use smoked sausages and add smoked paprika

  • Lemon Honey Garlic: Finish with a squeeze of fresh lemon juice

Final Thoughts

Oven-Baked Glazed Honey Garlic Sausages are proof that simple ingredients can create unforgettable flavor. With minimal prep and maximum reward, this dish deserves a permanent spot in your recipe rotation. Whether served as a main meal or a crowd-pleasing appetizer, these sausages deliver sticky, garlicky, honey-glazed perfection every single time.

Mongolian Ground Beef Noodles

This dish takes the bold, glossy flavors associated with Mongolian-style beef and reimagines them with ground beef and noodles for maximum comfort. Instead of relying on cornstarch-heavy sauces, we build flavor in stages—browning the beef deeply, blooming aromatics in fat, and finishing with a reduced sauce that clings naturally to the noodles. The result is rich, fragrant, and deeply satisfying.

Why Ground Beef?

Ground beef absorbs sauce more efficiently than sliced meat, making every bite flavorful. It also creates small crispy bits when cooked properly, adding texture that contrasts beautifully with tender noodles.

Ingredients (Serves 4)

Noodles & Beef

  • 400 g (14 oz) wheat noodles or egg noodles

  • 500 g (1 lb) ground beef (80/20 preferred for flavor)

  • 2 tbsp neutral oil (sunflower, canola, or peanut)

Aromatics

  • 1 medium onion, finely diced

  • 5 cloves garlic, minced

  • 1 tbsp fresh ginger, grated

  • 2 scallions, whites and greens separated

Sauce Base

  • ⅓ cup low-sodium soy sauce

  • 3 tbsp dark soy sauce (for color and depth)

  • 3 tbsp brown sugar (or palm sugar for complexity)

  • 2 tbsp oyster sauce

  • ½ cup beef broth or water

Spice & Finish

  • 1 tsp freshly ground black pepper

  • ½–1 tsp dried chili flakes (adjust to taste)

  • 1 tsp toasted sesame oil

  • 1 tsp rice vinegar

Optional Add-ins

  • Thinly sliced carrots

  • Shredded napa cabbage

  • Snow peas or green beans

Step 1: Prepare the Noodles

Cook the noodles in generously salted water until just al dente. Do not overcook—they will finish in the sauce later. Drain and toss lightly with a teaspoon of oil to prevent sticking. Set aside.

Tip: Slightly undercooked noodles absorb sauce better without becoming mushy.

Step 2: Brown the Beef Properly

Heat a wide skillet or wok over medium-high heat. Add the neutral oil and let it shimmer. Add the ground beef in a single layer and do not stir for 2–3 minutes. This allows deep browning to develop.

Once browned, break the beef apart and continue cooking until most moisture evaporates and crispy bits form. Season lightly with black pepper. Remove excess fat only if excessive—some fat is essential for flavor.

This step is crucial: browning equals flavor.

Step 3: Build the Aromatic Base

Lower heat to medium. Add diced onion directly to the beef. Cook until soft and slightly caramelized, about 4 minutes. Stir in garlic, ginger, and scallion whites. Cook for 30–60 seconds until fragrant but not browned.

At this stage, your kitchen should smell rich and savory, with warmth from the ginger and sweetness from the onion.

Step 4: Create the Mongolian-Style Sauce

In a bowl, mix:

  • Soy sauce

  • Dark soy sauce

  • Brown sugar

  • Oyster sauce

  • Beef broth

Pour the sauce into the pan and stir well, scraping up all browned bits from the bottom. Bring to a gentle simmer and let it reduce for 4–6 minutes. The sauce should thicken slightly and taste balanced—salty, sweet, and deeply savory.

Taste and adjust:

  • Too salty? Add a splash of water.

  • Too sweet? Add rice vinegar.

  • Too mild? Add chili flakes.

Step 5: Combine Noodles and Finish

Add the cooked noodles directly into the pan. Toss continuously to coat every strand with sauce. If using vegetables, add them now and cook just until tender-crisp.

Drizzle in toasted sesame oil and sprinkle in scallion greens. Toss one final time.

The sauce should cling to the noodles without pooling at the bottom.

Step 6: Rest and Serve

Turn off heat and let the noodles rest for 2 minutes. This allows flavors to meld and the sauce to settle into the noodles.

Serve hot, optionally garnished with:

  • Extra scallions

  • Toasted sesame seeds

  • A soft-boiled egg

  • Chili oil for heat lovers

Flavor Profile & What Makes It Unique

  • Sweetness: Comes from brown sugar, balanced—not candy-like

  • Umami: Built from beef browning, soy, and oyster sauce

  • Aromatics: Ginger and garlic are present but not overpowering

  • Texture: Crispy beef bits + silky noodles

Unlike takeout-style Mongolian dishes, this recipe avoids heavy starch thickeners and instead relies on reduction and fat for a natural gloss and deeper flavor.

Storage & Reheating

  • Refrigerate up to 3 days

  • Reheat in a pan with a splash of water or broth

  • Avoid microwaving if possible—it softens the noodles too much

Cheesy Breakfast Frittata-Sandwich for Effortless Mornings

Mornings are often a negotiation between hunger and time. This Cheesy Breakfast Frittata-Sandwich was created to end that negotiation. It’s not just a sandwich, and it’s not just a frittata—it’s a hybrid designed for effortless mornings, meal prep success, and maximum comfort. Imagine thick wedges of a fluffy, cheese-packed frittata tucked into toasted bread, finished with a lightly crisp exterior and a molten, savory center. One bake, several breakfasts, zero stress.

What makes this recipe unique is the way the frittata is engineered specifically to be sliced and sandwiched. It’s firm enough to hold its shape, yet tender and custardy inside. The cheese blend melts without leaking, the vegetables stay flavorful (not watery), and the final sandwich reheats beautifully without turning rubbery. Whether you’re feeding a family or stocking your fridge for the week, this recipe works hard so you don’t have to.

Why This Frittata Works as a Sandwich

Traditional frittatas are great on plates but fall apart in bread. This one is different because:

  • A small amount of cream cheese stabilizes the eggs

  • The vegetables are pre-cooked to remove excess moisture

  • A mix of melting and structured cheeses creates balance

  • It’s baked in a square pan for clean, sandwich-ready portions

The result? A slice that behaves like a patty—but tastes far better.

Ingredients (Makes 6–8 Sandwiches)

For the Frittata

  • 10 large eggs, room temperature

  • ½ cup whole milk or half-and-half

  • 2 oz cream cheese, softened

  • 1 cup shredded sharp cheddar cheese

  • ¾ cup shredded mozzarella or provolone

  • 1 tablespoon olive oil or butter

  • 1 small onion, finely diced

  • 1 cup vegetables of choice (bell peppers, spinach, mushrooms, or zucchini)

  • ½ teaspoon salt

  • ½ teaspoon black pepper

  • ½ teaspoon smoked paprika

  • Optional: pinch of chili flakes or dried herbs

For the Sandwich

  • 6–8 sandwich rolls, brioche buns, or thick sliced sourdough

  • Butter or mayo for toasting

  • Optional add-ins: cooked bacon, ham, sausage, avocado, or tomato

Step-by-Step Instructions

1. Prepare the Pan and Oven

Preheat your oven to 350°F (175°C). Line an 8×8-inch square pan with parchment paper, leaving overhang on the sides. This makes lifting and slicing effortless later.

2. Cook the Vegetables First

Heat olive oil or butter in a skillet over medium heat. Add the diced onion and cook until soft and lightly golden. Add your vegetables and cook until tender and any moisture has evaporated. This step is crucial—wet vegetables lead to soggy eggs. Set aside to cool slightly.

3. Build the Egg Base

In a large bowl, whisk the eggs until fully blended. Whisk in the milk, cream cheese, salt, pepper, and smoked paprika. Don’t worry if the cream cheese isn’t perfectly smooth—it will melt as it bakes.

Fold in the cooked vegetables, cheddar, and mozzarella. The mixture should look thick, rich, and generously filled.

4. Bake to Perfection

Pour the mixture into the prepared pan and smooth the top. Bake uncovered for 30–35 minutes, or until the center is just set and no longer jiggly. Avoid overbaking; a slightly soft center ensures tenderness after reheating.

Let the frittata cool for at least 15 minutes, then lift it out using the parchment. Slice into sandwich-sized squares or rectangles.

Assembling the Sandwich

Slice your rolls or bread and lightly butter or spread with mayo. Toast in a skillet or toaster oven until golden. Place a warm frittata slice inside each roll. Add any extras—crispy bacon, a slice of ham, or fresh avocado—and close the sandwich.

For an extra-cheesy finish, you can add a thin slice of cheese to the bread and toast it open-faced before assembling.

Make-Ahead & Storage Tips

  • Refrigerator: Store frittata slices in an airtight container for up to 4 days.

  • Freezer: Wrap individual slices tightly and freeze for up to 2 months.

  • Reheating: Microwave for 45–60 seconds or warm in a skillet for a lightly crisp edge.

For grab-and-go mornings, pre-assemble the sandwiches, wrap them in foil, and refrigerate. Reheat in the oven or air fryer for best texture.

Flavor Variations to Keep It Exciting

  • Mediterranean: Feta, spinach, sun-dried tomatoes, oregano

  • Southwest: Pepper jack, roasted peppers, green onions, cumin

  • Breakfast Classic: Cheddar, chives, and crumbled breakfast sausage

  • Veggie Deluxe: Mushrooms, zucchini, caramelized onions, Swiss cheese

Final Thoughts

This Cheesy Breakfast Frittata-Sandwich isn’t just a recipe—it’s a morning strategy. It gives you flexibility, comfort, and real flavor without demanding your time when you least have it. One calm evening of prep turns into a week of satisfying breakfasts that feel indulgent but function effortlessly.

Steamed Ginger in Vinegar: A 90-Year-Old Man’s Longevity Secret Money Can’t Buy

In a small riverside town where people still measure time by seasons rather than clocks, there lives a 90-year-old man known not for his wealth, but for his vitality. He rises before dawn, tends his garden with steady hands, eats simply, and laughs easily. When asked the secret to his long life, he never mentions supplements, superfoods, or expensive routines. He speaks instead of a humble dish his mother taught him to make when he was a boy: steamed ginger in vinegar.

This recipe is not flashy. It doesn’t promise miracles. What it offers is something far more enduring—balance, warmth, and consistency. Passed down through generations, it reflects an old philosophy: when digestion is strong and circulation flows freely, the body ages more slowly.

Why Ginger and Vinegar?

Ginger has been used for thousands of years in traditional Asian medicine as a warming root. It supports digestion, improves circulation, reduces internal dampness, and gently stimulates the body without exhausting it. Vinegar, especially naturally fermented varieties, helps extract ginger’s active compounds while aiding gut health and blood sugar balance.

Steaming the ginger—rather than boiling or frying—softens its sharpness while preserving its essential oils. Vinegar then transforms it into a food that can be eaten daily, even by elderly stomachs.

The old man eats a small portion every morning with warm water or rice porridge. “Not too much,” he says. “Just enough to remind the body to wake up.”

The Unique Steamed Ginger in Vinegar Recipe

This is not a quick condiment. It is a slow, respectful preparation meant to last weeks, improving with time.

Ingredients

  • 500 grams fresh young ginger (thin skin, firm, aromatic)

  • 500 ml naturally fermented rice vinegar or apple cider vinegar (unfiltered preferred)

  • 1 tablespoon raw honey (optional, added after cooling)

  • 1 teaspoon sea salt

  • A few dried red dates or a small piece of dried tangerine peel (optional, traditional touch)

Preparation Method

1. Choosing the Ginger

Select young ginger, not old fibrous roots. Young ginger contains more moisture and is gentler on the stomach. Wash thoroughly but do not peel unless the skin is very rough—many nutrients lie just beneath it.

Slice thinly, about the thickness of a coin. Uniform slices ensure even steaming.

2. Steaming, Not Boiling

Place the ginger slices in a ceramic or stainless-steel steamer. Steam over medium heat for 25–30 minutes until the ginger becomes translucent and fragrant.

This step is crucial. Steaming reduces harshness and makes the ginger suitable for long-term consumption, especially for older adults.

Allow the ginger to cool completely before the next step.

3. Vinegar Infusion

Place the cooled ginger slices into a clean glass jar. Add sea salt and optional red dates or tangerine peel.

Pour vinegar over the ginger until fully submerged. Press gently to remove air bubbles. Seal the jar tightly.

Let it rest at room temperature for 24 hours, then transfer to the refrigerator.

4. Aging for Strength

Although it can be eaten after three days, the flavor and medicinal balance deepen after two weeks. Some elders keep a jar for months, claiming the longer it rests, the kinder it becomes to the body.

If using honey, stir it in after the first week.

How to Eat It

  • Daily amount: 3–5 slices

  • Best time: Morning, before or with breakfast

  • How: With warm water, rice porridge, or plain steamed rice

Never eat it cold straight from the fridge—let it come to room temperature to avoid shocking the stomach.

Benefits the Old Man Swears By

He does not speak in scientific terms, but his life reflects the effects:

  • Warm hands and feet even in winter

  • Strong appetite and smooth digestion

  • Fewer aches and joint stiffness

  • Clear mind and steady energy

  • Rarely catching colds

Modern understanding suggests ginger supports circulation and reduces inflammation, while vinegar improves metabolic balance. Together, they form a daily reset for the digestive and vascular systems.

A Secret Money Can’t Buy

The true power of this recipe isn’t the ingredients—they are inexpensive and widely available. It lies in discipline and patience. The old man never skipped days, never overindulged, and never searched for shortcuts.

heaven on earth cake

Heaven on Earth Cake isn’t just a dessert—it’s an experience. Light, creamy, fruity, and blissfully indulgent, this no-bake layered cake has earned its heavenly reputation for good reason. Every spoonful melts into a balance of fluffy cake cubes, silky vanilla pudding, tart-sweet cherries, and clouds of whipped topping. It’s the kind of dessert people request again and again, scrape the dish for, and quietly dream about long after the last bite.

What makes this cake so special is its simplicity. There’s no oven involved, no complicated techniques, and no stress. Yet the final result looks elegant, tastes luxurious, and feels like something you’d be served at a celebration. Whether you’re hosting a family gathering, a potluck, or just craving a comforting treat, this Heaven on Earth Cake delivers maximum pleasure with minimal effort.

Why It’s Called Heaven on Earth

The name comes from its texture and flavor harmony. The cake is light and airy rather than dense. The cream layers are smooth and cool. The cherries add brightness and contrast. Together, they create a dessert that feels almost weightless—rich but never heavy. It’s indulgent without being overwhelming, sweet without being cloying, and simple without being boring.

This cake is also incredibly forgiving. Measurements don’t have to be perfect, layers don’t need to be pristine, and it actually tastes better after resting in the refrigerator. That makes it ideal for beginners and experienced home cooks alike.

Ingredients You’ll Need

This recipe uses easy-to-find ingredients, but when combined, they create something truly special.

For the cake layers:

  • 1 store-bought angel food cake (or homemade), cut into 1-inch cubes

For the creamy filling:

  • 1 package (3.4 oz) instant vanilla pudding mix

  • 1½ cups cold milk

  • 1 cup sour cream (full-fat for best flavor)

For the fruit layer:

  • 1 can (21 oz) cherry pie filling

For the topping:

  • 1 tub (8 oz) whipped topping, thawed

Optional garnish:

  • Toasted sliced almonds

  • White chocolate shavings

  • Extra cherries

Step-by-Step Instructions

1. Prepare the pudding layer
In a medium bowl, whisk together the instant vanilla pudding mix and cold milk until thickened, about 2 minutes. Add the sour cream and whisk until completely smooth. This combination gives the cake its signature creamy tang and rich texture. Set aside.

2. Build the first layer
In a clear glass trifle dish or a 9×13-inch serving dish, spread half of the angel food cake cubes evenly across the bottom. Don’t press them down—airiness is key.

3. Add cream and cherries
Spoon half of the pudding mixture over the cake layer, spreading gently to cover. Next, add half of the cherry pie filling, distributing it evenly so every bite gets a pop of fruit.

4. Repeat the layers
Add the remaining cake cubes, followed by the rest of the pudding mixture and the remaining cherry filling. The layers don’t have to be perfect—this dessert is meant to look soft and inviting.

5. Finish with whipped topping
Spread the whipped topping over the top in a thick, fluffy layer. Use the back of a spoon to create soft swirls for a cloud-like finish.

6. Chill to perfection
Cover and refrigerate for at least 4 hours, but overnight is even better. This resting time allows the flavors to meld and the cake cubes to absorb moisture, creating that melt-in-your-mouth texture.

Tips for the Best Heaven on Earth Cake

  • Angel food cake works best because it’s light and absorbent, but pound cake can be used for a richer version.

  • Don’t skip the chilling time. This cake transforms as it rests. Freshly assembled, it’s good—after chilling, it’s heavenly.

  • Balance is key. The tang of sour cream offsets the sweetness beautifully, so resist the urge to reduce it.

  • Use a clear dish if possible. The visible layers make the dessert even more appealing.

Easy Variations to Try

  • Berry Bliss: Swap cherry pie filling for blueberry, strawberry, or mixed berry filling.

  • Tropical Heaven: Use pineapple filling and coconut pudding, topped with toasted coconut flakes.

  • Chocolate Dream: Use chocolate pudding and add chocolate shavings between layers.

  • Lemon Cloud: Replace vanilla pudding with lemon pudding and use blueberry filling for a bright, refreshing twist.

Serving and Storage

Serve this cake chilled, straight from the refrigerator. Use a large spoon rather than a knife—it’s meant to be scooped, not sliced. Leftovers can be covered and stored in the fridge for up to 3 days, and many people swear it tastes even better on day two.

Final Thoughts

Heaven on Earth Cake proves that extraordinary desserts don’t need complicated steps or fancy ingredients. It’s a reminder that comfort, nostalgia, and joy can all live in one simple dish. Light yet creamy, sweet yet balanced, this cake truly earns its name. Make it once, and it’s guaranteed to become a beloved favorite—one that feels like a little slice of heaven every time you take a bite.

Could One Simple Daily Juice Support Healthy Blood Pressure and Better Circulation?

In a world filled with complicated wellness trends and expensive supplements, it’s refreshing to discover that something as simple as a daily juice can play a supportive role in maintaining healthy blood pressure and improving circulation. While no drink is a miracle cure, certain natural ingredients have long been valued for their gentle, nourishing effects on the cardiovascular system. This recipe focuses on whole, accessible foods that work in harmony with the body, making it easy to add to your daily routine.

Why Blood Pressure and Circulation Matter

Healthy blood pressure and smooth circulation are essential for overall well-being. When blood flows easily through relaxed, flexible blood vessels, oxygen and nutrients reach your organs more efficiently. Poor circulation, on the other hand, may contribute to fatigue, cold hands and feet, headaches, or feelings of heaviness in the legs. Over time, consistently high blood pressure can strain the heart and blood vessels.

Lifestyle habits—such as regular movement, stress management, balanced nutrition, and hydration—play a major role in supporting cardiovascular health. Within that bigger picture, certain foods and drinks can gently assist the body’s natural processes.

The Power of a Simple Juice

This daily juice is not about extremes or harsh detoxes. Instead, it combines ingredients known for their naturally occurring nutrients that may help support healthy blood flow:

  • Beets are rich in dietary nitrates, which the body can convert into nitric oxide. Nitric oxide helps blood vessels relax and widen, supporting smoother circulation.

  • Pomegranate contains antioxidants that help protect blood vessels from oxidative stress.

  • Ginger has been traditionally used to support circulation and warmth in the body.

  • Lemon provides vitamin C and enhances flavor while supporting overall freshness.

  • Water ensures proper hydration, which is essential for healthy blood volume and flow.

Together, these ingredients create a juice that is earthy, slightly sweet, gently spicy, and refreshing.

Simple Daily Circulation Support Juice (UNIE Recipe)

Ingredients (1 serving)

  • 1 medium raw beet, peeled and chopped

  • ½ cup fresh pomegranate seeds (or ¼ cup unsweetened pomegranate juice)

  • 1-inch piece fresh ginger, peeled

  • Juice of ½ lemon

  • ¾ to 1 cup cold water (adjust for desired consistency)

Instructions

  1. Prepare the ingredients: Wash, peel, and chop the beet into small cubes. Peel the ginger and cut it into slices.

  2. Blend: Add the beet, pomegranate, ginger, lemon juice, and water to a blender.

  3. Blend until smooth: Blend on high for 30–60 seconds until fully smooth.

  4. Strain (optional): For a lighter texture, strain through a fine mesh sieve or cheesecloth. For maximum fiber, drink it as-is.

  5. Serve fresh: Drink immediately for best flavor and nutrient content.

How This Juice May Support Blood Pressure and Circulation

1. Encouraging Relaxed Blood Vessels

Beets are the star ingredient here. Their natural nitrates support the body’s ability to relax blood vessels, which can contribute to smoother blood flow. This doesn’t mean an instant or dramatic effect, but when consumed regularly as part of a healthy diet, it may gently support vascular function.

2. Antioxidant Protection

Pomegranate and lemon provide antioxidants that help protect blood vessels from oxidative stress caused by everyday factors such as pollution, stress, and poor diet. Healthier blood vessels function more efficiently.

3. Warming Circulation

Ginger has a warming quality that has been traditionally associated with improved circulation, especially in people who often feel cold or sluggish. It also adds a pleasant, subtle spice to the juice.

4. Hydration Matters

Proper hydration is often overlooked in discussions about blood pressure. Dehydration can cause blood to become thicker, making circulation more difficult. The water in this juice supports healthy blood volume.

When and How to Drink It

  • Best time: Morning or early afternoon, when circulation tends to benefit from gentle stimulation.

  • Frequency: Once daily is enough. Consistency matters more than quantity.

  • Pair with habits: This juice works best alongside light movement (such as walking), deep breathing, and balanced meals.

Important Notes

This juice is a supportive wellness drink, not a treatment or replacement for prescribed medications. If you have diagnosed high blood pressure, are pregnant, or take blood pressure medication, consult your healthcare provider before making dietary changes—especially those involving beets or concentrated juices.

Final Thoughts

Could one simple daily juice support healthy blood pressure and better circulation? On its own, it’s not a cure. But as part of a mindful lifestyle, this gentle, nourishing juice can be a pleasant and practical way to care for your cardiovascular system. Sometimes, the most powerful habits are also the simplest—one glass at a time.

Revive Your Christmas Cactus: Simple Tips to Trigger Lush and Beautiful Flowers, Even on a Weak Plant

The Christmas cactus is one of the most beloved houseplants, known for its cascading stems and spectacular winter blooms. Yet many plant owners feel frustrated when their cactus looks weak, produces lots of green growth, but refuses to flower. The good news? Even a struggling Christmas cactus can be revived and coaxed into blooming with the right care. This isn’t about complicated techniques—just understanding what the plant truly needs and giving it a gentle reset.

Here’s a complete, practical guide to bringing your Christmas cactus back to life and encouraging lush, beautiful flowers, even if it looks tired right now.

Understand Your Christmas Cactus First

Unlike desert cacti, the Christmas cactus (Schlumbergera) is a tropical plant native to Brazilian rainforests. It grows on trees, not in sand, and prefers humidity, indirect light, and regular moisture. Treating it like a desert cactus is one of the most common reasons it becomes weak or refuses to bloom.

Once you shift your care approach, the plant often responds quickly.

Step 1: Fix the Light (The Biggest Bloom Trigger)

Christmas cacti need bright, indirect light during the day. Too much direct sun can weaken the plant and scorch its segments, while low light prevents flower bud formation.

For blooming:

  • Place the plant near an east- or north-facing window

  • Bright rooms are ideal, but avoid harsh midday sun

  • Rotate the pot occasionally so growth stays balanced

A weak plant often perks up within weeks once lighting is corrected.

Step 2: Use the “Darkness Trick” to Force Blooms

This is the secret many gardeners overlook. Christmas cacti are short-day bloomers, meaning they need long nights to set buds.

To trigger flowers:

  • Give the plant 12–14 hours of uninterrupted darkness every night

  • Do this for 6–8 weeks

  • Night temperatures should be cool (55–65°F / 13–18°C)

You can place the plant in a dark room, closet, or cover it with a box in the evening. Even weak plants often respond by producing buds once this cycle is consistent.

Step 3: Adjust Watering (Not Too Much, Not Too Little)

Improper watering is the fastest way to weaken a Christmas cactus.

Correct method:

  • Water when the top inch of soil feels dry

  • Never let the pot sit in standing water

  • Reduce watering slightly during bud formation

Overwatering causes root rot, while underwatering leads to limp, shriveled segments. Consistent moisture—never soggy—is the key.

Step 4: Feed Lightly, but at the Right Time

A weak plant often lacks nutrients, but too much fertilizer can do more harm than good.

Best approach:

  • Use a balanced houseplant fertilizer (10-10-10 or similar)

  • Feed once a month during spring and summer

  • Stop fertilizing in early fall to encourage blooming

If the plant is severely weak, start with half-strength fertilizer until it shows improvement.

Step 5: Improve the Soil and Pot Conditions

Christmas cacti hate compacted soil. If your plant has been in the same pot for years, it may be struggling to breathe.

Ideal soil:

  • Well-draining mix (potting soil + perlite or orchid bark)

  • Slightly acidic

  • Lightweight and airy

Repot only if necessary and never during bud formation, as this can cause flowers to drop.

Step 6: Increase Humidity Gently

Because this plant is tropical, dry indoor air—especially in winter—can stress it badly.

Easy humidity boosts:

  • Place a shallow tray of water near the plant

  • Group it with other houseplants

  • Light misting in the morning (not on buds)

Improved humidity often restores plump, healthy segments quickly.

Step 7: Don’t Move the Plant Once Buds Appear

This is critical. Christmas cacti are sensitive during bud formation.

Once buds appear:

  • Do not move the pot

  • Avoid temperature changes

  • Keep watering and lighting consistent

Sudden changes can cause buds to fall off before blooming.

Signs Your Weak Plant Is Recovering

Watch for these positive changes:

  • Firmer, shinier segments

  • New growth at stem tips

  • Tiny buds forming at joints

  • Upright, fuller appearance

Even a plant that looked nearly lifeless can rebound with patience and consistency.

Final Thoughts: Gentle Care Brings Big Rewards

Reviving a Christmas cactus isn’t about forcing growth—it’s about recreating the gentle conditions it loves. With proper light, controlled darkness, balanced watering, and a little patience, even a weak plant can surprise you with a stunning cascade of blooms.