chicken-bubble-biscuit-bake.

If you’re searching for a recipe that combines cozy comfort, creamy flavor, and a hint of Southern charm, the Chicken Bubble Biscuit Bake is the perfect dish. This recipe has everything you love in a home-cooked meal — juicy chunks of chicken, fluffy biscuits, melted cheese, and a creamy sauce that ties it all together. It’s hearty, filling, and best of all, easy enough to whip up on a busy weeknight. Each bite feels like a warm hug, with flavors that balance richness and crunch in every forkful.

A Brief History of Bubble Bakes

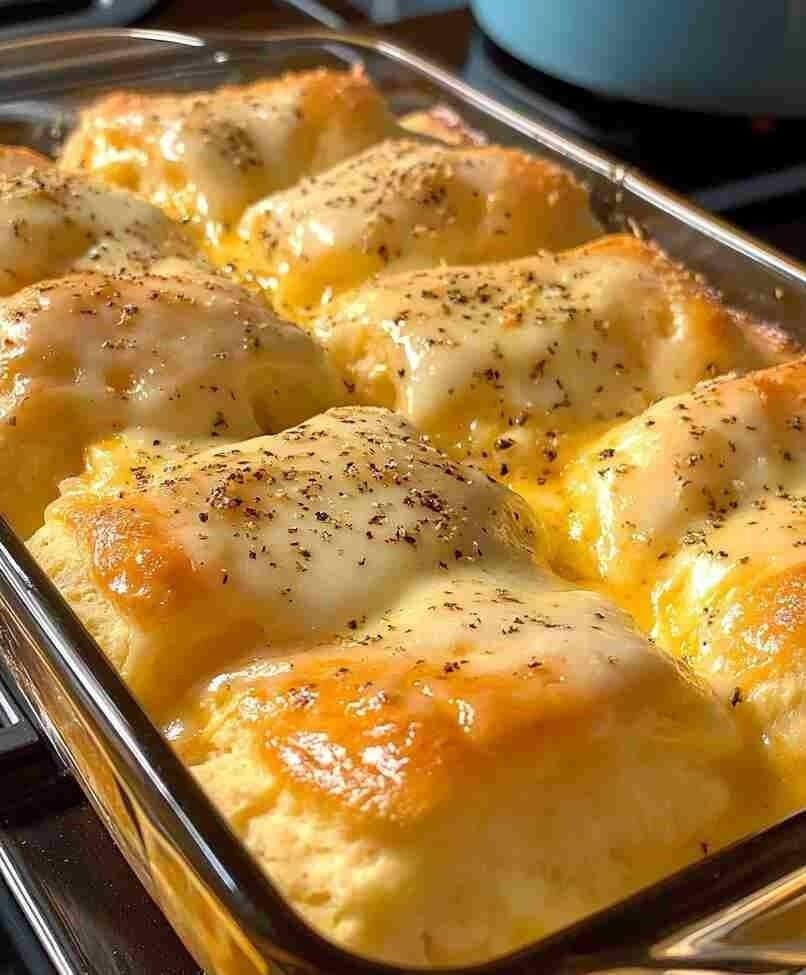
The “bubble bake” concept has been around for decades and became popular in the American South. It earned its name from the way the biscuit dough “bubbles up” as it bakes, creating a golden, puffy texture that’s irresistible. Cooks quickly discovered that adding shredded chicken, creamy soup, and melted cheese transformed the simple biscuit bake into a full-fledged family dinner. Over time, people added their own twists — like bacon, vegetables, and different cheeses — but the classic chicken version remains the most beloved.

Ingredients You’ll Need

This dish uses basic pantry staples and refrigerator favorites. You can customize it depending on what you have on hand, but here’s the base recipe:

For the Chicken Mixture

  • 2 cups cooked chicken breast, shredded or diced (rotisserie chicken works perfectly)

  • 1 can (10.5 oz) cream of chicken soup

  • ½ cup sour cream or plain Greek yogurt

  • ½ cup milk

  • 1 teaspoon garlic powder

  • 1 teaspoon onion powder

  • ½ teaspoon black pepper

  • ½ teaspoon salt

  • ½ teaspoon paprika (optional, for a hint of smokiness)

For the Biscuit Layer

  • 1 can refrigerated buttermilk biscuits (8-count, such as Pillsbury Grands)

  • 1 cup shredded cheddar cheese (sharp cheddar gives great flavor)

  • 2 tablespoons melted butter

  • 2 tablespoons chopped fresh parsley (optional, for garnish)

Optional Add-Ins

  • ½ cup frozen peas and carrots (for color and texture)

  • 4 slices cooked bacon, crumbled

  • ¼ cup diced onions or green onions for extra flavor

How to Make It

Follow these simple steps to bring this bubbling, creamy masterpiece to life:

Step 1: Prepare the Oven and Dish

Preheat your oven to 350°F (175°C). Lightly grease a 9×13-inch baking dish with butter or cooking spray to prevent sticking.

Step 2: Mix the Creamy Chicken Filling

In a large mixing bowl, combine the cream of chicken soup, sour cream, milk, garlic powder, onion powder, salt, pepper, and paprika. Stir until smooth and creamy. Then fold in the shredded chicken (and vegetables, if using) until everything is evenly coated in the sauce.

Step 3: Prepare the Biscuits

Open the can of biscuits and cut each one into four pieces. This helps them bake evenly and creates that “bubble up” effect. Gently toss the biscuit pieces in the melted butter to coat them lightly.

Step 4: Combine and Layer

Add the buttered biscuit pieces into the creamy chicken mixture. Stir gently to coat the biscuits but avoid overmixing — you want them to stay fluffy. Pour the entire mixture into your prepared baking dish, spreading it evenly. Sprinkle the shredded cheddar cheese evenly over the top.

Step 5: Bake to Perfection

Bake uncovered for 30 to 35 minutes, or until the biscuits are golden brown on top and fully cooked in the center. You’ll notice the edges bubbling and the cheese forming a beautiful melted crust.

Step 6: Rest and Serve

Once baked, let the casserole rest for about 5 minutes before serving. This allows the creamy sauce to thicken slightly and makes scooping easier. Garnish with chopped parsley for a pop of freshness.

Flavor Variations

One of the best things about the Chicken Bubble Biscuit Bake is its flexibility. You can easily tweak it based on your taste or what’s in your fridge:

  • Buffalo Style: Add 2 tablespoons of buffalo sauce and top with blue cheese crumbles for a spicy twist.

  • Bacon Ranch: Stir in a packet of ranch seasoning and cooked bacon pieces.

  • Veggie Boost: Add chopped spinach, mushrooms, or broccoli for a balanced meal.

  • Cheesy Deluxe: Mix different cheeses like mozzarella, pepper jack, or Monterey Jack for a richer flavor.

Serving Suggestions

This dish pairs beautifully with a crisp green salad, steamed vegetables, or roasted asparagus to balance its creamy richness. For a true Southern-style meal, serve it with sweet iced tea and a side of coleslaw.

It’s also perfect for potlucks, game nights, or family gatherings, since it can be made ahead and reheated easily. Simply cover leftovers with foil and store in the refrigerator for up to 3 days. Reheat in the oven at 350°F for about 15 minutes, or until warmed through.

Tips for Success

  1. Don’t overmix the biscuits. Overhandling can make them dense instead of light and fluffy.

  2. Use pre-cooked chicken. Rotisserie chicken saves time and adds extra flavor.

  3. Let it rest before serving. This helps the sauce set and makes serving neater.

  4. Watch for doneness. If the top browns too quickly, cover loosely with foil for the last 10 minutes of baking.

  5. Freeze for later. Assemble the bake (without baking), wrap tightly in foil, and freeze for up to 2 months. Thaw overnight and bake as usual.

Why You’ll Love It

Chicken Bubble Biscuit Bake is more than just a casserole — it’s comfort food in its purest form. The flaky, buttery biscuits soak up the creamy chicken sauce while still keeping a slight crunch on top. Every spoonful gives you the perfect blend of textures: soft, gooey, golden, and deliciously rich.

Families love it because it’s budget-friendly, kid-approved, and easy to make ahead. Whether you’re feeding a crowd or craving something warm and comforting after a long day, this bake never disappoints.

Final Thoughts

In a world full of fancy dishes, the Chicken Bubble Biscuit Bake stands out for its simplicity and soul-satisfying flavor. It captures everything we love about homemade cooking — warmth, ease, and a touch of nostalgia. Try it once, and it’s sure to become a regular on your dinner rotation.

Most Popular Bars

When it comes to desserts that everyone loves, dessert bars take the crown. They’re easy to make, simple to serve, and endlessly versatile. Whether it’s a bake sale, picnic, or cozy evening at home, bars are the perfect treat to satisfy any sweet craving. This unique Most Popular Bars recipe combines layers of buttery crust, chewy caramel, gooey chocolate, and a nutty crunch that melts in your mouth with every bite. These bars are a fusion of a cookie, brownie, and candy bar—all in one pan.

Ingredients

For the Crust:

  • 1 cup (2 sticks) unsalted butter, melted

  • 1 cup brown sugar, packed

  • 2 cups all-purpose flour

  • ½ teaspoon salt

  • 1 teaspoon vanilla extract

For the Filling:

  • 1 can (14 oz) sweetened condensed milk

  • 1 bag (11 oz) caramel bits or soft caramel candies

  • 2 tablespoons heavy cream

  • 1 cup semi-sweet chocolate chips

  • ½ cup chopped pecans or walnuts (optional)

  • 1 teaspoon sea salt flakes (for topping)

For the Topping:

  • ¾ cup mini chocolate chips

  • ¼ cup shredded coconut (optional, for added texture)

Instructions

Step 1: Prepare the Crust

Preheat your oven to 350°F (175°C) and line a 9×13-inch baking pan with parchment paper, leaving extra on the sides for easy removal later.
In a medium mixing bowl, whisk together the melted butter, brown sugar, and vanilla until smooth and glossy. Add the flour and salt, stirring until the mixture forms a soft dough.
Press the dough evenly into the bottom of the prepared pan using your fingers or the back of a spoon. Bake for 15 minutes, or until lightly golden around the edges. Remove from the oven and let it cool slightly while you prepare the filling.

Step 2: Make the Caramel Filling

In a small saucepan, combine the caramel bits (or unwrapped soft caramels) with the heavy cream. Heat over low to medium heat, stirring constantly until the caramel is melted and silky smooth.
Once the caramel is melted, stir in the sweetened condensed milk until fully blended and thickened—this will give the bars their signature chewy texture. Pour the caramel mixture evenly over the baked crust, spreading gently with a spatula.

Step 3: Add the Chocolate & Nut Layers

While the caramel layer is still warm, sprinkle the chocolate chips evenly on top. Wait a few minutes for the heat from the caramel to soften them, then gently swirl with a toothpick or knife to create a marbled look.
Next, sprinkle the chopped nuts over the chocolate layer for crunch and richness. For an extra indulgent touch, add a small handful of shredded coconut—this adds both texture and a subtle tropical note.

Step 4: Bake to Perfection

Return the pan to the oven and bake for another 10–12 minutes, just until the chocolate begins to set and the caramel layer bubbles lightly around the edges. Remove from the oven and immediately sprinkle the sea salt flakes on top. This contrast of sweet and salty makes these bars absolutely irresistible.

Allow the bars to cool completely in the pan—about 2 hours at room temperature, or 30 minutes in the refrigerator if you’re in a hurry. Once cooled, lift the bars out using the parchment paper and cut into squares or rectangles.

Step 5: Serve and Store

Serve the bars at room temperature for a soft, chewy bite, or chill them slightly for a firmer, candy-bar-like texture.
Store any leftovers in an airtight container at room temperature for up to 5 days, or refrigerate for up to two weeks. These bars also freeze beautifully—just layer them between parchment sheets in a freezer-safe container for up to three months.

Why This Recipe Works

This unique bar recipe brings together the best elements of classic dessert bars while adding layers of flavor and texture that make each bite special. The buttery crust provides the perfect base—crispy yet soft—while the caramel filling creates a luscious, melt-in-your-mouth center. The chocolate layer offers decadence, and the nuts (and optional coconut) add crunch and contrast. The touch of sea salt ties it all together with a gourmet twist.

Unlike many bar recipes that can turn overly sweet or crumbly, this one balances flavor beautifully. The caramel isn’t cloying thanks to the condensed milk, and the baked crust holds up well without being hard. The swirled chocolate layer gives them a bakery-style look that makes them as beautiful as they are delicious.

Variations to Try

  1. Peanut Butter Lovers’ Version: Add ½ cup of creamy peanut butter to the caramel mixture for a sweet-salty nutty twist.

  2. S’mores Bars: Replace half the crust with crushed graham crackers and top the bars with mini marshmallows before baking.

  3. White Chocolate Raspberry Bars: Use white chocolate chips instead of dark, and swirl in a few spoonfuls of raspberry jam before baking.

  4. Espresso Caramel Bars: Add 1 teaspoon of instant espresso powder to the caramel for a coffeehouse-inspired flavor.

  5. Gluten-Free Version: Substitute almond flour or a gluten-free baking blend for the all-purpose flour in the crust.

Serving Ideas

These bars are ideal for any occasion. Cut them into small squares for a party platter, or serve larger rectangles with a scoop of vanilla ice cream for a dessert plate that feels restaurant-worthy. Drizzle with extra melted chocolate or caramel sauce if you want to make them even more decadent.

They also make a thoughtful homemade gift—wrap a few bars in wax paper and tie with string for a rustic presentation.

Final Thoughts

The Most Popular Bars recipe earns its name for a reason. It’s the kind of treat that disappears first from dessert tables and always gets requested again. The combination of buttery crust, chewy caramel, rich chocolate, and crunchy nuts makes every bite unforgettable.

Oatmeal Peanut Butter Chocolate Bars

There’s something irresistibly heartwarming about the combination of oats, creamy peanut butter, and rich chocolate. It’s a trio that balances nutty, sweet, and hearty flavors into one comforting dessert. This Oatmeal Peanut Butter Chocolate Bar recipe takes those familiar pantry ingredients and turns them into a chewy, gooey, and slightly crisp masterpiece that feels both indulgent and nourishing. Whether you’re baking for a family treat, meal prep snack, or something to pair with your morning coffee, these bars hit the perfect balance between wholesome and decadent.

Ingredients

For the Oatmeal Layer:

  • 1 cup (2 sticks) unsalted butter, melted

  • 1 cup packed brown sugar

  • ½ cup granulated sugar

  • 2 teaspoons pure vanilla extract

  • 2 large eggs

  • 2 ½ cups old-fashioned rolled oats

  • 2 cups all-purpose flour

  • 1 teaspoon baking soda

  • ½ teaspoon salt

For the Peanut Butter Chocolate Filling:

  • 1 ½ cups creamy peanut butter

  • 1 ½ cups semi-sweet chocolate chips

  • ½ cup sweetened condensed milk

  • 1 teaspoon vanilla extract

  • Pinch of salt

Optional toppings:

  • ¼ cup chopped peanuts or mini chocolate chips

  • A drizzle of melted peanut butter or caramel

Directions

Step 1: Preheat and Prepare

Preheat your oven to 350°F (175°C) and line a 9×13-inch baking pan with parchment paper, leaving a little overhang for easy removal. Lightly grease the paper with butter or nonstick spray.

This recipe begins like any good comfort dessert — with butter and sugar. The melted butter adds moisture and richness, while the brown sugar lends a caramel undertone that pairs beautifully with oats and peanut butter.

Step 2: Make the Oatmeal Base

In a large mixing bowl, whisk together the melted butter, brown sugar, and granulated sugar until smooth and glossy. Beat in the eggs one at a time, followed by the vanilla extract.

In a separate bowl, combine the flour, rolled oats, baking soda, and salt. Slowly add the dry mixture into the wet ingredients, stirring just until combined. The batter should be thick, slightly sticky, and aromatic — a preview of the chewy layers to come.

Press about two-thirds of this oatmeal mixture evenly into the bottom of your prepared pan. Use the back of a spatula or your fingers to smooth it into an even layer.

Step 3: Prepare the Peanut Butter Chocolate Filling

In a medium saucepan, combine peanut butter, chocolate chips, and sweetened condensed milk over low heat. Stir continuously until the mixture melts into a silky, luscious sauce. Add in vanilla extract and a pinch of salt to enhance the flavors.

This filling is what transforms the bars from ordinary to extraordinary. It’s creamy, slightly salty, and luxuriously chocolatey — a perfect contrast to the hearty oat base. Pour the warm mixture over the oatmeal layer in your pan, spreading it evenly to the corners.

Step 4: Add the Topping

Crumble the remaining oatmeal mixture evenly over the peanut butter chocolate filling. It doesn’t need to be perfect — those rustic pockets of oat clusters will bake into golden, crispy bites that beautifully contrast the gooey filling beneath.

If desired, sprinkle chopped peanuts or mini chocolate chips on top for extra texture and flavor.

Step 5: Bake to Perfection

Bake for 25–30 minutes, or until the top turns golden brown and the edges start to crisp. The filling will still appear slightly soft, but it will firm up as it cools.

Remove from the oven and let the bars cool completely in the pan on a wire rack. Once cool, use the parchment paper to lift them out and cut into neat squares or rectangles.

Tips for the Perfect Bars

  1. Oats Matter: Use old-fashioned rolled oats, not quick oats. They hold their texture better and give a more satisfying chew.

  2. Peanut Butter Choice: Creamy peanut butter melts smoothly, but you can use crunchy if you want a nutty texture. Avoid natural peanut butters that separate easily, as they may alter the consistency.

  3. Don’t Overbake: The bars should be slightly soft when you remove them from the oven. Overbaking can make them dry instead of chewy.

  4. Cooling Is Key: Give the bars at least one hour to cool before slicing; the filling sets during this time, making for cleaner cuts.

  5. Storage: Store in an airtight container at room temperature for up to 5 days, or refrigerate for a firmer texture. They also freeze beautifully for up to 3 months.

Serving Ideas

  • For Breakfast Energy: Enjoy a square with a glass of milk or coffee — the oats and peanut butter make it a surprisingly filling start.

  • Dessert Delight: Warm slightly and serve with a scoop of vanilla ice cream for an indulgent treat.

  • Lunchbox Treats: Wrap individual squares in parchment for easy grab-and-go snacks.

Why This Recipe Works

This unique recipe blends nostalgic flavors with modern texture and balance. The buttery oat crust adds structure and chewiness, the peanut butter chocolate layer delivers creaminess and depth, and the crumbly top provides that golden crisp bite. The sweetness isn’t overwhelming — instead, it’s comfortingly balanced with a hint of salt and nuttiness.

Unlike classic oatmeal cookies, these bars are thicker, heartier, and more layered in flavor. The sweetened condensed milk in the filling ensures every bite stays moist while enhancing the chocolate’s richness. It’s a simple technique that makes the bars taste as though they came straight from a bakery.

Final Thoughts

The Oatmeal Peanut Butter Chocolate Bars are a masterpiece of texture and taste — chewy, fudgy, and perfectly balanced. Each layer tells its own story: the wholesome oats remind you of homey breakfasts, the peanut butter adds a nostalgic creaminess, and the chocolate ties everything together with its smooth sweetness.

Homemade Condensed Milk

There’s something wonderfully nostalgic about condensed milk — that thick, sweet, creamy nectar that adds richness to desserts, beverages, and baked goods. Store-bought versions are convenient, but making your own homemade condensed milk is surprisingly easy, incredibly satisfying, and often far more flavorful. This unique recipe delivers a perfectly smooth and luscious condensed milk using simple pantry ingredients, yet it has a depth of flavor and creaminess that’s hard to beat. Whether you’re crafting fudge, flan, tres leches cake, or simply sweetening your morning coffee, this homemade version will elevate every spoonful.

Ingredients You’ll Need

To make about 1½ cups of homemade condensed milk, gather:

  • 2 cups (480 ml) whole milk – full-fat milk gives a rich, creamy base.

  • ⅔ cup (130 g) granulated sugar – balances sweetness perfectly.

  • 2 tablespoons unsalted butter – adds smoothness and gloss.

  • ½ teaspoon pure vanilla extract (optional) – for a hint of warmth.

  • Pinch of salt – enhances flavor and balances the sweetness.

(Optional twist: Add 1 tablespoon of heavy cream for extra silkiness or 1 tablespoon of honey for a floral undertone.)

Step-by-Step Instructions

Step 1: Combine and Heat

In a heavy-bottomed saucepan, combine the milk and sugar. Stir well with a whisk to dissolve the sugar before heating. Turn the stove to medium-low heat, and let the mixture warm slowly — rushing it will cause the milk to scorch or curdle.

Keep stirring occasionally until the sugar completely dissolves and the milk begins to steam gently. You should see small bubbles around the edge but no rolling boil. This stage is about developing a smooth foundation for your condensed milk.

Step 2: Simmer Slowly

Once the milk is hot and the sugar is fully dissolved, reduce the heat to low. Let it simmer gently for 30–40 minutes, stirring every few minutes. You’ll notice it gradually thickening and reducing in volume. The key is patience — this slow reduction allows the natural sugars in the milk to caramelize slightly, giving the mixture a pale golden hue and rich, creamy flavor.

As it simmers, you might notice a thin film forming on top. Don’t worry — just whisk it back in or remove it gently with a spoon. The texture should be thick enough to coat the back of a spoon when it’s ready.

Step 3: Add Butter and Vanilla

When the milk has reduced by about half and feels syrupy, remove it from the heat. Stir in the butter, vanilla extract, and salt while it’s still warm. The butter will melt into the mixture, creating a luxurious, glossy texture. The salt rounds out the sweetness and makes the flavor more balanced and sophisticated.

If you like, you can blend the finished mixture for 10–15 seconds to ensure complete smoothness — this is especially helpful if small milk solids have formed.

Step 4: Cool and Store

Allow the condensed milk to cool to room temperature before transferring it to a clean, airtight glass jar or container. It will thicken further as it cools. Store it in the refrigerator for up to 2 weeks. If you plan to use it over time, it can also be frozen for up to 3 months — simply thaw in the fridge overnight before using.

Texture and Flavor Notes

This homemade condensed milk has a rich, velvety consistency — slightly thicker than store-bought varieties but far creamier. The flavor is deep and buttery, with a subtle hint of caramel and vanilla. Because it’s not overly sweet, it pairs beautifully with desserts, fruit, and coffee without overwhelming them.

If you prefer a lighter flavor, reduce the sugar slightly. For an extra caramelized note, let it simmer for an additional 5–10 minutes until slightly darker in color.

Creative Variations

You can personalize this condensed milk recipe in countless ways:

  1. Coconut Condensed Milk: Replace regular milk with full-fat coconut milk. The result is luxuriously thick with a tropical flavor — perfect for vegan desserts and Thai coffee.

  2. Honey or Maple Sweetened: Swap half the sugar for honey or maple syrup for a natural sweetness and subtle flavor depth.

  3. Caramel Condensed Milk: Stir in 1 tablespoon of brown sugar instead of white sugar for a butterscotch twist.

  4. Non-Dairy Almond Version: Use almond milk with 1 teaspoon of cornstarch for creaminess — ideal for lactose-intolerant or vegan users.

How to Use Your Homemade Condensed Milk

Homemade condensed milk can be used anywhere you’d use the canned version — and often with even more delicious results! Here are some irresistible ideas:

  • Desserts: Drizzle over pancakes, waffles, or French toast. Use it to make fudge, flan, key lime pie, or tres leches cake.

  • Coffee & Tea: Stir into espresso, Thai iced tea, or Vietnamese coffee for a luxurious sweetness.

  • Baking: Use it in cookie dough, cakes, and pies to add moisture and sweetness.

  • Fruit Topping: Pour over sliced strawberries, mangoes, or bananas for a quick dessert.

  • Homemade Ice Cream: Blend it into whipped cream or milk before freezing for a silky, scoopable treat.

Pro Tips for Success

  • Low and Slow: Never boil the milk — gentle simmering ensures a smooth texture.

  • Use a Heavy Pot: Prevents scorching and allows even heat distribution.

  • Whisk Often: Keeps sugar from sticking to the bottom and burning.

  • Measure by Reduction: When it has reduced by half, it’s done.

  • Flavor While Warm: Add extracts, butter, or other flavorings before it cools for the best infusion.

Final Thoughts

Homemade condensed milk is one of those old-fashioned kitchen treasures that remind us how simple ingredients can create extraordinary results. The process is calming and sensory — the warm aroma of sweet milk simmering slowly, the transformation into a thick, golden cream, and the satisfaction of tasting your own handcrafted sweetness. Once you make it yourself, you’ll likely never go back to the canned version again.

Air Fryer Roasted Potatoes

When you crave crispy, golden-brown potatoes without the guilt of deep-frying, the air fryer becomes your best friend. This Air Fryer Roasted Potatoes recipe combines simplicity, flavor, and that irresistible crunch—all achieved in a fraction of the time. Perfect as a side dish for breakfast, lunch, or dinner, these potatoes are seasoned to perfection and roasted to a delightful crispness with soft, fluffy centers. Whether you’re serving them with eggs, grilled steak, or just enjoying them with a dip, these air-fried wonders are pure comfort in every bite.

Ingredients

(Serves 4–6 people)

  • 1 ½ pounds baby potatoes (red, gold, or mixed), halved or quartered

  • 2 tablespoons olive oil

  • 1 teaspoon garlic powder

  • 1 teaspoon onion powder

  • 1 teaspoon smoked paprika

  • ½ teaspoon dried rosemary (optional but adds great flavor)

  • ½ teaspoon dried thyme or Italian seasoning

  • Salt and freshly cracked black pepper, to taste

  • 1 tablespoon grated Parmesan cheese (optional, for extra crispiness)

  • Fresh parsley, finely chopped, for garnish

Instructions

Step 1: Prep the Potatoes

Begin by washing and scrubbing the potatoes thoroughly to remove any dirt, especially if you’re keeping the skins on (which you should—those skins add flavor and crunch). Pat them completely dry with a clean kitchen towel or paper towel. Moisture is the enemy of crispiness, so make sure they’re as dry as possible before seasoning.

Cut your potatoes into evenly sized halves or quarters so they cook evenly. Smaller pieces mean more surface area for crisping.

Step 2: Season Generously

In a large mixing bowl, add your olive oil and all the seasonings—garlic powder, onion powder, smoked paprika, rosemary, thyme, salt, and pepper. Toss in the potatoes and stir or shake until every piece is evenly coated. The combination of paprika and garlic gives a smoky, savory aroma, while rosemary adds an earthy note that elevates these potatoes beyond ordinary roasted ones.

If you’re feeling indulgent, sprinkle in a tablespoon of grated Parmesan cheese. It melts slightly in the air fryer, creating a light golden crust that makes the potatoes irresistibly flavorful.

Step 3: Preheat the Air Fryer

Set your air fryer to 400°F (200°C) and preheat for about 3 minutes. Preheating helps the potatoes start crisping immediately, giving that deep roasted texture without overcooking the centers.

Step 4: Air Fry the Potatoes

Place the seasoned potatoes in the air fryer basket in a single layer. Don’t overcrowd the basket—air circulation is the secret to achieving that crispy exterior. If your air fryer is smaller, cook in batches.

Cook for 15 minutes, then pull out the basket and shake it well to ensure even browning. Return to the air fryer and cook for another 8–10 minutes, or until the potatoes are golden brown and crispy on all sides.

Cooking time may vary slightly depending on your air fryer model and the size of the potato pieces, so check for that perfect golden color.

Step 5: Finish and Serve

Once perfectly roasted, transfer the potatoes to a serving bowl. Sprinkle a bit of extra salt and pepper while they’re still hot. For a pop of color and freshness, garnish with chopped parsley or even a squeeze of lemon juice if you prefer a tangy kick.

Serve immediately—the contrast between the crispy outside and the fluffy inside is best when hot out of the fryer.

Serving Ideas

These air fryer roasted potatoes are unbelievably versatile. Here are some tasty ways to enjoy them:

  • Breakfast: Pair them with scrambled eggs, crispy bacon, and toast for a hearty morning meal.

  • Lunch or Dinner: Serve alongside grilled chicken, steak, or fish for a classic, comforting side.

  • Snack: Enjoy them as a crunchy snack with dipping sauces like garlic aioli, ranch, or spicy ketchup.

  • Loaded Style: Top with melted cheese, crispy bits of bacon, and a dollop of sour cream for an irresistible “loaded potato” treat.

Tips for Perfect Air Fryer Potatoes

  1. Don’t skip the preheat: This ensures the potatoes crisp up faster and cook evenly.

  2. Dry thoroughly: Wet potatoes steam instead of roast—drying is key for crunch.

  3. Use high heat: 400°F is ideal to get that deep golden crispness.

  4. Shake mid-cook: Shaking halfway through guarantees every piece browns evenly.

  5. Experiment with seasonings: Try Cajun spice, taco seasoning, lemon pepper, or even curry powder for different flavor twists.

Why Air Fryer Potatoes Are Better

Traditional roasted potatoes often require a large oven, lots of oil, and longer cooking times. In contrast, the air fryer uses rapid hot air circulation to achieve the same—if not better—results in under 25 minutes. You get crispy, evenly roasted potatoes with minimal oil, meaning fewer calories but maximum flavor.

Additionally, the air fryer gives you more control—no flipping trays or checking the oven constantly. It’s also perfect for small households or when you just need a quick side without heating up your kitchen.

Variations to Try

  • Garlic Parmesan Potatoes: Add extra minced garlic and a heavy sprinkle of Parmesan at the end for an Italian-inspired twist.

  • Spicy Cajun Potatoes: Toss with Cajun seasoning or chili flakes before air frying for bold heat.

  • Lemon Herb Potatoes: Mix in lemon zest, thyme, and oregano for a bright, Mediterranean flair.

  • Honey Mustard Roasted Potatoes: After cooking, drizzle lightly with honey and Dijon mustard for a sweet and tangy glaze.

Final Thoughts

Air Fryer Roasted Potatoes are proof that simple ingredients can create extraordinary flavor. With just a handful of pantry staples and a touch of oil, you can transform humble potatoes into a crispy, golden masterpiece that’s both healthy and indulgent. Every bite delivers that satisfying crunch followed by a creamy, tender center—everything you love about roasted potatoes but done faster, lighter, and better.

Whether you’re hosting a family brunch or preparing a cozy weeknight dinner, this recipe deserves a permanent spot in your kitchen routine. Easy, flavorful, and endlessly customizable—these air fryer roasted potatoes are comfort food made effortlessly delicious.

Oatmeal Apple Bake

There’s something magical about the aroma of baked apples mingling with the sweetness of cinnamon and the hearty comfort of oats. This Oatmeal Apple Bake is the perfect cozy dish for crisp mornings or as a wholesome dessert after dinner. It’s packed with fiber, warmth, and natural sweetness — and it feels like a hug in every bite. Whether you enjoy it fresh out of the oven with a drizzle of maple syrup or chilled the next morning for breakfast-on-the-go, this recipe delivers both comfort and nutrition.

Why You’ll Love This Recipe

This Oatmeal Apple Bake combines the texture of a chewy oatmeal cookie with the richness of an apple crisp. It’s healthier than traditional baked desserts since it uses wholesome oats, fresh apples, and minimal refined sugar. Plus, it’s versatile: you can customize it with nuts, dried fruit, or even a dollop of yogurt. It’s easy to prepare, requires no fancy equipment, and makes your kitchen smell like fall heaven.

Ingredients

For the Oatmeal Base:

  • 2 cups old-fashioned rolled oats

  • 1 teaspoon baking powder

  • 1 teaspoon ground cinnamon

  • ¼ teaspoon ground nutmeg

  • ¼ teaspoon salt

  • 2 tablespoons brown sugar or coconut sugar

  • 1 ½ cups milk (dairy or almond milk)

  • 2 large eggs

  • 1 teaspoon pure vanilla extract

  • 2 tablespoons melted butter or coconut oil

For the Apple Layer:

  • 3 medium apples, peeled, cored, and chopped (Honeycrisp or Fuji work best)

  • 2 tablespoons maple syrup or honey

  • 1 tablespoon lemon juice

  • 1 teaspoon cinnamon

  • 1 teaspoon cornstarch (for thickening juices)

Optional Add-ins:

  • ¼ cup chopped walnuts or pecans

  • ¼ cup raisins or dried cranberries

  • 2 tablespoons shredded coconut or flaxseed

For Topping (optional but highly recommended):

  • A drizzle of warm maple syrup or honey

  • A scoop of vanilla yogurt or whipped cream

Instructions

Step 1: Preheat and Prep

Preheat your oven to 375°F (190°C). Grease a 9×9-inch baking dish or line it with parchment paper. This ensures the oatmeal bake comes out cleanly and prevents sticking.

Step 2: Prepare the Apples

In a medium bowl, combine the chopped apples, maple syrup (or honey), lemon juice, cinnamon, and cornstarch. Toss until the apples are evenly coated. Spread them evenly at the bottom of your prepared baking dish. This forms a deliciously sweet and tangy fruit base that caramelizes while baking.

Step 3: Make the Oat Mixture

In a large mixing bowl, whisk together the oats, baking powder, cinnamon, nutmeg, salt, and brown sugar. In a separate bowl, whisk together the milk, eggs, vanilla extract, and melted butter. Pour the wet mixture into the dry ingredients and stir until combined. The oats will absorb some of the liquid but should remain slightly wet — that’s what keeps the bake moist.

If you’re adding nuts, raisins, or coconut, fold them into the mixture at this stage for extra texture and flavor.

Step 4: Layer and Bake

Pour the oat mixture over the apples and spread evenly with a spatula. Gently press down to ensure the liquid reaches all the apples. Bake uncovered for 35–40 minutes, or until the top is golden brown and the edges are slightly crisp. The apples will soften beautifully, and the oats will bake into a custard-like consistency in the middle.

Step 5: Cool and Serve

Once baked, remove from the oven and let it cool for about 10 minutes. This rest time allows the layers to set and makes it easier to slice. Serve warm, topped with a drizzle of maple syrup, a sprinkle of nuts, or a dollop of yogurt for a creamy finish.

Flavor Variations

  • Caramel Apple Bake: Add a swirl of caramel sauce over the apples before adding the oat mixture for a dessert-style version.

  • Berry Apple Bake: Mix in ½ cup of blueberries or cranberries for a pop of tartness.

  • Apple Banana Bake: Mash one ripe banana into the wet ingredients for a naturally sweet, creamy texture.

  • Spiced Chai Apple Bake: Add a pinch of ground cloves, cardamom, and ginger to the dry ingredients for a cozy chai twist.

Storage and Reheating

This Oatmeal Apple Bake stores beautifully, making it perfect for meal prep.

  • Refrigerate: Store in an airtight container for up to 5 days.

  • Freeze: Cut into portions, wrap tightly, and freeze for up to 2 months.

  • Reheat: Warm in the microwave for 30–40 seconds per serving or in the oven at 325°F for 10 minutes to restore crispness.

Tips for Success

  1. Use Firm Apples: Crisp varieties like Honeycrisp, Fuji, or Granny Smith hold their shape best while baking.

  2. Don’t Overbake: If baked too long, the oatmeal can dry out. Remove when the center is just set.

  3. Make It Dairy-Free: Substitute almond or oat milk for dairy milk and coconut oil for butter.

  4. Add Protein: Mix in a scoop of vanilla protein powder to the oat mixture for a nutritious breakfast version.

  5. Serve with a Twist: Try serving warm slices with a drizzle of heavy cream, caramel, or even peanut butter for indulgence.

Why This Recipe Works

The magic of this Oatmeal Apple Bake lies in the contrast of textures and flavors. The apples become tender and caramelized, their juices soaking into the oats, while the top bakes into a lightly crisp crust. The blend of cinnamon, nutmeg, and vanilla creates a cozy, comforting aroma that feels nostalgic yet fresh. Unlike sugary apple desserts, this bake is wholesome enough for breakfast yet delicious enough to double as dessert.

It’s also an excellent make-ahead dish. You can mix everything the night before, refrigerate it, and bake it fresh in the morning — perfect for holidays, weekend brunches, or busy weekdays. The leftovers taste just as good (if not better) the next day, as the flavors meld together beautifully.

Serving Ideas

  • Breakfast: Serve warm with milk poured over it and a handful of berries.

  • Brunch: Pair with scrambled eggs and coffee for a balanced meal.

  • Dessert: Add vanilla ice cream and caramel drizzle for a rustic apple crisp vibe.

  • Snack: Enjoy cold slices straight from the fridge — it’s surprisingly satisfying.

Final Thoughts

The Oatmeal Apple Bake is more than a recipe — it’s a celebration of simplicity, comfort, and wholesome flavor. It brings together pantry staples and seasonal fruit to create a dish that feels indulgent yet nourishing. Whether you’re craving a cozy fall breakfast, a comforting dessert, or a nutritious snack, this bake delivers on every front. Warm, aromatic, and utterly satisfying, it’s bound to become a cherished favorite in your kitchen.

Homemade Thumbprint Cookies Recipe

There’s something undeniably nostalgic about thumbprint cookies — those tender, buttery delights crowned with a jewel of jam or chocolate in the center. This cookie is a perfect balance between elegance and simplicity, buttery richness and fruity sweetness. Whether you’re baking for the holidays, a tea party, or just craving something heartwarming, these cookies never disappoint. The recipe below brings a unique twist: a buttery almond dough that melts in your mouth, paired with vibrant jam fillings that add color and flavor.

Ingredients

For the Cookies:

  • 1 cup (2 sticks) unsalted butter, softened

  • 2/3 cup granulated sugar

  • 1 large egg yolk

  • 1 ½ teaspoons pure vanilla extract

  • ¼ teaspoon almond extract (optional but recommended)

  • 2 ¼ cups all-purpose flour

  • ¼ teaspoon salt

For Rolling:

  • 1 large egg white (lightly beaten)

  • ½ cup finely chopped almonds or crushed pecans (optional for coating)

For the Filling:

  • ½ cup raspberry jam (or your choice: apricot, strawberry, lemon curd, or Nutella)

Optional Garnish:

  • Powdered sugar for dusting after baking

  • Melted white or dark chocolate drizzle

Step-by-Step Instructions

1. Prepare the Dough

In a large mixing bowl, cream together butter and sugar until light and fluffy — about 2 to 3 minutes using a hand or stand mixer. This step ensures air gets incorporated into the dough, resulting in soft, tender cookies.

Add in the egg yolk, vanilla extract, and almond extract, beating just until combined. The almond extract is optional but gives the cookies a subtle nutty depth that pairs beautifully with the jam filling.

In a separate bowl, whisk together flour and salt. Gradually add the dry ingredients to the butter mixture, mixing until a smooth dough forms. If the dough feels too sticky, add an extra tablespoon of flour; if too crumbly, a teaspoon of milk will bring it together.

2. Chill the Dough

Once the dough is mixed, shape it into a disk and wrap it tightly in plastic wrap. Chill for at least 45 minutes (or up to overnight). Chilling helps the butter firm up and prevents the cookies from spreading too much while baking.

3. Shape the Cookies

Preheat your oven to 350°F (175°C) and line a baking sheet with parchment paper.

Scoop out 1-inch portions of dough and roll them into smooth balls. If you want a crunchier exterior, dip each dough ball in the beaten egg white and then roll in crushed almonds or pecans before placing them on the baking sheet.

Using your thumb or the back of a teaspoon, press a small well in the center of each cookie. This will be the space for your jam filling. Be gentle — if the dough cracks around the edges, simply pinch it back together.

4. Fill and Bake

Spoon about ½ teaspoon of jam into the indentation of each cookie. Don’t overfill; the jam will bubble slightly during baking and can overflow if there’s too much.

Bake the cookies for 12–14 minutes, or until the edges are just lightly golden. The centers should remain pale and soft. Rotate the baking sheet halfway through to ensure even baking.

Remove from the oven and let the cookies cool on the baking sheet for 5 minutes before transferring them to a wire rack to cool completely.

5. Optional Finishing Touches

Once cooled, dust the tops lightly with powdered sugar for a snowy, festive look. Alternatively, drizzle with melted chocolate — white chocolate looks especially stunning over raspberry or strawberry jam.

For an even fancier version, mix two jams side by side in one cookie (like raspberry and apricot) for a marbled jewel effect that’s both beautiful and delicious.

Flavor Variations

One of the best things about thumbprint cookies is how adaptable they are. Here are a few creative twists you can try:

  1. Chocolate Lovers’ Delight:
    Replace jam with Nutella, chocolate ganache, or even salted caramel sauce. Sprinkle with sea salt for an elegant touch.

  2. Lemon Zest Dream:
    Add 1 tablespoon of lemon zest to the dough and fill with lemon curd for a tangy and bright version perfect for spring or tea parties.

  3. Coconut Paradise:
    Roll the dough balls in shredded sweetened coconut before baking, then fill the centers with pineapple or mango jam.

  4. Holiday Edition:
    Use red raspberry jam and green-tinted icing for a festive Christmas cookie platter.

  5. Gluten-Free Option:
    Substitute almond flour for half of the all-purpose flour for a naturally nutty and gluten-friendly texture.

Storage and Serving Tips

These cookies can be stored at room temperature for up to 5 days in an airtight container. For longer storage, refrigerate for up to 10 days or freeze for up to 3 months.

If freezing, place them in a single layer on a baking sheet until solid, then transfer to a freezer bag. Thaw at room temperature before serving. The jam centers remain vibrant and glossy even after thawing, making them a perfect make-ahead treat for holidays or gatherings.

Serve them with tea, coffee, or a glass of cold milk for a comforting experience that feels like home.

Why You’ll Love This Recipe

What makes this thumbprint cookie recipe unique is its combination of rich buttery flavor, almond undertone, and customizable fillings. The dough is soft and delicate but sturdy enough to hold its shape, and the jam filling adds a beautiful contrast of texture and color. Every bite delivers a perfect mix of buttery crumble and fruity sweetness.

Beyond the taste, these cookies are also visually stunning — the glossy jam centers gleam like jewels against the golden cookie base. They make wonderful edible gifts when packaged in a tin or cellophane bag with a ribbon.

Most importantly, this recipe captures the spirit of homemade baking: simple ingredients transformed into something that feels special and nostalgic.

Final Thoughts

Homemade thumbprint cookies are proof that the most delightful desserts don’t have to be complicated. With just a few pantry staples, a spoonful of jam, and a little love, you can create a treat that’s elegant enough for parties and comforting enough for everyday enjoyment.

Creamy Country-Style Potato Salad

There’s nothing quite like a bowl of creamy, comforting potato salad to bring back memories of backyard picnics, barbecues, and lazy summer afternoons. This unique country-style potato salad recipe takes the classic comfort dish to the next level — balancing tender potatoes with a luscious, tangy dressing and crunchy vegetables for texture and freshness. The secret lies in the combination of ingredients that provide depth, contrast, and a touch of nostalgia.

Ingredients:

For the Salad:

  • 2 pounds (about 6 medium) russet or Yukon Gold potatoes, peeled and cubed

  • 4 large eggs

  • ½ cup finely chopped celery

  • ½ cup finely chopped red onion

  • ¼ cup chopped dill pickles (or sweet relish, if preferred)

  • 2 tablespoons chopped fresh parsley

  • 1 teaspoon celery seeds (optional, for an earthy crunch)

For the Dressing:

  • 1 cup mayonnaise

  • 2 tablespoons yellow mustard

  • 1 tablespoon apple cider vinegar

  • 1 tablespoon Dijon mustard

  • 1 teaspoon sugar

  • ½ teaspoon smoked paprika

  • Salt and black pepper, to taste

For Garnish:

  • Sprinkle of smoked paprika

  • Chopped green onions or parsley

Step-by-Step Instructions:

1. Prepare the Potatoes

Start by peeling and dicing your potatoes into uniform 1-inch cubes. This ensures they cook evenly and hold their shape. Place them in a large pot and cover with cold water by at least an inch. Add a generous pinch of salt — this infuses the potatoes with flavor from the beginning.
Bring to a boil, then reduce heat to medium. Simmer for 10–12 minutes, or until the potatoes are fork-tender but not mushy. Drain and let them cool slightly on a baking sheet to allow steam to escape. Cooling prevents the salad from turning watery later.

2. Hard-Boil the Eggs

While the potatoes cook, place eggs in a small saucepan and cover with water. Bring to a gentle boil, then cover and remove from heat. Let sit for 10–12 minutes. Transfer eggs to an ice bath to cool. Once cooled, peel and chop them coarsely. The eggs add richness and creaminess to the salad.

3. Mix the Dressing

In a large bowl, whisk together the mayonnaise, yellow mustard, Dijon mustard, apple cider vinegar, sugar, smoked paprika, salt, and black pepper. The combination of mustards gives a beautiful tang, while the sugar and paprika balance the sharpness with a touch of sweetness and warmth.

This dressing should be smooth, creamy, and flavorful — the perfect coating for tender potatoes.

4. Combine the Ingredients

Add the cooled potatoes to the bowl of dressing and gently fold until the potatoes are evenly coated. Then mix in the celery, red onion, pickles (or relish), parsley, and celery seeds if using.
Finally, fold in the chopped hard-boiled eggs carefully to avoid breaking them up too much. Taste and adjust seasoning — more salt for balance, a splash of vinegar for brightness, or a spoonful of mayonnaise if you prefer it creamier.

5. Chill and Serve

Cover the bowl and refrigerate for at least 2 hours (or overnight for best flavor). Chilling allows the ingredients to meld together, letting the tangy dressing soak into the potatoes beautifully. When ready to serve, sprinkle with smoked paprika and garnish with fresh parsley or green onions for a pop of color.

Why This Potato Salad is Unique

What sets this version apart is its layering of textures and flavors — creamy yet tangy, soft yet crunchy. The use of both yellow and Dijon mustard gives it a balanced flavor: one familiar and nostalgic, the other slightly sophisticated. The combination of dill pickles and a dash of apple cider vinegar introduces acidity that cuts through the richness. Smoked paprika adds a subtle depth and warmth you won’t find in ordinary recipes.

Unlike store-bought versions that often taste flat or overly sweet, this homemade potato salad celebrates contrast — the sweetness of onions, the crunch of celery, and the tenderness of perfectly cooked potatoes all shine through in harmony.

Tips for Perfection:

  1. Choose the Right Potato:
    Yukon Golds give a buttery, creamy texture and hold their shape well, while russets are fluffier and absorb dressing beautifully. For a chunkier salad, go with Yukon Golds; for a softer, creamier version, choose russets.

  2. Don’t Skip the Cooling Step:
    Adding dressing to hot potatoes can cause the mayonnaise to separate, resulting in a greasy texture. Slightly warm potatoes, however, absorb flavor better — so let them cool about 10 minutes before mixing.

  3. Add Crunch Wisely:
    Celery and onions are classic, but you can add crisp diced bell peppers, chopped green apples, or even crispy bacon for a creative twist.

  4. Let It Rest:
    The magic happens in the refrigerator. Chilling the salad allows the dressing to thicken and the potatoes to soak up the seasonings, enhancing every bite.

  5. Customize the Flavor:
    Want it spicy? Add a dash of hot sauce or cayenne pepper. Prefer it extra tangy? Double the vinegar or add a splash of pickle juice.

Serving Ideas

Serve this potato salad cold as a side for barbecue ribs, fried chicken, burgers, or grilled fish. It’s equally good at picnics, potlucks, or even as a light lunch alongside fresh greens. For a beautiful presentation, spoon it into a serving bowl, top with sliced boiled eggs, dust with paprika, and add a sprig of parsley — rustic and inviting.

Storage and Make-Ahead

This potato salad stores well in an airtight container in the refrigerator for up to 3 days. The flavor often improves with time as the dressing continues to infuse the potatoes. Avoid freezing it, as mayonnaise-based dressings can separate upon thawing.

If making it ahead, stir in a little extra mayo before serving to refresh the creaminess.

Final Thoughts

This Creamy Country-Style Potato Salad is everything a great side dish should be — simple, satisfying, and full of character. Every spoonful tells a story of tradition, family gatherings, and comfort food done right. It’s proof that even the most familiar dishes can be reinvented with care and creativity. So the next time you crave something nostalgic yet refreshing, whip up a bowl of this unique potato salad — it’s guaranteed to steal the show at any table.

Paula Deen’s 5-Minute Fudge

If there’s one dessert that captures the spirit of Southern comfort and nostalgia, it’s Paula Deen’s 5-Minute Fudge. This recipe embodies the simplicity and warmth that Paula Deen is famous for — creamy, chocolatey, rich, and made with love. What makes this fudge so special isn’t just how delicious it tastes but how unbelievably quick and easy it is to make. With only a handful of ingredients and five minutes of cooking time, you can have a tray of decadent fudge ready to cool and cut — perfect for holidays, potlucks, or just to satisfy your sweet cravings.

A Sweet Southern Tradition

Fudge has long been a cherished treat across American kitchens, but Paula Deen’s version stands out for its old-fashioned charm and no-fuss preparation. Traditional fudge recipes can be intimidating — requiring candy thermometers, precise temperatures, and constant stirring. But Paula’s recipe brings that same silky-smooth texture with none of the stress. It’s the perfect introduction to homemade candy making, even for beginners.

The secret lies in a smart combination of sweetened condensed milk, chocolate chips, butter, and marshmallows, which work together to create a luscious, melt-in-your-mouth texture without needing to boil sugar to the softball stage. In just minutes, these humble ingredients transform into something magical — soft, rich, and delightfully sweet fudge that tastes like it took hours to make.

Ingredients You’ll Need

Here’s what you’ll need to make Paula Deen’s famous 5-minute fudge:

  • 1 ⅔ cups granulated sugar

  • 2/3 cup evaporated milk

  • 2 tablespoons unsalted butter

  • 1/2 teaspoon salt

  • 1 (6-ounce) package of semisweet chocolate chips

  • 16 large marshmallows (or about 2 cups mini marshmallows)

  • 1 teaspoon pure vanilla extract

  • 1/2 cup chopped pecans or walnuts (optional)

This combination creates a fudge that’s perfectly balanced — not too dense, not too soft, with a deep chocolate flavor that pairs beautifully with crunchy nuts. You can swap the semisweet chips for milk chocolate or even white chocolate for a fun twist.

Step-by-Step Instructions

Step 1: Prepare Your Pan
Line an 8×8-inch baking dish with parchment paper or foil, leaving a little overhang on the sides for easy removal later. Lightly grease it with butter or nonstick spray.

Step 2: Combine the Base Ingredients
In a medium saucepan, add the sugar, evaporated milk, butter, and salt. Place the saucepan over medium heat and bring the mixture to a rolling boil while stirring constantly. Once it begins to boil, continue stirring for about 4–5 minutes. This helps the sugar dissolve completely and gives the fudge its smooth texture.

Step 3: Add the Chocolate and Marshmallows
Remove the pan from heat and quickly stir in the chocolate chips and marshmallows. The residual heat will melt them beautifully. Stir until the mixture becomes thick, glossy, and completely smooth — this should take about a minute or two.

Step 4: Flavor and Fold in the Nuts
Once everything is melted and combined, stir in the vanilla extract for a warm, aromatic finish. If you’re adding pecans or walnuts, fold them in gently. The nuts give the fudge a classic Southern flair and a pleasant crunch that balances the creamy texture.

Step 5: Pour and Set
Quickly pour the fudge mixture into your prepared baking dish and spread it evenly with a spatula. It will start to set fast, so work efficiently. Let it cool at room temperature for about 1–2 hours, or refrigerate it for about 45 minutes if you’re in a hurry. Once firm, lift it out of the pan using the parchment overhang and cut into small squares.

Tips for Perfect 5-Minute Fudge

  1. Don’t Overcook – Boil the milk and sugar mixture only for about 5 minutes. Overcooking can make the fudge grainy.

  2. Stir Constantly – Keep the spoon moving to prevent sticking or scorching.

  3. Use Quality Chocolate – High-quality chocolate chips make all the difference in flavor and texture.

  4. Mix-Ins – Get creative! Try adding crushed candy canes, peanut butter swirls, toffee bits, or dried cranberries for a fun twist.

  5. Storage – Store the fudge in an airtight container at room temperature for up to a week, or refrigerate it for longer freshness.

Why This Recipe Works

Paula Deen’s genius lies in her ability to simplify classic recipes without sacrificing flavor. By using marshmallows, she eliminates the need for corn syrup or complex candy-making steps — they melt into the fudge, ensuring a creamy, velvety finish. The evaporated milk adds richness, and the butter lends that unmistakable Southern decadence.

The result? A perfect bite of fudge that’s sweet but not cloying, chocolatey but balanced, and soft enough to melt in your mouth yet firm enough to hold its shape. It’s the kind of recipe that brings smiles to faces and warmth to hearts, no matter the occasion.

Serving Suggestions

This 5-minute fudge is incredibly versatile. Serve it:

  • During the holidays – wrapped in wax paper and tied with ribbon as a homemade gift.

  • At parties – arranged on a dessert tray alongside cookies and brownies.

  • With coffee – for an indulgent afternoon treat.

  • Crumbled over ice cream – for a decadent sundae topping.

You can even drizzle melted white chocolate over the top or sprinkle with sea salt for a gourmet touch.

The Sweet Story Behind the Recipe

Legend has it that Paula Deen first made this fudge as a last-minute holiday treat when guests arrived unexpectedly. Without time to make traditional candy, she whipped up this 5-minute version using pantry staples — and it became an instant hit. Over time, fans across the country adopted it as their go-to quick dessert, proving that sometimes the best recipes are born out of simplicity and creativity.

Final Thoughts

Paula Deen’s 5-Minute Fudge is more than just a dessert; it’s a celebration of homemade joy and timeless Southern charm. It shows that you don’t need fancy equipment or hours in the kitchen to create something special. In just five minutes, you can have a tray full of glossy, melt-in-your-mouth chocolate fudge that’s guaranteed to impress anyone who tastes it.

So, the next time you’re craving something sweet or need a quick dessert for a gathering, skip the store-bought candy and whip up this classic Paula Deen treat. It’s simple, foolproof, and utterly irresistible — the kind of fudge that turns ordinary moments into something extraordinary.

Pecan Pie Balls

If you love the rich, buttery flavor of classic pecan pie but want a treat that’s portable, no-bake, and irresistibly snackable, these Pecan Pie Balls are the perfect indulgence. They capture everything you adore about pecan pie — the toasted nuts, caramel-like sweetness, and melt-in-your-mouth richness — all rolled into bite-sized perfection. Whether for holiday gatherings, dessert tables, or a cozy snack with coffee, these little orbs of southern sweetness deliver pure comfort in every bite.

The Inspiration Behind the Recipe

The magic of pecan pie lies in its simplicity — butter, sugar, and pecans coming together to create something extraordinary. But sometimes, you want the same decadence without the oven. That’s where this recipe shines. Instead of baking, we blend roasted pecans with graham cracker crumbs, brown sugar, maple syrup, and a touch of vanilla to create a dough that’s rolled into balls and dipped in luscious chocolate. The result is a truffle-like confection that’s chewy, nutty, and blissfully sweet.

Think of them as pecan pie meets chocolate truffle — smooth on the outside, crunchy and caramel-rich inside.

Ingredients

For the Pecan Pie Ball Mixture:

  • 2 cups finely chopped pecans (lightly toasted)

  • 1 ½ cups graham cracker crumbs

  • 1 cup brown sugar (packed)

  • ¼ cup pure maple syrup or light corn syrup

  • ½ teaspoon ground cinnamon

  • ½ teaspoon salt

  • 1 teaspoon pure vanilla extract

  • 2 tablespoons melted butter

For the Chocolate Coating:

  • 2 cups semi-sweet or dark chocolate chips

  • 1 tablespoon coconut oil or shortening (for a smoother coating)

  • Extra chopped pecans or sea salt for garnish (optional)

Step-by-Step Instructions

1. Toast the Pecans

Preheat your oven to 350°F (175°C) and spread the chopped pecans on a baking sheet. Toast them for 6–8 minutes, stirring halfway through. This brings out their natural oils and intensifies the nutty aroma — the foundation of your pecan pie flavor. Once done, let them cool completely before adding to the mixture.

2. Create the Base Mixture

In a large mixing bowl, combine the toasted pecans, graham cracker crumbs, brown sugar, cinnamon, and salt. Stir until evenly blended. The graham crumbs act as the “crust,” binding the sweetness with the earthy crunch of pecans.

In a smaller bowl, whisk together the melted butter, maple syrup, and vanilla extract until smooth. Pour this liquid mixture into the dry ingredients and stir until it all comes together into a sticky dough.

If it feels too dry, add an extra teaspoon of syrup at a time until the texture resembles cookie dough — soft but moldable.

3. Roll into Balls

Using your hands or a small cookie scoop, portion out the dough and roll it into 1-inch balls. Place them on a parchment-lined baking tray. You should get around 24–30 pecan pie balls, depending on size.

Place the tray in the refrigerator for 30 minutes to help the balls firm up before coating. This step is crucial for keeping their shape when dipped in chocolate.

4. Melt the Chocolate

In a microwave-safe bowl, combine chocolate chips and coconut oil. Heat in 20-second intervals, stirring between each until the mixture is smooth and glossy. Alternatively, you can melt it over a double boiler for more control.

5. Dip and Decorate

Using a fork or dipping tool, coat each chilled pecan ball in the melted chocolate, letting excess drip off before placing it back on the parchment paper. For an extra touch of beauty and texture, sprinkle a few crushed pecans or a pinch of sea salt on top before the chocolate sets.

6. Chill to Perfection

Refrigerate the tray for another 30–45 minutes or until the chocolate hardens. Once set, transfer your pecan pie balls to an airtight container. They’ll keep fresh for up to two weeks in the fridge or three months in the freezer.

Flavor Variations & Add-Ins

  • Bourbon Twist: Add a tablespoon of bourbon to the mixture for a Southern flair that enhances the pecan and caramel notes.

  • White Chocolate Coating: Swap the dark chocolate for white chocolate for a creamier, sweeter bite.

  • Espresso Kick: Mix in a teaspoon of espresso powder to deepen the flavor and balance the sweetness.

  • Coconut Crunch: Add ¼ cup of shredded coconut to the mixture for a tropical texture contrast.

These variations let you reinvent the recipe each time, making it a signature dessert for any occasion.

Serving Ideas

Serve these pecan pie balls on a decorative platter lined with mini cupcake liners for a professional touch. They pair beautifully with hot coffee, chai latte, or even a small glass of bourbon or rum for adults. During holidays, they make delightful additions to cookie exchanges, gift boxes, or dessert charcuterie boards.

You can even crumble them slightly and sprinkle over vanilla ice cream or pancakes for a quick pecan pie sundae moment.

Why You’ll Love This Recipe

  1. No baking required: Perfect for busy days or warm weather when you want dessert without turning on the oven.

  2. Authentic flavor: Tastes just like classic pecan pie, but easier to make and eat.

  3. Customizable: From bourbon to white chocolate, you can tailor it to your taste.

  4. Portable treats: Great for parties, picnics, or snacking on the go.

  5. Crowd-pleaser: Every bite has that buttery, nutty, caramel flavor that makes pecan pie a timeless favorite.

Tips for Success

  • Don’t skip toasting the pecans. It’s the secret to that rich, roasted flavor.

  • Use high-quality chocolate. Since it’s the outer layer, it defines the final taste.

  • Keep hands slightly damp when rolling to prevent sticking.

  • Let them chill fully before dipping, so they don’t fall apart in the chocolate.

  • For extra shine, lightly drizzle melted chocolate on top after chilling.

Conclusion

These Pecan Pie Balls are a modern twist on a classic dessert that embodies southern warmth and homemade comfort. Every bite bursts with caramel sweetness, buttery richness, and toasted nut flavor — the essence of pecan pie, reimagined in the most irresistible way.

Whether you serve them during holidays or keep a stash in your fridge for sweet cravings, they’re guaranteed to bring smiles, comfort, and a little taste of nostalgia with every bite.