Loaded Potato Rounds: The Ultimate Crispy, Cheesy Appetizer That Steals the Show

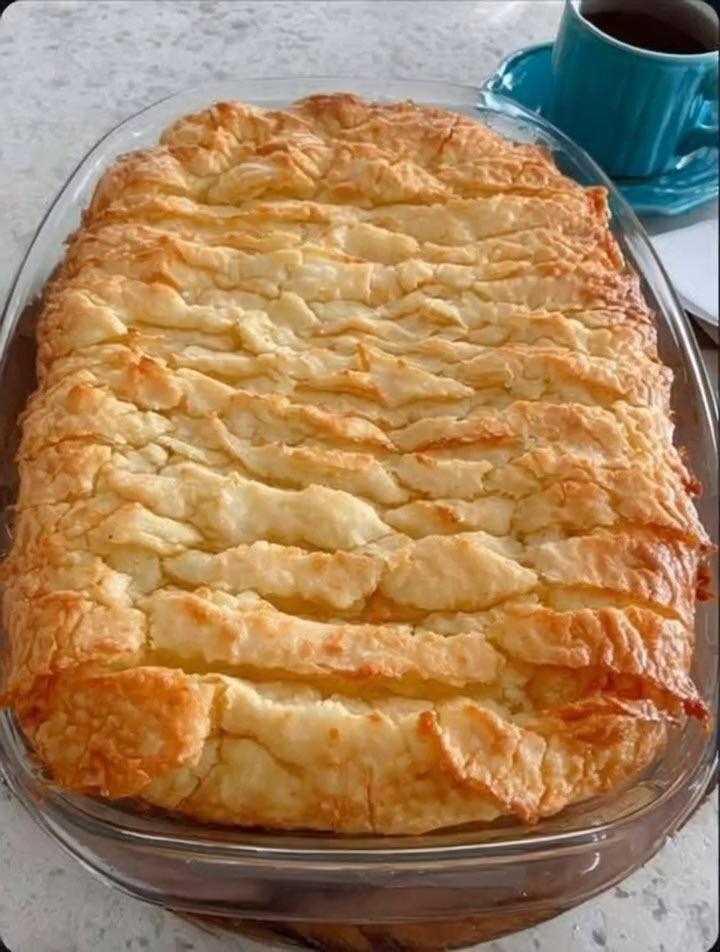
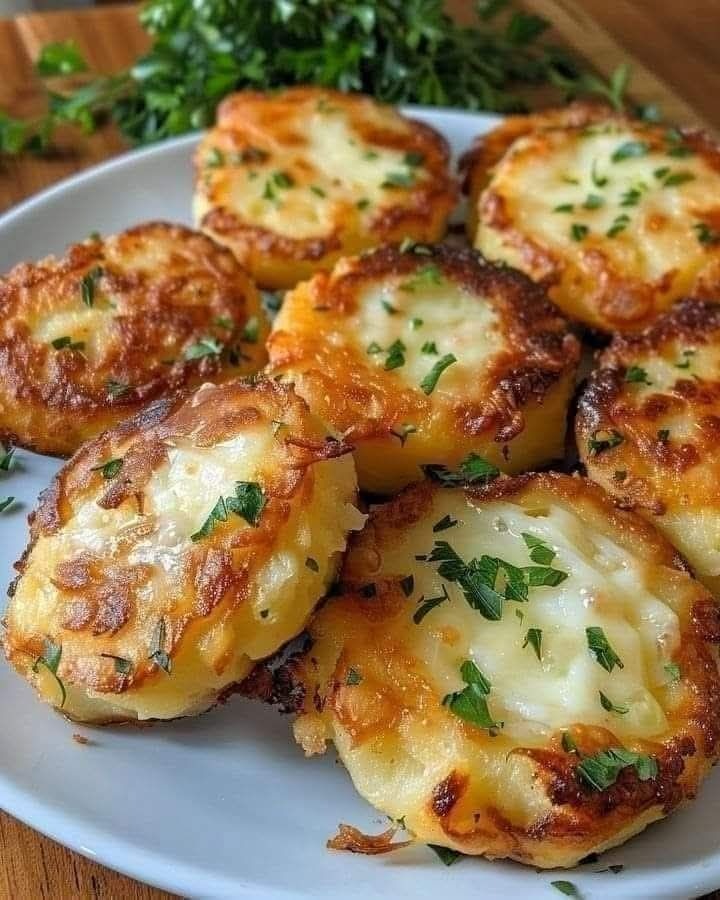
If there’s one appetizer guaranteed to disappear within minutes, it’s Loaded Potato Rounds. Crispy on the outside, fluffy on the inside, and piled high with gooey cheese, smoky bacon, and fresh toppings—these little bites deliver all the comfort of a loaded baked potato in a perfectly snackable form. Whether you’re hosting a game night, planning a party, or just craving something indulgent, this recipe is a true crowd-pleaser that never fails to impress.

What makes loaded potato rounds so irresistible is the contrast: golden, crunchy edges paired with creamy potato centers and melty cheese. Best of all, they’re incredibly versatile. You can customize the toppings, adjust the seasoning, or even make them vegetarian-friendly without losing any of that crave-worthy flavor.

Why You’ll Love This Recipe

  • Crispy perfection without deep frying

  • Easy to make with simple, everyday ingredients

  • Perfect for parties, potlucks, or casual snacking

  • Customizable with endless topping options

  • Make-ahead friendly for stress-free entertaining

These potato rounds look fancy, taste indulgent, and yet come together with minimal effort—exactly what a great appetizer should do.

Ingredients (Serves 4–6)

For the Potato Rounds:

  • 4 large russet potatoes (scrubbed clean)

  • 3 tablespoons olive oil

  • 1 teaspoon garlic powder

  • 1 teaspoon paprika

  • ½ teaspoon onion powder

  • Salt and black pepper, to taste

For the Toppings:

  • 1½ cups shredded cheddar cheese (or a cheddar–mozzarella blend)

  • 6 slices bacon, cooked and crumbled

  • ½ cup sour cream

  • 2 tablespoons fresh chives or green onions, finely chopped

Step-by-Step Instructions

1. Prepare the Potatoes

Preheat your oven to 425°F (220°C). Line a large baking sheet with parchment paper or lightly grease it. Slice the potatoes into ½-inch thick rounds—thick enough to stay fluffy inside but thin enough to crisp beautifully.

2. Season for Flavor

Place the potato slices in a large bowl. Drizzle with olive oil, then sprinkle with garlic powder, paprika, onion powder, salt, and pepper. Toss until every slice is evenly coated.

3. Bake Until Crispy

Arrange the potato rounds in a single layer on the baking sheet, making sure they don’t overlap. Bake for 25–30 minutes, flipping halfway through, until they’re golden brown and crisp around the edges.

4. Add the Cheese

Remove the tray from the oven and sprinkle shredded cheese evenly over each potato round. Return to the oven for 5–7 minutes, just until the cheese is melted and bubbly.

5. Load Them Up

Top each cheesy round with crumbled bacon. Finish with a dollop of sour cream and a sprinkle of fresh chives or green onions.

Serve immediately while hot and irresistible.

Pro Tips for Perfect Potato Rounds

  • Use russet potatoes for the crispiest texture—they have less moisture than waxy varieties.

  • Don’t overcrowd the pan. Space equals crispiness.

  • Flip halfway through baking to ensure even browning.

  • Shred your own cheese if possible—it melts better than pre-shredded varieties.

Delicious Variations to Try

  • Spicy Loaded Rounds: Add sliced jalapeños and a drizzle of hot sauce.

  • Vegetarian Style: Skip the bacon and add sautéed mushrooms or caramelized onions.

  • Tex-Mex Twist: Use pepper jack cheese and finish with salsa and avocado.

  • Breakfast Rounds: Top with scrambled eggs and a sprinkle of breakfast sausage.

  • Garlic Parmesan: Swap cheddar for parmesan and add roasted garlic and parsley.

These variations make the recipe endlessly adaptable—perfect for using what you already have on hand.

Make-Ahead & Storage Tips

You can bake the potato rounds in advance and store them in the refrigerator for up to 2 days. When ready to serve, reheat in the oven at 400°F (205°C) for 8–10 minutes, then add cheese and toppings fresh.

Avoid microwaving if you want to keep that crispy texture intact.

Perfect Pairings

Loaded potato rounds pair beautifully with:

  • Ranch or garlic aioli for dipping

  • Buffalo wings or sliders for game day

  • A crisp green salad to balance the richness

  • Iced drinks or sparkling beverages for parties

Final Thoughts

Loaded Potato Rounds are the kind of appetizer that steals attention from the main dish. Crispy, cheesy, and generously topped, they deliver maximum flavor in every bite. Simple enough for a casual night in yet impressive enough for entertaining, this recipe proves that potatoes truly are the ultimate comfort food.

11 Foods You Should Never Put in a Slow Cooker

Slow cookers are beloved for their convenience—dump, set, and forget. They’re perfect for soups, stews, braises, and comfort foods that benefit from long, gentle heat. But despite their versatility, slow cookers are not a one-size-fits-all solution. Some foods simply don’t behave well during hours of low, moist cooking. They can turn mushy, bitter, unsafe, or just plain disappointing.

If you want consistently delicious results, it’s just as important to know what not to put in a slow cooker as it is to know what works. Here are 11 foods you should never put in a slow cooker, and why avoiding them will instantly improve your meals.

1. Dairy Products (Added Too Early)

Milk, cream, sour cream, cream cheese, and yogurt are all prone to curdling under long, slow heat. When cooked for hours, dairy separates into grainy solids and watery liquid, ruining the texture of your dish.

Better approach: Add dairy in the last 15–30 minutes of cooking, once the heat is lower and cooking time is nearly done.

2. Lean Cuts of Meat

Lean meats like chicken breast, pork loin, turkey breast, or extra-lean beef dry out easily in a slow cooker. Without enough fat or connective tissue, they become stringy and tough after hours of cooking.

What works instead: Use tougher, fattier cuts like chuck roast, pork shoulder, chicken thighs, or beef short ribs—they break down beautifully over time.

3. Fresh Herbs (Early On)

Fresh herbs such as basil, parsley, cilantro, and dill lose their flavor when cooked for long periods. In a slow cooker, they often turn bitter or completely flavorless.

Tip: Use dried herbs during slow cooking, and add fresh herbs right before serving for brightness and aroma.

4. Seafood

Fish, shrimp, scallops, and other seafood cook very quickly. Leaving them in a slow cooker for hours results in rubbery, overcooked protein with a strong, unpleasant smell.

Exception: Some firm fish like salmon may work if added only during the last 20–30 minutes—but in most cases, seafood is better cooked separately.

5. Pasta

Pasta absorbs liquid and releases starch as it cooks. In a slow cooker, it often turns gummy, bloated, and mushy, especially if added too early.

Smarter option: Cook pasta separately and stir it into the slow cooker just before serving, or add it only in the final 20–30 minutes with extra liquid.

6. Rice (Uncooked)

Uncooked rice can be tricky in a slow cooker. It may remain undercooked, become gluey, or cook unevenly depending on liquid levels and cooking time.

Best practice: Use parboiled rice if necessary, or cook rice separately and add it at the end for better texture and reliability.

7. Delicate Vegetables

Vegetables like zucchini, spinach, peas, asparagus, and bell peppers break down quickly. After hours in a slow cooker, they lose color, texture, and nutritional value.

Solution: Add delicate vegetables in the last 30–60 minutes so they stay vibrant and slightly crisp.

8. Raw Beans (Especially Kidney Beans)

This is a serious safety issue. Raw or undercooked kidney beans contain a toxin called phytohaemagglutinin, which is destroyed only by boiling at high temperatures. Slow cookers often don’t get hot enough.

Rule: Always use canned beans or fully pre-cooked dried beans. Never put raw dried beans directly into a slow cooker.

9. Alcohol

While alcohol burns off quickly on the stovetop, it does not evaporate efficiently in a slow cooker. This can leave your dish with a harsh, raw alcohol taste.

Fix: Reduce alcohol in a pan before adding it to the slow cooker to concentrate flavor and remove bitterness.

10. Crunchy Toppings

Breadcrumbs, croutons, fried onions, tortilla chips, and nuts lose their crunch completely in the moist environment of a slow cooker, becoming soggy and unappealing.

Better idea: Add crunchy toppings right before serving for contrast and texture.

11. Frozen Meat

Putting frozen meat directly into a slow cooker is unsafe. It keeps the food in the “danger zone” temperature range too long, allowing bacteria to multiply before the meat reaches a safe temperature.

Always: Thaw meat fully before adding it to your slow cooker.

Final Thoughts

Slow cookers are fantastic tools—but only when used wisely. Understanding their limitations helps you avoid bland flavors, unpleasant textures, and food safety risks. Think of a slow cooker as a specialist rather than an all-purpose appliance: it excels at long, gentle cooking of hearty ingredients, but struggles with delicate, quick-cooking, or temperature-sensitive foods.

The most powerful medicinal plant you should know

For thousands of years, civilizations across Asia, the Middle East, and Africa have relied on medicinal plants not just to flavor food, but to strengthen the body, calm inflammation, and support long-term wellness. Among all of these plants, turmeric stands out as one of the most powerful and widely respected medicinal plants known to humanity. Often called “the golden healer,” turmeric has earned its reputation through centuries of traditional use and modern scientific interest.

Turmeric (Curcuma longa) is a bright yellow root related to ginger. While it may look humble sitting on a spice rack, its health-supporting potential is extraordinary. The secret behind turmeric’s power lies in its active compound curcumin, which is responsible for most of its medicinal properties.

Why Turmeric Is Considered So Powerful

Turmeric is not a quick-fix remedy—it is a deep, foundational plant medicine that works gradually and holistically. Traditional systems like Ayurveda and Unani medicine have long used turmeric to balance the body, cleanse the blood, and strengthen immunity.

Some of the most recognized wellness benefits associated with turmeric include:

1. Natural Anti-Inflammatory Support
Chronic inflammation is often linked to joint discomfort, fatigue, and many long-term health concerns. Turmeric is known for helping the body manage inflammatory responses naturally, making it popular among people seeking gentle, plant-based support.

2. Powerful Antioxidant Properties
Turmeric helps neutralize free radicals, which are unstable molecules that contribute to premature aging and cellular stress. Antioxidants support overall vitality and help protect the body from environmental damage.

3. Digestive and Gut Support
Traditionally, turmeric has been used to stimulate digestion, support liver function, and reduce bloating. It encourages the production of bile, which helps the body break down fats more efficiently.

4. Immune System Support
In many cultures, turmeric is used during seasonal changes to help maintain immune resilience. It is often consumed in warm drinks or broths when the body feels run down.

5. Brain and Mood Support
Emerging research has explored curcumin’s potential role in supporting brain health and balanced mood. This may explain why turmeric has long been associated with mental clarity and emotional balance in traditional medicine.

The Secret to Using Turmeric Correctly

One important fact many people don’t know: curcumin is not easily absorbed on its own. To unlock turmeric’s full potential, it must be combined with black pepper (which contains piperine) and a healthy fat. This combination dramatically increases absorption.

That’s why traditional cultures rarely used turmeric alone—they paired it wisely.

Unique Healing Recipe: Golden Turmeric Vitality Paste

This recipe is far more effective than simply sprinkling turmeric into food. It creates a concentrated, absorbable form that can be used daily.

Ingredients:

  • ½ cup organic turmeric powder

  • 1½ cups filtered water

  • 1 teaspoon freshly ground black pepper

  • 2 tablespoons coconut oil or olive oil

Instructions:

  1. In a small saucepan, combine the turmeric powder and water.

  2. Cook on low heat, stirring constantly, until a thick paste forms (about 7–10 minutes).

  3. Add black pepper and oil, mixing thoroughly.

  4. Remove from heat and allow to cool.

  5. Store in a glass jar in the refrigerator for up to 2 weeks.

How to Use the Golden Paste

  • Golden Milk: Stir ½ teaspoon into warm milk (dairy or plant-based) with a little honey.

  • Morning Tonic: Mix ½ teaspoon into warm water with lemon.

  • Food Boost: Add a small amount to soups, stews, or rice dishes.

Start with small amounts and be consistent. Turmeric works best when used regularly rather than occasionally.

Why This Recipe Is So Effective

This preparation mirrors ancient medicinal techniques. The heat activates the turmeric, the fat binds to curcumin, and the black pepper dramatically enhances absorption. Together, they transform turmeric from a simple spice into a true functional remedy.

A Word of Balance and Safety

Turmeric is powerful, but it is still a plant—not a miracle cure. People who are pregnant, have gallbladder issues, or take blood-thinning medications should consult a healthcare professional before using concentrated turmeric regularly. Used wisely, however, turmeric is one of the safest and most beneficial medicinal plants available.

Final Thoughts

In a world full of synthetic supplements and quick solutions, turmeric reminds us that nature often provides the most effective tools for long-term wellness. Simple, affordable, and deeply rooted in tradition, this golden plant continues to prove why it deserves a place in every kitchen and wellness routine.

the-5-most-laxative-foods-in-the-world-natural-remedies-to-combat-constipation

Constipation is one of the most common digestive complaints worldwide. Busy lifestyles, low fiber intake, dehydration, stress, and lack of movement can all slow digestion and make bowel movements uncomfortable or irregular. While over-the-counter laxatives can offer quick relief, many people prefer gentle, food-based solutions that support gut health naturally. Certain foods have earned a global reputation for their natural laxative effects, helping the body restore regularity without harsh side effects.

Below are five of the most effective laxative foods in the world, how they work, and simple ways to include them in your daily routine.

1. Prunes (Dried Plums)

Prunes are often considered the gold standard of natural laxatives—and for good reason. They contain a powerful combination of dietary fiber, sorbitol, and phenolic compounds, all of which work together to stimulate bowel movements.

Sorbitol is a natural sugar alcohol that draws water into the intestines, softening stool and making it easier to pass. Meanwhile, the insoluble fiber in prunes adds bulk, encouraging the colon to contract and move waste along.

How to use them:
Eat 3–5 prunes in the morning, or soak them in warm water overnight and consume both the fruit and the liquid. Prune juice is another option, but whole prunes provide more fiber

 .2. Flaxseeds Flaxseeds are small but incredibly effective for digestive health. They are rich in soluble and insoluble fiber, which helps regulate bowel movements while feeding beneficial gut bacteria.

When mixed with liquid, flaxseeds form a gel-like substance that lubricates the intestinal tract, making stool softer and easier to pass. Unlike stimulant laxatives, flax works gently and consistently when used regularly.

How to use them:
Grind flaxseeds before consumption for best absorption. Mix one tablespoon into yogurt, oatmeal, smoothies, or warm water. Drink plenty of fluids alongside them to maximize their effect.

3. Papaya

Papaya is a tropical fruit widely used as a digestive remedy in many cultures. It contains an enzyme called papain, which helps break down proteins and supports smoother digestion. Papaya is also high in water and fiber, both essential for preventing constipation.

The fruit’s natural enzymes help reduce bloating and ease sluggish digestion, making it especially helpful for people who feel heavy or uncomfortable after meals.

How to use it:
Eat fresh papaya on an empty stomach in the morning, or blend it into a smoothie. A small bowl daily can significantly improve digestive regularity.

4. Chia Seeds

Chia seeds are another fiber powerhouse known for their stool-softening properties. When soaked in water, they expand up to ten times their size, creating a gel that adds bulk and moisture to stool.

This gel-like texture helps stimulate bowel movements while soothing the digestive tract. Chia seeds are especially useful for people with dry or hard stools caused by dehydration.

How to use them:
Soak one tablespoon of chia seeds in a glass of water for at least 20–30 minutes, then drink. You can also add soaked chia to smoothies, yogurt, or overnight oats.

5. Figs

Fresh and dried figs have been used as a natural laxative for centuries. They are high in dietary fiber, natural sugars, and compounds that promote healthy bowel contractions.

Figs help increase stool volume while also encouraging water retention in the colon, making elimination easier and more comfortable. They are particularly helpful for chronic constipation when eaten consistently.

How to use them:
Eat 2–3 dried figs soaked overnight in water, first thing in the morning. Fresh figs can be eaten as-is or added to salads and breakfast dishes.

Tips to Boost the Effect of Laxative Foods

  • Stay hydrated: Fiber works best when paired with adequate water.

  • Be consistent: Natural remedies often work gradually; daily use is key.

  • Move your body: Light walking after meals stimulates digestion.

  • Avoid processed foods: Refined foods can worsen constipation.

Final Thoughts

Nature offers powerful tools for restoring digestive balance, and these five foods are among the most effective natural laxatives in the world. Unlike harsh chemical laxatives, they nourish the gut, support beneficial bacteria, and promote long-term regularity. While occasional constipation is normal, persistent symptoms may signal an underlying issue and should be discussed with a healthcare professional.

Doctor Sounds Alarm on a Popular Medication: Why Experts Say It Could Lead to Organ Failure

A growing number of doctors are raising concerns about a medication millions of people take every day—often without a second thought. It’s available by prescription, sometimes even over the counter, and is commonly viewed as “safe.” But according to medical experts, long-term or improper use may place serious strain on vital organs, potentially leading to organ failure in vulnerable individuals.

This warning isn’t meant to spark panic—but awareness.

The Problem Isn’t One Single Pill

When doctors talk about medication-related organ damage, they’re rarely pointing to a single drug that harms everyone. Instead, the risk comes from how often, how long, and in what combination medications are used.

Several widely prescribed drug categories have been linked—under specific circumstances—to liver, kidney, or heart complications:

  • Pain relievers (NSAIDs and acetaminophen)

  • Certain antibiotics

  • Cholesterol-lowering medications

  • Acid-reducing drugs

  • Some blood pressure medications

These drugs are effective and often necessary—but problems arise when warning labels are ignored or medications are taken without proper medical supervision.

The Organs Most at Risk

Doctors emphasize that the liver and kidneys are especially vulnerable because they act as the body’s filtration systems.

  • The liver processes medications, breaking them down so they can be used or eliminated. Over time, excessive strain can lead to inflammation, scarring, or liver failure.

  • The kidneys filter waste from the blood. Certain medications can reduce blood flow to the kidneys or cause toxic buildup, increasing the risk of kidney damage or failure.

In severe cases, damage may progress silently for years before symptoms appear.

Why This Risk Often Goes Unnoticed

One of the most dangerous aspects of medication-related organ stress is that early warning signs are easy to miss.

Symptoms may include:

  • Fatigue

  • Nausea

  • Loss of appetite

  • Swelling in the legs or ankles

  • Dark urine

  • Changes in urination

  • Brain fog or confusion

Because these signs are vague, many people attribute them to stress, aging, or diet—never suspecting their daily medication.

Who Is at Higher Risk?

Doctors say certain groups should be especially cautious:

  • Adults over 50

  • People taking multiple medications

  • Those with existing liver or kidney conditions

  • Individuals who drink alcohol regularly

  • People who exceed recommended dosages

  • Patients who self-medicate long-term without follow-ups

Even “normal” doses can become risky when combined with dehydration, illness, or other drugs.

A Common Mistake Doctors See

One of the biggest red flags physicians mention is long-term daily use without reassessment.

Many patients start a medication during a short-term health issue—but never stop. Years later, they’re still taking it, unaware their body chemistry has changed.

Doctors stress that medications should be reviewed regularly, especially if:

  • You’ve been taking them for more than 3–6 months

  • Your dosage has never been adjusted

  • You haven’t had blood tests to monitor organ function

What Doctors Recommend Instead

Medical professionals are not urging people to stop medications abruptly. Instead, they recommend a smarter approach:

  1. Never exceed the recommended dose

  2. Avoid mixing medications without guidance

  3. Stay well hydrated

  4. Limit alcohol

  5. Get routine blood work

  6. Discuss alternatives when possible

In some cases, lifestyle changes—such as diet adjustments, weight management, physical activity, or stress reduction—may reduce reliance on long-term medication.

The Importance of Open Conversations

Doctors say patients often hesitate to question medications, fearing they’ll appear ungrateful or difficult. But open communication can prevent serious complications.

Simple questions like:

  • “Do I still need this?”

  • “Is there a safer long-term option?”

  • “Should we check my liver or kidney function?”

can make a life-saving difference.

The Bottom Line

This warning isn’t about demonizing medication—it’s about respecting its power. Even the most common drugs can have serious consequences when misused, overused, or ignored for years.

Den hvite giften som ødelegger nyrene dine (og det er ikke salt)

Når vi hører ordet «hvit» i sammenheng med helsefare, tenker de fleste umiddelbart på sukker eller salt. Men det finnes et annet hvitt stoff som i stillhet kan belaste kroppen – og spesielt nyrene – uten at mange er klar over det. Det sniker seg inn i hverdagen vår, skjult i vanlige matvarer og drikker, og forbrukes ofte i langt større mengder enn kroppen tåler over tid.

Denne «hvite giften» er raffinert sukker.

Hvorfor akkurat nyrene rammes

Nyrene fungerer som kroppens avanserte filtreringssystem. De renser blodet, regulerer væskebalanse, blodtrykk og viktige mineraler. Når du stadig inntar store mengder raffinert sukker, settes dette systemet under konstant stress.

Overskudd av sukker i blodet fører til forhøyede insulinnivåer. Over tid kan dette bidra til insulinresistens, som igjen er nært knyttet til type 2-diabetes – en av de vanligste årsakene til kronisk nyresykdom. Selv hos personer uten diabetes kan høyt sukkerinntak føre til økt betennelse og skade på de små blodårene i nyrene.

Fruktose – den skjulte synderen

Det er særlig fruktose, en type sukker som ofte finnes i hvitt sukker og glukose-fruktose-sirup, som er problematisk. I motsetning til glukose, som brukes av nesten alle celler i kroppen, brytes fruktose hovedsakelig ned i leveren. Når leveren overbelastes, øker produksjonen av urinsyre.

Høye nivåer av urinsyre kan redusere nyrenes evne til å filtrere effektivt, og det er også knyttet til nyrestein og høyt blodtrykk – begge risikofaktorer for nyreskade.

Ikke bare søtsaker

Mange tror at sukker kun finnes i kaker, brus og godteri. I virkeligheten skjuler det seg i:

  • Ferdige sauser og dressinger

  • Hvitt brød og bakevarer

  • Smaksatt yoghurt

  • Frokostblandinger

  • «Sunn» energibarer

  • Juice og iste

Disse produktene kan virke uskyldige, men når de konsumeres daglig, kan de bidra til et kronisk høyt sukkerinntak uten at man merker det.

Sukker og væskebalanse

Et høyt sukkerinntak påvirker også kroppens væskebalanse. Når blodsukkeret er høyt, forsøker kroppen å kvitte seg med overskuddet gjennom urinen. Dette fører til hyppigere vannlating og økt belastning på nyrene. Over tid kan denne konstante «overarbeidingen» bidra til redusert nyrefunksjon.

Tegn på at nyrene kan være belastet

Nyreskade utvikler seg ofte stille, men tidlige tegn kan inkludere:

  • Vedvarende tretthet

  • Hevelser i ankler og føtter

  • Skummende urin

  • Hyppig vannlating, spesielt om natten

  • Konsentrasjonsvansker

Disse symptomene kan ha mange årsaker, men vedvarer de, bør de tas på alvor.

Hva kan du gjøre for å beskytte nyrene?

Det handler ikke om å kutte ut alt sukker for alltid, men om bevisste valg og moderasjon.

Praktiske grep:

  • Les ingredienslister – sukker har mange navn

  • Bytt ut søtede drikker med vann eller urtete

  • Velg fullkornsprodukter fremfor hvitt mel

  • Spis hel frukt i stedet for juice

  • Lag mer mat fra bunnen av

Å redusere sukkerinntaket kan gi raske fordeler: stabilere energi, bedre blodsukkerkontroll og mindre belastning på nyrene.

En stille, men påvirkbar risiko

Det farlige med raffinert sukker er ikke én enkelt dessert eller festlig anledning, men den daglige, langsomme overdoseringen. Nyrene er robuste organer, men de er ikke uovervinnelige. De responderer på hvordan vi behandler kroppen vår over tid.

Ved å bli mer bevisst på hvor sukker skjuler seg og ta små, konsekvente valg, kan du gjøre mye for å beskytte nyrene dine – lenge før problemer oppstår.

Southern Potato Salad

Southern Potato Salad isn’t just a side dish—it’s a tradition. You’ll find it at Sunday dinners, church potlucks, summer barbecues, and family reunions, sitting proudly next to fried chicken and baked beans. What sets Southern potato salad apart from other versions is its rich creaminess, gentle tang, and unmistakable warmth from mustard, sweet relish, and perfectly cooked eggs. This is comfort food at its finest—simple ingredients, layered flavors, and made with love.

Unlike lighter or vinegar-heavy potato salads, the Southern version is indulgent and satisfying. The potatoes are tender but never mushy, the dressing is smooth and well-seasoned, and every bite carries a balance of savory, tangy, and slightly sweet notes. Below is a truly unique Southern potato salad recipe, rooted in tradition but refined with a few chef-level tips to make it unforgettable.

Ingredients (Serves 6–8)

For the salad:

  • 3 pounds russet or Yukon Gold potatoes

  • 5 large eggs

  • ½ cup finely diced celery

  • ⅓ cup finely diced sweet onion (Vidalia if available)

  • ¼ cup sweet pickle relish

  • 1 tablespoon pickle juice (optional but recommended)

For the dressing:

  • 1 cup full-fat mayonnaise

  • 2 tablespoons yellow mustard

  • 1 tablespoon Dijon mustard (adds depth without overpowering)

  • 1 teaspoon sugar

  • ½ teaspoon smoked paprika

  • ¾ teaspoon salt (adjust to taste)

  • ½ teaspoon black pepper

  • ¼ teaspoon garlic powder

For garnish (optional but traditional):

  • Paprika or smoked paprika

  • Chopped parsley or green onions

Step-by-Step Instructions

1. Cook the potatoes properly
Peel the potatoes and cut them into evenly sized chunks—about 1½ inches. Place them in a large pot and cover with cold, generously salted water. Starting with cold water ensures the potatoes cook evenly. Bring to a gentle boil and cook for 10–15 minutes, until fork-tender but not falling apart.

Drain immediately and spread the potatoes on a baking sheet or wide bowl to release steam. Let them cool slightly while still warm—this helps them absorb flavor later.

2. Boil the eggs
Place eggs in a saucepan, cover with water, and bring to a boil. Once boiling, turn off the heat, cover, and let sit for 10–12 minutes. Transfer to ice water, peel, and chop. For extra creaminess, you can mash two yolks directly into the dressing.

3. Make the Southern dressing
In a large mixing bowl, whisk together mayonnaise, yellow mustard, Dijon mustard, sugar, salt, pepper, garlic powder, and smoked paprika. Add pickle relish and pickle juice for that signature Southern tang. Taste and adjust seasoning—this is where the magic happens.

4. Assemble the salad
Gently fold the warm potatoes into the dressing, allowing them to soak up flavor without breaking down. Add chopped eggs, celery, and onion. Fold carefully until everything is evenly coated.

5. Chill and rest
Cover and refrigerate for at least 1 hour, preferably 2–3. This resting time allows flavors to meld and deepen—Southern potato salad is always better after it sits.

6. Garnish and serve
Before serving, sprinkle with paprika and a little chopped parsley or green onion for color and freshness.

What Makes This Southern Potato Salad Special

  • Mustard-forward flavor: Yellow mustard gives it that unmistakable Southern taste.

  • Creamy but structured: Russet or Yukon Gold potatoes provide softness without turning mushy.

  • Sweet and tangy balance: Relish and sugar soften the acidity and round out the flavor.

  • Egg-rich texture: Eggs add richness and authenticity—never skip them in a true Southern version.

Tips for Perfect Results

  • Don’t overcook the potatoes—mushy potatoes ruin texture.

  • Always season the water heavily when boiling potatoes; it’s your only chance to flavor them internally.

  • Let potatoes cool slightly before mixing to prevent oily separation.

  • Taste again after chilling—cold food needs more seasoning.

Make It Your Own (Southern Variations)

  • Add crumbled bacon for a smoky twist.

  • Stir in a spoonful of sour cream for extra tang.

  • Use a dash of cayenne if you like heat.

  • Swap sweet relish for chopped bread-and-butter pickles for more texture.

Final Thoughts

Southern Potato Salad is more than a recipe—it’s a memory on a plate. Creamy, comforting, and boldly flavored, it’s the kind of dish people come back for seconds (and ask for the recipe). Whether served at a backyard cookout or a holiday table, this classic never goes out of style. Make it once, and it’ll become your go-to version for years to come.

Castor Oil After 50: This Is What Happens After 7 Days of Use

After the age of 50, the body begins to change in noticeable ways. Skin becomes drier, joints may feel stiffer, digestion can slow down, hair may thin, and overall recovery feels different than it once did. Because of this, many people start looking for simple, natural remedies that support the body without harsh chemicals. One traditional remedy that has stood the test of time is castor oil. Used for centuries in beauty and wellness routines, castor oil has recently regained attention—especially among people over 50. But what actually happens if you use castor oil consistently for just 7 days?

Let’s explore what many people experience, how to use it safely, and why this humble oil continues to be so popular.

What Is Castor Oil?

Castor oil is a thick, pale-yellow oil extracted from the seeds of the Ricinus communis plant. It is rich in ricinoleic acid, a fatty acid known for its moisturizing and soothing properties. Traditionally, castor oil has been used for skin care, hair health, massage, and digestive support. Its simple composition and versatility make it especially appealing after 50, when the body benefits from gentle, nourishing care.

Day 1–2: Deep Moisture and Skin Comfort

Within the first couple of days, most people notice castor oil’s intense moisturizing effect. Mature skin often struggles to retain moisture, leading to dryness, fine lines, and tightness.

When applied to the skin—especially hands, feet, elbows, knees, or face (in very small amounts)—castor oil creates a protective barrier that locks in hydration. After 1–2 days, skin may feel:

  • Softer and more supple

  • Less itchy or tight

  • More comfortable, especially overnight

Many people over 50 like to apply it before bed, allowing the oil to work while the body rests.

Day 3–4: Improved Hair and Scalp Feel

By midweek, attention often turns to hair and scalp. Thinning hair, dryness, and brittle strands are common concerns after 50.

After 3–4 days of gentle scalp massage with castor oil (2–3 times per week), users often report:

  • A calmer, less dry scalp

  • Hair feeling thicker or more conditioned

  • Reduced breakage when brushing

Castor oil does not magically regrow hair in a few days, but it can create a healthier scalp environment, which is essential for long-term hair strength.

Day 5: Joint and Muscle Comfort

Another common use after 50 is castor oil massage on joints and muscles. Knees, hands, shoulders, and lower back are popular areas.

By day 5, some people notice:

  • A warming, soothing sensation during massage

  • Temporary relief from stiffness

  • Improved comfort after gentle movement

This effect is largely due to massage combined with the oil’s ability to reduce dryness and improve skin flexibility around joints.

Day 6: Digestive Awareness (If Used Internally – With Caution)

Traditionally, castor oil has been used as a digestive aid. However, internal use should only be done with medical guidance, especially after 50.

Some people who use very small, medically approved doses report:

  • A sense of digestive movement

  • Temporary relief from occasional sluggishness

It’s important to note that castor oil is powerful and not meant for daily internal use. Many people choose to benefit from castor oil externally only, which is the safest approach.

Day 7: Overall Sense of Nourishment

After a full week, the most common change is not dramatic transformation—but consistency-related comfort. Many people report:

  • Skin looking healthier and more nourished

  • Hair feeling softer and easier to manage

  • A sense of relaxation from nightly self-care rituals

After 50, small daily habits can make a big difference, and castor oil often becomes part of a calming routine rather than a “quick fix.”

How to Use Castor Oil Safely After 50

For skin:

  • Use a few drops on damp skin

  • Best applied at night

  • Patch test first

For hair/scalp:

  • Massage a small amount into scalp

  • Leave for 30–60 minutes, then wash

  • Use 1–2 times per week

For joints:

  • Warm a small amount between hands

  • Massage gently into the area

Important:

  • Always choose cold-pressed, hexane-free castor oil

  • Avoid eyes and broken skin

  • Consult a doctor before internal use

Final Thoughts

Castor oil after 50 isn’t about overnight miracles—it’s about gentle support, nourishment, and consistency. After 7 days of use, many people feel more connected to their bodies through simple self-care. Skin feels softer, hair feels healthier, and nightly routines become moments of calm.

Crinkle Cake: The Stunning, “Cracked” Masterpiece That’s Easier Than It Looks

Crinkle Cake is one of those desserts that stops people mid-sentence. With its dramatic ridges, golden peaks, and beautifully cracked surface, it looks like something straight out of a high-end pastry shop. The best part? It’s surprisingly simple to make, using basic ingredients and a technique that’s more about arrangement than precision. This cake proves that elegance doesn’t have to be complicated—and that sometimes the most impressive desserts are born from the easiest methods.

Crinkle Cake is believed to be inspired by Middle Eastern and Mediterranean pastry traditions, especially desserts made with phyllo dough and syrup. But unlike traditional baklava, which requires careful layering and cutting, Crinkle Cake embraces imperfection. The folds are loose, the cracks are intentional, and the end result is both rustic and refined.

Why Crinkle Cake Is So Special

What makes Crinkle Cake stand out isn’t just its appearance—it’s the texture. The top bakes up crisp and deeply golden, while the inside stays soft, custardy, and rich. Each bite offers contrast: crunchy edges, tender centers, and a gentle sweetness that doesn’t overwhelm.

Another reason this cake is so beloved is its versatility. You can keep it classic with vanilla and butter, add citrus zest for brightness, infuse the syrup with rose or orange blossom water, or sprinkle nuts on top for extra crunch. It’s a dessert that adapts beautifully to your taste and occasion.

And perhaps most importantly, Crinkle Cake is forgiving. No perfect measurements, no advanced skills, no stress. If you can scrunch paper, you can make this cake.

Ingredients You’ll Need

For the cake:

  • Phyllo dough sheets (thawed if frozen)

  • Unsalted butter, melted

  • Eggs

  • Whole milk or cream

  • Granulated sugar

  • Vanilla extract

  • A pinch of salt

For the syrup:

  • Sugar

  • Water

  • Lemon juice or orange juice

  • Optional flavorings: rose water, orange blossom water, or vanilla

How to Make Crinkle Cake

Step 1: Prepare the Phyllo
Preheat your oven and generously butter a baking dish. Take one sheet of phyllo dough at a time and gently scrunch it lengthwise, like an accordion. Don’t press too tightly—loose folds create better texture. Place the scrunched sheet into the baking dish. Repeat until the dish is filled with upright, wrinkled phyllo sheets packed snugly together.

Step 2: Bake Until Golden
Drizzle melted butter evenly over the phyllo, making sure it seeps into the folds. Bake until the top turns golden and crisp. This first bake sets the structure and creates those dramatic cracks that give the cake its name.

Step 3: Make the Custard
While the phyllo bakes, whisk together eggs, milk or cream, sugar, vanilla, and salt. The mixture should be smooth and pourable.

Step 4: Pour and Bake Again
Remove the partially baked phyllo from the oven and slowly pour the custard over the top. Let it sink into the folds. Return the dish to the oven and bake until the custard is set and the top is deeply golden.

Step 5: Add the Syrup
Simmer sugar, water, and citrus juice until slightly thickened. As soon as the cake comes out of the oven, pour the warm syrup evenly over the hot cake. You’ll hear a gentle sizzle—that’s exactly what you want. The syrup soaks in, adding moisture and shine without making the cake soggy.

Tips for Perfect Crinkle Cake

  • Don’t flatten the phyllo: Airy folds are key to texture.

  • Use enough butter: It ensures crispness and rich flavor.

  • Pour slowly: Let the custard and syrup absorb gradually.

  • Rest before serving: Allow the cake to cool slightly so the layers set.

Flavor Variations to Try

  • Citrus Crinkle Cake: Add lemon or orange zest to the custard.

  • Nutty Crinkle Cake: Sprinkle chopped pistachios or almonds on top before the final bake.

  • Spiced Version: Add cinnamon or cardamom to the syrup.

  • Chocolate Twist: Drizzle melted chocolate over the cooled cake.

How to Serve Crinkle Cake

Crinkle Cake is wonderful warm, at room temperature, or chilled. Serve it plain, dusted with powdered sugar, or with a scoop of vanilla ice cream or whipped cream. It pairs beautifully with coffee or tea, making it perfect for gatherings, holidays, or a simple treat-yourself moment.

Final Thoughts

Crinkle Cake is proof that beauty doesn’t require perfection. Its cracked surface, dramatic folds, and golden finish celebrate simplicity and creativity. Whether you’re an experienced baker or a complete beginner, this cake delivers maximum impact with minimal effort. Once you make it, don’t be surprised if it becomes your signature dessert—the one everyone asks for again and again.

Seeing a Wire Tied Around a Car Door Handle: What It Could Mean

Spotting a piece of wire, string, zip tie, or thin cord tied around a car door handle can instantly trigger concern—and for good reason. Stories circulate online claiming it’s a secret signal used by criminals to mark vehicles or trap unsuspecting drivers. While not every instance points to danger, the sight should never be ignored. Understanding the possible meanings behind a wire on a door handle helps you respond calmly, wisely, and safely.

Why This Situation Raises Alarm

A car door handle is a personal access point. Anything unusual attached to it suggests intentional placement. Unlike random litter, a wire tied neatly around a handle requires effort and proximity, which immediately narrows the possibilities. The key question is whether the object was placed accidentally, maliciously, or as a harmless prank.

Possible Meanings of a Wire on a Door Handle

1. Attempted Distraction Technique

One widely discussed theory is that criminals tie wire or zip ties around door handles to delay the driver. As you fumble to remove it—especially with one hand while holding bags—you may be distracted long enough for someone to approach, intimidate, or attempt theft. While documented cases are rare, distraction crimes are real and rely on surprise and divided attention.

2. Vehicle Marking

Another belief is that vehicles are “marked” to indicate a potential target. In some criminal schemes, subtle markings identify cars that appear unattended, valuable, or vulnerable (such as those parked in isolated areas). However, law enforcement has stated that systematic marking with wires is uncommon. Still, isolated incidents have occurred where vehicles were tagged to observe owner behavior.

3. Prank or Vandalism

Not all explanations are sinister. Teenagers or passersby sometimes use zip ties or wire as pranks or acts of minor vandalism. While annoying and inappropriate, these cases are usually random and lack follow-up criminal intent.

4. Personal Mistake or Leftover Object

Occasionally, a wire could be left behind unintentionally—perhaps from construction, towing, or a previous repair. If the wire looks worn, loose, or unrelated to your handle specifically, this explanation becomes more likely.

What Makes a Situation More Concerning

Certain factors increase the likelihood that the wire should be treated seriously:

  • The wire is new, tight, and deliberately knotted

  • You are parked in a dimly lit or isolated area

  • The object is attached only to your vehicle, not others nearby

  • You notice someone lingering nearby or watching

  • The wire is difficult to remove quickly

Trust your instincts. Discomfort without a clear reason is often your body’s early warning system.

What You Should Do If You Find One

  1. Do Not Remove It Immediately
    Before touching anything, look around. Check your surroundings for people or movement. If you feel unsafe, get back into a nearby building or populated area.

  2. Enter Your Car from Another Door
    If possible, unlock and enter from the passenger side. This reduces exposure and keeps your focus inside the vehicle.

  3. Lock the Doors Immediately
    Once inside, lock all doors and start the engine. You can remove the wire later when you’re in a safe, secure place.

  4. Document the Situation
    Take a photo of the wire and its placement. This can be helpful if you choose to report it or notice a pattern later.

  5. Report Suspicious Findings
    If the situation feels genuinely threatening—especially if it happens more than once—contact local authorities or building security. Non-emergency lines are appropriate unless someone is actively threatening you.

What Law Enforcement Generally Says

Police departments often caution against panic but emphasize awareness. While many viral posts exaggerate the frequency of such tactics, officers agree that unexpected objects on vehicles should be treated with caution. Criminal methods evolve, and opportunistic crimes rely on surprise rather than elaborate signaling systems.

Prevention Tips

  • Park in well-lit, busy areas whenever possible

  • Walk with keys already in hand

  • Avoid distractions like texting while approaching your car

  • Perform a quick visual scan before unlocking

  • If something feels off, leave and ask for help

The Bottom Line

Seeing a wire tied around your car door handle doesn’t automatically mean danger—but it does mean pause, observe, and protect yourself. Most cases turn out harmless, yet the small chance of risk is reason enough to stay alert. Awareness is not fear; it’s preparedness. By knowing what to look for and how to respond, you turn an unsettling moment into a controlled, confident decision.