There are recipes that surprise you with their complexity, and then there are recipes that surprise you with their simplicity. This 2-Ingredient Peanut Butter Fudge belongs to the second category — a dessert so delicious, so velvety, so melt-in-your-mouth soft, that it feels impossible it was made from only two ingredients. Yet it is. No mixers, no candy thermometers, no long boiling stages. Just two pantry staples coming together to create a fudge that rivals anything from a bakery. This is the kind of recipe people beg you for, and they’re stunned when you reveal the secret: “Just two ingredients.”
What makes this recipe truly magical is how those two ingredients transform when heated. The peanut butter becomes silky and warm, while the sweet base melts into a glossy mixture that firms into perfect fudge as it cools. The texture is thick and creamy, with a slightly chewy finish. The flavor is deep, nutty, nostalgic, and comforting — like childhood peanut butter sandwiches reimagined into a grown-up dessert.
Below is a unique, perfectly balanced version of this unbelievably easy fudge, with expert tips to ensure it sets beautifully every time.
Ingredients (2 Ingredients Only!)
-
1 cup creamy peanut butter (the no-stir variety works best)
-
1 can (14 oz / 396 g) sweetened condensed milk
That’s it. No butter, no sugar, no extras — unless you want to add some optional enhancements later.
Instructions
1. Warm the peanut butter
Scoop your creamy peanut butter into a medium saucepan. Place it over low heat and let it warm gently. This loosens the peanut butter and makes it easier to blend with the condensed milk. Stir continuously to prevent sticking at the bottom.
2. Add the sweetened condensed milk
Pour the entire can of sweetened condensed milk into the saucepan. As soon as the milk hits the peanut butter, you’ll see the mixture beginning to thicken and turn glossy.
3. Stir until perfectly smooth
Increase the heat very slightly (still low-medium). Stir the mixture constantly for 3–5 minutes until everything is fully combined, silky, and lump-free. Avoid boiling; gentle heating is the key.
4. Prepare your pan
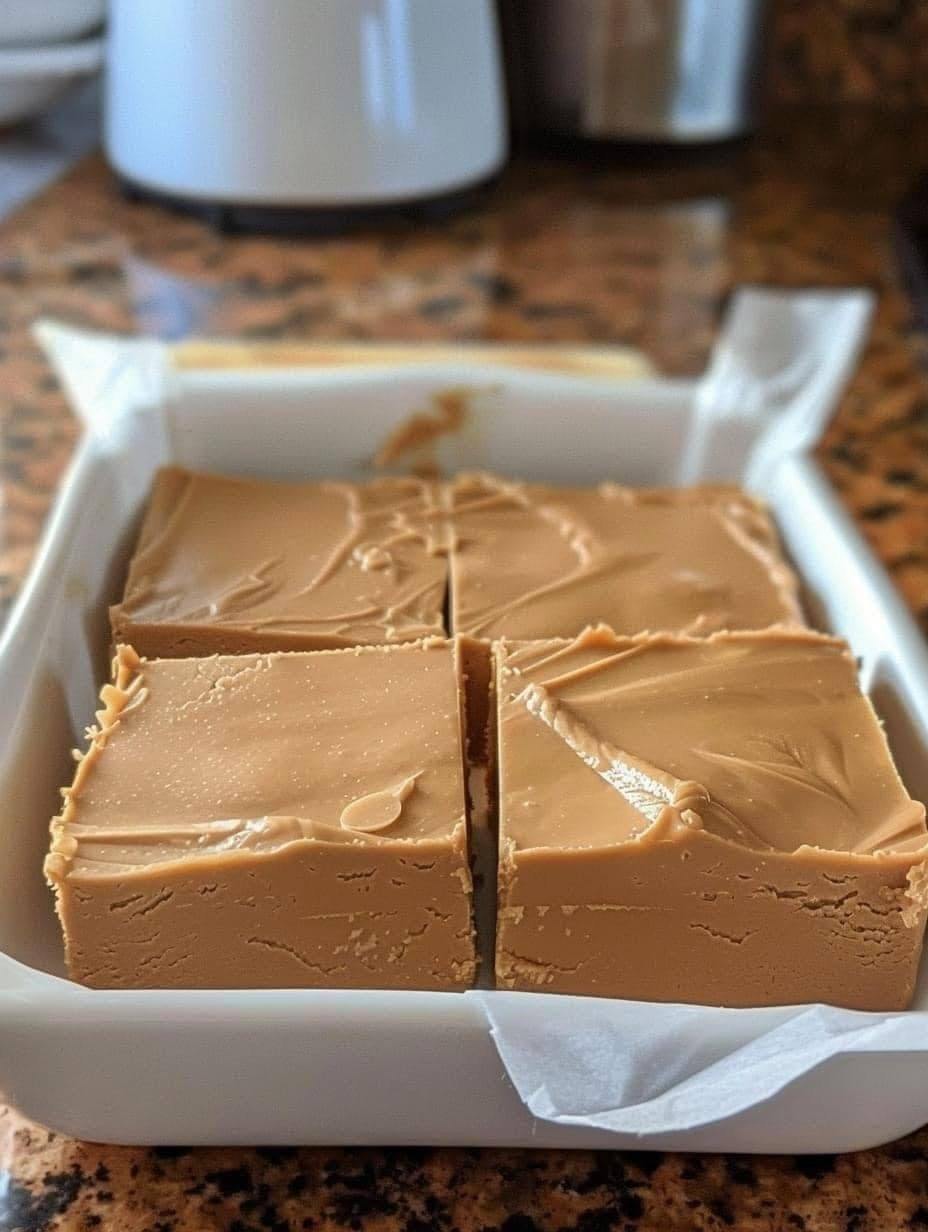
Line a small square dish (6×6 or 8×8 inches) with parchment paper, leaving an overhang for easy lifting later. If you want extra neat edges, lightly grease the parchment.
5. Pour and smooth
Transfer the hot fudge mixture into the dish. Spread evenly with a spatula, smoothing the top until it looks glossy and level.
6. Chill and set
Place the dish in the refrigerator for 2–3 hours or until firm enough to slice. Overnight chilling produces the best texture. Once set, lift the fudge using the parchment, cut into small squares, and store in an airtight container.
How It Works — The Science of 2-Ingredient Fudge
Sweetened condensed milk contains sugar that prevents crystallization and milk solids that thicken when cooled. Peanut butter contains natural fats and proteins that firm up when cold. Together, they create a self-setting fudge mixture without the need for butter, powdered sugar, or stovetop candy techniques. It’s dessert chemistry made deliciously simple.
Variations to Make It Uniquely Yours
Even though the original recipe uses only two ingredients, you can personalize it with optional add-ins:
1. Crunchy Peanut Twist
Use crunchy peanut butter instead of creamy for an added bite.
2. Peanut Butter Swirl Fantasy
Drizzle a small amount of melted dark chocolate over the top and swirl with a toothpick before chilling.
3. Salted Peanut Butter Fudge
Sprinkle a pinch of flake sea salt on top for a gourmet finish.
4. Peanut Butter Cookie Fudge
Fold in crushed digestive biscuits or shortbread crumbs before pouring into the pan.
5. Cinnamon Peanut Butter Fudge
Add ½ teaspoon cinnamon to the mixture for warmth and depth.
Expert Tips for Perfect Fudge Every Time
✔ Use regular peanut butter, not natural
Natural peanut butter separates, which can cause greasy or crumbly fudge. Stick to brands like Skippy, Jif, Adam’s no-stir, or similar creamy types.
✔ Low heat is essential
High heat can scorch the mixture or affect its setting properties. Slow and steady wins.
✔ Refrigerate fully before cutting
If you slice too early, the squares will lose their shape. Cold fudge cuts cleanly and holds beautifully.
✔ Store it properly
Keep in an airtight container in the fridge for up to 7 days. Or freeze for up to 2 months.
Serving Suggestions (For Maximum Enjoyment)
-
Enjoy with a cup of hot chai or coffee — the warm drink makes the fudge even creamier.
-
Pair with vanilla ice cream for a hot-cold dessert contrast.
-
Use it as a topping: slightly warm a square and drizzle over pancakes or waffles.
-
Wrap squares in mini parchment pieces for gifting — simple, sweet, and beautiful.
Why You’ll Love This Recipe
This 2-ingredient peanut butter fudge is the kind of treat everyone can make, even on the busiest day. No fancy tools, no mess, and no culinary experience required. Yet the result feels luxurious — like something you’d serve during holidays, parties, or special family moments. It’s budget-friendly, fast, and incredibly satisfying. Every bite delivers that soft, creamy, rich peanut butter flavor people adore.
If you need a last-minute dessert, a sweet craving fix, or an edible gift that makes you look like a kitchen pro, this recipe is your new secret weapon.
